カラー
カラーホイール
ツールホイールの中央には、現在使用中のツールの色と不透明度を表す円が表示されます。
この円をタップすると、現在のカラーホイールが表示されます。コンセプトでは、コピック、HSL、RGBの3種類のカラーホイールを用意しています。それぞれ独自の方法で色を表現します。
どのホイールを開く場合でも、中央のリングには重要なツールがいくつかあるので覚えておきましょう。
Copic、HSL、RGBカラーホイールの切り替えボタンです。タップすると、それぞれのカラーホイールに切り替えることができます。
スポイトボタン。カラーピッカーが起動します。
色を選びましょう。
コピックのカラーホイール
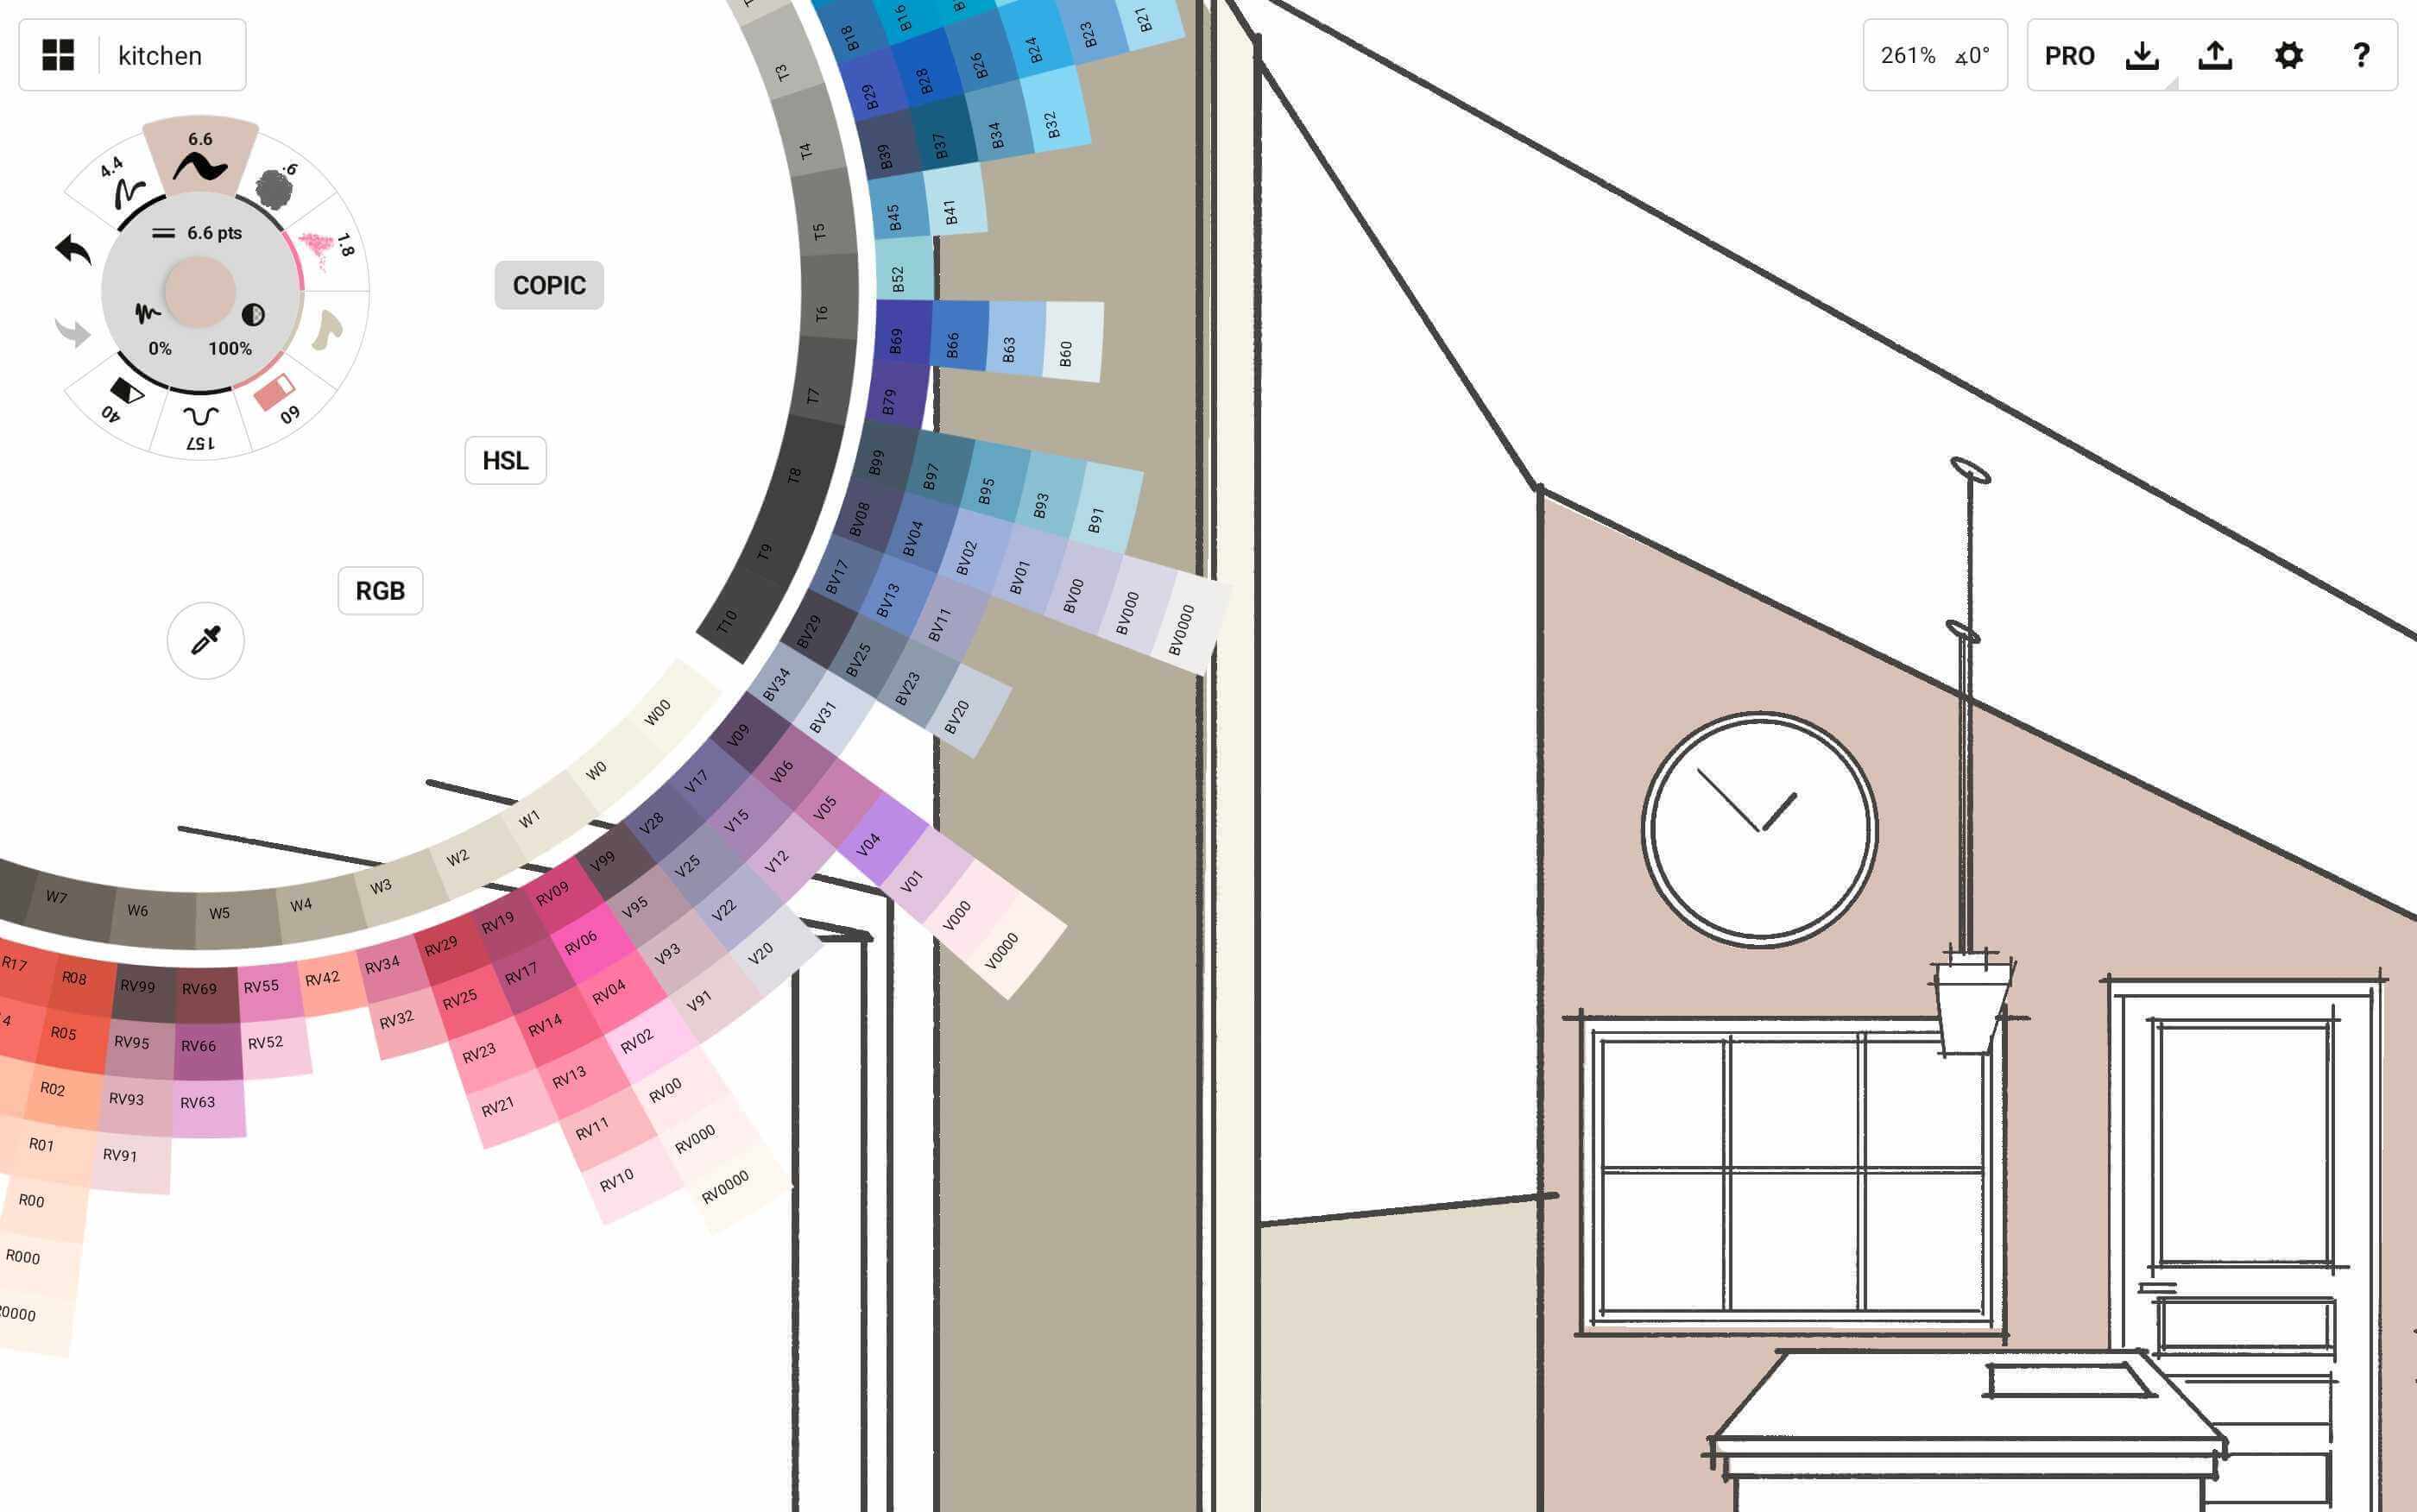
このホイールは、Too株式会社が厳選したカラースペクトラムで、作品に統一感と美しさをもたらしながら、色選びや配色をシンプルにできるよう設計されています。色は、色相と彩度に基づいて数学的に整理され、アルファベットと数字のコードでホイール上に示されています。コピックの色理論について詳しくは、こちらをご覧ください。コンセプト内の色は、実際のマーカーの色にできる限り近づけて再現されています。
カラーホイールは回転させることができます。指を上下にドラッグすると、ホイールが回転します。
中心部(ツールホイールの外側)には、カラーピッカーを起動するスポイトがあります。
次に表示されるのは、明るさのグラデーションと、純粋な黒と白です。その外側のリングには、クール、ウォーム、ニュートラル、トーナルの4種類のグレイが並びます。さらにその外側には、色相のつながりが視覚的にわかるグラデーションリングがあります。
カラーをタップすると、使用中のブラシに適用されます。
HSLのカラーホイール
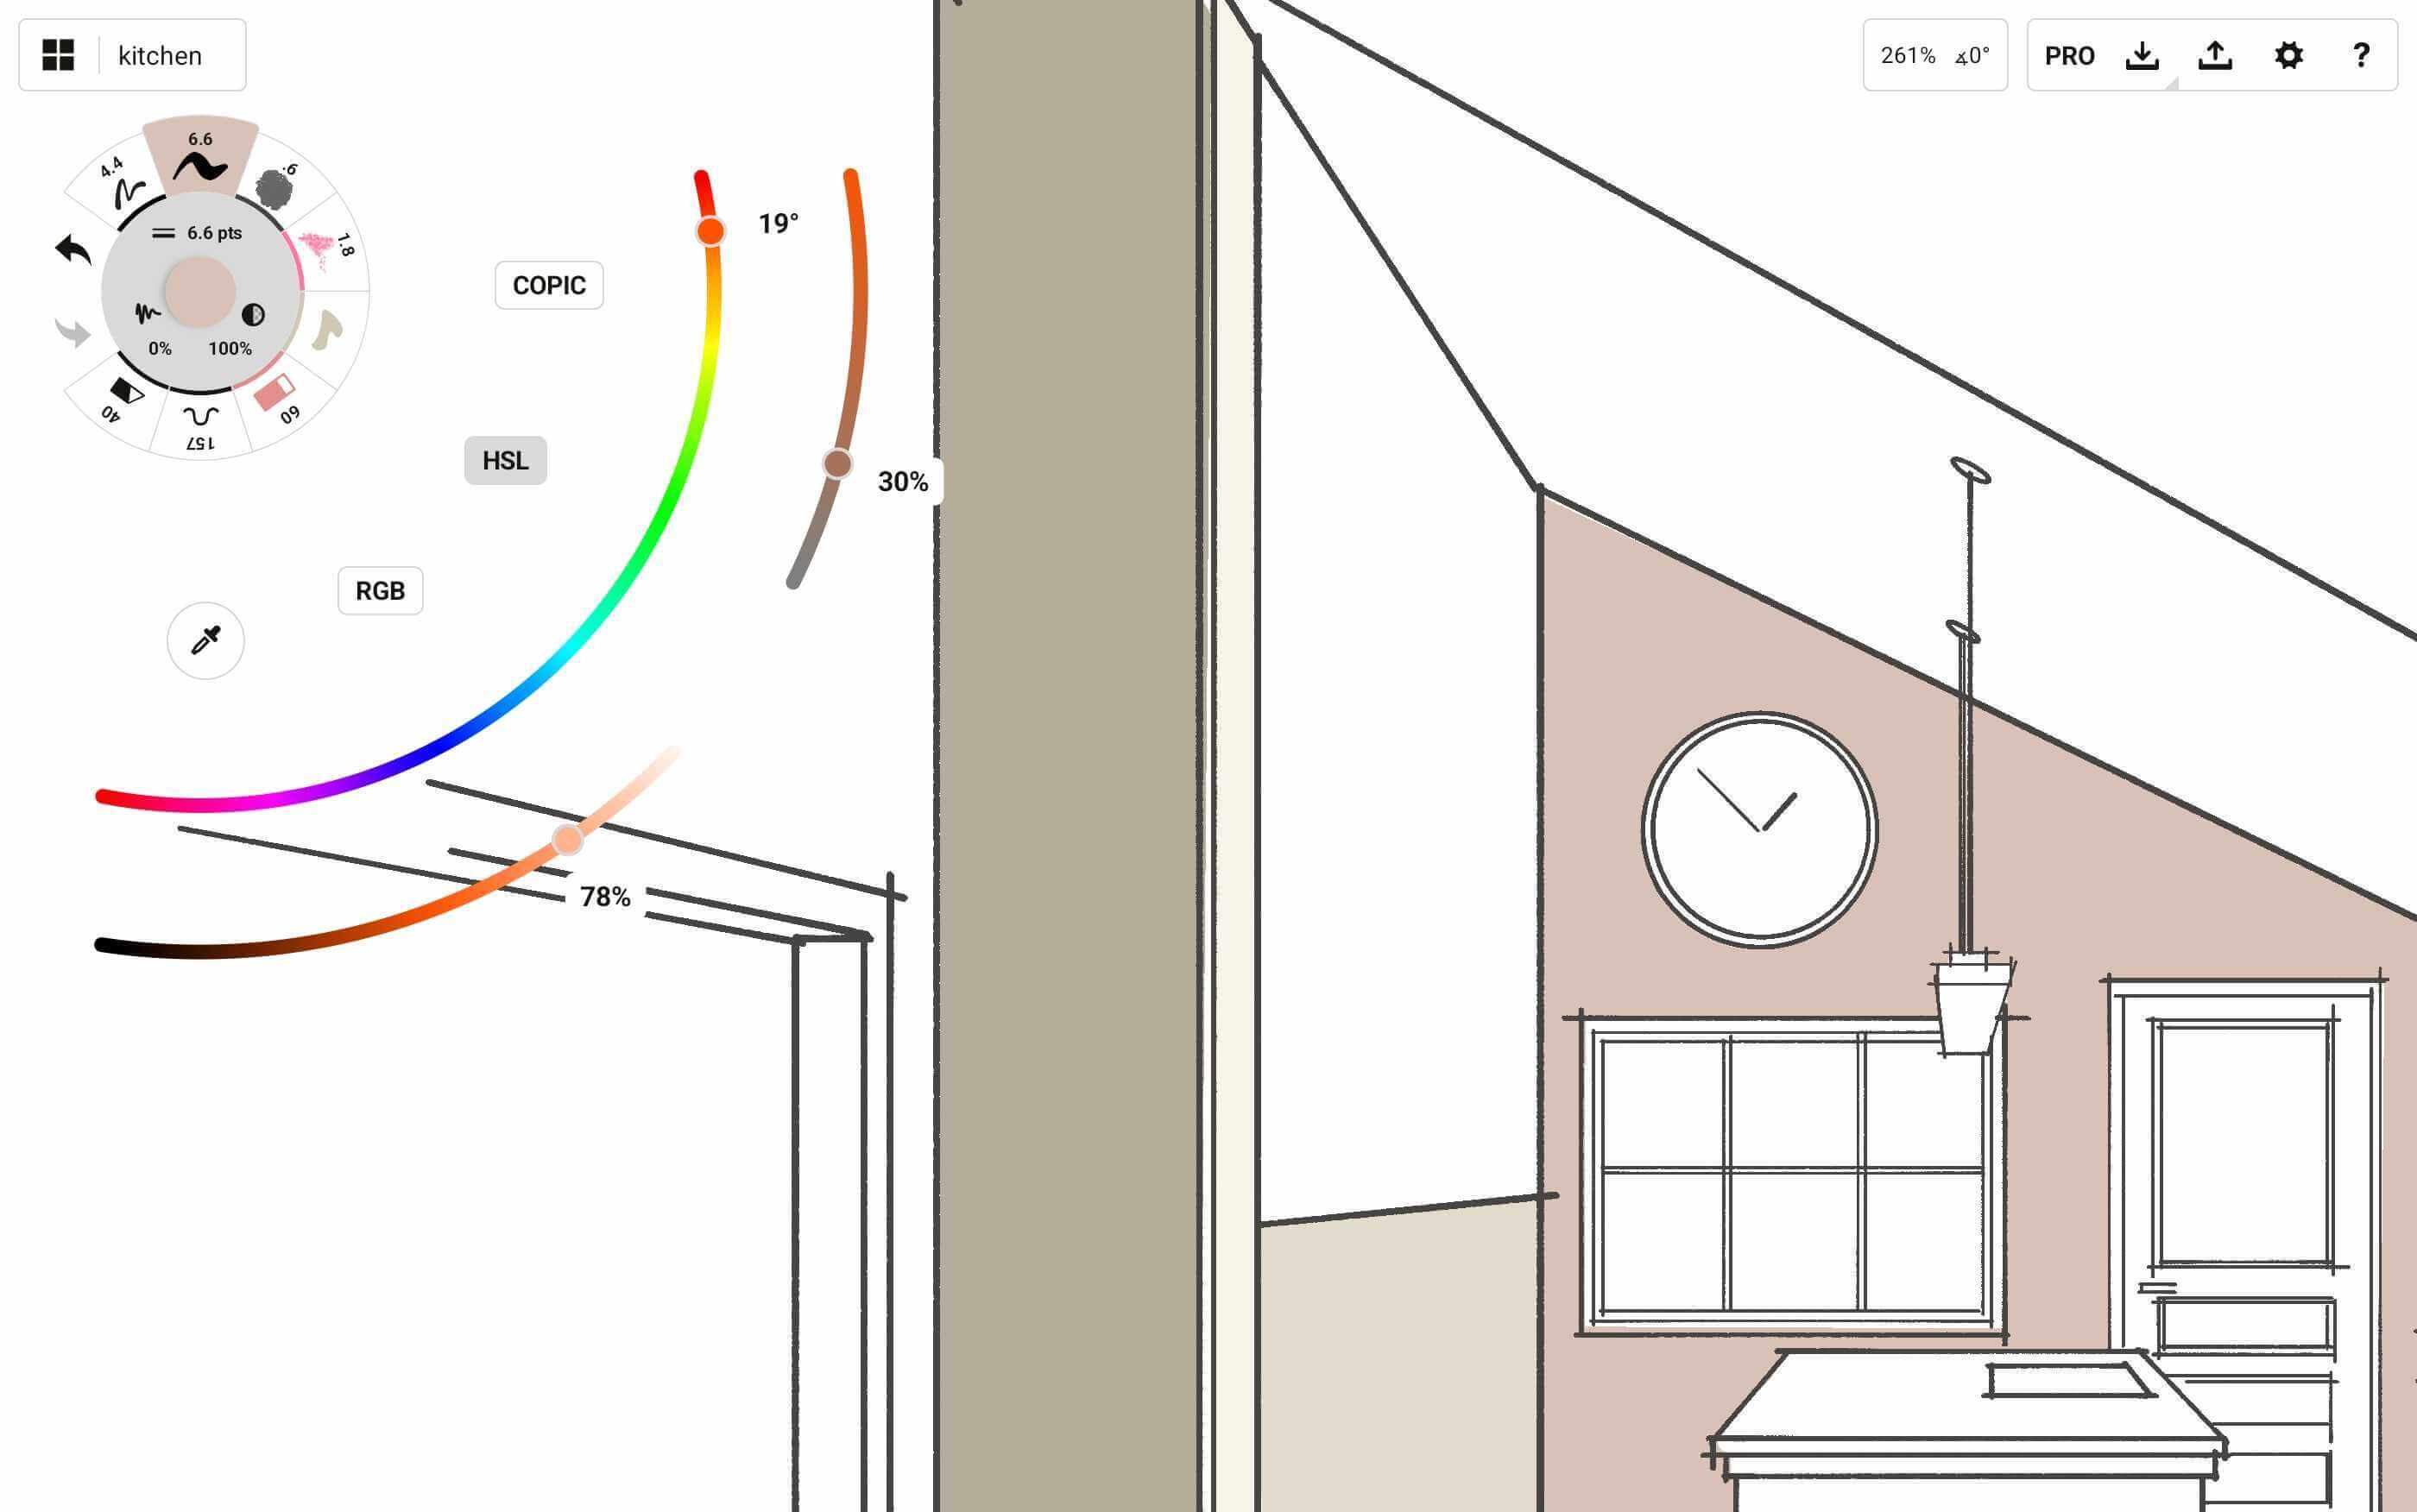
このホイールは「色相 (Hue)」、「彩度」 (Saturation)、「輝度 (Lightness)」の3つのスライダーで構成されています。
色相のスライダーは、ホイールの内側にあり、ベースとなる色合いを決めることができます。
彩度スライダーは、ツールホイールがキャンバスのどこに配置されていても、画面上部に最も近い位置に表示されます。片方の端がグレー、もう一方が選択中の純色になっており、色にどれくらいの彩度(鮮やかさ)を加えるかを調整できます。
輝度のスライダーは、彩度のスライダーの下にある3番目のスライダーです。色の明暗を変更することができ、一番明るくすると白色に、一番暗くすると黒色になります
いずれのスライダーも、小さなサークルを動かして調整します。
RGBのカラーホイール
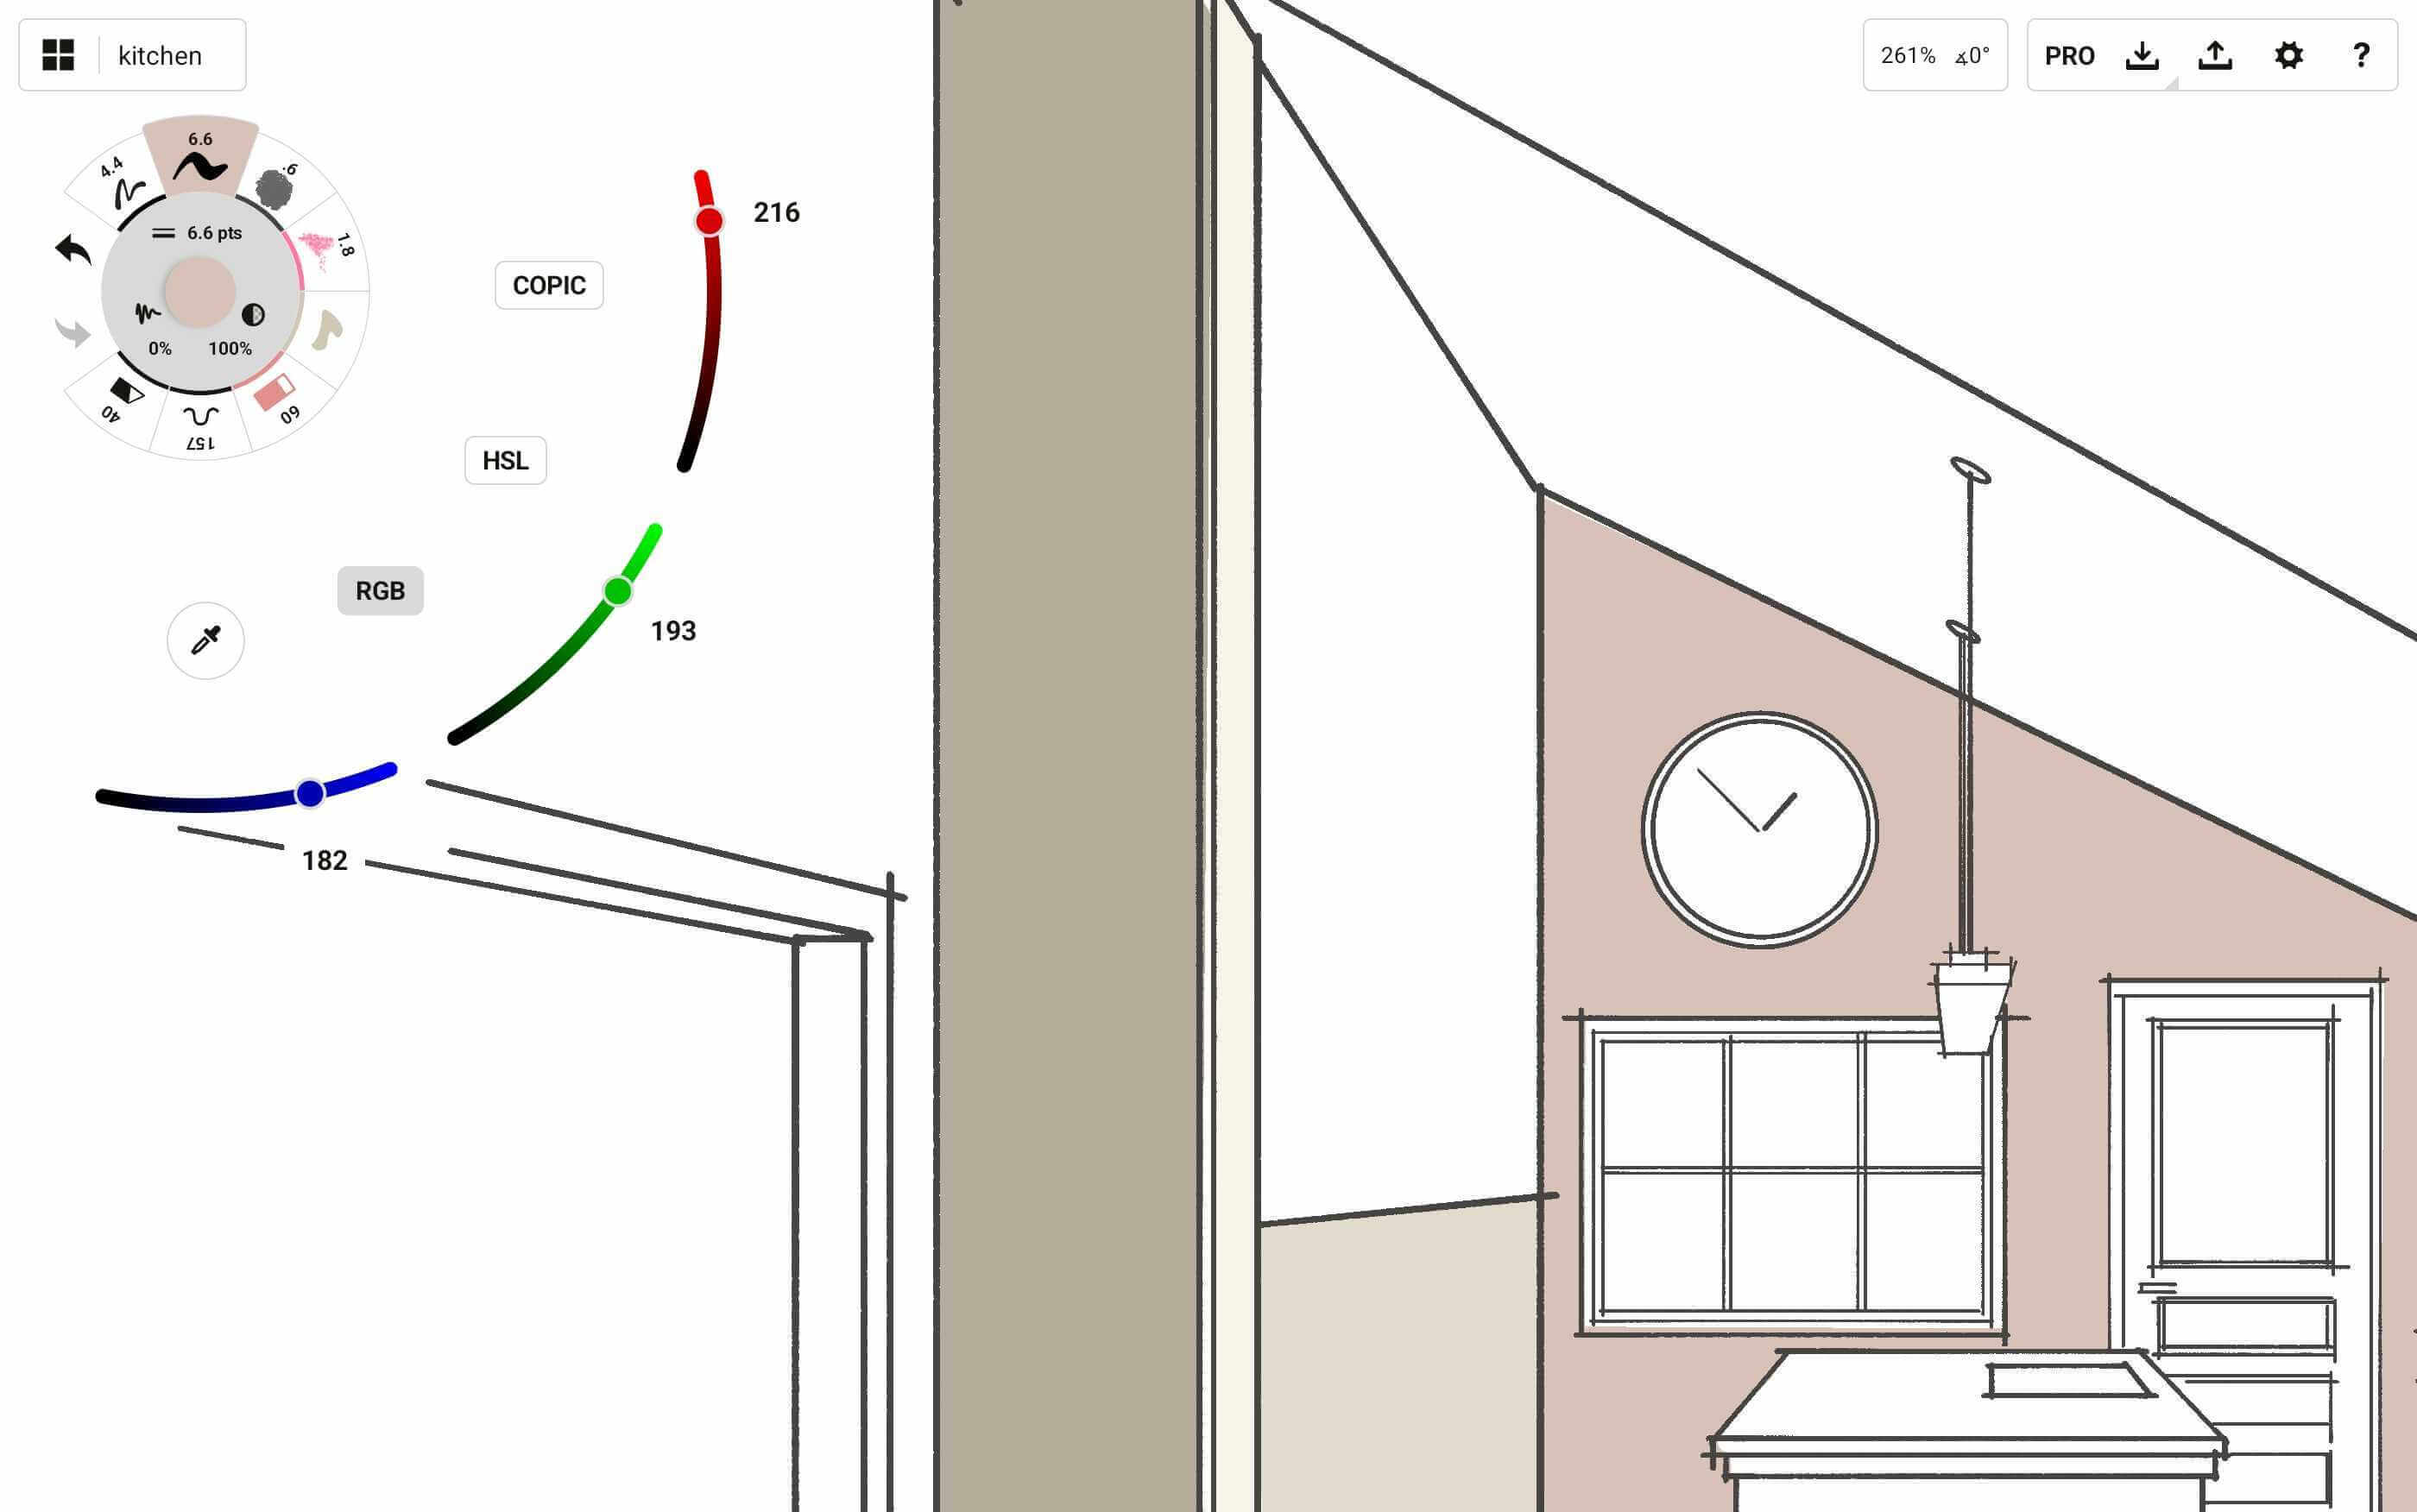
HSLホイールと同様に、RGBホイールも3つのスライダーで構成されています。ただし、HSLでは色相を選び、彩度と明度を調整するのに対し、RGBホイールでは赤・緑・青それぞれの量を組み合わせて、目的の色を作り出します。たとえば、赤と緑を混ぜるとイエローに、青と緑を混ぜるとシアンに、赤と青を混ぜるとマゼンタになります。すべてのスライダーを0に設定すれば純粋な黒(ブラック)に、すべてを255に設定すれば明るい白(ホワイト)になります。
カラーピッカー
コンセプトのカラーピッカーは、もちろん従来の色選択ツールとして機能しますが、ベクター形式のアプリケーションとしての優れた特性も兼ね備えています。
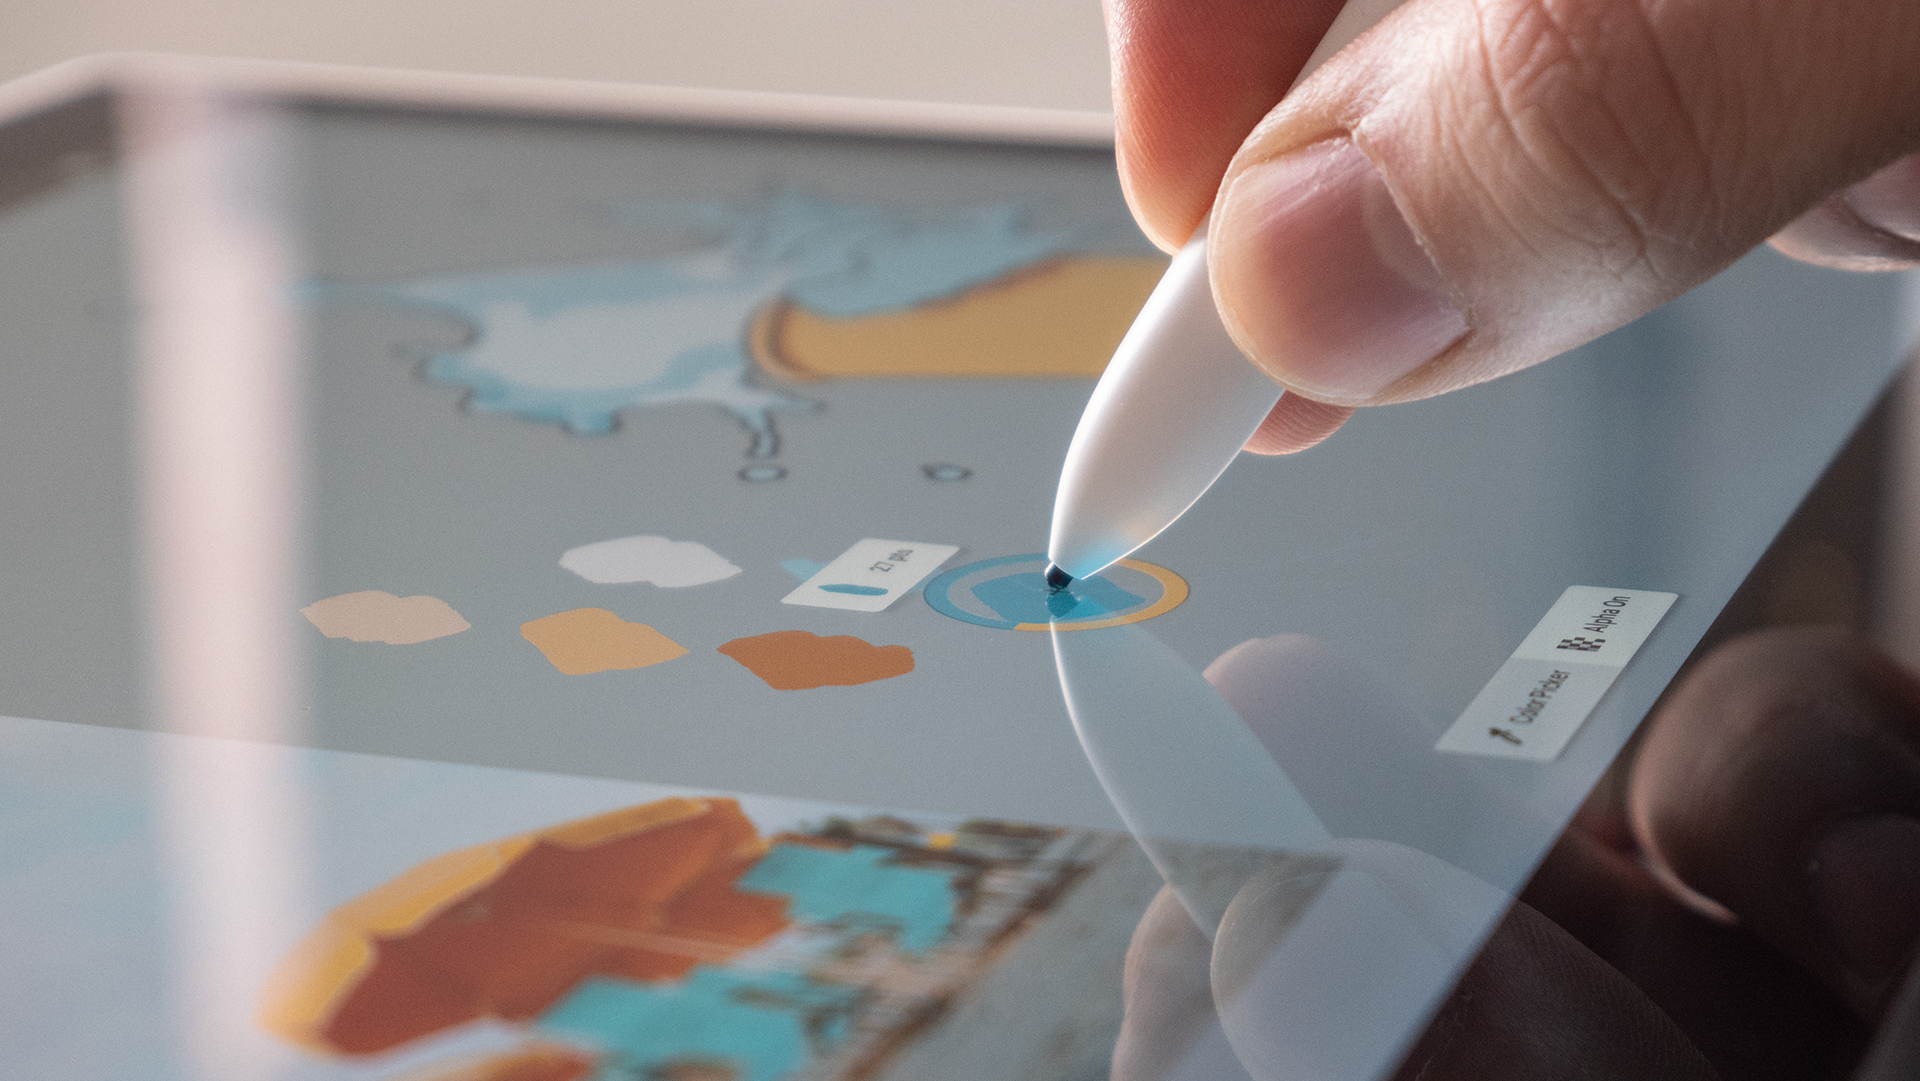
カラーピッカーへアクセスする方法はいくつかあります。
- ツールホイール中央のカラーサークルをタップすると、カラーホイールが表示され、スポイトが見つかります。
- キャンバスの任意の場所を長押しして、「セレクション」メニューを開きます。別の指を使って、左側のボタンを投げ縄、アイテムピッカー、カラーピッカーへと切り替えることができます。これは作業を中断せずにカラーやブラシ設定を選択できる、大変便利なショートカットです。
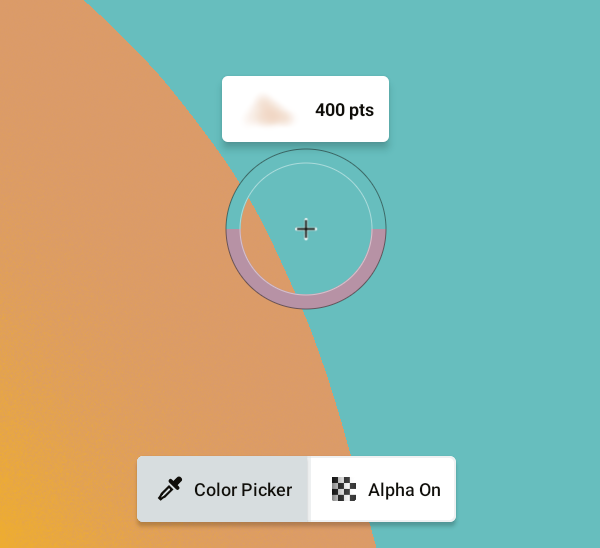
カラーピッカーを画面でドラッグすると、以下のようなマークが現れます。
- リング型の円は、選択範囲の役割を果たします。中央の十字で、正確な選択場所がわかります。
- リング下半分の単色部分は、ブラシが現在選択している色です。指示しない限り、この色は変わりません。
-
リング上半分で変化する色は、十字の通過時点の色です。カラーピッカーを指から離すと、この接触部分の色がブラシに適用されます。カラーピッカーは、デッサン内のすべてのレイヤーから色を検索します。
画面下のポップアップでは、「アルファ値オン」と「アルファ値オフ」の切り替えができます。アルファ値をオンにすると、カラーピッカーは背景を無視し、色の不透明度を検知します。アルファ値をオフにすると、背景色を含めた不透明度100%の色が常に表示されます (従来のピクセルアプリと同様)。
- リングがストロークの色と不透明度を分析する一方で、サークルの上に浮かぶタグは、ブラシの種類やサイズなどのベクター情報を表示します。表示されているのは、ストロークを最初に描いたときに使用したブラシの特性です。リングから指を離さずにタグをタップすると、使用したブラシがそのままツールスロットに設定されます。
