Selection
Concepts is a vector-based app, which gives you the powerful freedom to pick up and move, tweak or change any stroke at any time, even after it’s drawn. It allows you to make changes to your designs with minimal effort - instead of redrawing an entire project, you can just select what needs to be adjusted and change it. Perfect for design iterations, reorganizing mind-maps, or preparing materials for clients after feedback, Selection frees you to accomplish more.
There are four ways to Select (aka pick up) a stroke or multiple strokes in your sketch.
- Use the Selection tool. In the Brushes menu, you can choose the Selection tool (the arrow) and set it as a separate tool on your tool wheel or bar. Touch the screen to use it like you use any tool.
- Tap+hold anywhere on canvas to activate Selection. This is a really nice shortcut so you don’t have to interrupt your drawing flow by changing tools.
- If you’re using a stylus, configure your Finger Action to Select (Settings → Stylus). Your finger will work as the Selection tool while your stylus follows your selected preset in the tool wheel.
- If you want to select all strokes on a single layer, you can tap on the active layer to open the Layer Selection pop-up. Tapping the cursor icon will select everything on that layer.

The Selection Menu
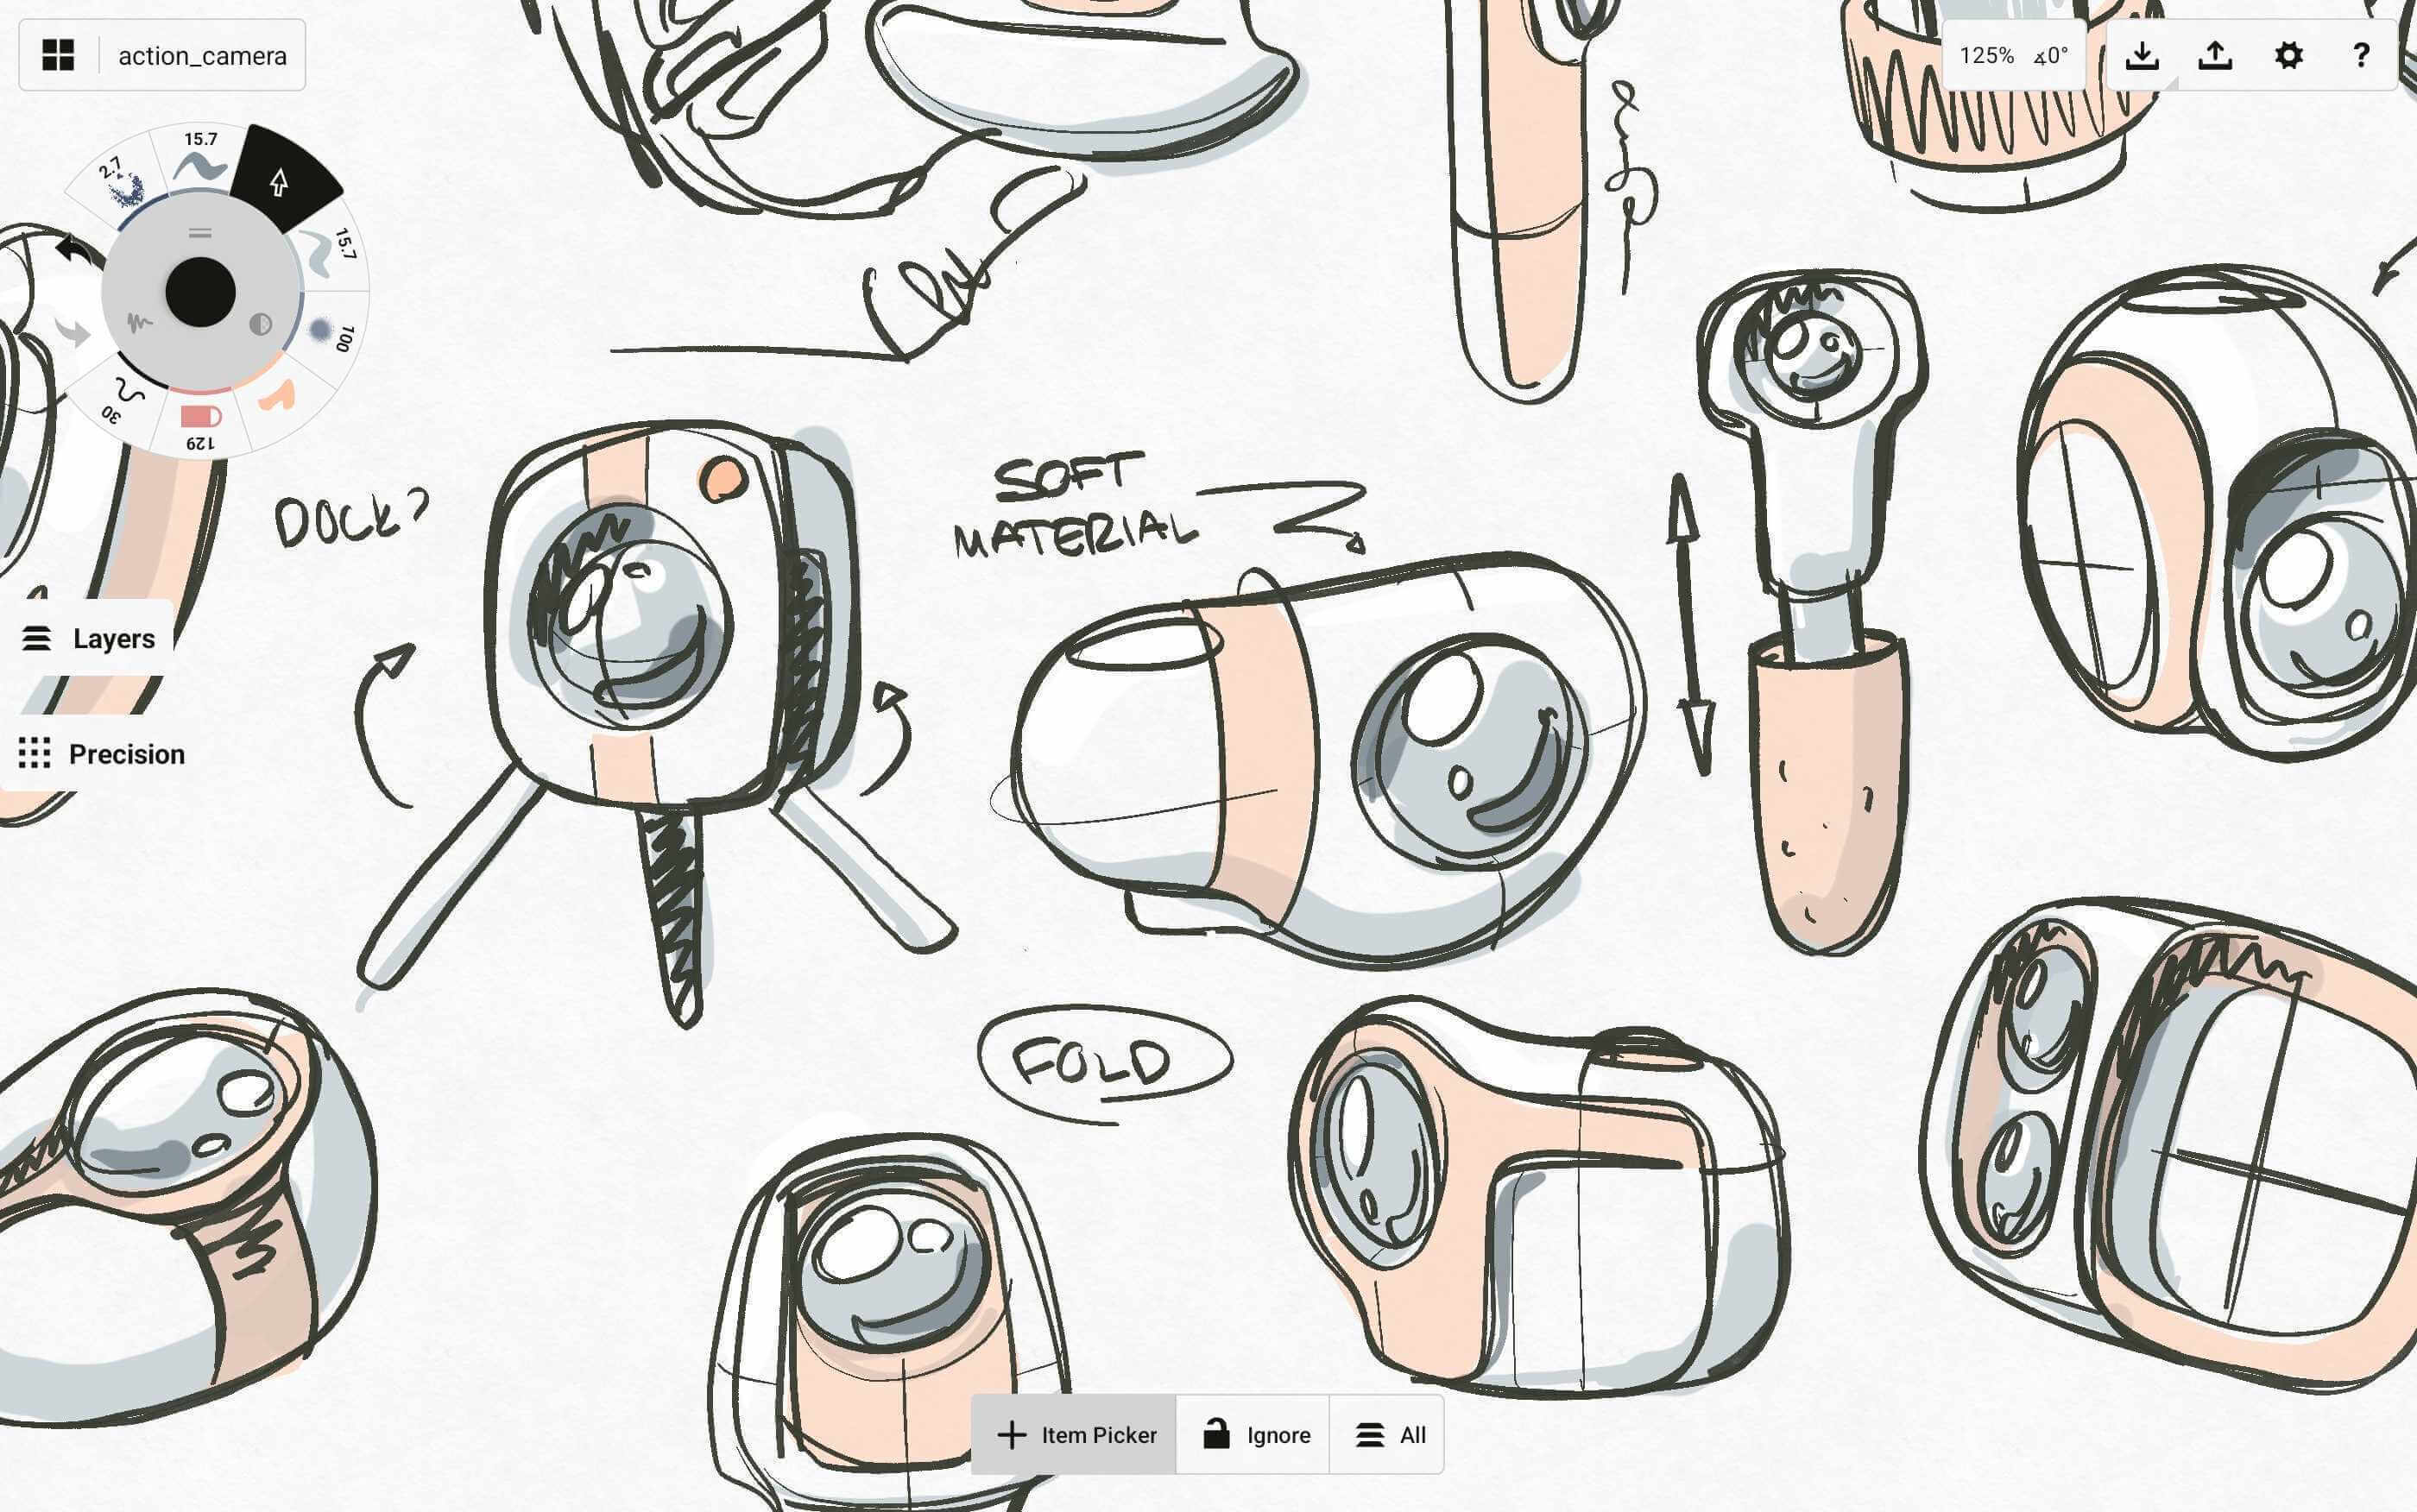
Once you’ve activated selection by any of the above options, you’ll find a popup at the bottom of the screen. This is your Selection menu. The Selection menu helps you to filter the strokes you’d like to select from, so whenever you select something, this menu will hang around.
- When using the Selection tool from your tool wheel, the menu will remain on screen as long as the brush is active.
- When Selecting via the tap+hold, the menu will remain for as long as your finger rests on screen. With a second finger, you can toggle the menu buttons to set your filters (we’ll talk about those below).
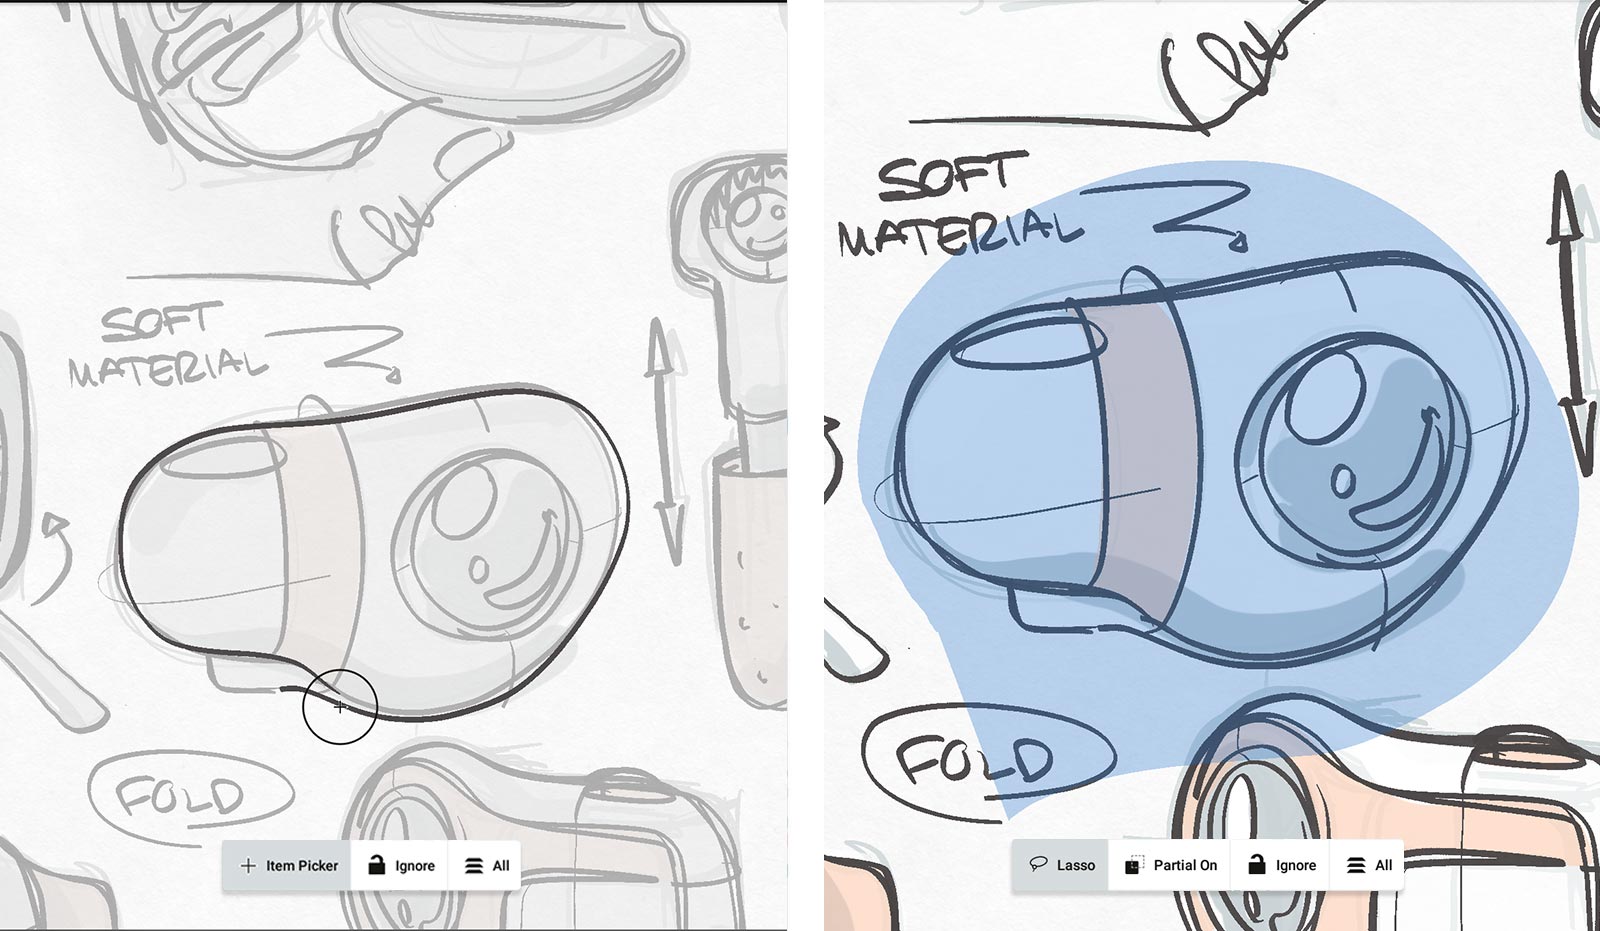
Item Picker and Lasso with their respective popups.
In the Selection menu, depending on which toggle you have active, you’ll find from left to right:
- A Selection Type toggle, for which selection method you’d like active. Tap it to toggle between Item Picker (single item selection, with the ability to add or subtract strokes individually), and Lasso (multi-select using drag to lasso your strokes).
- A Stroke Type toggle, allowing you to choose whether you’d like to select Partial or Complete strokes inside your selection.
- A Lock toggle, which includes or ignores any strokes you may have locked while drawing.
- A Layers toggle, so you can choose whether to select inside your Active layer only, or inside All layers at once.
Item Picker
On the left-hand of the selection toggle is your Item Picker. This is a single item selection mechanism, which allows you to add and subtract individual strokes to your selection.
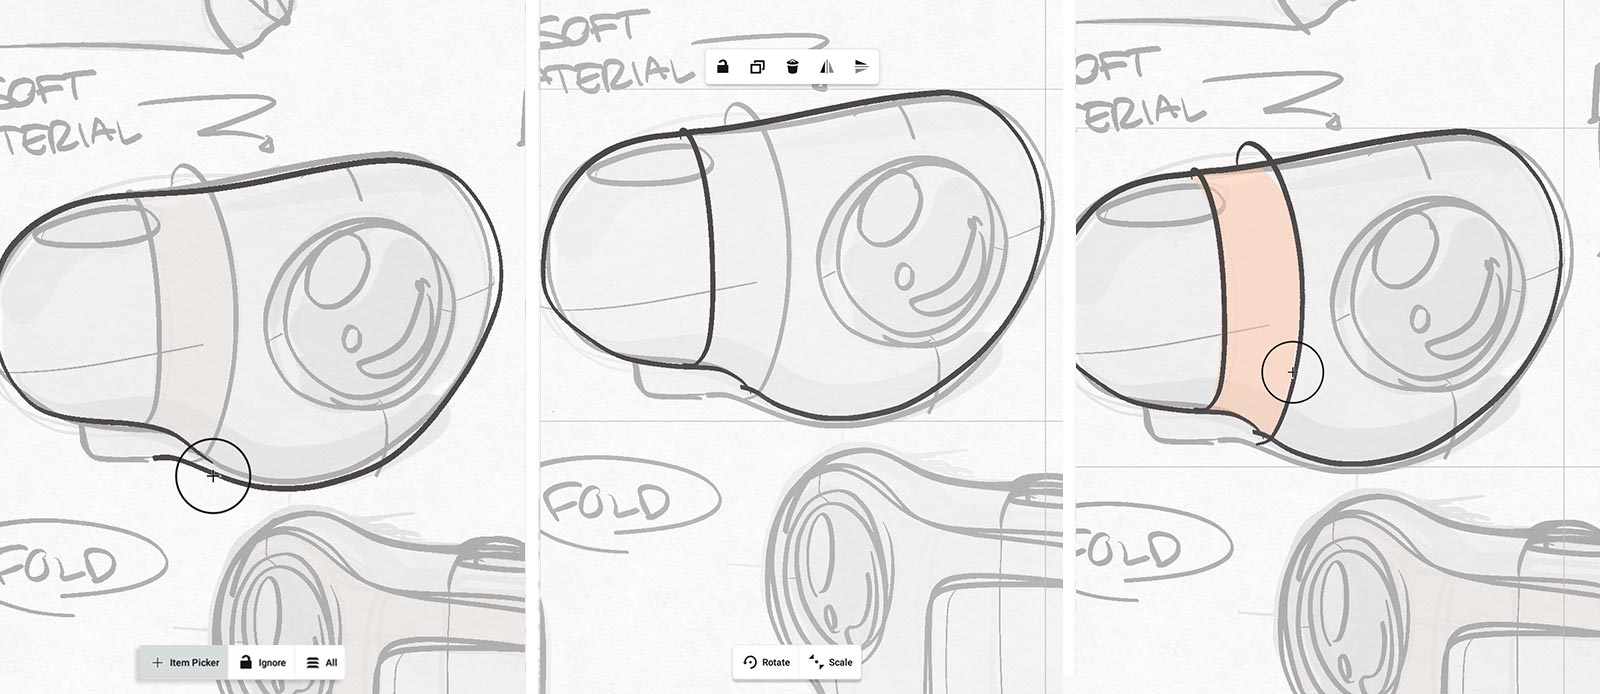
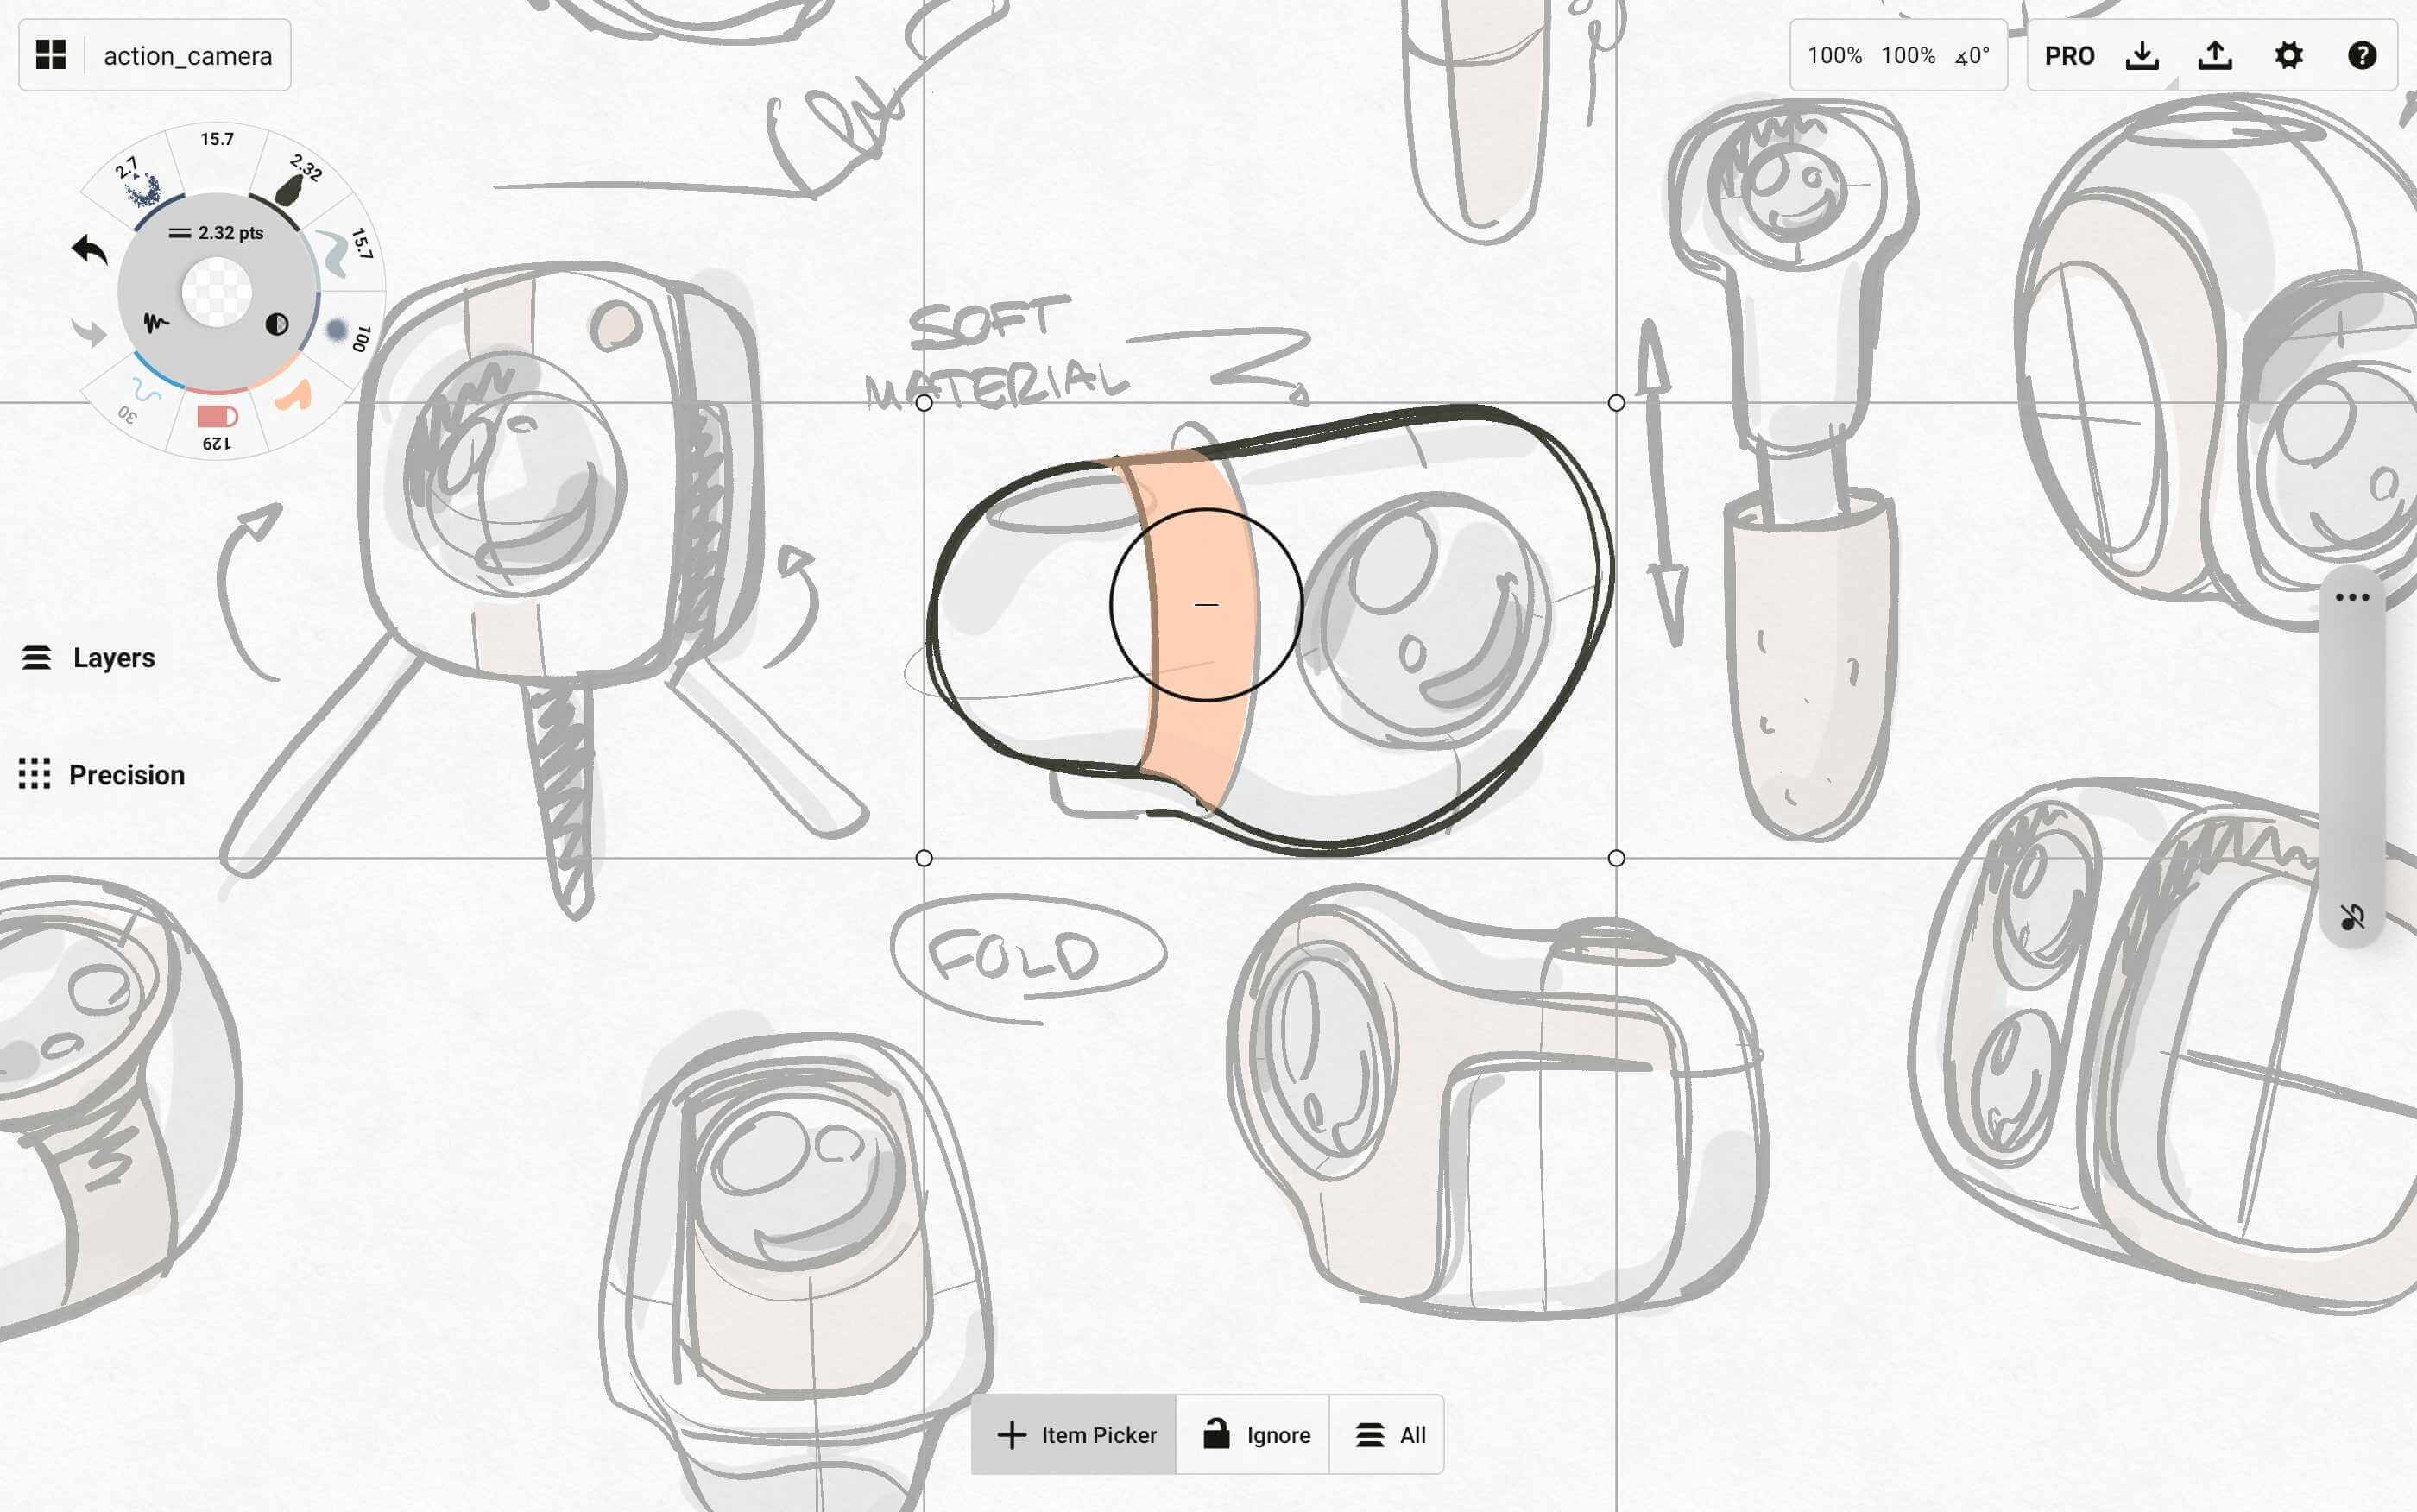
Drag the crosshairs over a stroke. For a single selection, let go. To multi-select, tap the screen with another finger to select the stroke, then move to another stroke and repeat.
To use Item Picker, set your finger or stylus on the screen. A small crosshairs or plus (+) will appear above your finger, or at the tip of your stylus.
When you touch the crosshairs to a stroke, a circle will appear, telling you it has located a stroke. Tap the screen to validate the stroke, and let go of the screen. The stroke will be selected.
To add strokes to your selection, just drag the crosshairs to your next stroke and tap the screen to select it. It doesn’t matter whether you have lifted your finger from the screen or not, you can select as many strokes as you’d like.
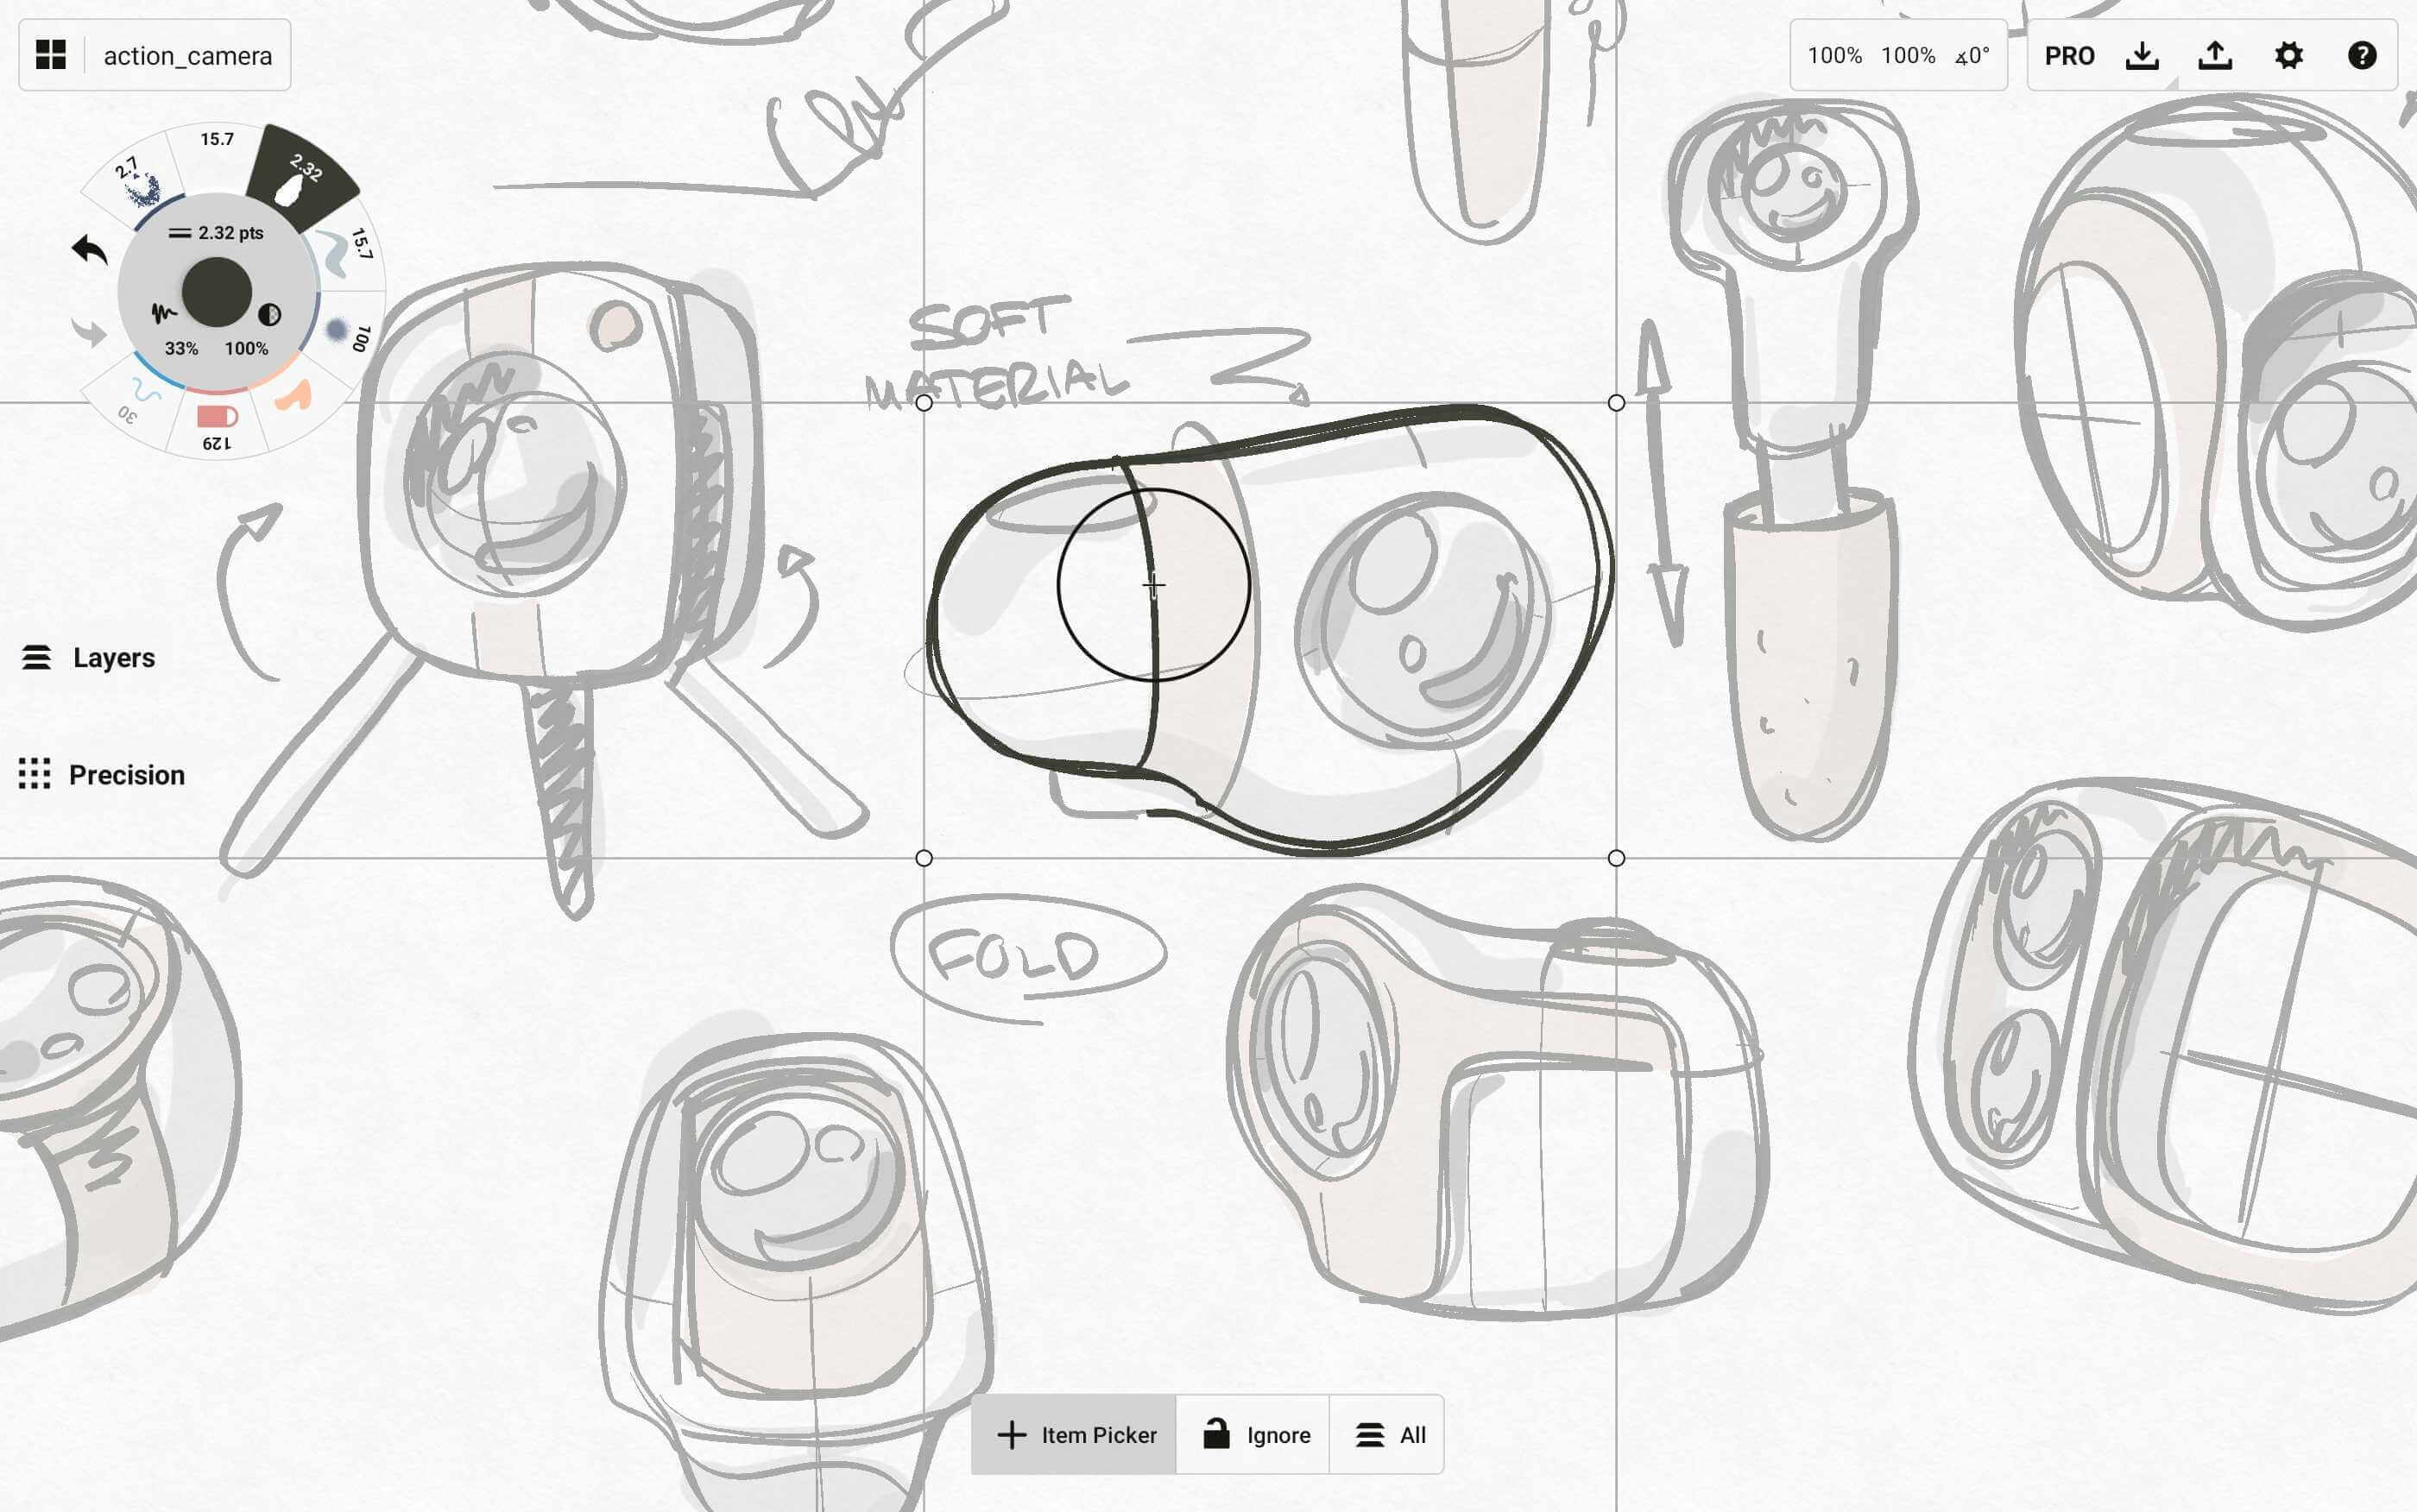
To subtract a stroke from your selection, drag the crosshairs to an already selected stroke. You’ll see the plus turn to a minus. Tap the screen to accept it.
Lasso
If you tap the Selection Type toggle again, you’ll find the Lasso. This allows you to select multiple items by dragging your finger across or around your strokes. Whatever the blue lasso touches will be part of your selection. Lasso again to subtract from the selection.
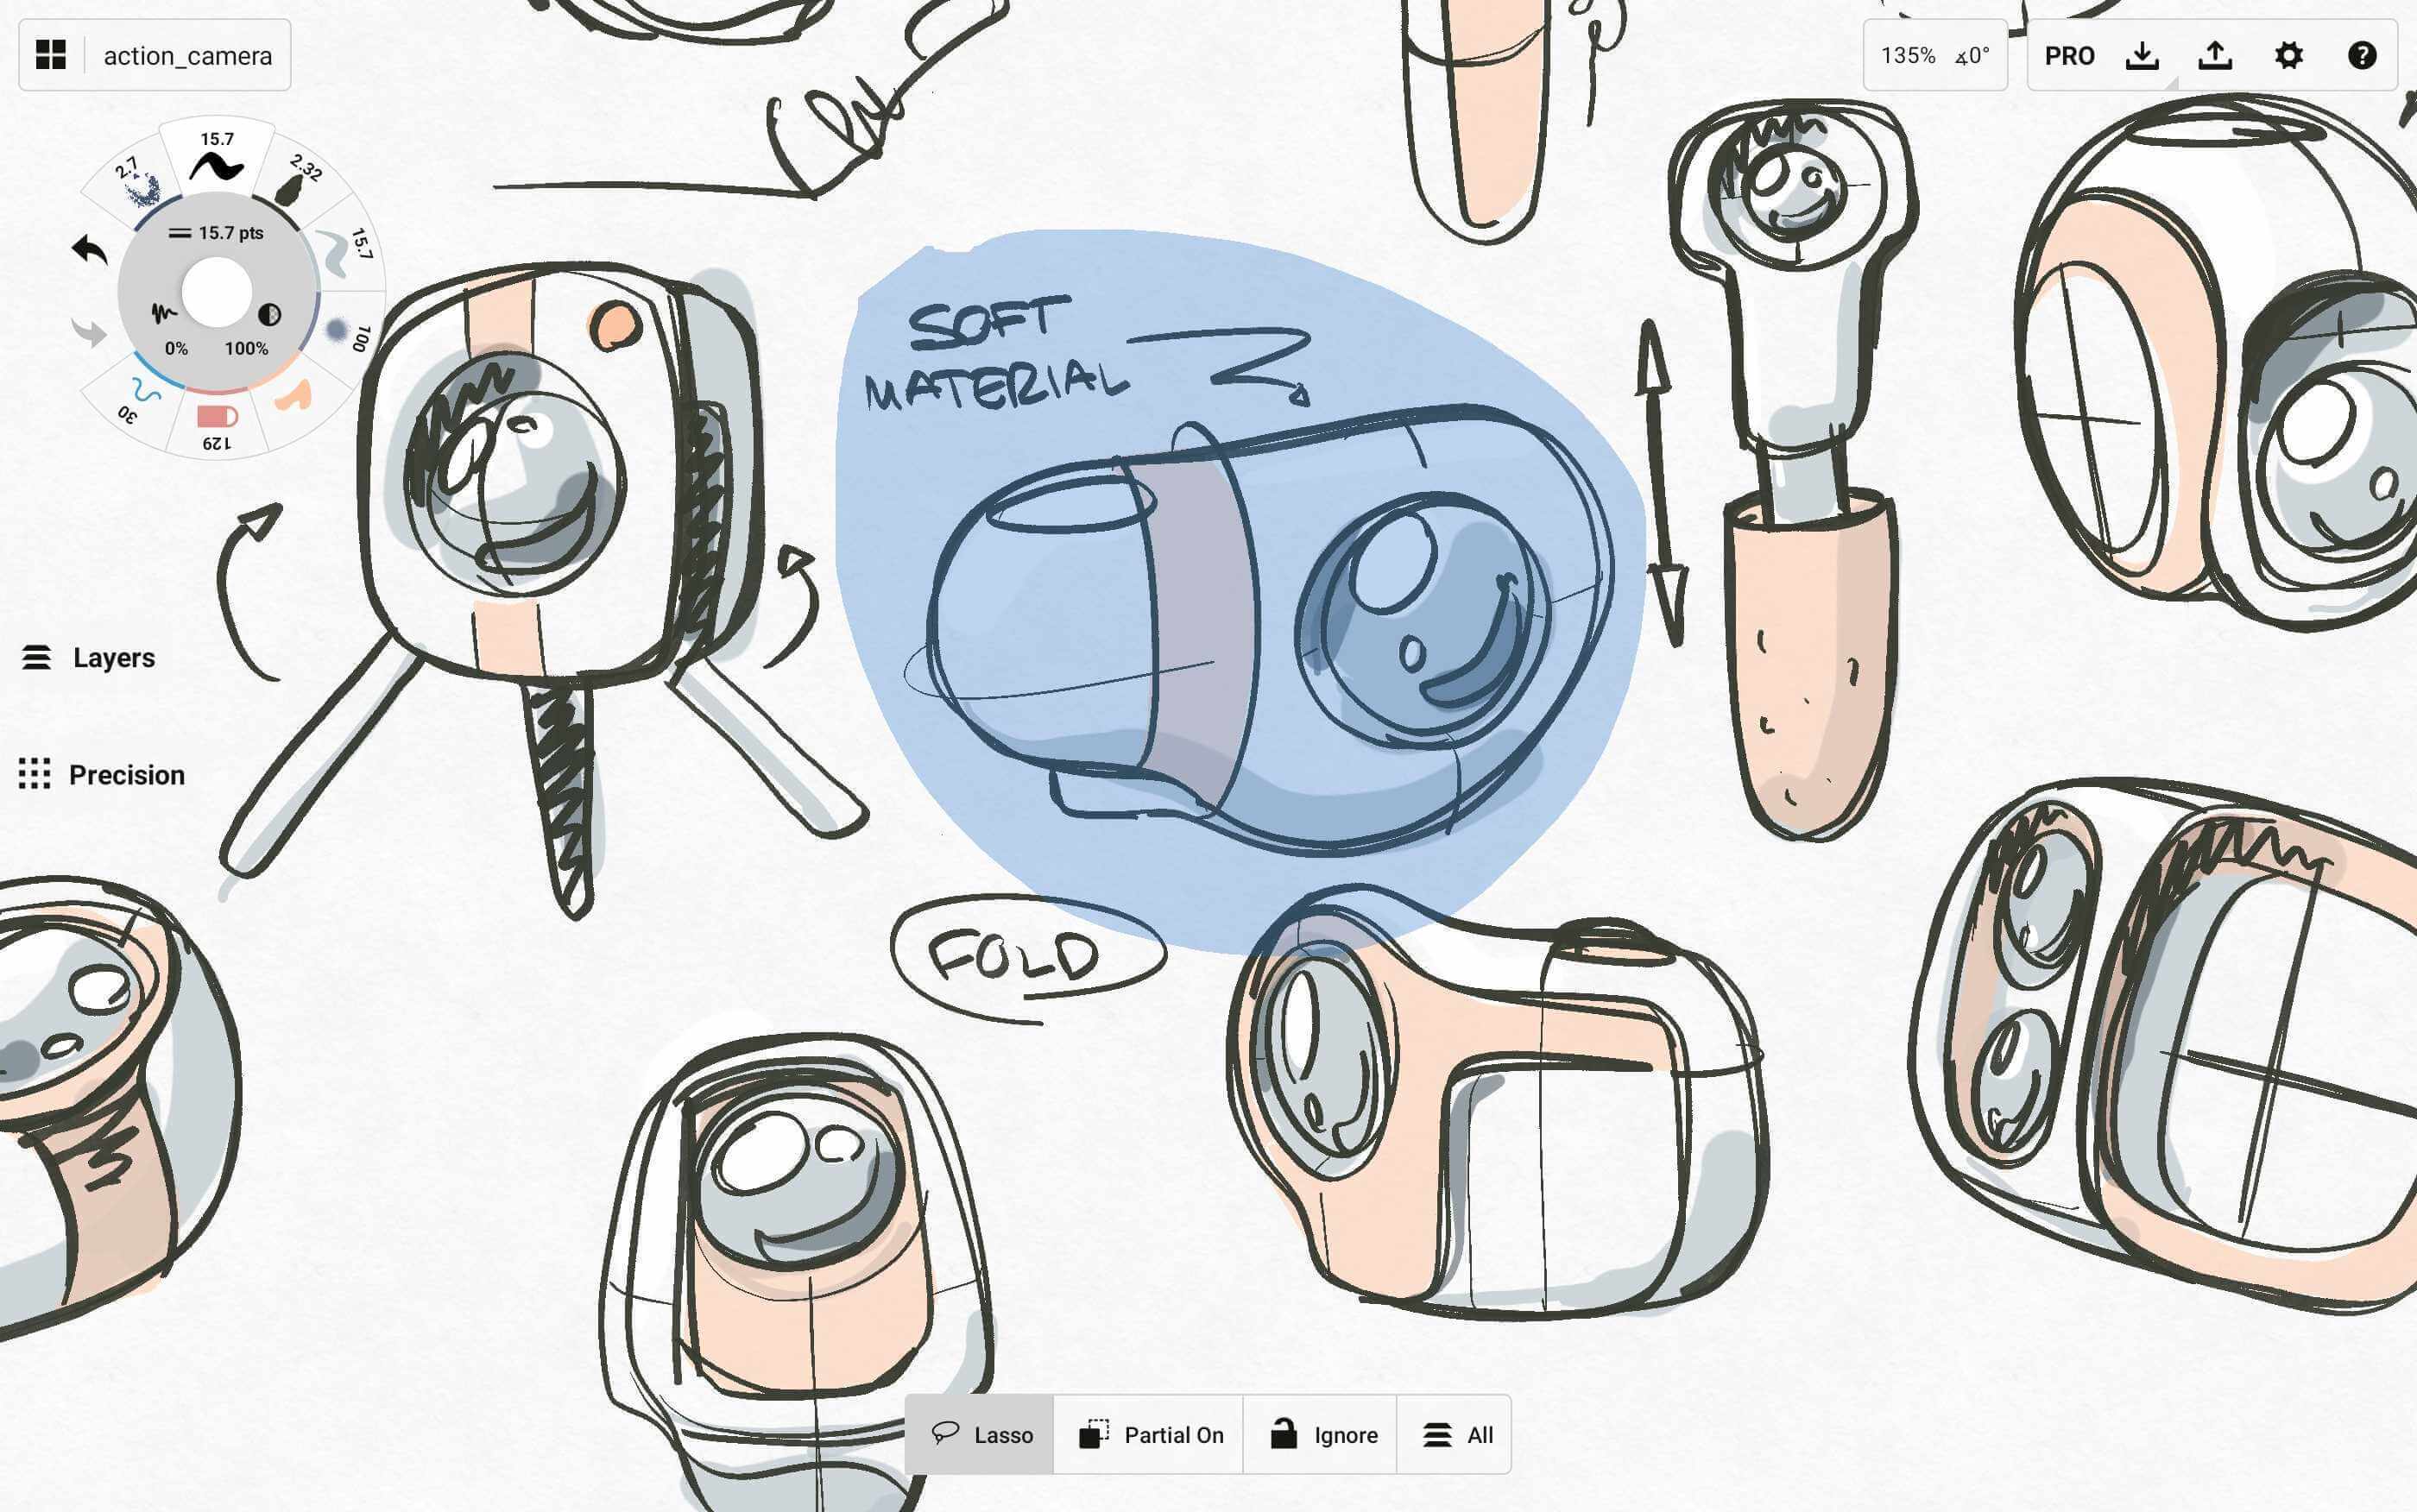
If you lasso a selection and decide you want to add further individual strokes, toggle the button back to Item Picker via the Filters toggle, and continue making your selections.
Color Picker
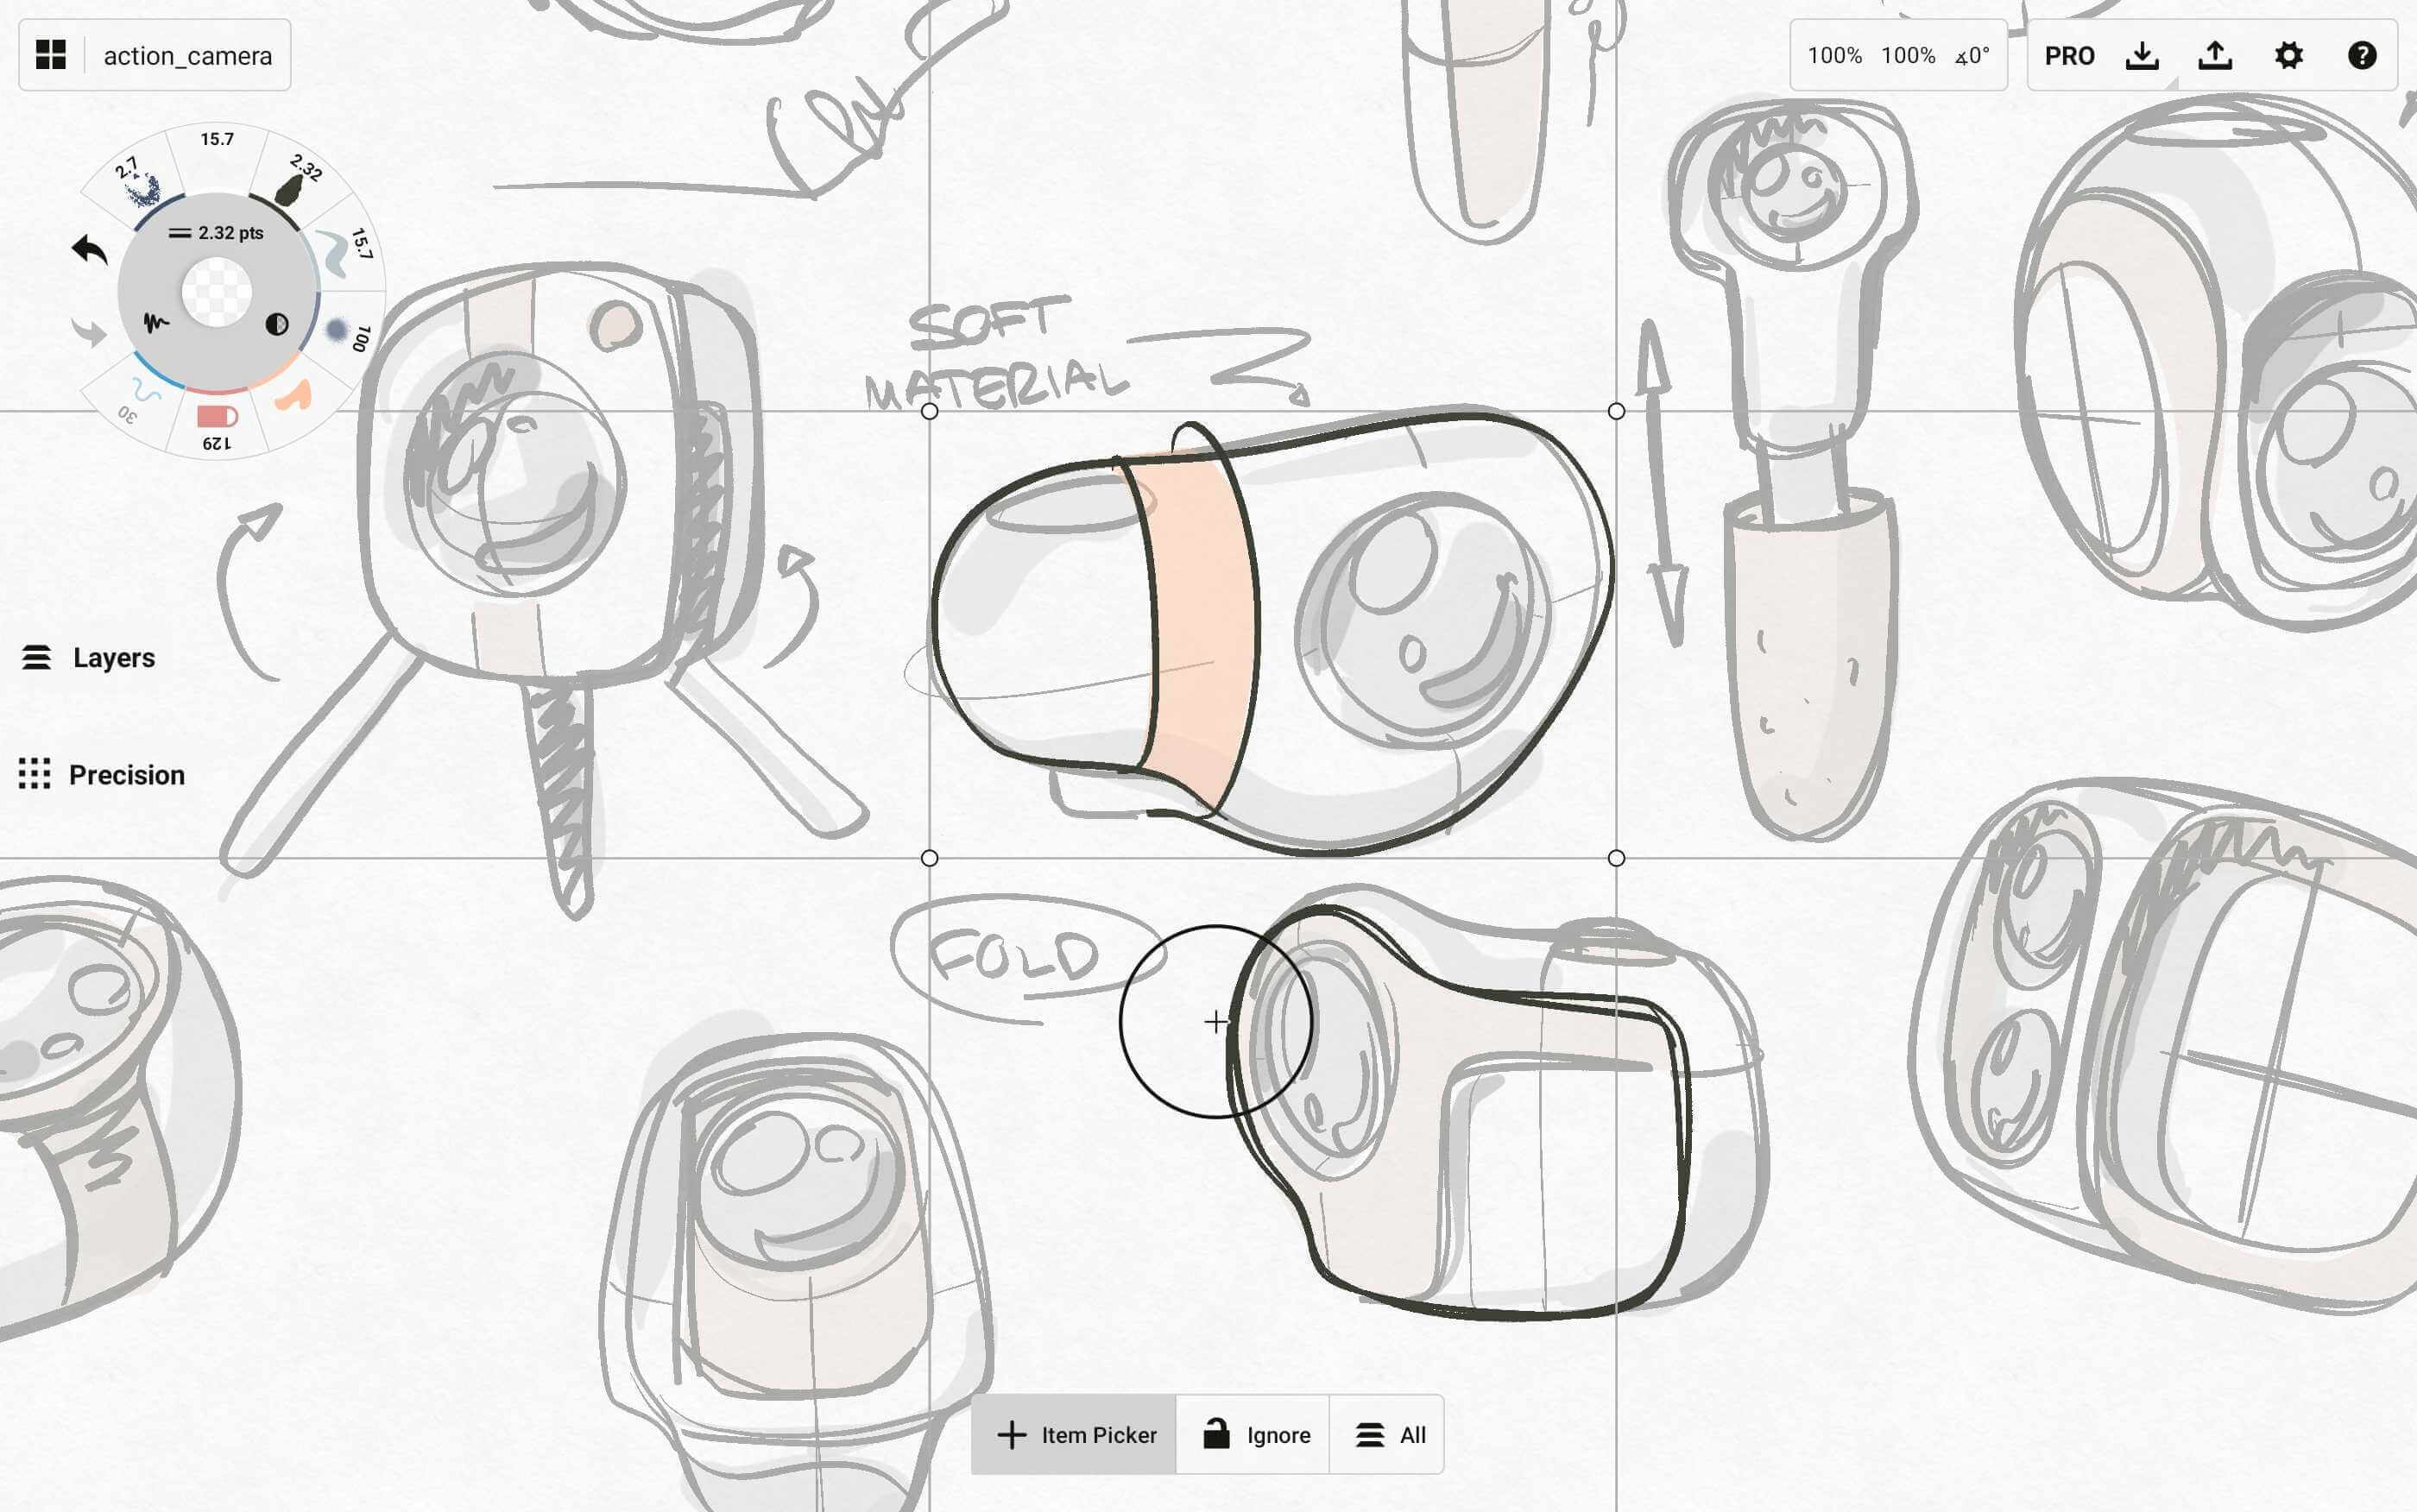
The third Selection toggle is the Color Picker. This is a vector color picker with a few more capabilities than standard color pickers in other apps. It allows you to select and remember color, brush and stroke properties, and set them to your tools.
In addition to the Selection toggle, you can activate the color picker from the Color Wheel. Open the wheel, find the eyedropper, and tap it to use it.
When Color Picker is active, drag the circle with crosshairs across the screen. You’ll see the top half of the picker changes colors and transparency according to the character of the color beneath it, while the bottom half of the picker displays your active tool’s current color. When you let go of the color picker, the new color will be assigned to the tool.
In the selection menu at the bottom of the screen, you’ll see an option for “Alpha On”. This means the color reflected will be calculated as if the color were against a transparent background. It grabs the actual flat color without applying opacity to the brush.
Finally, you’ll see a tool tag floating above the color picker. This tag recalls the exact tool you used to draw each stroke in your drawing. If you’re having trouble remembering which tool you used in what color, tap the tag and the tool will be applied to your tool slot.
You can find an illustrated tutorial about the Color Picker here.
Adjusting a Selection
Once you’ve selected a stroke or group of strokes, you’ll notice the Selection menu at the bottom of the screen has shifted to give you a few more helpful toggles.
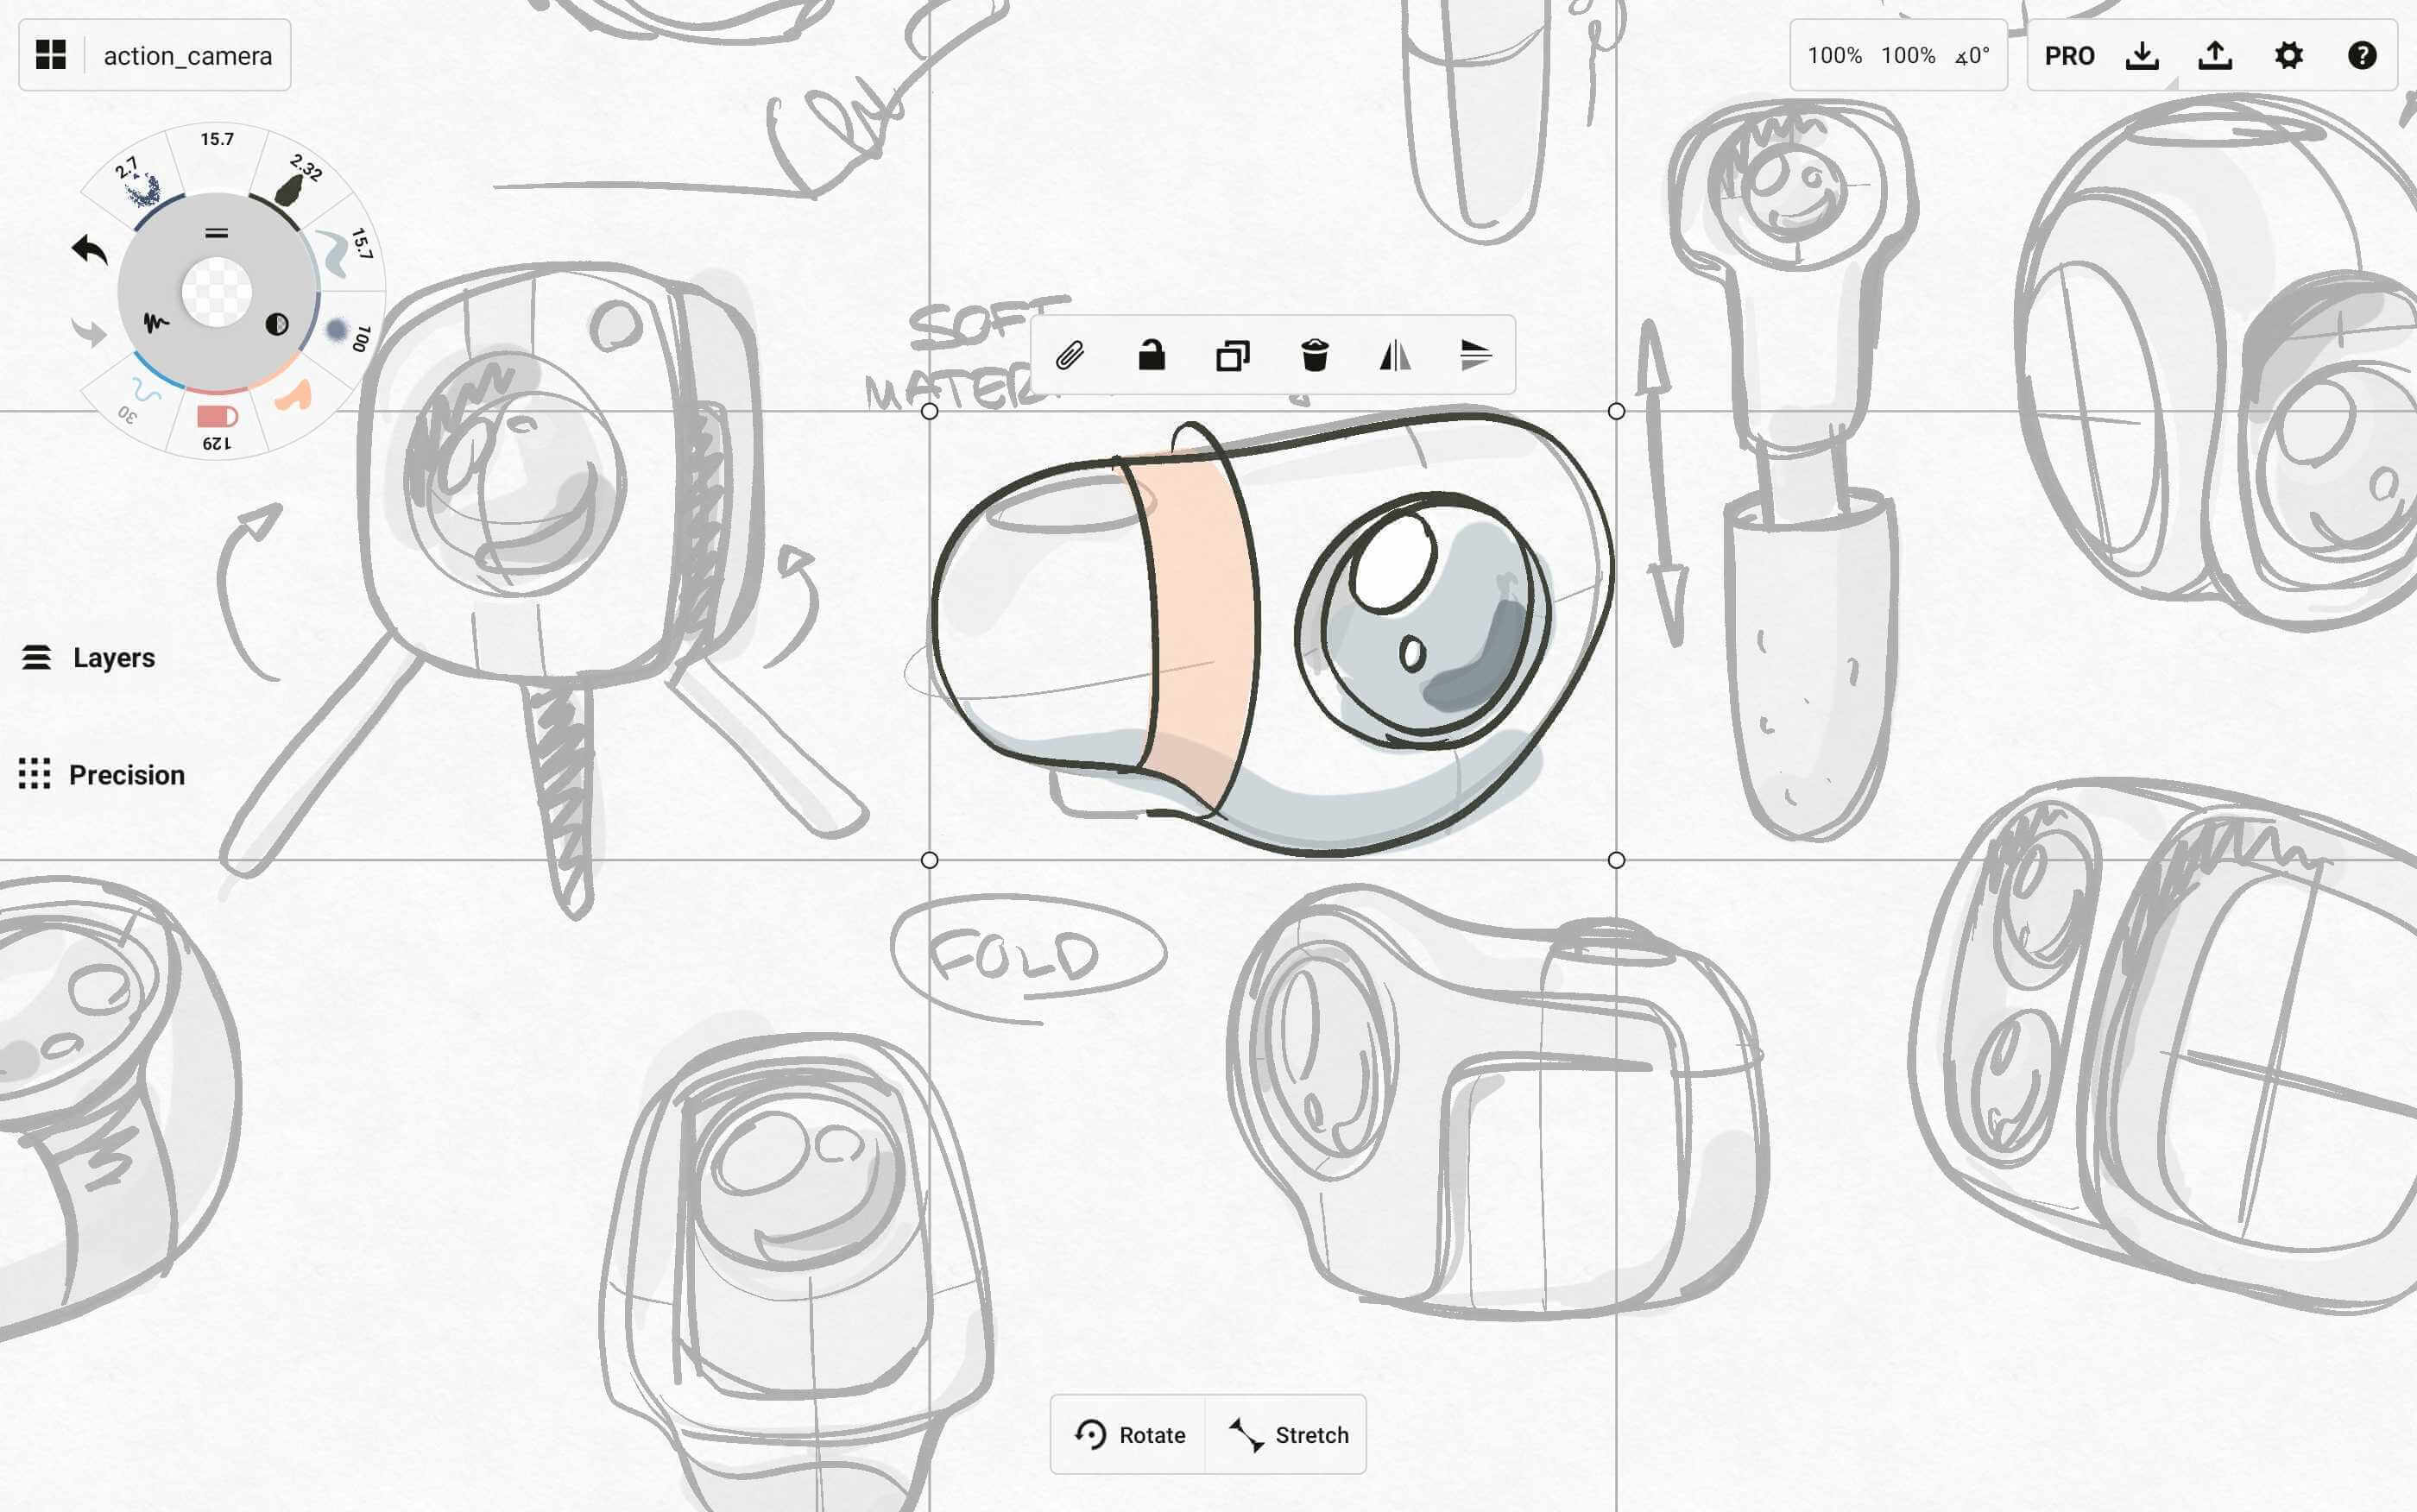
- Rotate. Allows you to rotate your selection. Tap it on or tap it off.
- Scale / Stretch / Off. Toggle between these to scale strokes (grow the whole selection bigger or smaller, with a locked aspect ratio), stretch strokes (stretch strokes longer or shorter, keeps the same tool size), or lock your strokes from scaling or stretching.
Use a two-finger gesture to scale and rotate the selection.
You can also do an exact angle rotation of your selection using the angle field below the status bar at the top of the canvas. Tap+hold the angle field to bring up a keyboard, and type in your custom degrees value. Objects will rotate clock-wise. It helps to lock your rotation toggle on the selection menu first to avoid turning it again when moving the object.
You can also use the four corner handles around a selection to adjust the selection. These handles are your Control Points. You can tap, then drag a single point to scale/stretch the selection. Or you can tap a corner point or two and distort, skew and warp your selection just by pulling with one or two fingers. These are excellent for tweaking size and shape to make your drawing proportions right. They’re also helpful for aligning strokes, text or other images into your sketch’s perspective.
- Scale/stretch. Drag one of the corner points to resize the selection. Put another finger on screen to lock the aspect ratio while resizing.
- Distort. Tap one corner and drag anywhere on screen to pull it around.
- Skew. Tap two corners at once, and use one finger to pull the entire side about.
- Warp. Tap two corners at once, and use two fingers to either pinch or expand your selection. This makes your drawing act like the Star Wars credits.
The Selection Popup
Above the selection box is a Selection popup. This has many useful features you might use to work with your strokes.
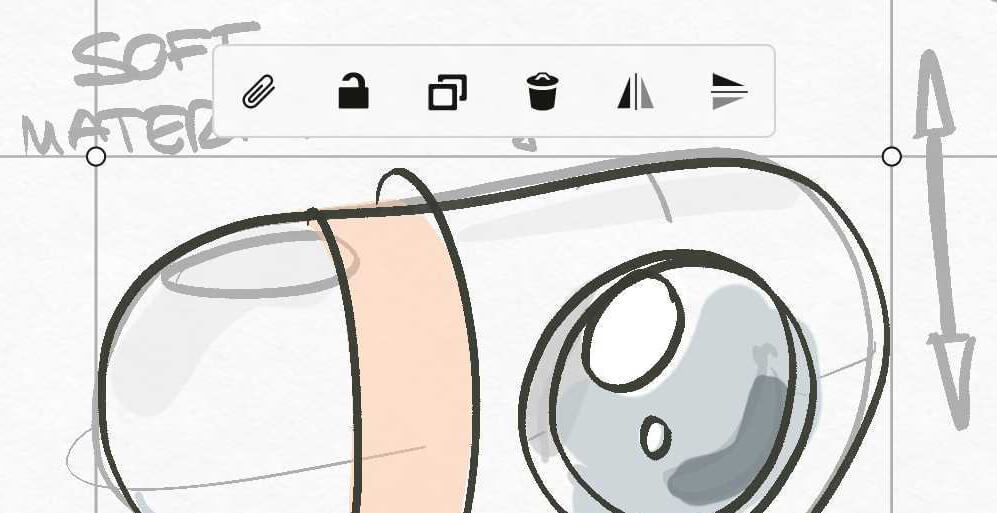
Copy to Clipboard. You can use the import menu in Gallery or on canvas to paste strokes you’ve copied to the clipboard.
Lock. The Lock button locks your selection from all other selections and adjustments you might make in the future. You can access it again by selecting and unlocking it, or by changing the Lock filter on the Selection menu.
Duplicate. Anything you select, you can also copy, as many times as you’d like. Just touch Duplicate and it will create an exact match for fast iterations. Drag the duplicate to a new layer to keep or hide your old selection, and iterate on the new.
Delete. The best way to erase a vector stroke is to delete it, so if you truly dislike a stroke and want to banish it to the far nethers, just delete it from your life and drawing. You can also use the Slice tool that acts like an eraser. Of course, you can Undo.
Flip and Mirror. The final two buttons allow you to flip your selection from side to side, or to mirror it vertically. Great for creating reflections and shadows, as well.