セレクション
クイックサマリー
- キャンバスを長押ししてセレクションを有効にします
- 編集または削除したいストロークを選択します
- 画面下部のセレクションフィルターを使用して、選択範囲を絞り込みます
コンセプトはベクターベースなので、描いた後でもいつでも任意のストロークを選択して移動、微調整、または変更することができます。これは、デザインの反復作業、マインドマップの整理、フィードバックを受けた後のクライアント向け資料の作成に最適です。
セレクション方法
デッサン内でストロークを選択する方法は4つあります。
セレクションツール

ブラシメニューで、セレクションツール(矢印)を選択し、ツールホイールまたはツールバーの独立したツールとして設定できます。画面にタッチすれば、他のツールと同じように使用できます。
長押し
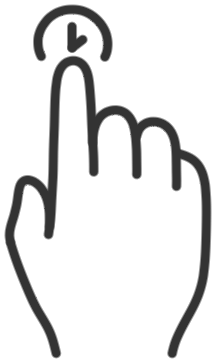
キャンバス上のどこかを長押しすると、セレクションが起動します。ワークフローに合わせて、設定 → インタラクション → 長押し から、長押しする時間や起動するセレクション方法を変更できます。
フィンガーアクション

対応しているスタイラスペンを使用している場合は、フィンガーアクションを選択に設定してください(設定 → インタラクション → タッチ入力 → フィンガーアクション)。そうすることで、スタイラスペンではツールホイールで選択したプリセットを使用し、指ではセレクションツールとして機能させることができます。
レイヤーセレクションポップアップ

単一レイヤー上のすべてのストロークを選択したい場合は、使用中のレイヤーをタップしてレイヤーセレクションポップアップを開きます。セレクション矢印アイコンをタップすると、そのレイヤー上のすべてが選択されます。
セレクションメニュー

いずれかの方法でセレクションを有効にすると、画面の下部にメニューが表示されます。これがセレクションメニューです。セレクションメニューを使用すると、選択したいストロークをフィルタリングできます。
- ツールホイールからセレクションツールを使用している間は、ツールが使用中である限りメニューが画面に表示され続けます。
- 長押しで選択する場合、メニューは指が画面に触れている間表示され続けます。2本目の指を使ってメニューボタンを切り替え、フィルターを設定できます(詳細は後述)。

アイテムピッカー(左)と投げ縄(右)のそれぞれのセレクションメニュー。
セレクションメニューでは、有効にしている切り替え設定に応じて、左から順に以下の項目が表示されます:
- 選択タイプの切り替え。タップすることで、アイテムピッカー(個別にストロークを追加・減算できる単一アイテム選択)、投げ縄(ドラッグしてストロークを囲んで複数選択)、カラーピッカー(ストロークから色やベクタープロパティを選択)を切り替えられます。
- 一部選択オン/オフの切り替え。選択範囲内のストロークを、部分的に選択するか、完全なストロークとして選択するかを選べます。(投げ縄のみに適用)
- ロックの切り替え。描画中にロックしたストロークを含めるか、無視するかを選択できます。
- レイヤーの切り替え。使用中のレイヤーのみを選択するか、すべてのレイヤーを一度に選択するかを選べます。
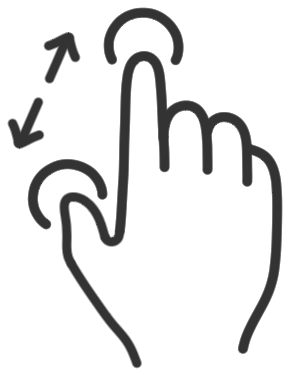
投げ縄での選択


- 長押し、セレクションツール、またはフィンガーアクションでセレクションツールを有効化します。デフォルトでは、最初の選択オプションは投げ縄です。

- 選択したいストロークの上または周囲を指でなぞります。再度投げ縄を使うと、選択範囲から除外 できます。

- 投げ縄で範囲を選択した後、さらに個別のストロークを追加したくなった場合は、追加で投げ縄を使うか、選択タイプを切り替えてアイテムピッカーに切り替えることで、選択範囲に要素を追加し続けることができます。
アイテムピッカーでの選択


- 長押し、セレクションツール、またはフィンガーアクションでセレクションツールを有効化します。デフォルトでは、最初の選択オプションは投げ縄です。セレクションタイプの切り替えをタップすると、アイテムピッカーが表示されます。これは単一アイテムの選択モードで、個々のストロークを選択範囲に追加したり、除外したりできます。

- 十字カーソルをストロークの上へドラッグします。ストロークが選択可能になると、十字カーソルの周囲に円が表示されます。
- 単一のストロークを選択するには、指を離すとそのストロークが選択されます。複数のストロークを選択するには、別の指で画面をタップして、カーソルが重なっているストロークを選択してください。

- 選択範囲にストロークを追加したい場合は、再度ピッカーにアクセスし、十字カーソルを次のストロークまでドラッグして、画面をタップすると選択したストロークに追加されます。

- 選択範囲からストロークを減らしたい場合は、十字カーソルを既に選択されているストロークまでドラッグします。プラス記号がマイナス記号に変わるのが確認できます。画面をタップすると、そのストロークが選択範囲から削除されます。
カラーピッカー

セレクションの切り替えを投げ縄からアイテムピッカーまで順にタップしていくと、3番目の切り替えがカラーピッカーになります。このベクターカラーピッカーは、他のアプリの標準的なカラーピッカーよりも多くの機能を提供しています。色、ブラシ、ストロークのプロパティを選択して記憶し、それらをツールに設定できます。カラーピッカーの詳細については、カラーセクションをご覧ください。
セレクションポップアップ
選択ボックスの上には、セレクションポップアップが表示されます。このツールには、ストロークの編集に役立つ便利な機能がたくさん備わっています。

- クリップボードにコピー。 クリップボードのアイコンをタップすると、選択した内容をデバイスのクリップボードにコピーできます。この機能に対応しているアプリでペーストをタップすると、選択した内容を背景が透明なPNGとして貼り付けることができます。コンセプト内では、インポートメニューからクリップボードからストロークを貼り付けることができます。また、他のアプリからクリップボードに色をコピーし、カラーホイールでそれらを使用することもできます(iOSのみ)。
- 選択範囲を複製。 選択したものは何でも複製できます。「複製」をタッチするだけでコピーが作成され、素早い試行錯誤が可能です。複製したものを新しいレイヤーにドラッグすると、作業の履歴を整理して保持できます。
- 選択範囲をグループ化。 これにより、選択範囲内のすべてのストロークを単一のグループにまとめることができます。グループ内のストロークを一つ選択するだけで、オブジェクト全体を選択できるようになります。グループ化を解除するには、オブジェクトを選択してグループボタンを再度タップしてください。
- 選択範囲をロック。 ロックボタンは、選択範囲がその後の選択や調整の影響を受けないようにロックします。セレクションメニューのフィルターでロックされたアイテムの選択を許可することで、ロックされたアイテムに再度アクセスできます。
- 選択範囲を削除。 選択範囲を削除するには、削除ボタンをタップします。
- 左右反転。選択範囲を左右に、つまり水平方向に反転させます。反射や影を作るのに最適です。
上下反転。選択範囲を上下に、つまり垂直方向に反転させます。反射や影を作るのに最適です。
選択範囲の調整

ストロークまたはストロークのグループを選択すると、画面下部のセレクションの切り替え項目が変化し、より便利な切り替え項目が表示されるようになります。

- 回転。選択範囲の回転を許可または無効にします。回転の状態を切り替えます。
- スケール / ストレッチ / オフ。スケールは選択範囲全体を拡大縮小し、線幅も一緒に変更します。ストレッチは線幅を維持したまま、ストロークを伸ばします。スケール/ストレッチをオフにすると、ストロークの拡大縮小や引き伸ばしができなくなります。
- フィルター。これをタップすると、セレクションのメニュー項目、アイテムピッカー、投げ縄、カラーピッカー、および選択フィルターが表示されます。
- 選択範囲をスケールするには、2本指のジェスチャーで選択範囲をつまむ、または広げる操作を行ってください。また、ズームツールやキーボードショートカットを使用することもできます。

- 選択対象を回転させるには、2本指のタッチジェスチャーで選択対象を回転させてください。また、回転ツールやキーボードショートカットを使用することもできます。

- キャンバス上部のステータスバーの下にある角度とサイズのフィールドを使用すると、選択対象の正確な回転角度とスケールを指定することもできます。角度またはサイズのフィールドを長押ししてキーボードを表示し、カスタム値を入力してください。回転させる際、オブジェクトは時計回りに回転します。オブジェクトを移動する際に、意図せず選択対象が回転したりスケールが変わったりするのを防ぐには、まずセレクションメニューで回転とスケールの切り替えをロックしてください。
選択対象の変形

選択対象の周囲にある4つのコーナーハンドルを使用して、選択対象をスケールしたり歪ませたりすることができます。これらのハンドルは制御点です。

- 単一のポイントから直接ドラッグして、選択対象をスケール/ストレッチできます。リサイズ中にアスペクト比を固定するには、もう一本の指を画面に置いてください。

- コーナーポイントを1つタップして有効化し、ドラッグして選択範囲を歪ませることができます。

- コーナーポイントを2つタップして有効化し、指1本でドラッグして選択範囲を傾けることができます。

- コーナーポイントを2つタップして有効化し、指2本でピンチまたは広げる操作をして選択範囲を変形させることができます。
制御点を表示するには、スケール/ストレッチが有効である必要があることに注意してください。
選択対象をハイライト表示


- デフォルトでは、コンセプトは選択したストロークをハイライト表示し、選択されていない部分をグレーアウトします。また、選択中のオブジェクトは最前面に表示されるため、選択したストロークが他のストロークの後ろにある場合でも、視覚的に一番上に表示されます。
- 「設定」→「インタラクション」→「長押し」メニューの中に、選択対象をハイライト表示するオプションがあります。お好みに合わせて、この設定をオンまたはオフに切り替えてください。
- 「選択対象をハイライト表示」をオフにすると、デッサンの色はそのまま維持されます。ただし、選択中のオブジェクトは引き続き最前面に表示されます。
ハイライト選択とナッジ

ハイライト選択をナッジツールと一緒に使うこともできます。
- ハイライト選択がオンになっていると、画面上で線をナッジする際に変更前と変更後のストロークの両方が表示され、元のストロークはわずかにグレー表示されます。
- ハイライト選択がオフになっていると、調整後のストロークのみが表示されます。