PDF or Portable Document Format is the universal language for document shares. It’s a file type that allows graphic data - like fonts, images and layouts - to be flattened as-is and shared independently of all software and hardware brands, so that your important work can’t get mucked up during the export / import process.
It also means your work can’t be edited, which means design iterations are difficult and require lengthy re-drawing. Concepts allows you to create, import, mark up, rearrange, substitute and export crystal clear PDF pages. Available in the Pro Shop either a-la-carte or as part of subscription, it has a lot of power but is simple to use.
Importing a PDF
To import a PDF, download it via your email, text, Files, Cloud or other preferred method to your device, and open it in Concepts.

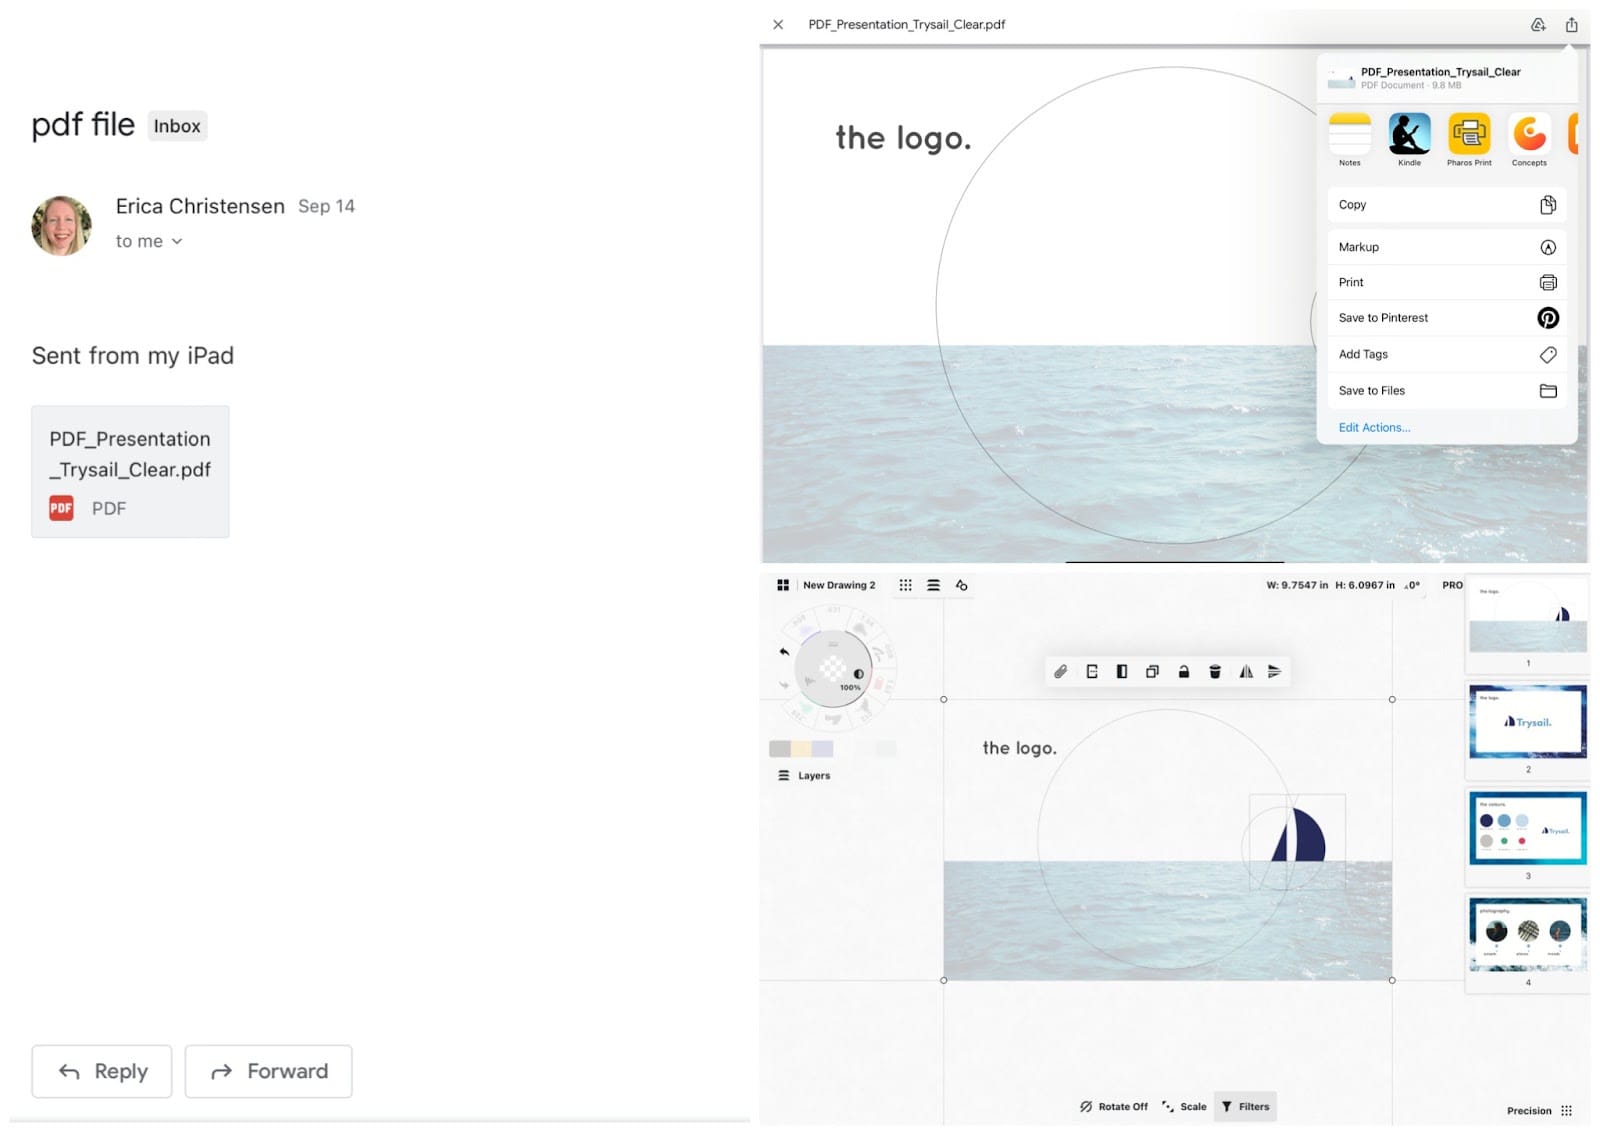
Importing a PDF from email: 1 - Tap the PDF to open it. 2 - Tap the sharing icon in the top right corner to bring up the menu. 3 - Find and tap the Concepts icon.

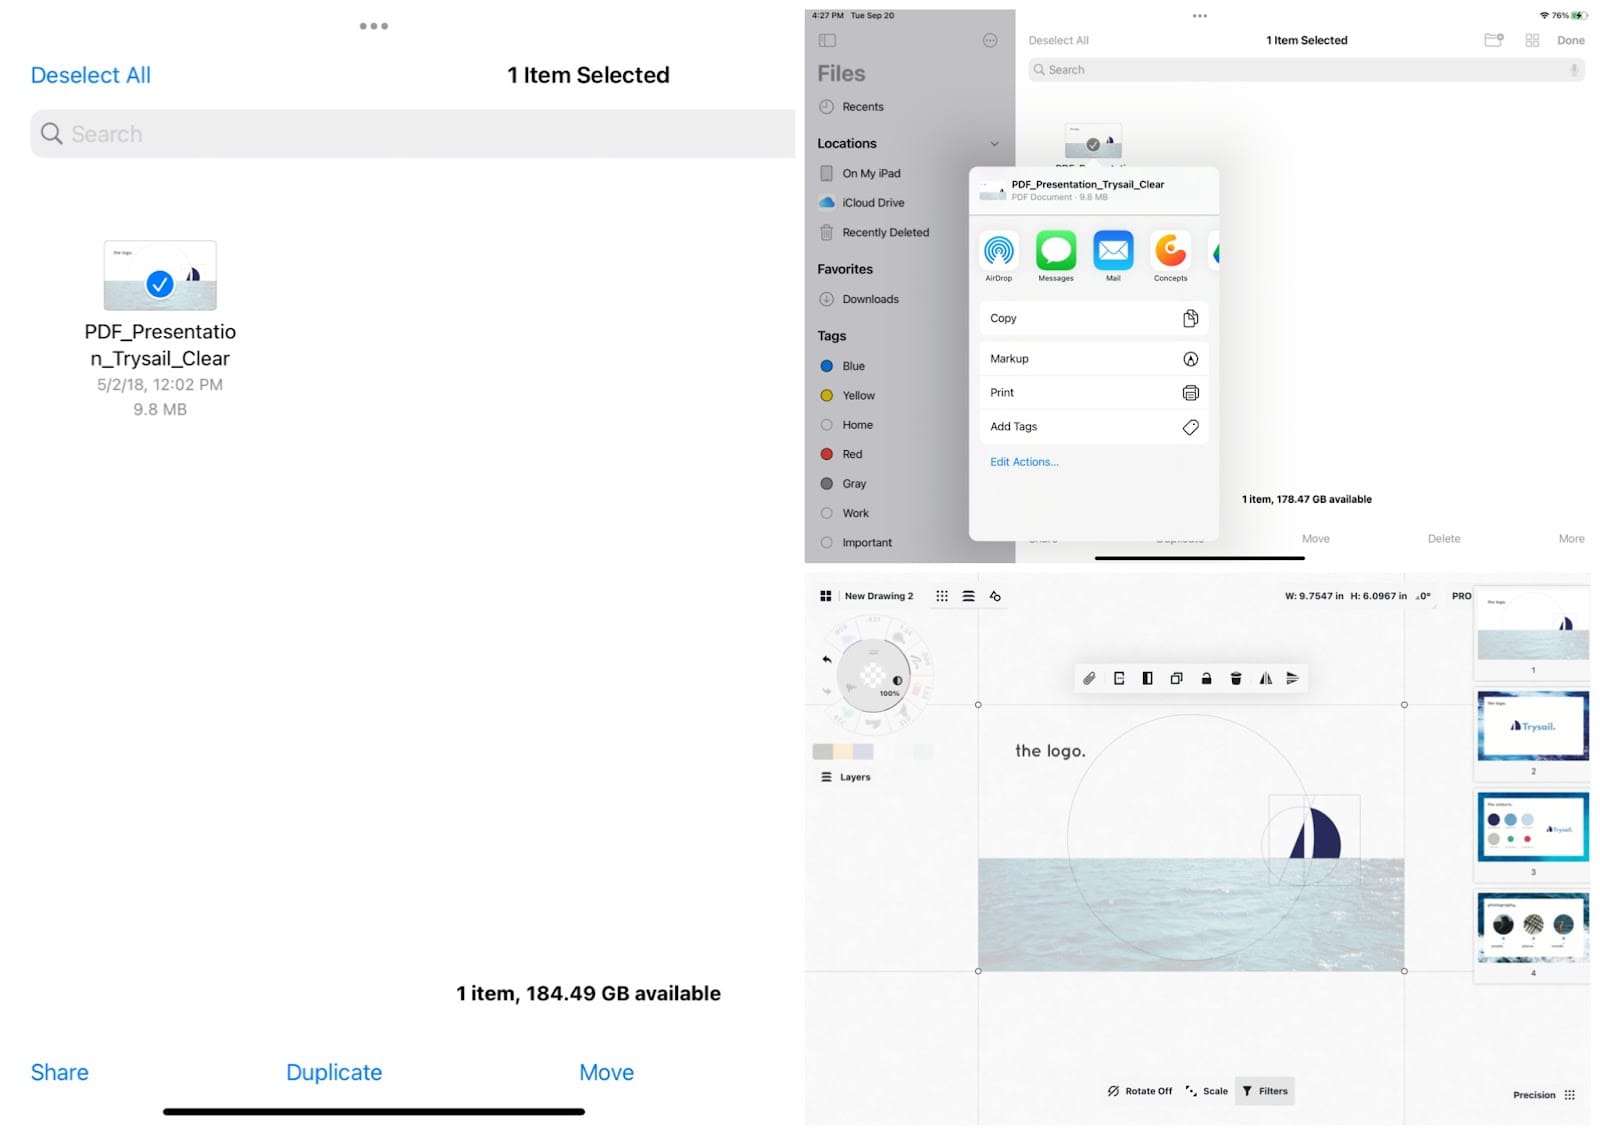
Importing a PDF from Files: 1 - Tap Select in the upper corner and select your PDF. 2 - Tap Share in the lower corner to bring up Sharing locations. 3. Select the Concepts icon.
With a single-page PDF, it will import just like an image onto the canvas.
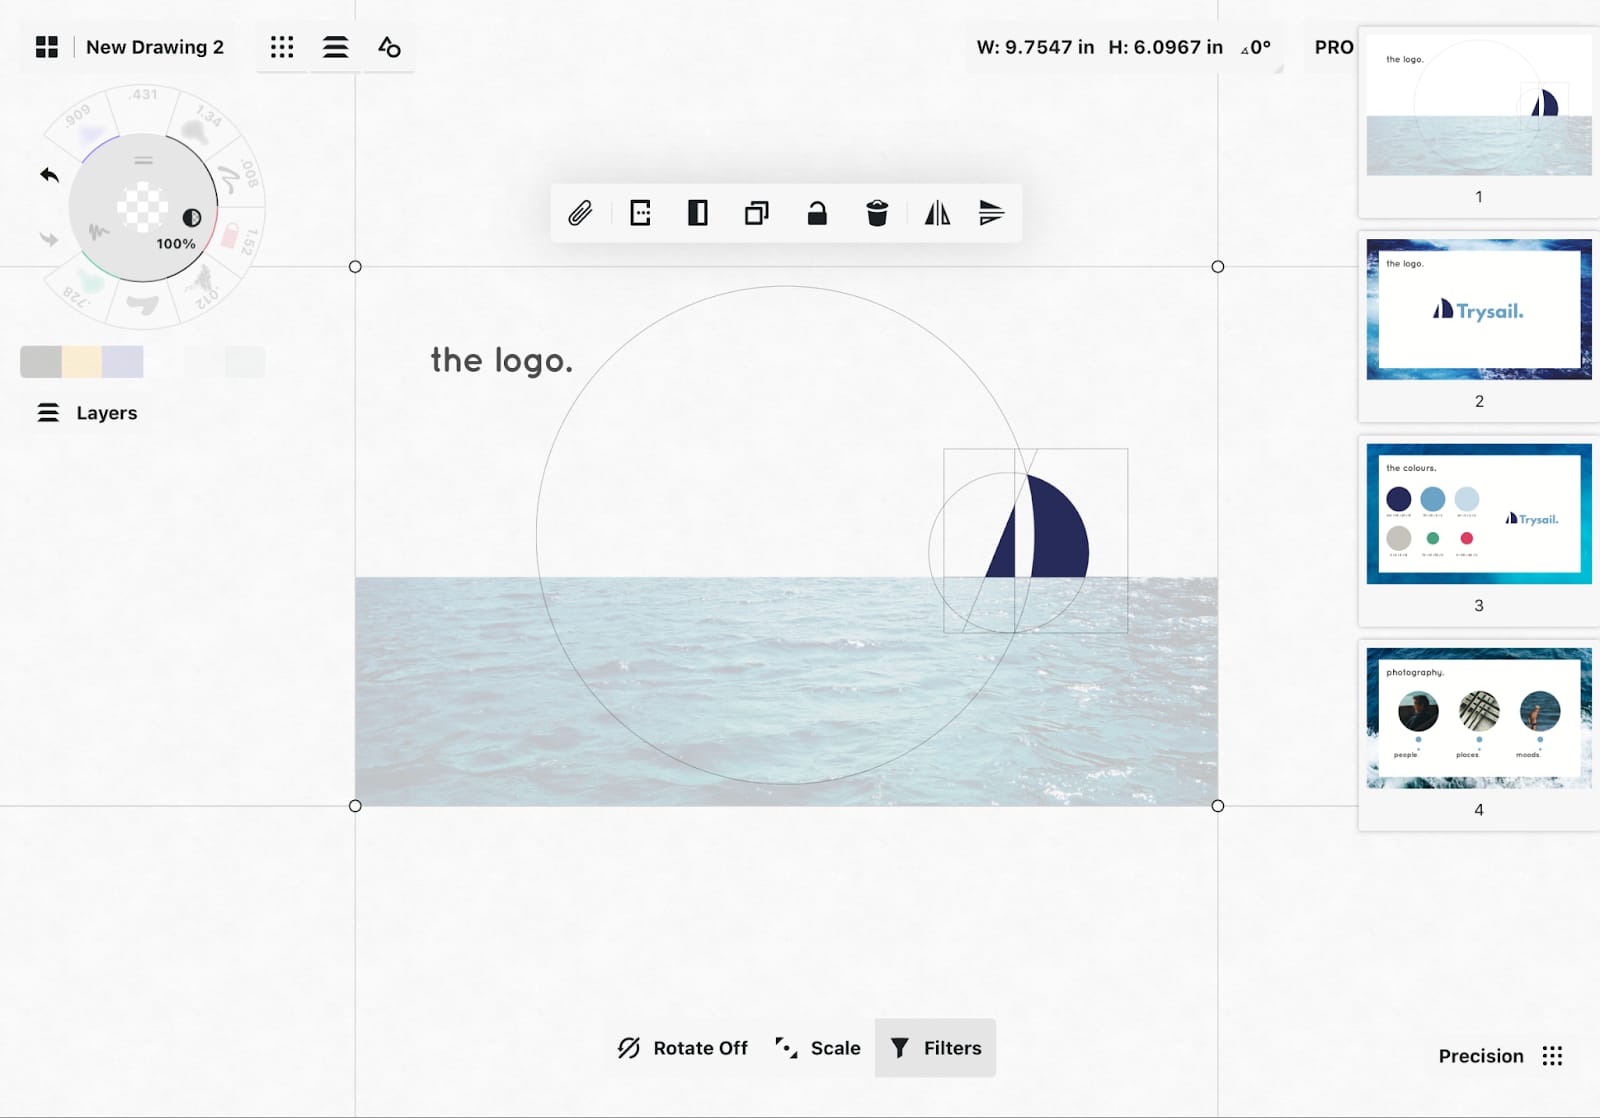
With a multi-page PDF, you’ll see a scrollable selection of pages appear at the side of the screen. You can drag these pages onto your canvas and position them exactly as you would an image, object or other selection.
Your PDF will import to scale onto your canvas. A PDF has a “real world” size based on a standard 72dpi. When Concepts imports the PDF, it respects that size - for example, a PDF that is US Letter size will be shown as 8.5 by 11.0 inches on your canvas. If you enable measurements, the imported document will match the measurements displayed in Concepts.

Interacting with your PDF
When working with a PDF, the standard gestures and selection abilities apply, plus a few extras.
- Drag a page with a finger or stylus onto the canvas.
- Tap to set the page onto the canvas.
- Tap+hold the page to select it, move it about, and perform all the useful abilities selection offers, plus one just for PDF - apply transparency when exported.
- With a multi-page PDF, swipe the PDF menu off the edge of the screen to hide it while you work.
- To bring it back, select a PDF page and touch the left-most button on the popup with the rectangle+dots - another PDF-only button - and it will reappear.

Go ahead and mark up or make edits to your PDF how you’d like.
Concepts reads your pages from top to bottom, and from left to right. If you’re looking to rearrange pages in your PDF, drag your pages onto the screen into the order you’d like them to appear, then export your PDF.
Don’t worry about crooked pages, Concepts will export anything within a page’s selection rectangle and true it up to the page, assessing the furthest left / right and top / bottom points. If it’s more horizontal, it will export to your true horizontal page; if it’s more vertical, it will export to your true vertical page.
For substituting in pages without having to recreate the entire document, read on to Exporting a PDF(option 3b).
Exporting a PDF
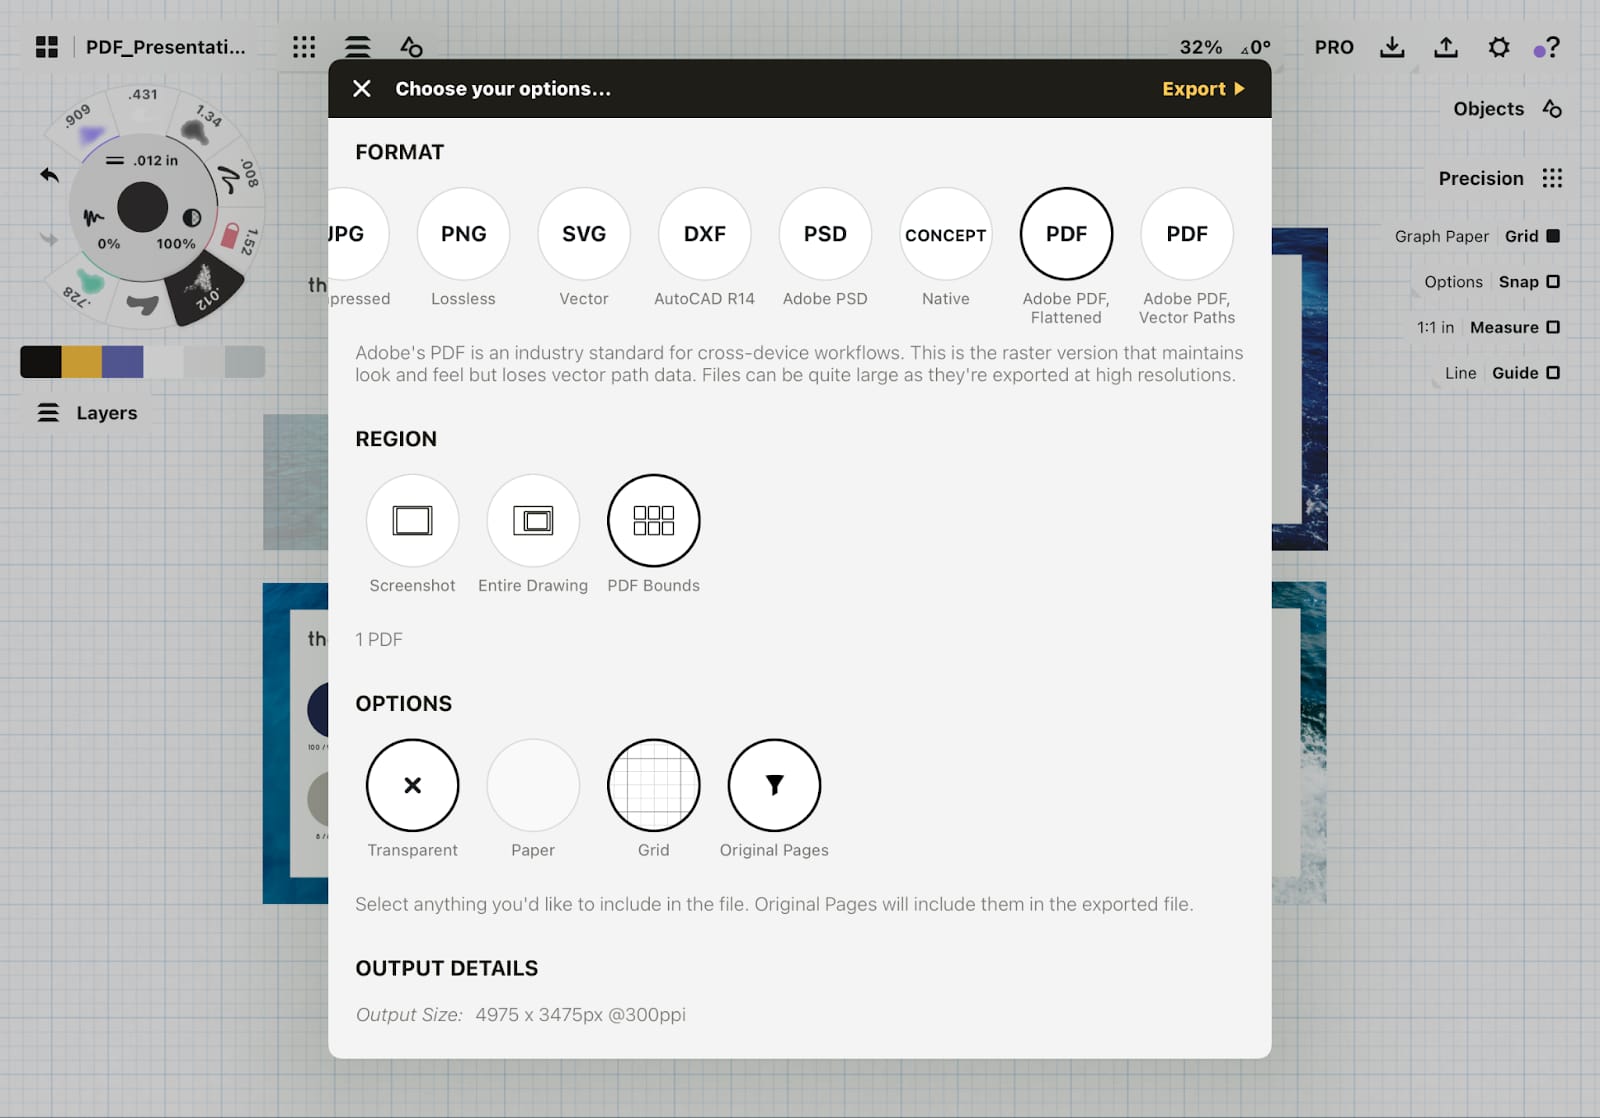
When your document is how you want it and you're ready to export it as a new PDF, touch the Export button in the Status Bar. It will take you to this screen:

Notice there are two PDF options. The first is PDF (Adobe PDF, Flattened). This option is the standard PDF export that flattens your work into an untouchable, high-resolution document.
The second option is PDF (Adobe PDF, Vector Paths). This allows you to export the Concepts vector paths to PDF for use in editors that allow you to work with vector PDFs (e.g. Adobe Illustrator). Warning: the resulting PDF will not look exactly the same as your Concepts sketch - you can expect your lines to appear as simple, non-textured lines. PDF simply does not support the rich, textured strokes that Concepts produces. If you intend to export your file to other vector editors, use the Fixed Width and Wire tools for drawing, and the Slice tool for trimming.
Select whichever PDF option you prefer, then move to Region. Here you see several options, with a Part B on the last. Choose wisely.
1. If you choose Screenshot, whatever configuration of pages or beautiful work you’ve created that show within the current boundaries of the screen will save as a single PDF page.
2. If you choose Entire Drawing, everything you’ve drawn, including what you don’t see in the visible screen boundaries, will save into a single PDF page.
3. If you have an artboard on canvas, you’ll see this represented in your Region. Choosing this option exports your configured size to a single PDF page. We don’t support multiple artboards yet.
4a. If you choose PDF Bounds, you will create a multiple-page PDF. As many PDF pages you have within your drawing, read from left-to-right and top-to-bottom, will export into a full PDF document.
4b. If you select PDF Bounds and include Original Pages, any page(s) you dragged from the PDF and adjusted will automatically substitute in for the original pages, giving you an updated version of your original PDF. This is great for signing the last page of a legal document, for example, without having to recreate the entire spread.