Concepts is an infinite, flexible creative tool for all your good ideas. Available on iOS, Windows and Android.
The Concepts Sketchnoting Toolbox
Learn sketchnoting tips so you can sketch ideas and take notes visually, and use this guide to set up your infinite canvas and pens in Concepts.
Visual communication has become popular — we use emojis to express our moods and pictures to share our experiences, while our thousands of text characters blur into gray among everyone else’s. Studies show that 60–65% of the population are visual thinkers. Are you a visual thinker?
Within businesses, visual thinking is used for brainstorming sessions, making presentations and building team vision. Instead of skimming screens of hard-to-digest text, teammates are connecting ideas via a few carefully chosen words and meaningful images.
On an individual level, visual note taking has become a positive force for understanding and remembering your experiences, whether for class lectures, Audible recordings, or travelogues. The truth is, combining pictures with text to represent the main ideas in a presentation helps you to both listen and recall more fully, since it uses both halves of your brain.
The great news is, you don’t have to be an artist to do it.
Mike Rohde, champion of sketchnoting and creator of the highly digestible The Sketchnote Handbook, shows that by using five basic shapes (a circle, square, triangle, line and dot), you can sketch quick, simple images along with your words to capture big ideas. It transforms arduous note taking into a fun experience with memorable and shareable results.
You can sketchnote with any sort of presentation - classes, conferences or team meetings, even while listening to podcasts or livestreams.
What is a Sketchnote?
A sketchnote is an idea turned into a picture. The simplest image can contain a big idea, and help you to remember that idea every time you see or think about the image. It is powerful for communicating an idea in a glance.
The idea behind sketchnoting is to turn as many ideas into simple sketches as possible, and to use those sketches - or visual vocabulary - in place of text while you take notes.
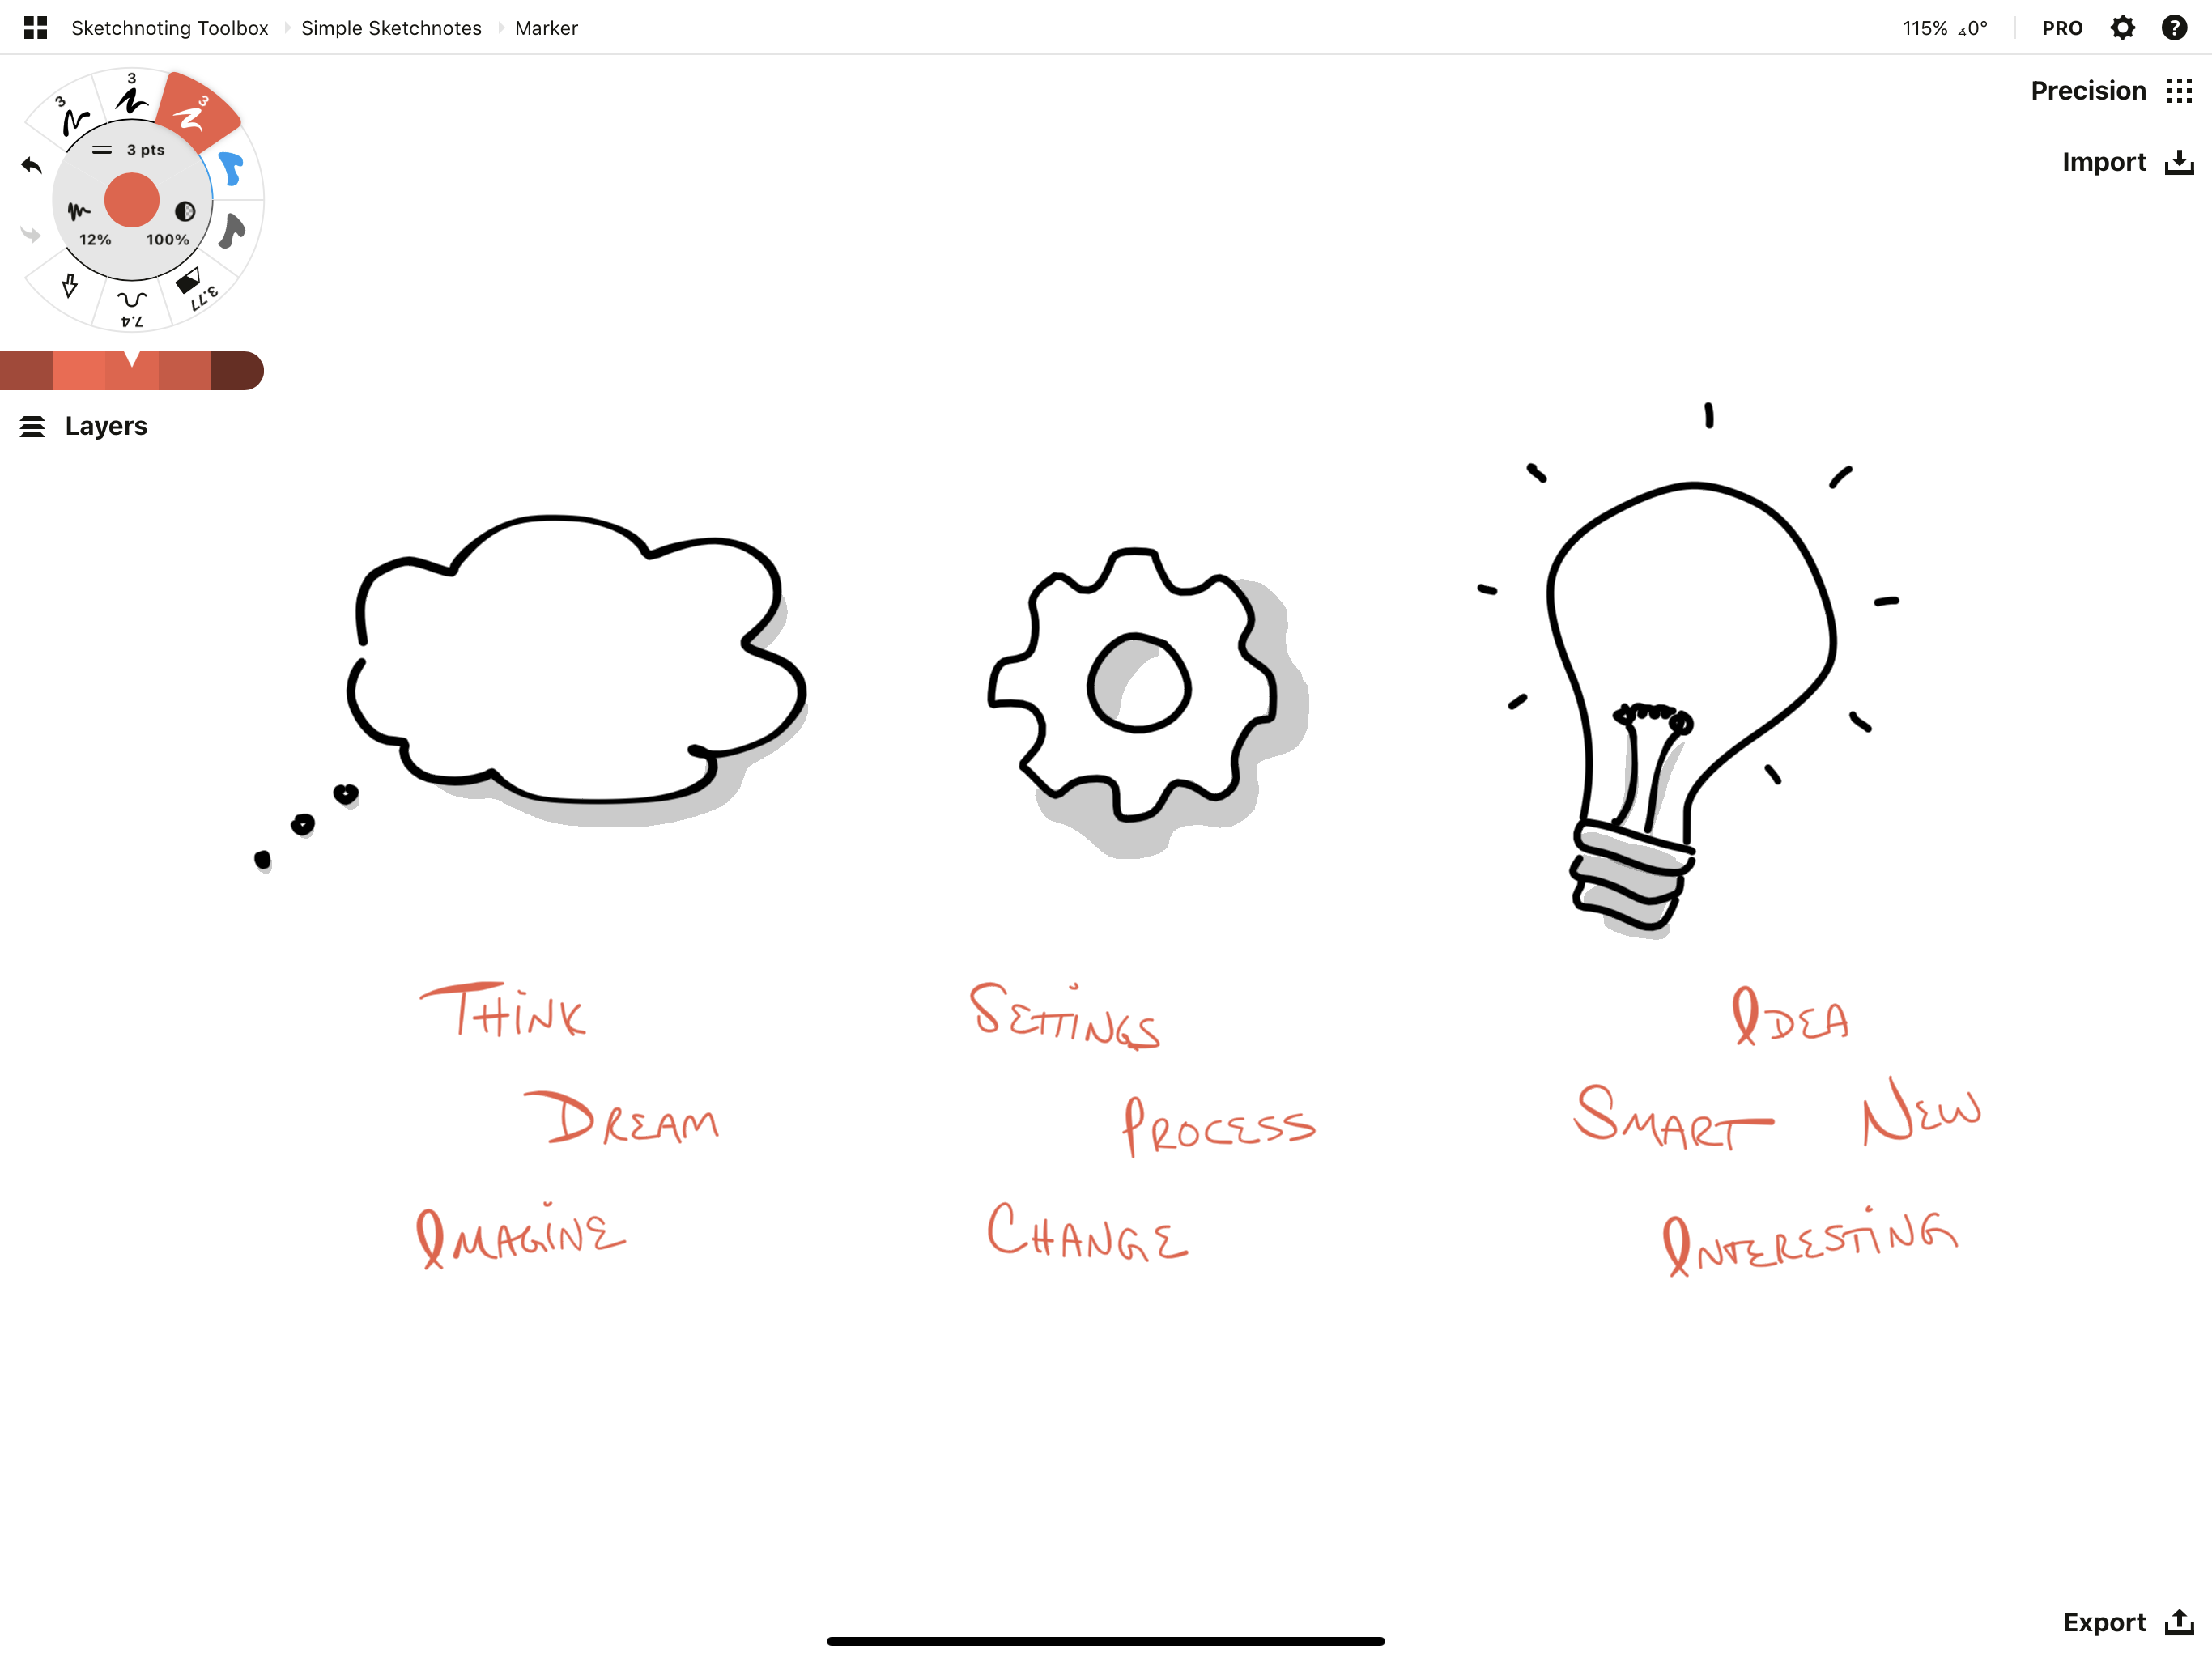
Simple sketches can carry a lot of meaning.
Not only is it quick, it's enjoyable, and you get a zing whenever you sketch and later reference it on the canvas. Sketching allows you to express an idea and even play with it as you go, enhancing the idea and its meaning in your mind.
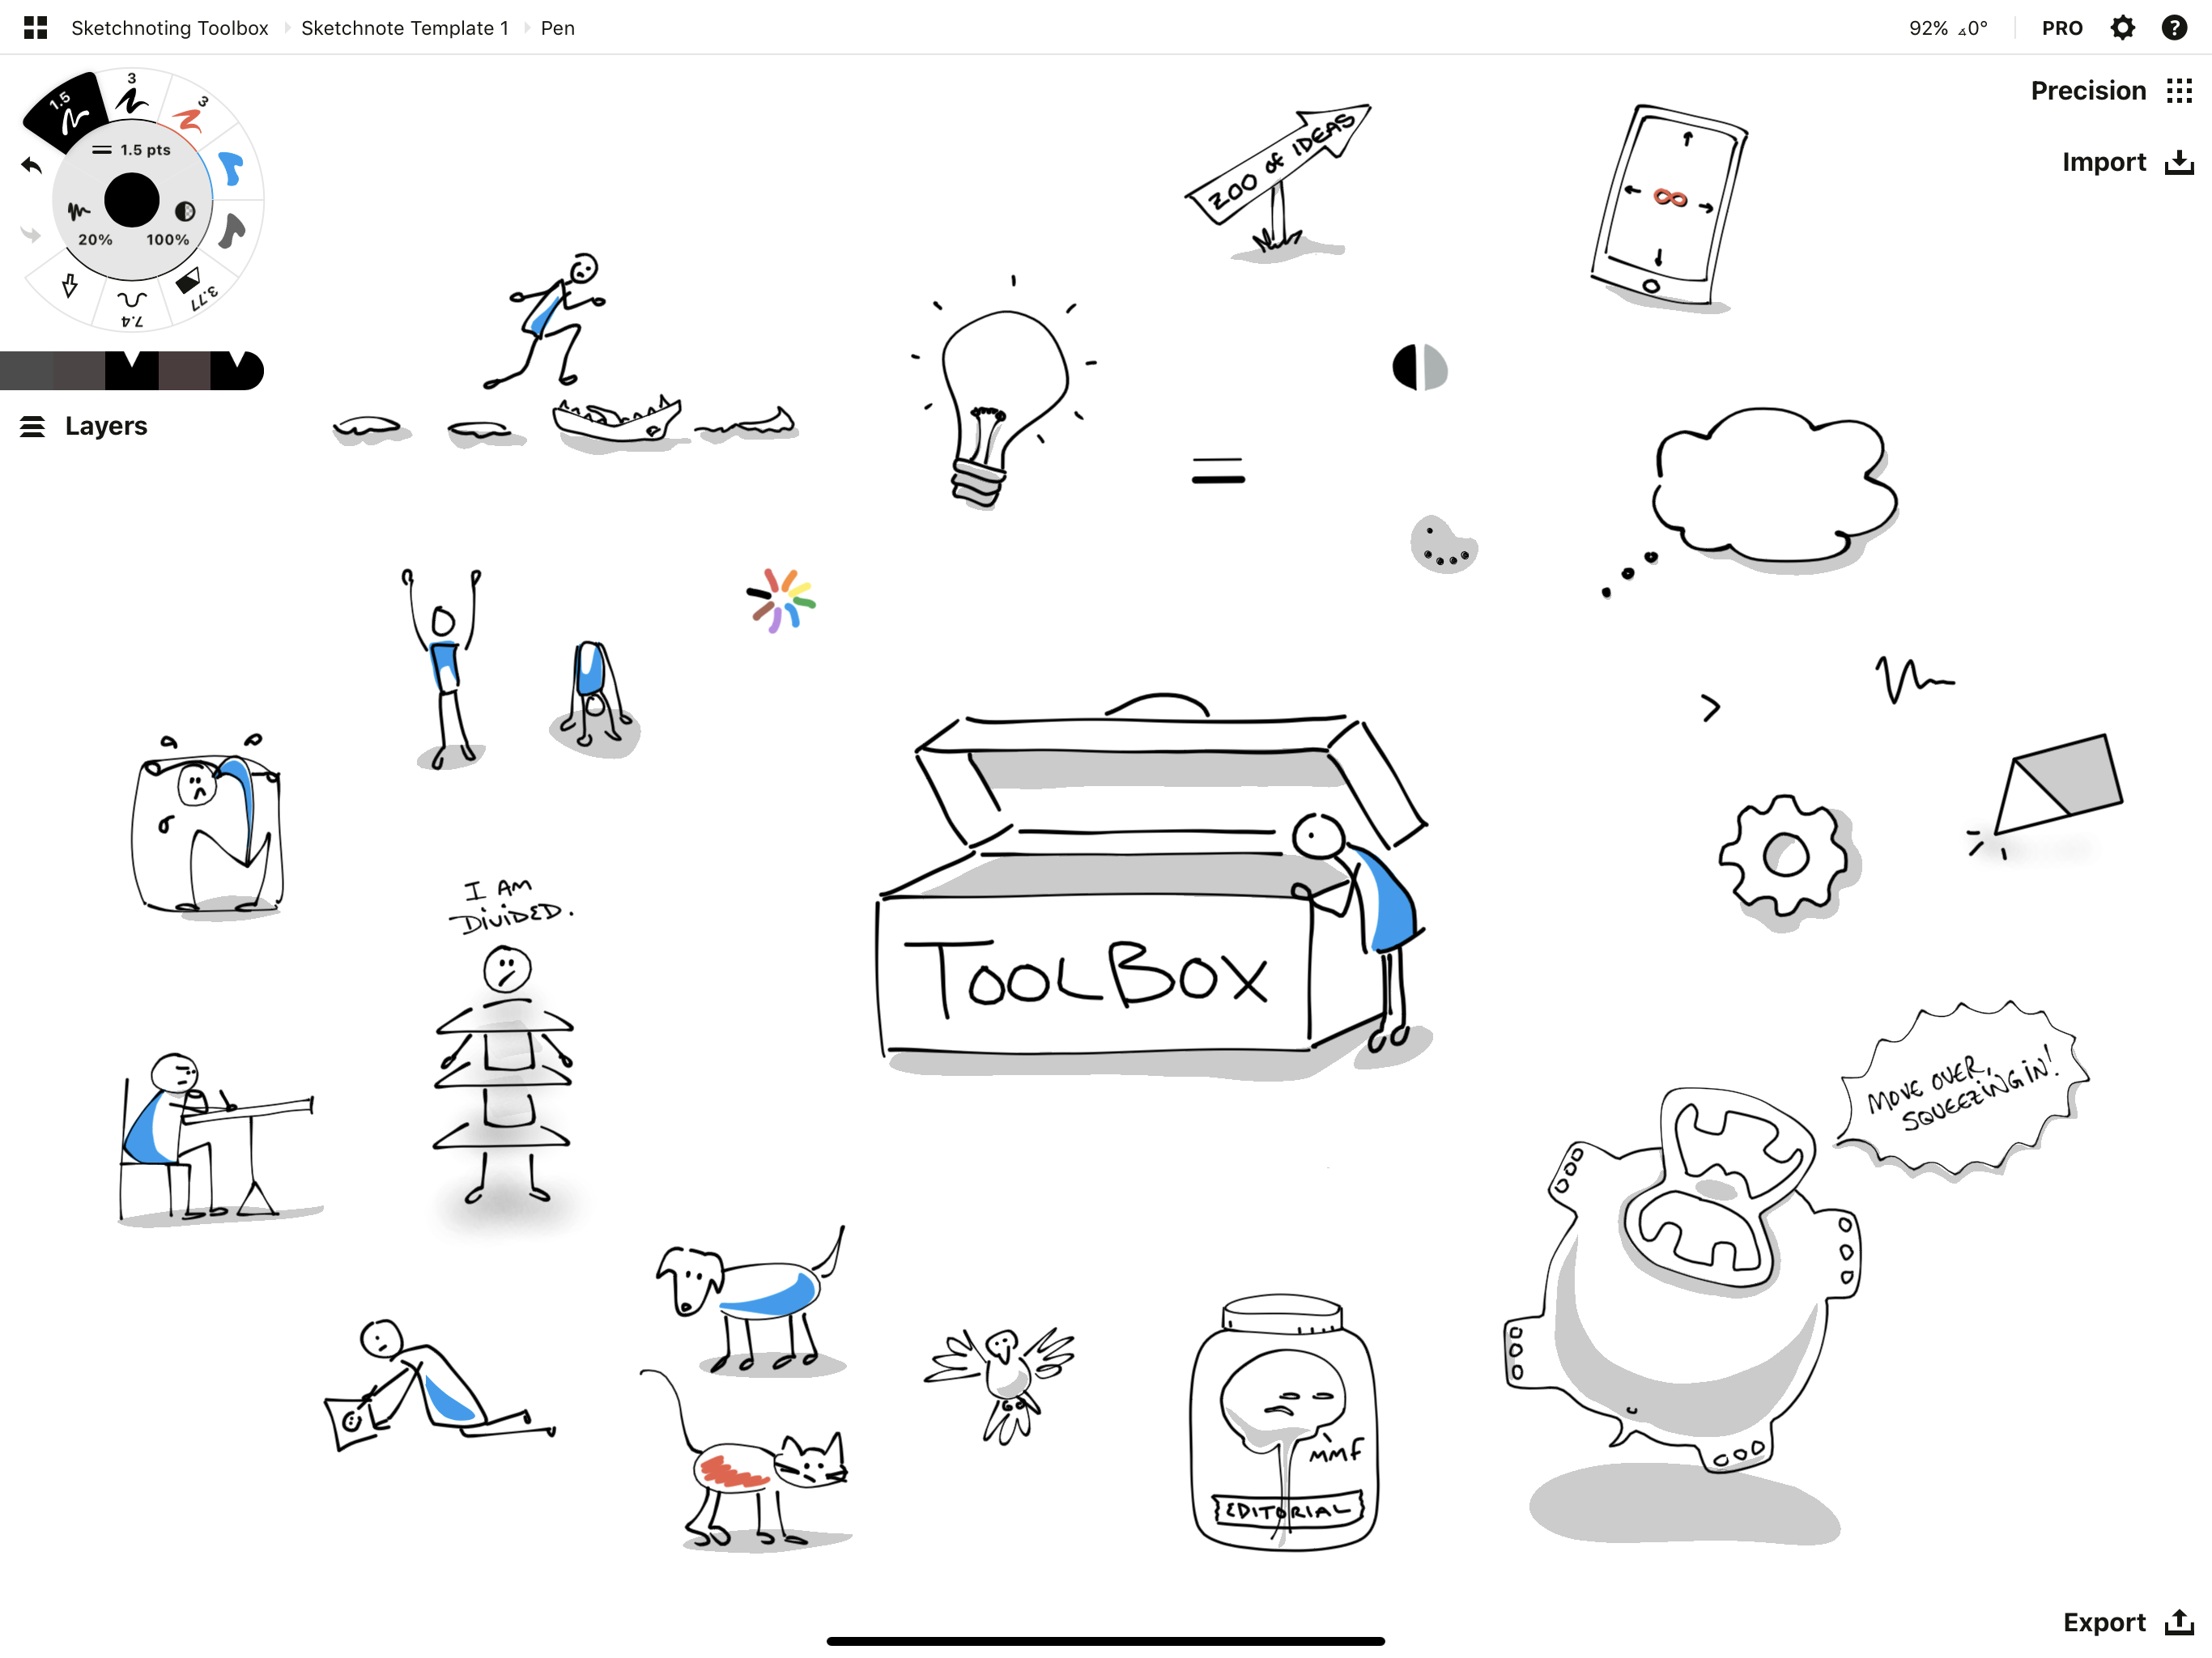
The Toolbox
Concepts' infinite canvas and natural tools make it an ideal app for sketchnoting on your digital tablet or phone. This guide shares how to get started sketchnoting with Concepts, and some practical tips to help you gain confidence with your sketching.
Create a Drawing Template
Step 1 - Make a Sketchnoting Project in the Gallery
Once you start sketchnoting, you'll be tempted to make more, and it's great to catalog them in one place.
Tap the + in the upper left corner of the status bar in the Gallery, or tap+hold the + at the bottom, and select New Project.

Tap+hold > New Project.
Step 2 - Create a Drawing Template
This is as simple as opening a new drawing and setting it up with your favorite background, brushes, tools and gestures for sketchnoting.
Every time you want to create a new sketchnote in the future, just tap+hold the drawing in the Gallery and duplicate it. The same settings will be applied to the new drawing, so you're instantly ready to take notes.
If you're not sure what the best tools are, try the following recommendations to get started.
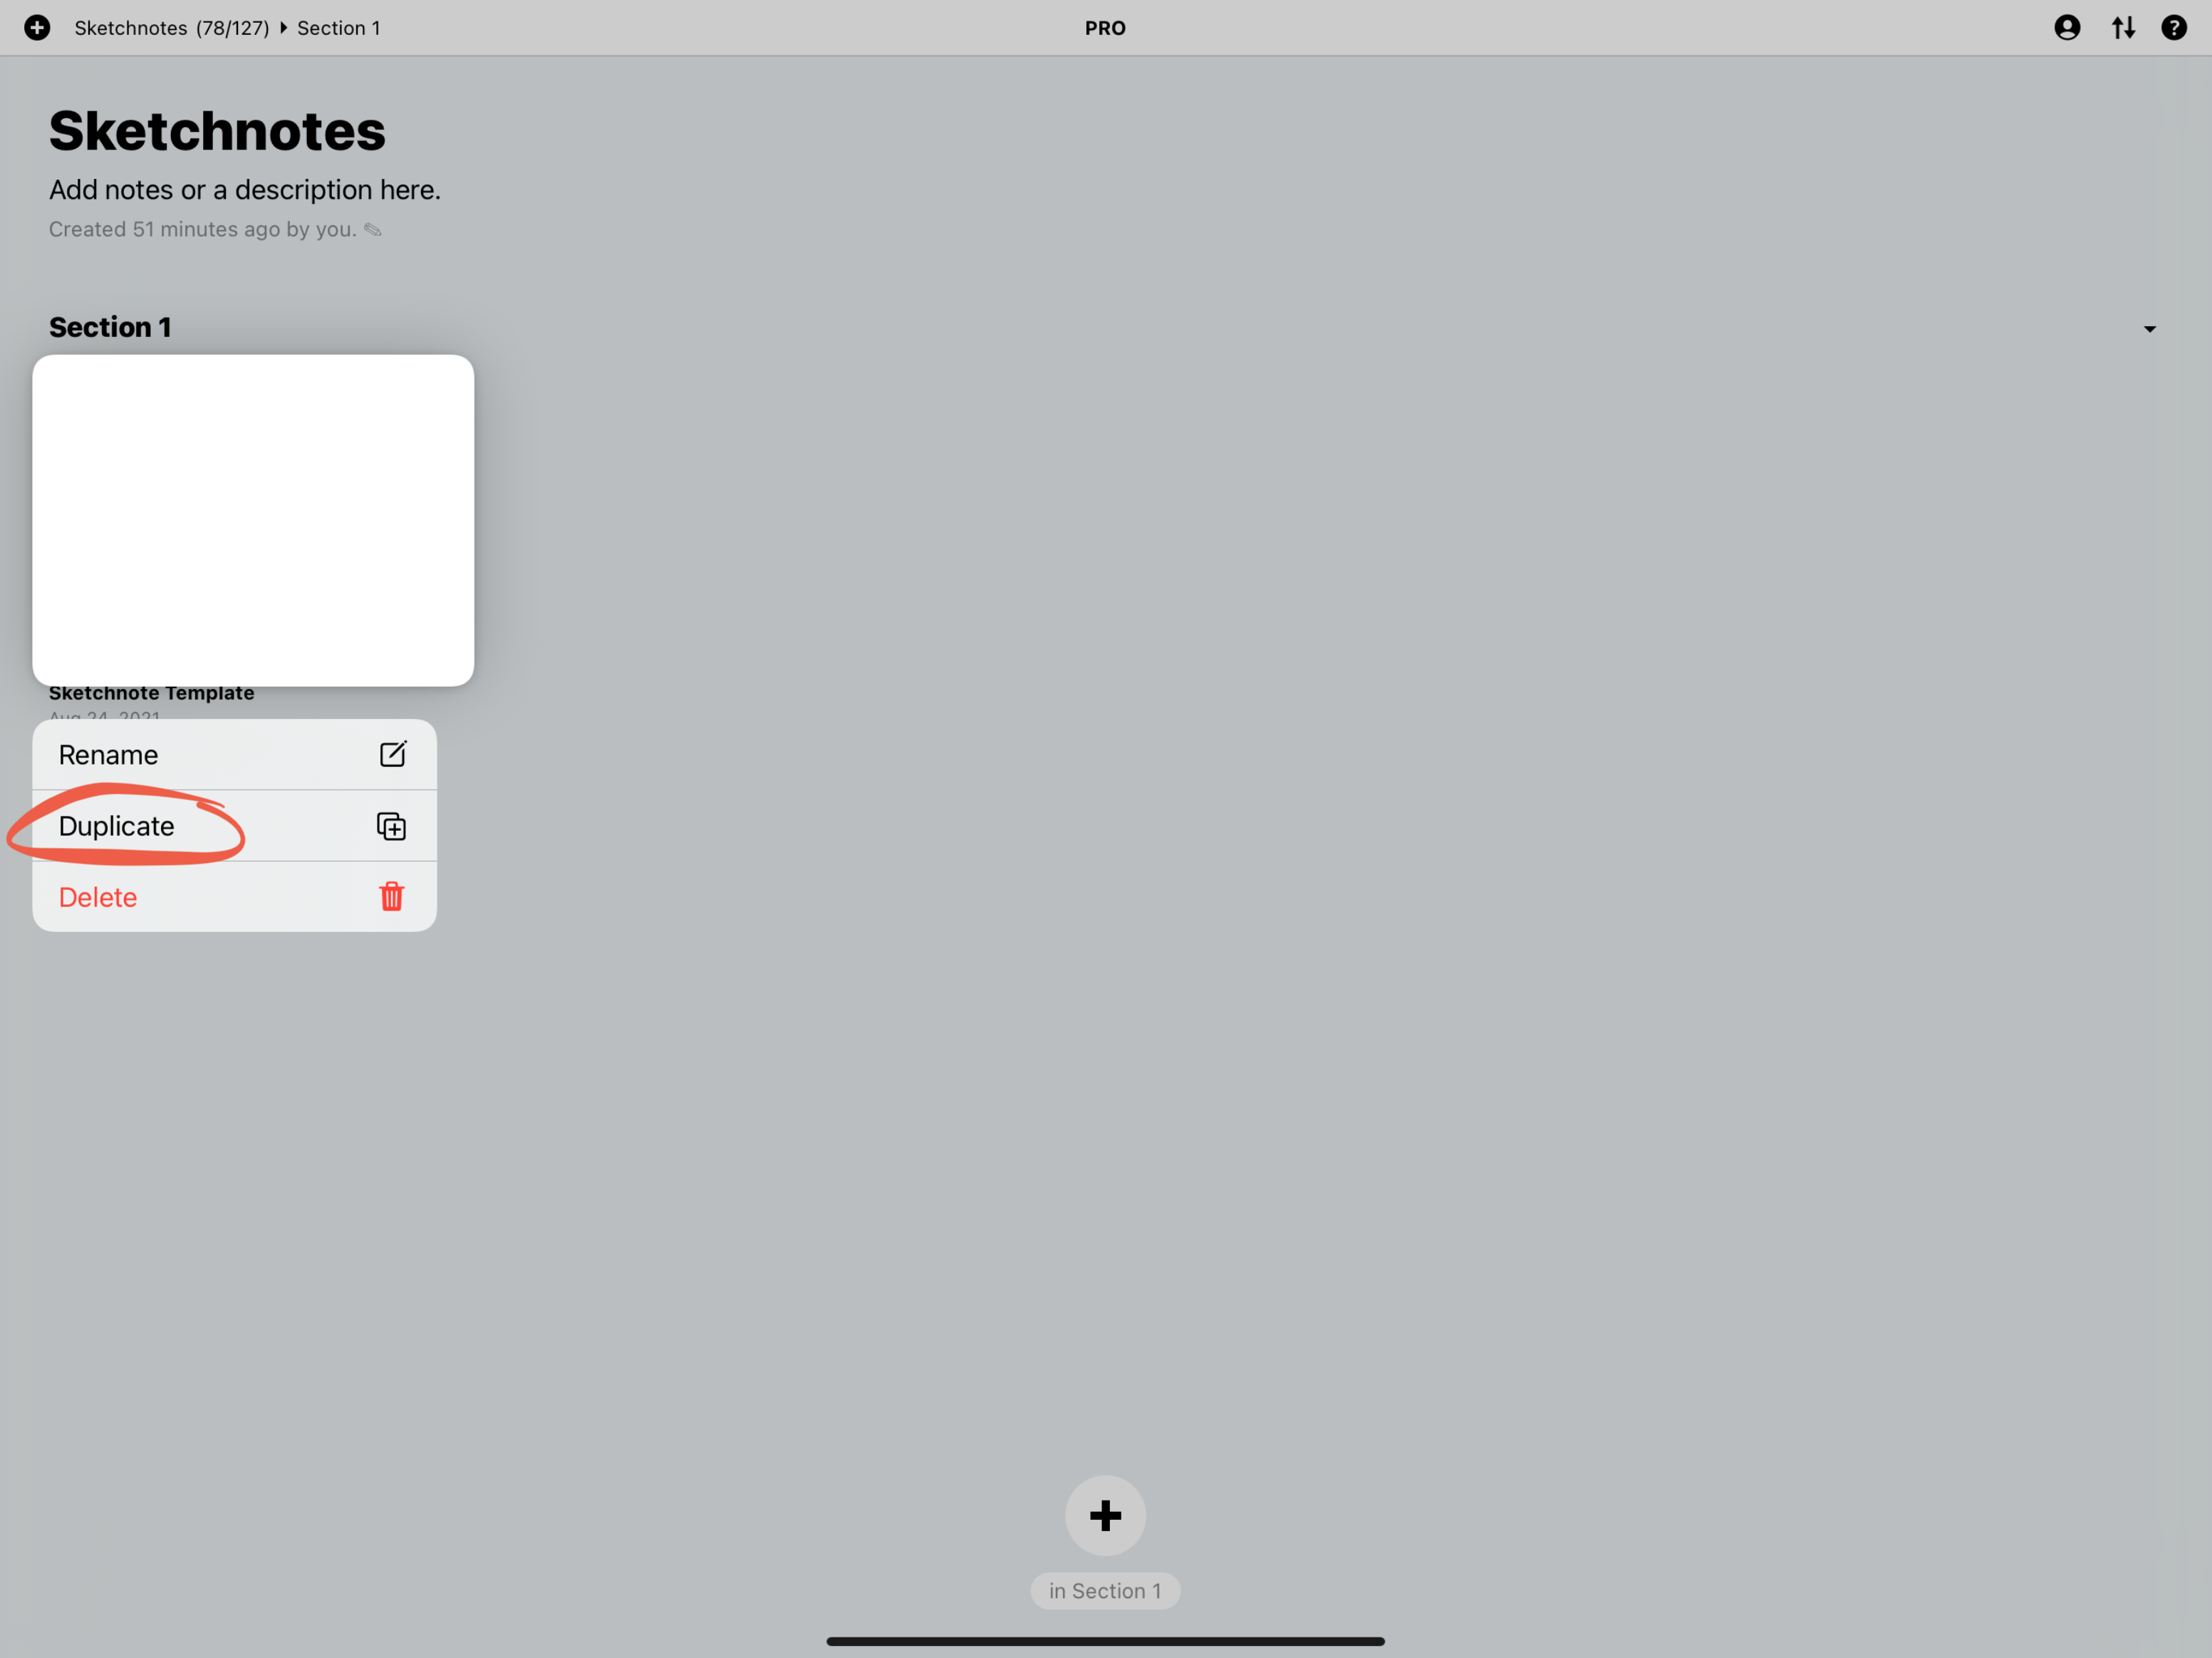
Tap+hold > Duplicate to create an identical template drawing in the Gallery.
Paper Types
1 - Set your Paper Size to Infinite
Knowing how to segment your paper can be excruciating. What if you don’t have a clear idea of the topics that will be discussed? What if there are details to squeeze in but you’ve run out of room? What if the presenter goes off course into an interesting tangent and you never make it back to the plan?
You don’t have to be confined by dreadful boundaries. An infinite paper size lets you keep going wherever the ideas go. Tap Settings > Paper Size > Infinite.
Note: Infinite is Concepts' default canvas type, but if you've applied an artboard in the past, you can switch it back to infinite for sketchnoting. You can always reapply a custom sized artboard later to help you export sections of your notes.
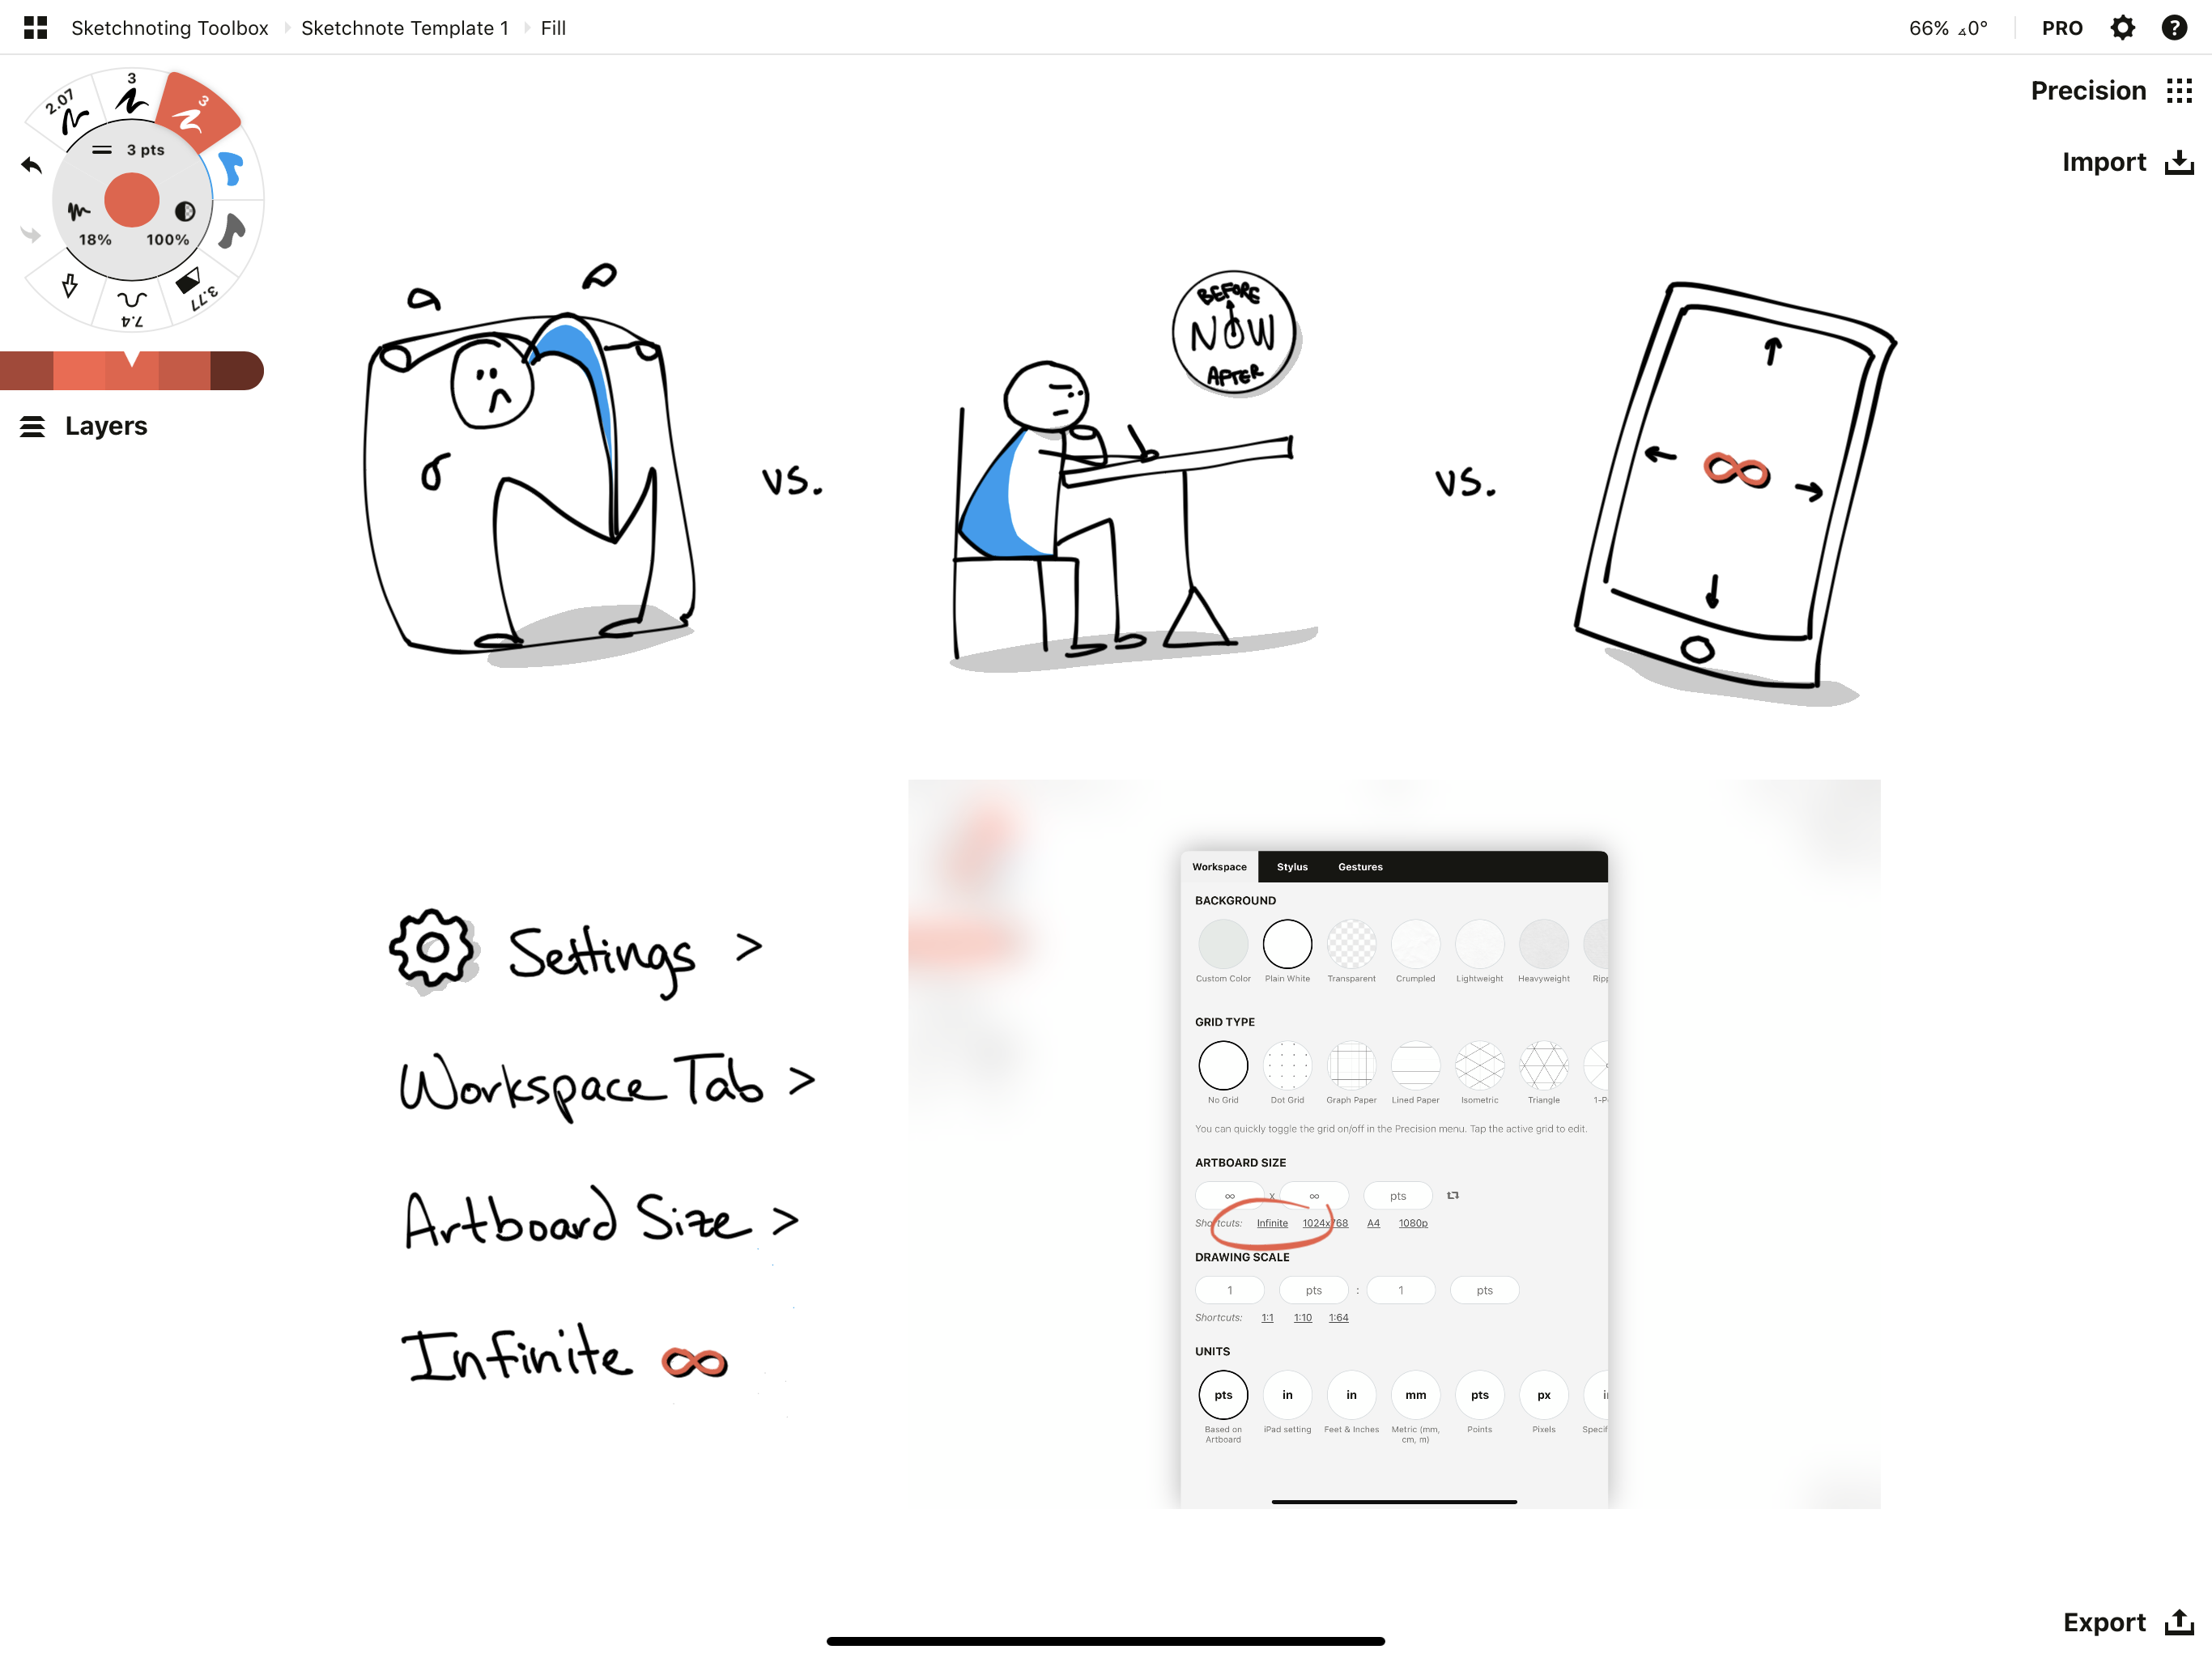
Settings > Workspace > Artboard Size > Infinite
2 - Choose a Paper Background
Concepts has a blank page for freehand sketching that comes in many textures, but you could also try a dot grid for loose structure, or customize a lined piece of paper.
If you prefer to sketch in Dark Mode to keep the glare down, try the Darkprint paper with lighter-inked pens.
Find the paper and grid options in Settings > Background and Grid Type.
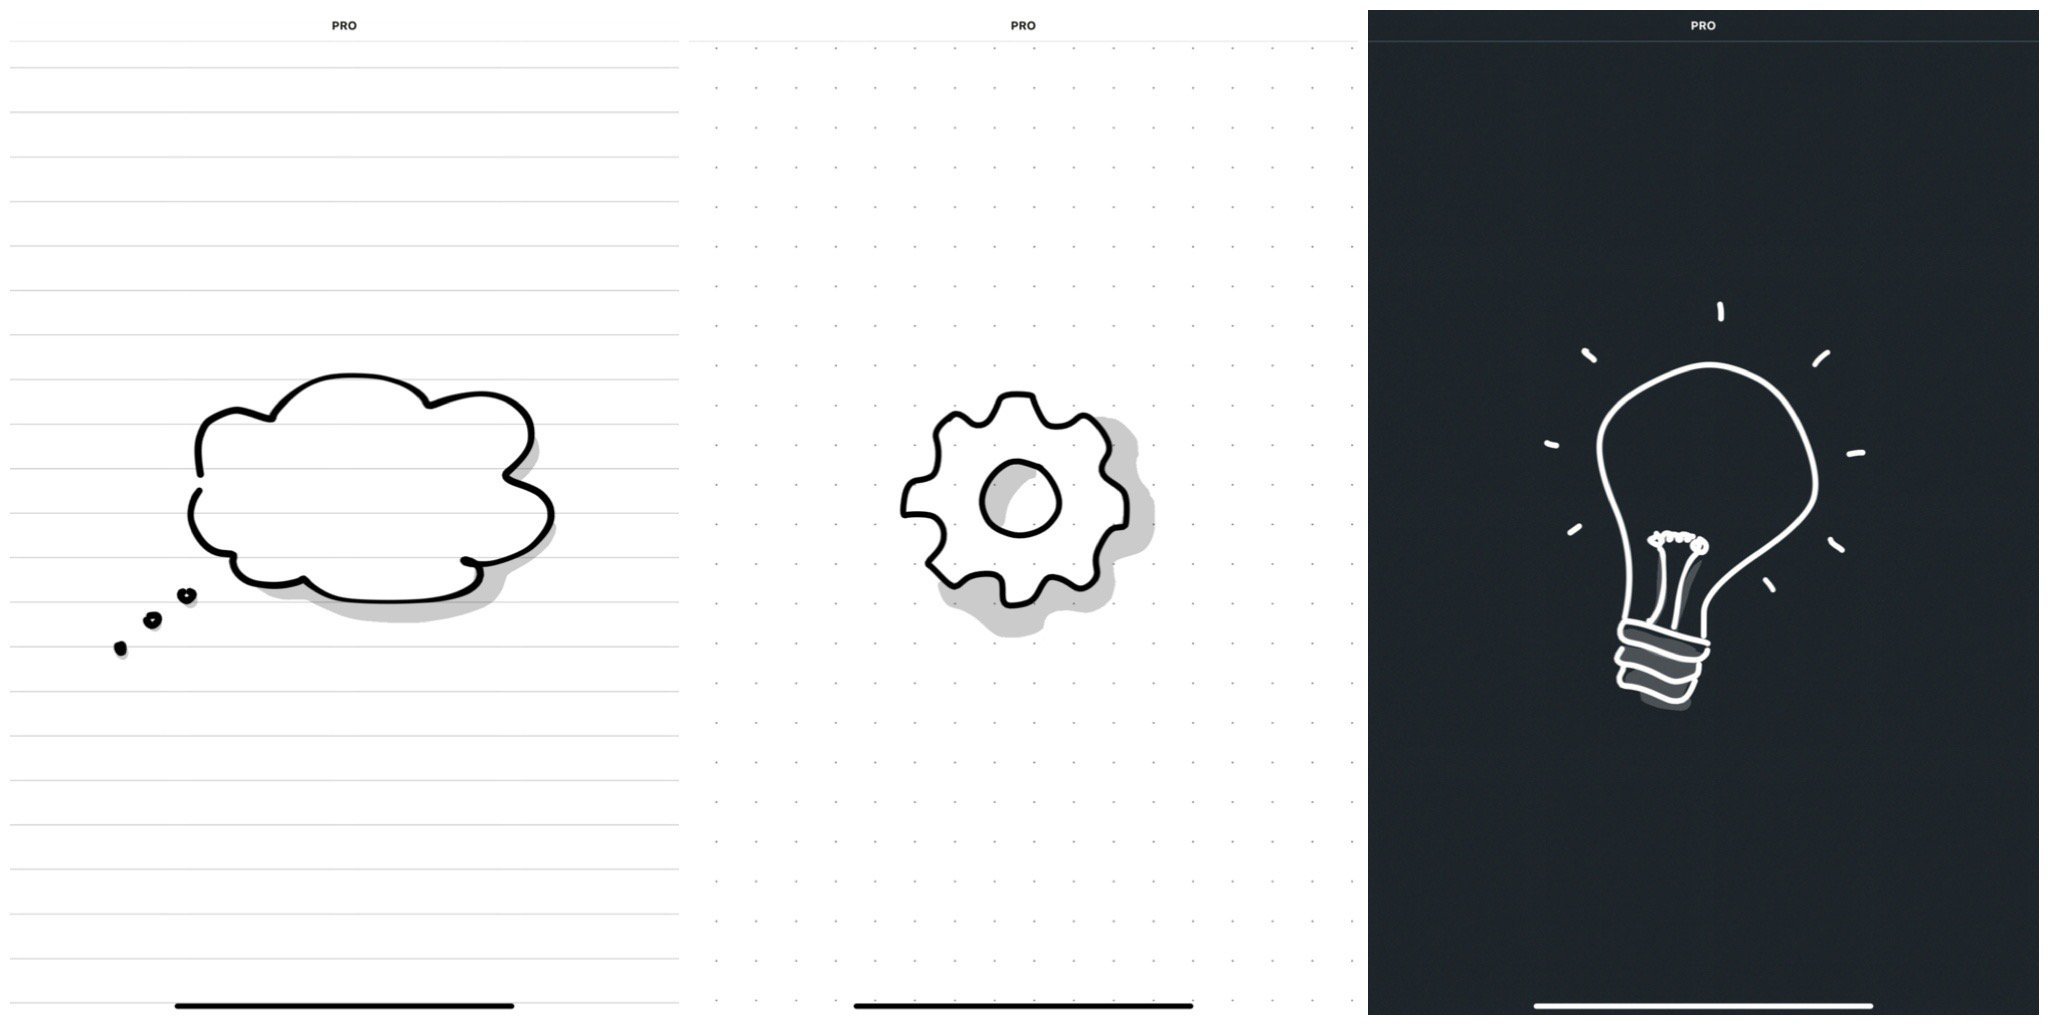
A few paper and grid types.
3 - Set Up Your Gestures
With sketchnoting, flow is everything — you want to keep up your speed and capture the next idea. While you’re still in Settings, let's add some Gesture shortcuts to make your workflow faster.
In Settings, tap the Gestures tab at the top of the menu.
- Set your Two Finger Tap to Undo. This gesture spoils you.
- Set your Three Finger Tap to Toggle Color Wheel. If you need a new color, you’re prepared.
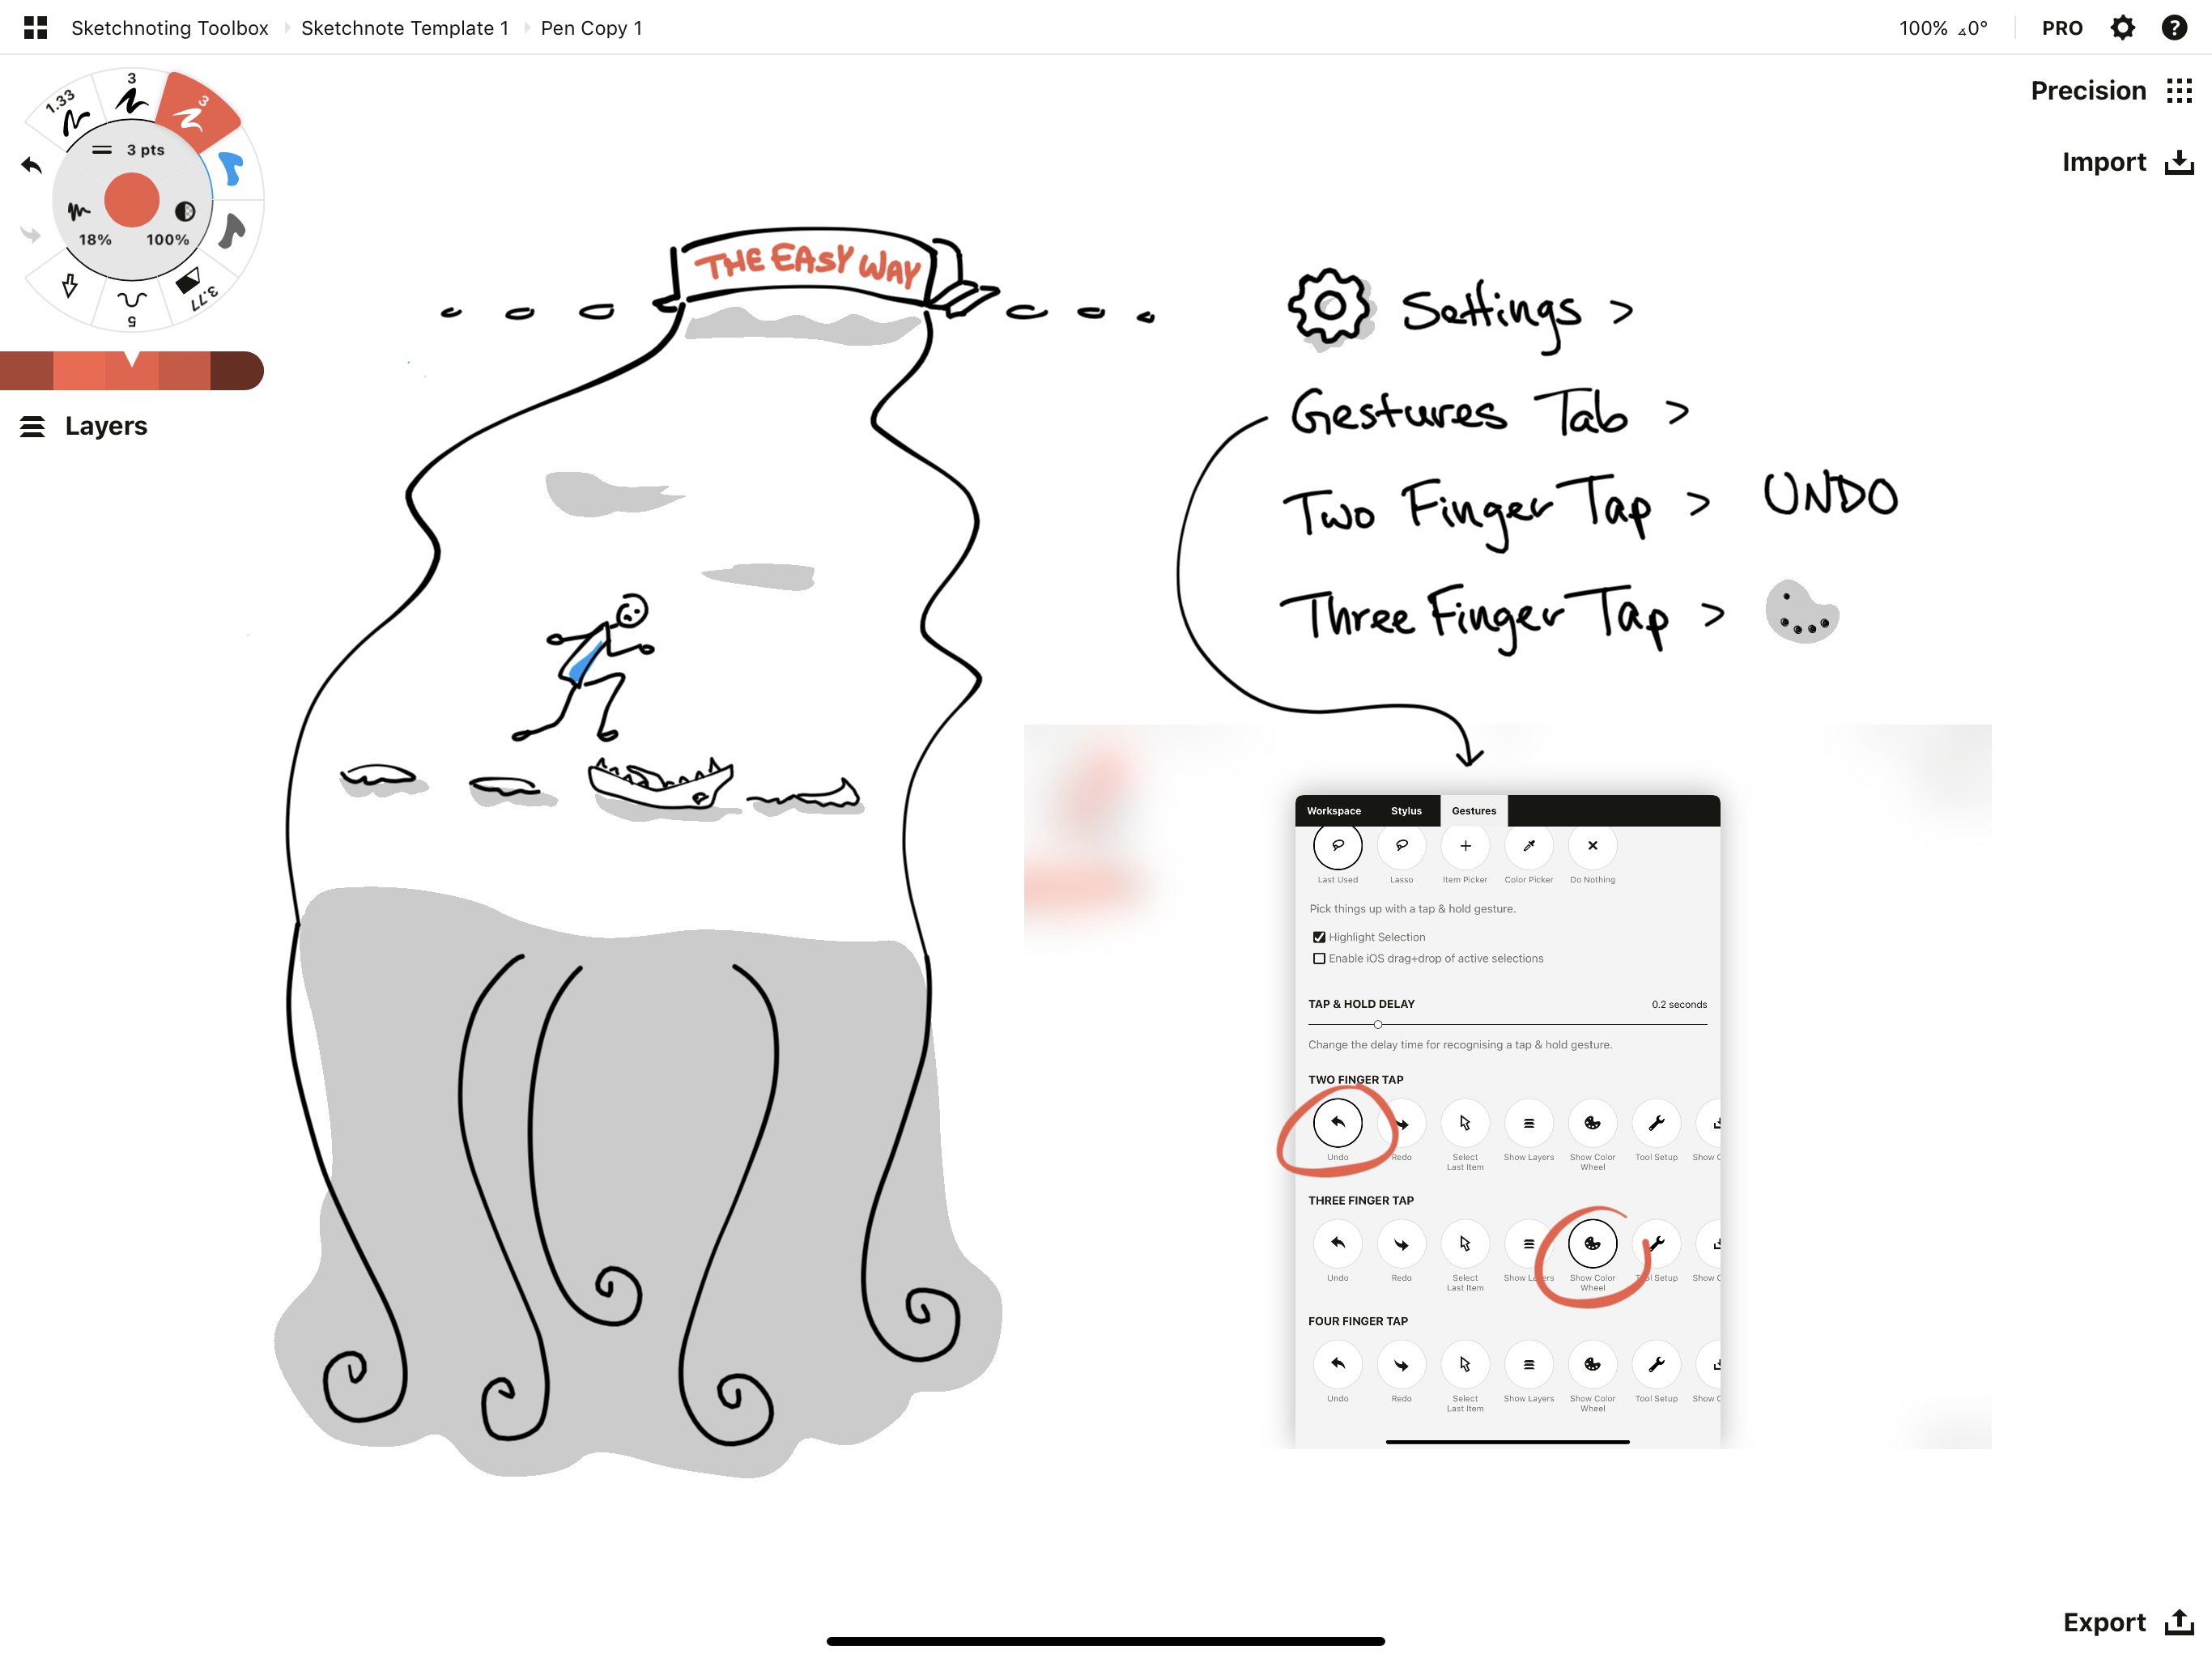
A few good gestures can make sketchnoting faster.
Pens and Tools
Concepts lets you have eight tools available at once on the tool wheel. Try these suggestions.
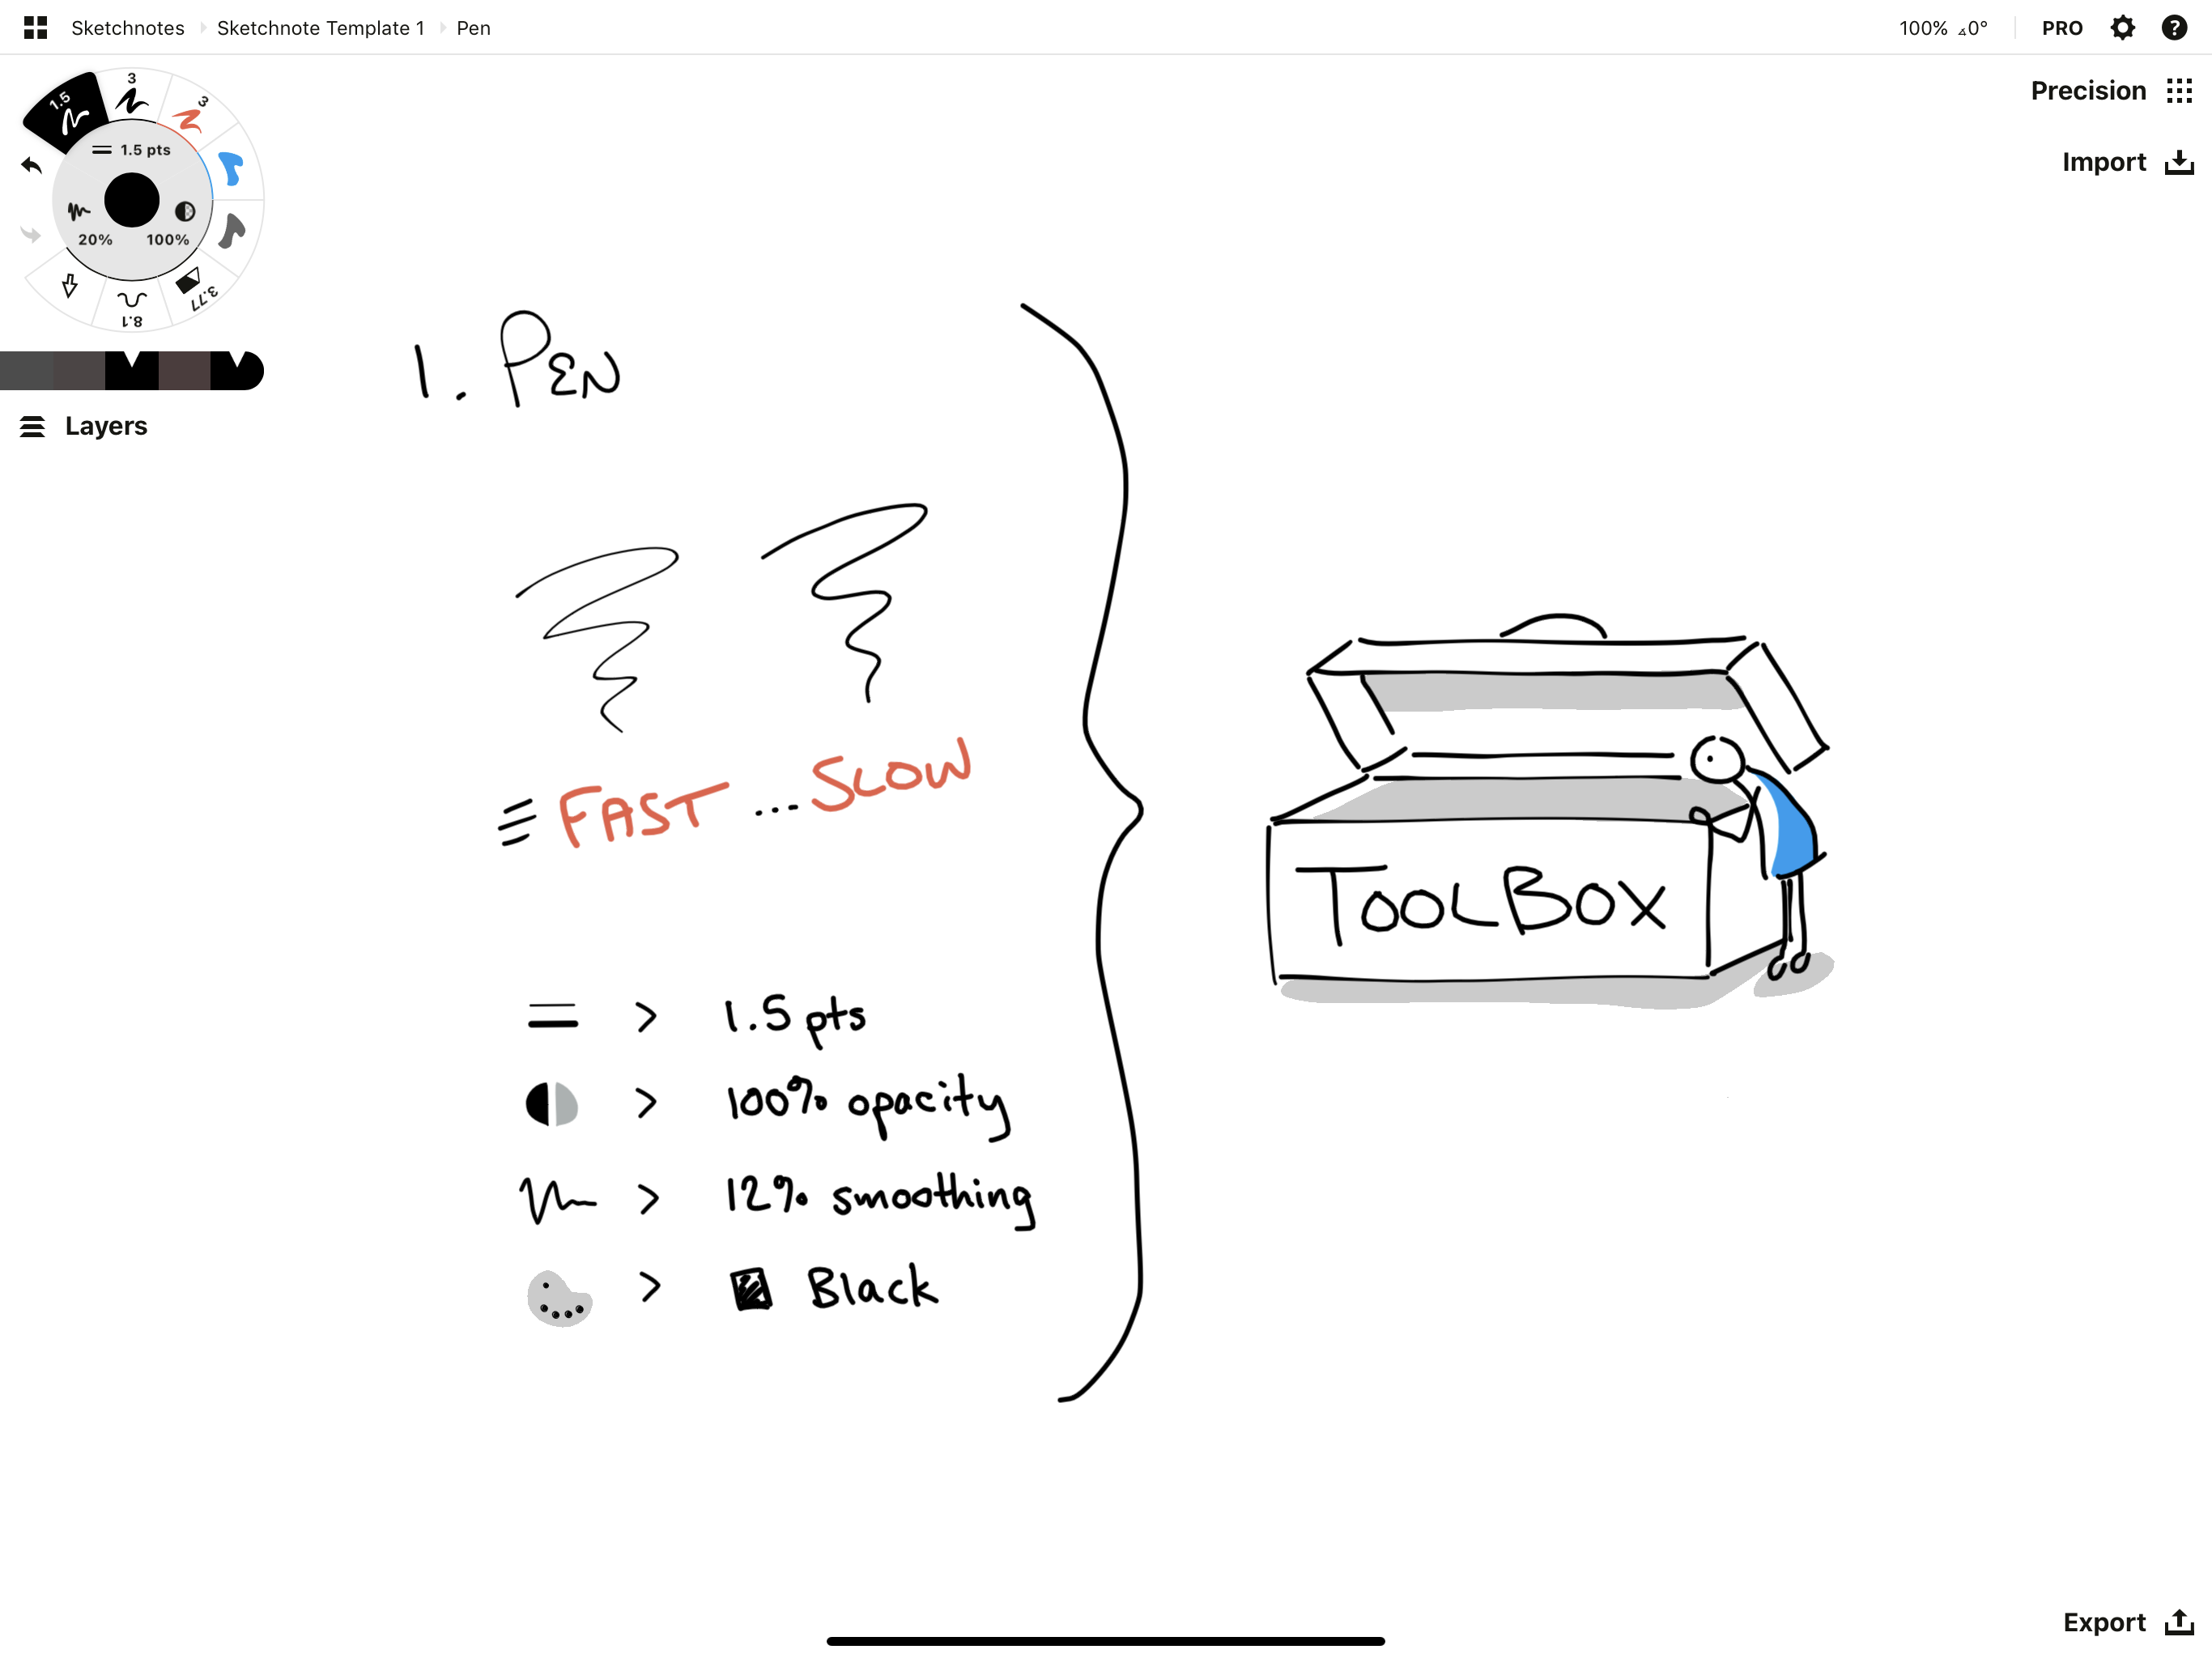
Tool #1 - Pen
You'll use Concepts' ordinary Pen for most of your sketching and writing.
This tool responds to your writing velocity. Slower is thicker, faster is thinner. Set it to 1.5 pts, color black, and adjust it to between 10% - 15% smoothing so your lines flow like your thoughts.
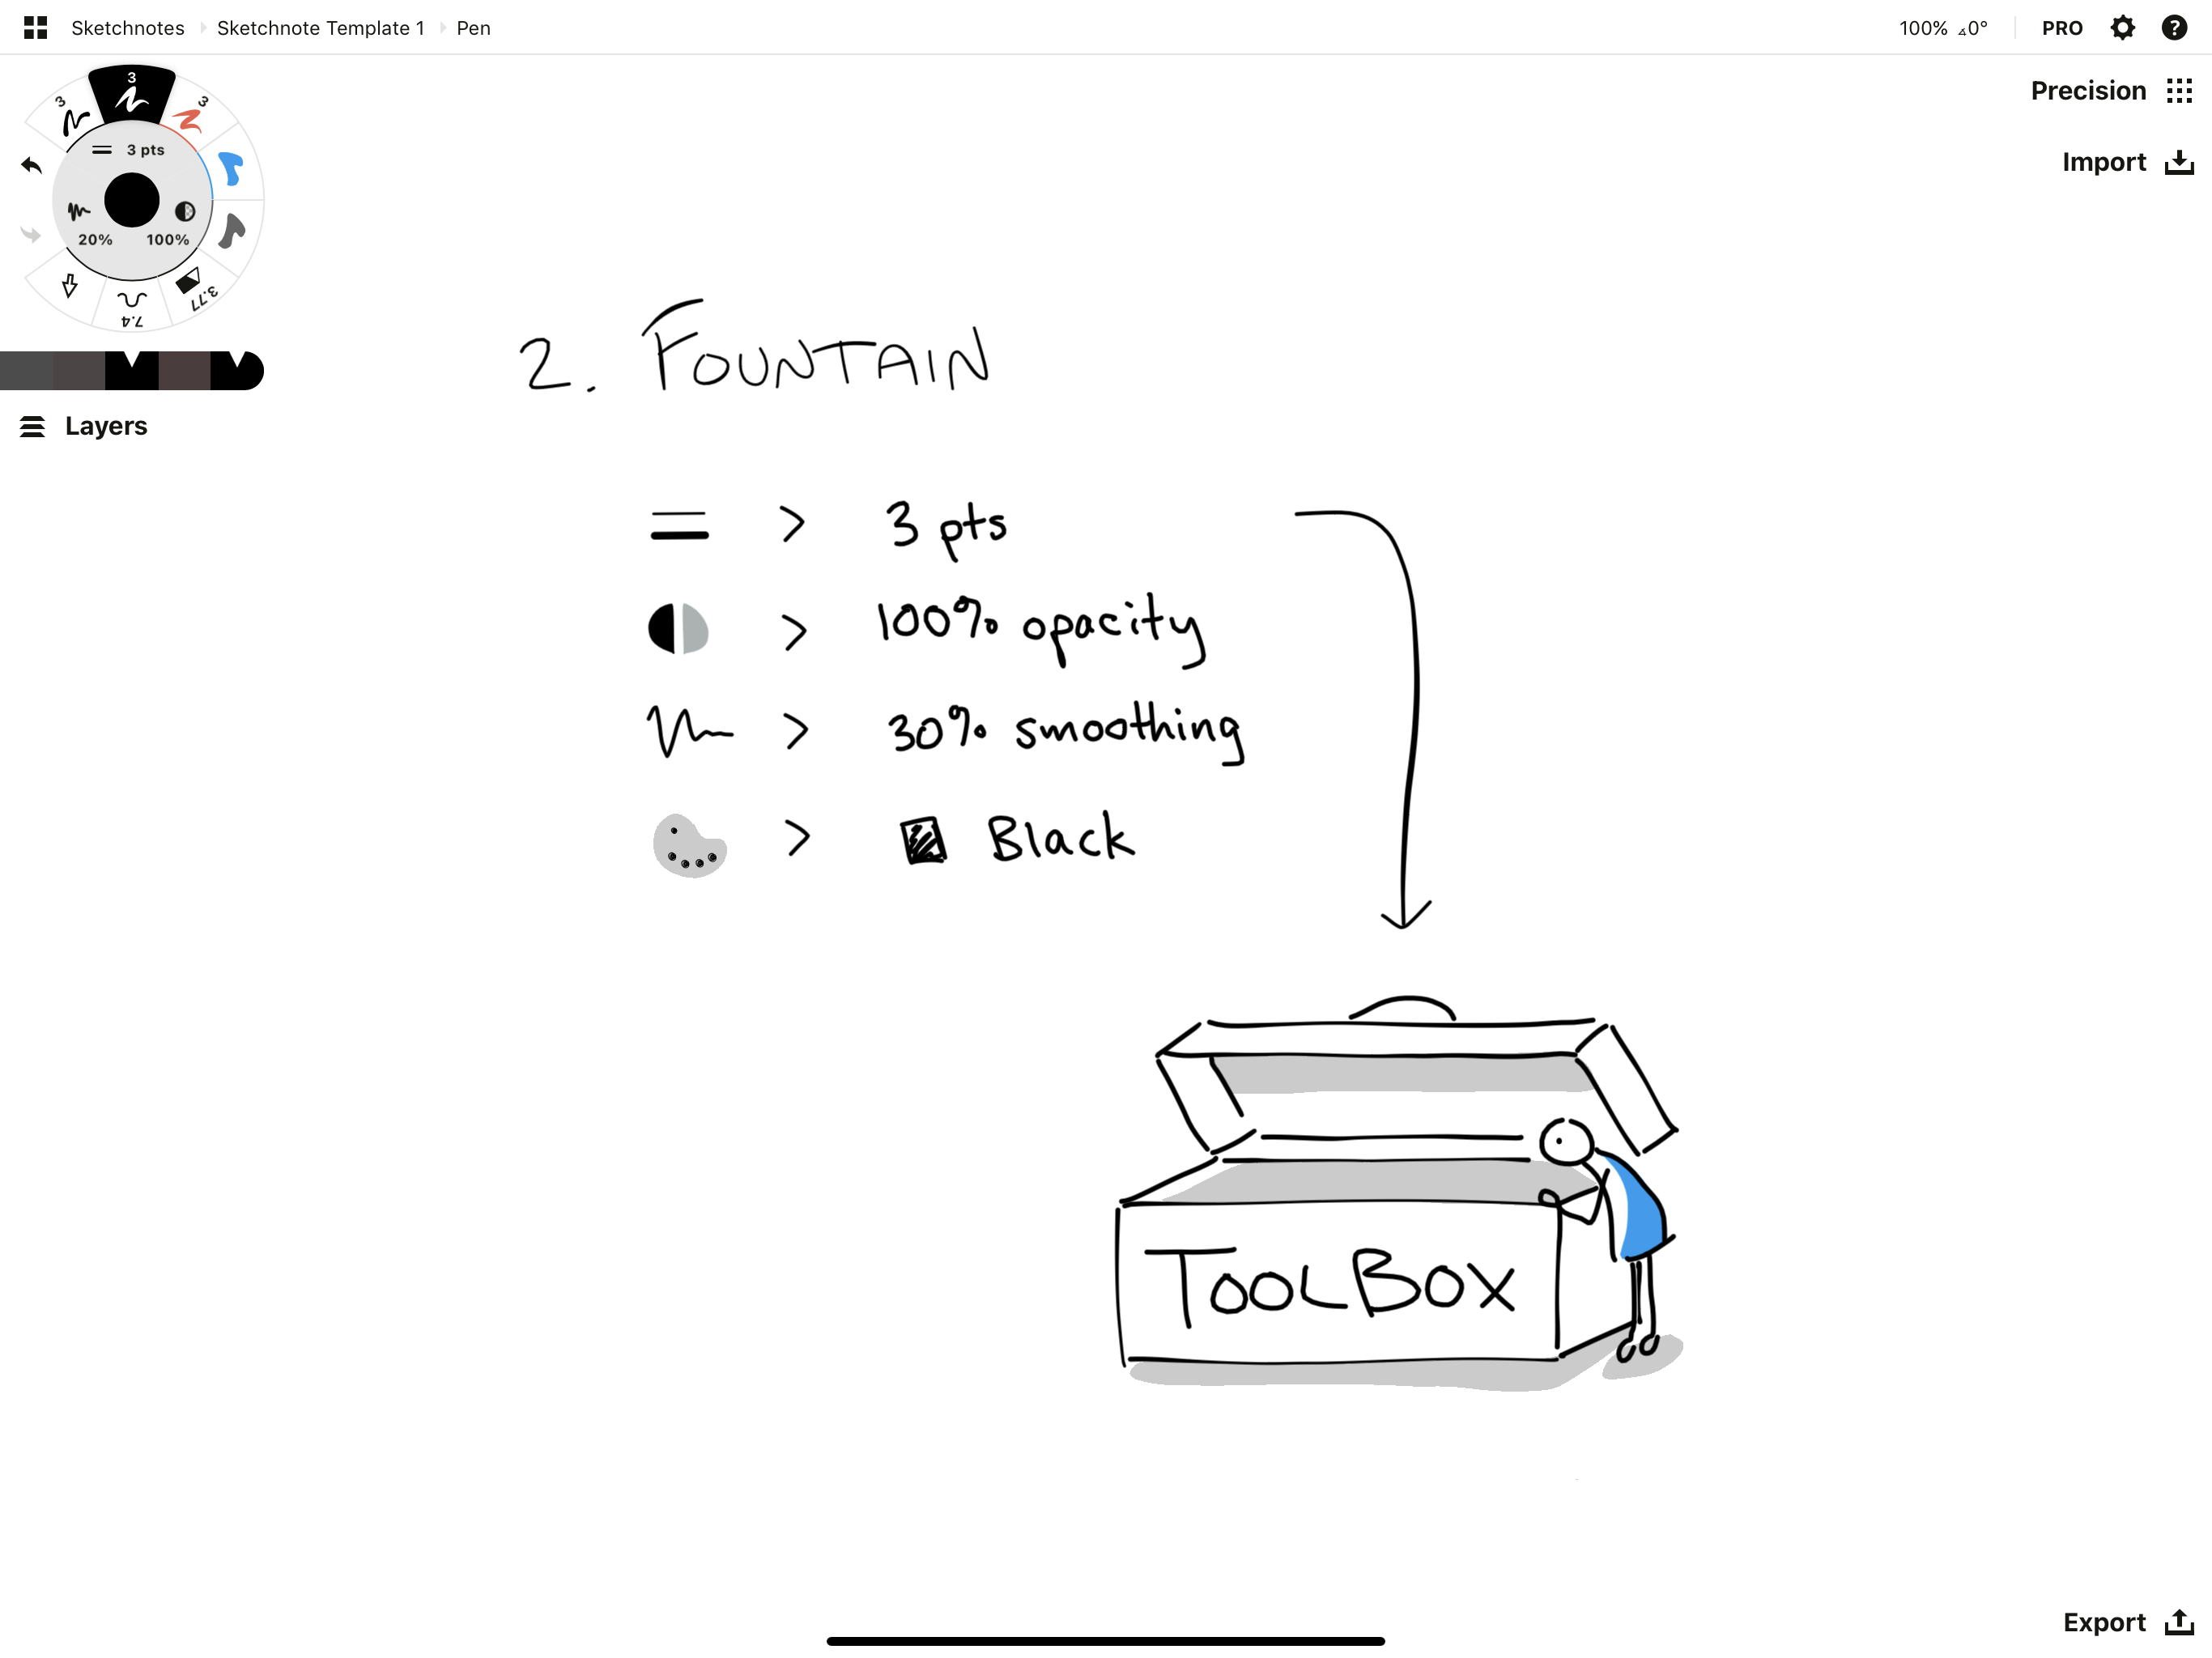
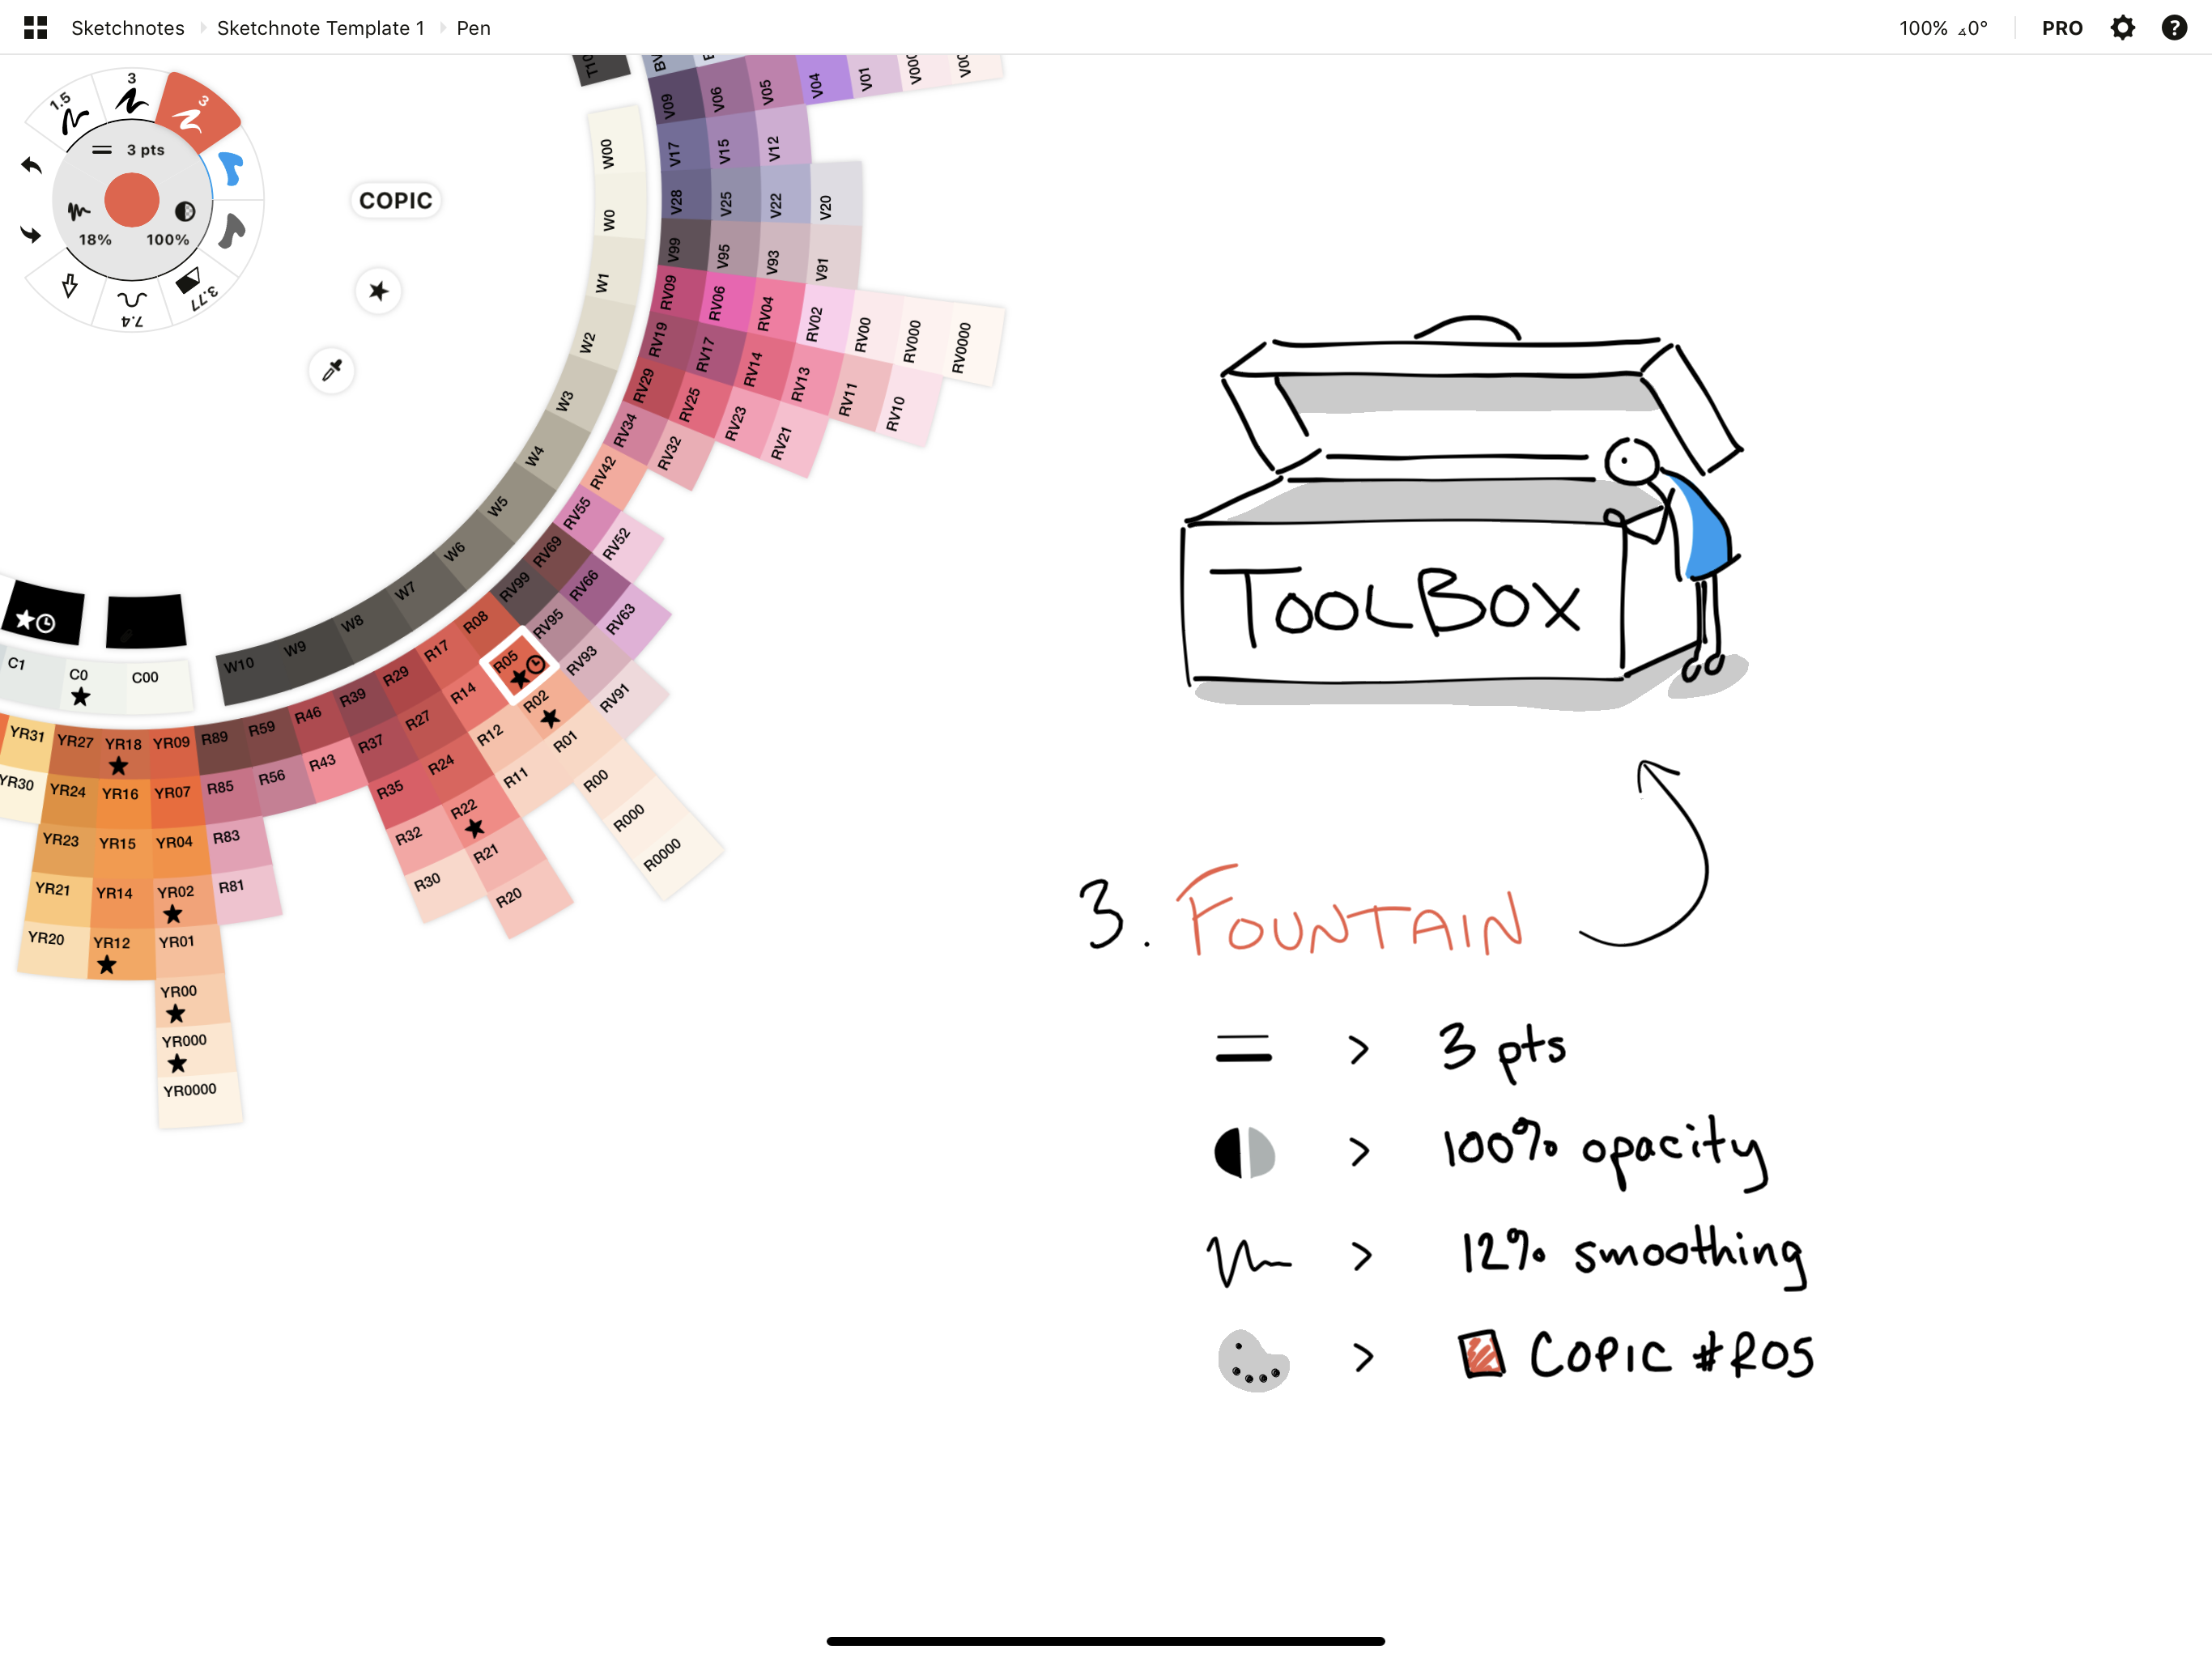
Tool #2 - Fountain Pen
This alternate pen is a little bolder and is great for popping out important text.
Set the Fountain Pen to 3 pts. Give it 100% opacity, 12% smoothing, and make the color black.
Tool #3 - Another Pen
Select the same pen as #1 or #2, but in a highlight color you like. Maybe try a Fountain Pen set to 3 pts. Orange, pink, green, blue… choose whatever color strikes your fancy at the moment.
Since you preset your Gestures to Three Finger Tap = Toggle Color Wheel, you can quickly switch at any time.
Tool #4 - Filled Stroke
The Filled Stroke tool fills in the area between where you put your pen down and where you pick it up. Use this to highlight and add shadows to your sketches — it pulls them away from the canvas and makes them active.
Set the tool to 100% opacity and 20% smoothing, and choose a highlight color. You'll use this tool in a layer beneath the Pen so the ink stays nice and crisp on top. (More on layers soon.)
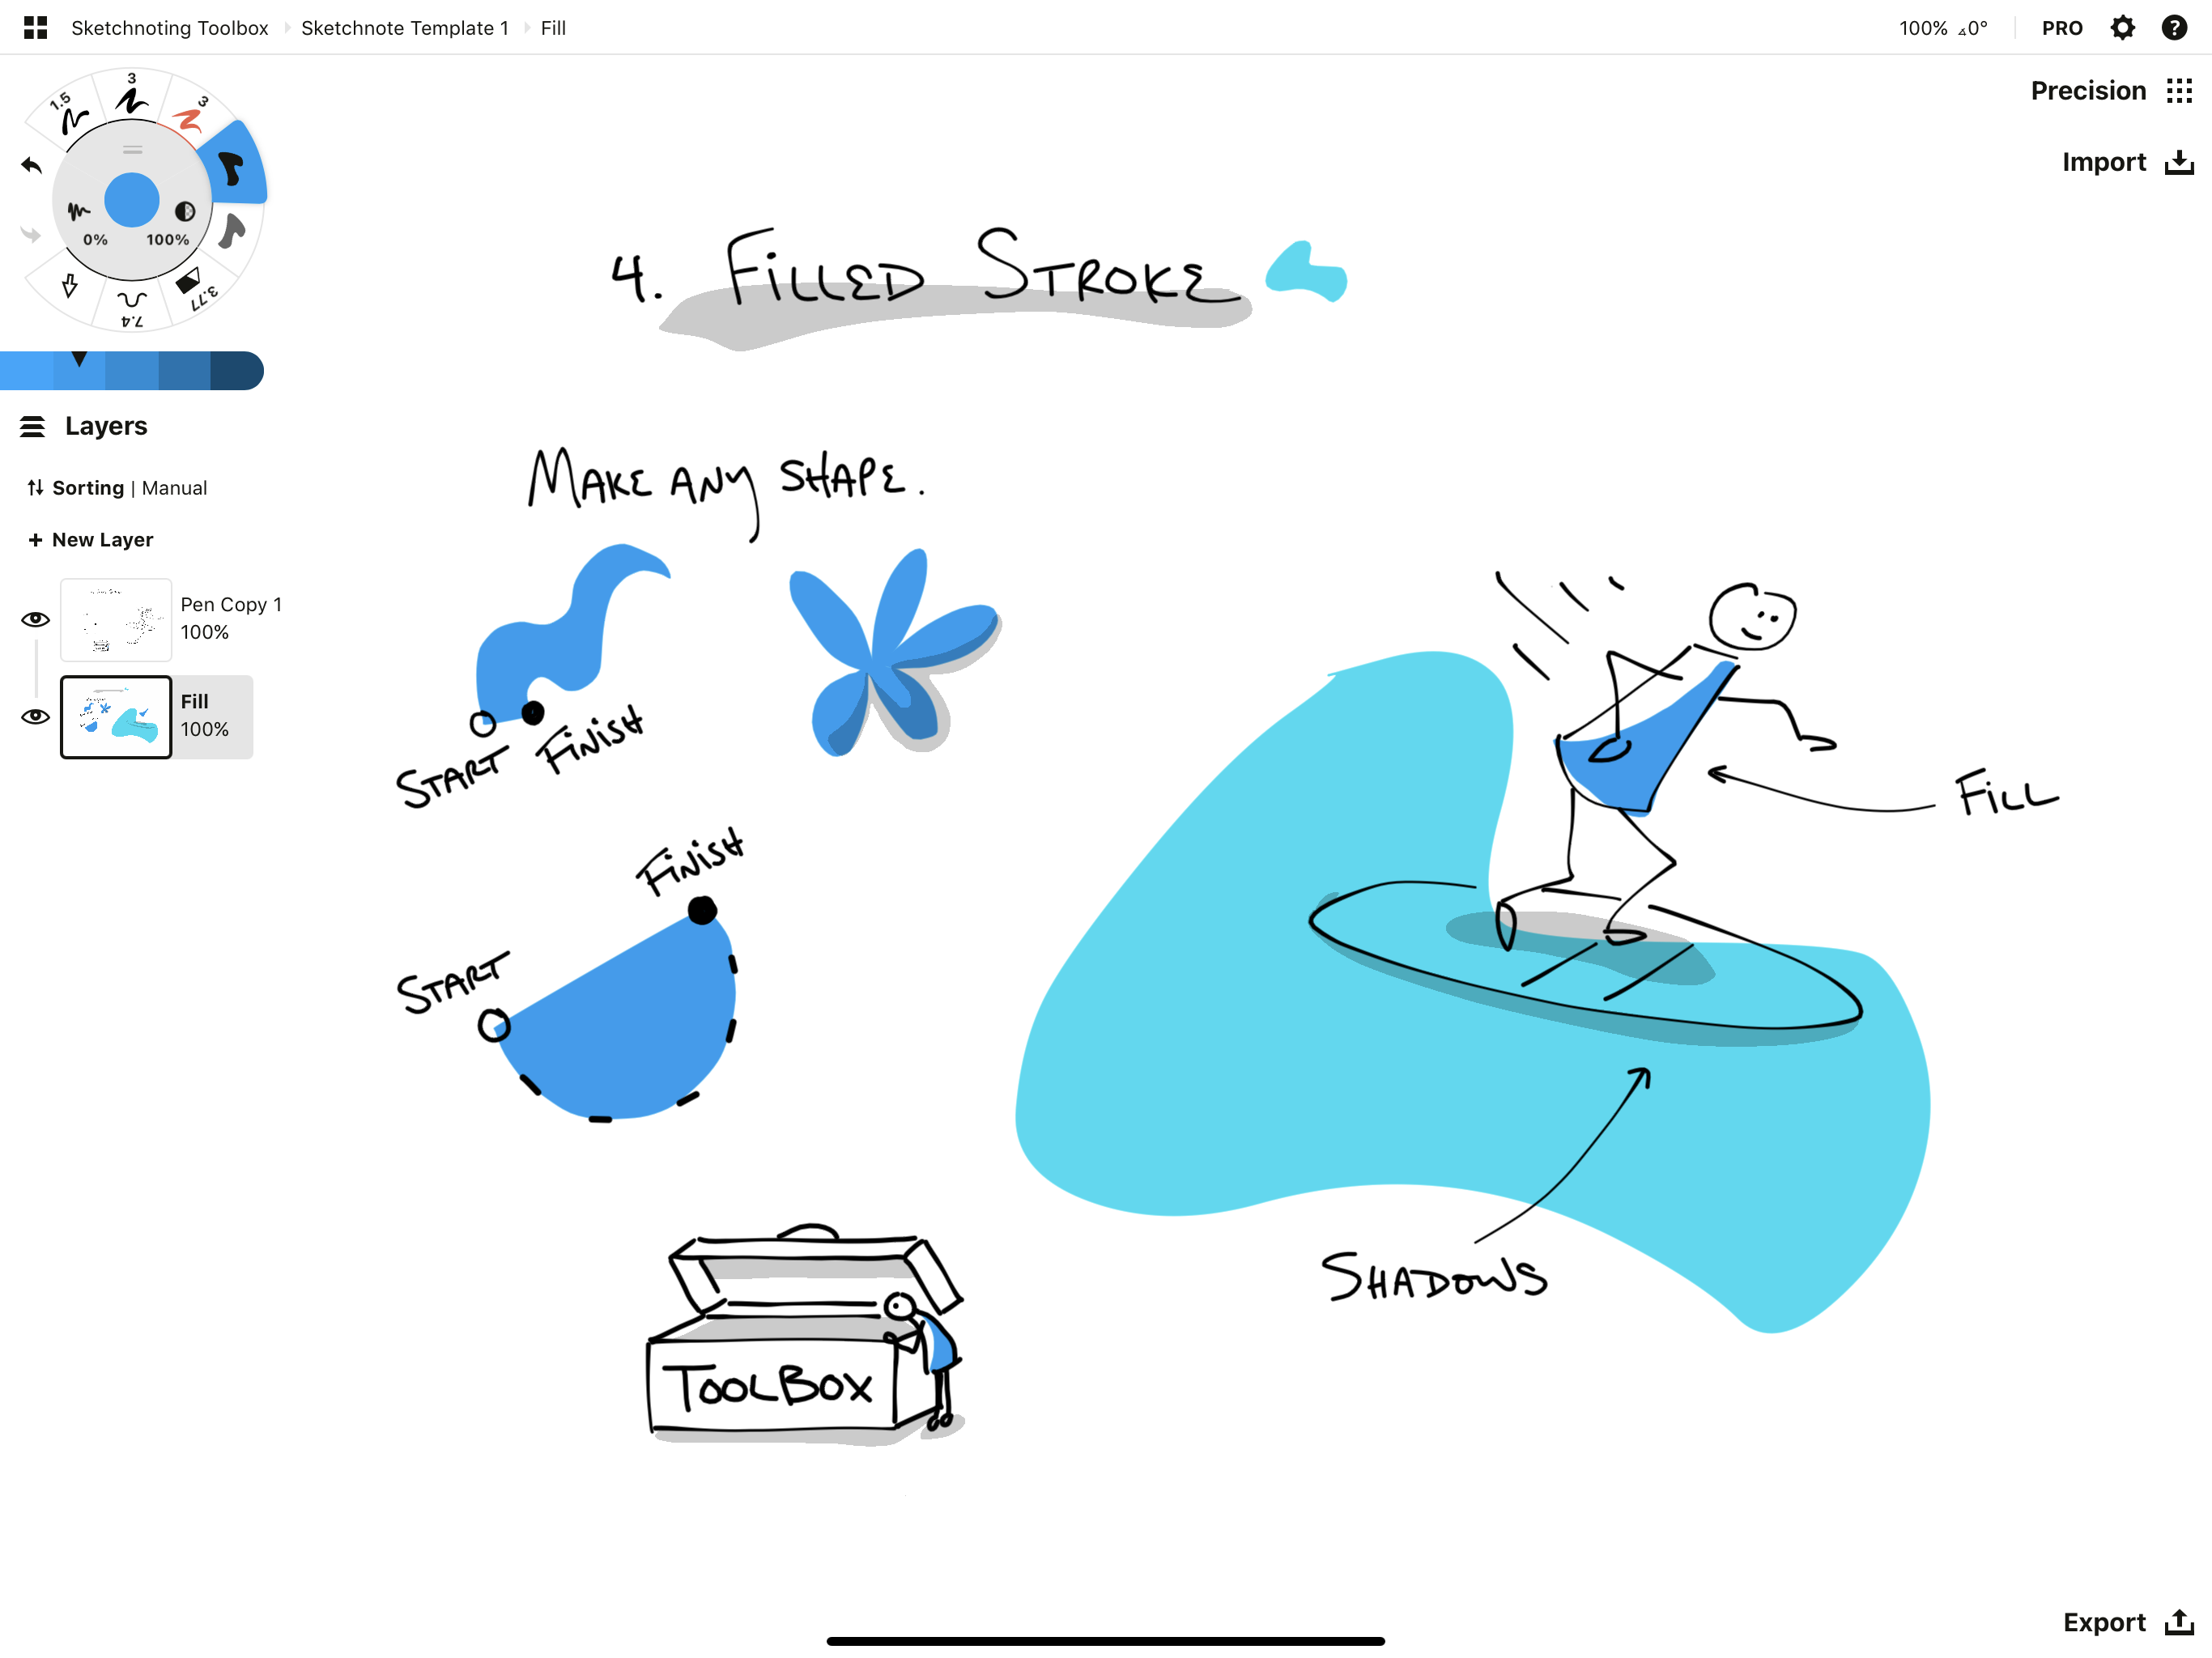
Use the Filled Stroke tool for hand-drawn shapes, fills, shadows and highlights.
Tool #5 - Airbrush, Marker, or Second Filled Stroke
This is for shading and emphasis. Whichever tool you choose, make it black. When you lower the opacity of black, it becomes a shadowy, semi-transparent gray that blends in with your color palette.
- Airbrush is best for soft shadows - set to 50 pts, 20% opacity, 20% smoothing.
- Marker is for crisp emphasis - set to 40 pts, 20% opacity, 20% smoothing.
- Filled Stroke defines areas - set to 20% opacity, 20% smoothing.
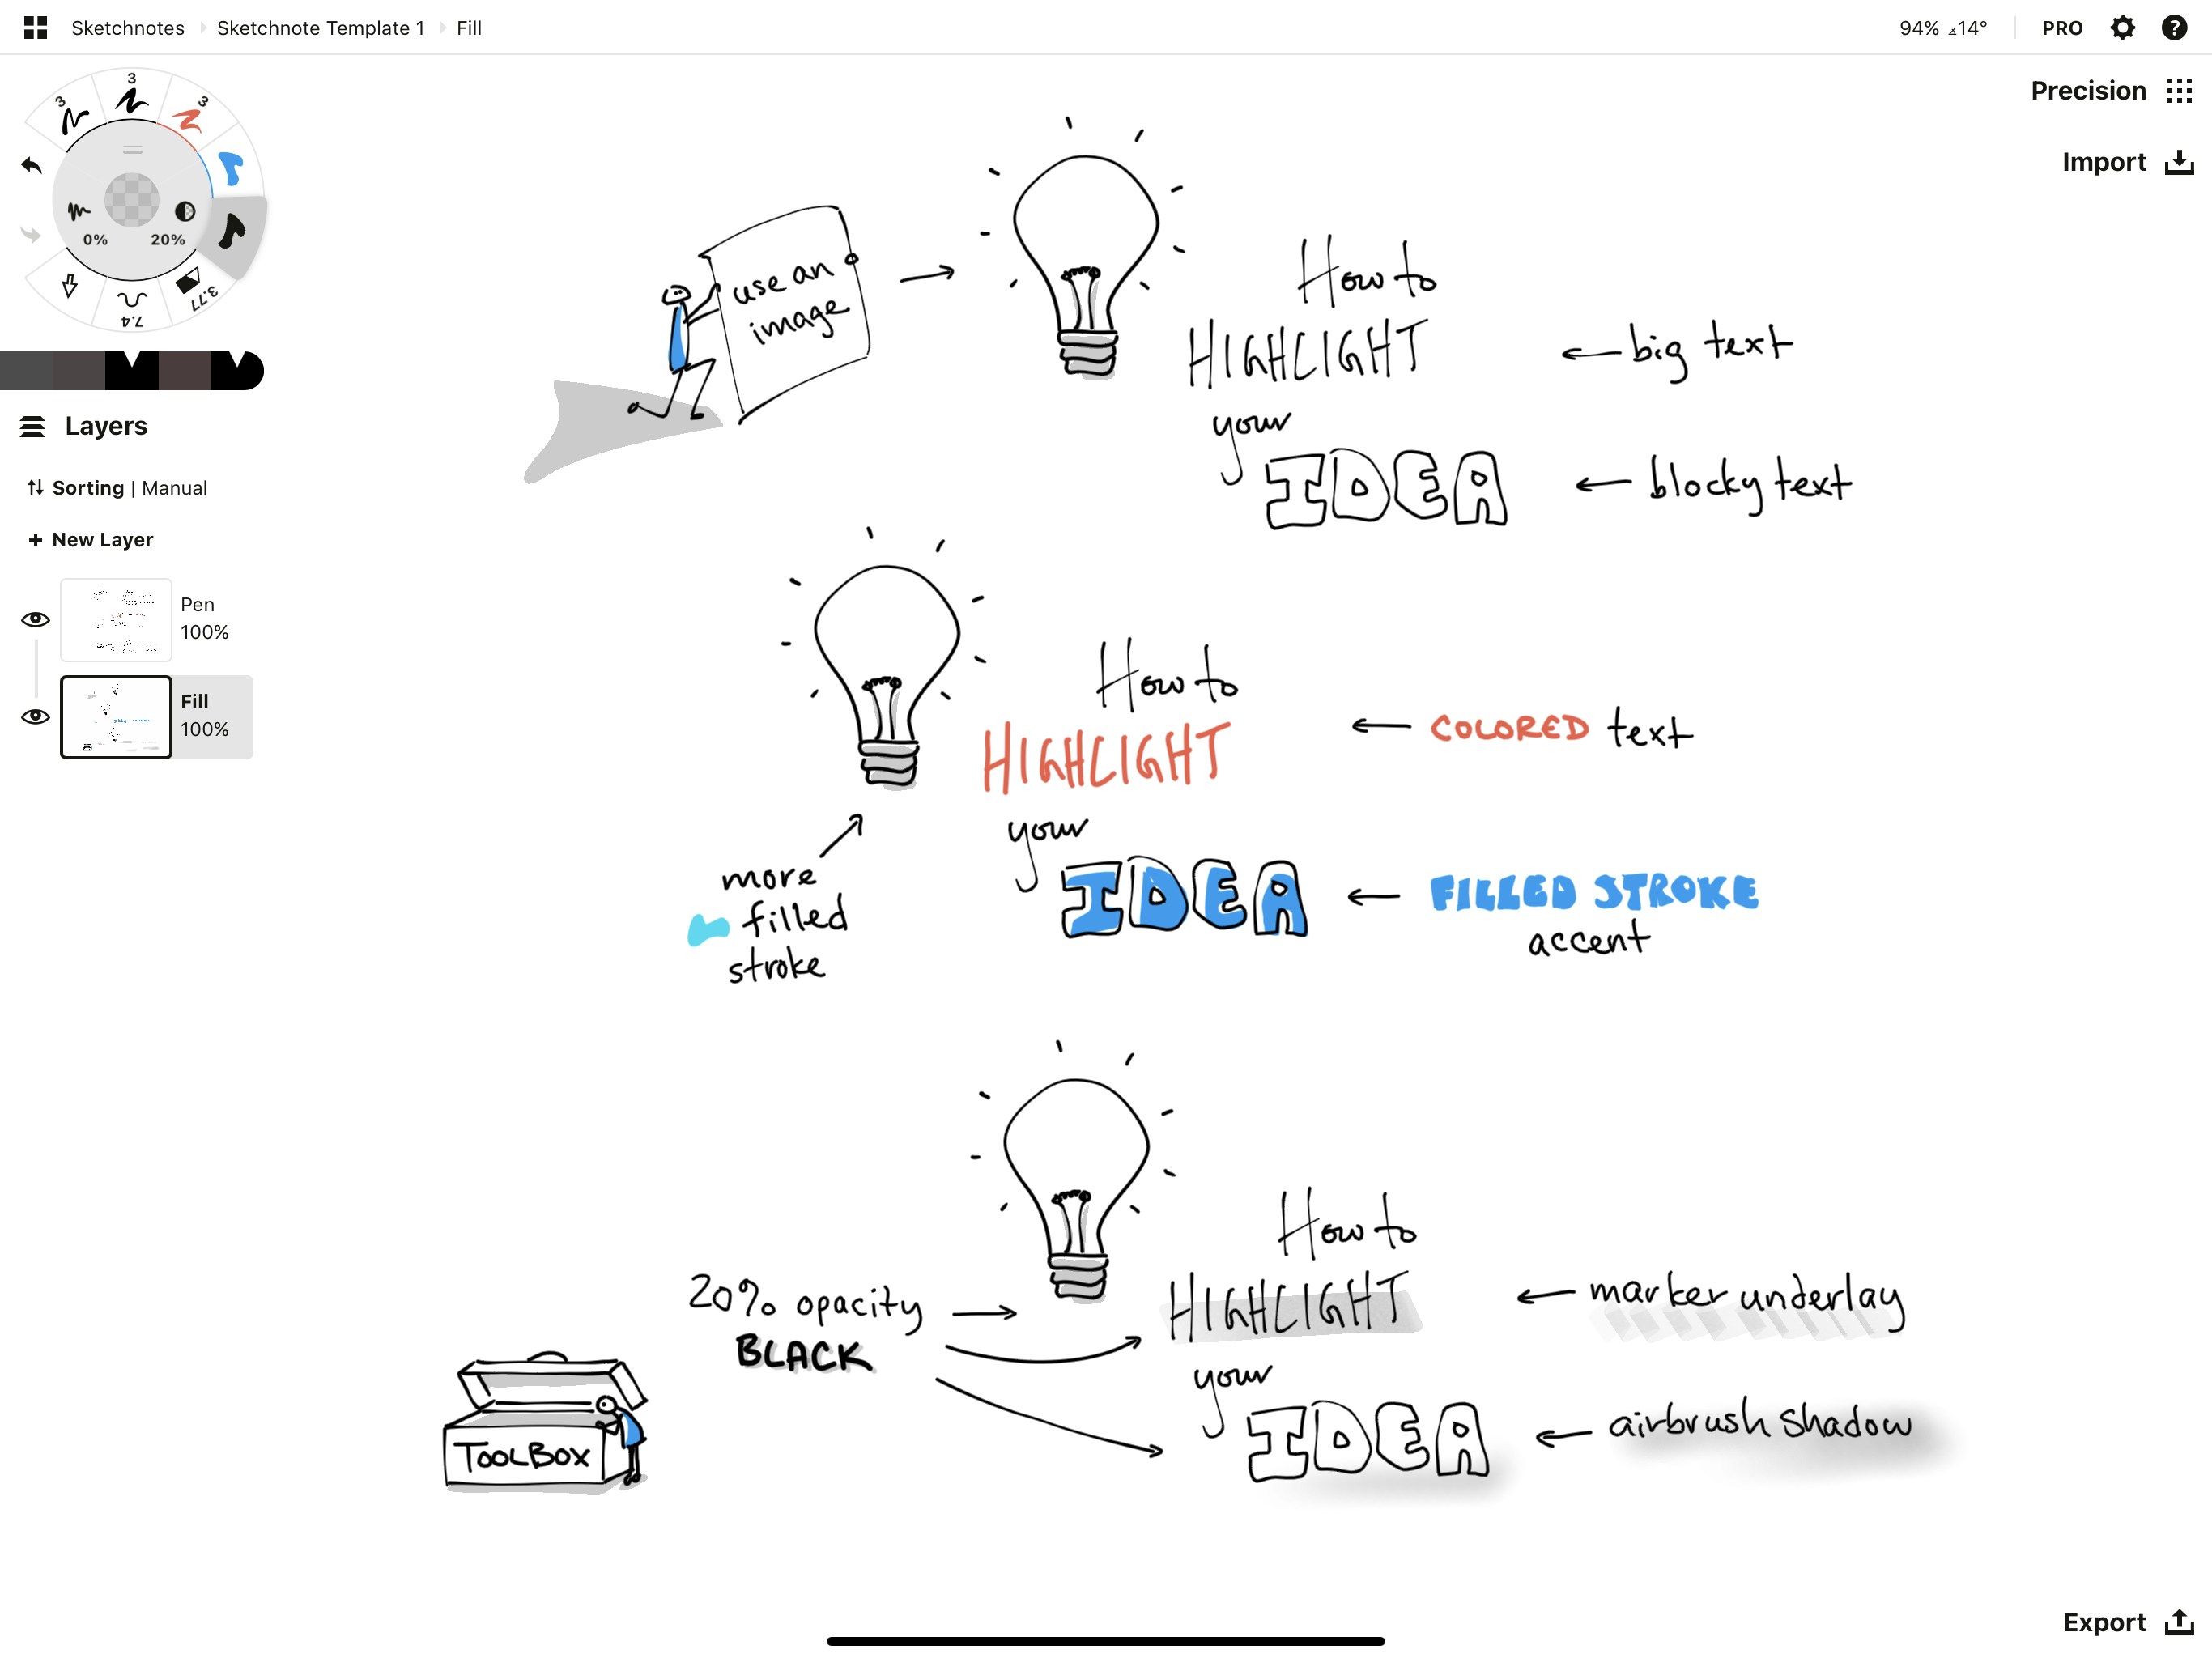
A few approaches to highlighting ideas in your notes.
Tool #6 - Slice
That's it for the pens. What about an eraser? Since flow is everything in sketchnoting, the goal is actually not to erase. But people always erase, right?
As Concepts draws with vectors, the easiest way is to Select your offending stroke with a tap+hold and just delete it. Or Undo your last stroke with that nifty Two Finger Tap shortcut. Fastest.
But an eraser is also great security and can absolutely fit in the toolbox. In Concepts, the best eraser for trimming strokes and permanently deleting text is the Slice tool (as the masking erasers only hide strokes).
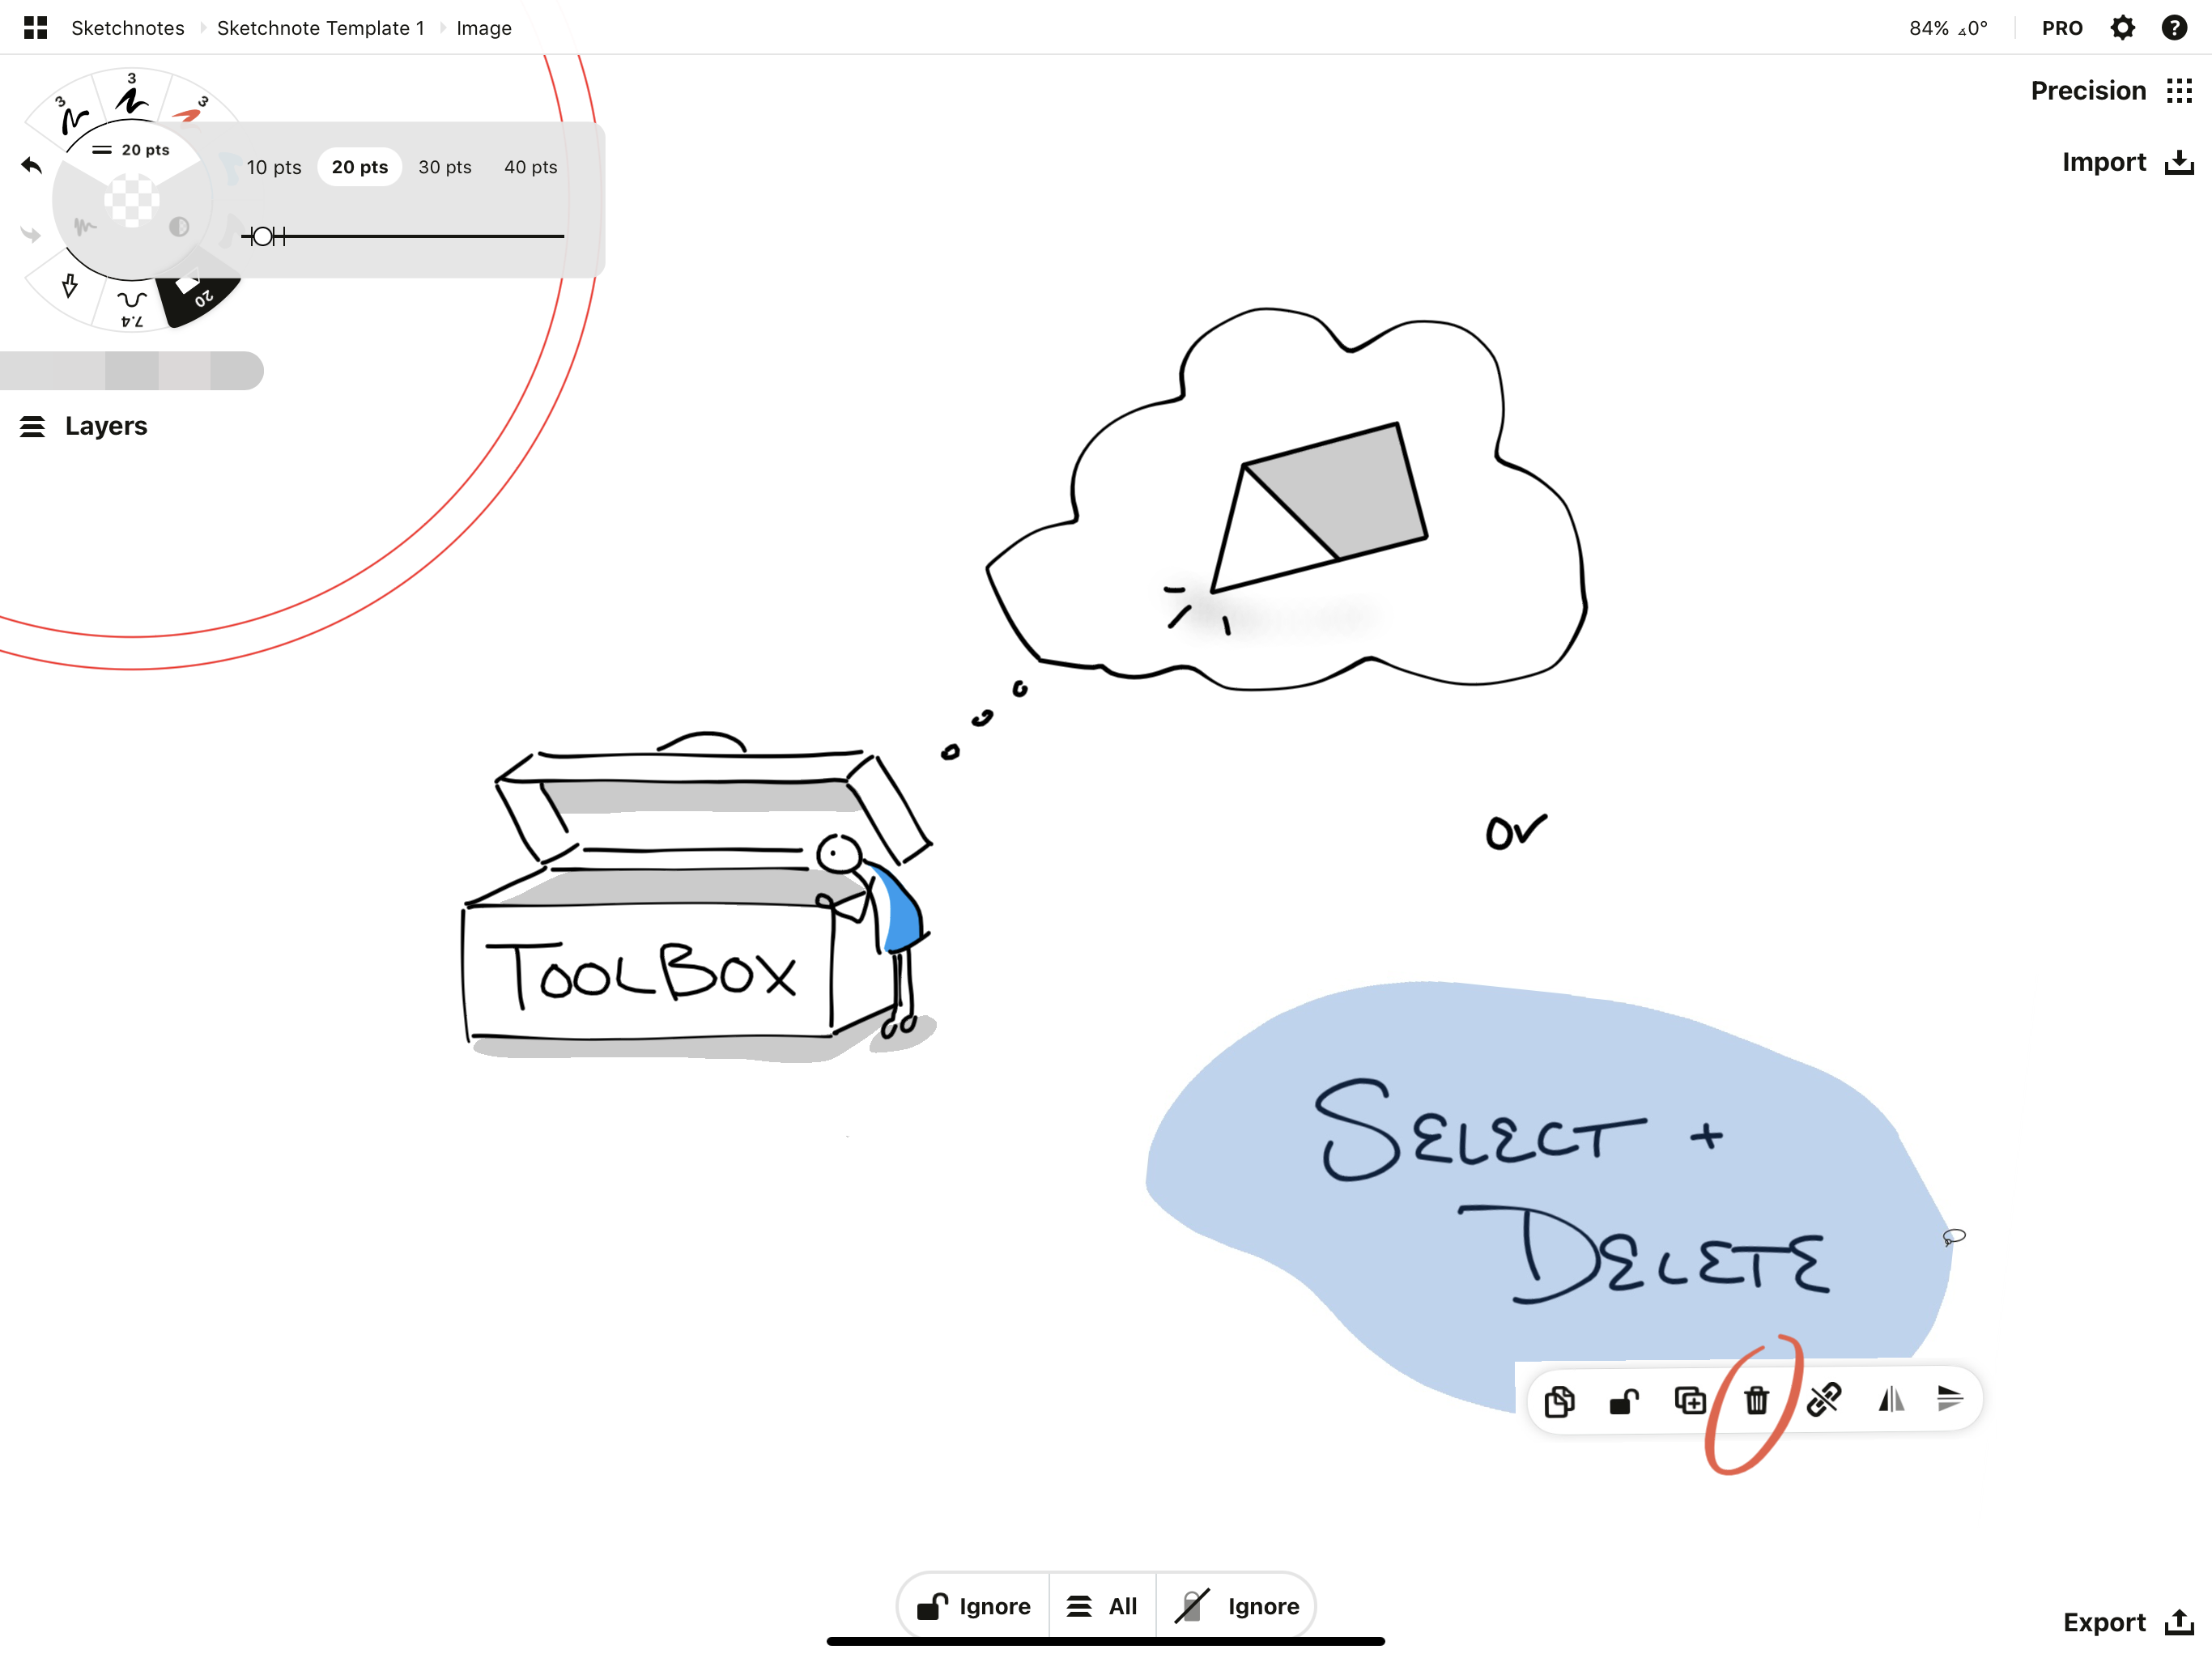
Use the Slice tool at a large size to quickly and permanently erase your sketch, or try it at a small size to trim edges.
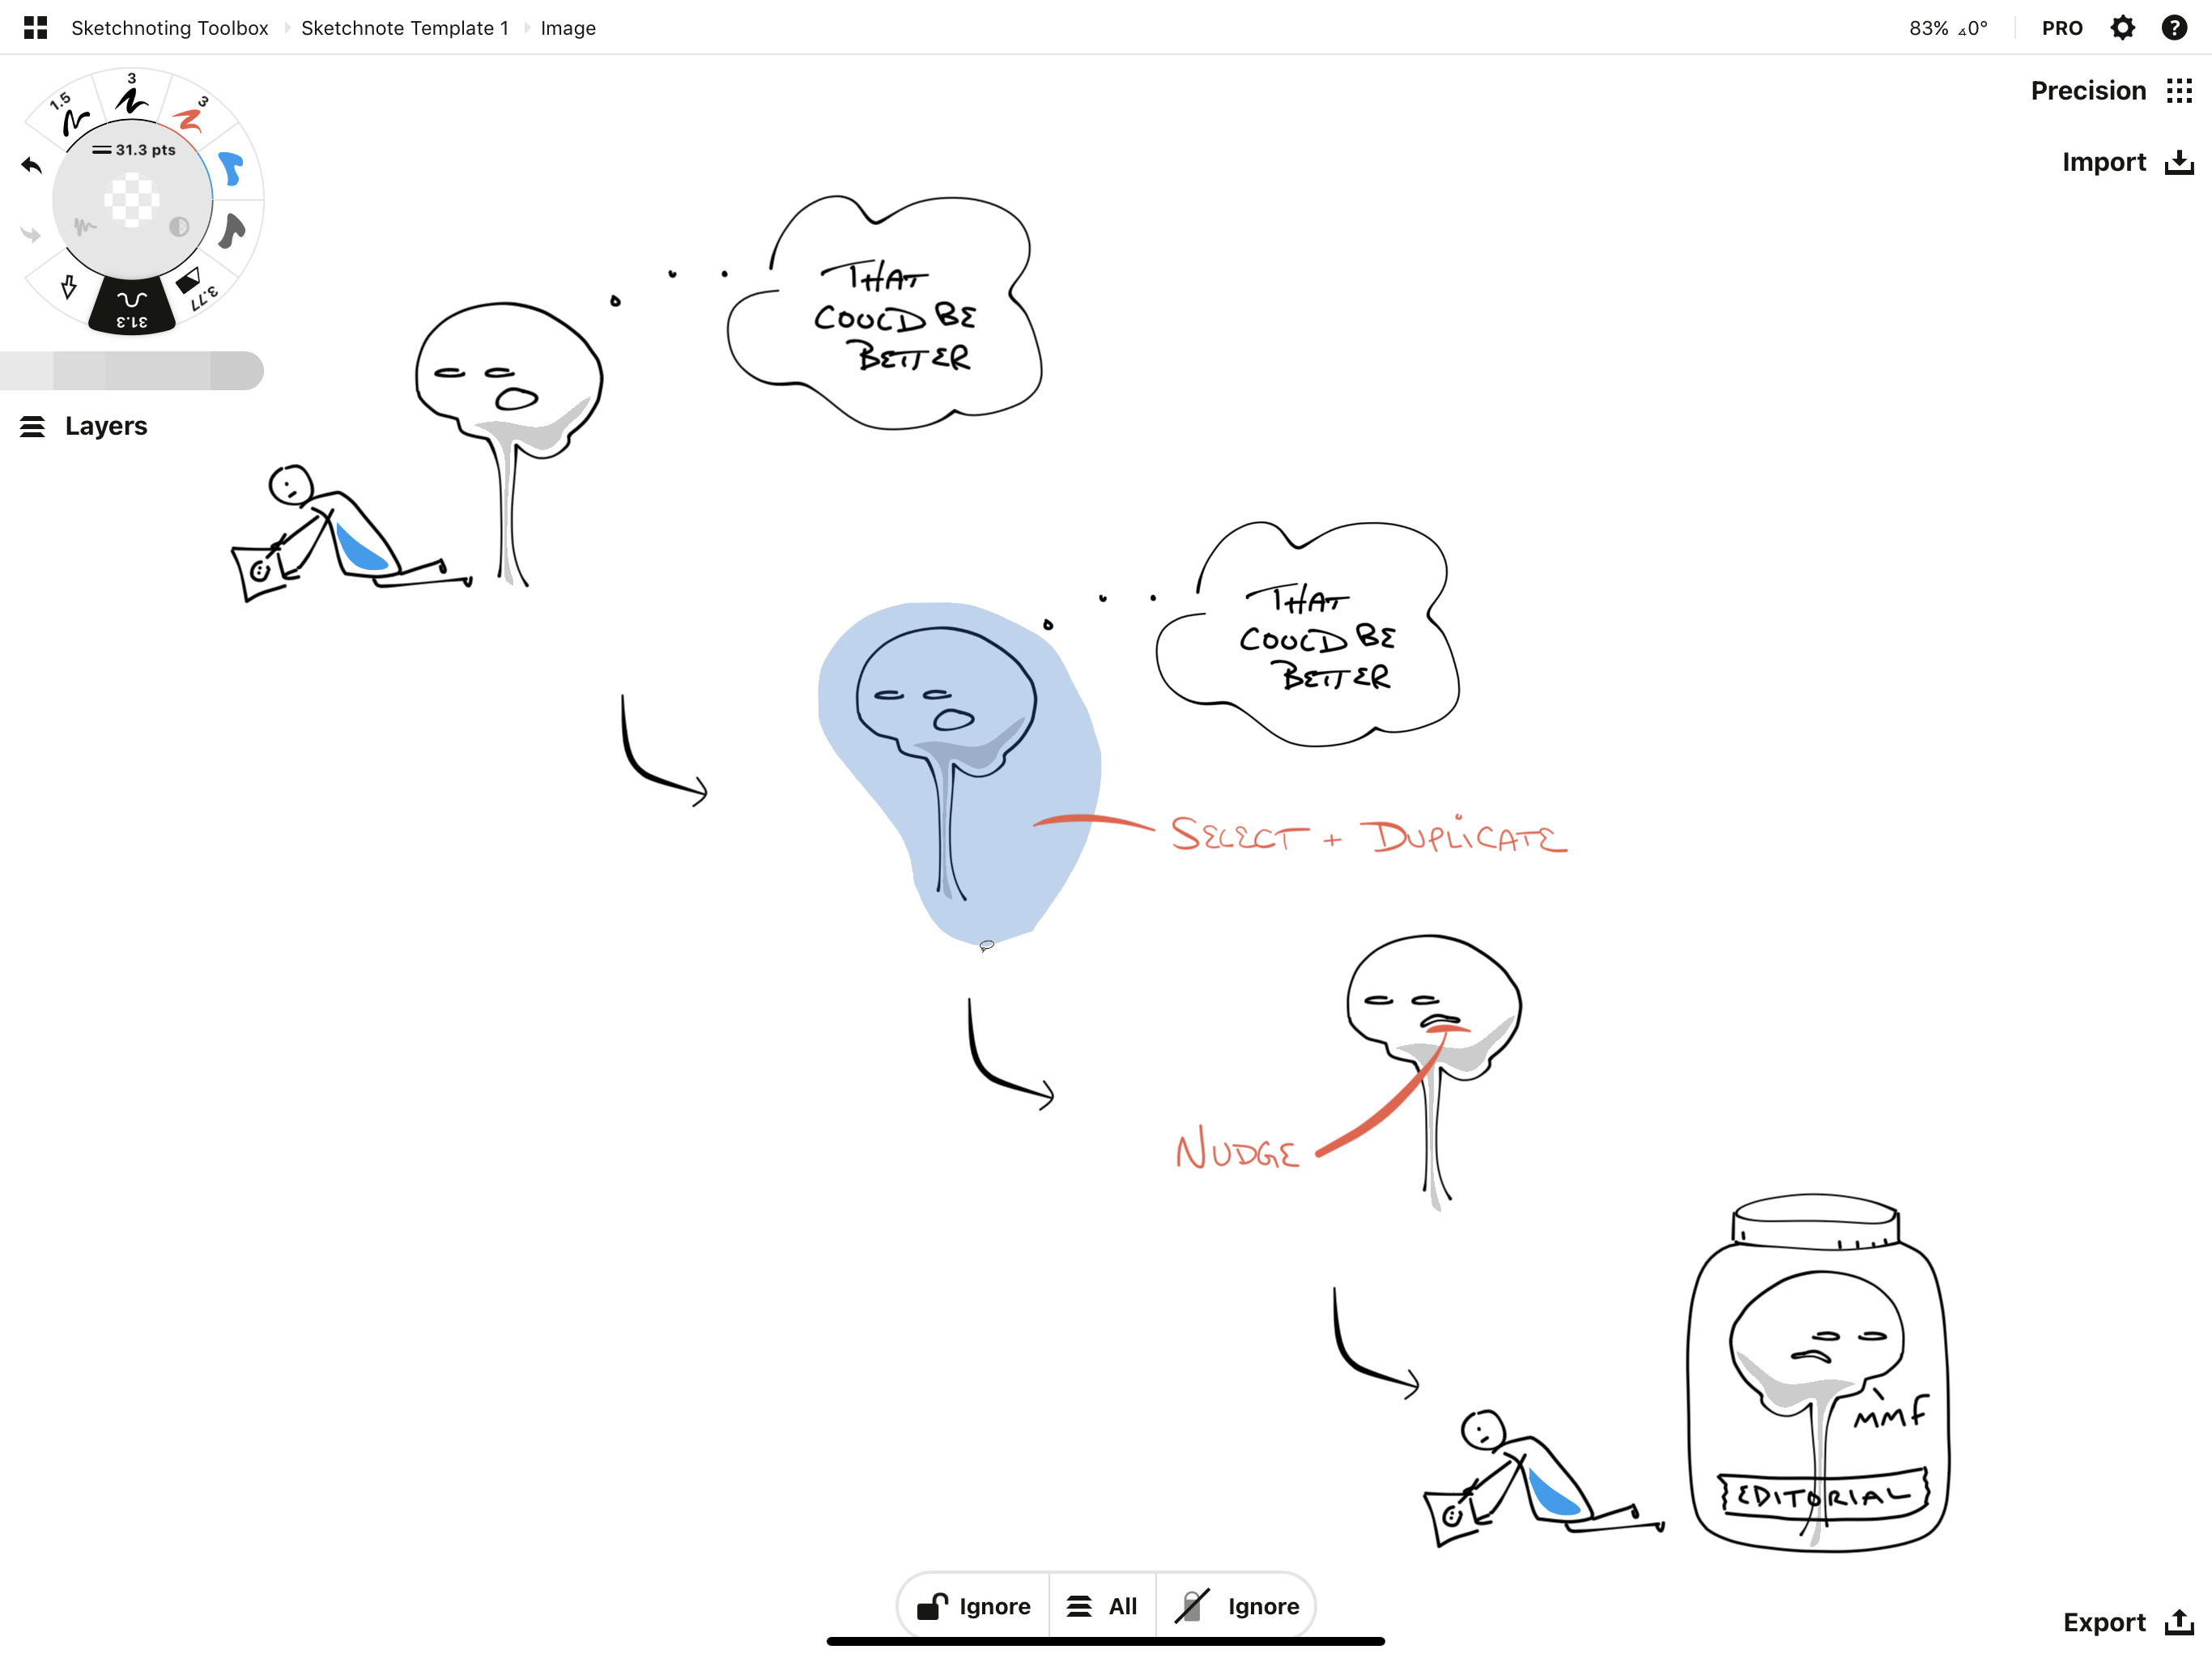
Tool #7 - Nudge
As an editorial tool, one of the most useful vector tools Concepts has for editing linework is the Nudge tool. With this tool, you can literally pull or poke areas of your text into place after you've drawn them.
Sometimes your editorial mind kicks in between the active note taking moments. You should ignore it, for the most part - there is nothing wrong with how you write or sketch. Mostly the editorial brain gets in the way with comments before you're even ready for editing - it's an assessment tool you can acknowledge with "that's an interesting idea", then shush until you need it.
But sometimes it's nice to play with your sketch, and if you do intend to share your notes after your session in a true editorial moment, you can use Nudge, Slice, and Select to clean up and rearrange any messy bits.
Tool #8 - Select
Finally, if you prefer to use the Select tool for one-finger lassoes or stroke picking, feel free to add it to your tool wheel. Otherwise, you always have the default tap+hold gesture to activate Selection, and you can choose a different tool to fill the slot.
A note on Selection - it's the prime tool in Concepts that allows you to move, duplicate and edit your drawings. You can read a tutorial on it here. Selection is what makes the editorial vector power of Concepts come to life and is incredibly helpful for organizing your notes after you take them.
A Few More Useful Tools
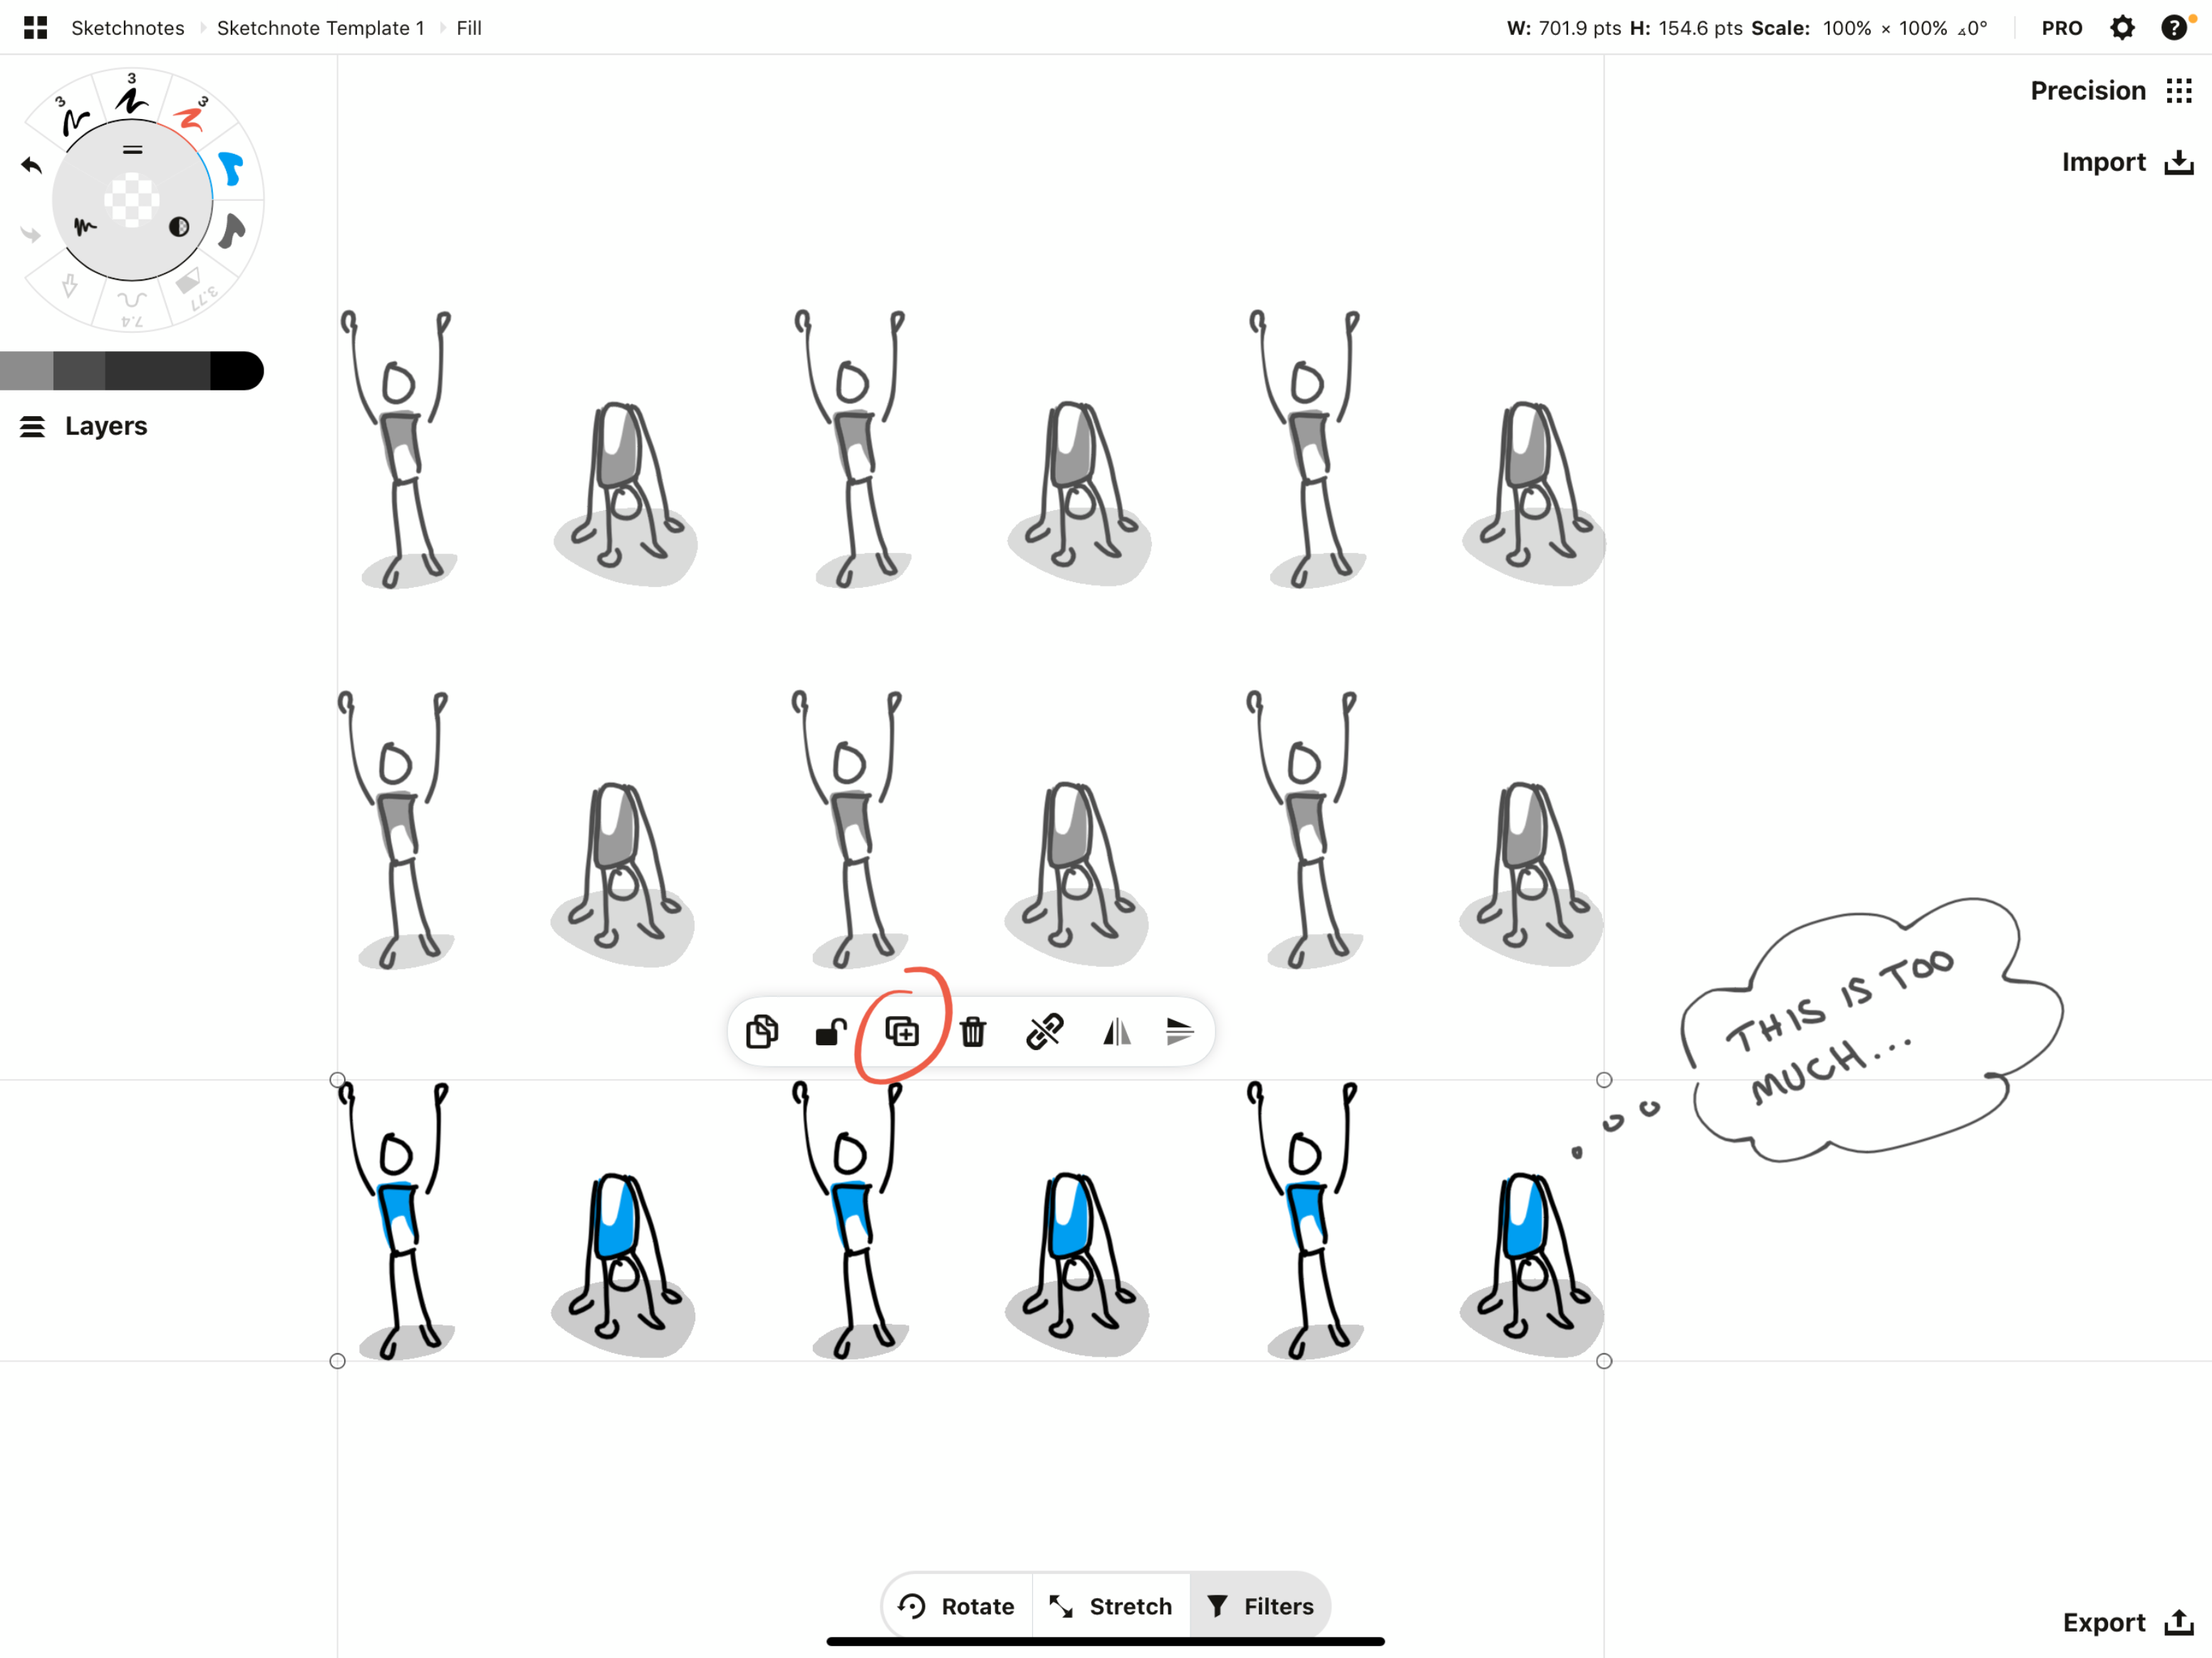
1 - Duplicate
With sketchnoting, flow is key. So on items where you've already drawn the main idea, just Select > Duplicate and place it. You can use it for everything - lines, arrows, figures, objects - anything that represents the same idea you've already referenced elsewhere. This can give your sketchnote cohesion, make it easier to read, and faster to draw.
2 - Layers
Concepts has two Layer modes. If you open the Layers menu, you'll see a toggle for Automatic / Manual. Tap it for one or the other.
Automatic mode puts each tool into its own layer for you. So each time you pick that tool, it will draw inside its layer namesake.
It also lines the layers up in a smart order. By default, the Fill tool or Airbrush will always draw in a layer beneath the Pen, so the ink stays on top.

In Automatic mode, Concepts smartly sorts layers by tool.
But the app doesn’t differentiate every pen type. For example, the ordinary Pen is different from the Fountain Pen, but they both draw in the same Pen layer with Automatic mode.
This might be a reason to consider Manual mode, which is also simple. Tap the Sorting button to toggle the mode to Manual. From here on out, you'll manually select the layer you want to draw in. If you make it a part of your drawing routine - like "Tap Fill tool, tap Fill layer" - you'll always draw in the right layer.
If you forget because you're busy drawing, you can always Select the misguided strokes and drag them onto the correct layer thumbnail in the menu. Once you let go of the dragging motion, the strokes will return to their location on the canvas but show up in the new layer.
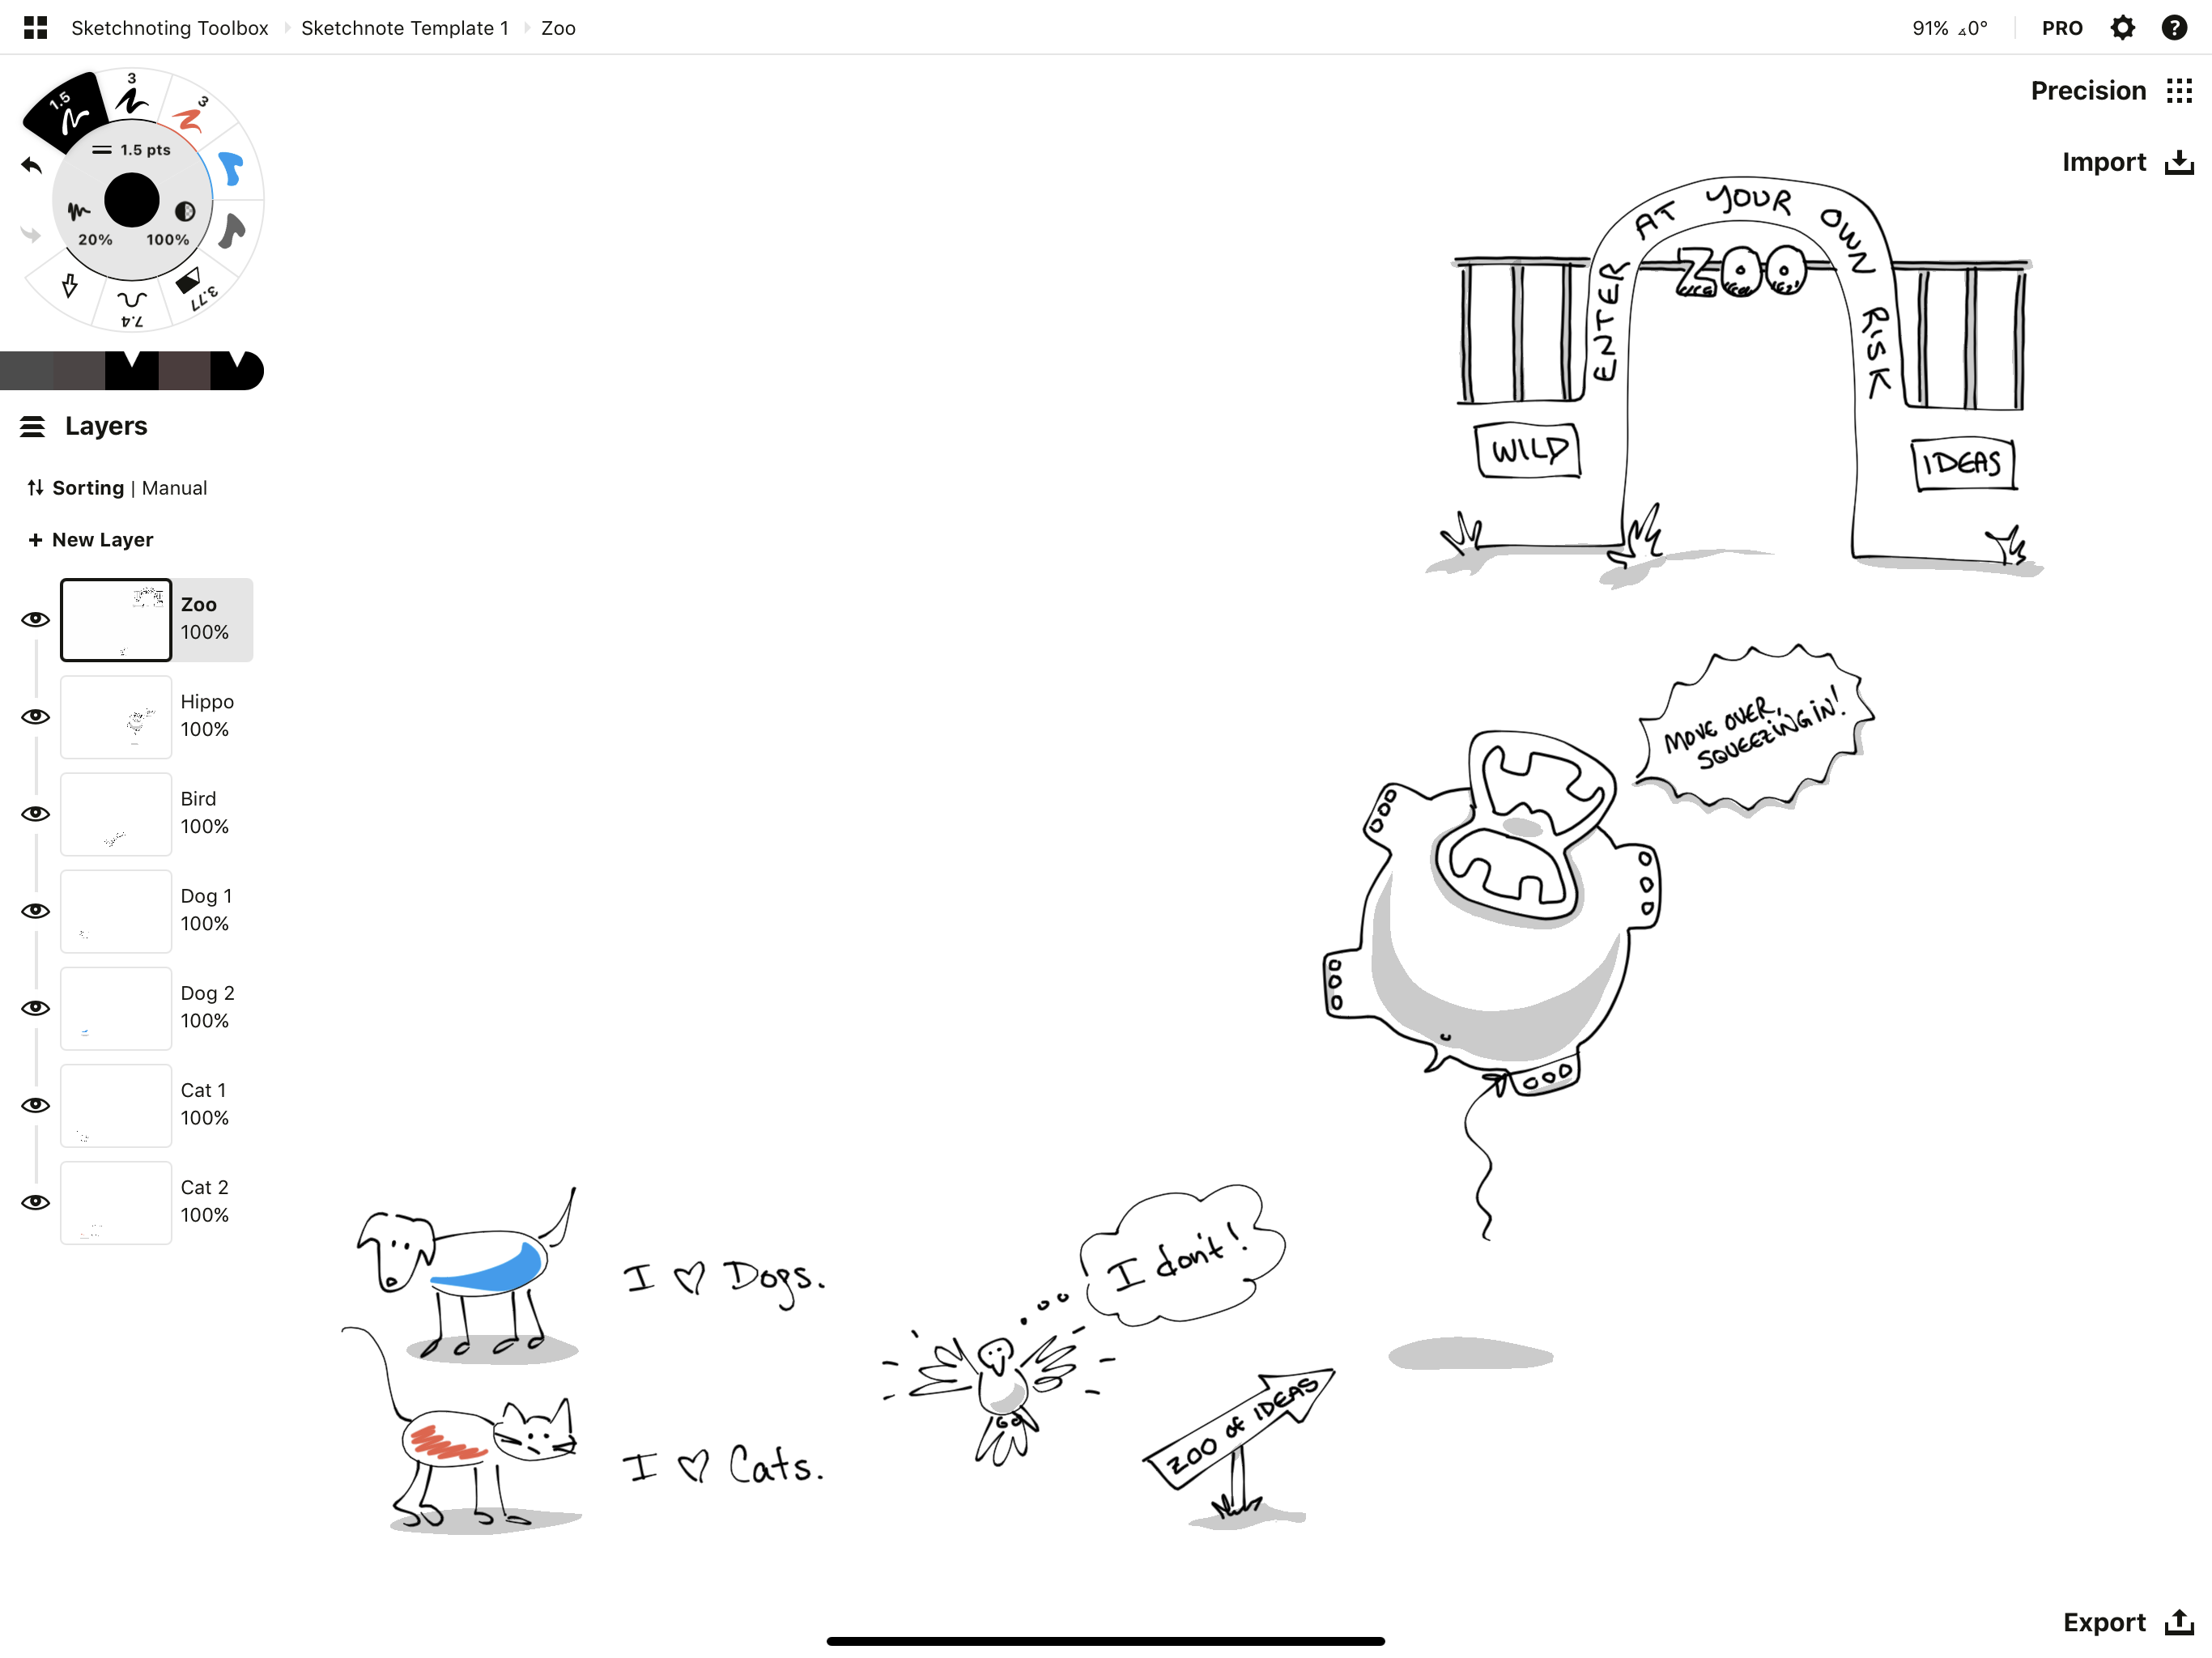
One of the benefits to this method is that instead of organizing by tool, you can organize by idea. You might consider creating both a Pen layer and a coloring layer beneath it for each idea, as in the image below, then create a new duo for the next idea. This can help you track key areas on the canvas.
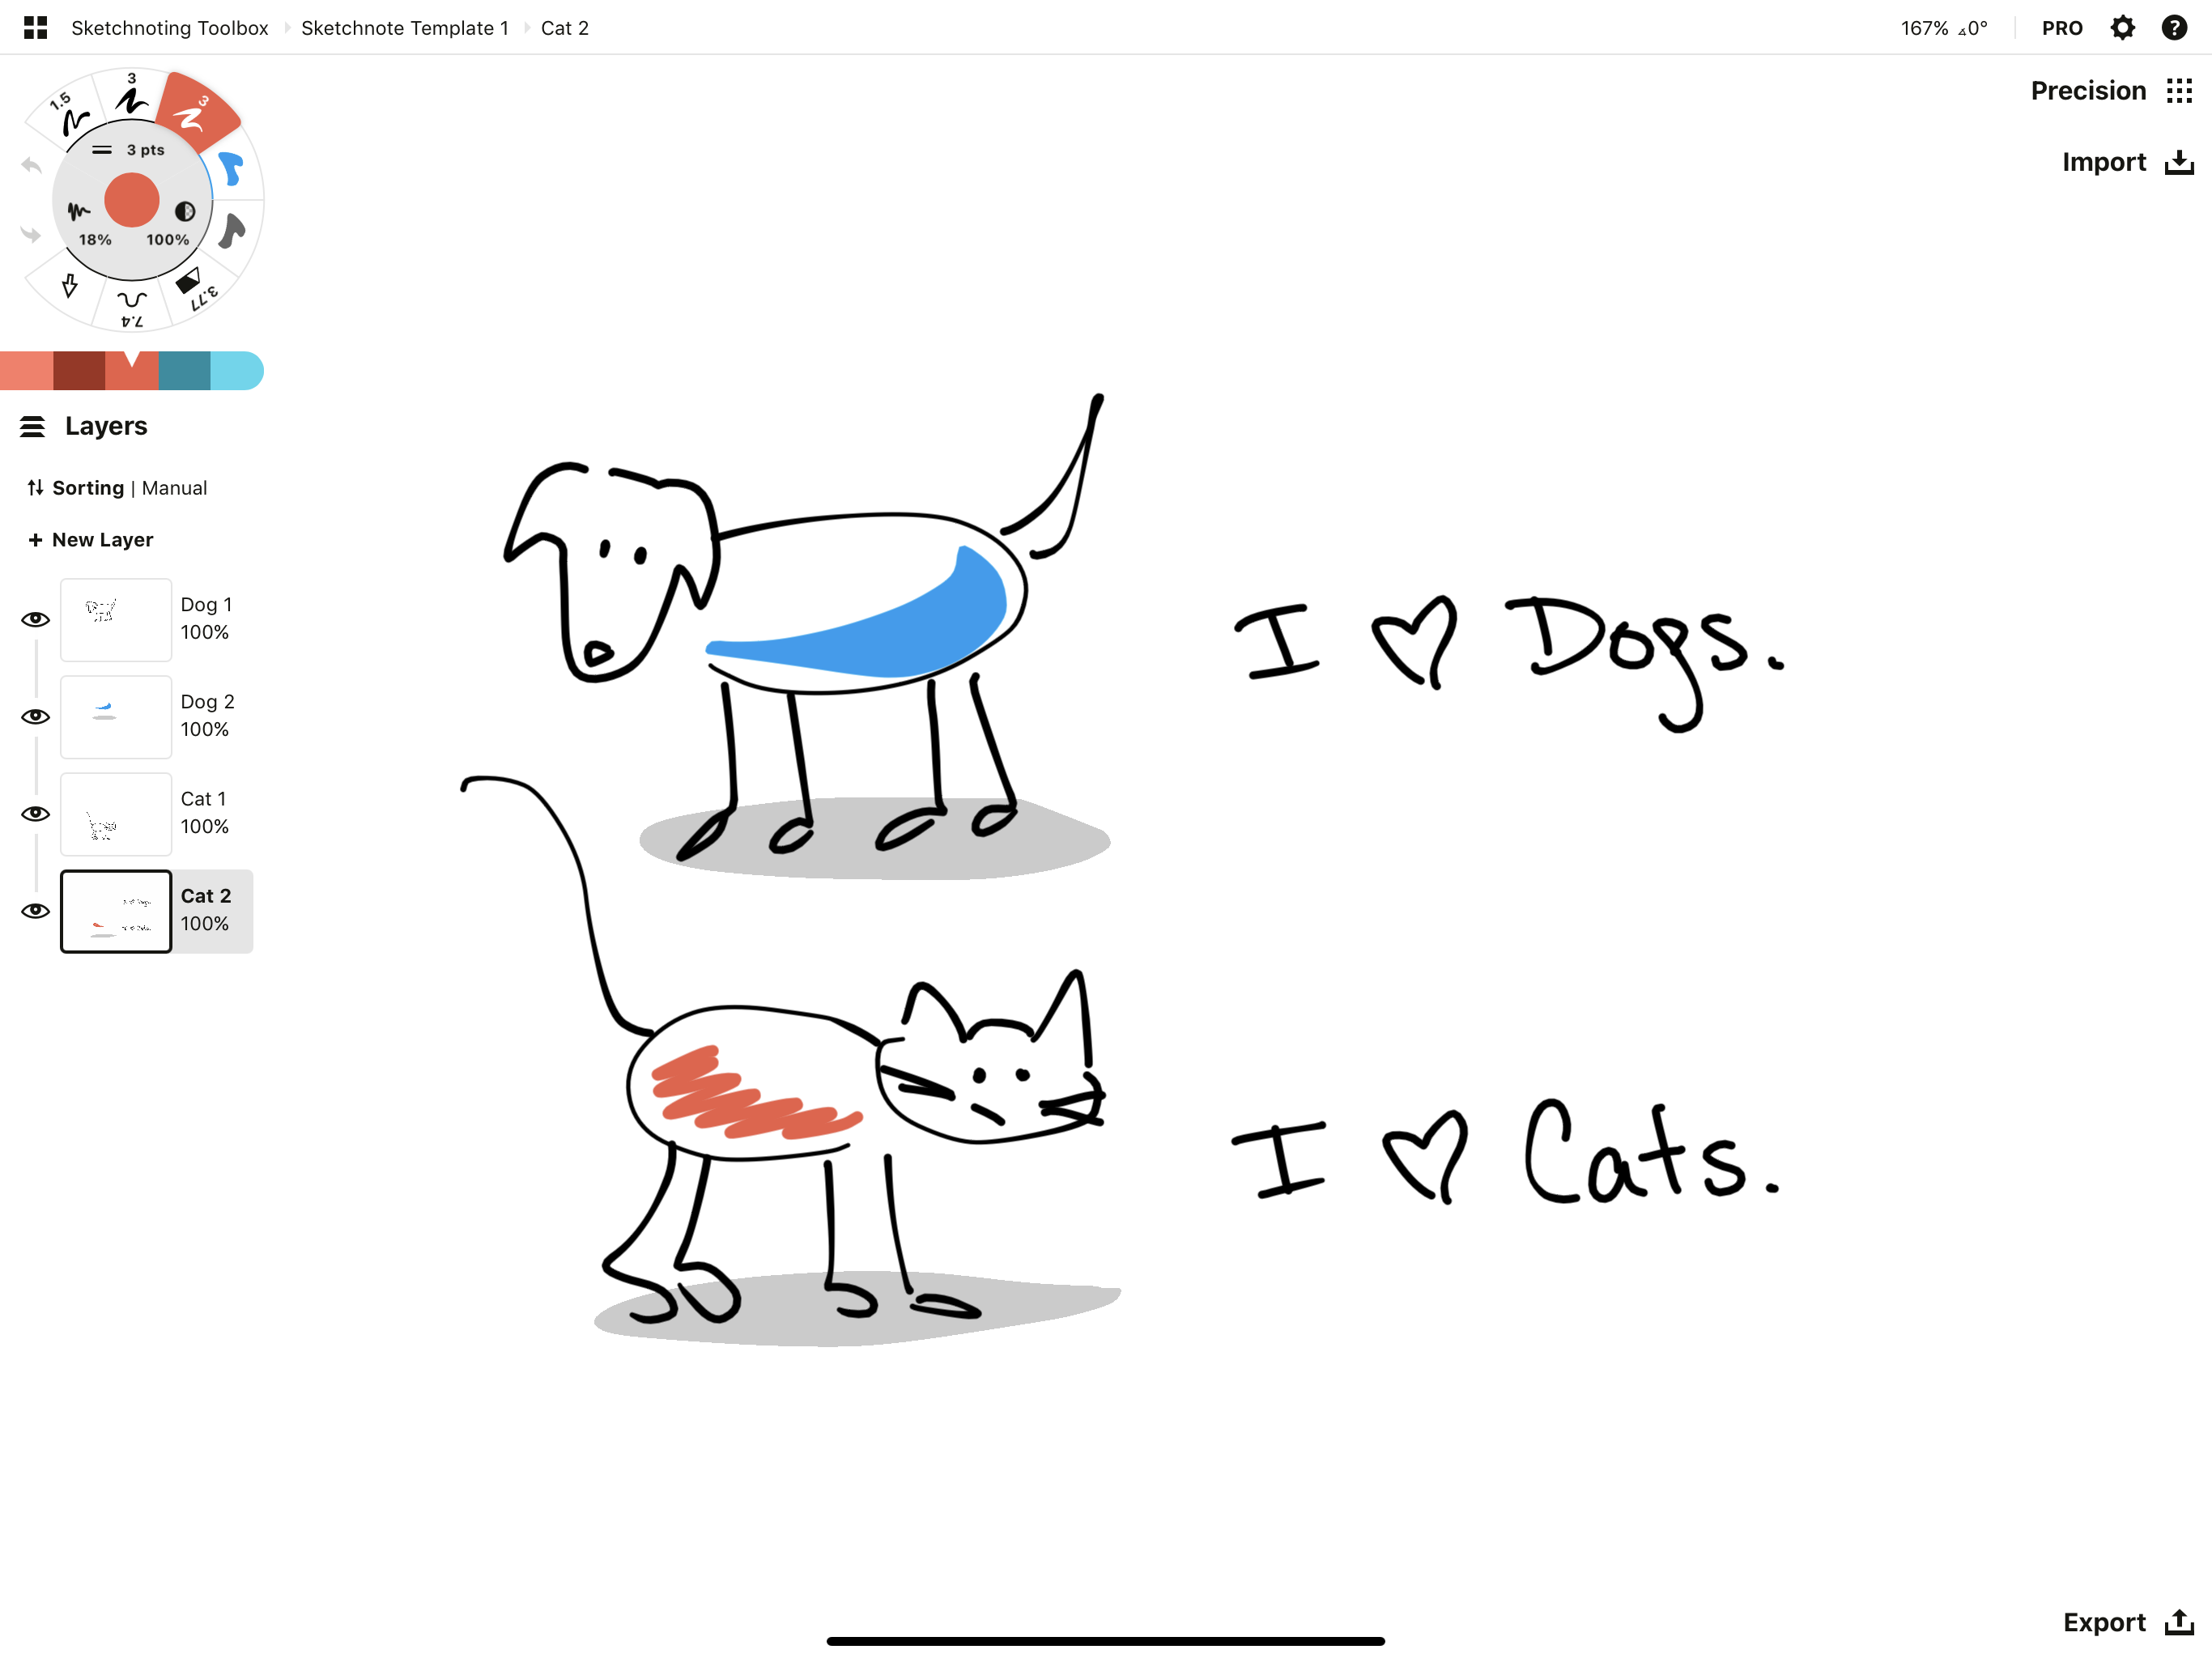
If you're in Manual mode, try using layers to sort by subject or idea.
3 - Group Strokes to Group Thoughts
Whether you draw in one or several layers, you can keep your sketch or even your bigger ideas together by selecting your strokes and grouping them into a single object. This way, when you want to reorganize, you can select the entire group with a single tap and move it to a new location, a new layer, or even a new object library (read below).
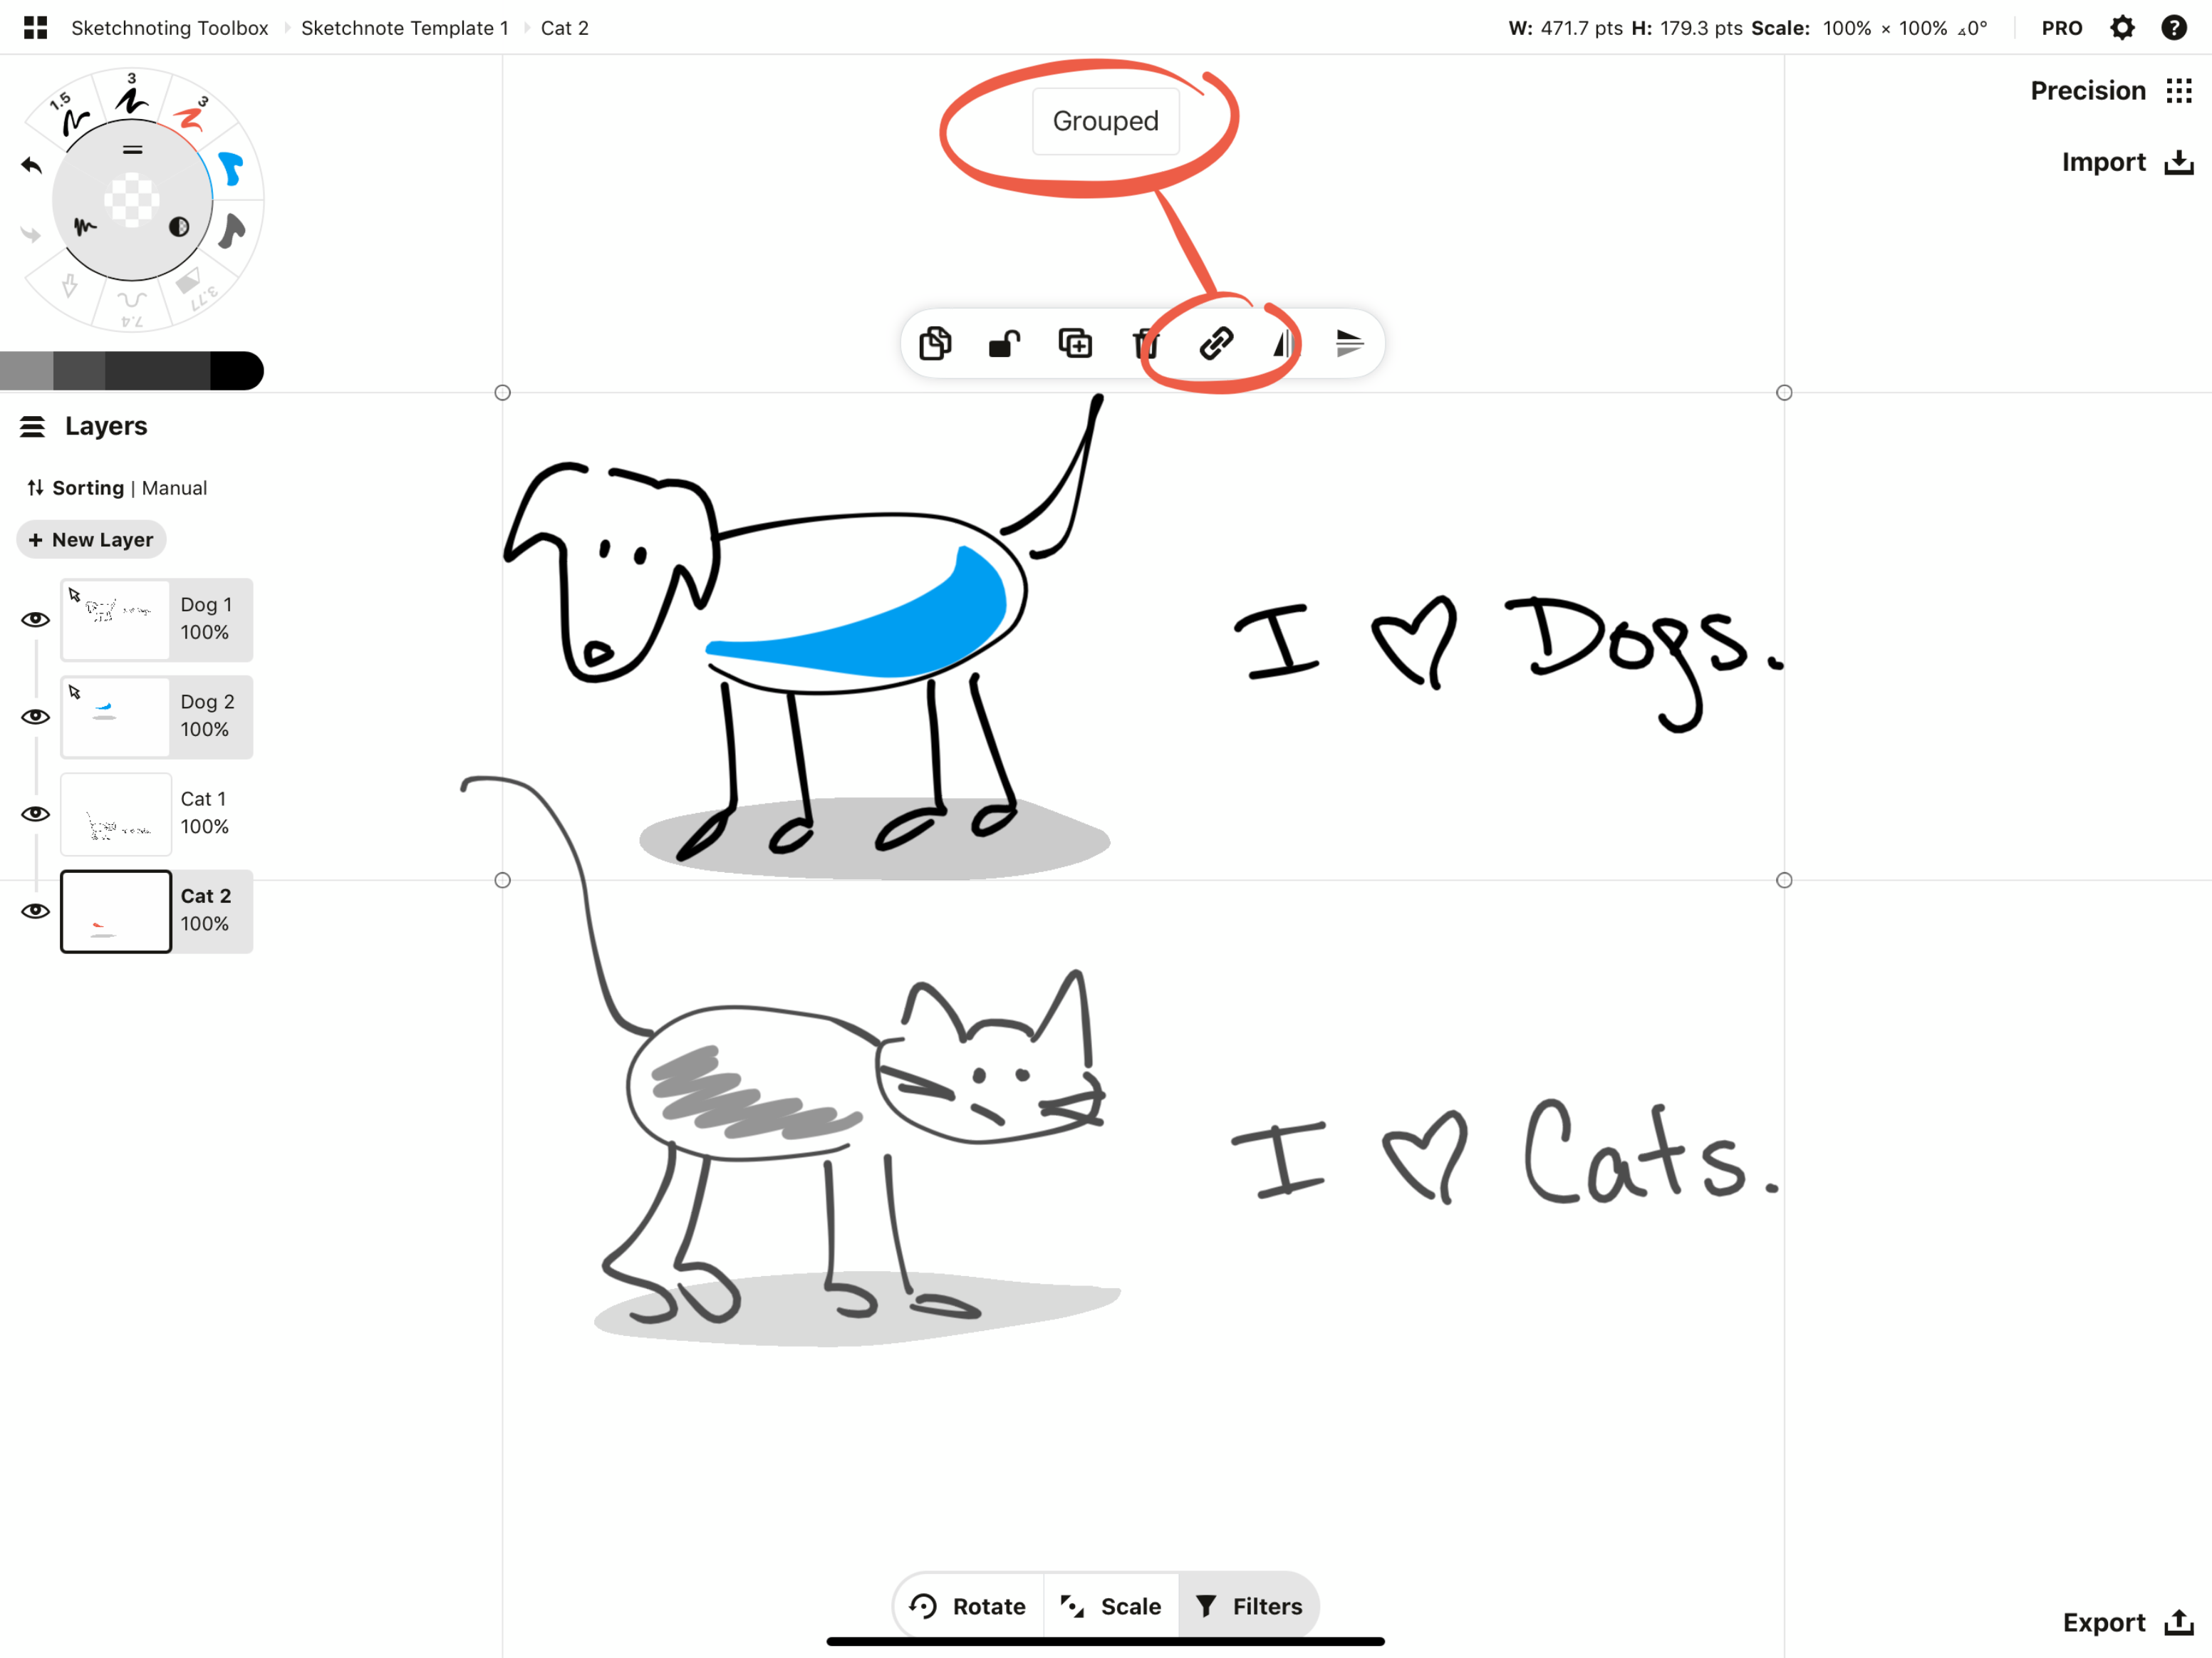
Try grouping your ideas together so you can easily select and organize them.
4 - The Object Library (iOS only)
Concepts' object library is a way for you to collect key elements of your visual library and store them for use in later sketchnotes. With the Make Your Own Objects feature, you can drag anything you sketch into a library, then tap them back out at any time, in any drawing, when you're in a hurry.
Many sketchnoters will keep a collection of post-it notes, notecards, and drawing prompts to help them reference ideas for future note taking sessions. The object library works great for collecting your digital sketches.
Also, with a little preparation before a note taking session, you can pre-sketch useful visuals, create visual library collections around a theme or perhaps color palette, and prepare your visual lexicon for an upcoming presentation.

Add your sketchnote to an object library to create a visual vocabulary collection.
5 - Infinitely Edit Your Ideas
You've seen how easily you can select and re-organize your thoughts. If an idea is growing too big for its part of the paper…

… you can calmly select and shrink it, or move it to another area of the infinite canvas.
Some ideas grow too big for the space you'd planned. You can always move them over to a new patch.
You can also edit your sketch's size, scale, brush, color, opacity, smoothing, angle or layer to tidy it up.
6 - Share Your Sketchnotes
Once you've finished taking notes and even organizing them a bit, it's awesome to share what you've created with others. Not only does this promote a great approach to learning new ideas, you'll probably inspire others to try taking their own sketchnotes.
You can share your sketchnotes in all of the usual ways. Take a screengrab or use an artboard to frame a favorite portion, and export as a JPG or PNG to your social channels, text or email.
You can also sketch and present live. If you're with an audience using an iPad (iOS only for now), you can AirPlay your canvas to a large screen and sketchnote live with your friends or team. If you're sketching remotely, connect in via Zoom or other live conferencing app, and sketch on screen. Share your sketchnotes straight from the app when you're done as a memory of your session.
A Handful of Sketchnoting Tips
- Warm up by drawing a few quick strokes on your paper. Think "action" — you're attending the event to actively learn from it. Feel the flow of the ink from your mind to your hand, through the pen to your paper.
- Every idea has a motion behind it, i.e. you're going somewhere with the idea. Arrows and lines are great for showing motion, flow, speed, and even emotion. Allow your notes to share the same energy you do.
- We highly recommend Mike Rohde’s The Sketchnote Handbook for learning the simple shapes and sketching techniques you use for sketchnoting. It is a fantastic visual guide to help you master the basics.
- Jot down the title, author, a link if possible, and the date you took the notes. This way you have proper credits for quoting and sharing later on.
- Don’t try to write or draw every word. Focus on listening for and capturing the main ideas of the discussion. The most powerful sketchnotes have a central visual symbol at the center that represents the main topic. From there, you can sketch key ideas or symbols about related topics. Make them simple - fast and messy is totally fine.
- As you sketch, think of the easiest way to portray the idea. Which pictures automatically come to mind? Use them. People understand and appreciate universal symbols. At the same time, it's absolutely fine to be authentic and unique - draw freely and express your imagination. This helps you to process the idea, adhering it into your memory like a fingerprint.
- If you just can't come up with something, jot it down in a few words, then brainstorm or look up what others have drawn later. This is a great technique when learning a new language, and can also be a great way to build your visual lexicon.
- You'll notice that most speakers structure their presentations around a central point, then branch into supporting topics with useful details to support those topics. It might look like an outline if you were to write it down, but it could also look more like a bubble graph or a mindmap. For sketchnoting, connect simple sketches with arrows, and flow either outwardly or linearly from the main idea.
- Sketch the ideas that mean something to you, because relevance is how you learn best. You’ll be surprised at how much you remember of your experience when you revisit your notes, and they'll be meaningful to you because you've taken the time to connect those ideas into your personal landscape.
- Find a note taking flow that works for you. Encourage your inner note taker by trying new things, but also appreciate it for its strengths. Your mind is your very best friend.
With only a little enjoyable practice, you'll become quick and confident at taking visual notes. Remember to keep your sketches as simple as possible, to constantly open your mind to new ideas, and to go with the flow.
Please tag @conceptsapp or #conceptsapp to share your sketchnotes with us, and we'll appreciate your great work! If you have thoughts or comments about your own note taking preferences, let us know on social or email us at support@concepts.app - we'll be happy to chat. Thanks!
By Erica Christensen
Recommended
Sketchnoting Tools and Techniques - Graphic Recorder Tobey Busch shares tips for creating simple visual images and sketchnotes.
Visually Minded: Drawing and Presenting Ideas as Sketchnotes - Visual thinker and sketchnoter Jonny Daenen shares techniques for drawing and organizing graphic presentations and sketchnotes for ideas you are passionate about.
How to Save the Earth with a Sketch - For kids and adults — learn how to create a visual solution for real-world change using your pencil, a piece of paper and a few great ideas.
5 Tools for Visual Thinking on Your iPad - Five great tools to help you take notes, think visually and communicate on your iPad with Concepts.