How to Set Up a Perspective Grid in Concepts
Learn how to set up and customize your perspective grids in Concepts.
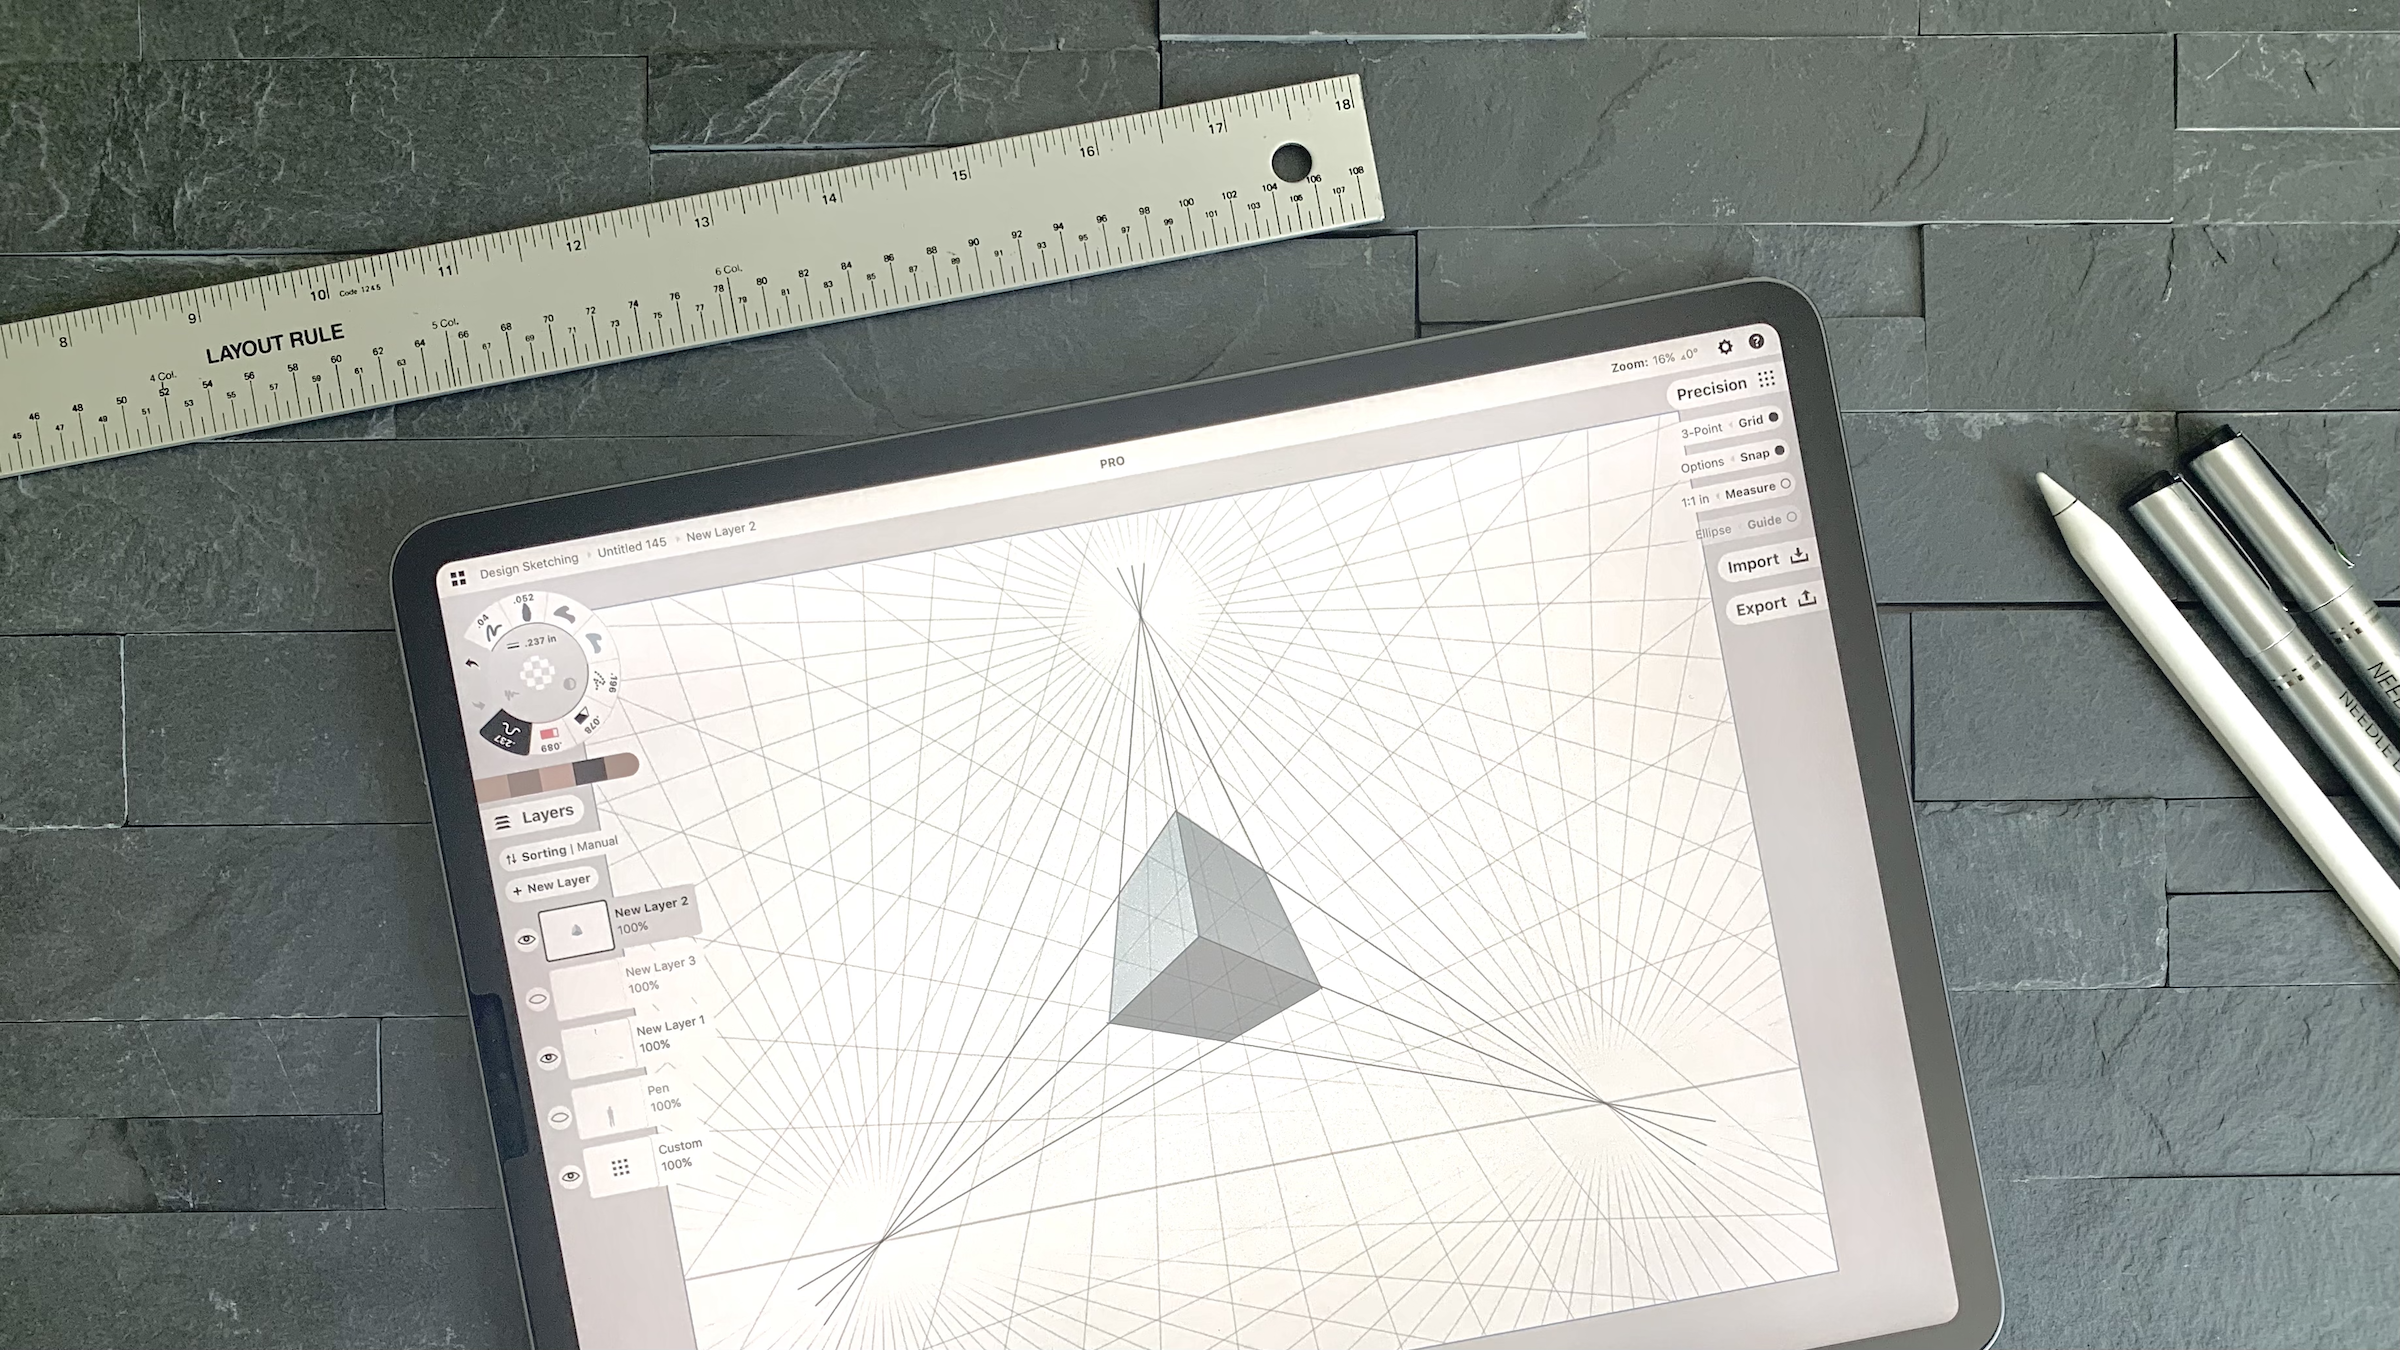
Concepts' 1-point, 2-point and 3-point perspective grids help you to quickly sketch your ideas with a 3-dimensional framework. In this tutorial, we'll share how to set up a perspective grid in Concepts, how to customize it, and how to work with it on the canvas.
*The following workflows are the same across all iOS, Windows, Android & Chrome OS devices, except where noted. All remaining updates are on their way to our Windows & Android platforms.
Activating a Perspective Grid
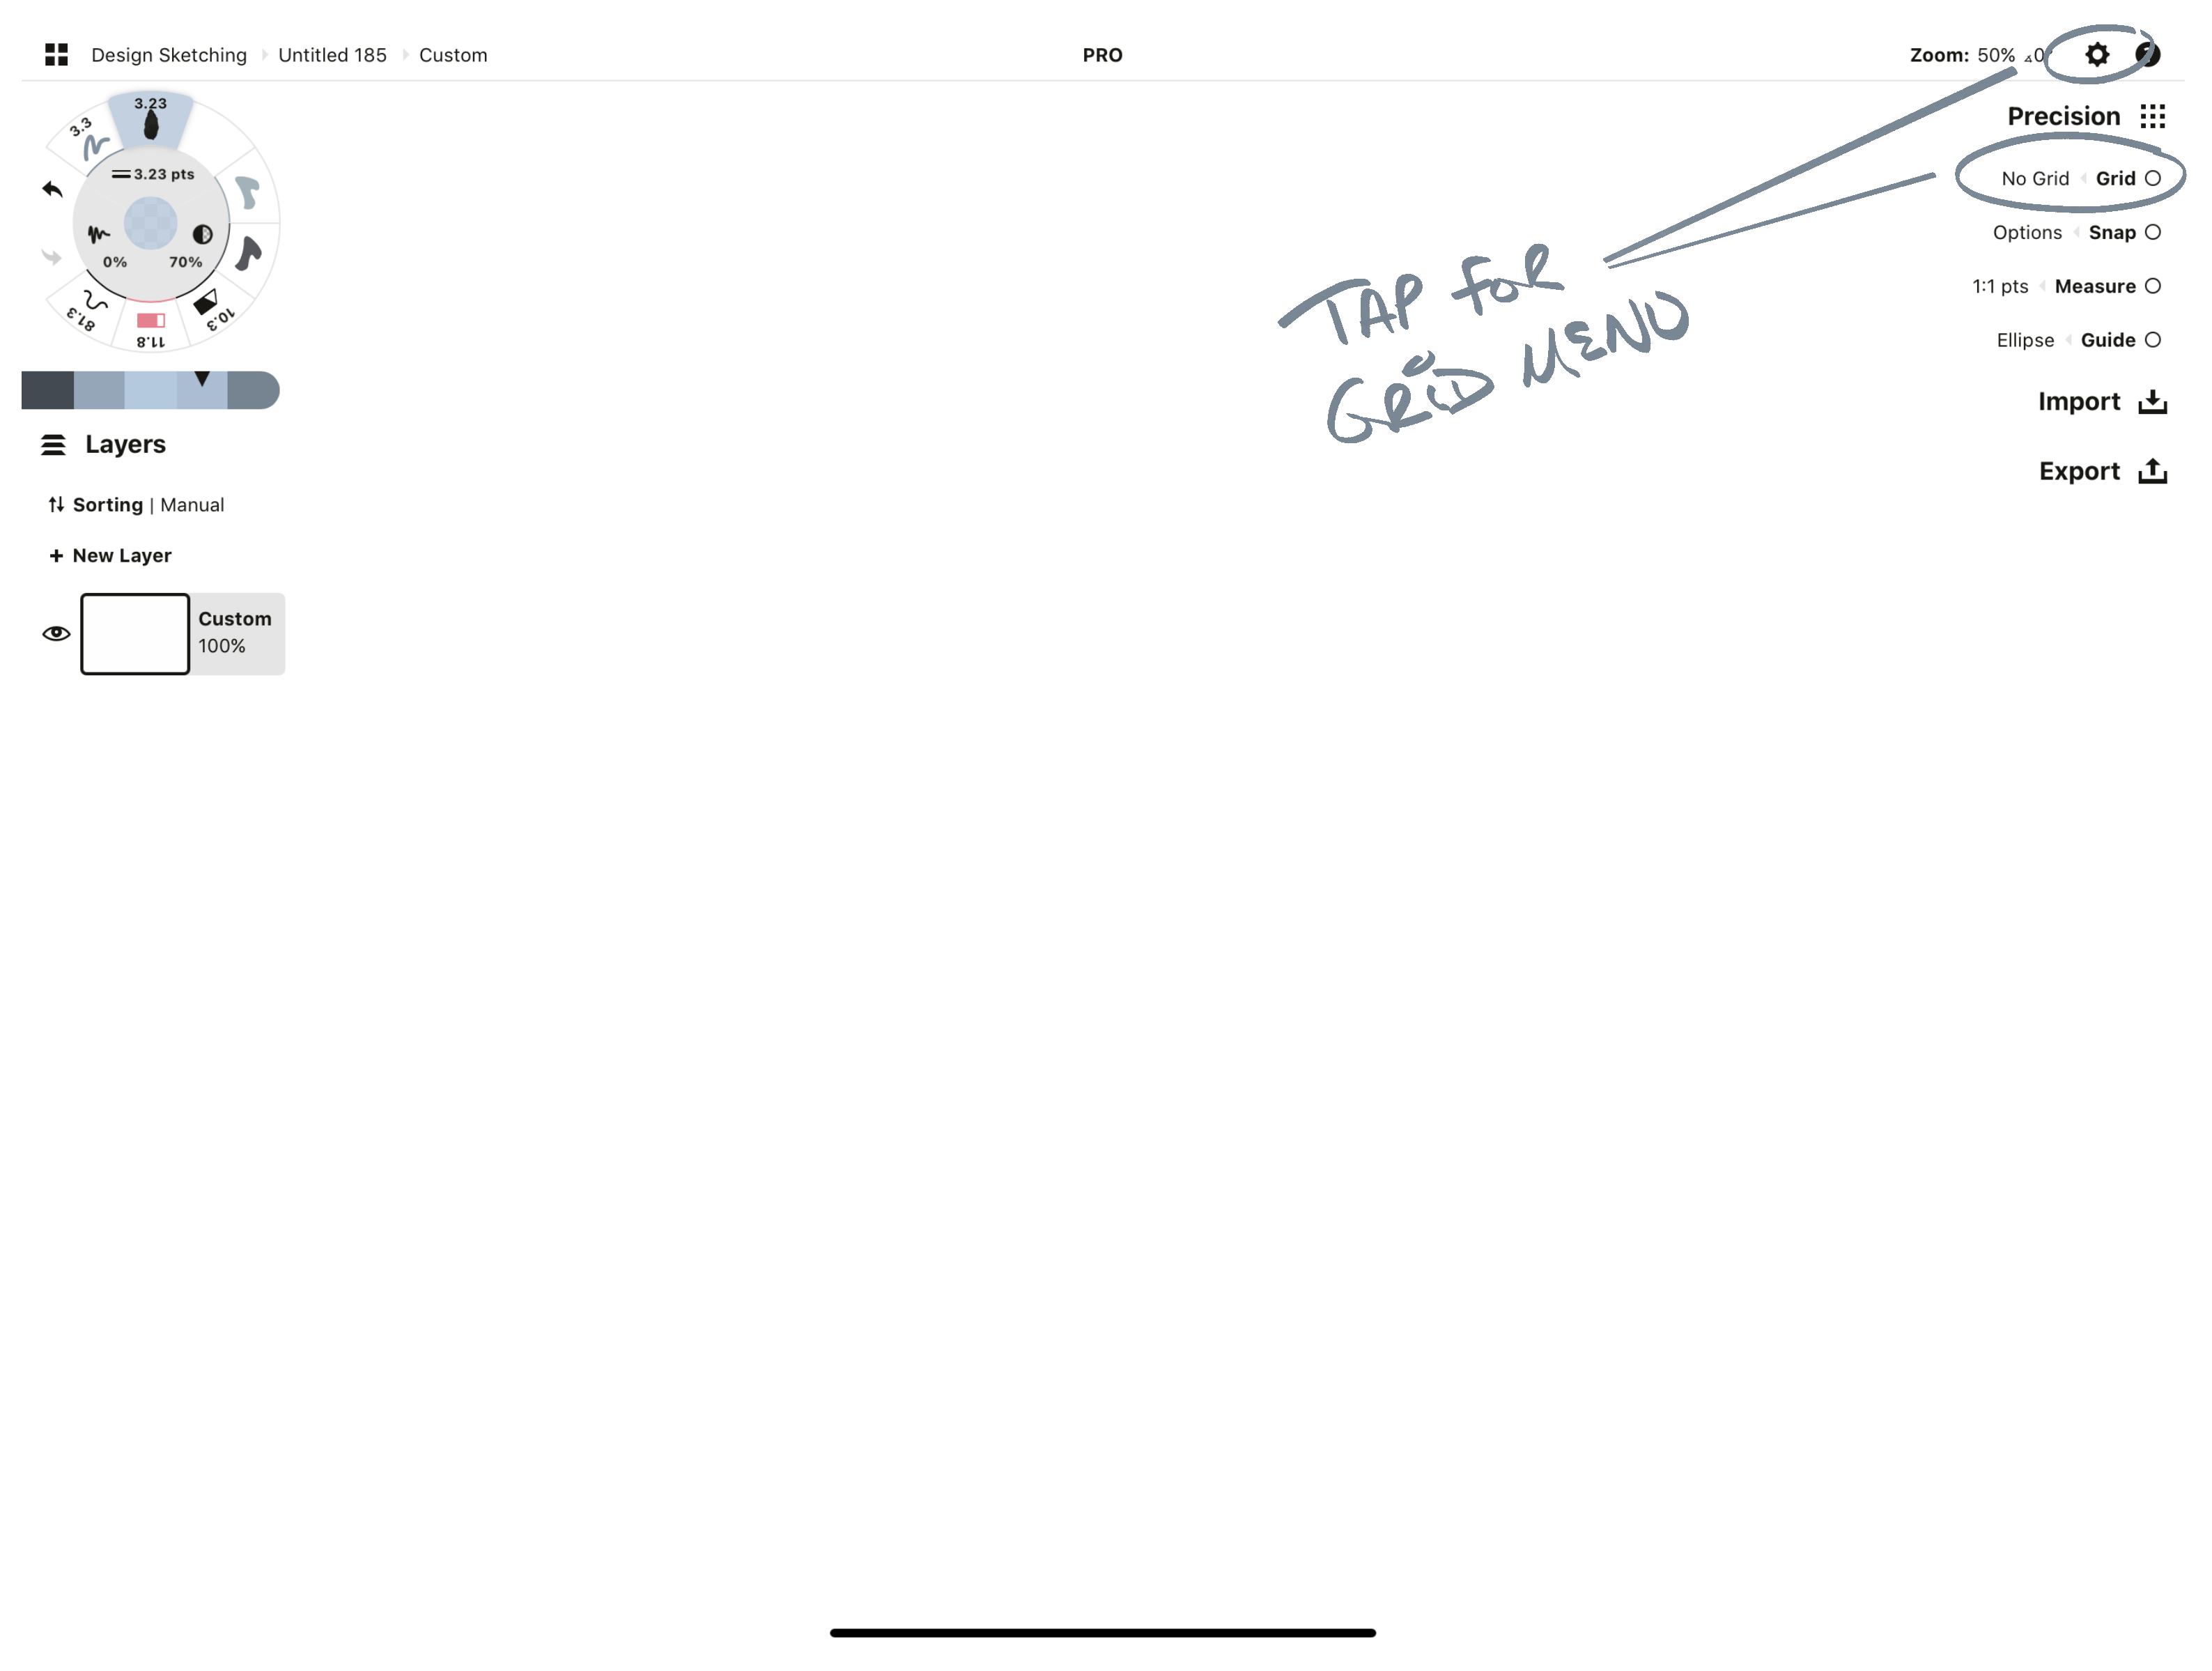
1. In a new drawing, tap the Settings icon, or open the Precision menu and tap the Grid option.
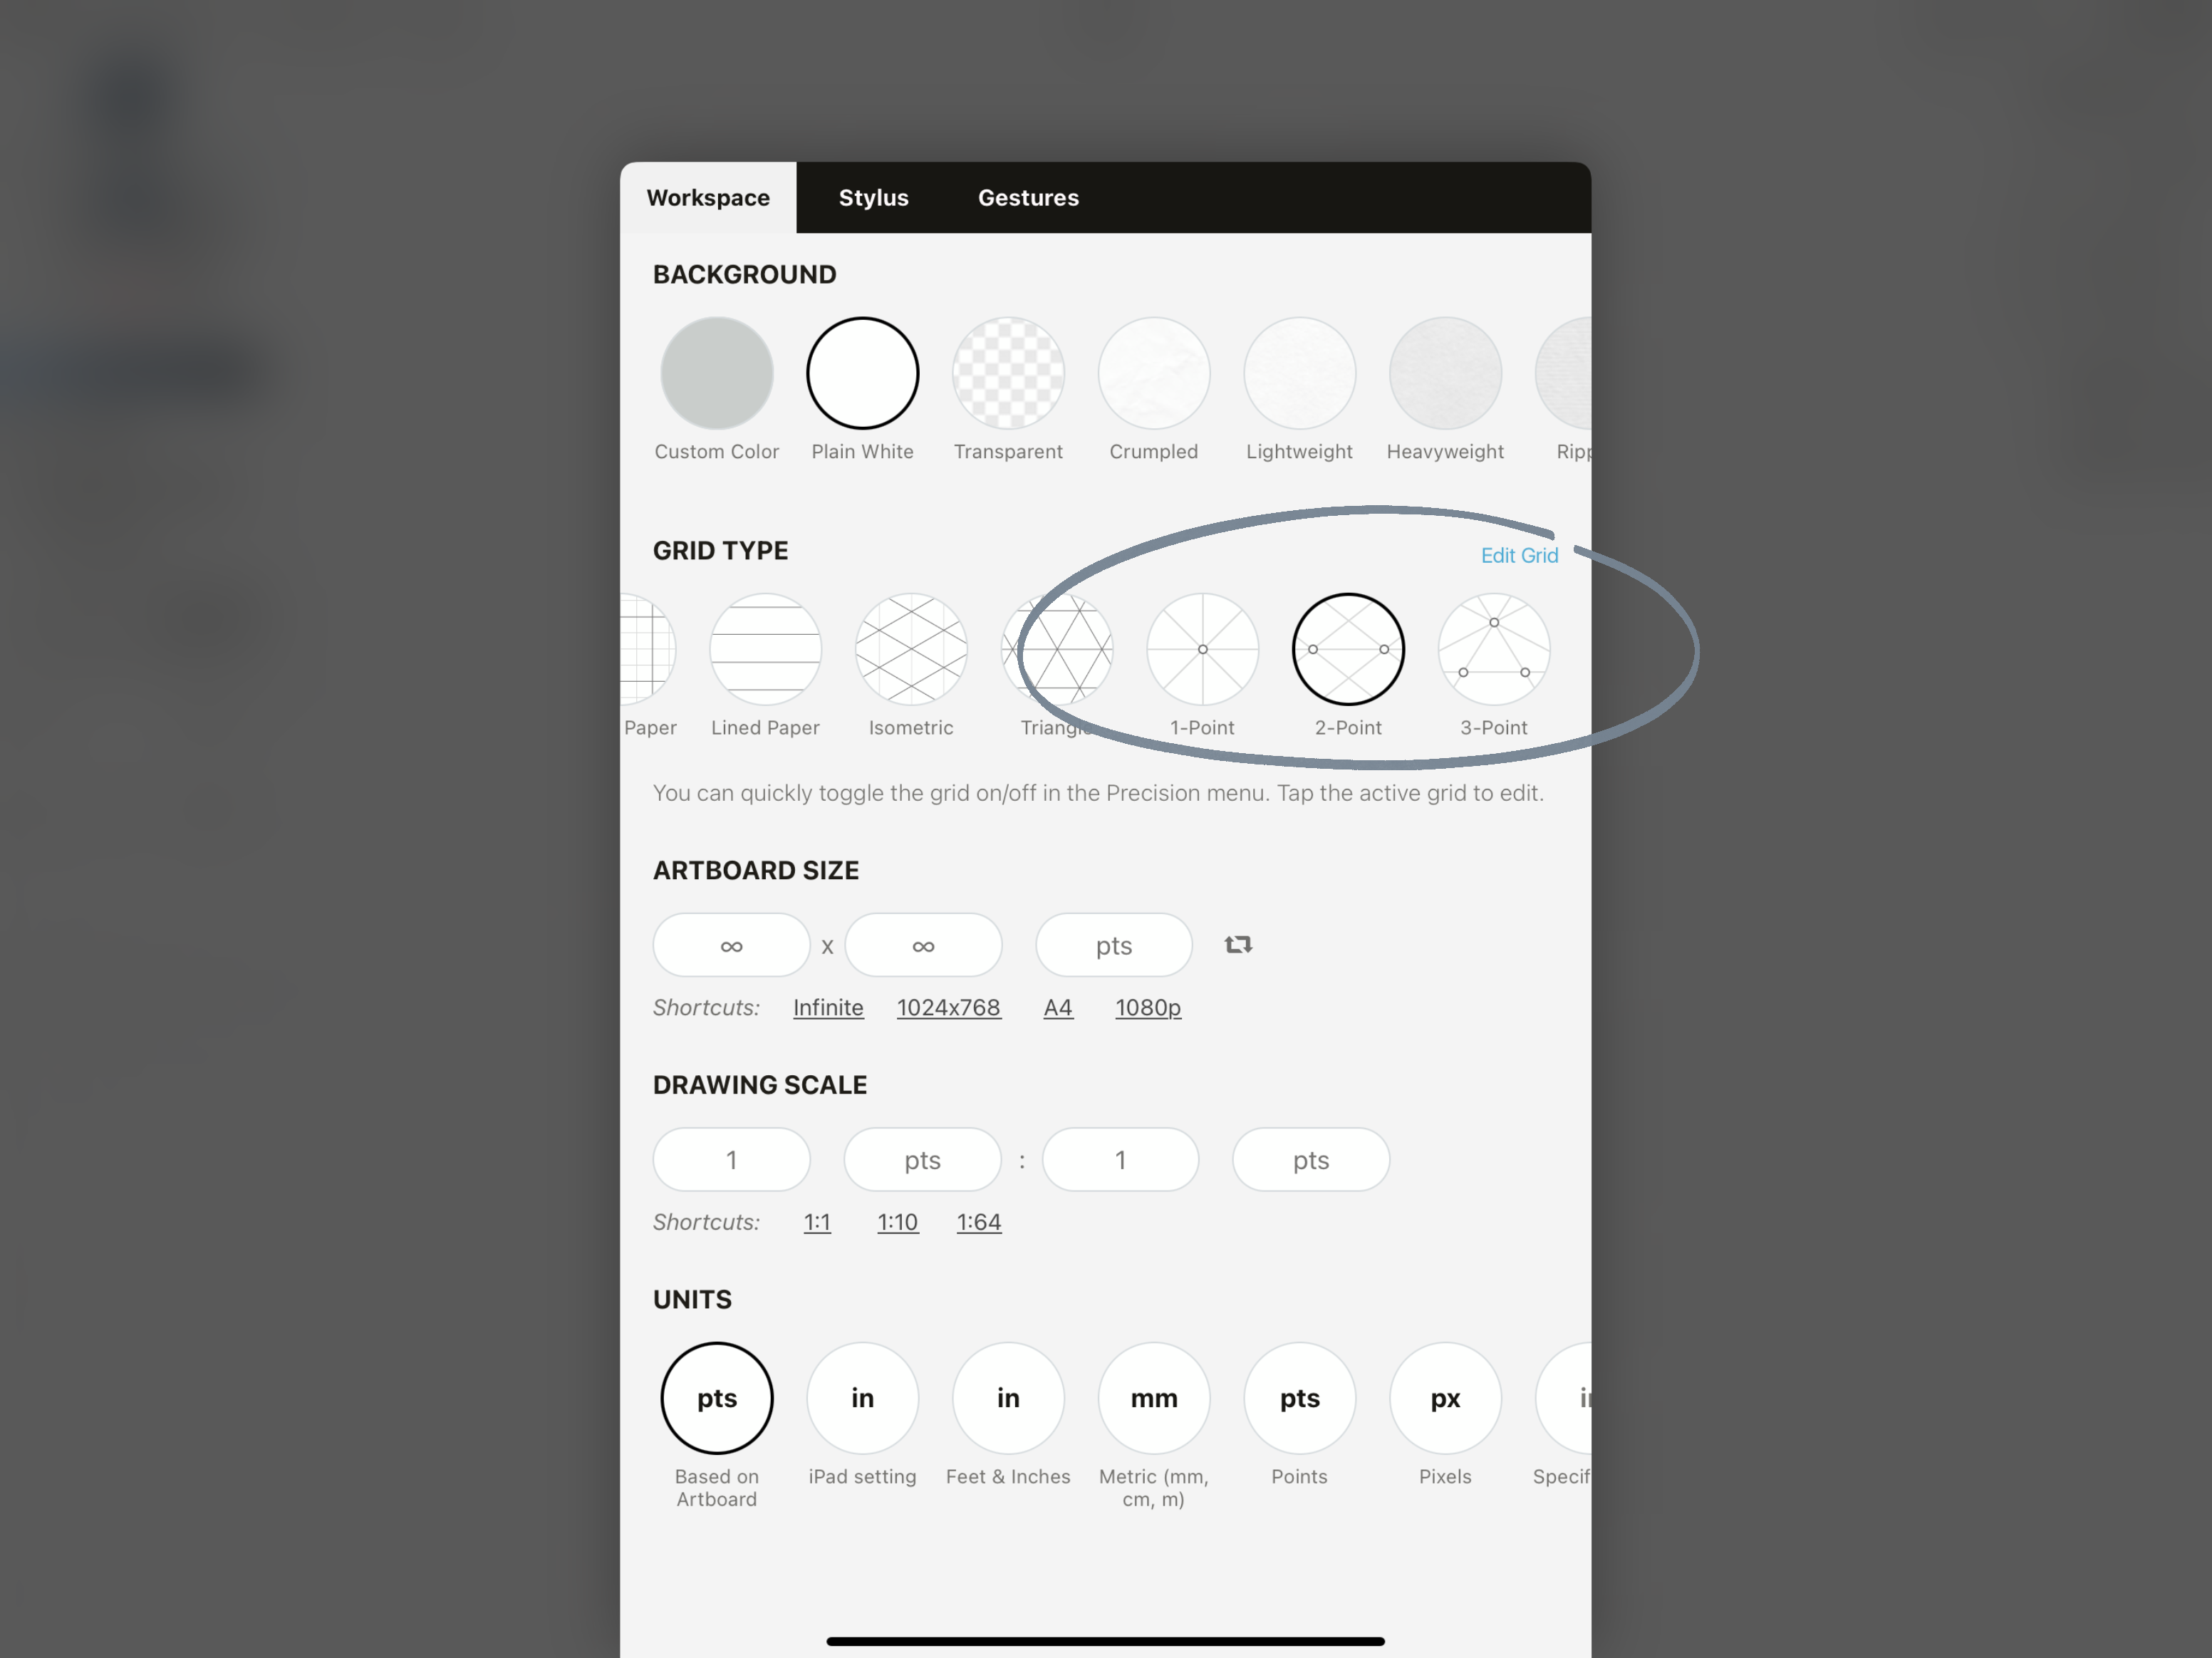
2. Find the Grids menu and scroll through the grids. You'll spot 1-point, 2-point and 3-point perspective grids as options in the menu. (1-point is a free grid, 2- and 3-point come with the Pro Essentials or Everything purchases.)
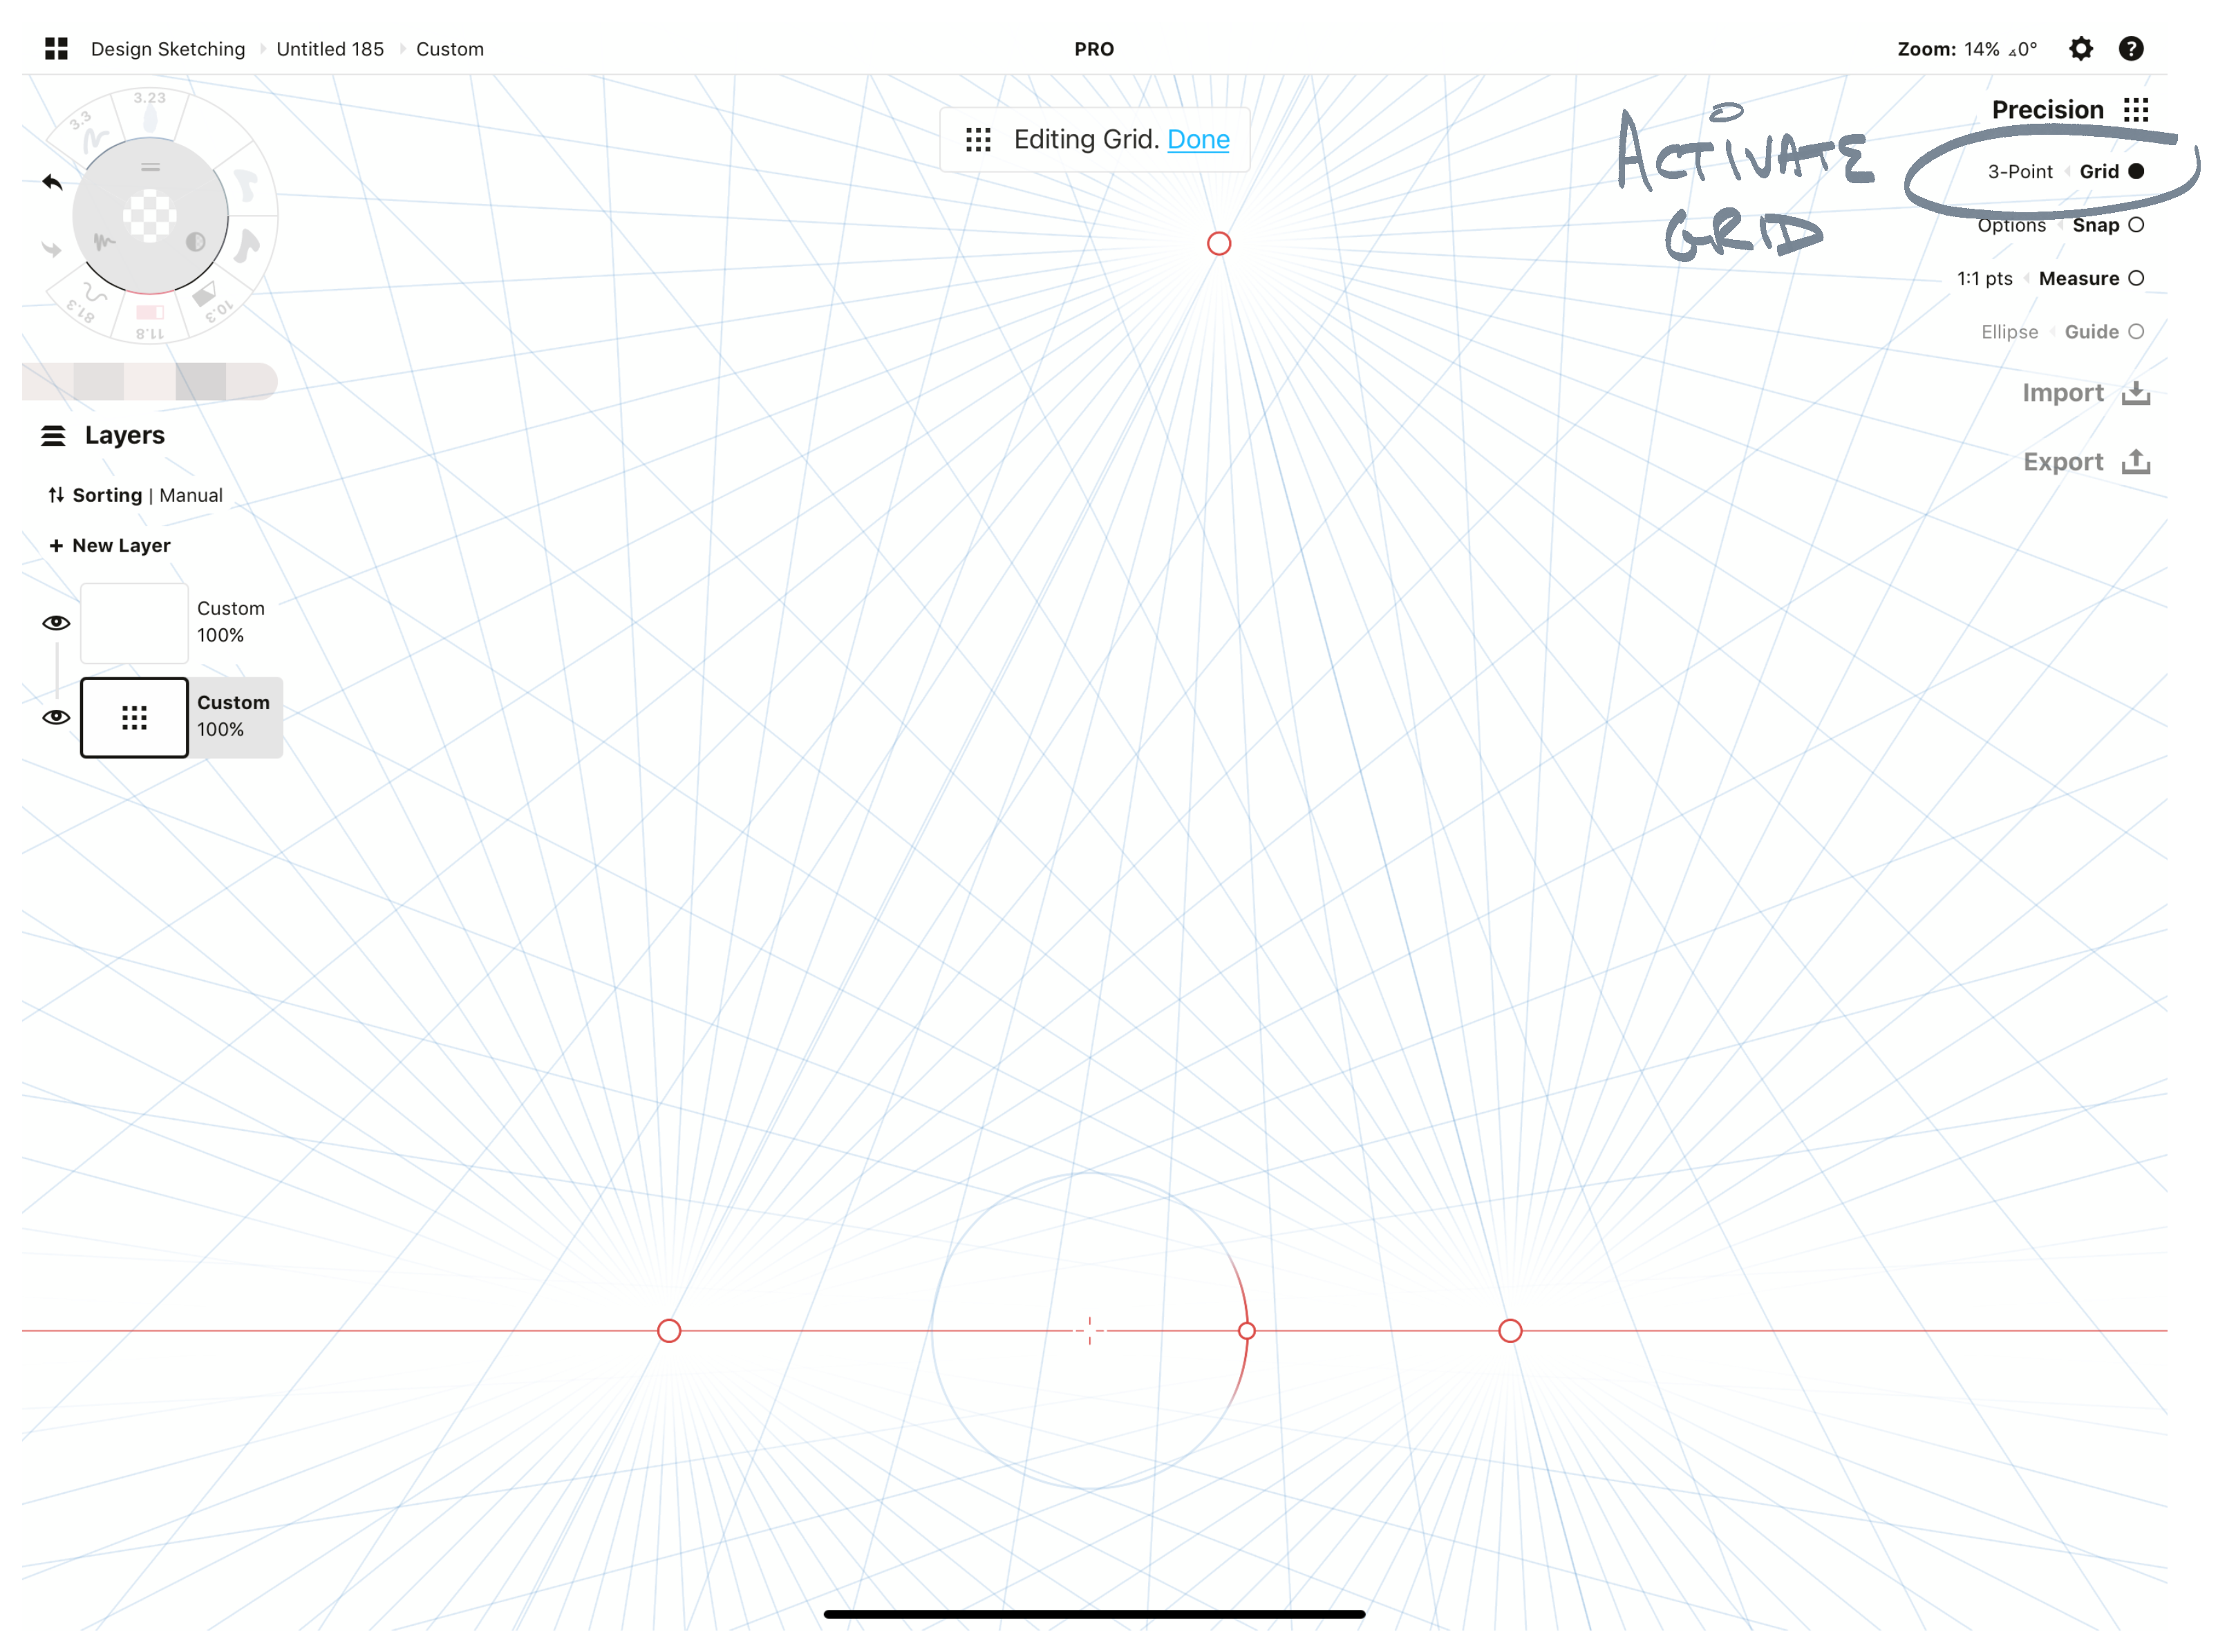
3. Tap the grid you'd like, and exit the menu. If the grid isn't showing on canvas, open the Precision menu and tap Grid active.
Adjusting your Grid on the Canvas
Once the grid is on the canvas, if you open the Layers menu, you'll see a specialized Grid layer. When this layer is active, you can adjust elements of the grid - placement and rotation of the grid, horizon line, and vanishing points.
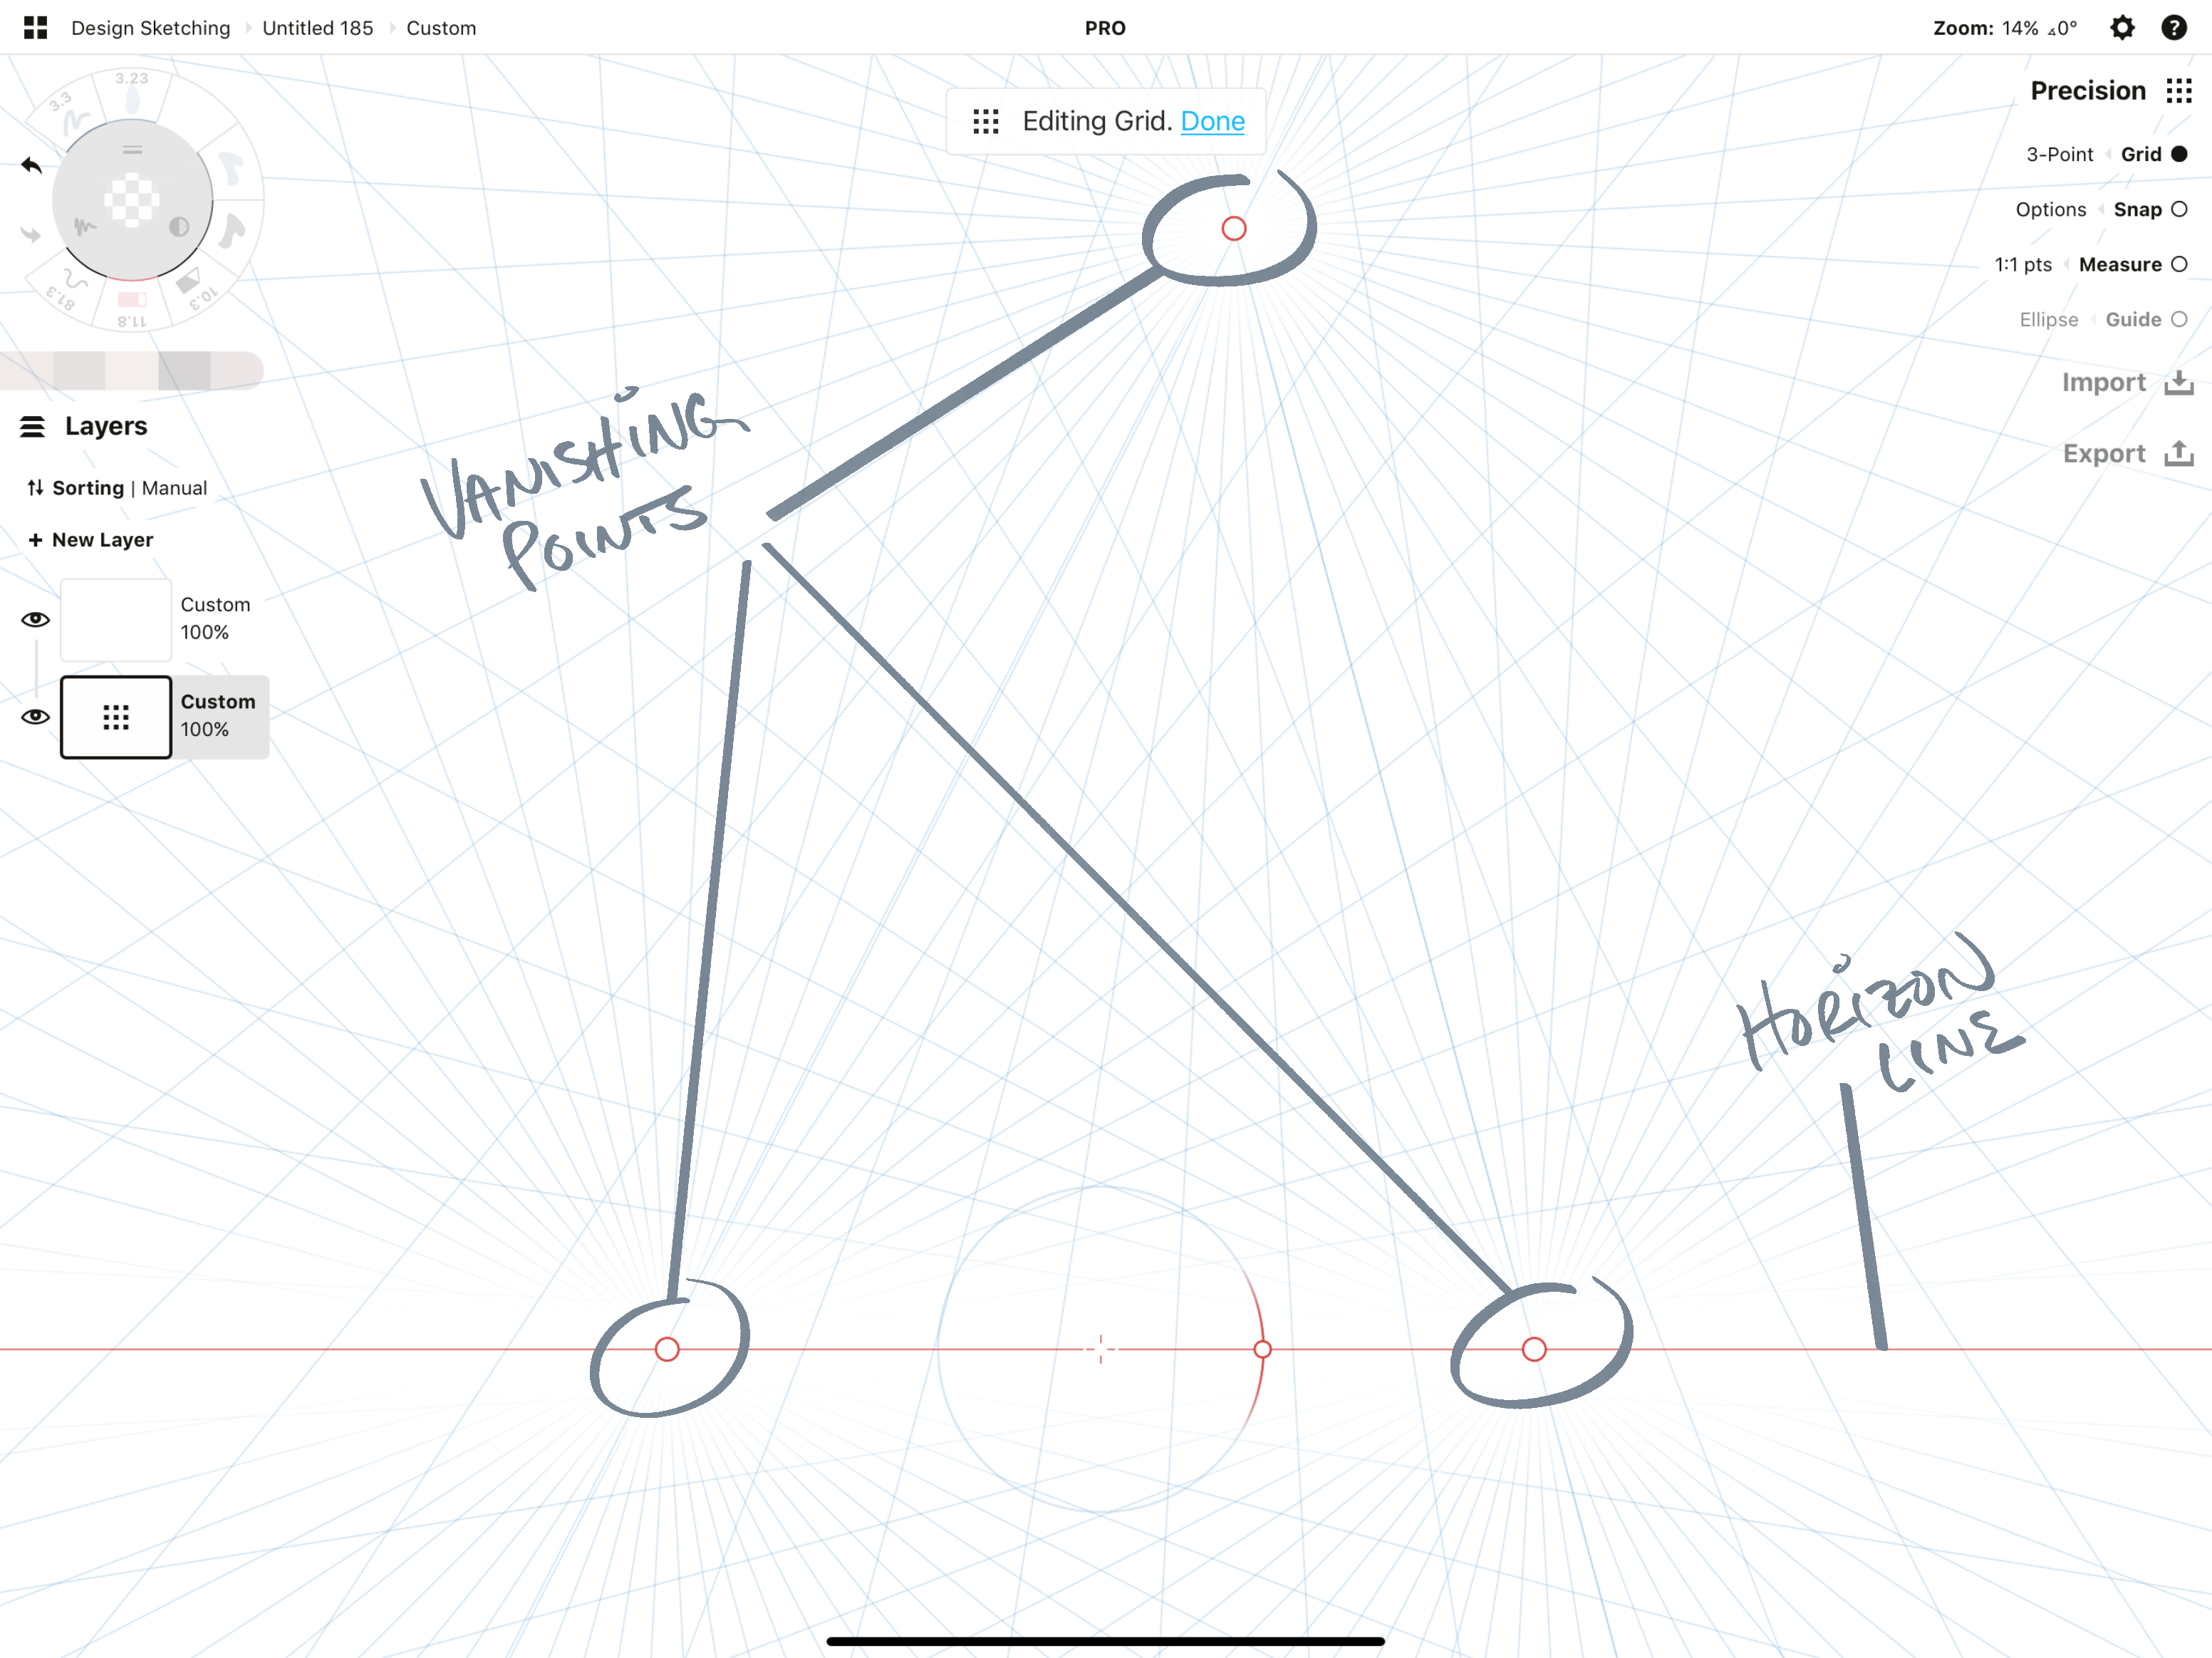
To adjust these grid elements to your project:
Tap+drag the horizon line to move it.
Tap+rotate the point on the rotation circle to rotate the horizon line and grid.
Tap+drag a vanishing point to move it. As a shortcut, you can also tap+hold+drag a vanishing point from any layer to revisit the Grid layer and adjust them.
Use two fingers on screen to rotate your entire grid at any time while you draw.
You can also tap+hold+drag the entire Grid layer and move it up and down the Layers menu, so you more easily see the grid over your sketches and photos.
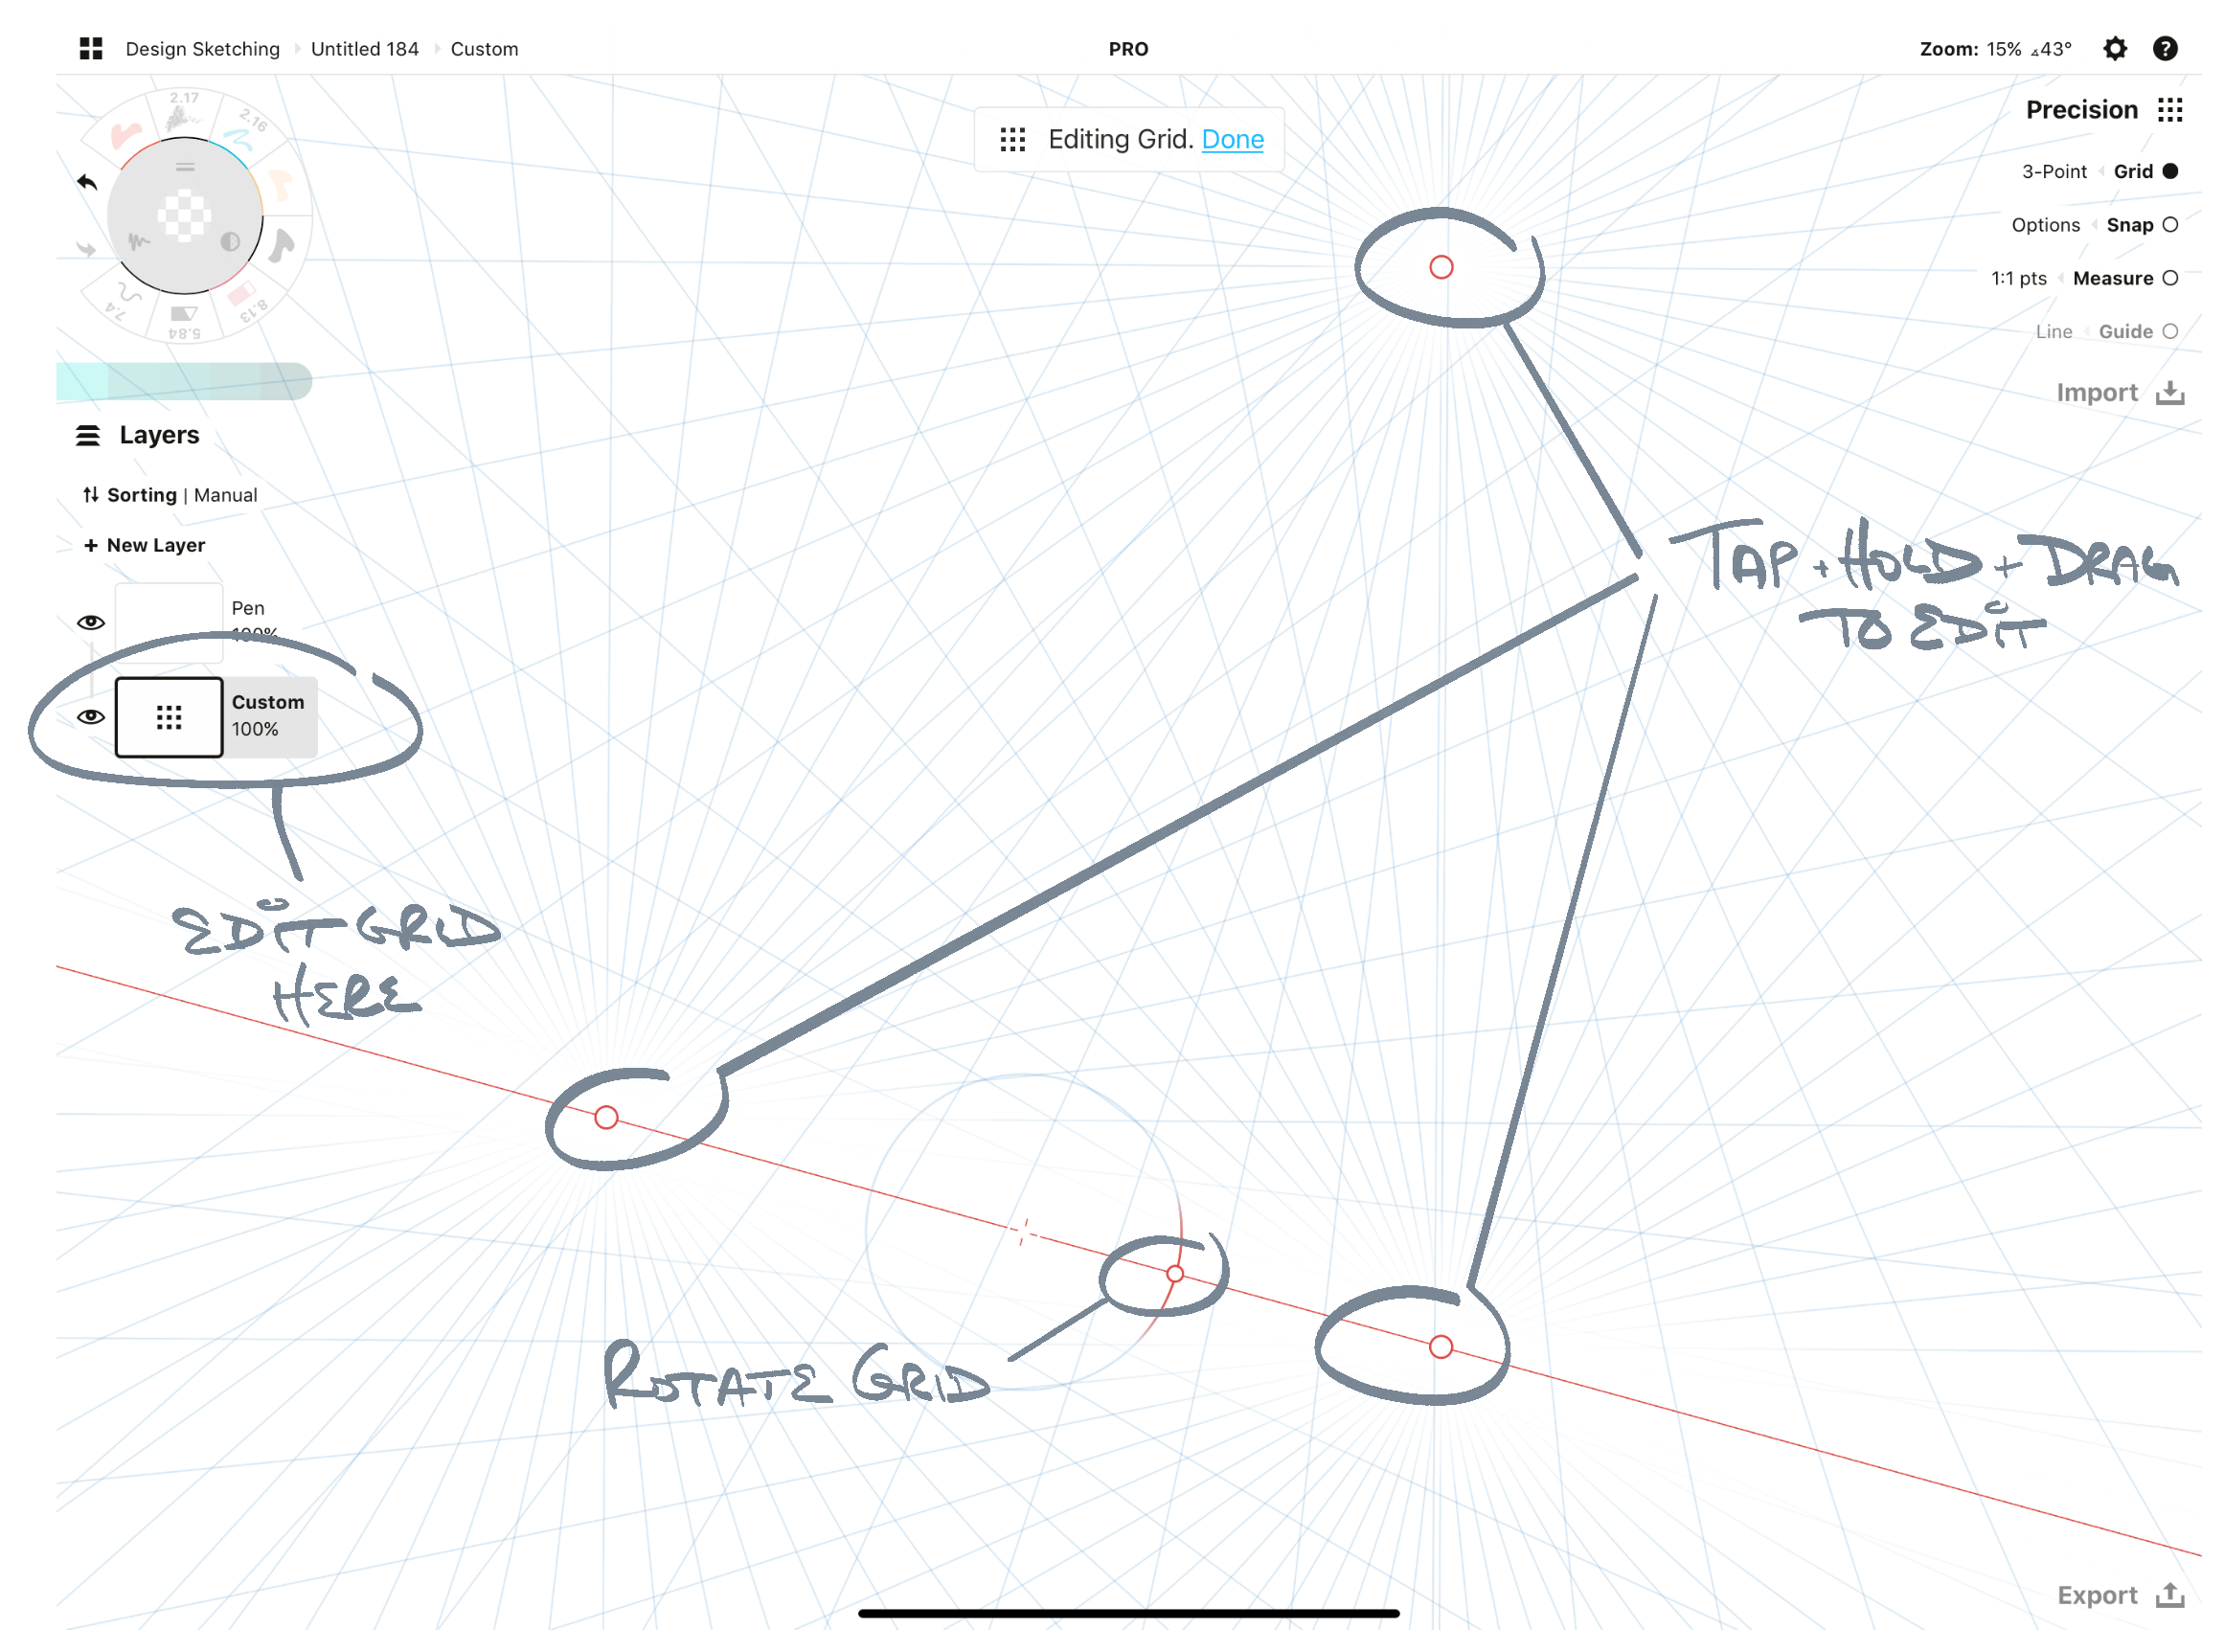
Tap the Grid layer or tap+hold any vanishing point to adjust them.
Grid Presets
If you have an idea in mind but aren't sure how to set up the grids to match, or if you want a quick set up without much effort, think about trying out the Grid Presets. These presets set up your horizon line and vanishing points for you.
You'll find these presets in the Edit Grid menu. Tap Settings > choose your grid > tap Edit Grid > choose a preset. Exit the menu and use the grid guides (as explained below in Drawing with the Grid) to sketch in your object.
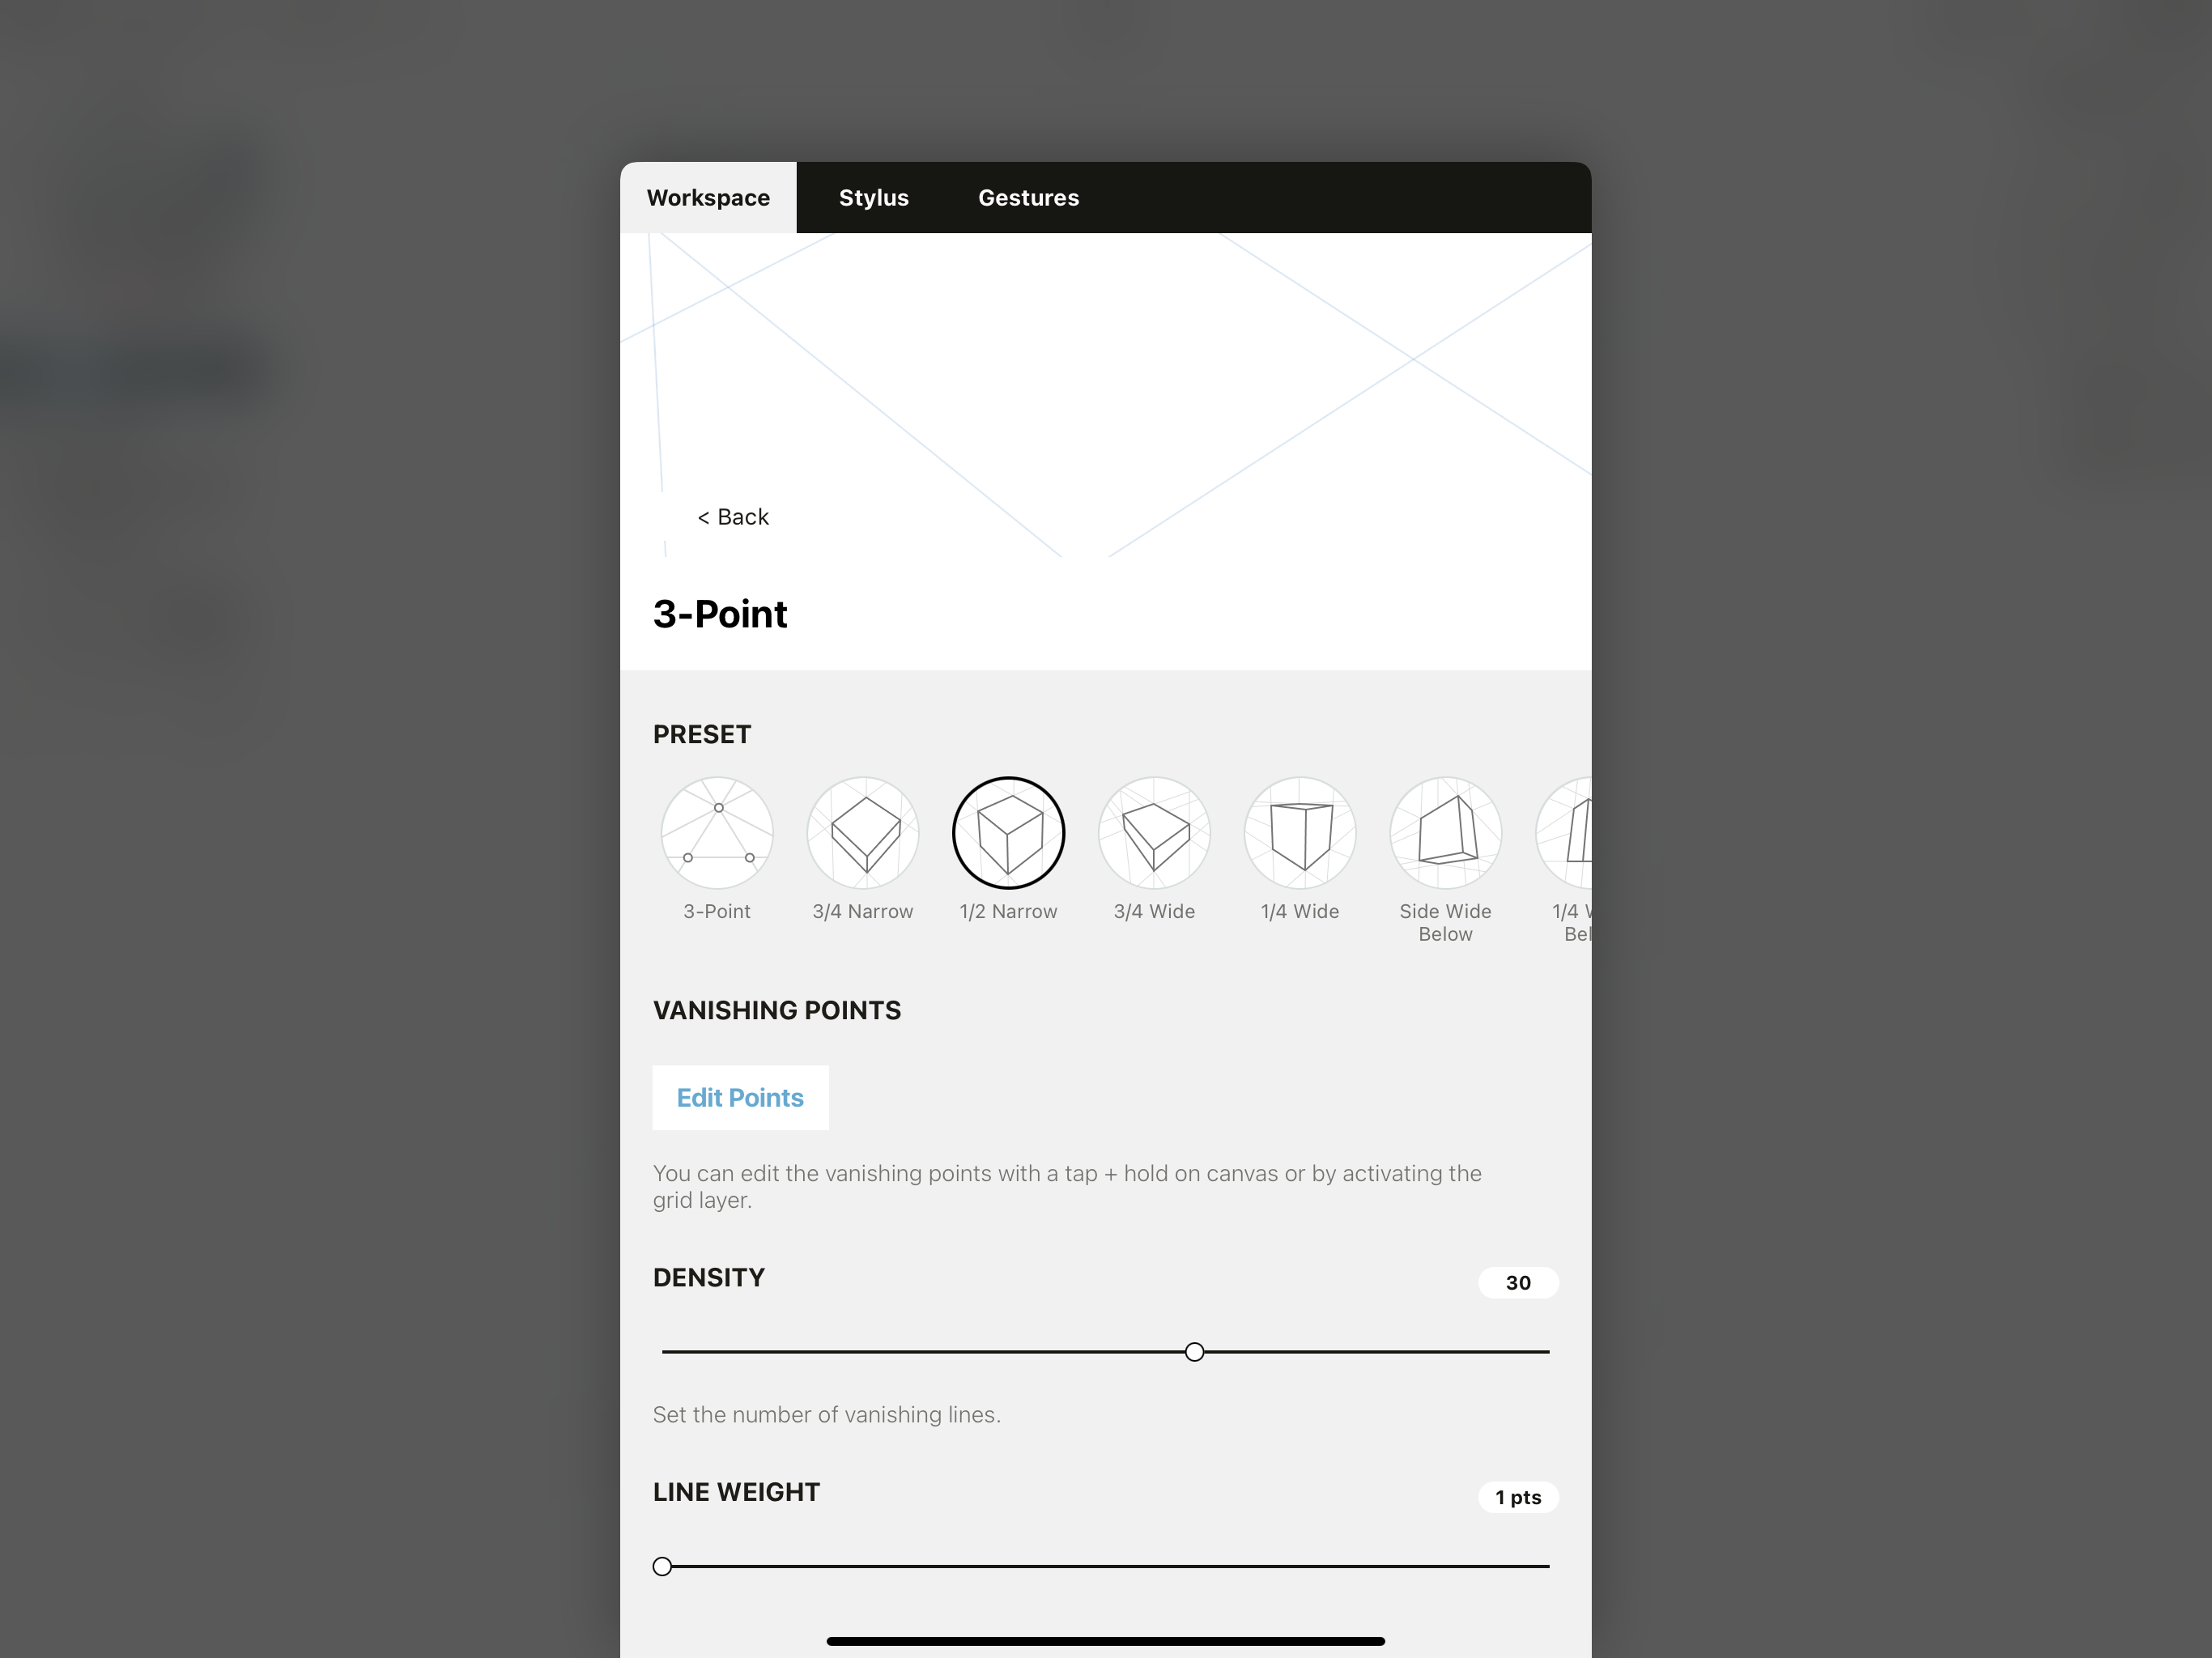
Customizing Your Grid
You can customize your perspective grid appearance in the Grid Editor. In the Settings menu, select your grid, then tap it again or tap Edit Grid in the right corner of the menu.
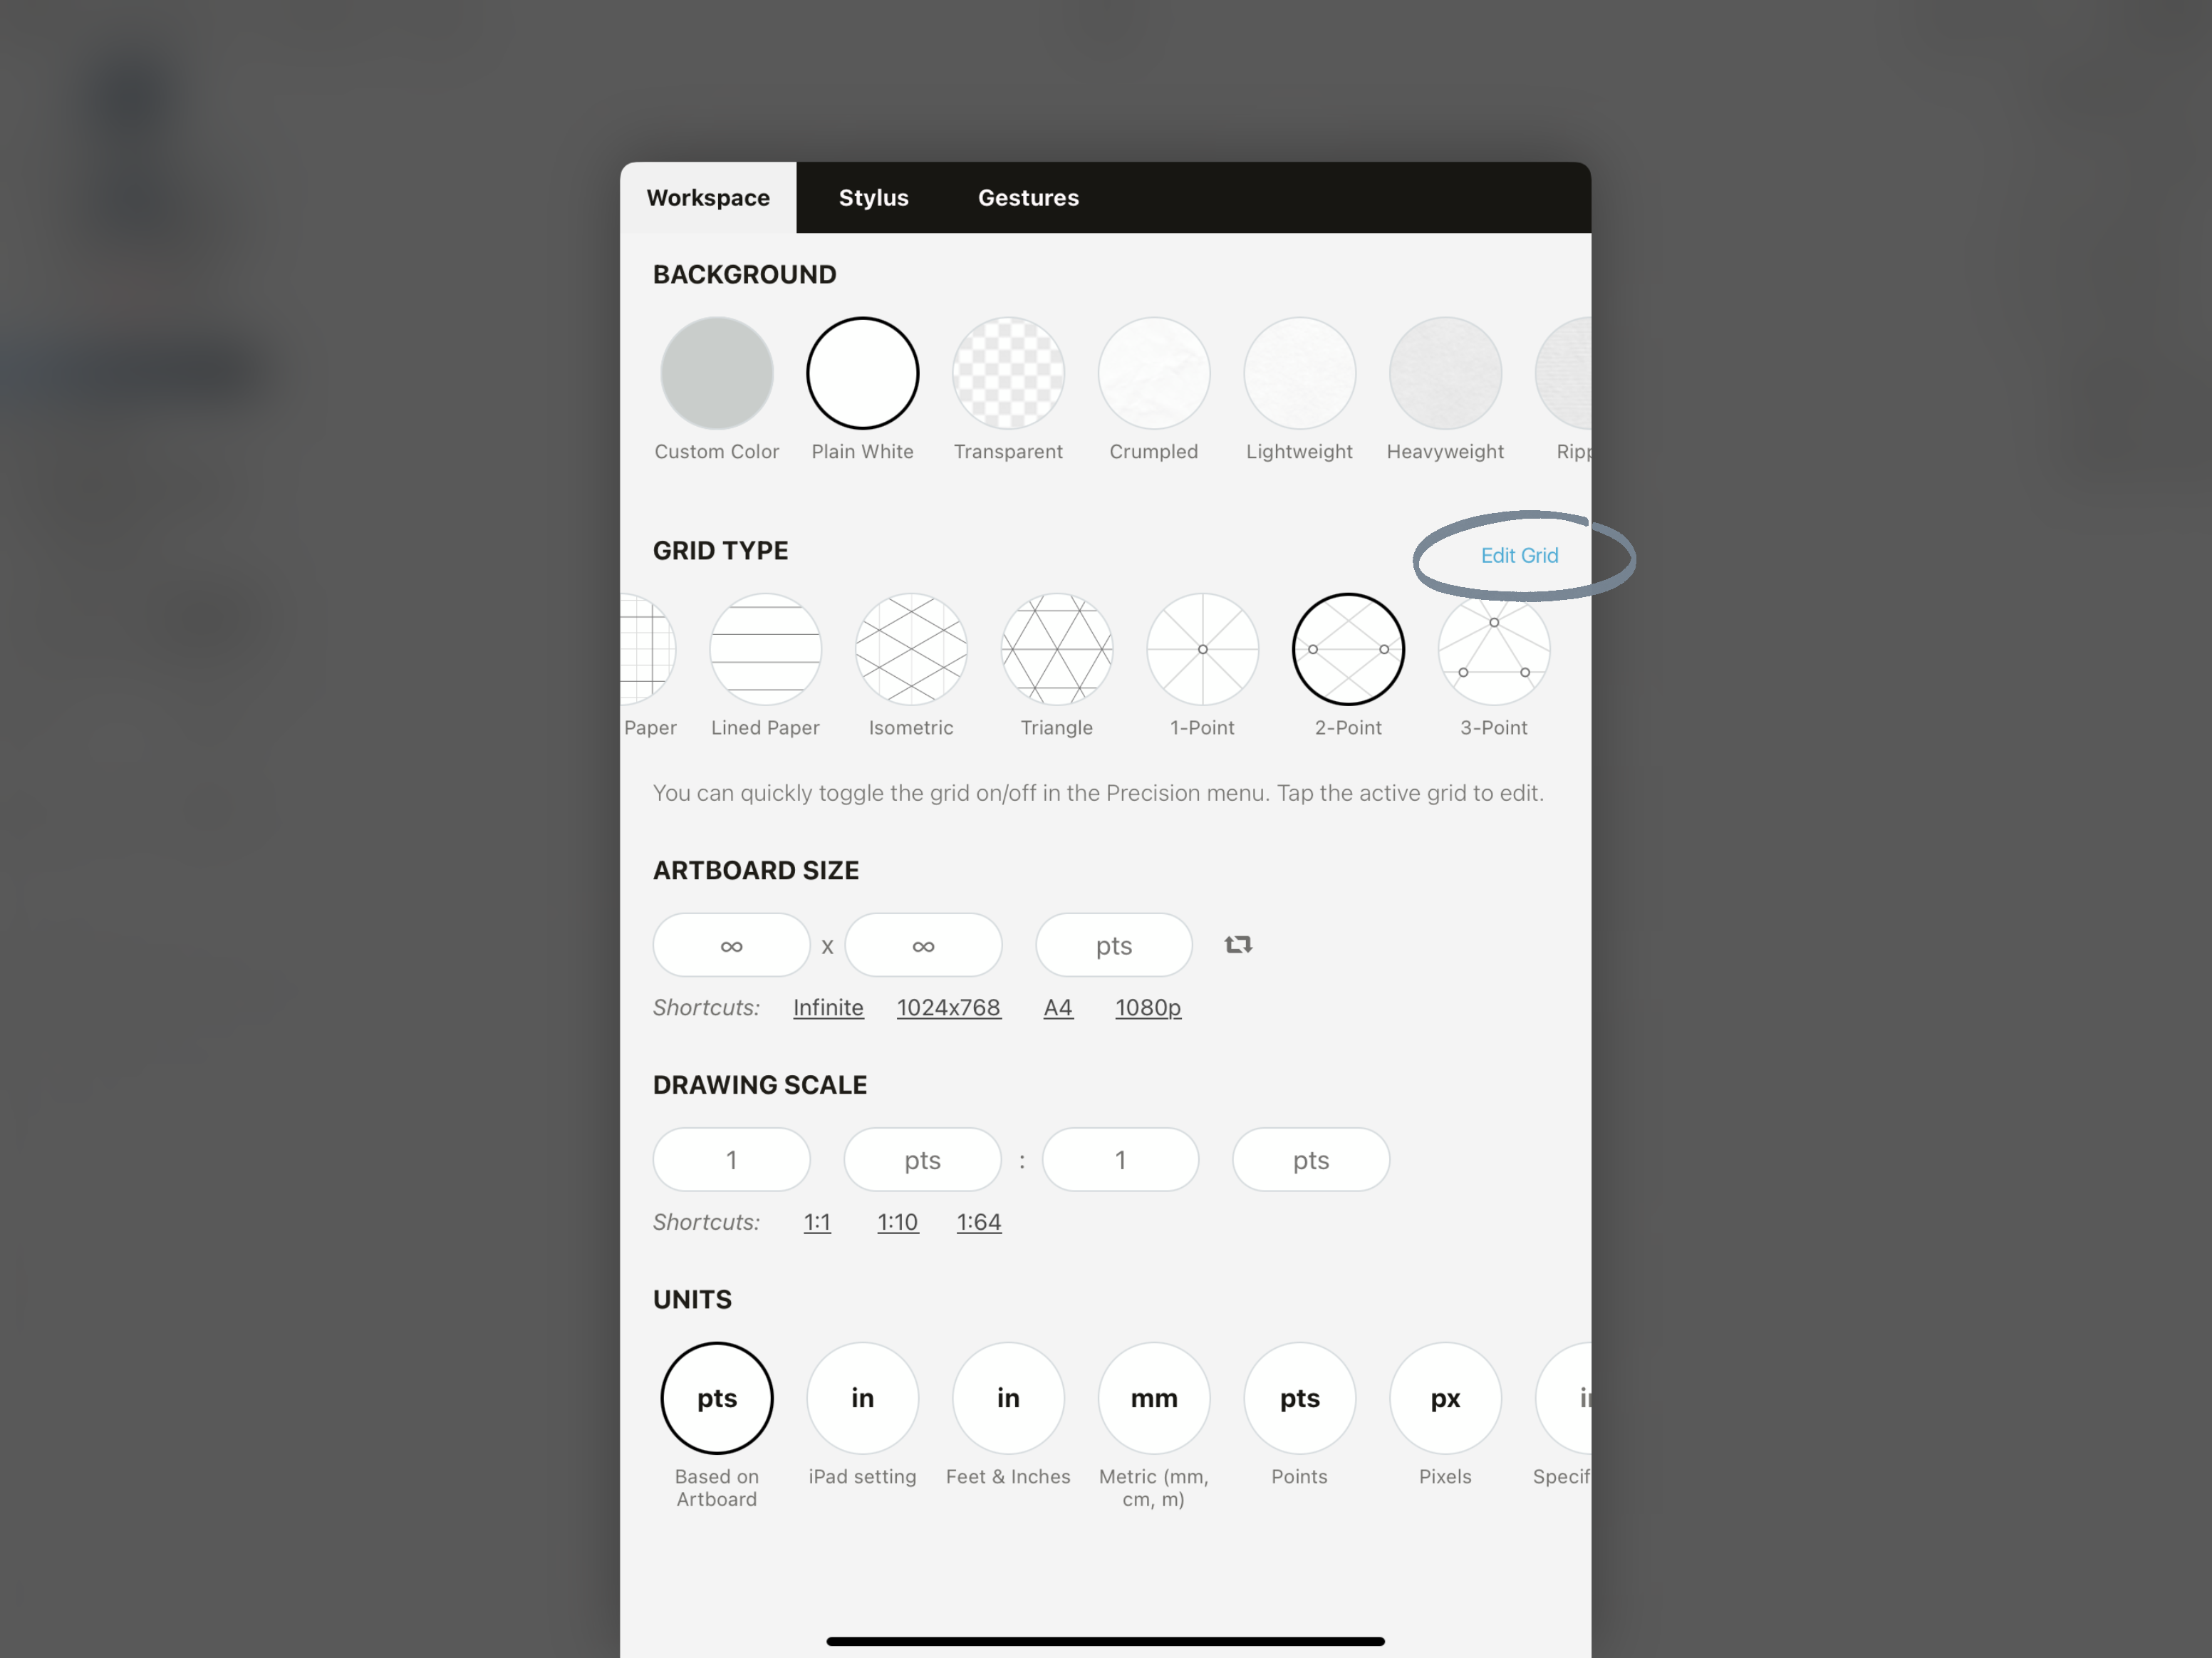
Here in the Grid Editor, you can adjust the density of grid lines, their line weight, color, opacity and orientation. This is also where you opt to isolate the grid to your artboard if you're using one.
Density + Line Weight
Adjust the density (or number of lines appearing on canvas) and line weight with their respective sliders, or tap+hold the value fields to enter a number.
Color + Opacity
The automatic color option will darken or lighten your grid color according to your background options.
The custom color does not auto-adjust, but you can change it to complement your project. To set a custom color, tap the Custom option (this selects your previous custom color), then tap it a second time to open the color wheel and make your selection.
With the custom color option, you can also adjust the opacity of the grid lines using the slider that appears beneath the color options.
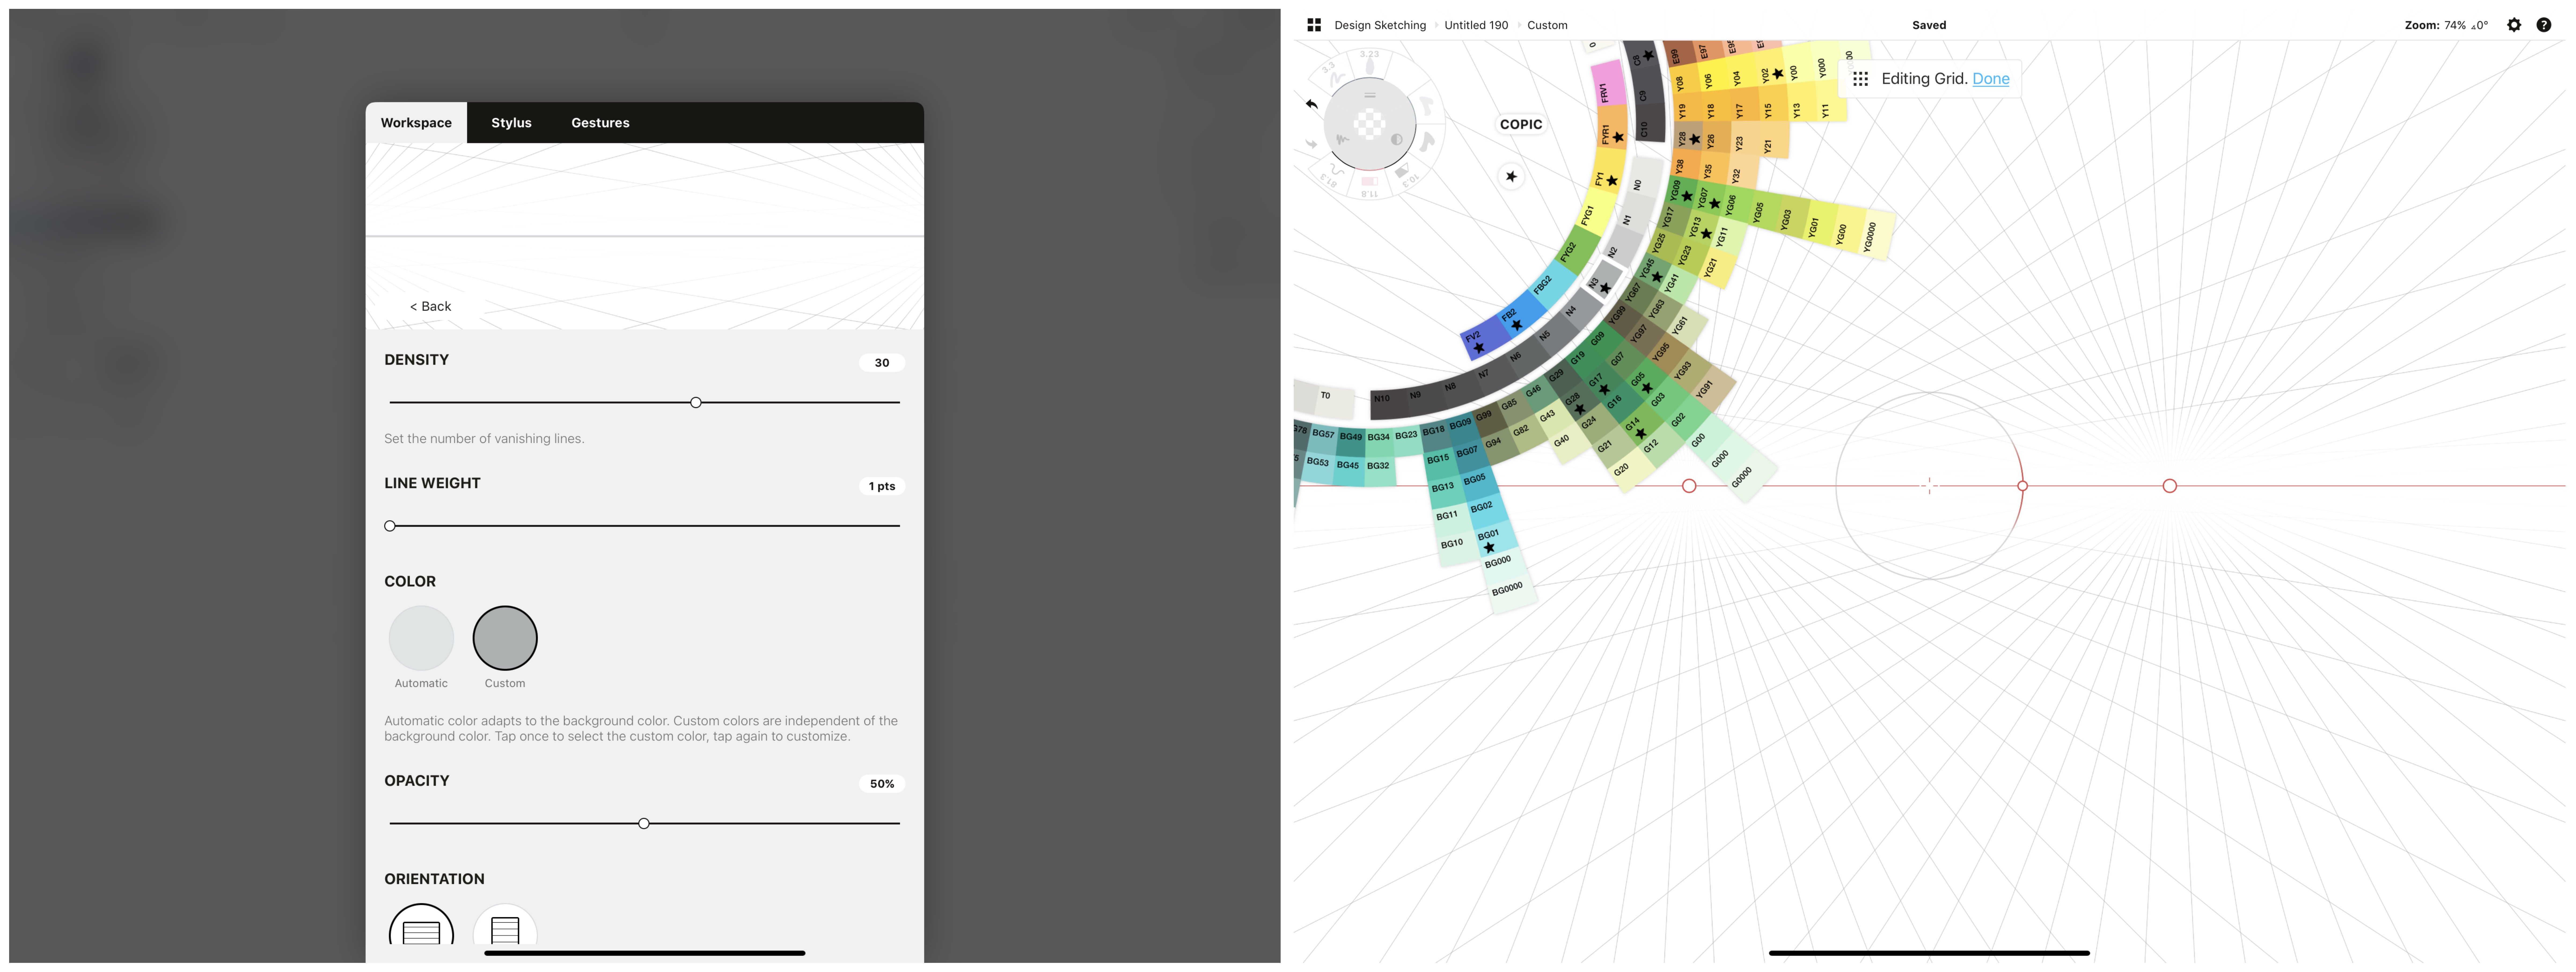
Orientation
Choose to auto-align your horizon line horizontally or vertically on the canvas with these options. You can also use the angle rotation point on the horizon line to rotate your grid to any angle, or use two fingers to rotate your entire canvas.
Confine Grid to Artboard
You also have the option to confine your grid to show only within an active artboard. This lets you focus in on your drawing composition, while keeping an open space to sketch drawing elements beside the artboard.
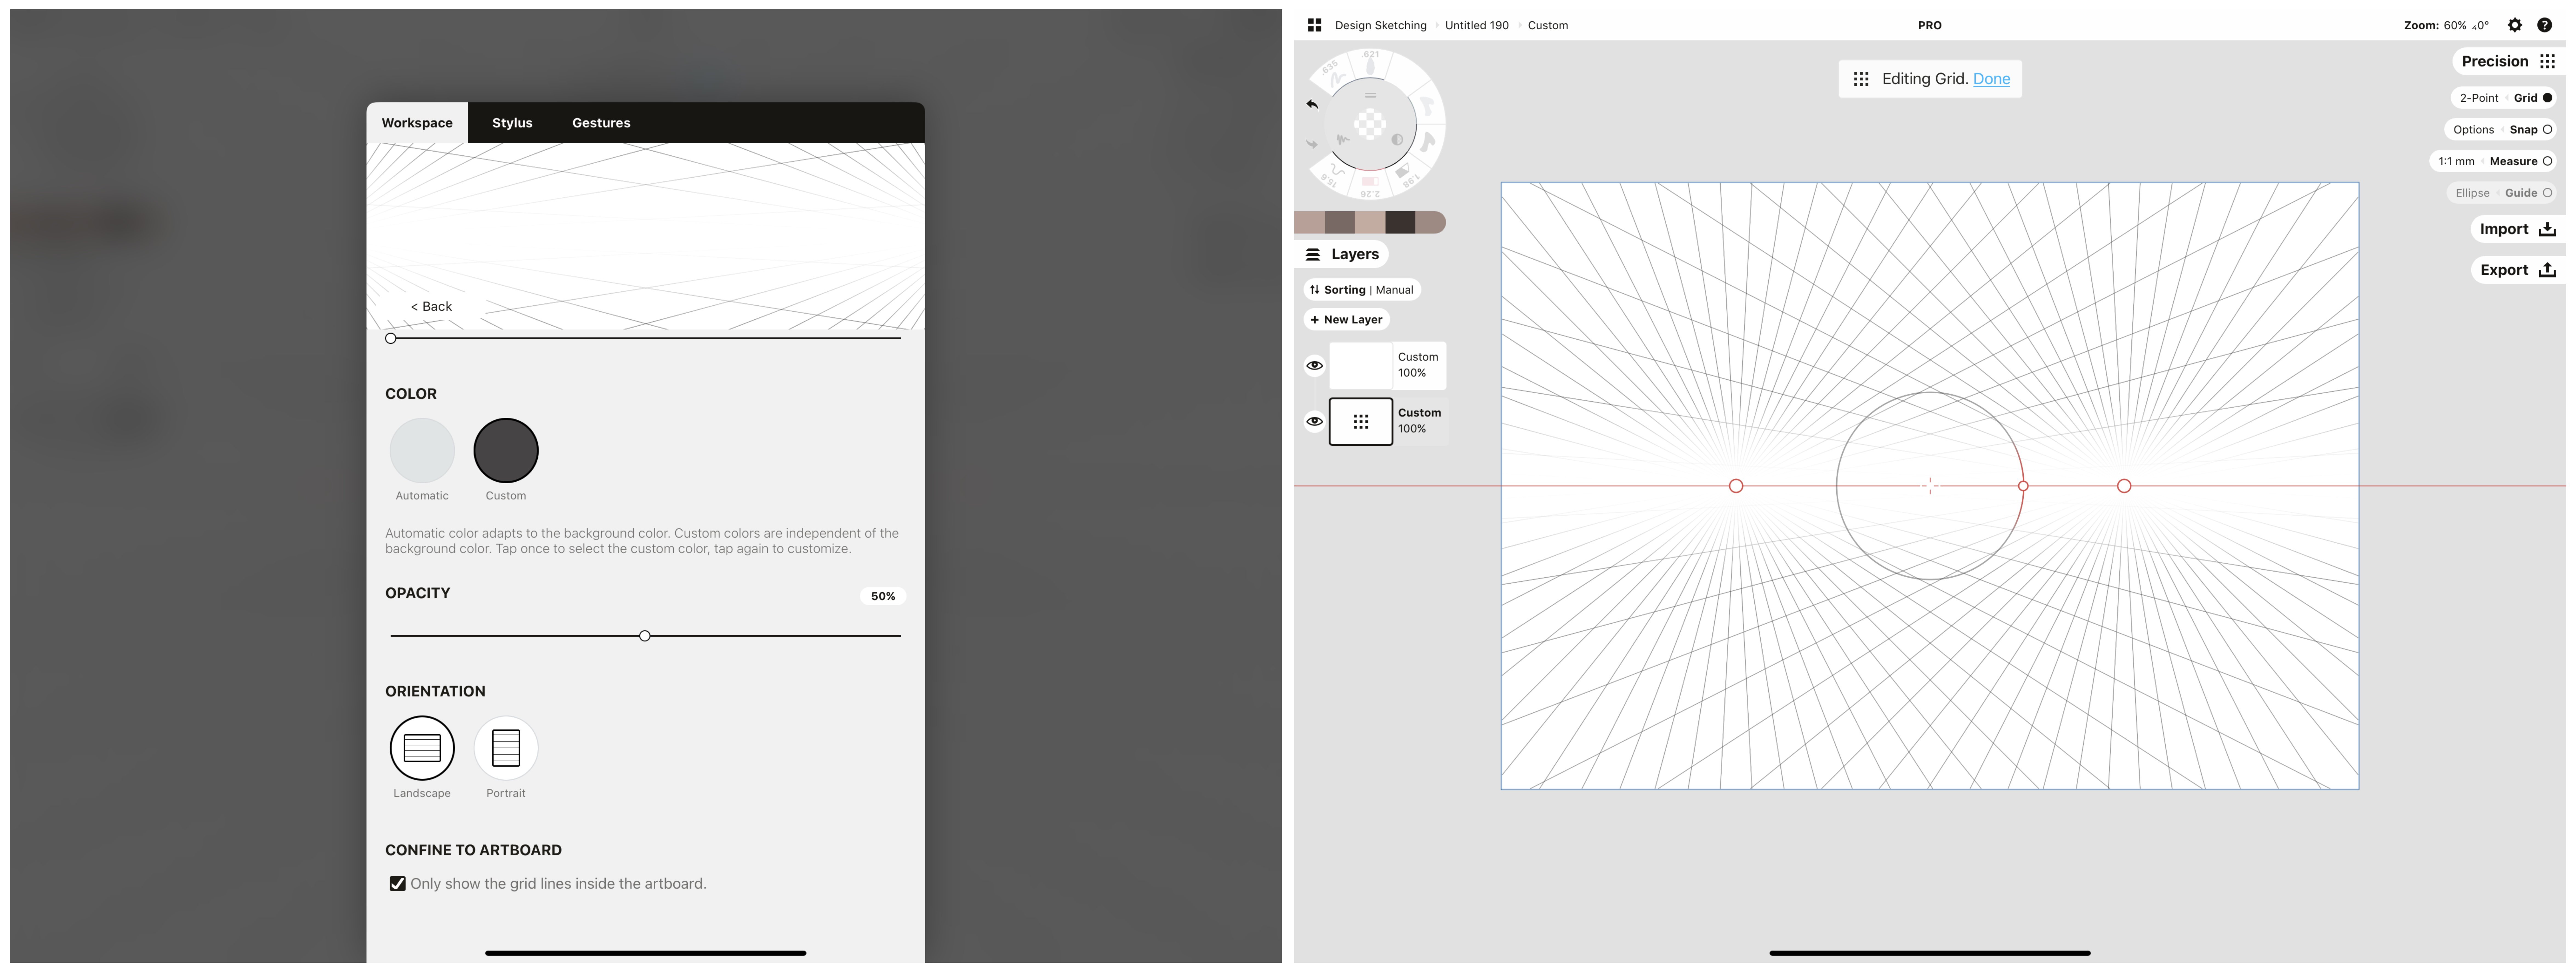
Note that you have these options for editing any of Concepts' grid types - read our grid editing tutorial here.
Drawing with the Grid
Concepts' grids are meant to be flexible reference tools to help you sketch structural drawings more easily. Each of the perspective grids (and the other grid types as well) have their own set of constraints you can draw with, as well, using the Align to Grid drawing assistance option. Here are a few tools and customization options for drawing with the grids.
100% Line Smoothing
With 100% line smoothing, you can draw instant straight lines with your tool. This option lets you flexibly sketch lines on the grid without directional constraints. Tap the Smoothing option on the inner ring of the tool wheel and apply maximum smoothing to your brush to enable straight lines.
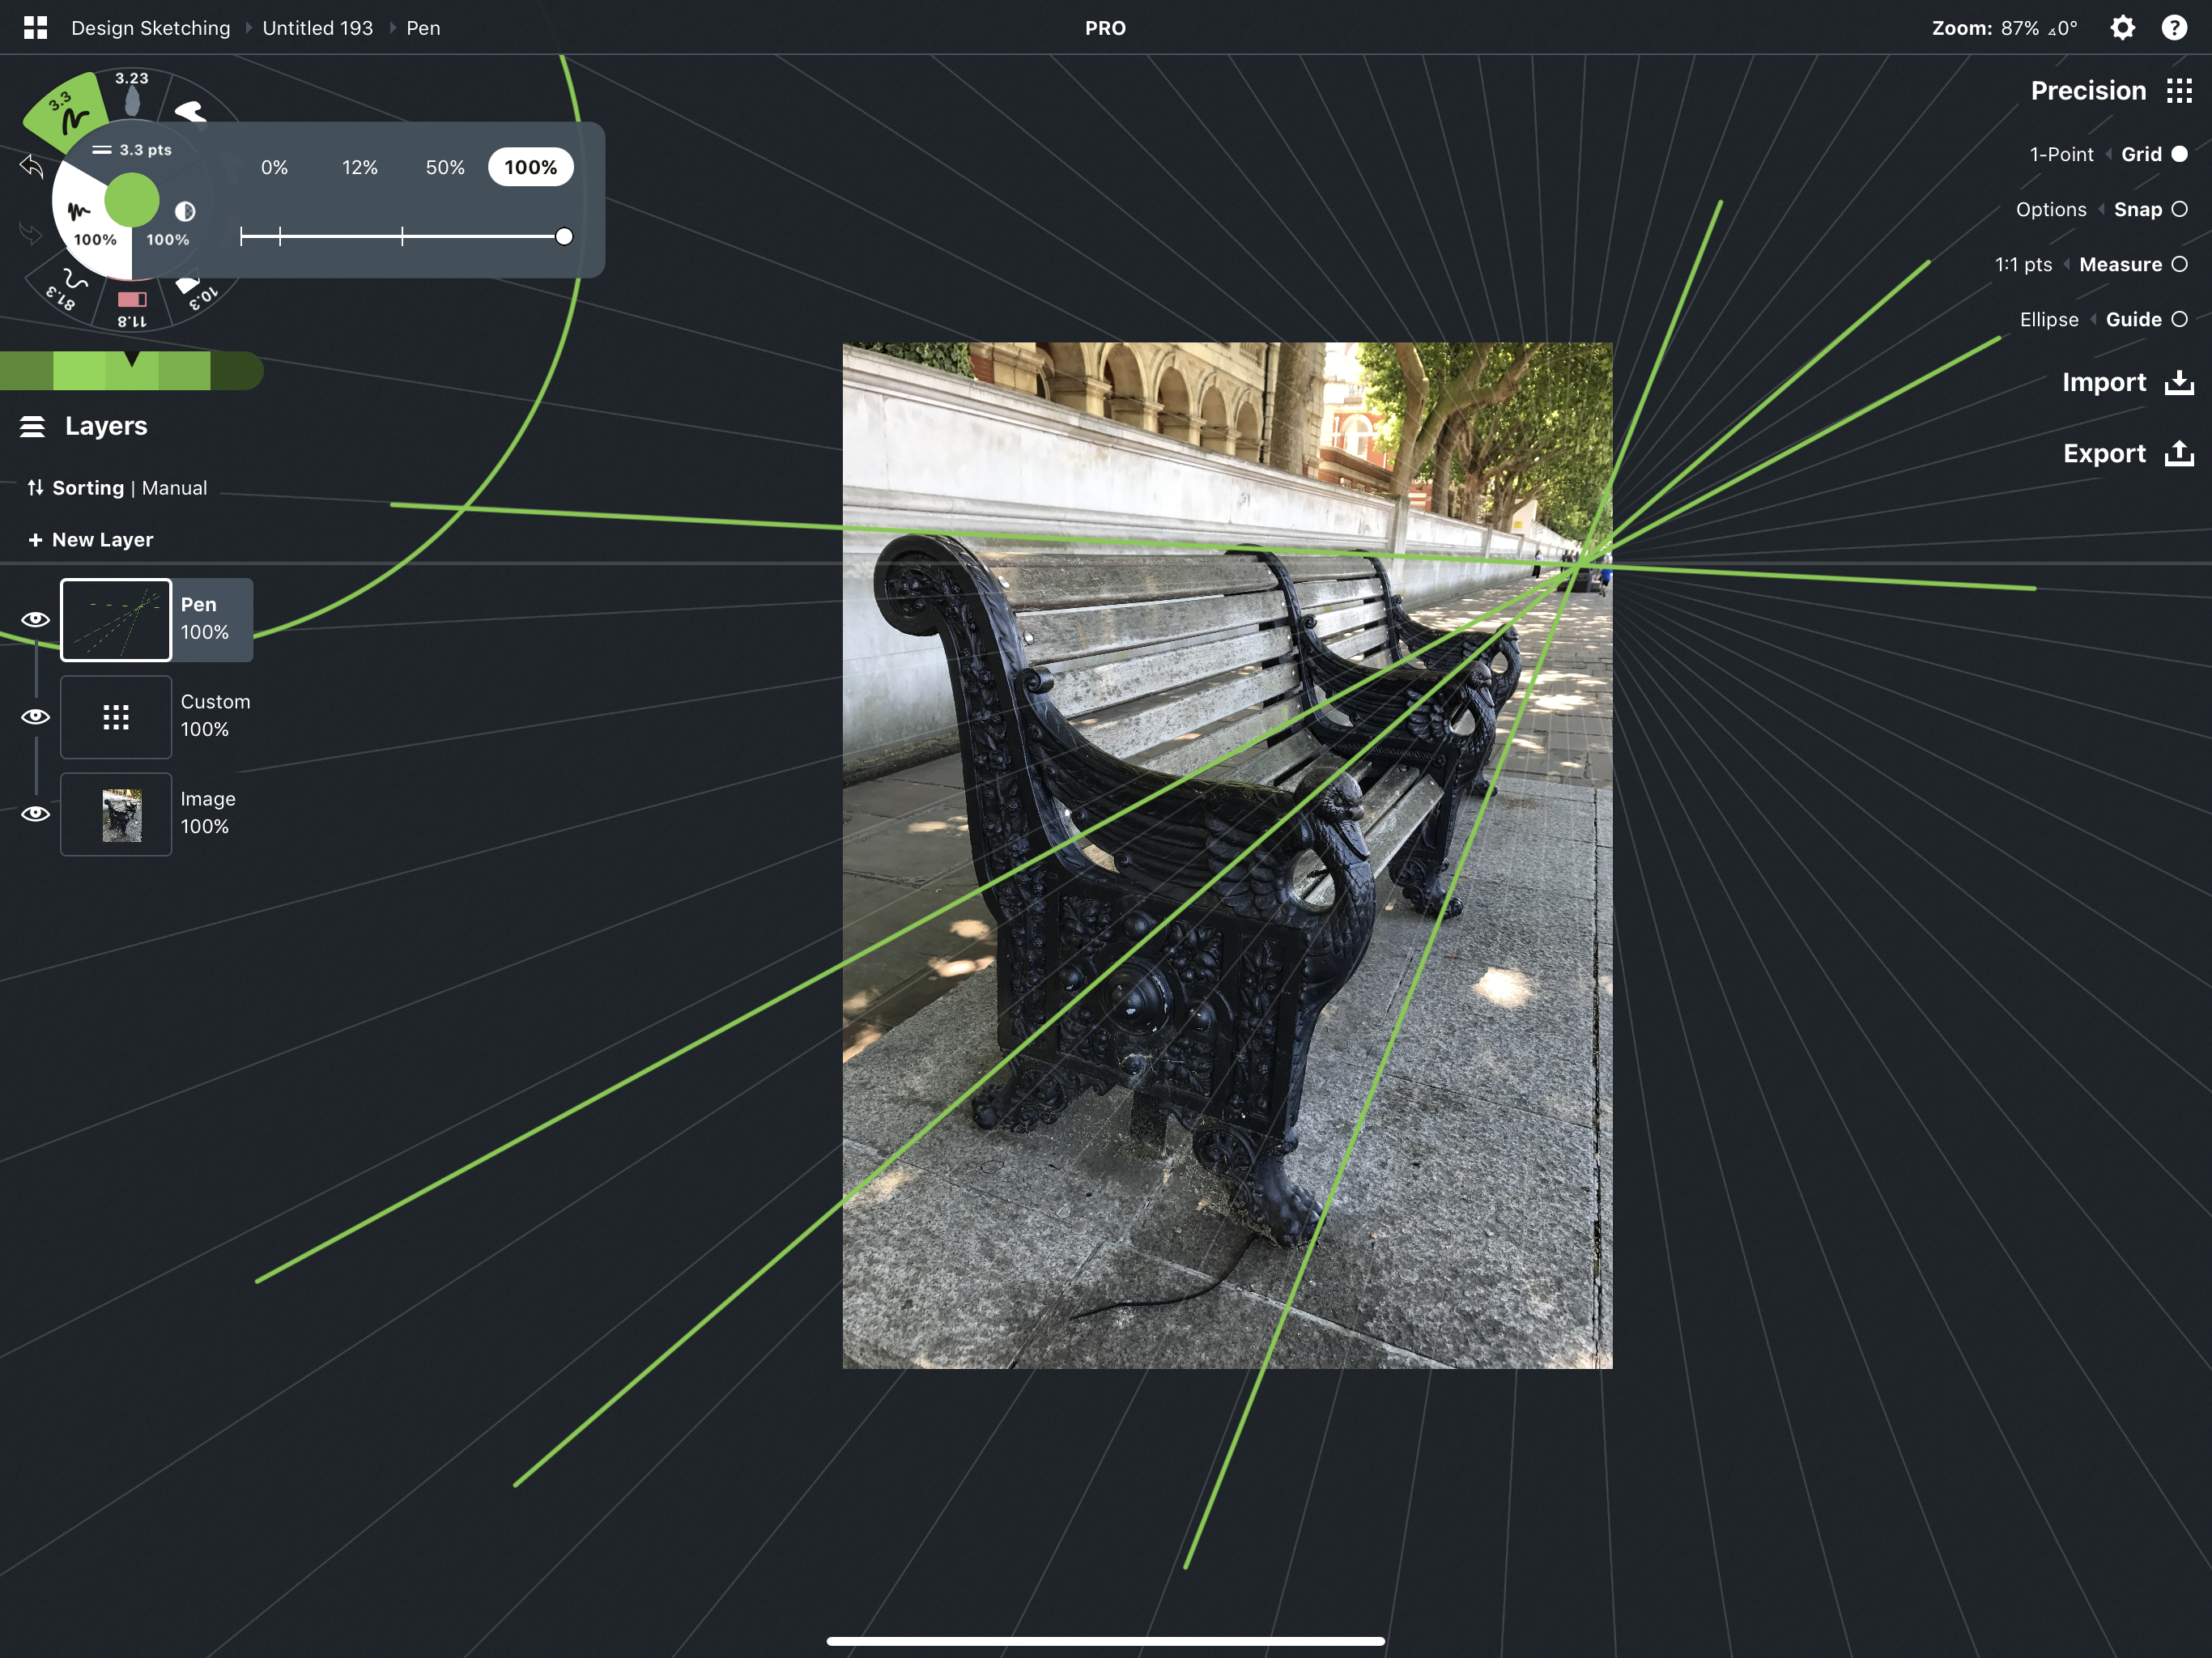
Align to Grid
Align and Snap are Concepts' grid drawing guides. When they are active, you can draw only in the directions constrained by the grid type (for example, a graph paper grid lets you draw only horizontal and vertical lines). You can flexibly Align your drawing with these directions, or you can Snap directly to the grid itself. With the perspective grids, Align is the only option - you'll find you can smoothly draw either on the grid or beside it as you need.
Drawing with Align active lets you draw very quick structures true to perspective.
- 1-point perspective lets you draw horizontal and vertical lines, and lines heading toward the vanishing point.
- 2-point perspective allows vertical lines (or perpendicular to the horizon line), and perspective lines heading toward the vanishing points.
- 3-point perspective lets you draw only according to the perspective lines on the grid.
You can learn more about why these grids work the way they do in our sketching tutorial here.
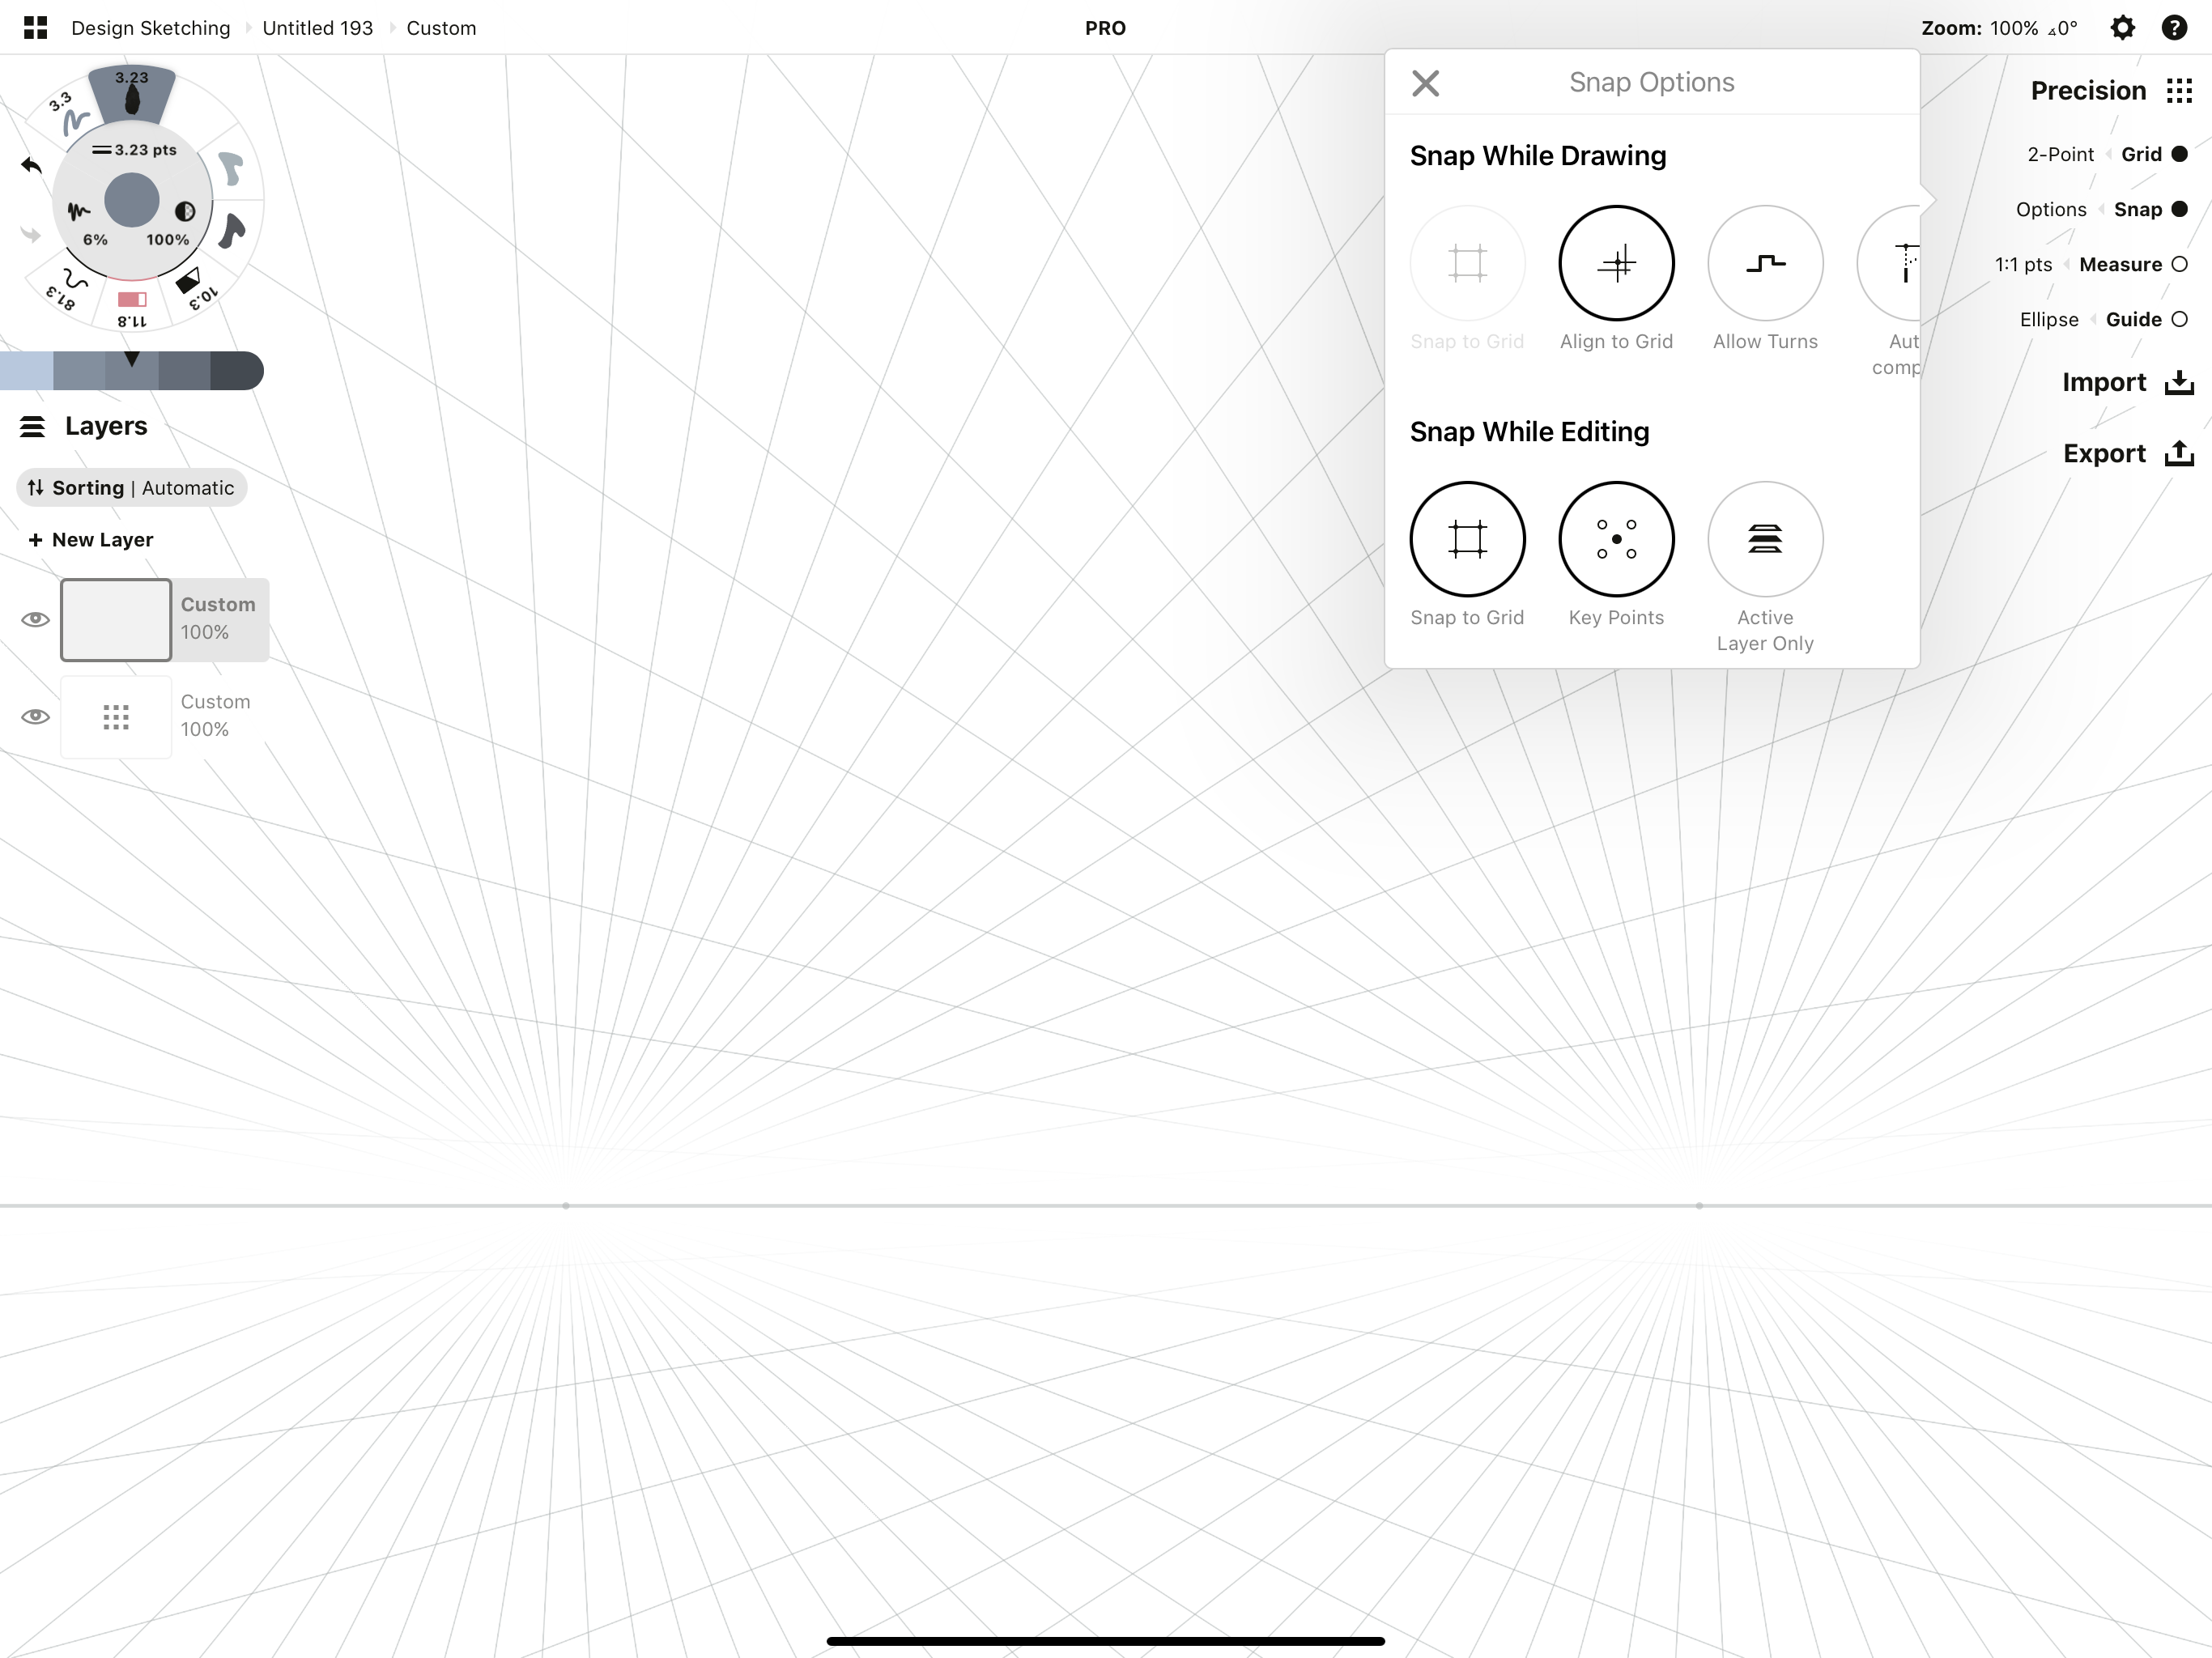
You have a few drawing customization options for working with Align. Open the Precision menu and tap the Snap options. A menu will open with two sections: Snap While Drawing and Snap While Editing (e.g. while you have a Selection active). Just tap an option to activate it. You can opt for any combination.
A few of these options are still only available on iOS, but they are on our Precision Tools roadmap for Windows and Android and will be coming shortly.
Snap While Drawing
- Align to Grid - Draw lines parallel in direction to lines on your current grid.
- Allow Turns - This allows you to turn while you draw, but only in the directions allowed by your current grid.
- Auto-Complete (iOS) - This option gives you options to snap your lines to nearby points you've drawn.
- Active Layer Only (iOS) - This lets you Snap to strokes only on the currently active layer.
Snap While Editing (iOS)
- Snap to Grid - Snap selected strokes directly to the grid.
- Key Points - Snap selected strokes to Key Points on the grid.
- Active Layer Only - Snap selected strokes to your selected options only on the currently active layer.
A Few Brushes to Consider
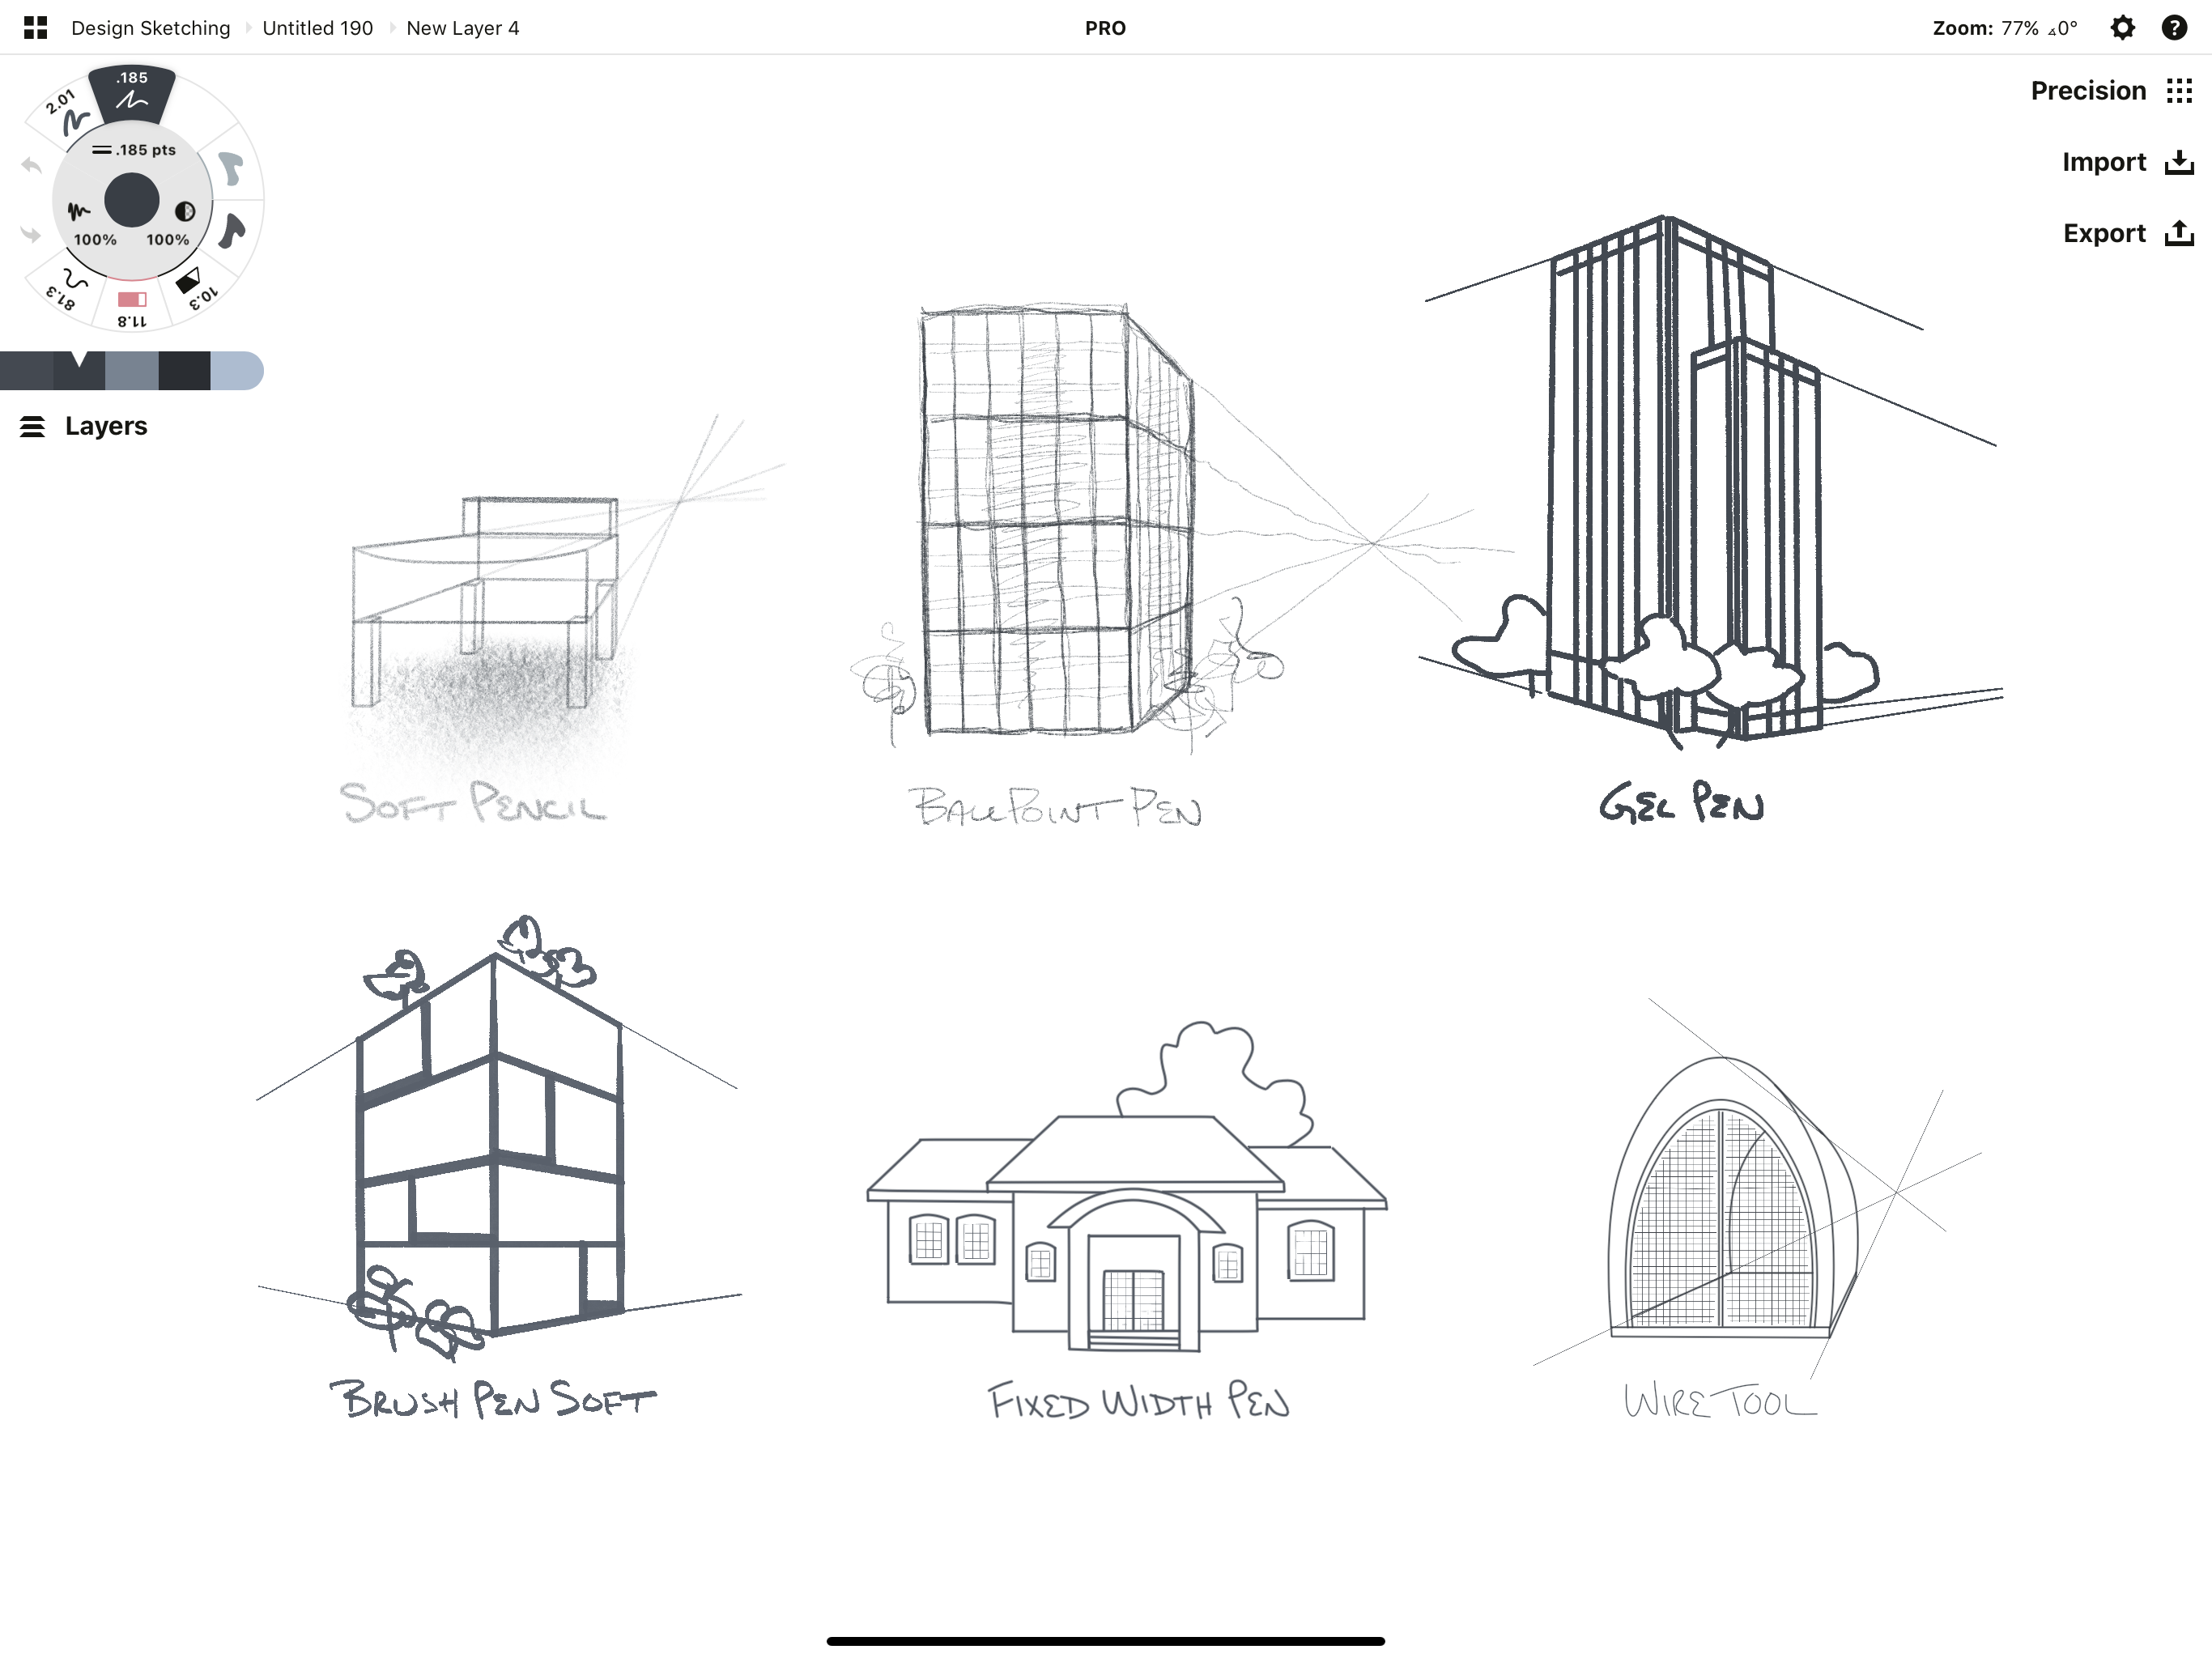
If you're looking for a few great pens or brushes to sketch with on your perspective grids, these feel very similar to what you might draw with in a traditional sketchbook. We also have options that export cleanly into apps like Adobe Illustrator, AutoCAD, or 3D printing software.
Pencil - For a traditional look, our pencils are made from the real thing and feel genuine for both sketching and shading. Use them for framing in your initial idea and drawing in your perspective lines.
Ballpoint Pen - If you prefer a classic ballpoint in your urban sketchbook, try this pen at a fine setting on your canvas.
Gel Pen - This pen rolls like your favorite Jelly pen, as smoothly as you'd expect on the canvas. Try white or pastel colors on a darkprint canvas.
Brush Pen - These soft-tipped pens have a lovely taper and are somewhat pressure sensitive for more artistic urban sketching.
Fixed Width - This tool is always the same width as you draw, with no tapered ends. Use it for drawings you intend to take into other vector apps, CAD or printing software.
Wire - This tool is similar to the Fixed Width tool (including exports) but remains the same scale no matter what the zoom level - a great tool for product diagrams.
You might already be a pro at sketching with perspective grids, but if you're looking for some insights and exercises to get you started, check out these tutorials:
How to Sketch with a Perspective Grid - This illustrated tutorial walks you through perspective types and shares several exercises to help you get used to sketching with 1-point, 2-point and 3-point perspective grids.
Learn to Draw: Basics of Perspective - This video tutorial teaches you the fundamentals of perspective drawing and how to set up a perspective grid on paper, and also offers some downloadable homework for additional practice.
Good luck with your sketching! If you have any questions about using the perspective grids in Concepts, please feel free to ask us. Tap Help > Ask Us Anything in the app and we'll be happy to help.
By Erica Christensen
Recommended
How to Edit Your Grid - Learn how to set up and customize grids in Concepts.
3 Ways to Draw a Straight Line - Three ways to draw a straight line in Concepts and when to sketch it.
How to Design in Concepts - Get started using Concepts' Shape Guides, Snap, Selection and Layers as you design a simple object.