Concepts is an infinite, flexible creative tool for all your good ideas. Available on iOS, Windows and Android.
How to Make a Custom Brush Stamp and Grain
Learn how to make your own brush stamps and grains to create custom brushes in Concepts.
Concepts' brush editor gives you the ability to create your own brushes and adjust them easily to your own style and needs. With the brush editor, you can:
- create artistic textures with your own stamps and grains
- make brushes that respond to pressure, tilt or velocity
- fine tune brushes with an assortment of variability options
- purchase professionally crafted brush packs from the in-app store and edit them to suit your needs
In this tutorial, we'll walk you through how to make a simple stamp, a more complex stamp, and a grain (aka extra texture) for your custom brush.
If you would like a few ready-made samples to work with while you get to know the brush editor first, you can find the final stamps and grain we'll create here in our follow-on article How to Create a Custom Brush.
What is a Stamp?
A stamp is any JPG or PNG image (for example, from a photo or scan) used as a foundation for a digital brush. A brush editor takes that image and formats it into a repeatable “stamp” you can use for drawing. The brush editor will also allow you to apply certain settings like rotation, pressure and scatter (to name a few) to give the brush a certain appearance and action or "flow". Just like pixel-based applications might allow you to make a brush using the image of a blossom or a finger-print, for example, you can use the same image in Concepts' brush editor to create a stamp-based vector brush.
An example of a repeating stamp with basic size, pressure and scatter variance applied in Concepts' brush editor.
A Simple Stamp
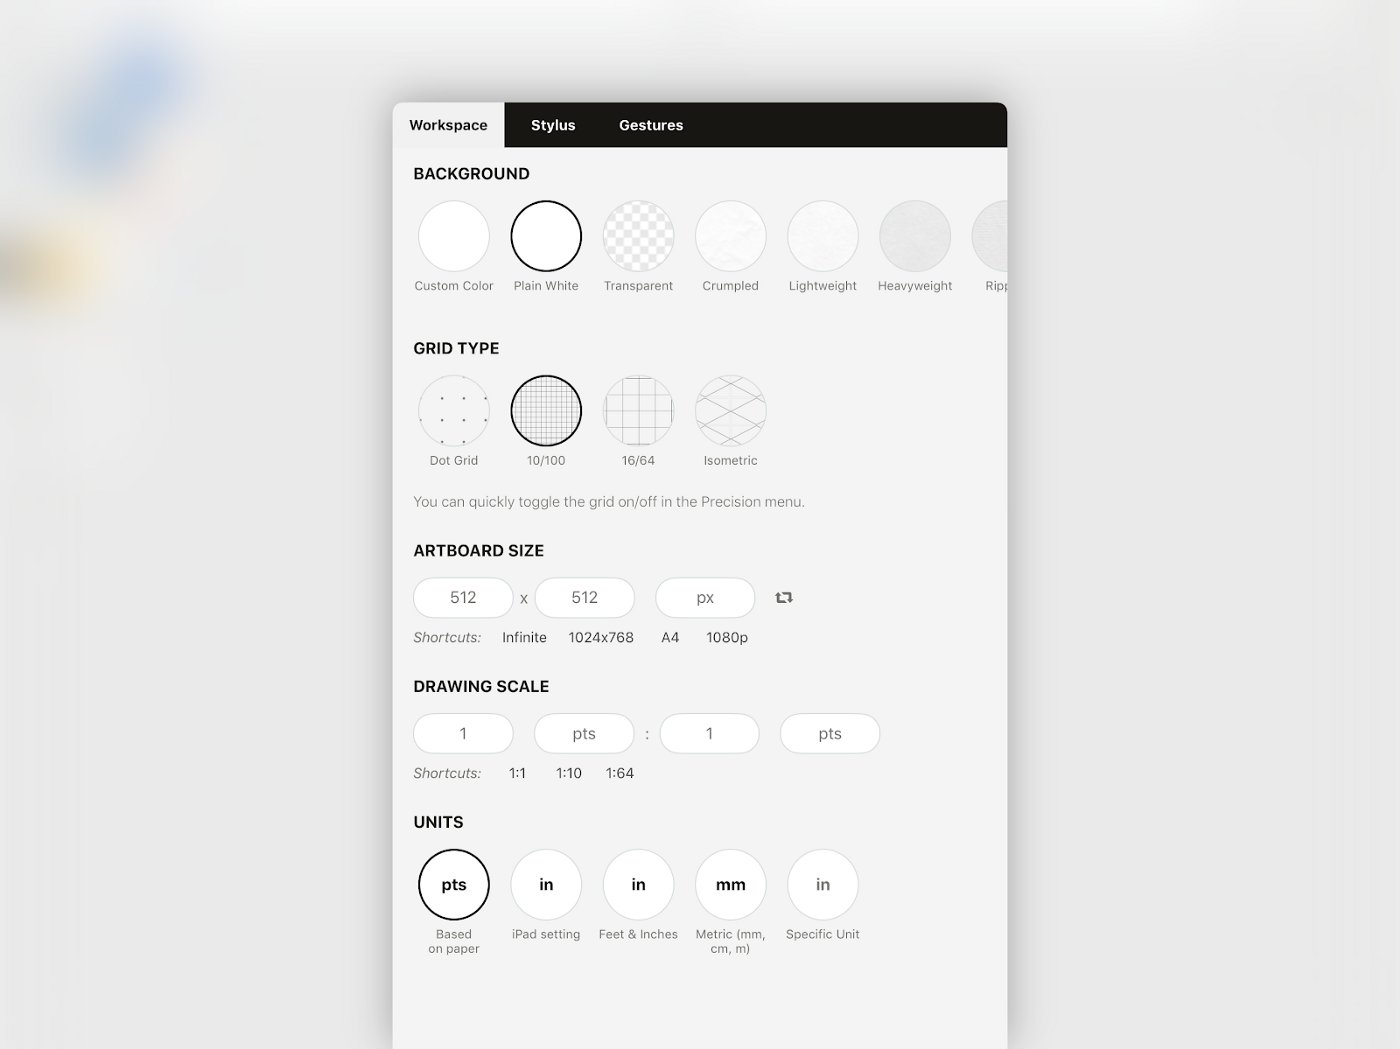
1. Create a plain white artboard on your infinite canvas.
Go to Settings, find Artboard Size, and define your artboard to be 512 x 512 pixels. (The smallest we recommend is 256 x 256 px. The largest we recommend is 1024 x 1024 px. The artboard doesn't have to be square, but it offers the most consistent brushes and is a great place to start.)
While you’re there, make sure the background color is white. Any color that isn’t white will be read as “pigment” in the stamps. If you use a transparent background, the app will automatically turn it white when you import the stamp image into the editor.
2. Add a simple shape to your artboard.
You can draw a shape, or open the object library and drag a basic circle or star onto the artboard. You can apply the Filled Stroke tool to make it a solid shape. Center the image in the artboard. Go edge to edge for the biggest stamp possible, this does affect your maximum brush size.
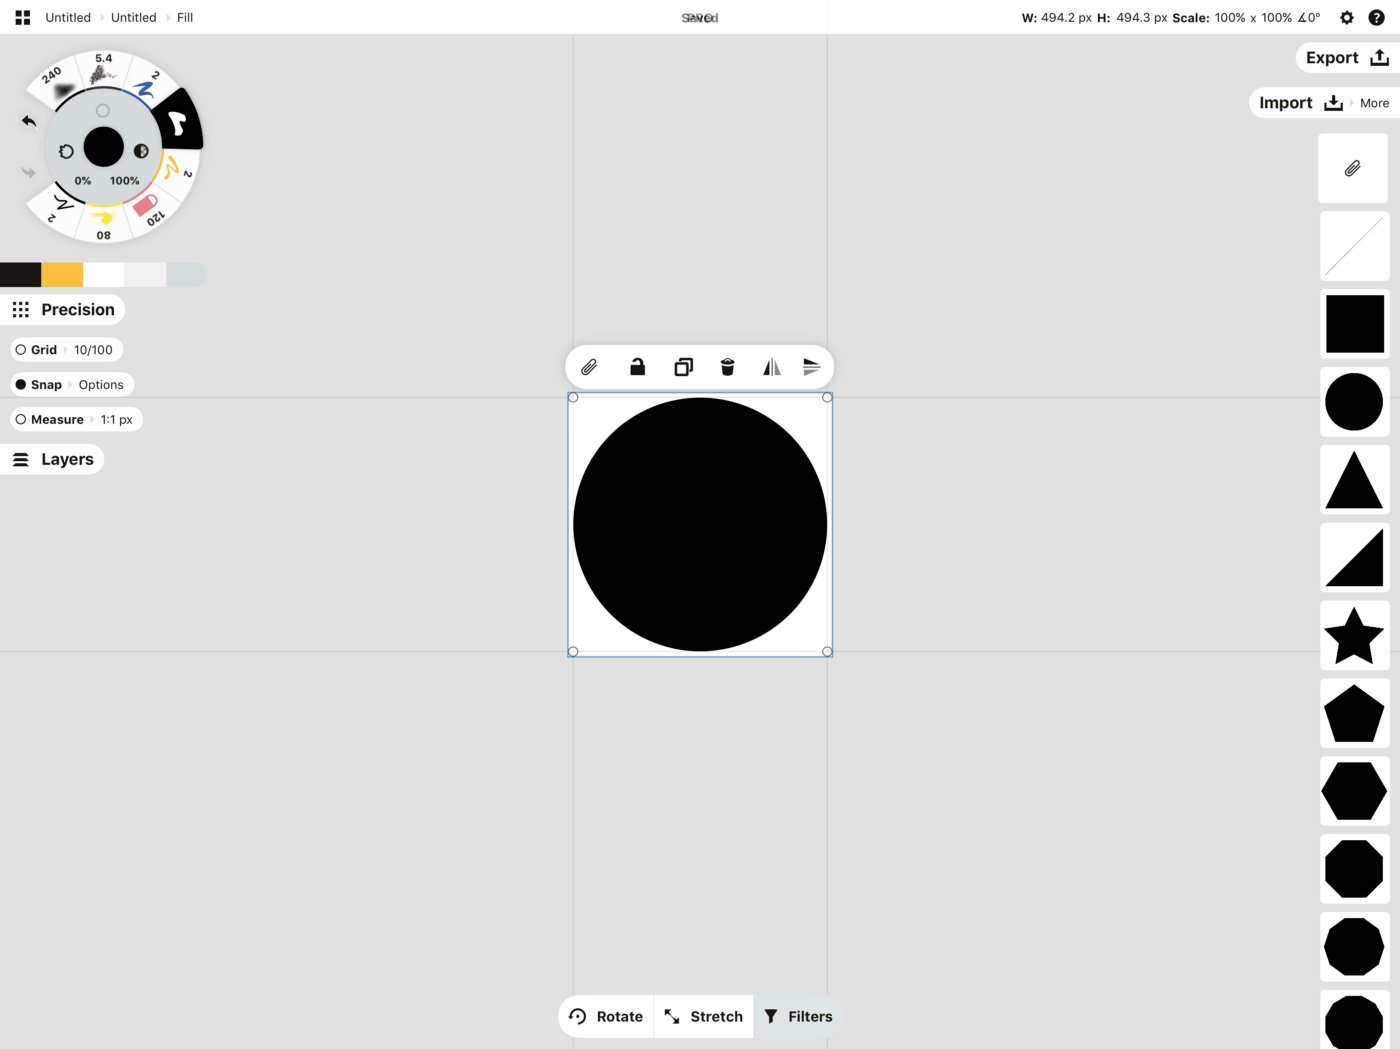
You can use the Precision tools to do this instead, drag multiple shapes onto the artboard, import images, or just draw something. You can even drag+drop an image or other shape from a Google search onto the artboard. Totally your call.
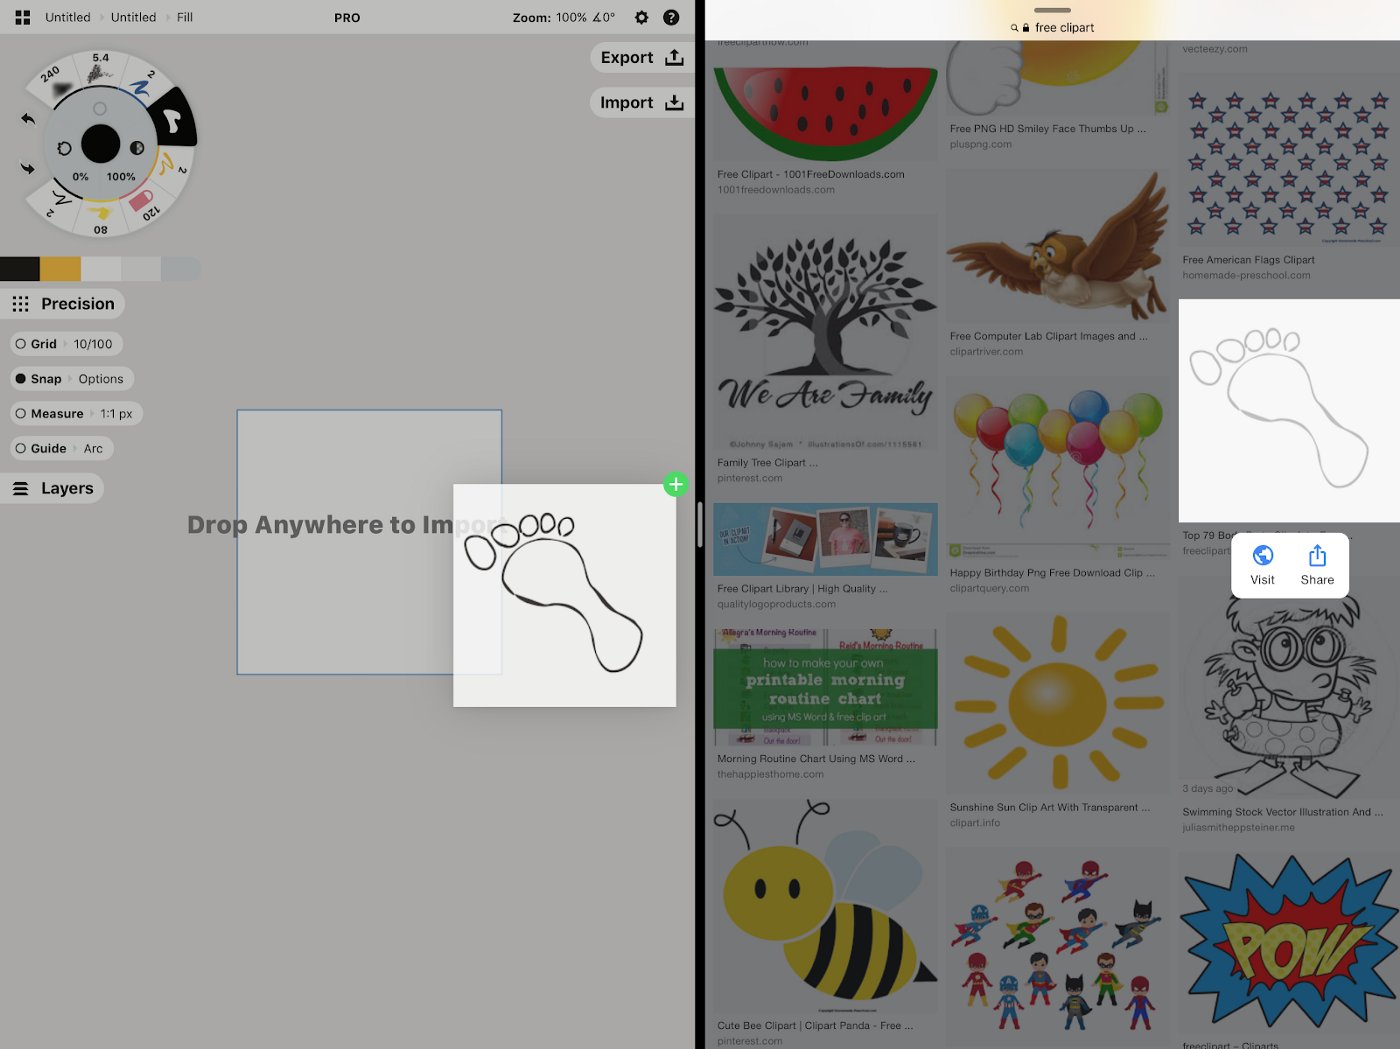
Image attributed to freeclipart.com, thanks!
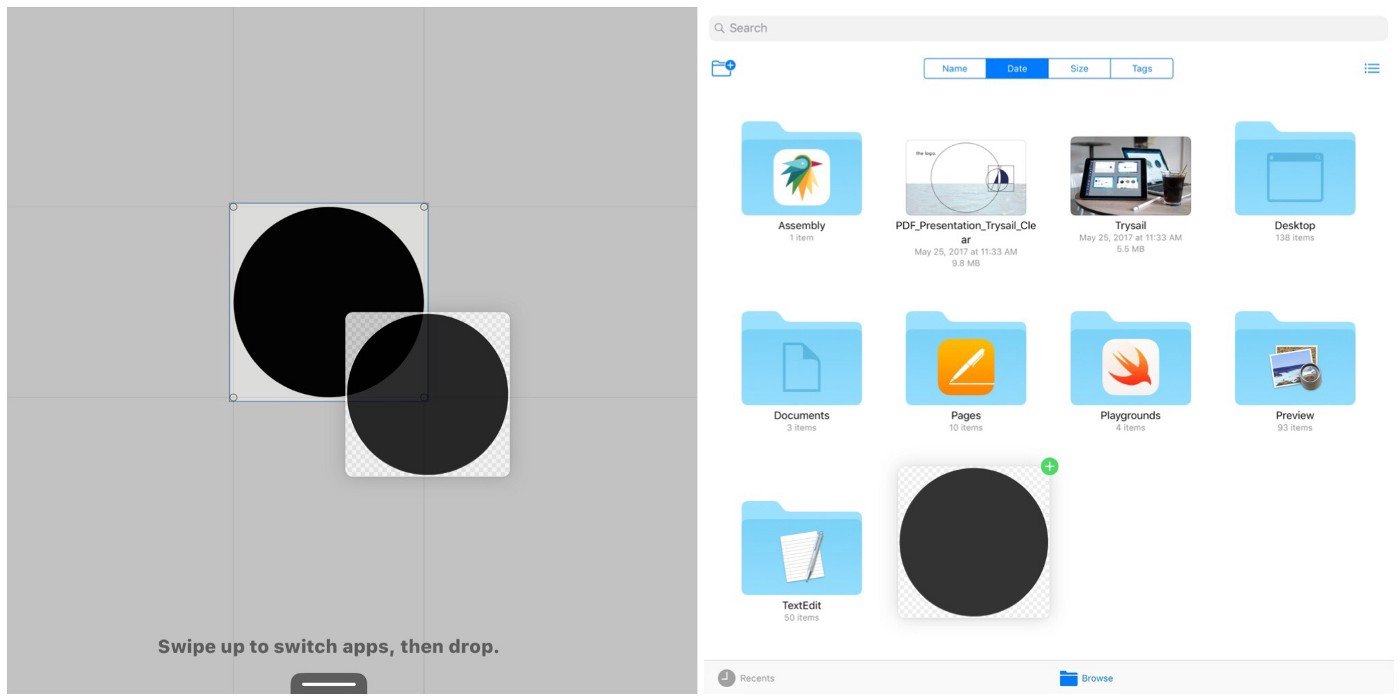
3. Export your artboard as a PNG using the “Custom” option to your iPhoto library, Files or Cloud.

You can also select the shape, then drag+drop it straight to your other app. It will save as a PNG file.
Final circle stamp — the basis for a simple pen.
This image is all it takes to make a brush in Concepts. We’ll show you how to create a brush with it, including pressure sensitivity, tilt and other options, in How to Create a Custom Brush.
A More Complex Stamp
To make a brush that has textures or styles like the mediums used in traditional artworks, you can take a photo or scanned sample of the medium itself and bring it into the app. There is so much room for creativity here.
At the same time, the more complex or the bigger the brush you create, the more data and performance it will consume on your device. You’ll need to make some considerations for size and resolution. As Concepts remembers every stroke so you can move and adjust your work, we recommend you keep your stamp and grain usage as efficient as possible while achieving the look you want.
One other thing to note that feels a bit ironic in a vector-based app: since you are making brushes from pixel-based images in the brush editor, it is possible to have pixellated brush strokes when you zoom in. This depends on the resolution of your initial stamp image - keep in mind how big your final artwork will need to print if you decide to go that route.
1. Create a sample of the medium you want to emulate digitally.
You can make a sample out of anything — oil pastel, chalk, spray paint, cloth material, acrylic paint, oil paint, quill pen, sand, leaves… just draw, paint or scatter it around on a piece of paper.
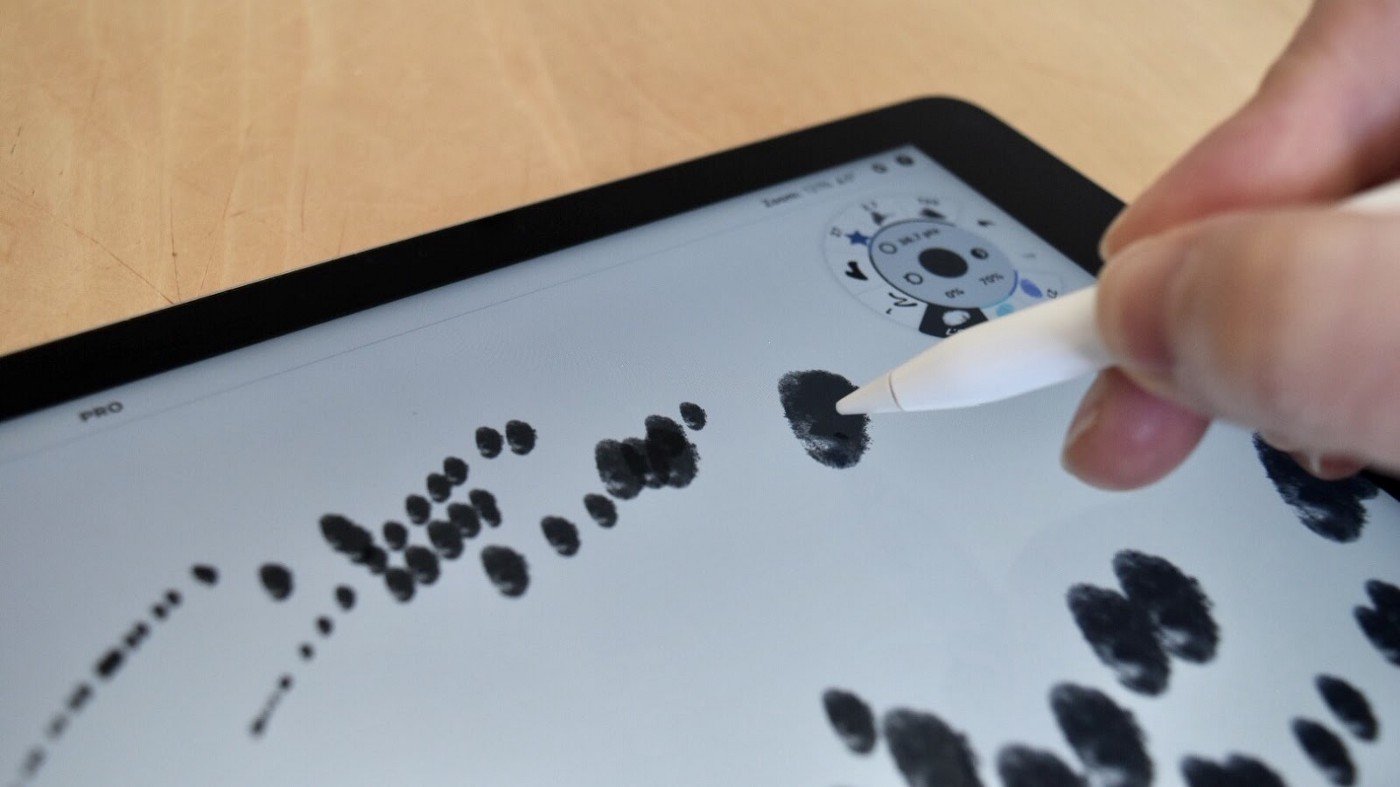
You can make a fast sample with a scribble, or take the time to study the feel of your medium. To show how deep you can go, we took an oil pastel and made this sample drawing.
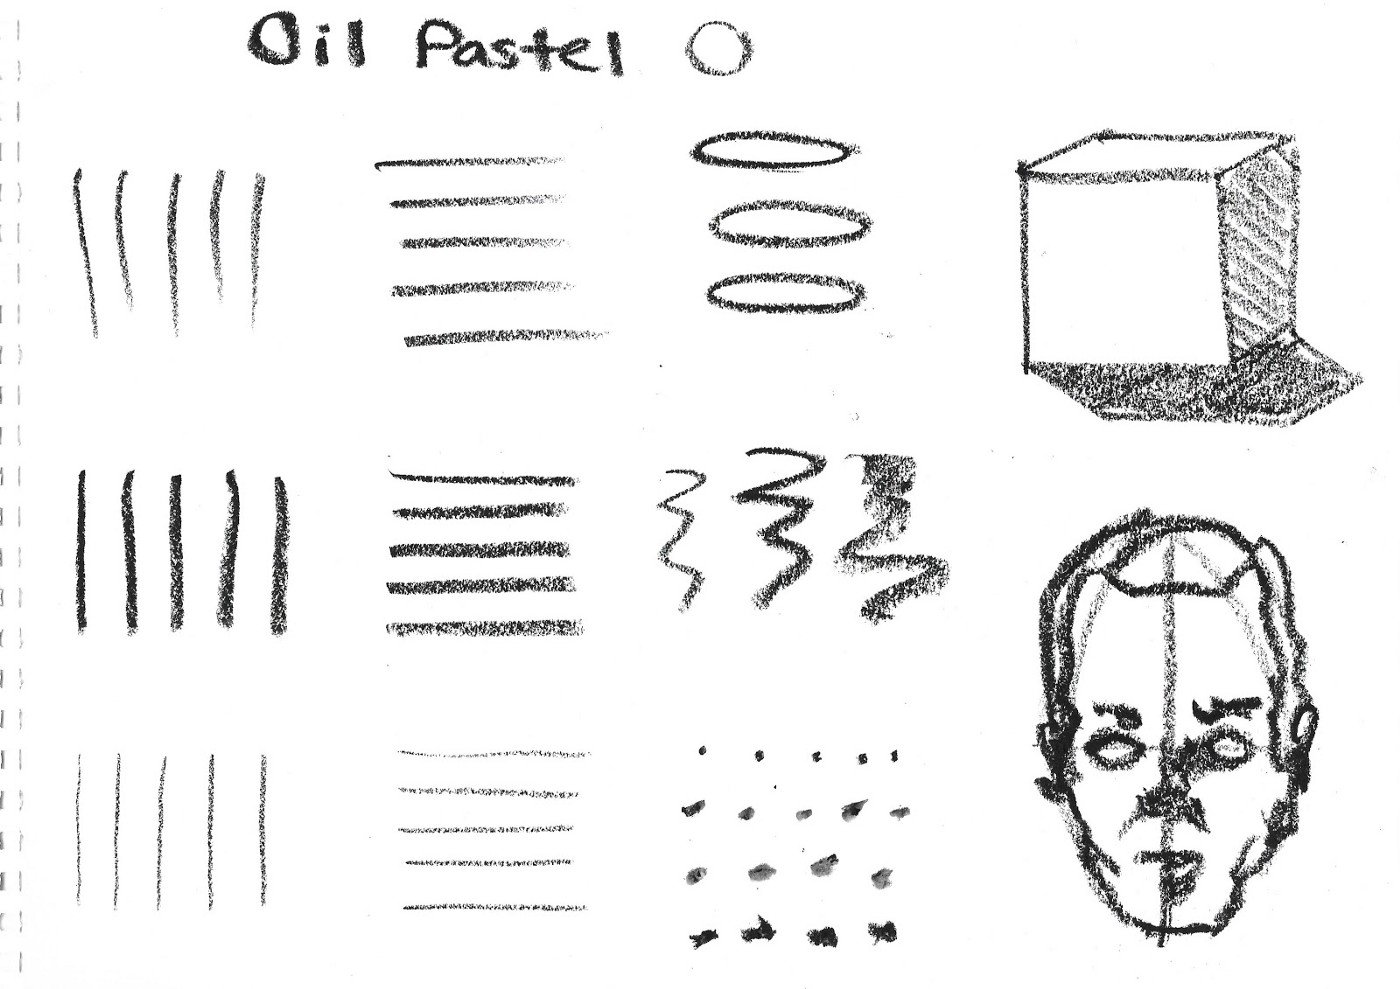
We did quick sweeps with the pastel, then slow sweeps at high pressure, more at low pressure, tried different tilts and velocities, drew ovals and dots… whatever it took to see how the medium behaves when it’s used. We did the exact same set of strokes for every medium we tried, to get a full understanding of how to mimic them in our digital settings.
2. Scan in your sample or take a picture with your camera, iPhone or iPad.
We used one of the dots in the above picture. The lowest recommended image size is 256 x 256 px, great for small brushes, or you can go all the way up to 1024 x 1024 or higher px for larger-size brushes. We purchased a USB microscope and went really high on the resolution so we could zoom in close enough and pull out the textures.
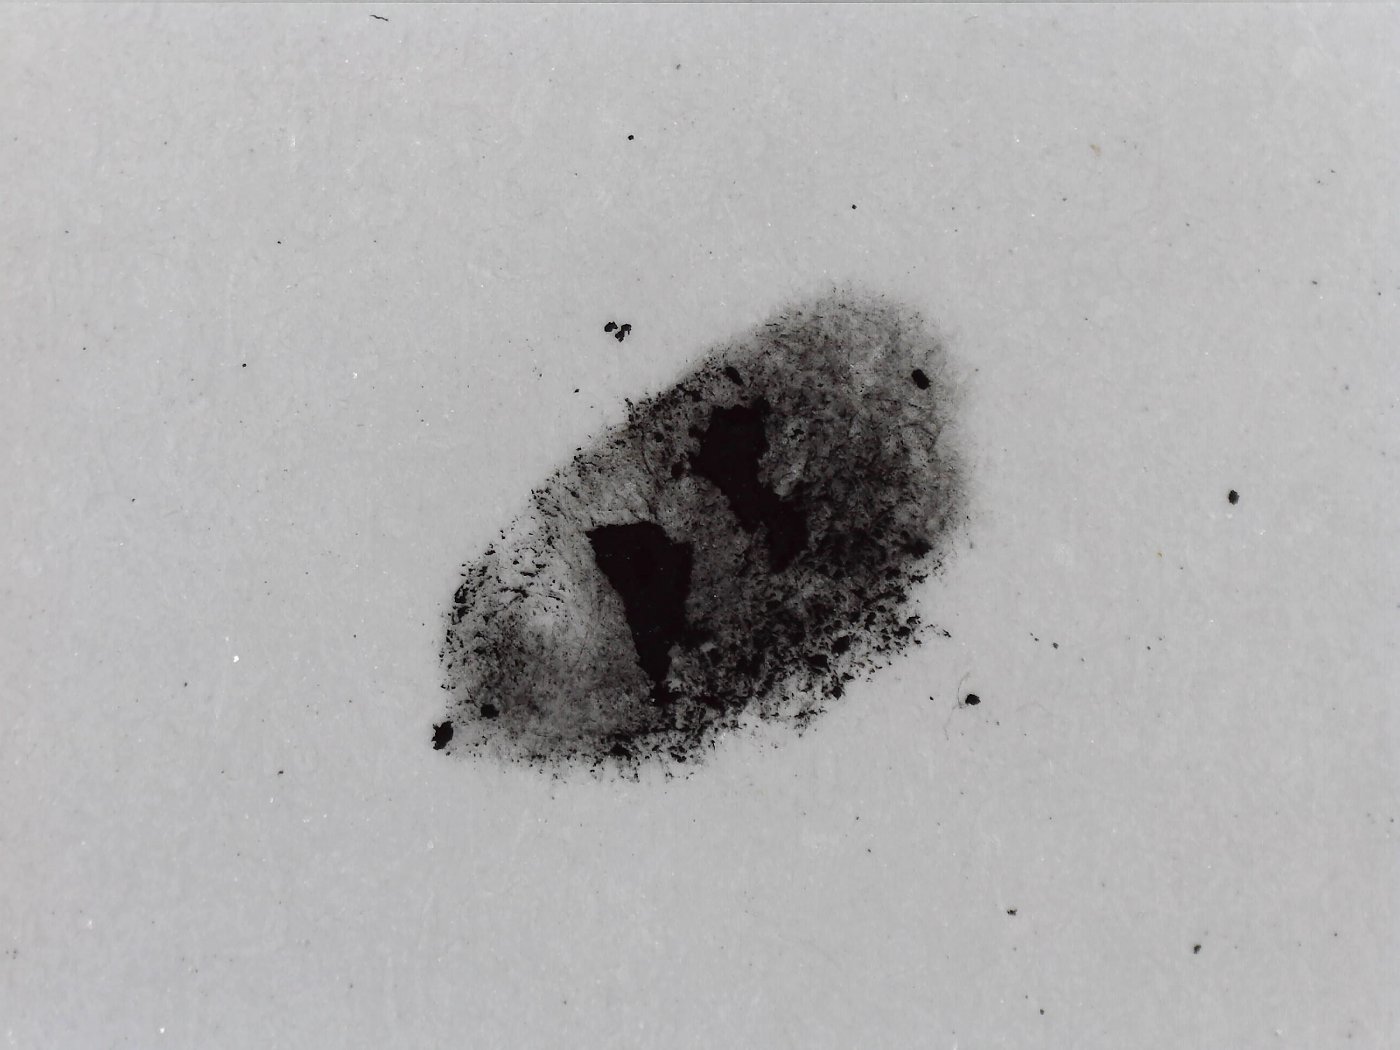
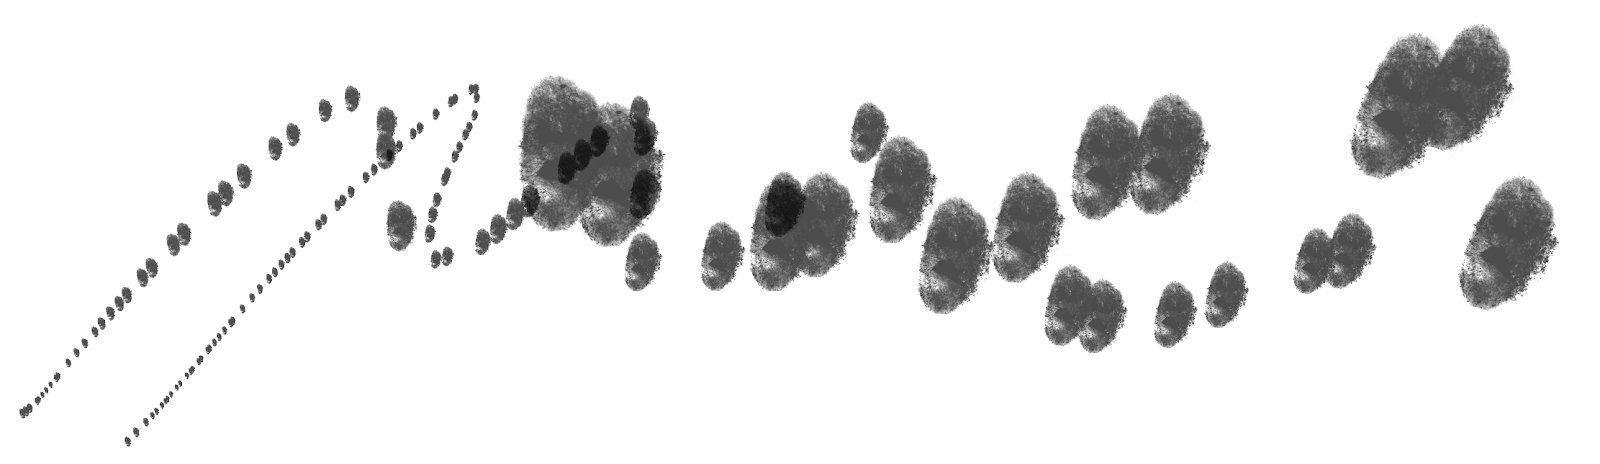
This is the raw oil pastel scan. If you were to bring this image into Concepts as a stamp at this point, the app would make it greyscale for you, but you would have all that grey background filling the brush. If you drew with this as your stamp, it would become a series of grey blocks with a black middle on the canvas.
Another note from the design team — while Concepts will automatically convert your photo to greyscale for you when you bring it into the brush editor (the fast option), if you’re very particular and want to have more control over your tonal values, we recommend you make it greyscale beforehand, either when scanning or by using a photo editor.
3. Filter your photo background to white.
Bring your scan or photo into a photo editor like Enlight, SnapSeed, iPhoto or Photoshop. Adjust the color values so that the background is pure white. Depending on the app, this can be as simple as adjusting your filter, or running it through a filter a couple of times.
Your stamp color does not matter besides basic contrast, it will be greyscale in the end.
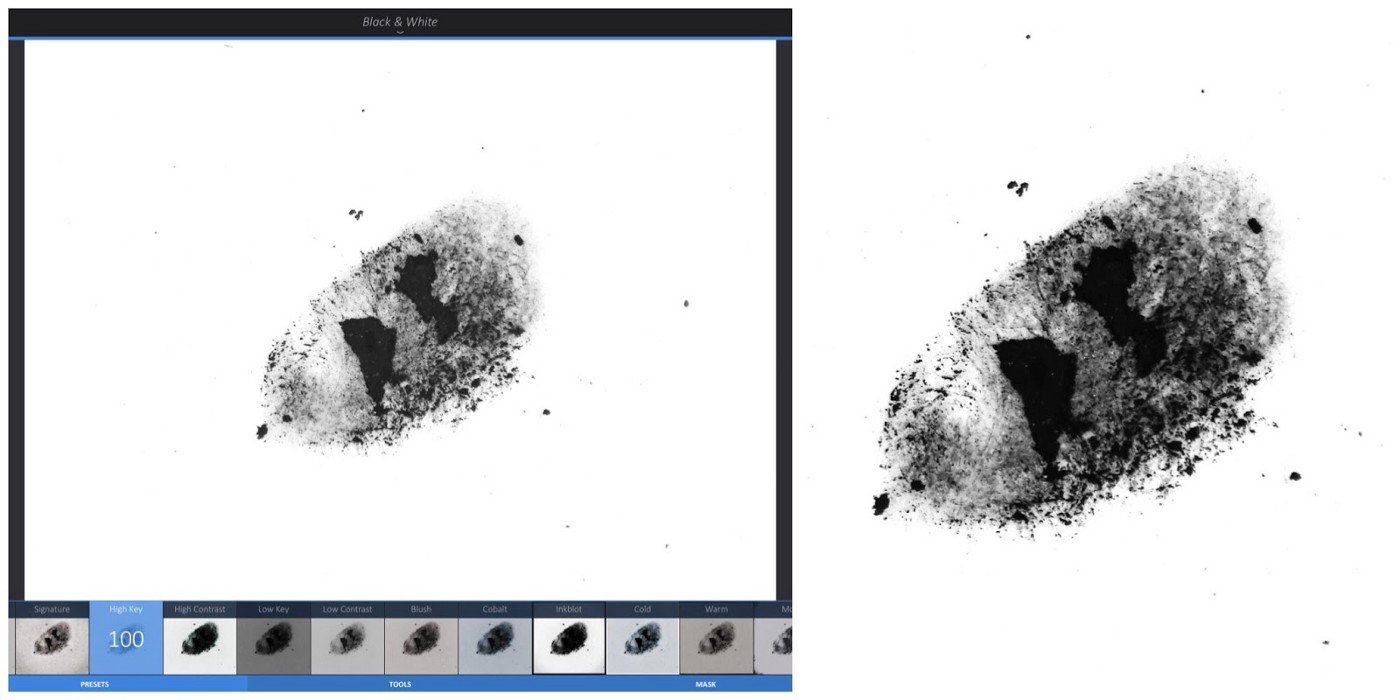
Left: The image was adjusted in the Enlight app using Filters -> BW -> High Key. Right: The image as adjusted in Photoshop. Whichever editor you choose, you can see all that beautiful texture come out — both are great options.
4. Now, do you see all those little black specks around the edges? We don’t know if that was part of the pastel or dust on the camera lens, but we want get rid of those and isolate the main shape.
Import the image into Concepts and use your masks to clean away the specks. You also want to get rid of any really conspicuous dots along the edge of your shape like the one in the lower left corner, because it will prevent repetition in your final brush texture.
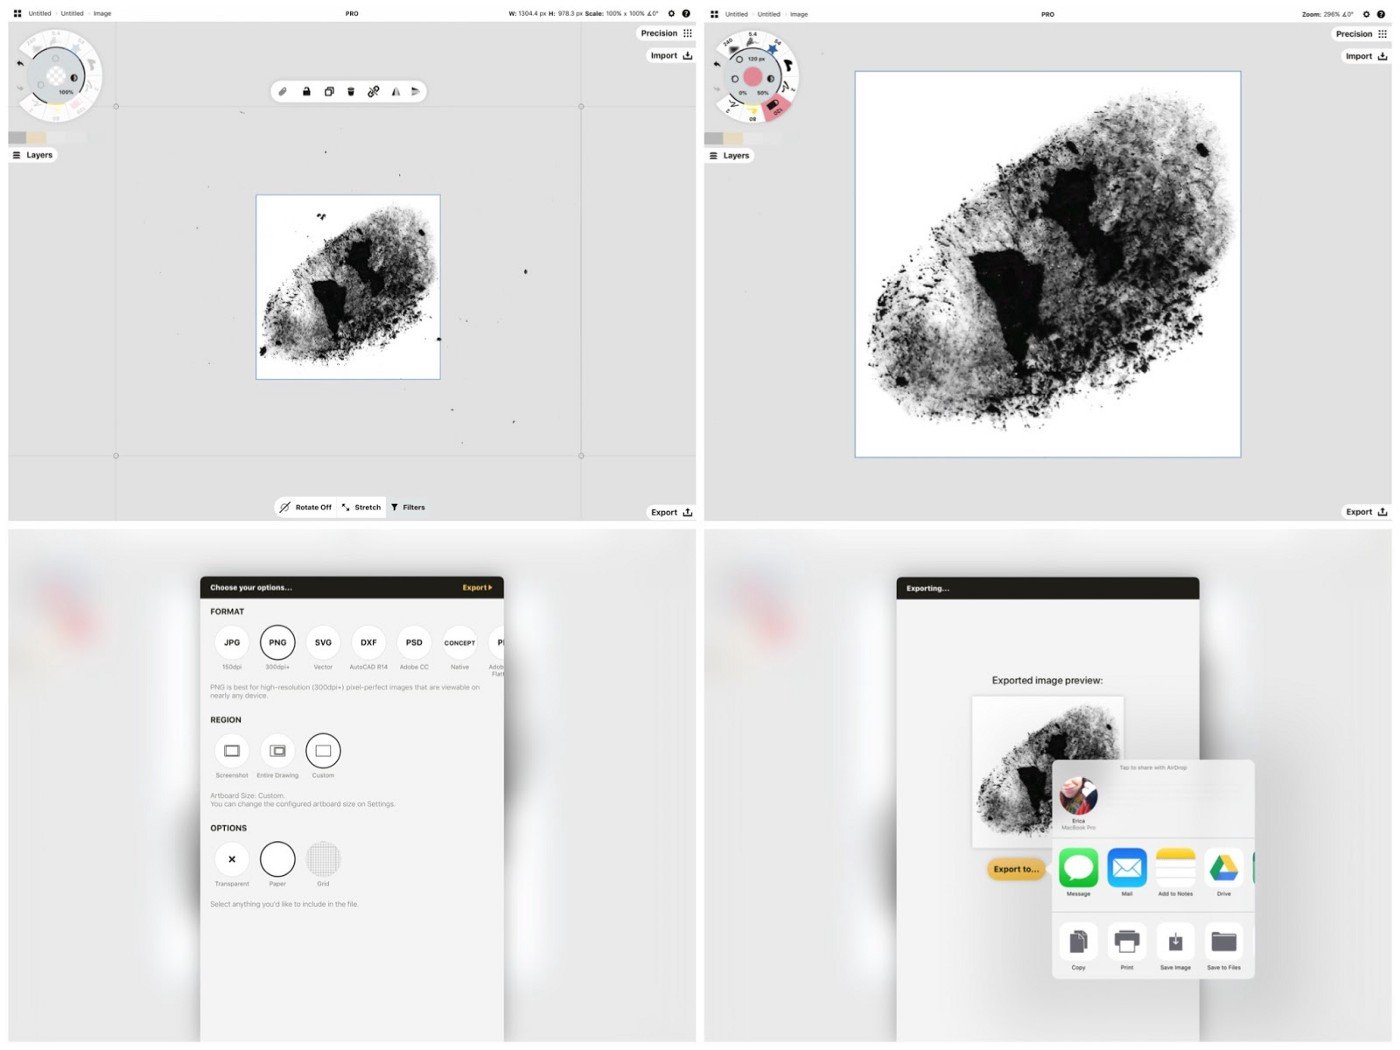
Go ahead and export the cleaned up version on a white background to your happy place. If you have an oblong brush (tall and skinny, for example), you can crop the image so the edges touch all the way around, it doesn’t have to be square.
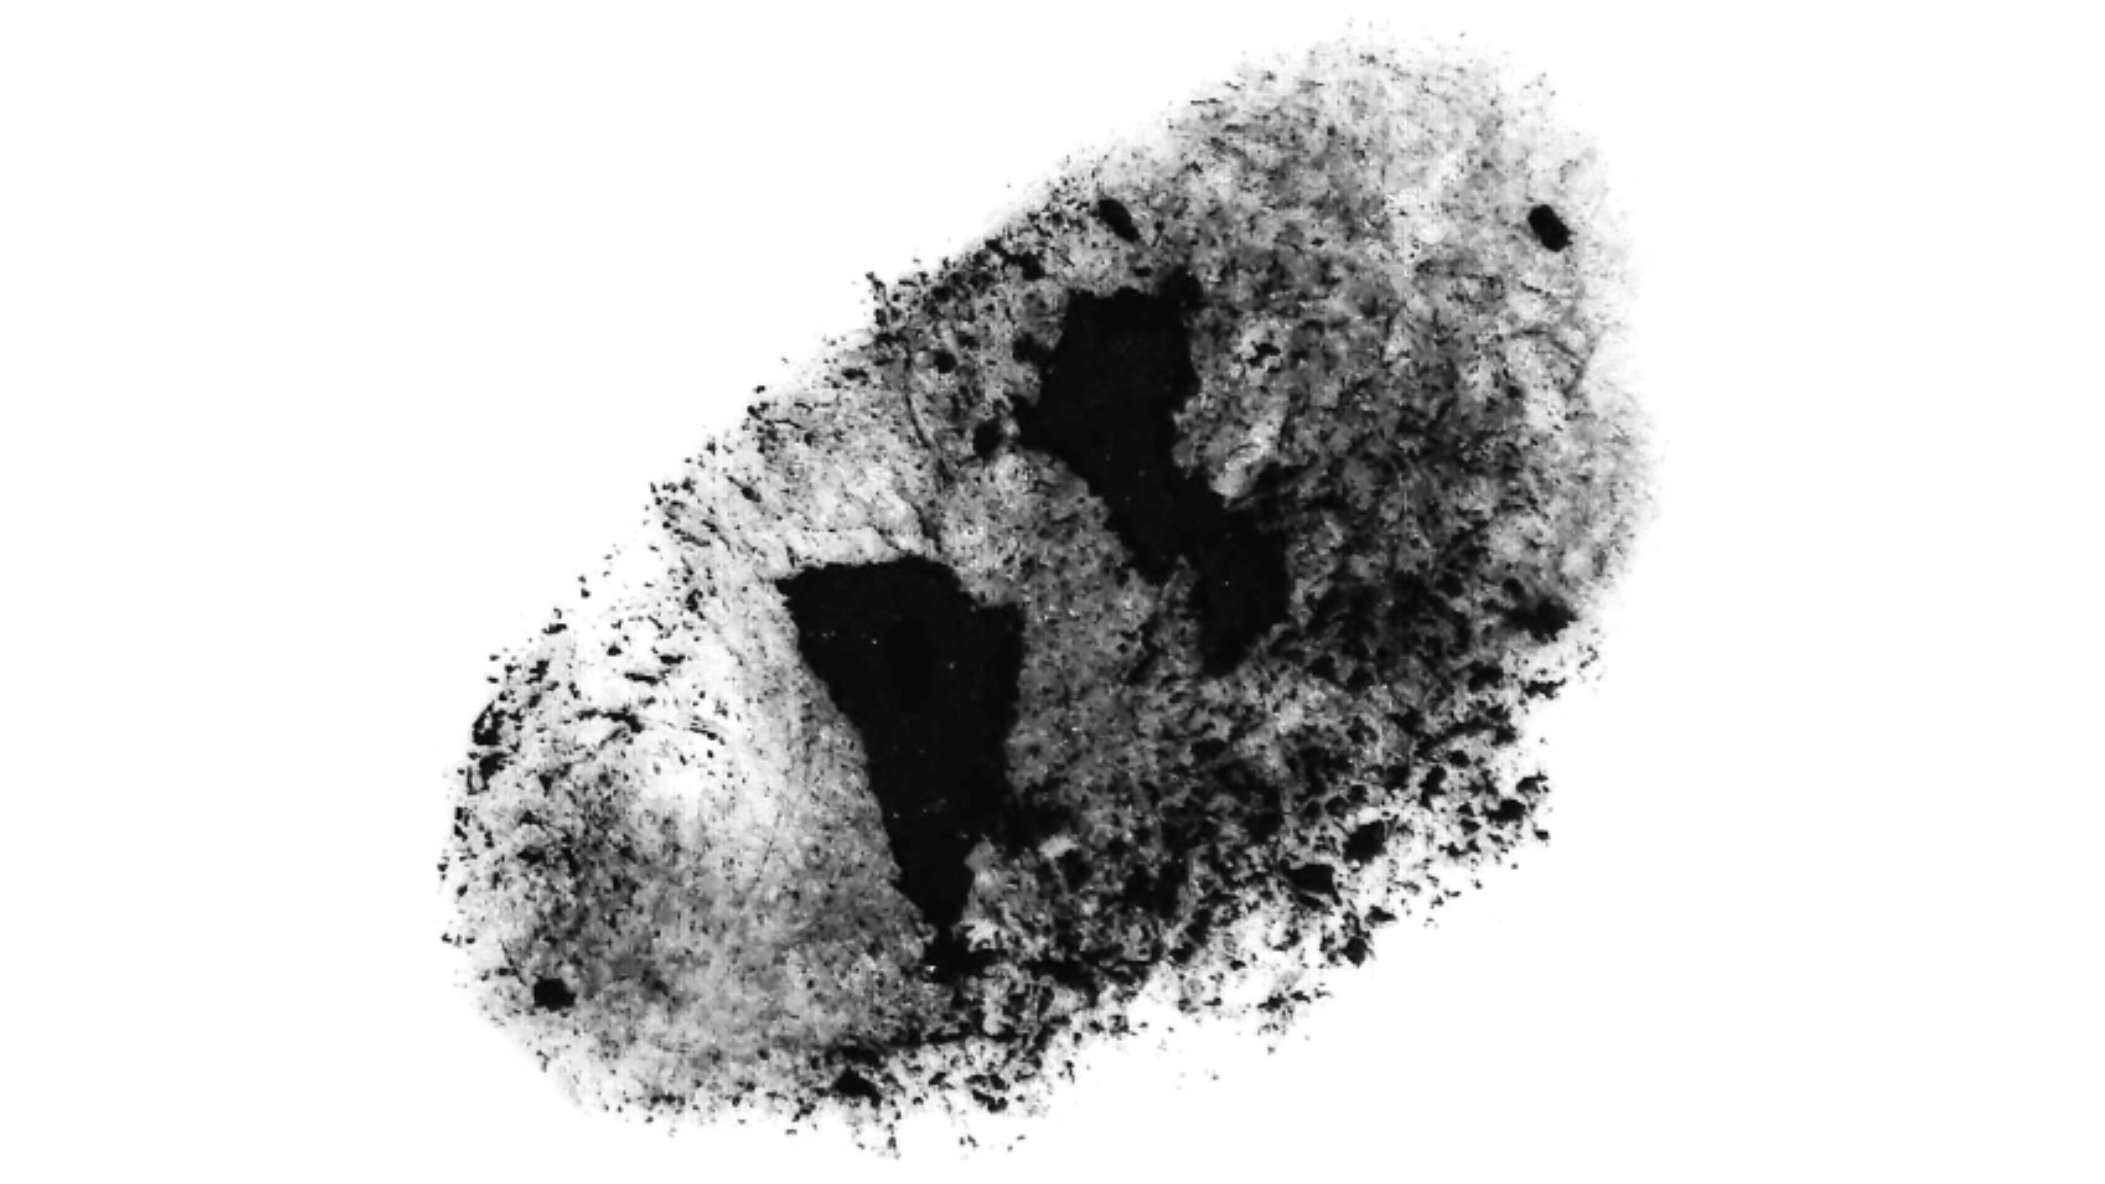
The final oil pastel stamp. You’re welcome to download this image, crop it and use it to create a brush in Concepts.
You now have a unique, artistic stamp that is ready to be made into a custom brush. We’ll show you how to do this in How to Create a Custom Brush. Let's move on to grains.
What is a Grain?
You might also want to consider creating a grain for your brush. A grain is a separate image layer that adds additional texture to your brush.
Think of drawing on a paper with a rough texture, like a cold-press paper. The roughness adds an extra dimension to your ink or medium and can enhance your drawing. Watercolor paper has a very defined grain that comes out when you add the pigment, as opposed to painting on smooth cardstock. Concrete also has a rough texture that combines well with chalk or spray paint, adding a wonderful character to the overall result. You can do this on a digital level by combining stamps with a grain.
Creating a Grain Image
Making a grain image is similar to making a stamp, but goes a little deeper as it requires your images to be seamless at the edges. If you’re familiar with making patterns for fabrics or materials, you’ll understand the principle of repeating images — they need to meet up at the edges in a way that you can’t see the seams when they repeat.
If you don’t have access to pixel-based editors like Photoshop or GIMP, you can use the grain we make here, or find free or paid ones on the internet by doing a Google search for "seamless image" or "seamless pattern".
1. Create a sample block of your physical medium on a piece of paper.
This example is ~5 cm x 5 cm square. (You can go bigger if you want.)

2. Scan in the image or take a photo of it. Make it greyscale, and crop the image to a square.

3. Import your image into a pixel-based editor like Photoshop or GIMP that allows you to offset and blend your edges.
This example shows Photoshop. You can search for an offset tutorial for GIMP and create the same effect.
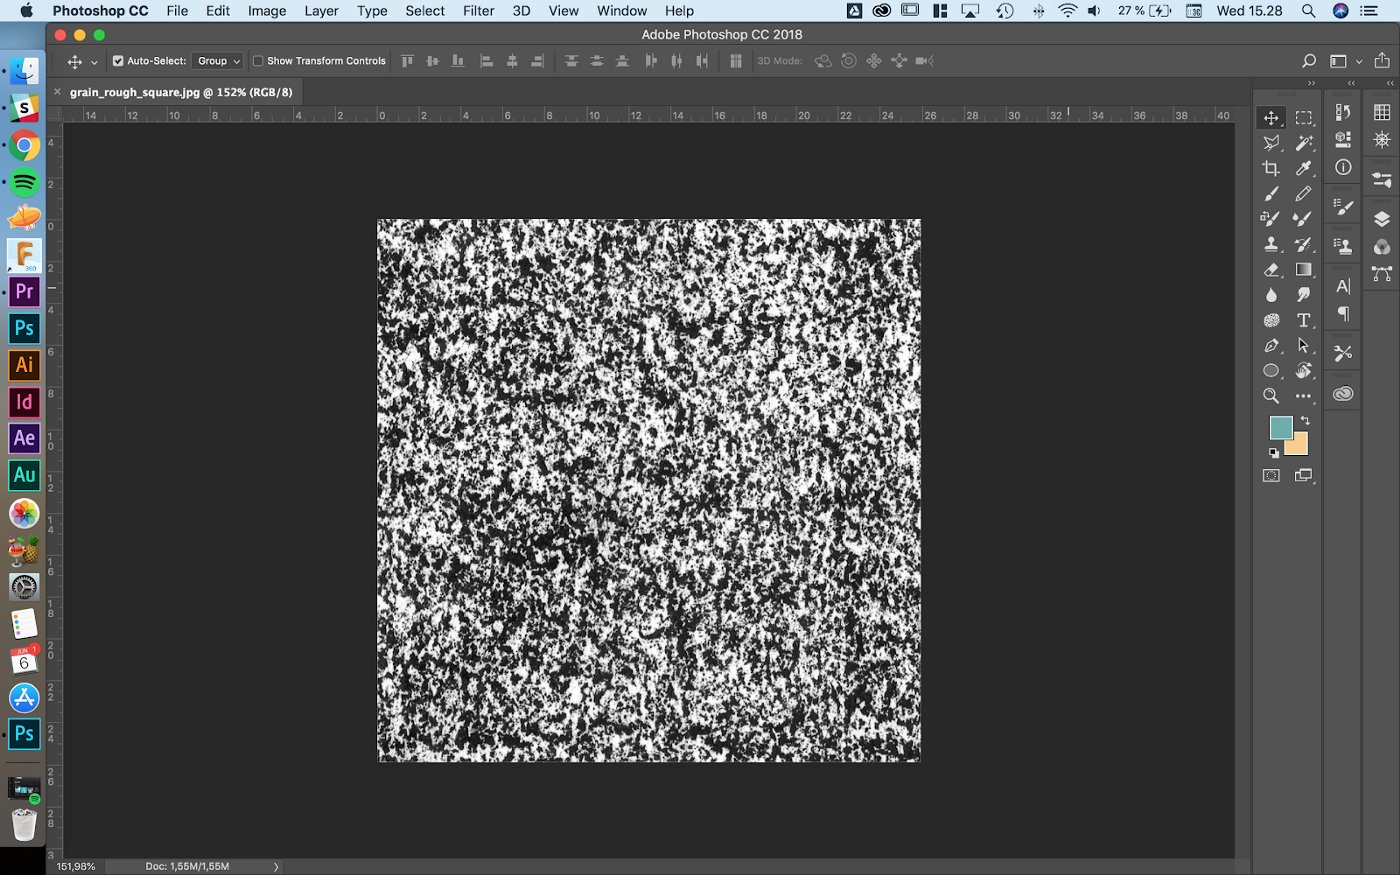
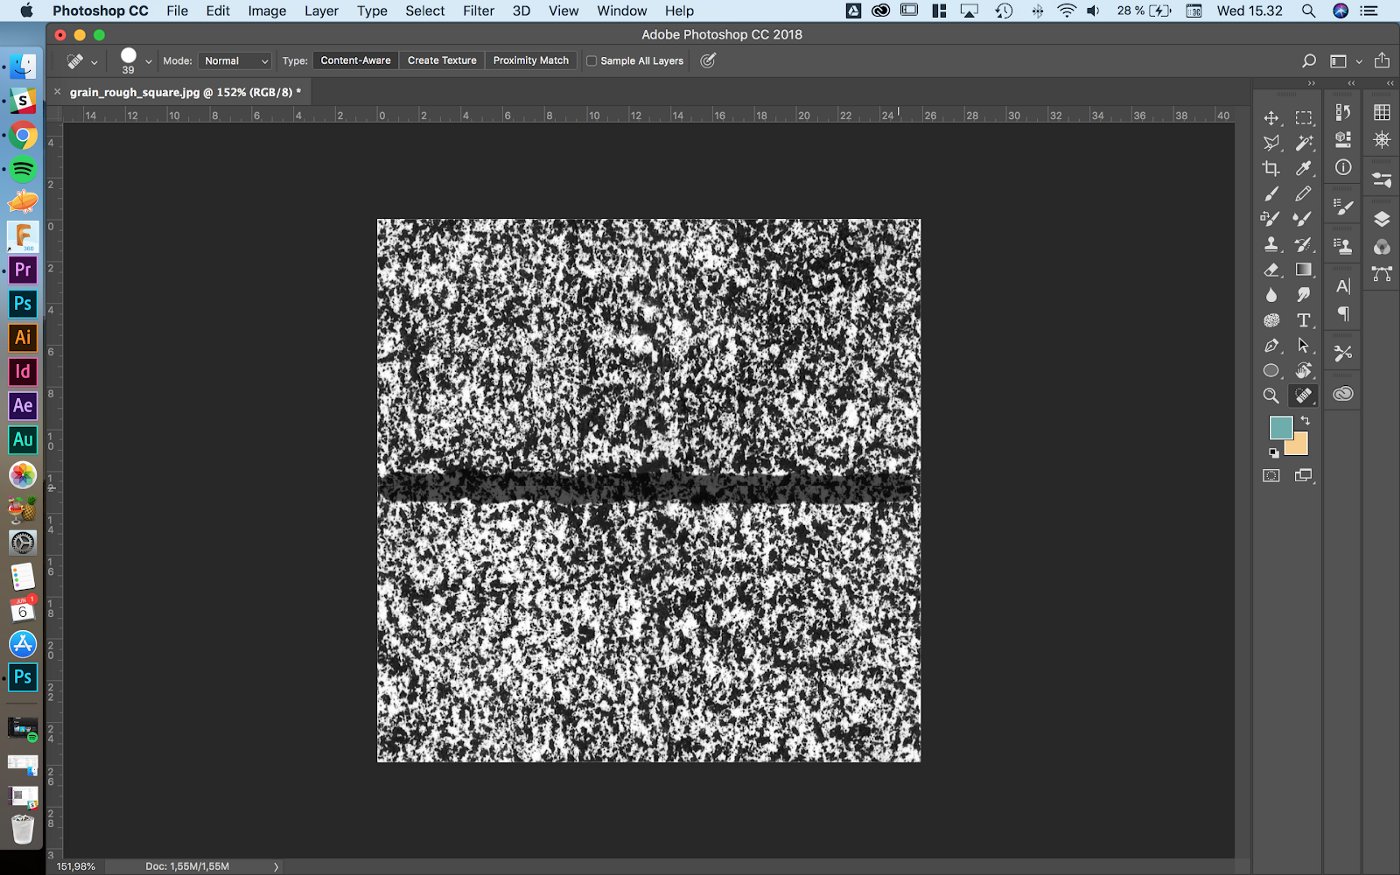
4. Apply the Offset filter to the edges of the square.
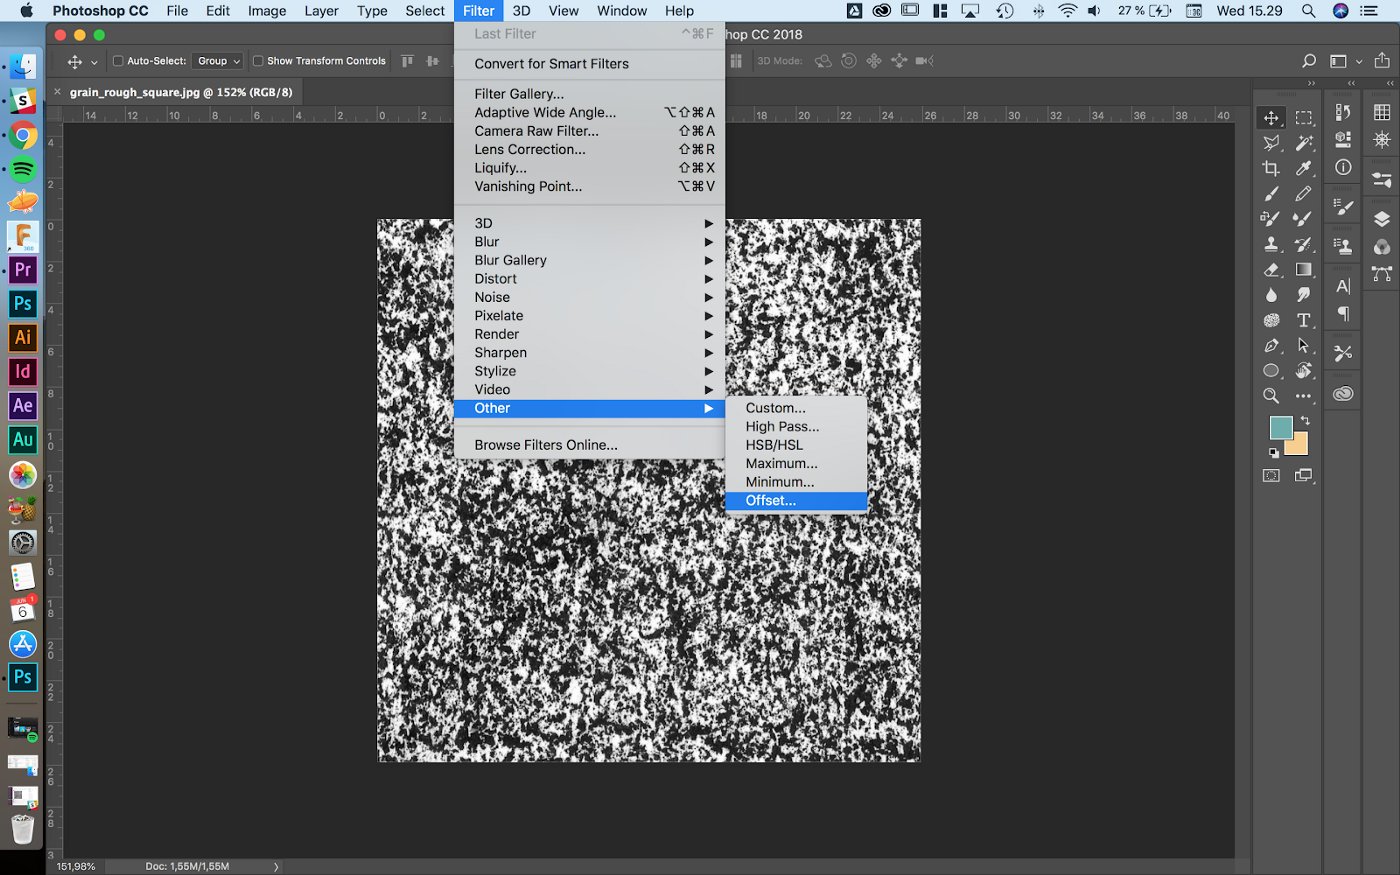
Locating the Offset filter in Photoshop.
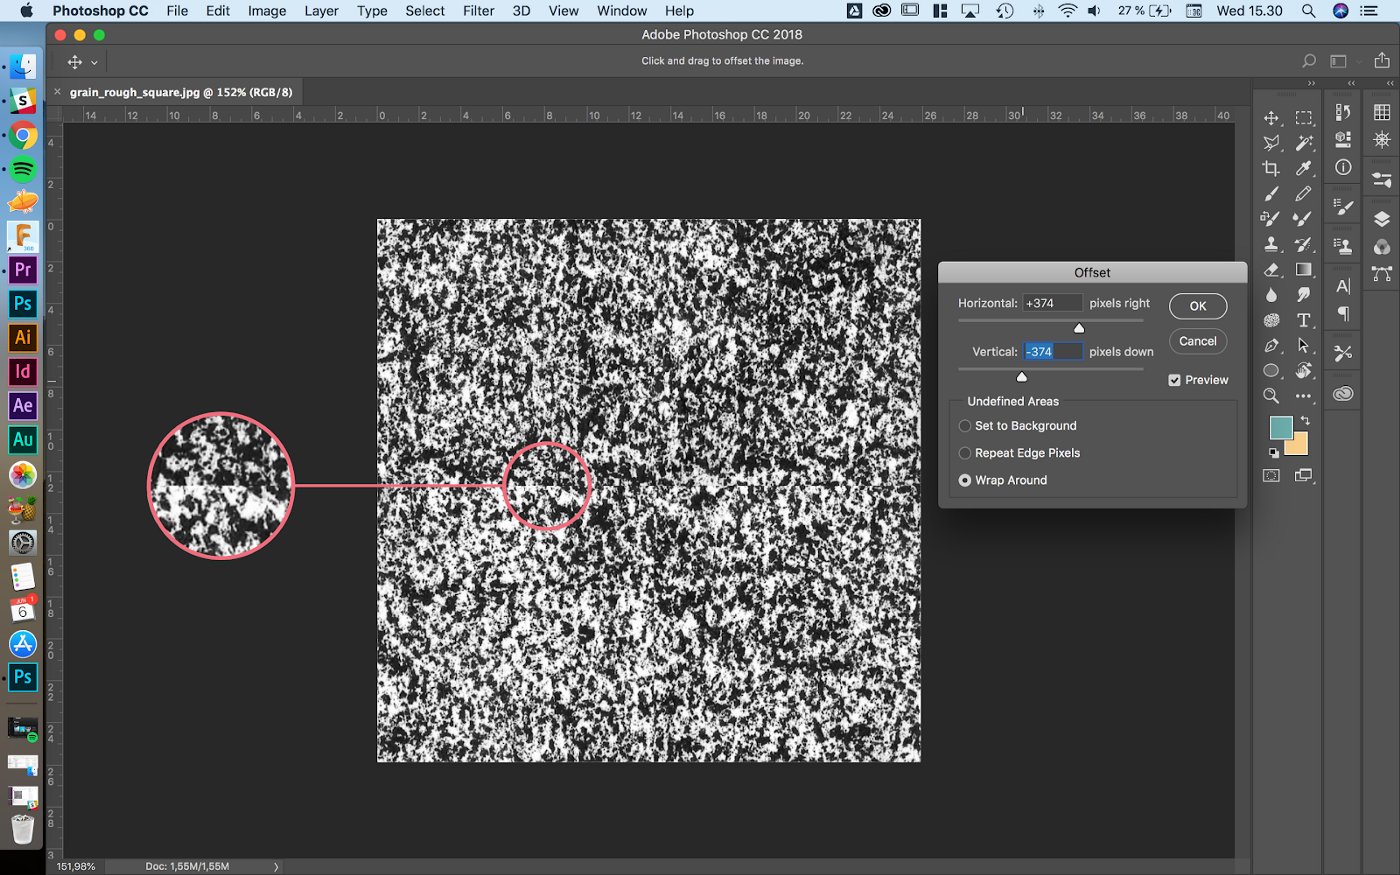
Here you can see the seams inside the square from applying the filter.
5. Take a Spot Healing tool and clean those up.
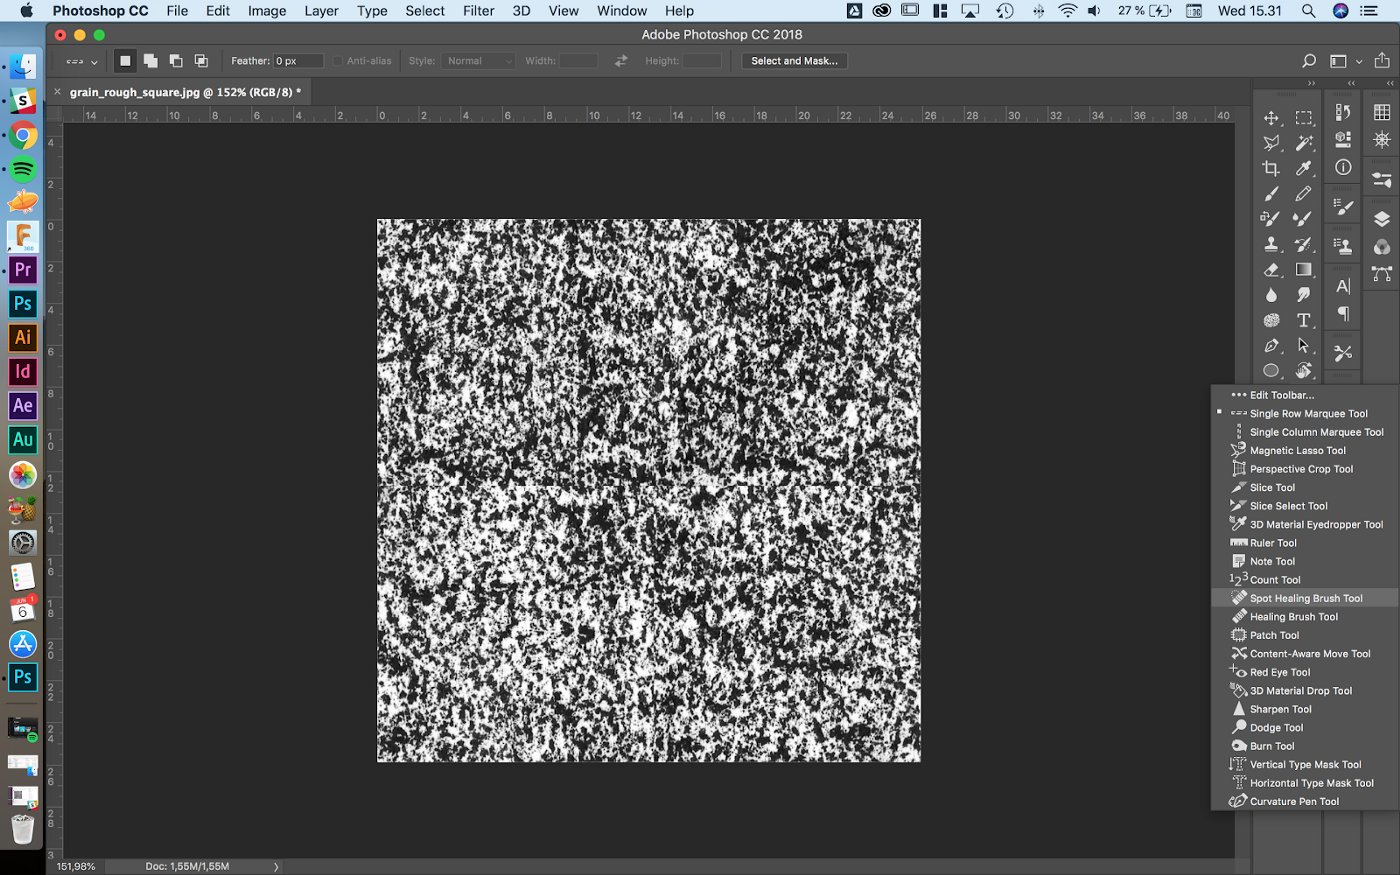
Locating the Spot Healing tool.
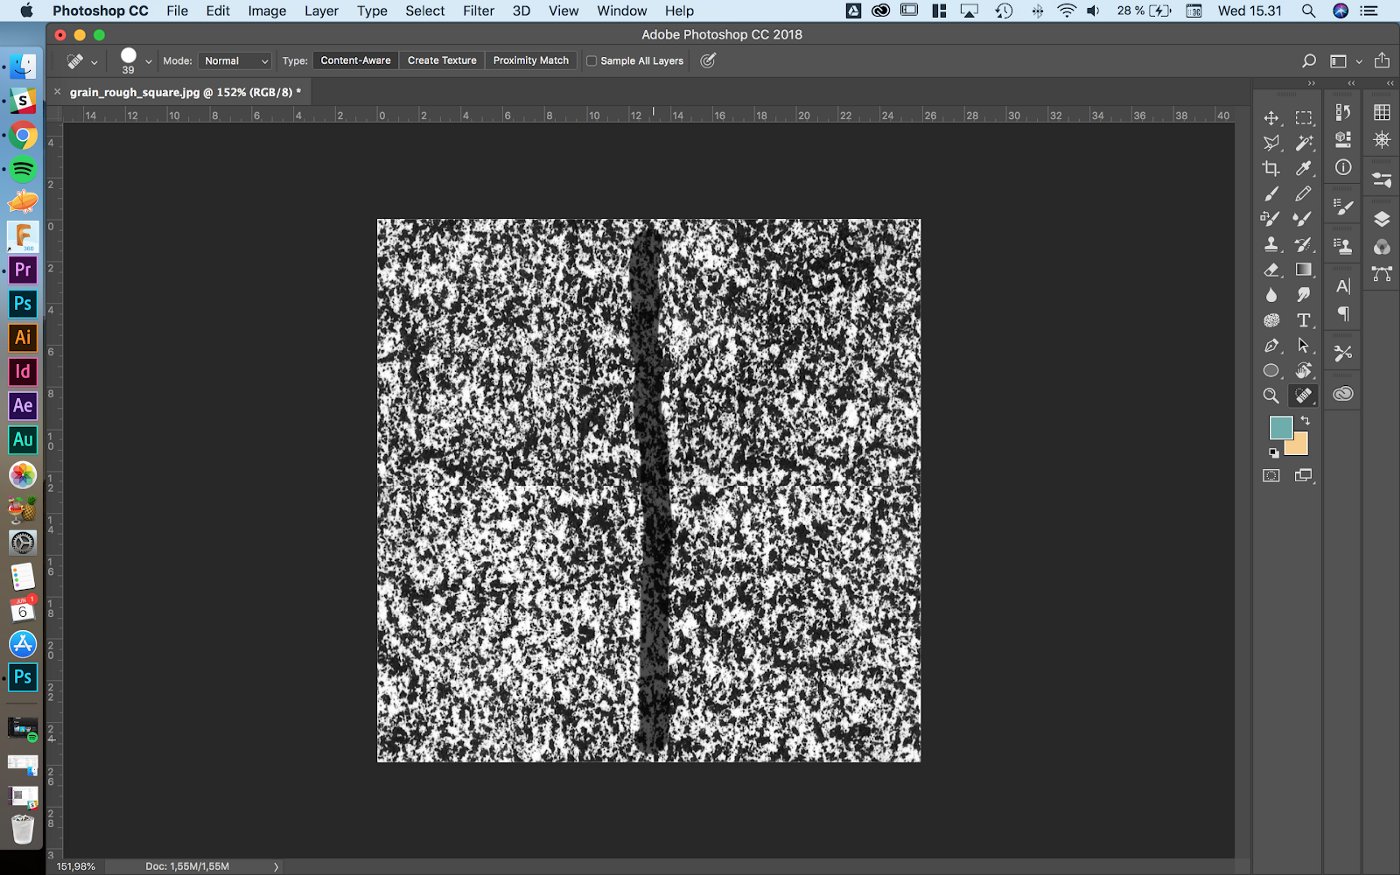
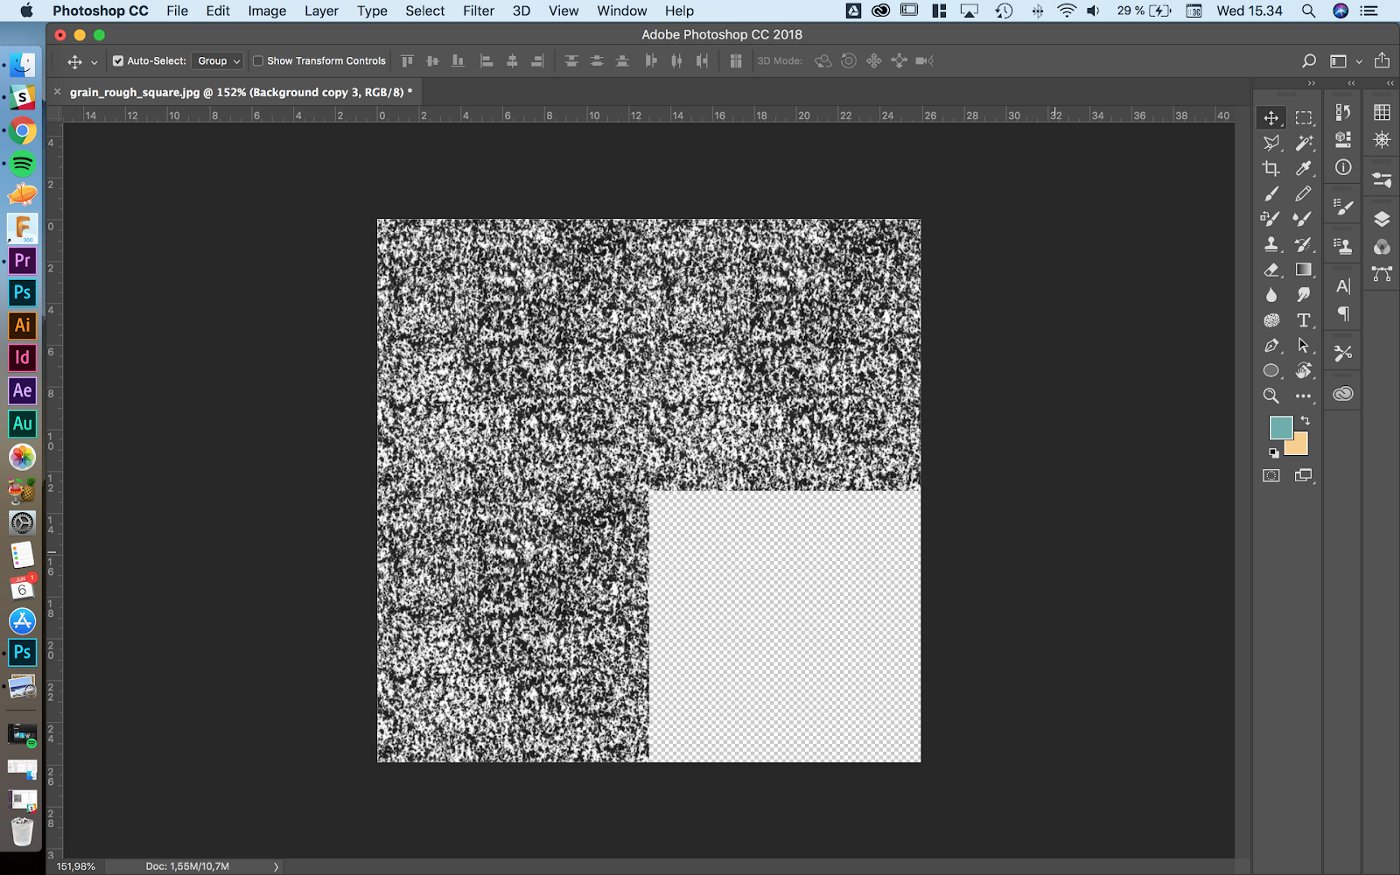
Getting rid of seam one.
Getting rid of seam two.
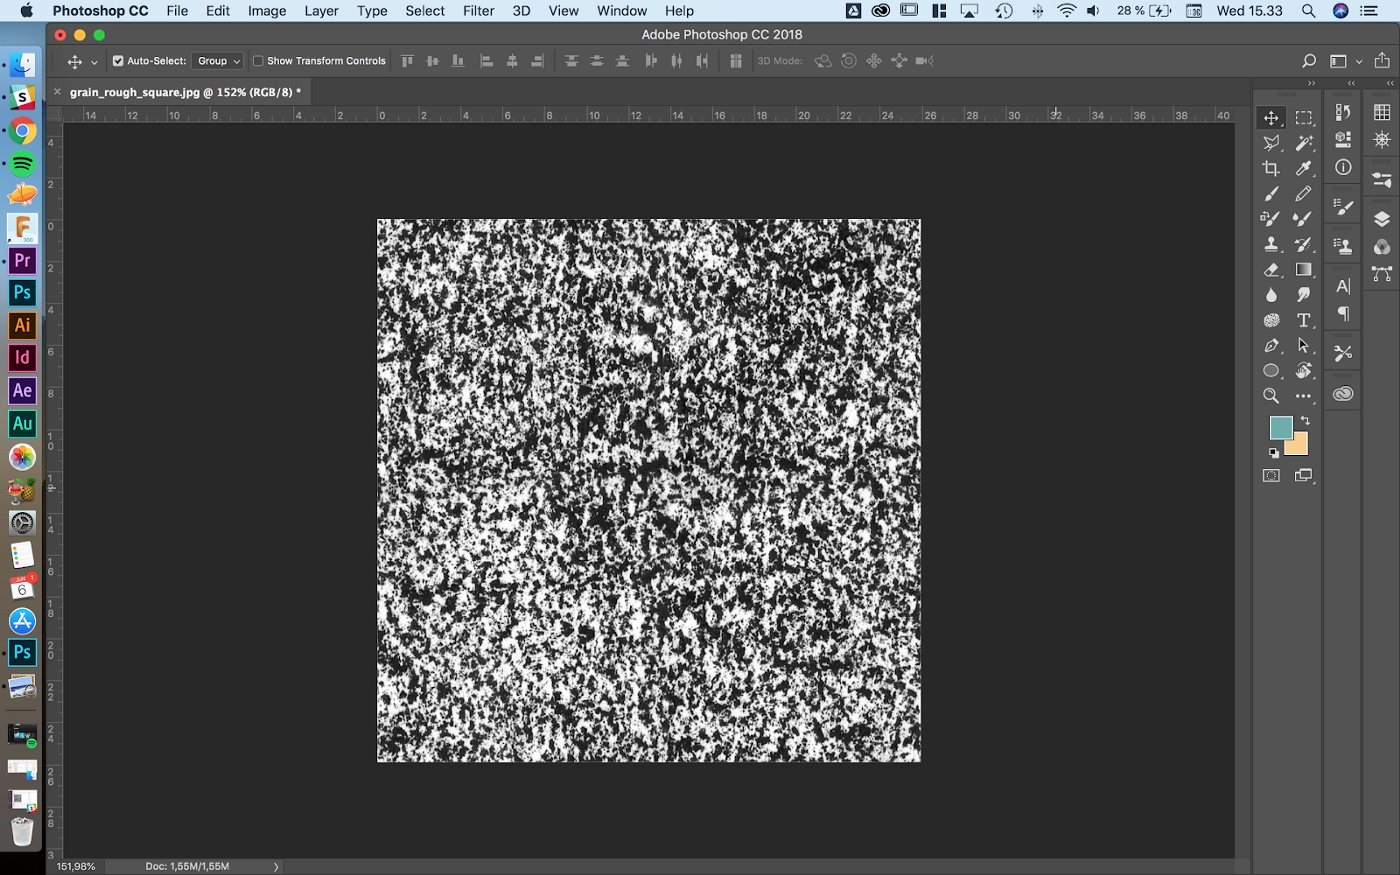
The finished, seamless result in the editor.
Here you can see several of these finished images together without apparent seams.
Here is the final, seamless oil pastel grain.
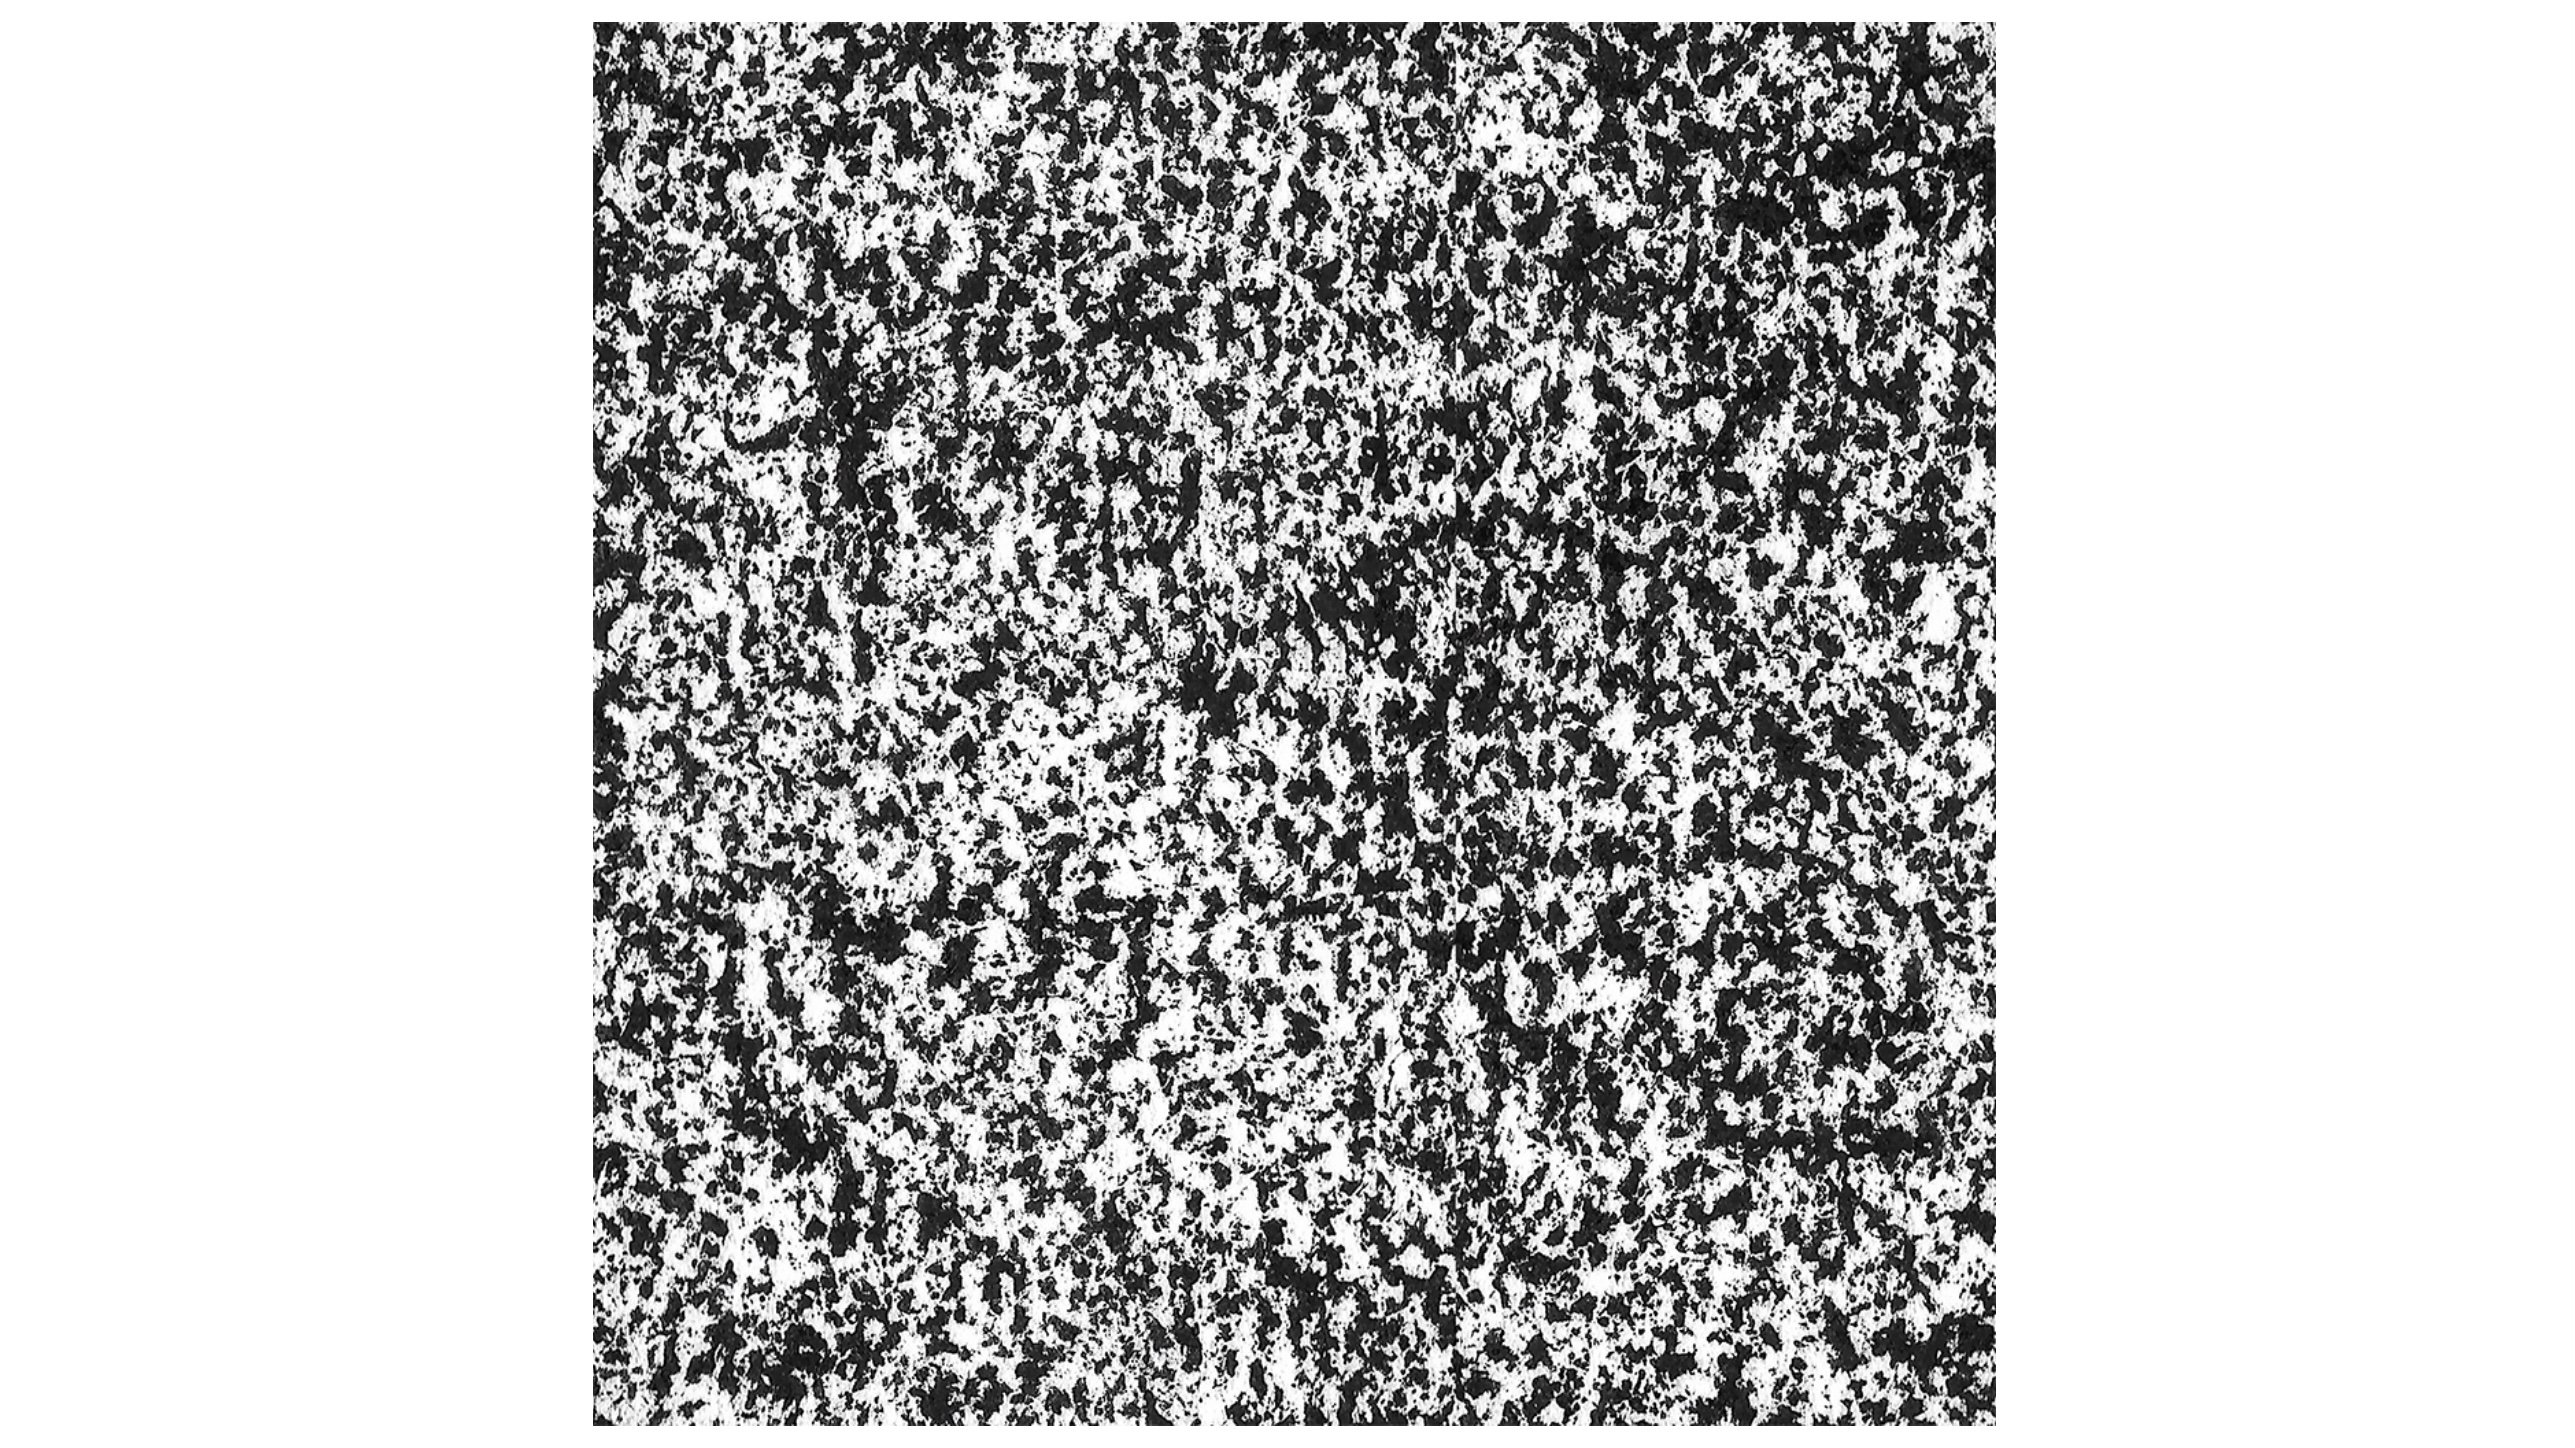
You can download this image, crop it and use it for your brushes.
When you bring this grain into the brush editor in Concepts, you’ll see a live preview of it and be able to zoom in or out to get a finer or larger grain texture.
Awesome! Now that you have a stamp and a grain, you’re ready to turn them into a new brush in How to Create a Custom Brush.
If you have questions about how to create a stamp and grain, please send an email to support@concepts.app. We’ll be happy to help.
Tutorial by Erica Christensen
Stamp and grain by Lasse Pekkala
Recommended
How to Create a Custom Brush - Learn how to use the brush editor in Concepts to create custom brushes.
Creating an Acrylic-Based Brush - This tutorial shows you how to combine six acrylic stamps and turn them into your own digital brush to paint with in Concepts.
Create a Photo-based Brush - Learn how to turn a photo into a custom brush in Concepts.