How to Create a Custom Brush
A Concepts Tutorial for iOS
Learn how to use the brush editor in Concepts to create custom brushes.
Concepts' brush editor gives you the ability to create your own brushes and adjust them easily to your own style and needs. With the brush editor, you can:
- create artistic textures with your own stamps and grains
- make brushes that respond to pressure, tilt or velocity
- fine tune brushes with an assortment of variability options
- purchase professionally crafted brush packs from the in-app store and edit them to suit your needs
In the prequel to this tutorial, you learned how to make your own stamps and grains as a basis for your custom brushes. Below are the images we created. Feel free to download these to your iPad or iPhone to get a quick start with this tutorial, or import your own stamps and grains as you go through the steps.

A simple shape stamp.
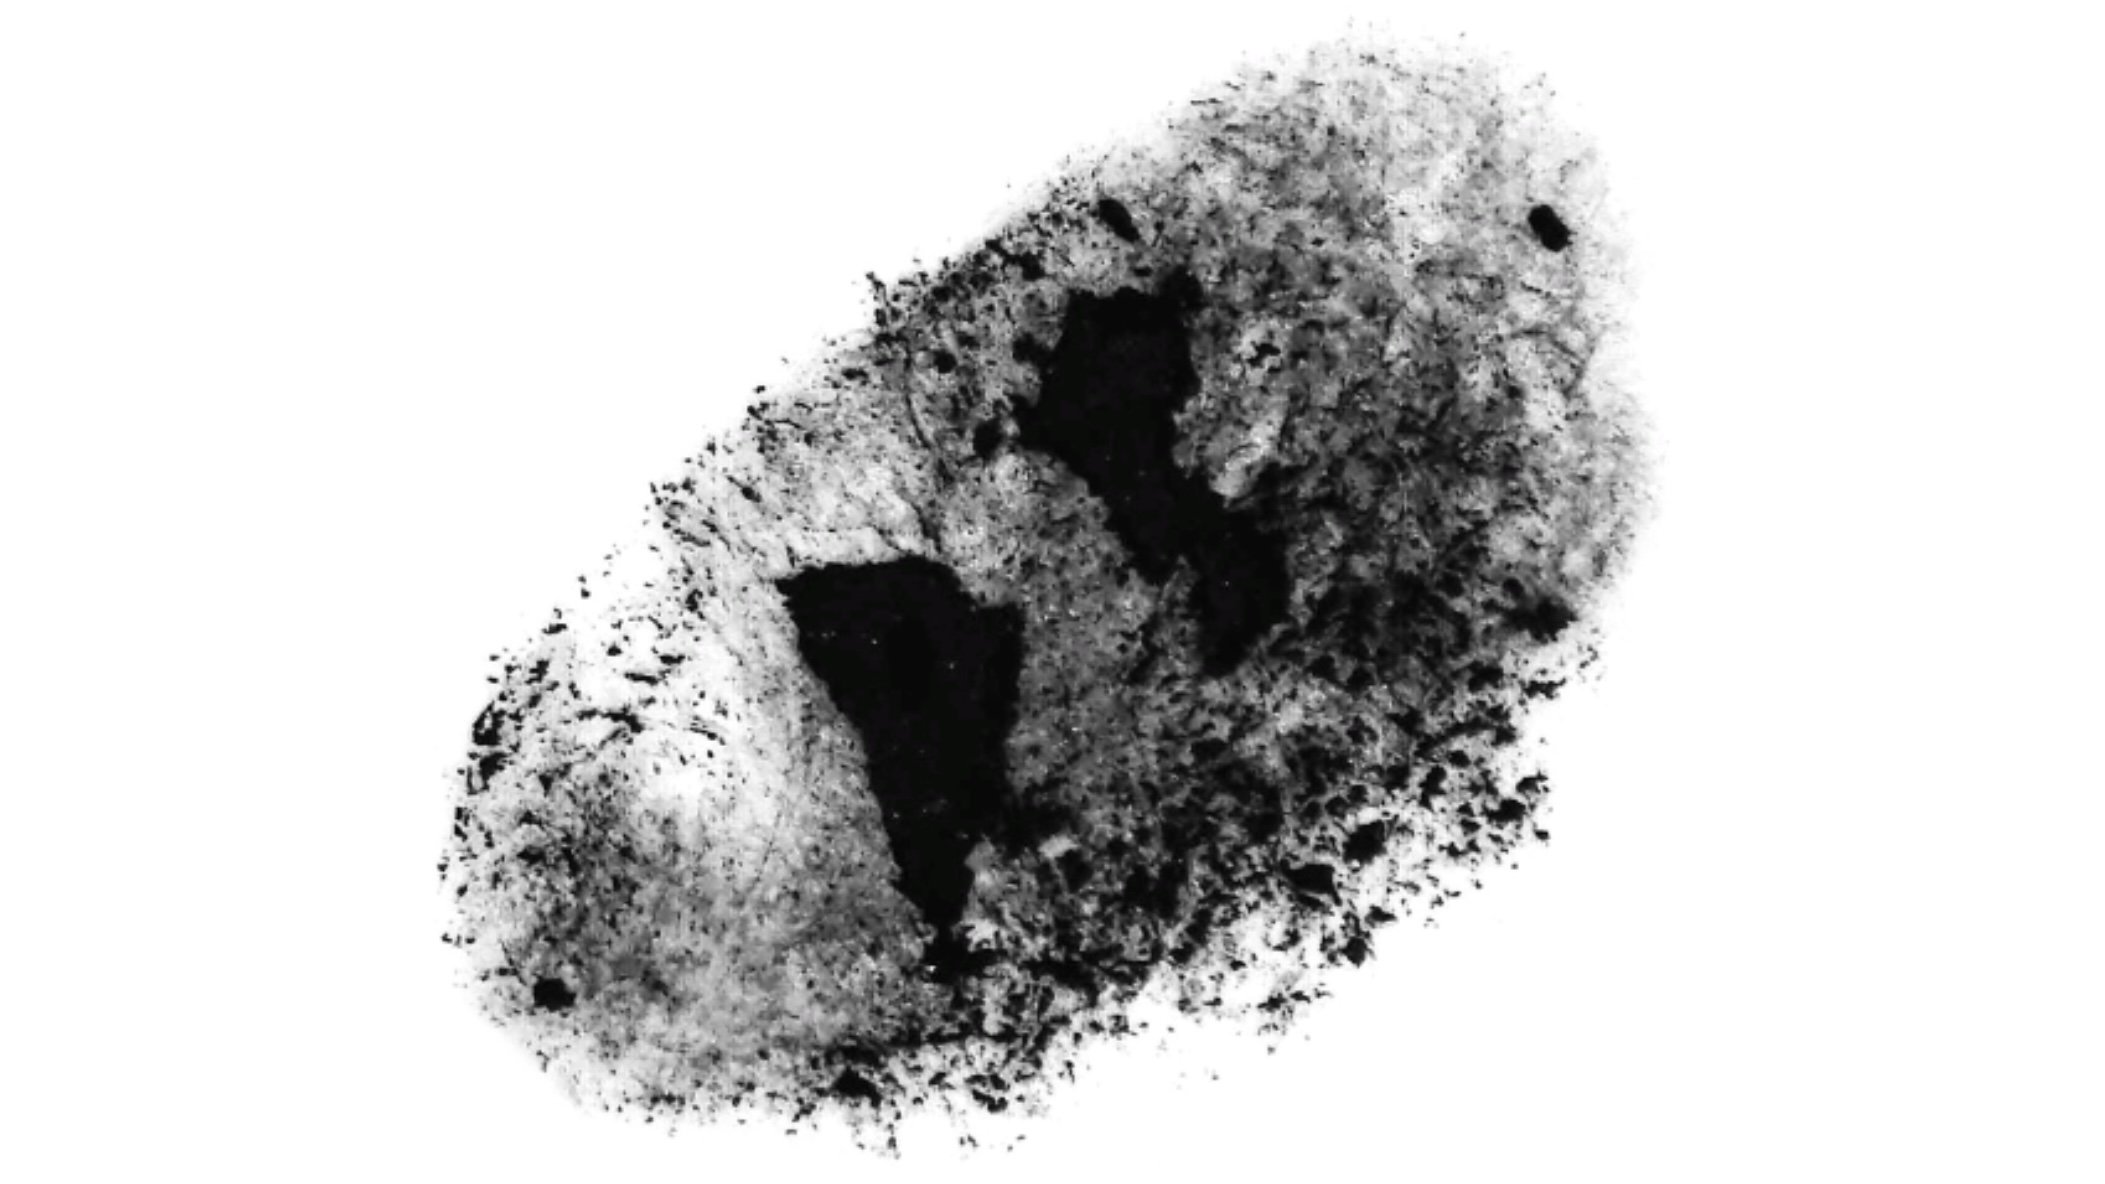
An organic, oil pastel stamp.

A seamless oil pastel grain.
Let’s walk through the Concepts brush editor and turn these images into a new brush.
The Brushes Menu
Tap a tool on the tool wheel to activate it, then tap it again to enter the Brushes menu (or just double-tap a tool).
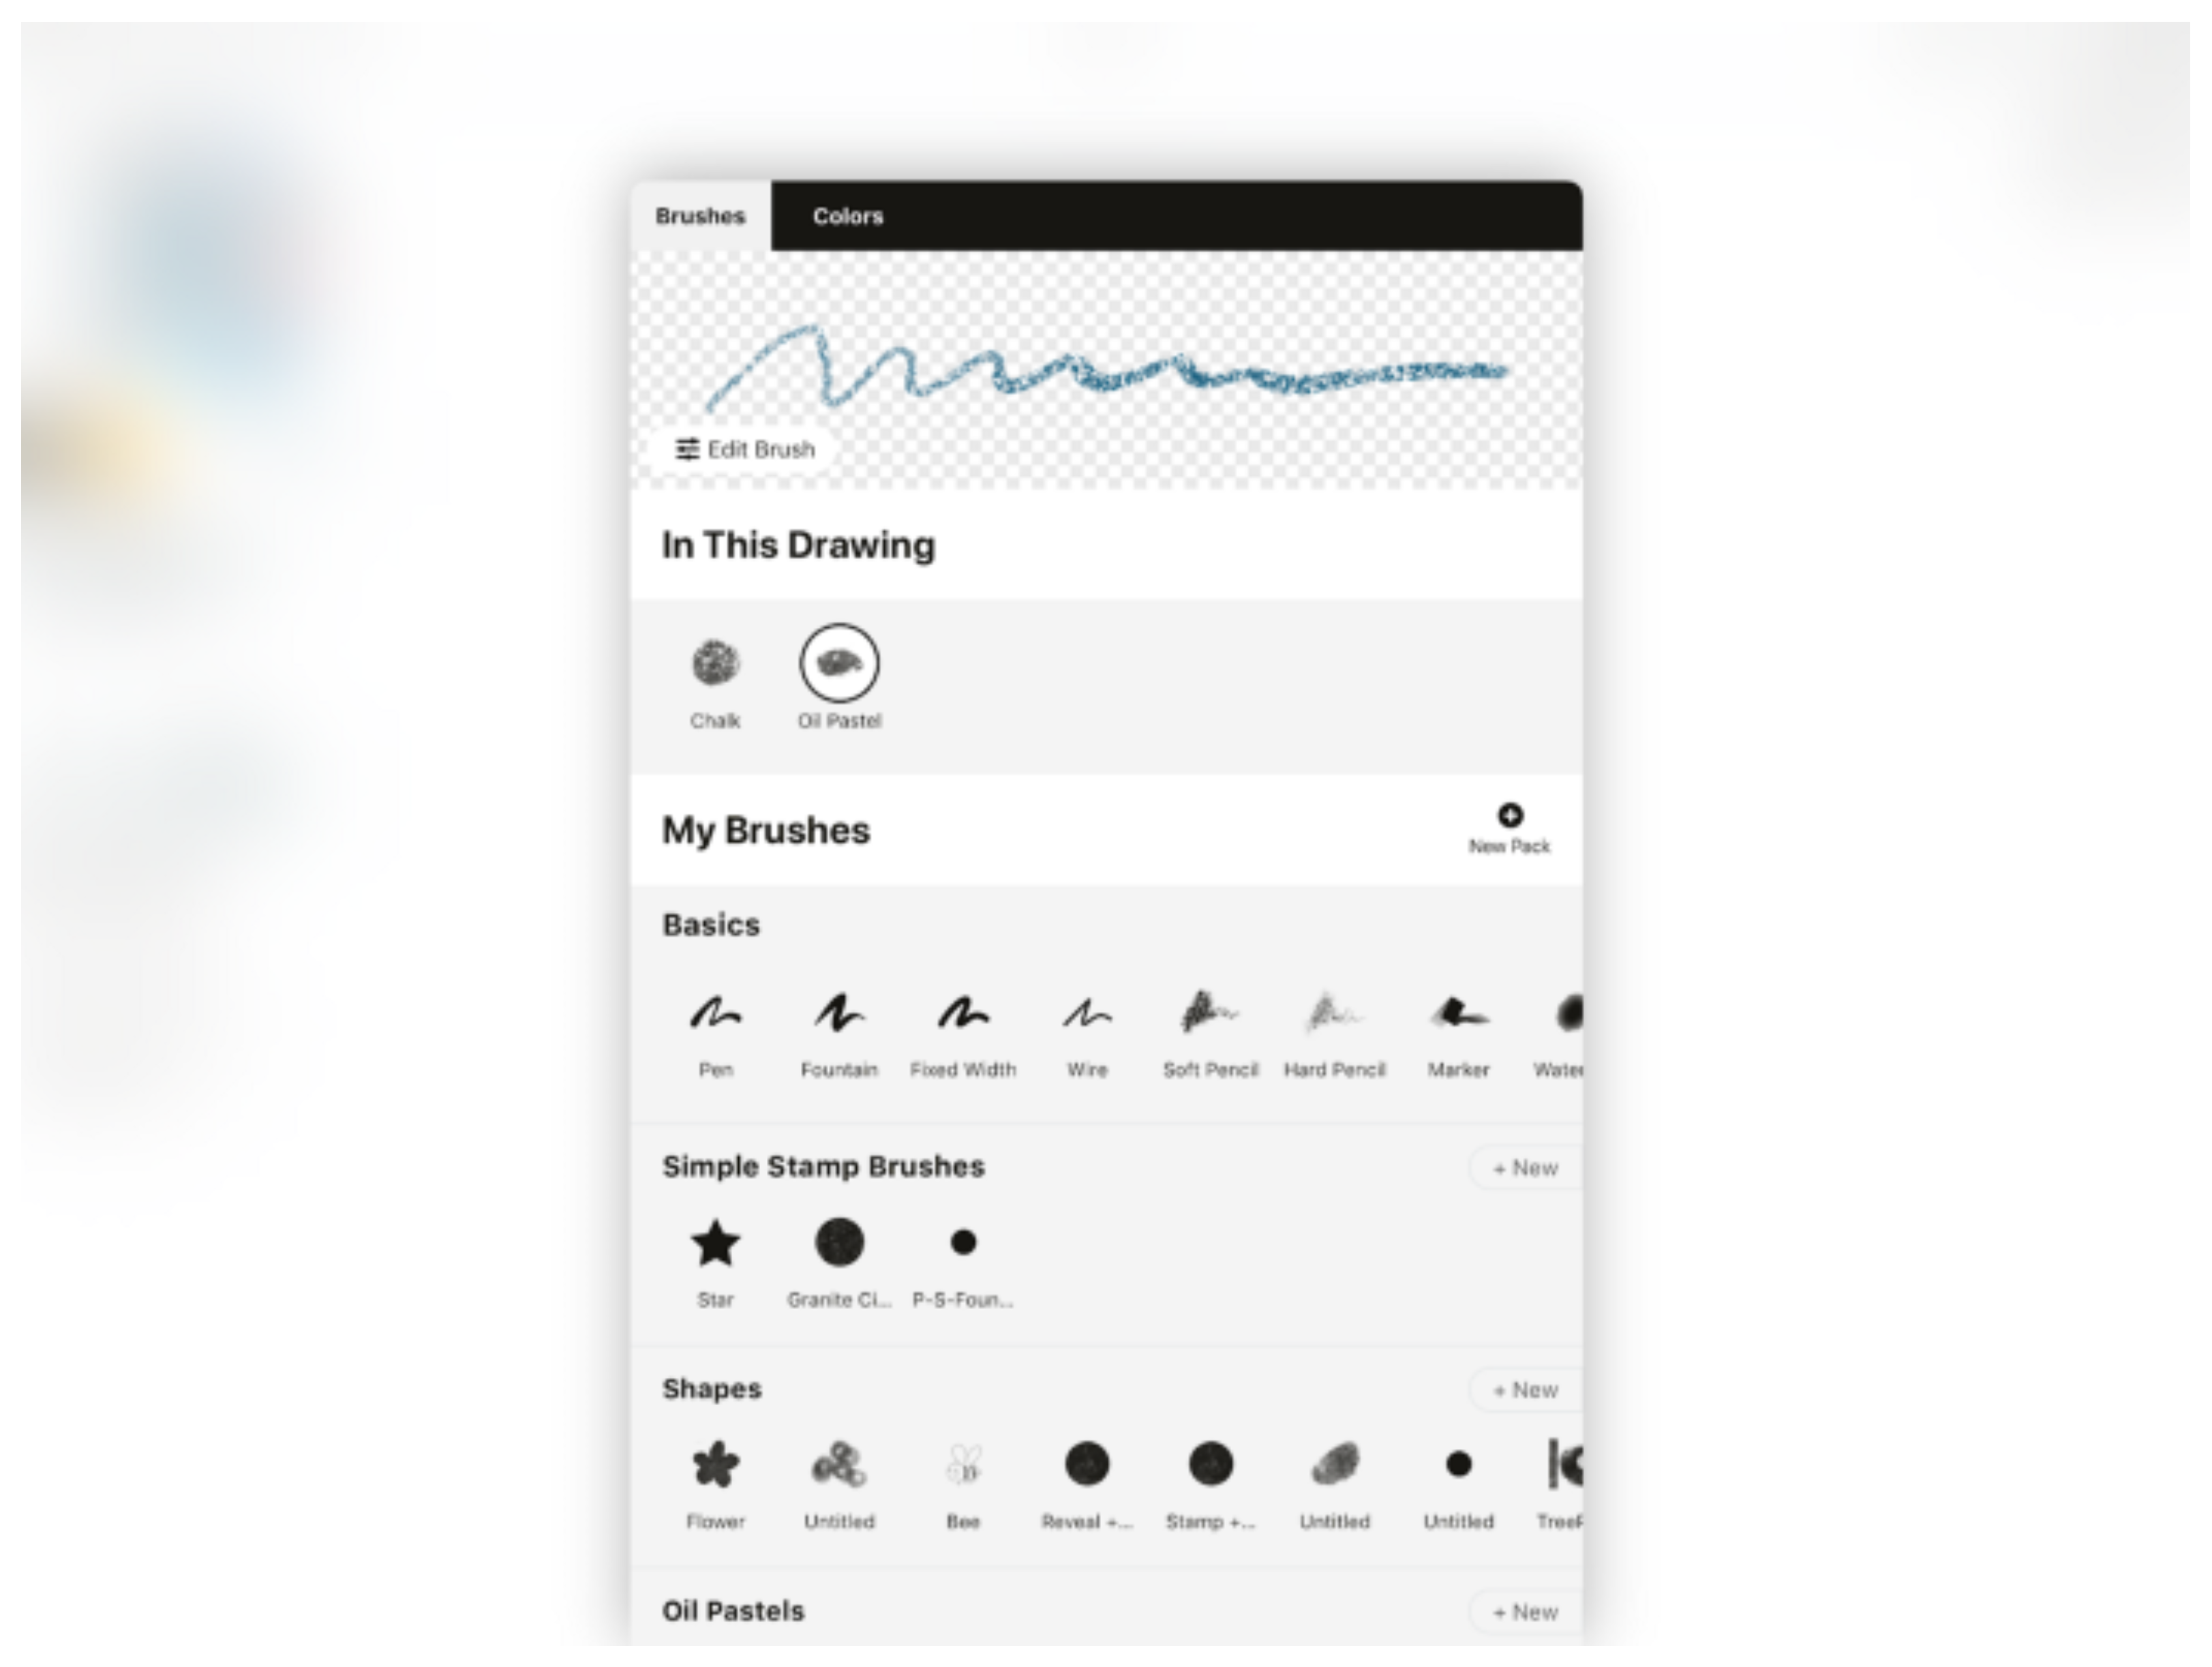
The Brushes menu displays a live brush preview, a list of all brushes used in your current drawing for quick recall, your basic brushes and tools, and if you scroll downward, any brush libraries you've purchased, imported from others or created yourself, and the Brush Market.
In the My Brushes header, you'll see a "+ New Pack" icon. This is how you'll create your new brush libraries. You can tap+hold a row or a brush to rearrange it within the menus. You can also tap+hold a brush title to give it a new name or delete it.
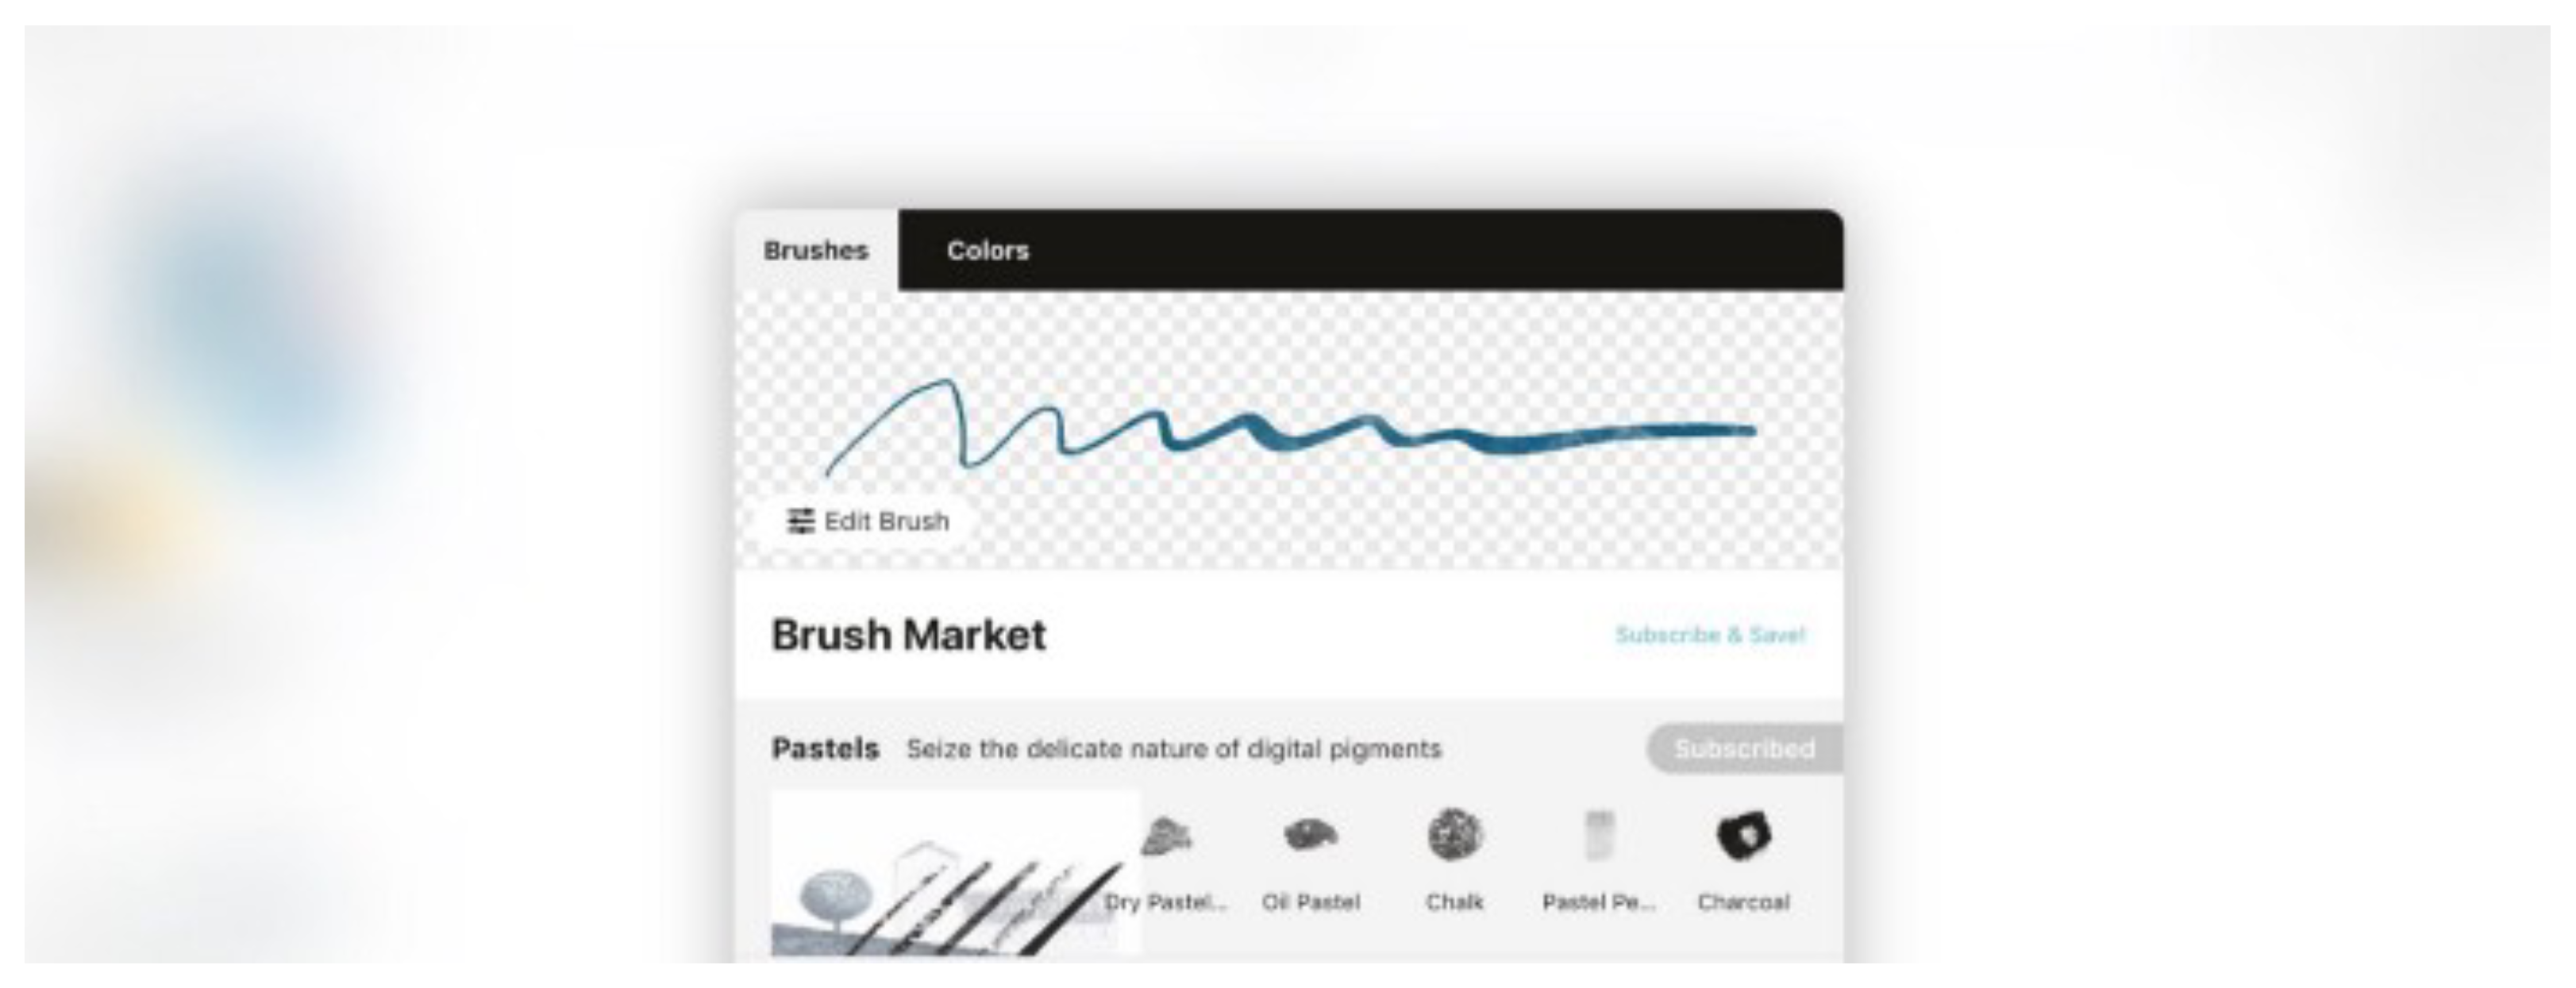
Beneath the My Brushes section (and if you've imported or purchased brushes, you'll see those sections as well), you’ll find the Brush Market with packs of brushes available for purchase. These are just like object packs — if you're a subscriber, they will automatically be unlocked; if you are a one-time purchaser, you can buy credits and redeem them for both objects and brushes. You are welcome to duplicate and tweak these brushes within the brush library using the brush editor.
Editing a Standard Brush
Editing one of Concepts' Basic Brushes or Tools is limited to the same size, opacity and smoothing settings available in the inner ring of the tool wheel. You can't change these tools beyond these abilities. Tapping on the Edit Brush icon will bring you to a menu version of these basic settings, and editing them will update the settings on the canvas.
Creating a New Brush
To create a new set of brushes, tap + New Pack on the My Brushessection header. This will create a new "Untitled" brush library with a basic, uncustomized brush inside it. The library will also display the option to add another brush in the right corner. To add new brushes to the library, tap + New. You can create as many brushes as you like in a library. You can also tap+hold on an existing brush in a library, duplicate it, and update it into a new version.
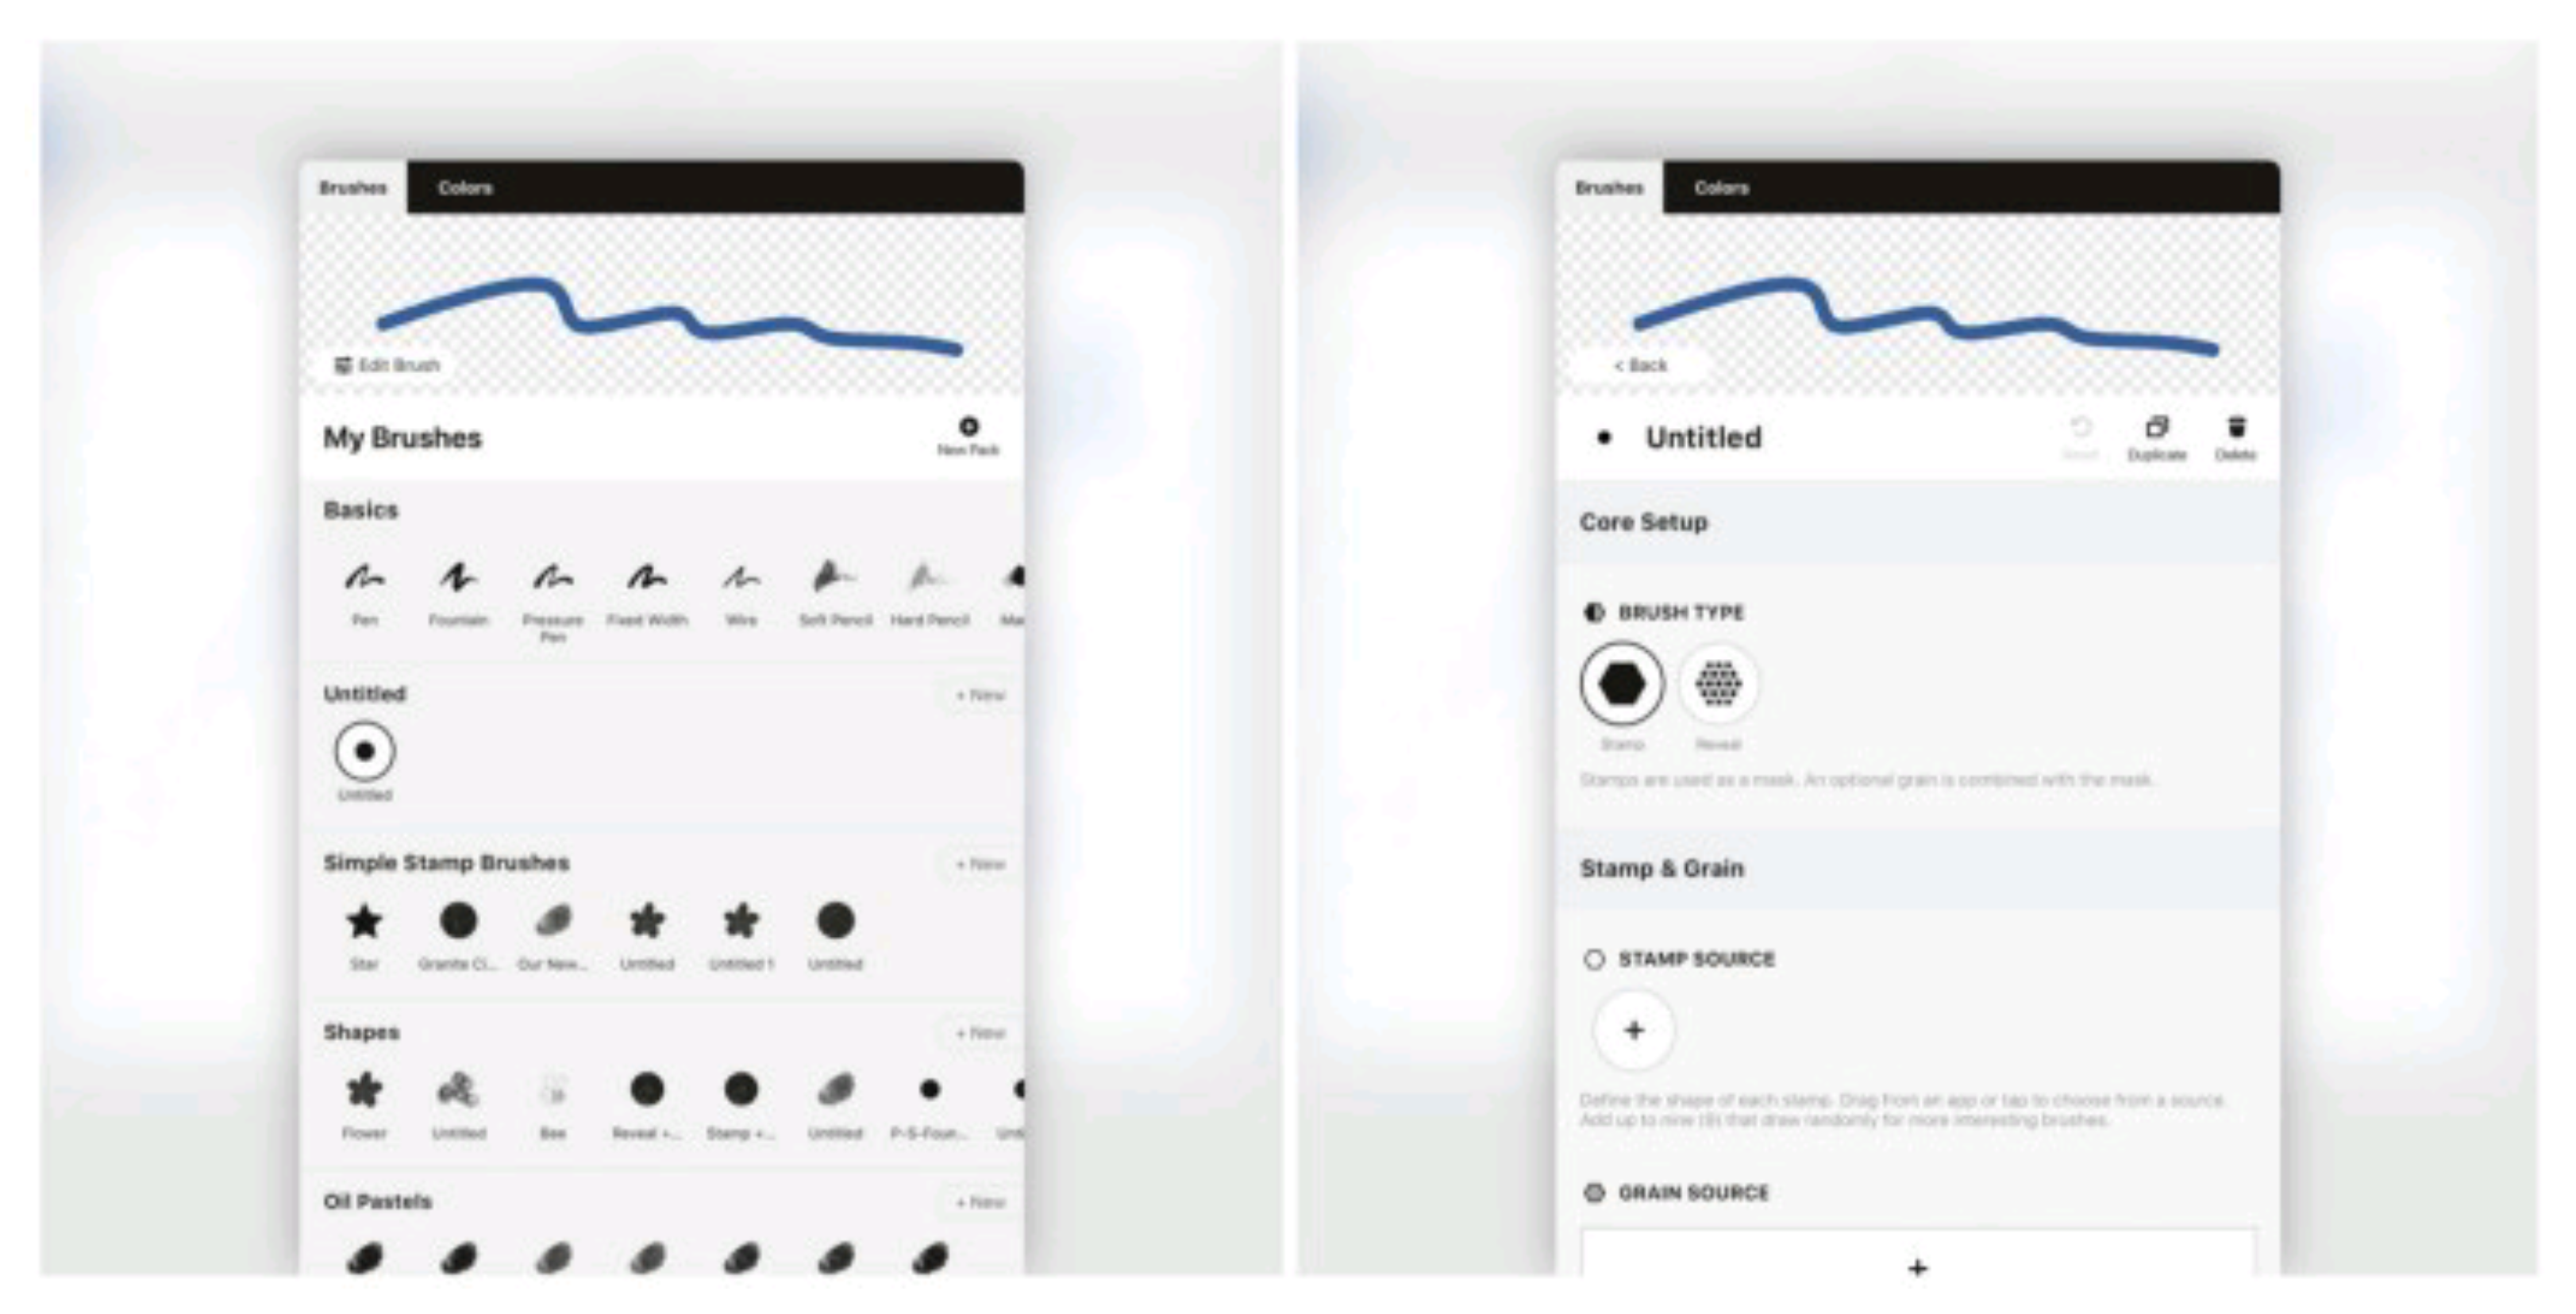
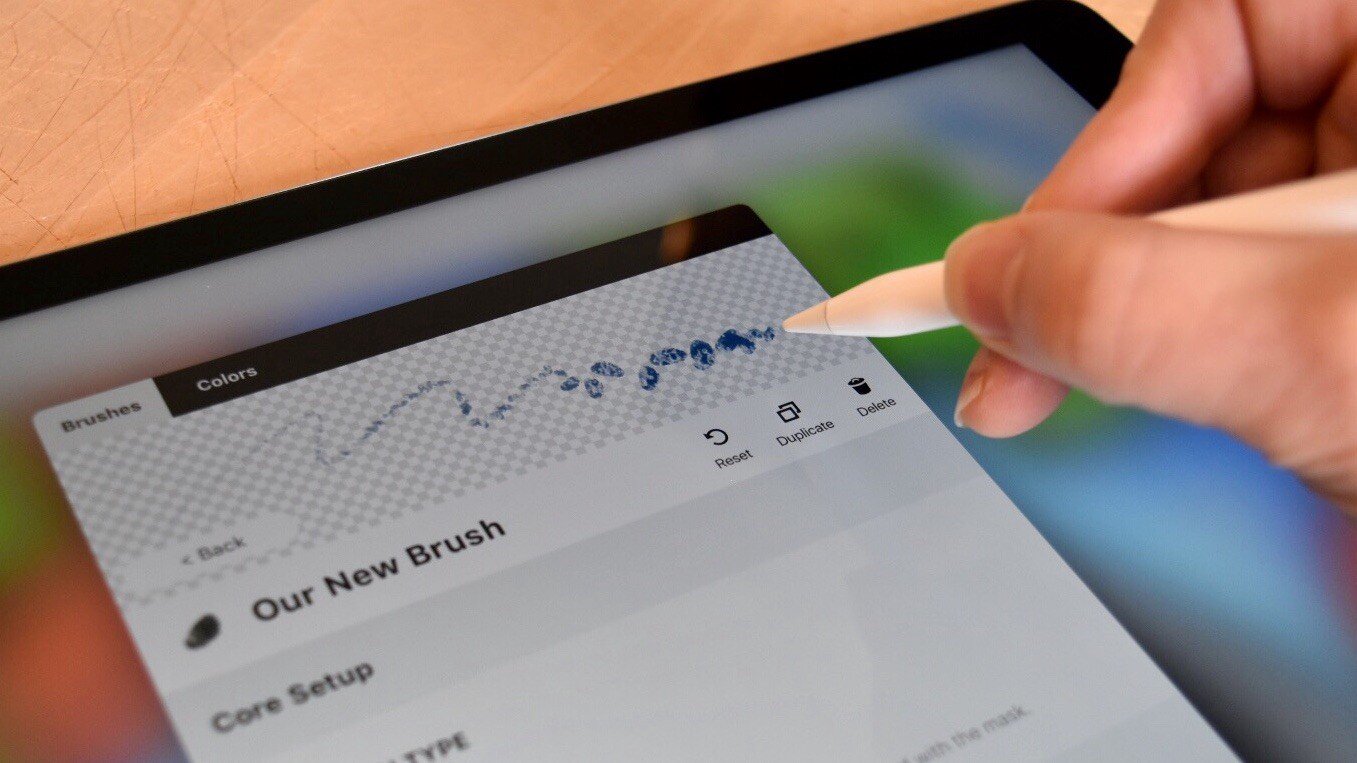
Tap the new brush to enter the Brush editor and customize it. You can also tap “Edit Brush” in the viewer up top.
The Brush Editor
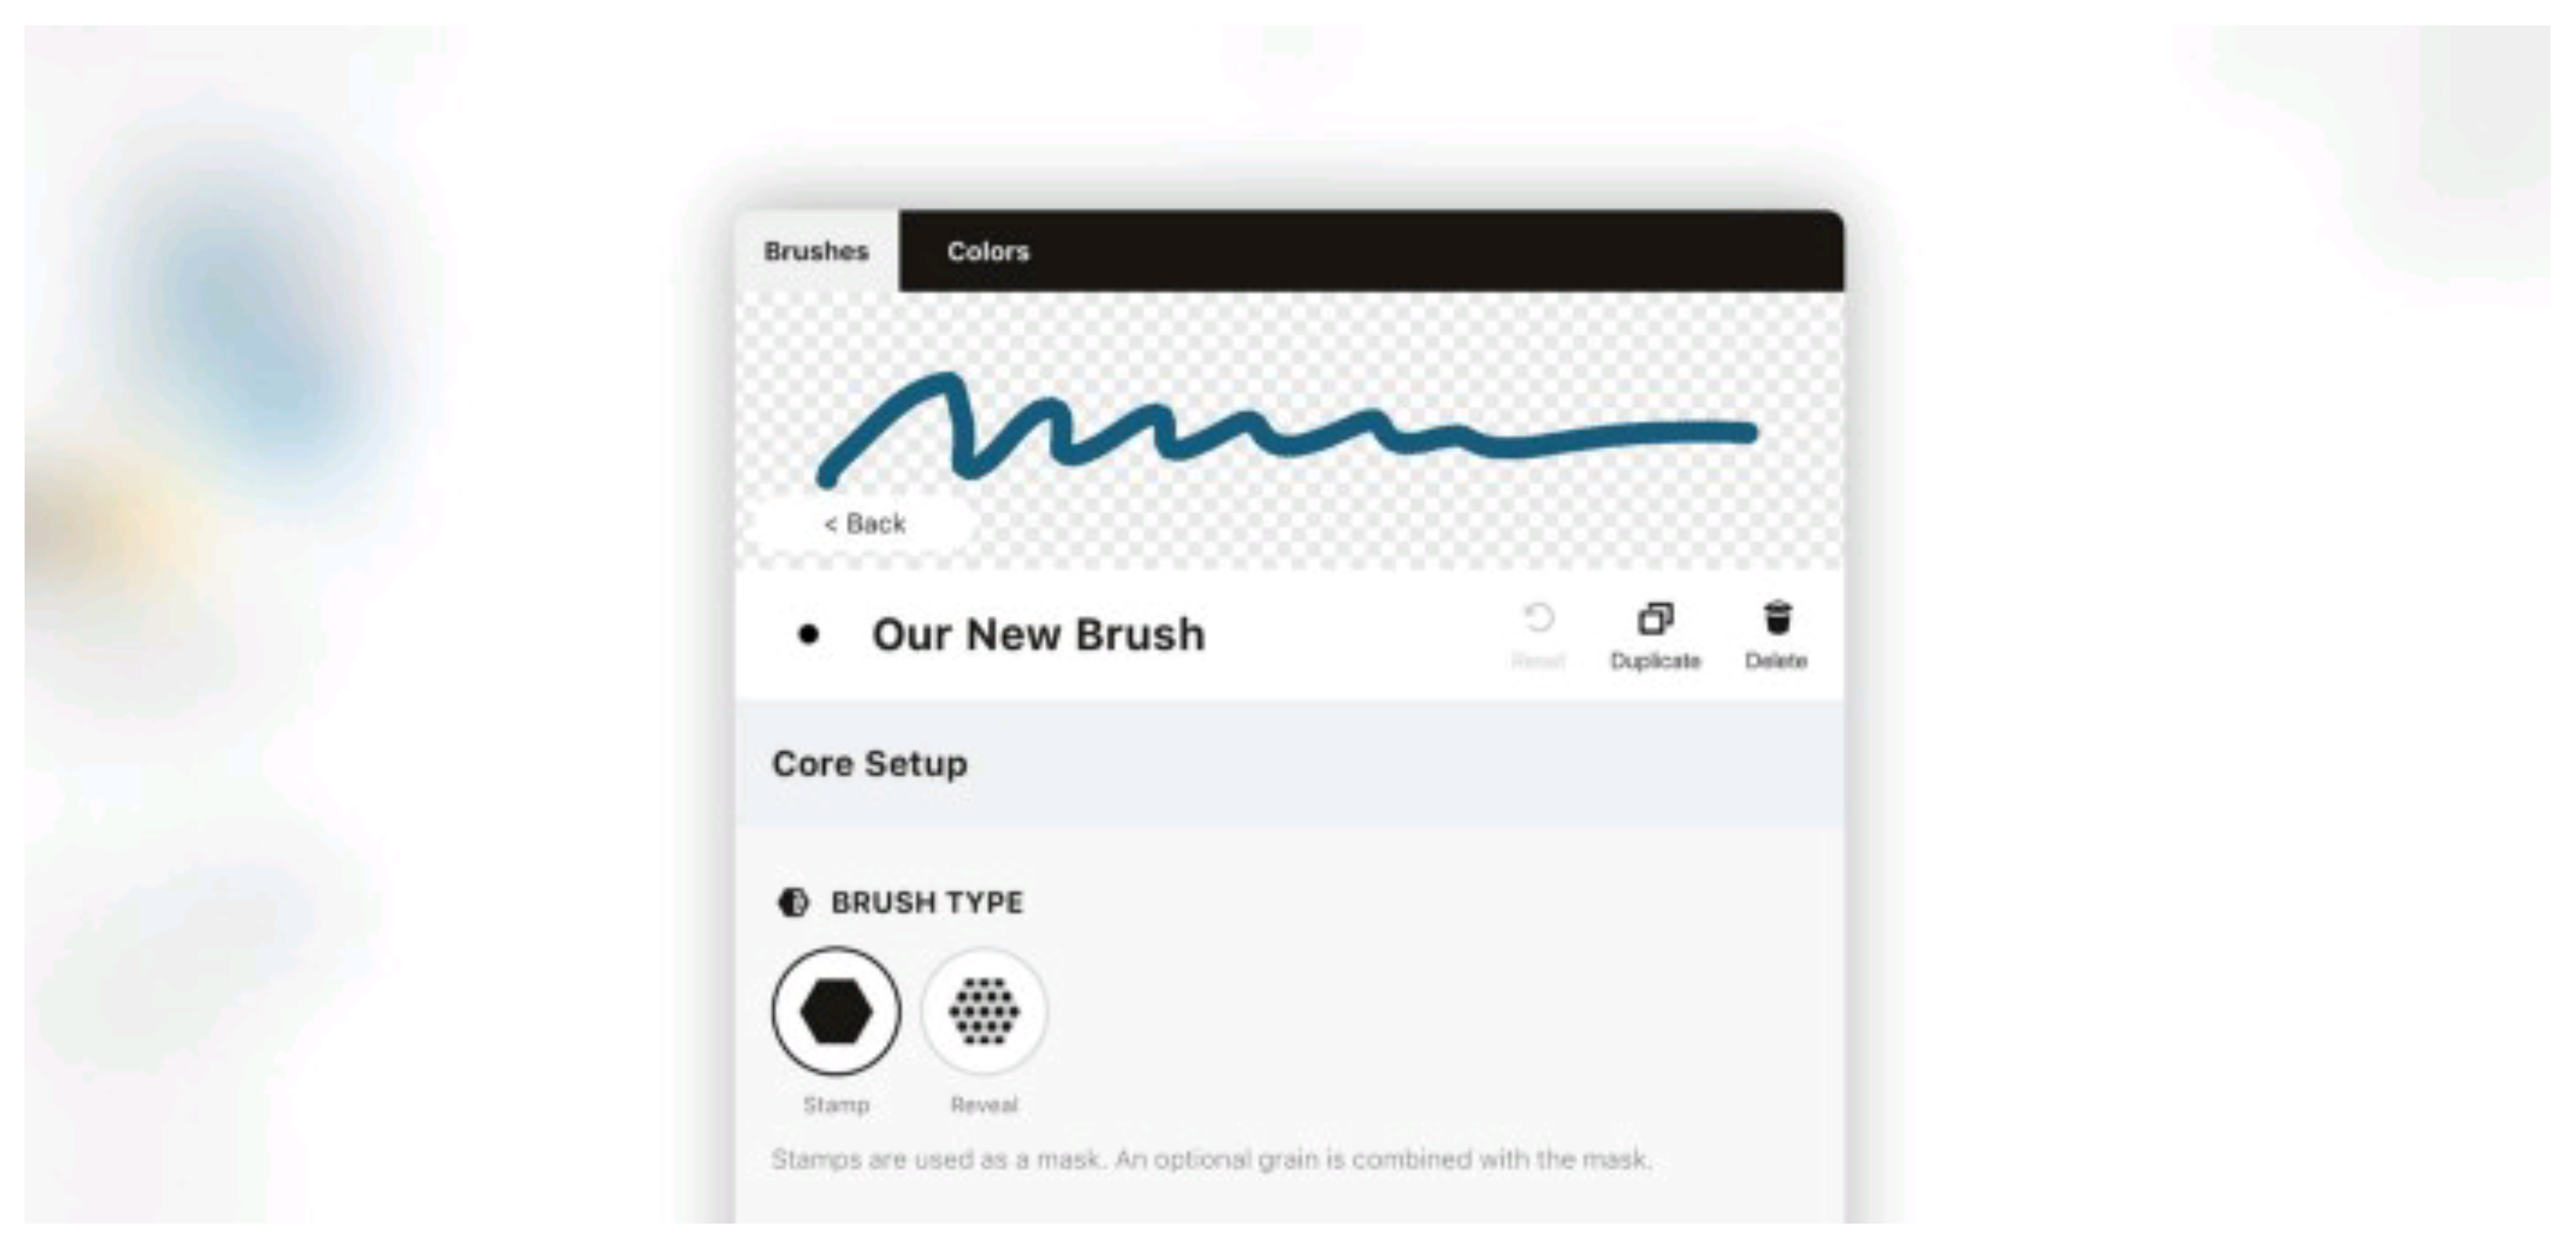
Here you’ll see the live viewer, your brush specs with options to reset, duplicate or delete the brush, and many ways to edit your brush, starting with the Core Setup.
Core Setup
Core Setup refers to your starting brush type. This can either be a Stamp brush or a Reveal brush. These function oppositely from each other in a fundamental way.
- A Stamp brush creates a stamp using one or several images, and stacks these stamps on top of each other at intervals you set to create your brush texture. Think real-life ink stamps built on top of each other, repeating as they create a stroke.
- A Reveal brush uses its image base to unmask a grain underneath. A good metaphor for this might be watercolor paint — it seeps into the textured paper to enhance the paper with pigment and reveal the texture further. The resulting stroke of this brush type is even and consistent, there is no “overlap” when a stroke doubles back on itself.
Choose which type of brush you’d like to create.
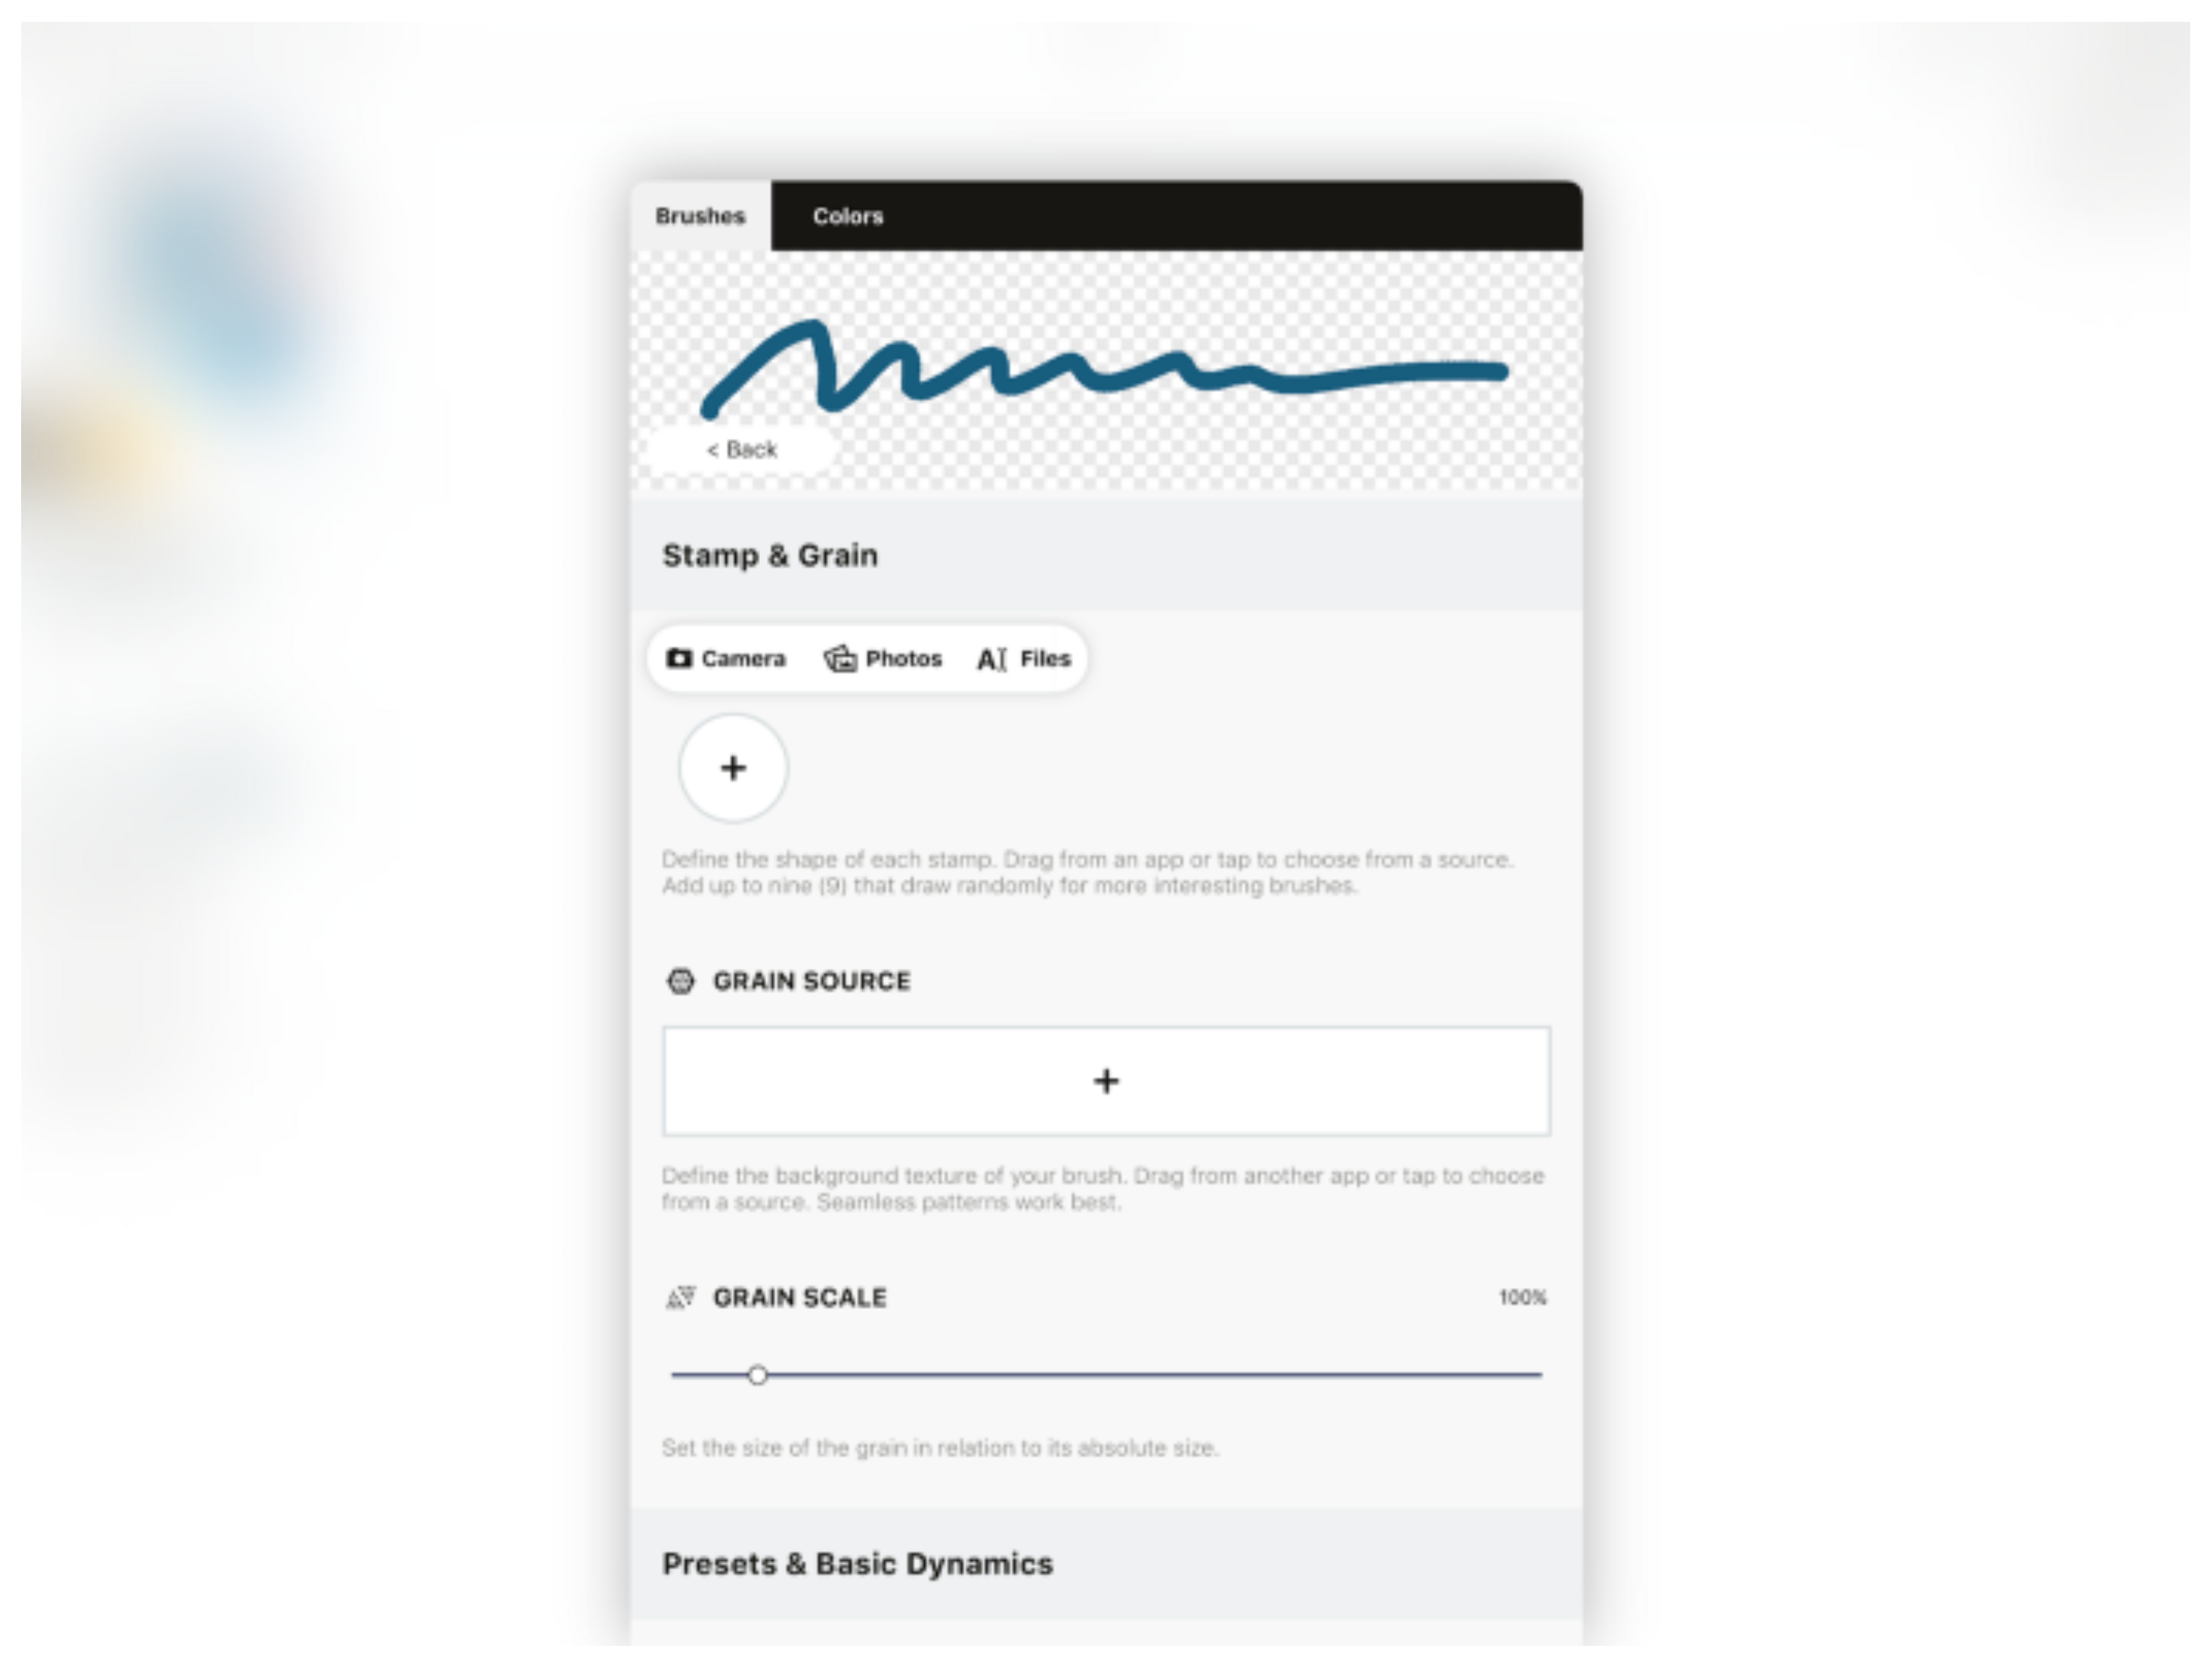
Stamp & Grain
Now scroll down to Stamp & Grain.
STAMP
“Stamp” in this section refers to the image you import, not your core brush setting. Tap the “+” under Stamp Source to bring up options to import your image — the camera, your photo roll or Files (including Cloud). This means you can take a picture using your iPad / iPhone or import from somewhere else.
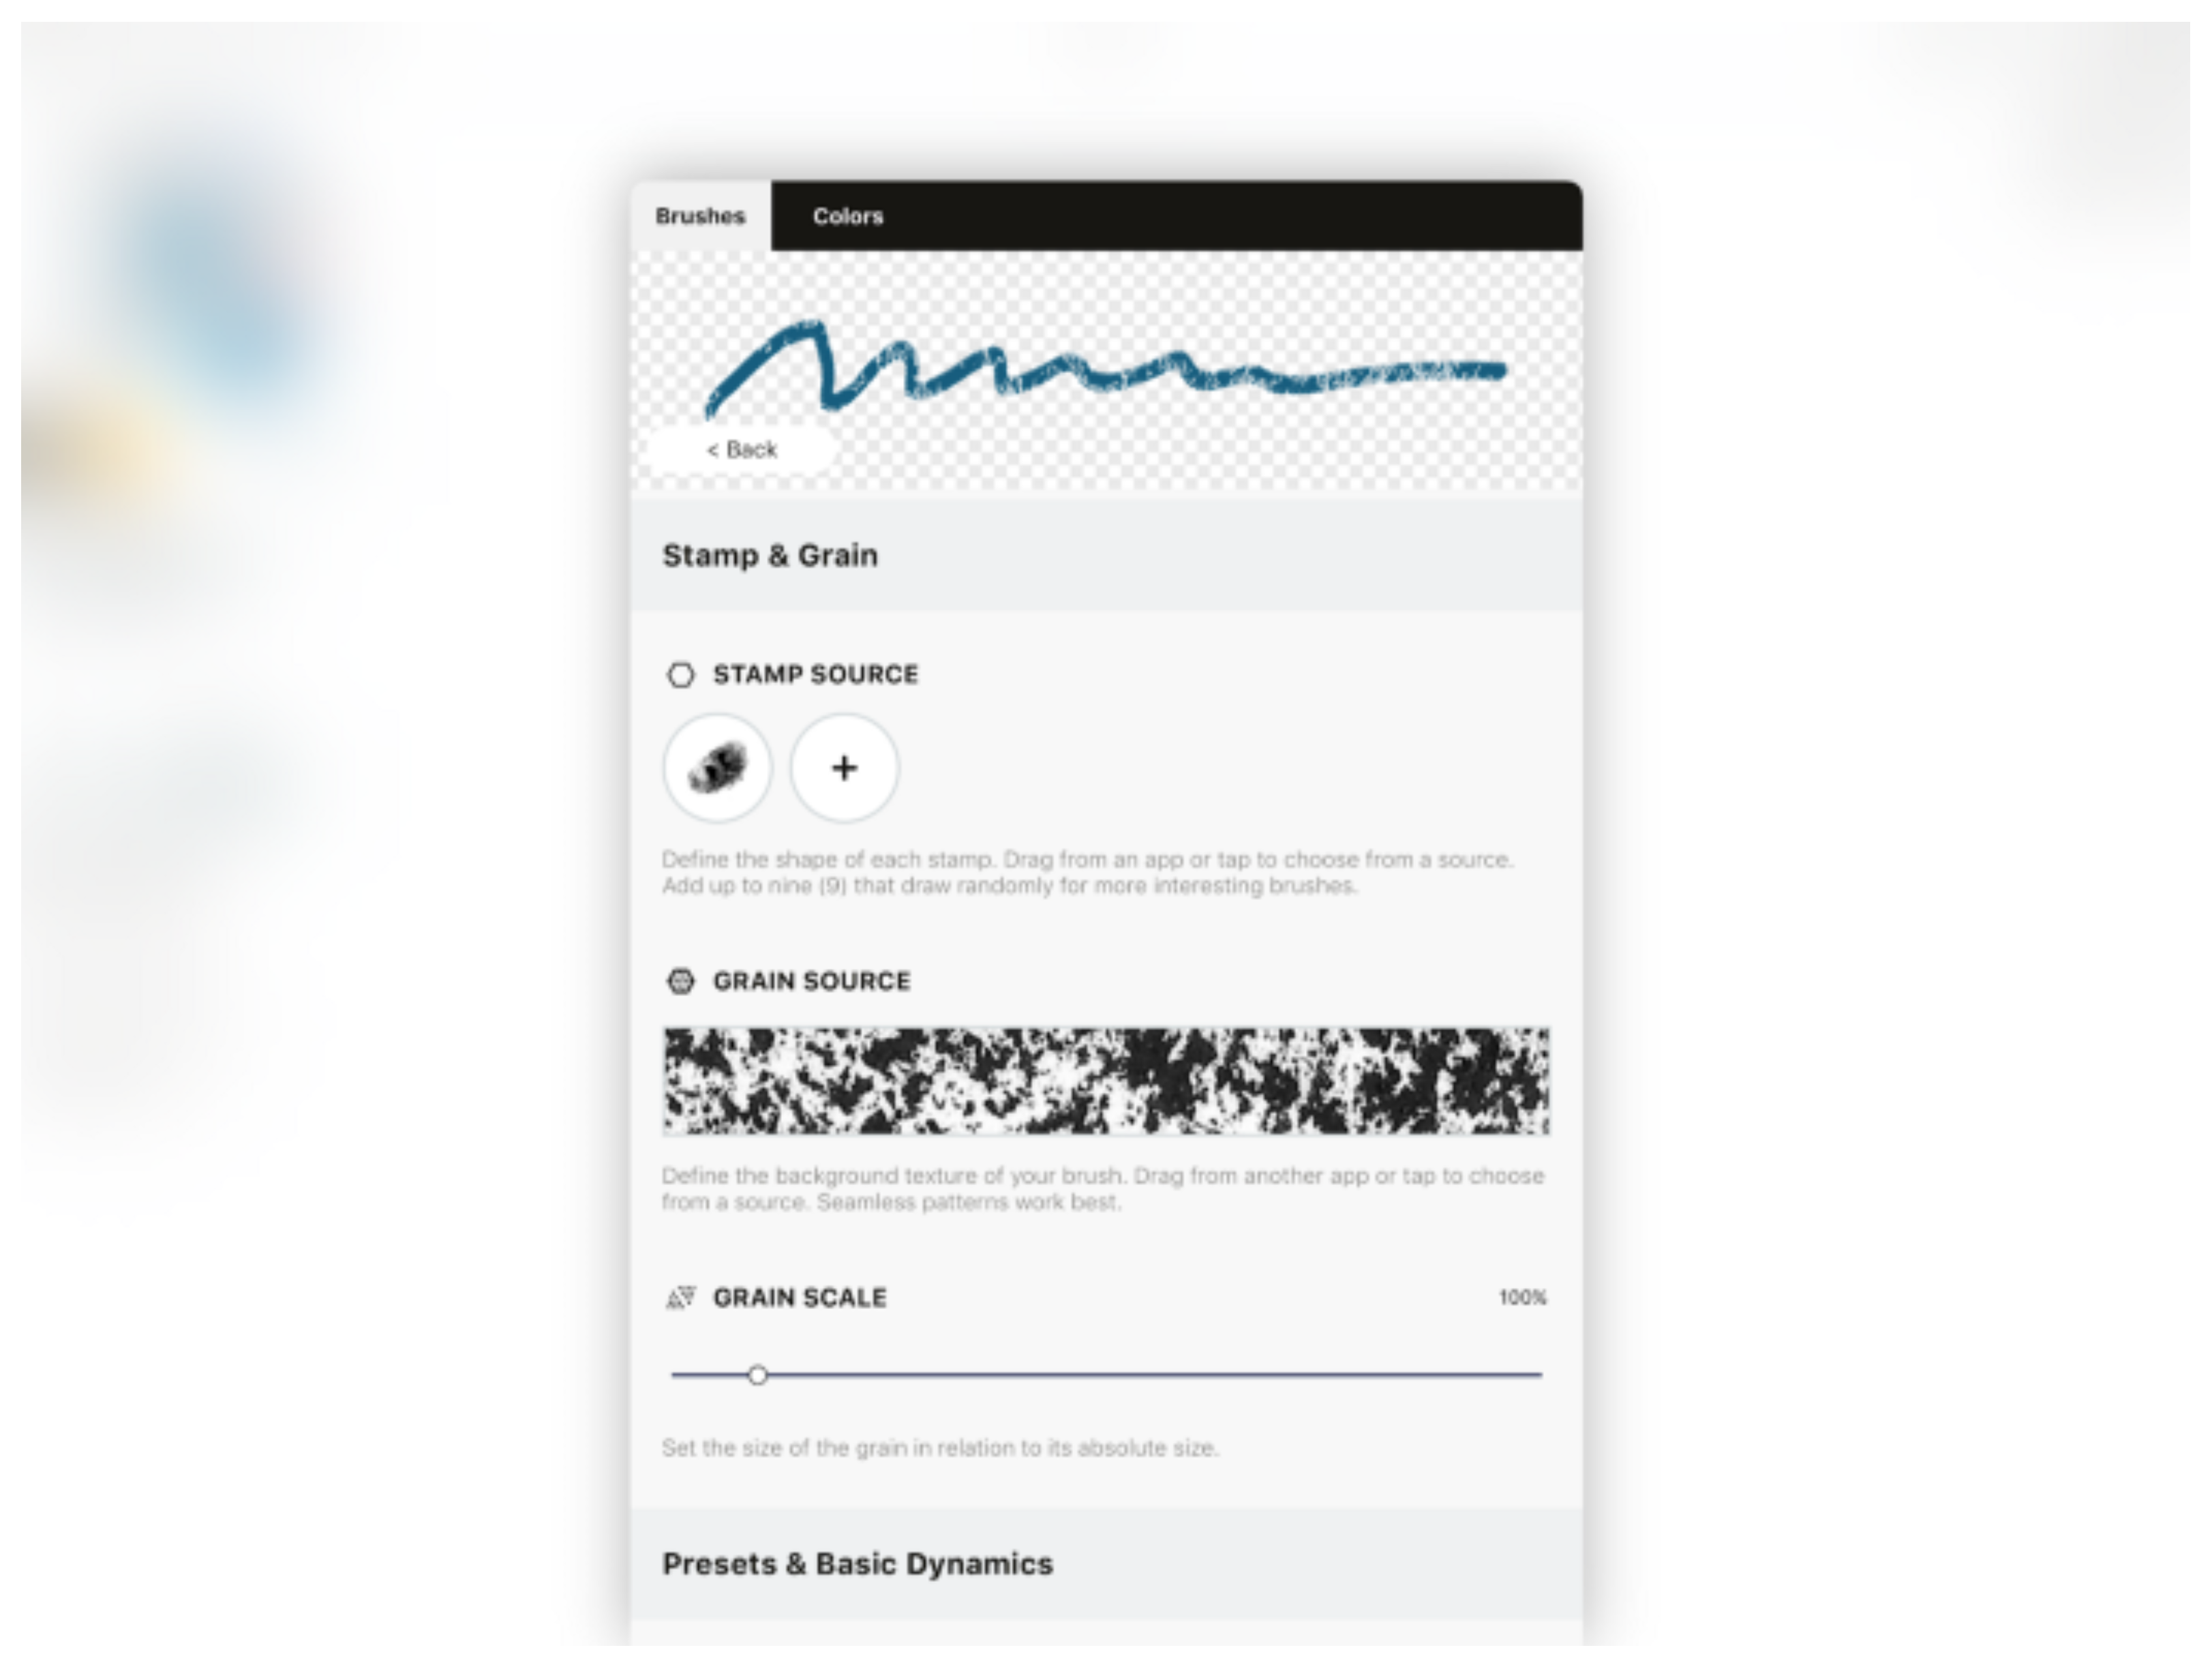
Go ahead and import a stamp image — for example, one of the images we gave you at the beginning of the tutorial.
A couple things to note as you do this:
- If you take a photo, you’ll notice the editor turns your photo to greyscale automatically.
- You can add up to nine stamps that draw randomly for more interesting brushes.
GRAIN
If you’d like, you can also include a Grain source. This is an additional background texture for your brush, and if you’re using the Reveal type brush especially, it can make a big difference.
Tap the viewer to import an image for your grain.
Try using the oil pastel grain from the beginning of the tutorial. This one is seamless so it will repeat unnoticeably as you draw. Unless you’re going for a possibly-contemporary look, you’ll want to create seamless grains for your brushes — this process is outlined in this tutorial.
Some other interesting grains might be watercolor paper, the fabric on your clothing, a photo of some wood or stone, or another image that has great natural texture to it.
You can increase or decrease the scale of your grain by using the slider below, and if you draw inside the viewer, you can immediately see what your brush is looking like so far… which is pretty awesome.
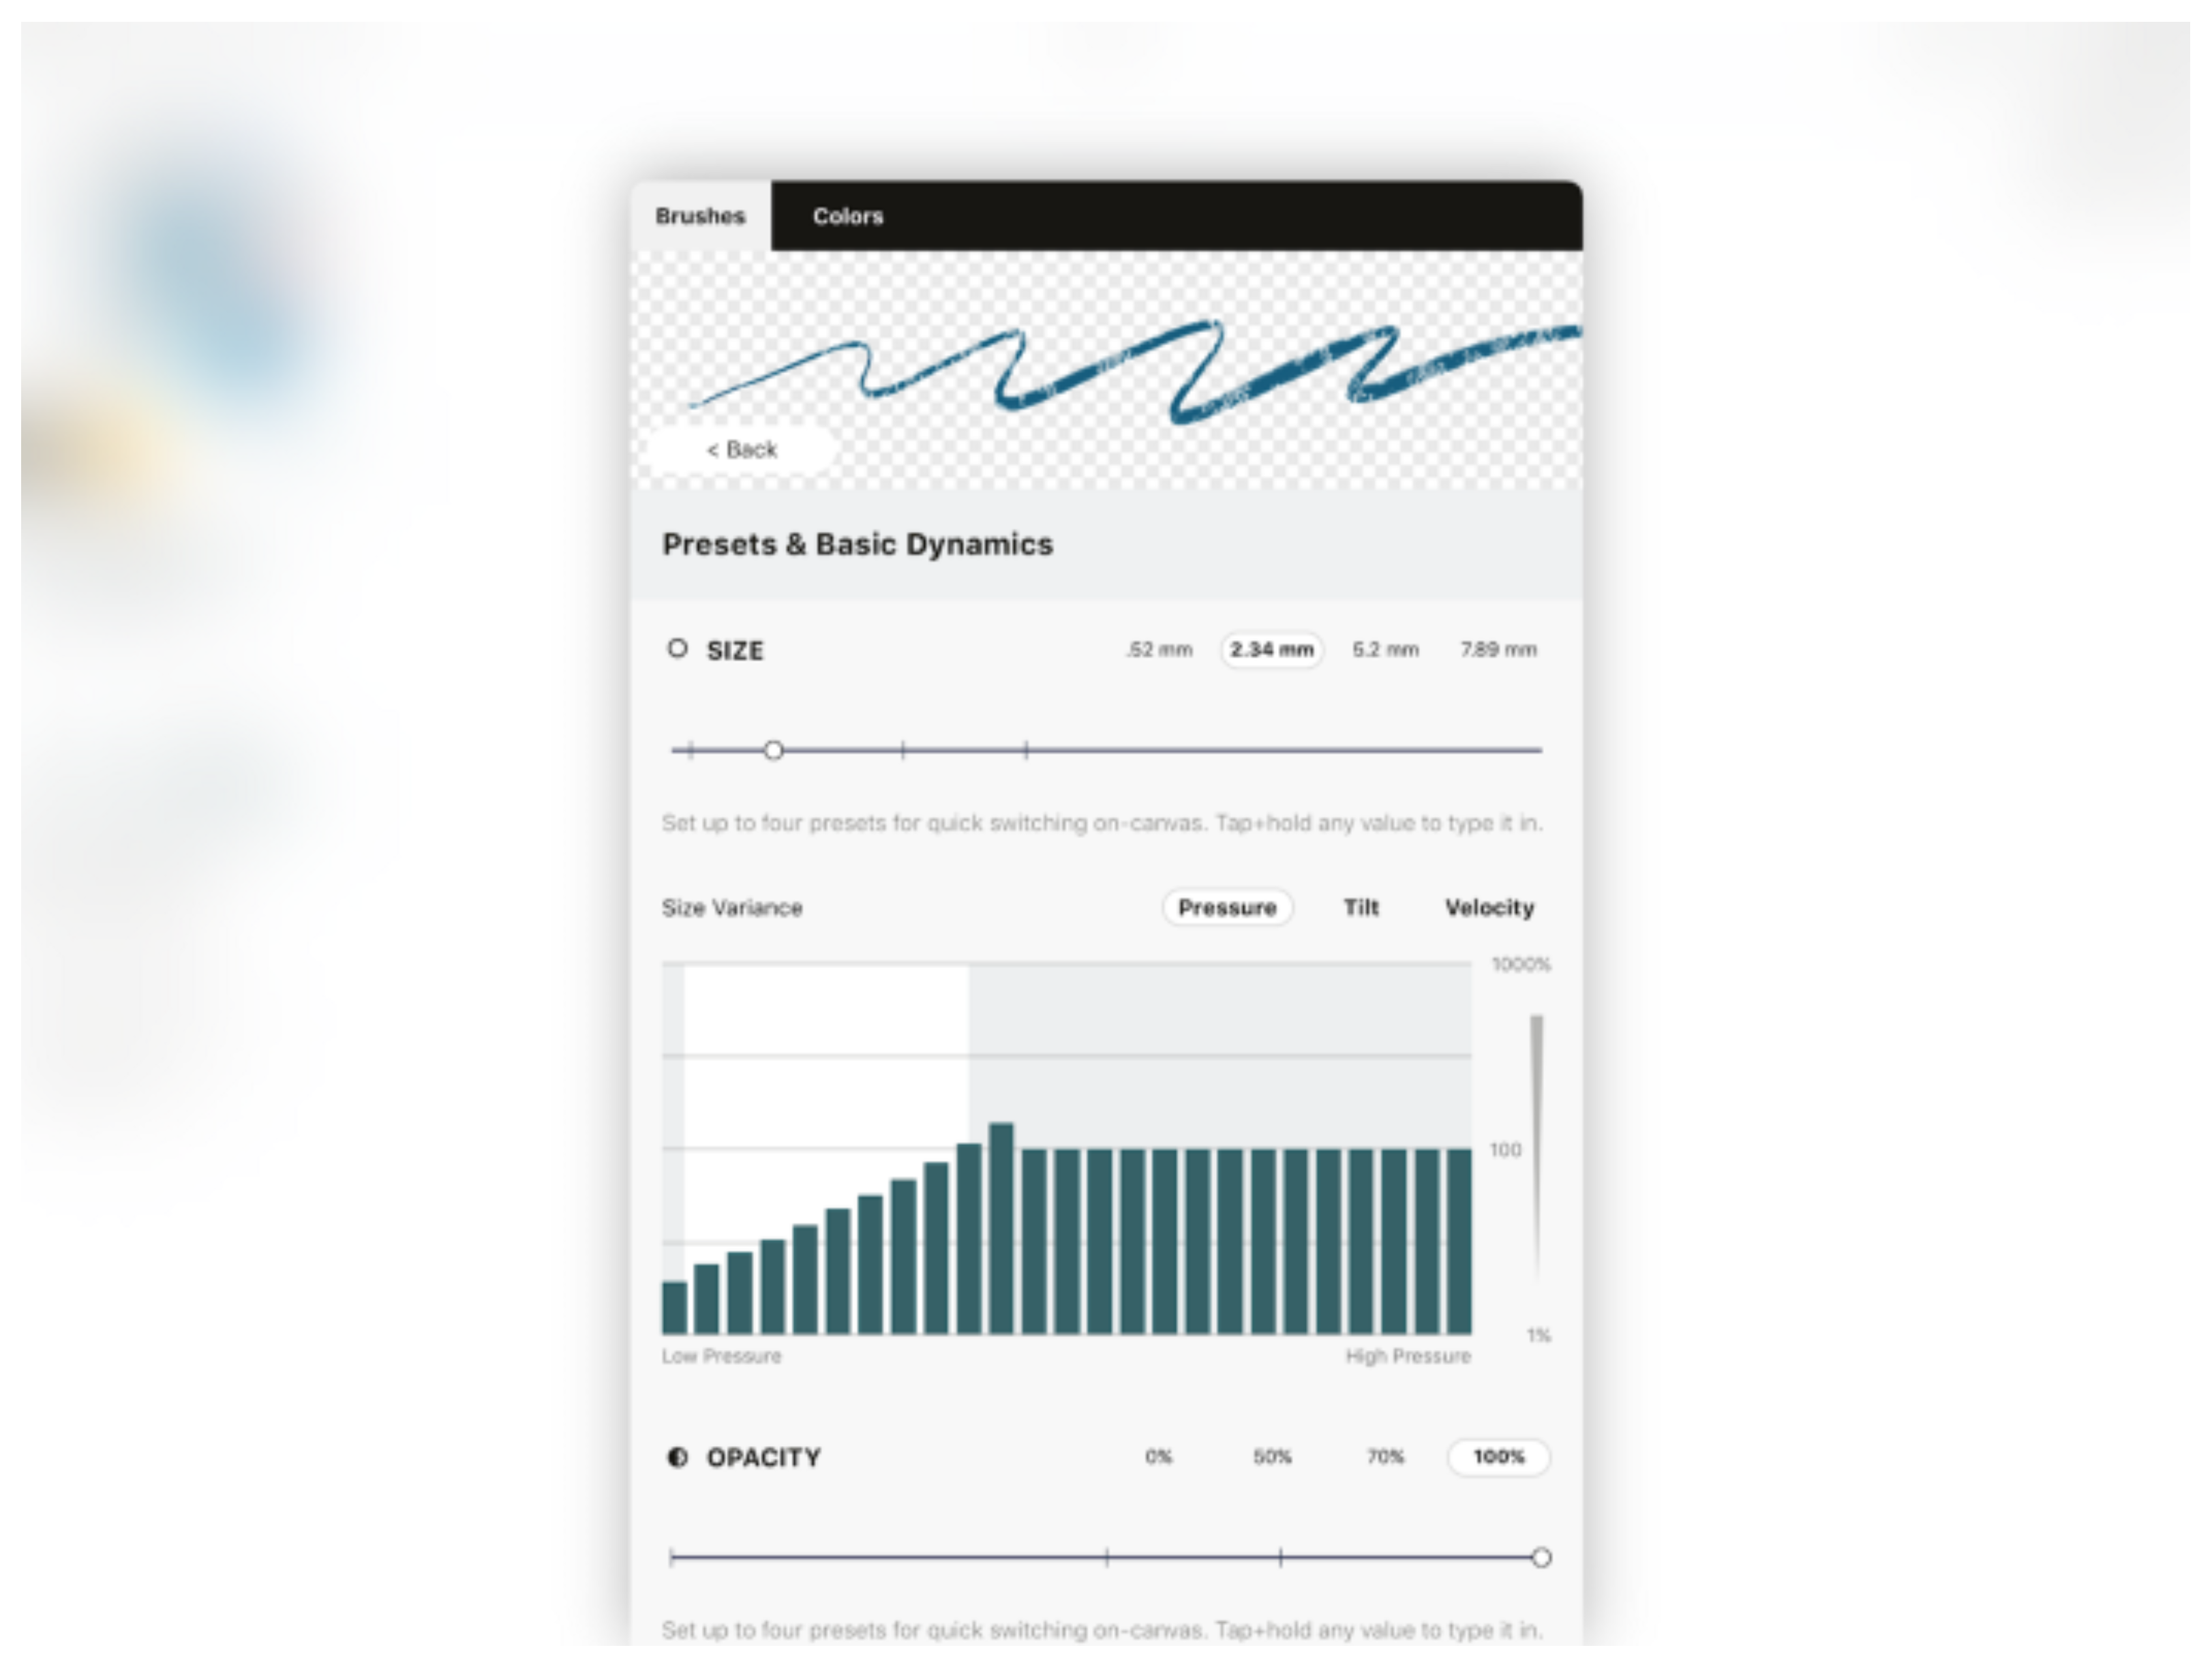
Presets & Basic Dynamics
Under Presets & Basic Dynamics, you’ll see some of the basic transformations you can apply to your brush.
Your presets are the same variety you’re used to with the standard tools — size, opacity and smoothness — but you now have the option to apply some variance to these based on the pressure, tilt and velocity of your stroke. This makes the brush dynamic as you draw. The variance graph below the basic preset allows you to fine tune exactly how the brush will act depending on your input.
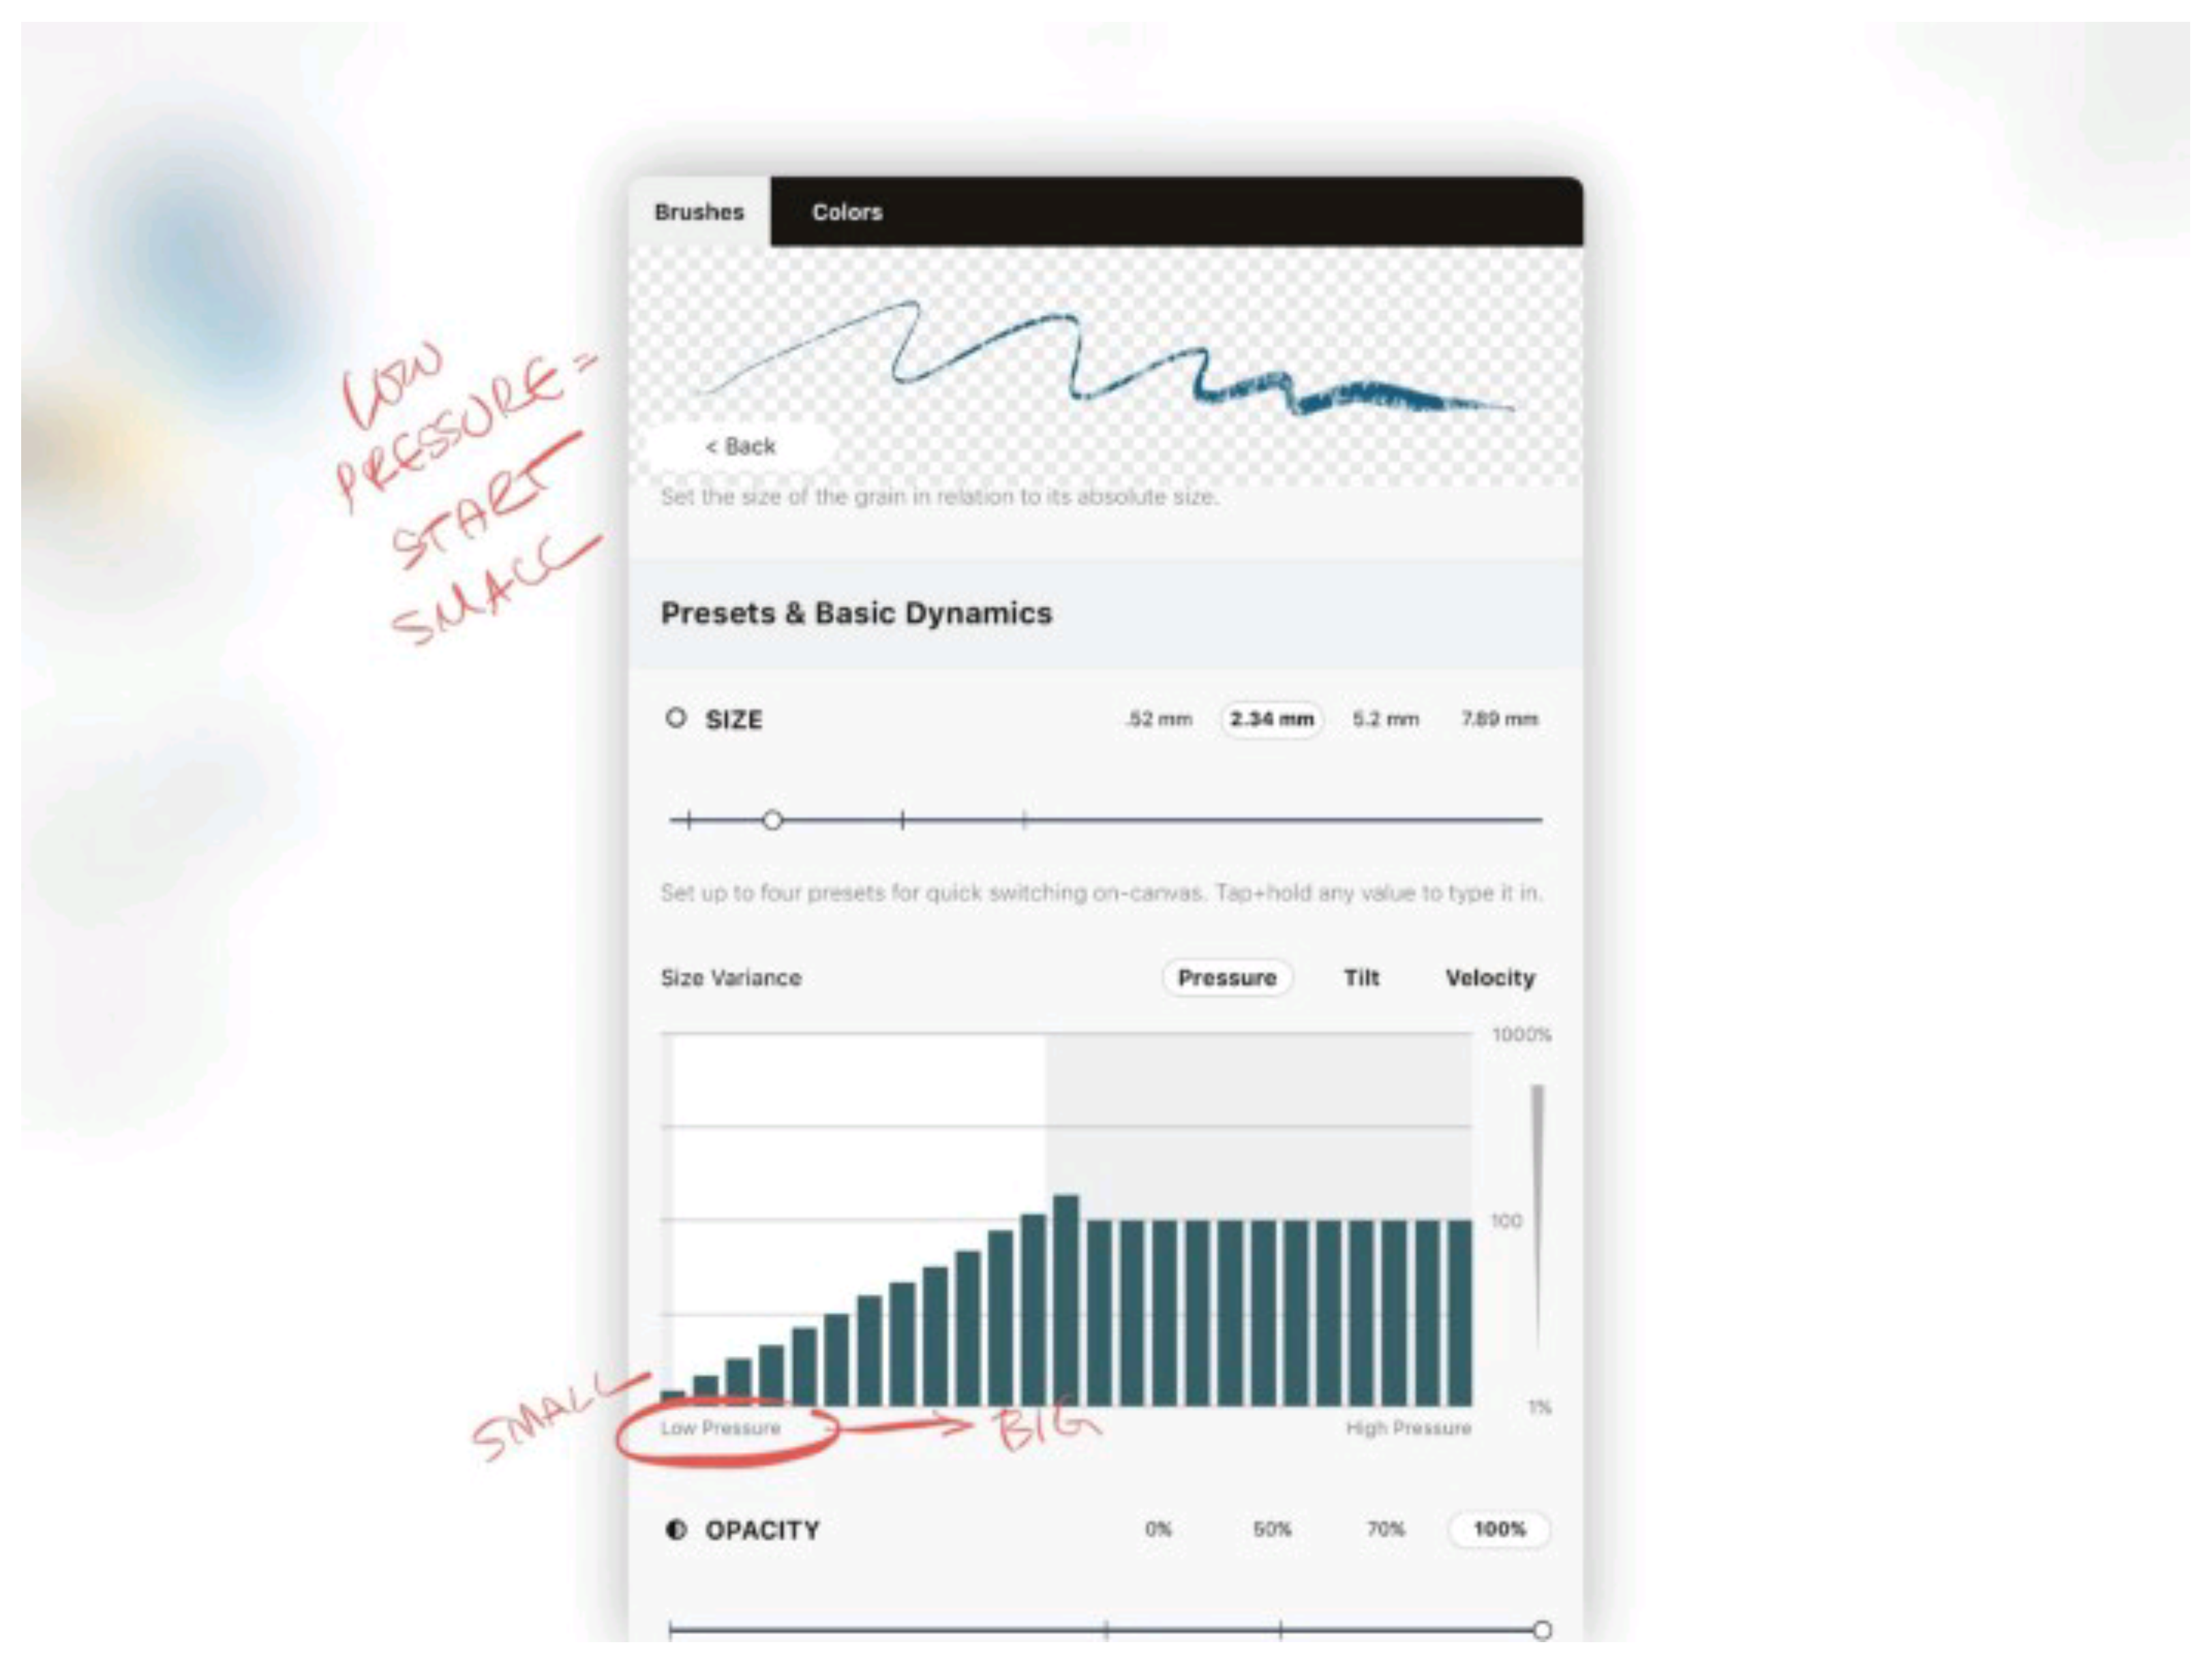
SIZE
- Pressure — The harder you press (with a pressure-sensitive stylus), the larger the brush stroke will become. Or smaller, depending how you draw the graph. More on that below.
- Tilt — The further you tilt your pen (with a tilt-sensitive stylus), the larger or smaller the brush stroke will become.
- Velocity — The faster your draw with your pen, the larger or smaller the brush stroke will become.
Pressure is the most popular option, here — with an upward-sloping graph like above, your brush stroke will naturally get wider as you press, as though using a real fountain pen or marker.
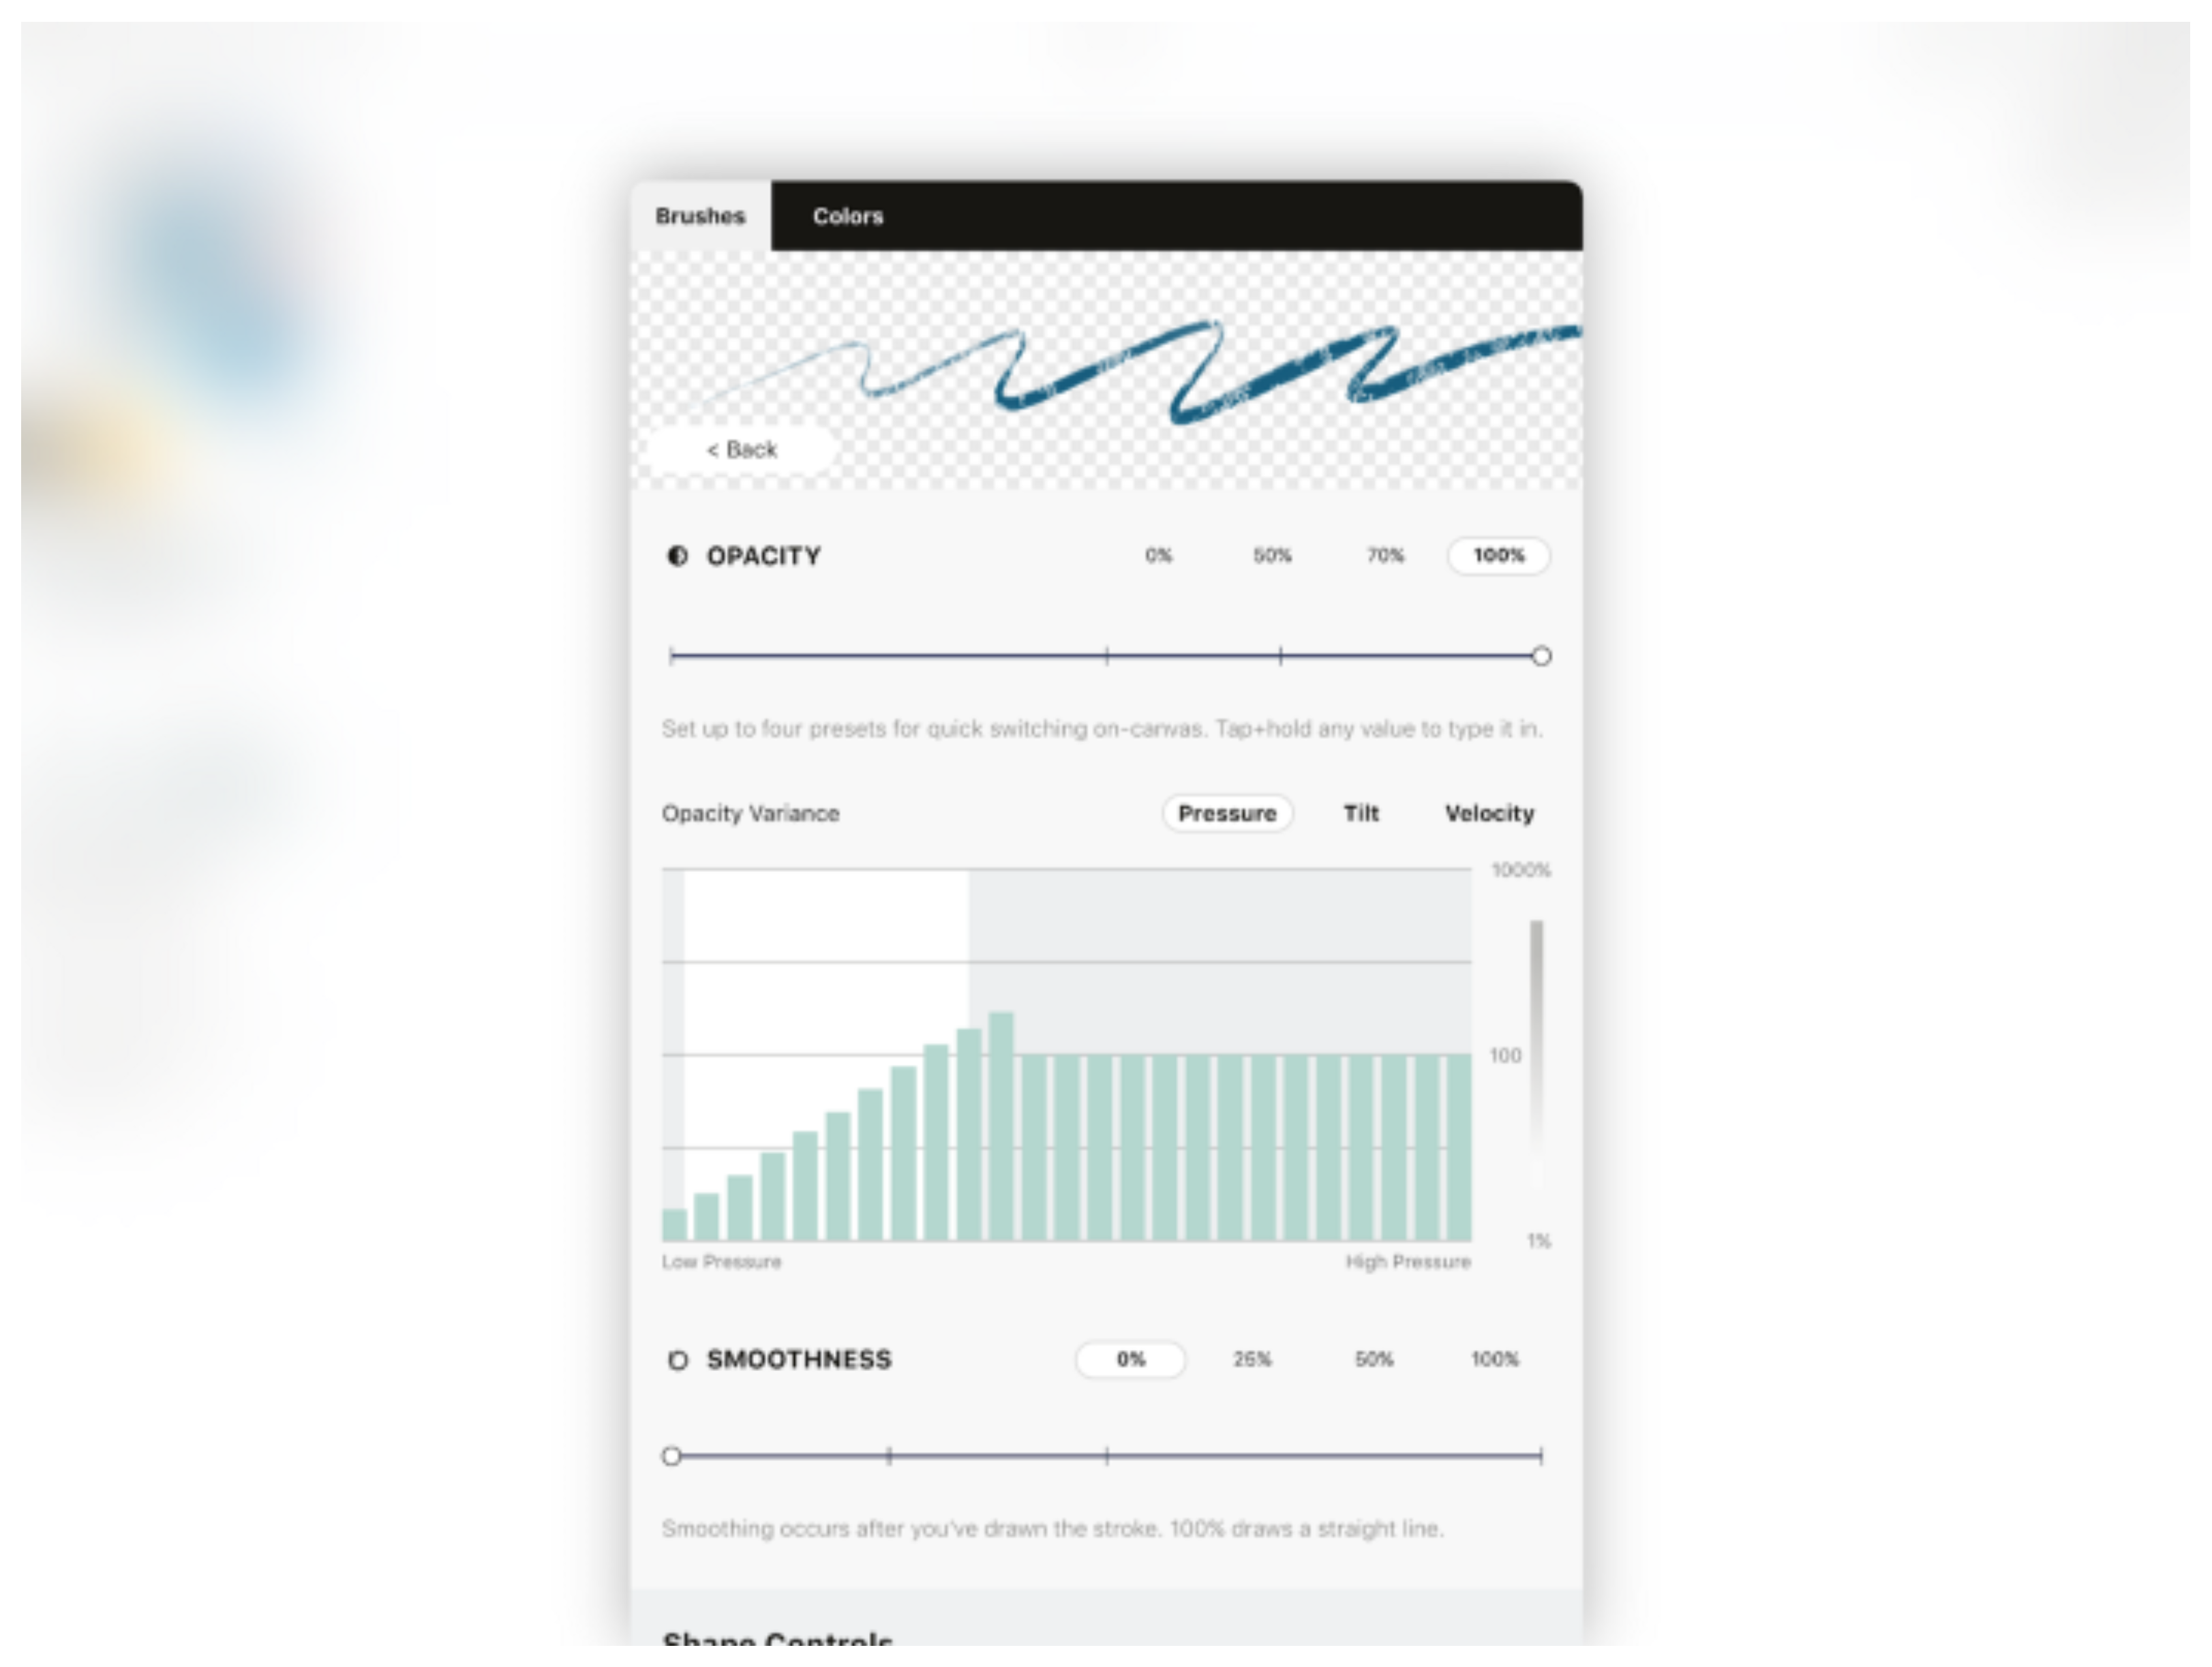
OPACITY
- Pressure — The harder you press (depending on the graph), the more or less opaque the brush stroke will become.
- Tilt — The more or less you tilt, the more opaque the brush stroke will become.
- Velocity — The faster or slower you draw, the more opaque the brush stroke will become.
Pressure is again the most usual preference. If you think of sketching with a pencil, you’ll know how touching the paper lightly gives you a very light pencil stroke; when you press harder, the stroke will darken.
Note that the opacity graph is hidden for the Reveal type brush, as when it draws over itself, it doesn’t build up any opacity. You can still make the brush more transparent overall with the slider, but there is nothing to adjust during the stroke itself.
SMOOTHNESS
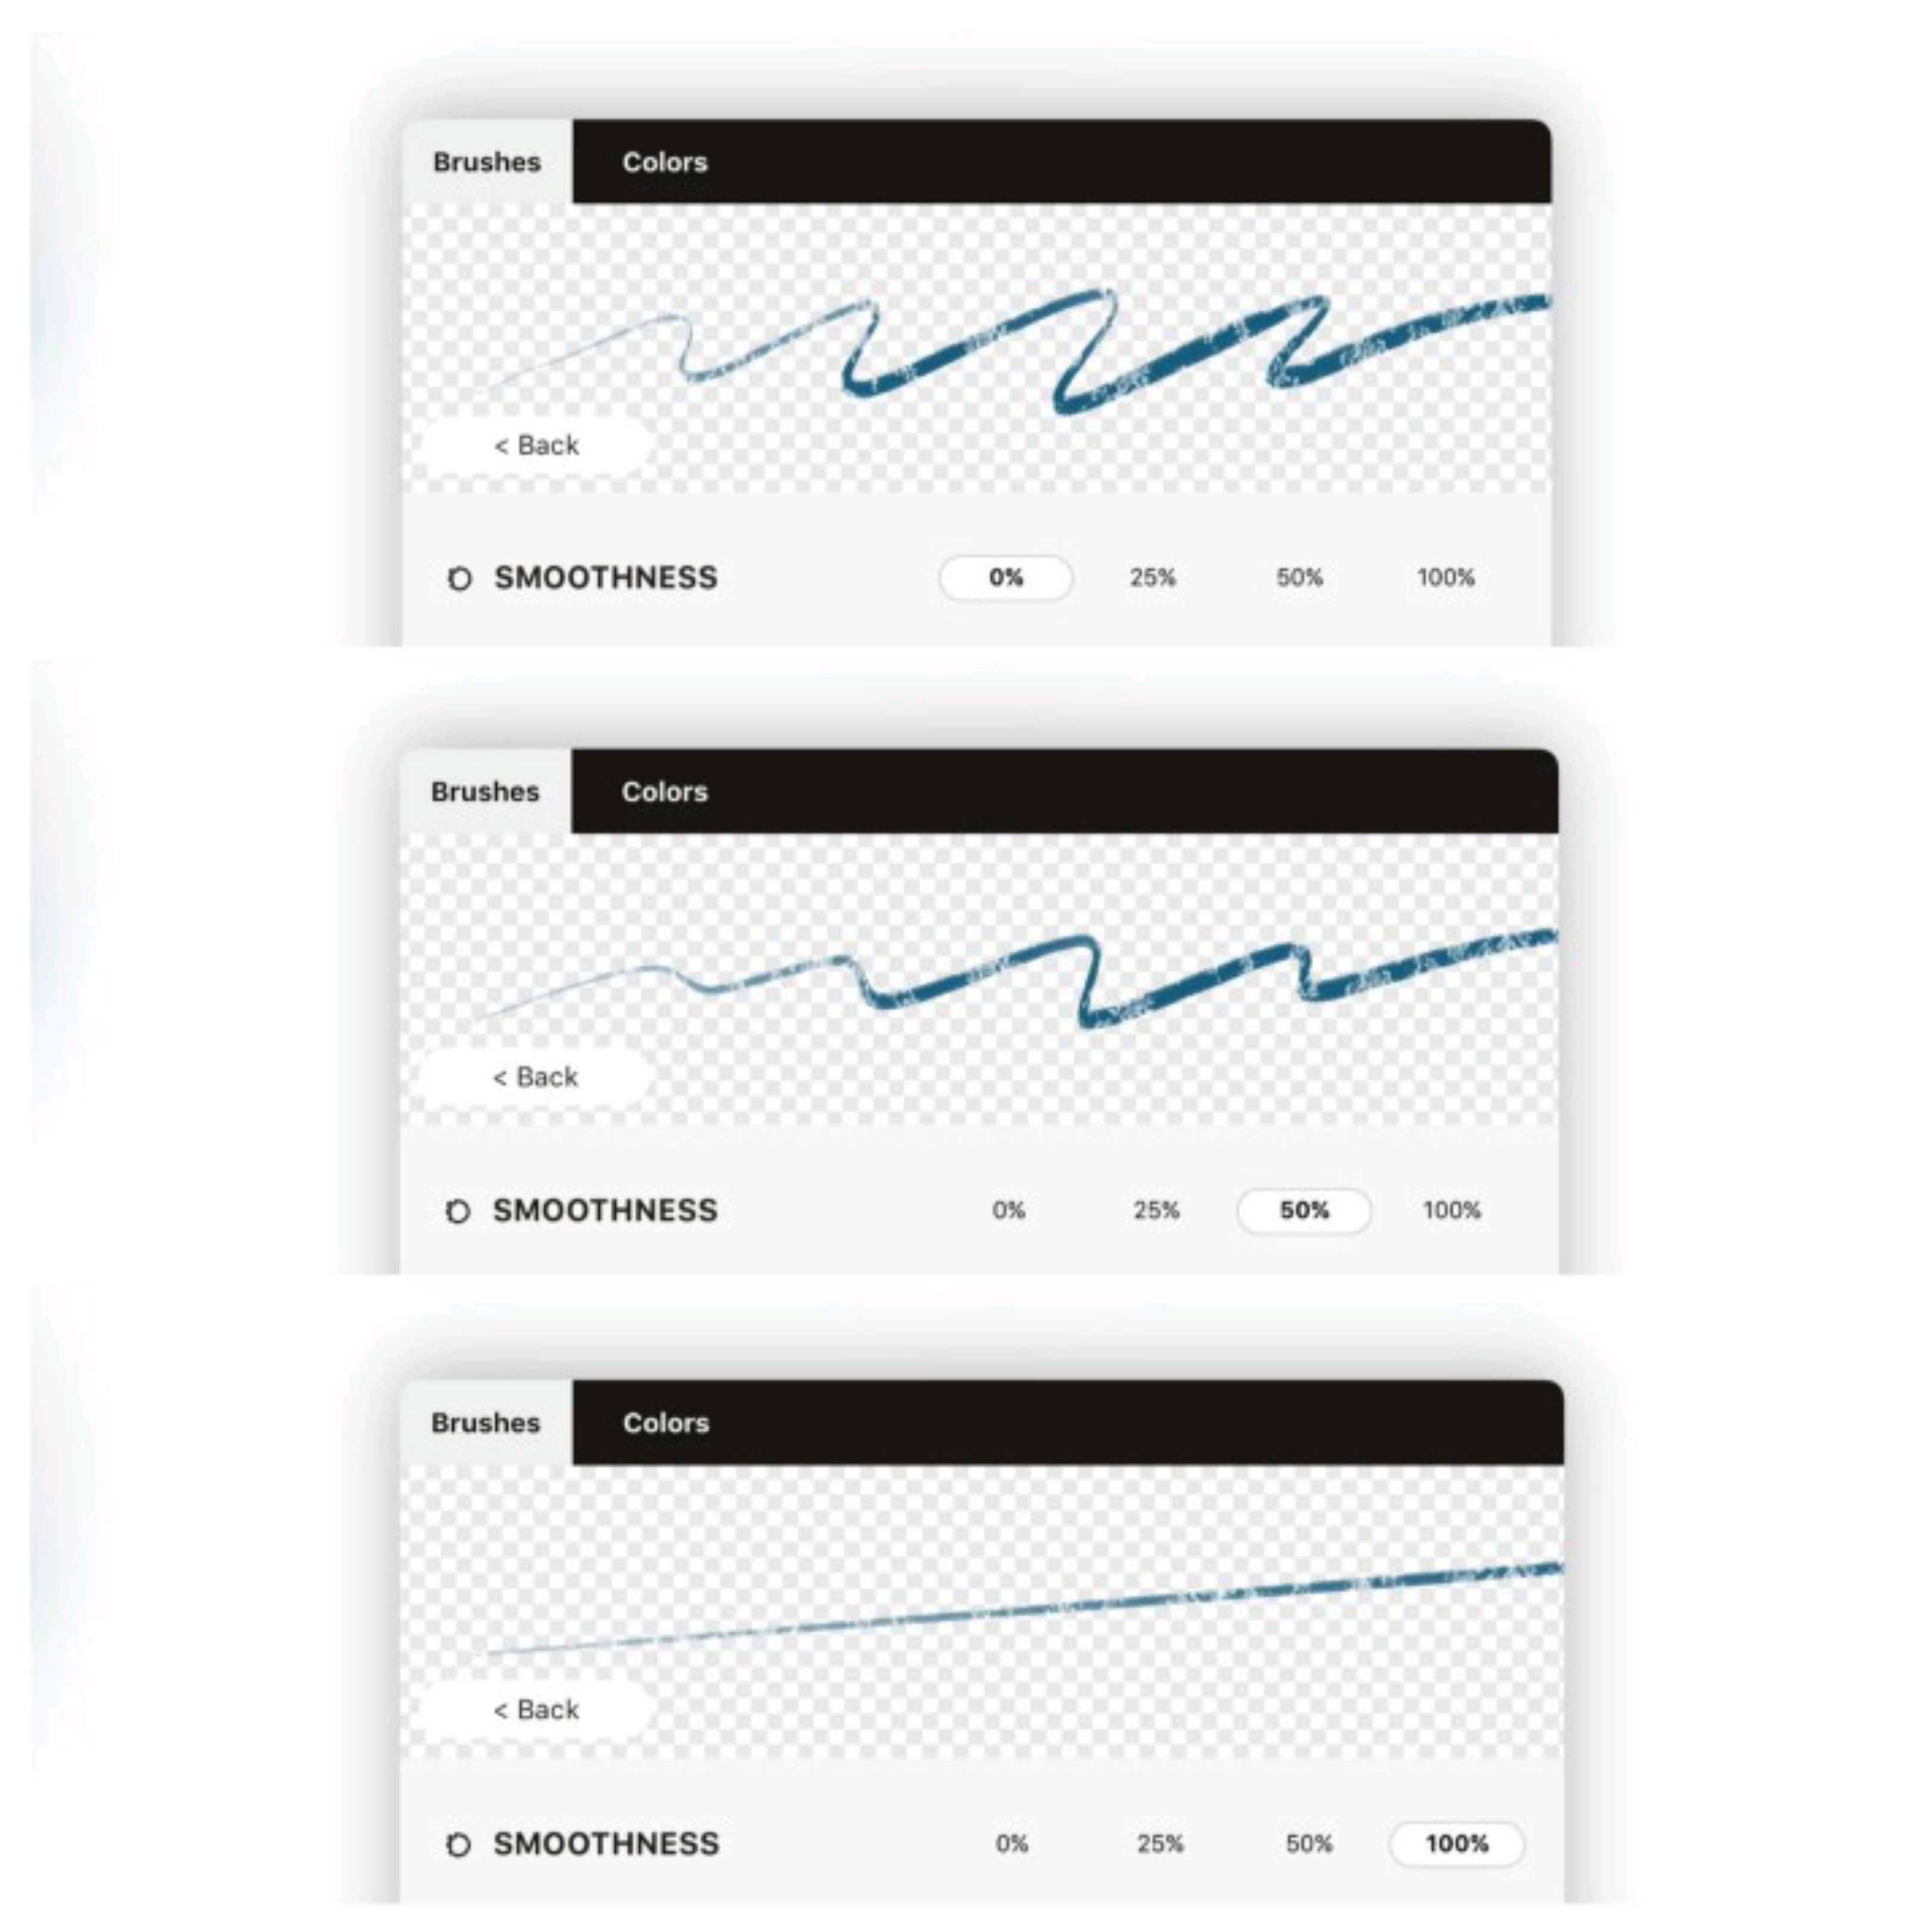
Smoothing is a basic percentage preset, you can set those with the slider or with a tap+hold on a field.
WORKING WITH THE VARIANCE GRAPHS
Now that you have a basic idea of the preset effects possible, let’s move on to fine tuning the variance graphs. Before adjusting one of these settings, we recommend you draw a stroke in the live preview area.
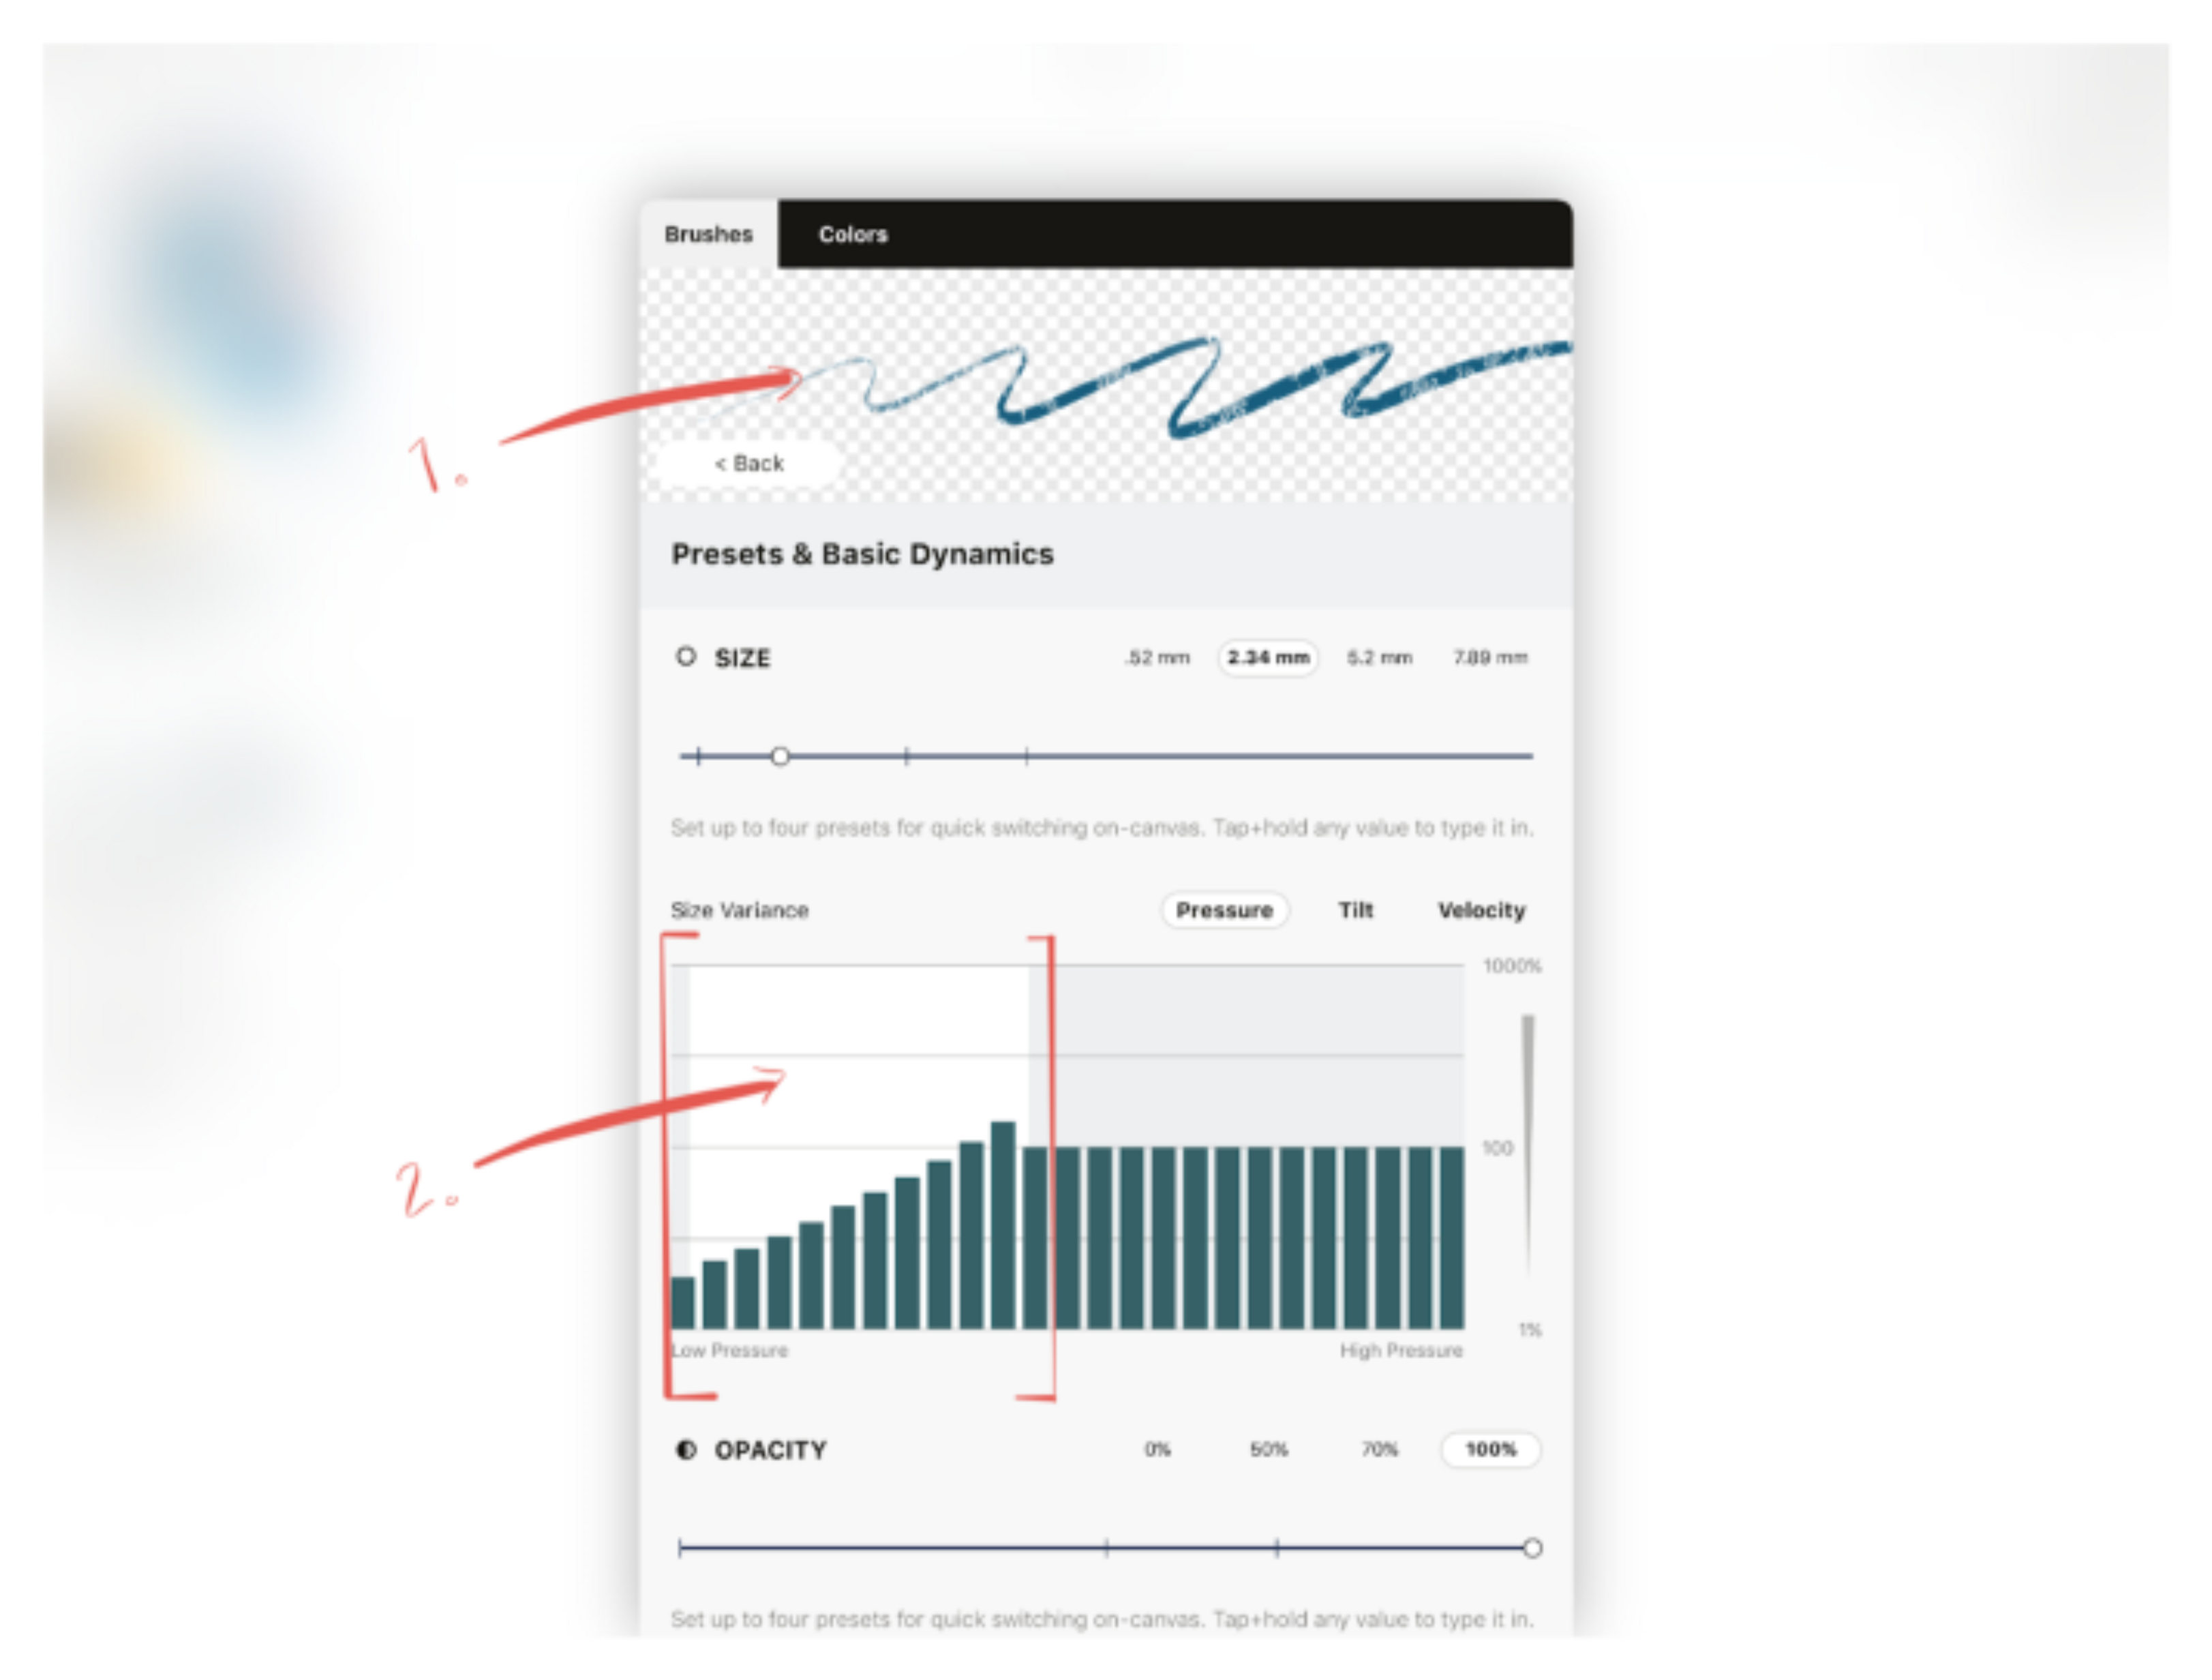
1. Draw a stroke in the viewer. 2. Notice the white range area appear behind the graph.
While you draw, take a look at one of the graphs: you’ll see a white area appear behind the bars while drawing. This is a live match to your brush stroke on the viewer, reflecting the range of pressure, tilt or velocity (depending on your selection) you’re applying as you draw. As you adjust the bars in the graph, you’ll see the effects in the viewer.
Typically, you want a nice smooth line upward or downward. A pressure-sensitive fountain pen, for example, will start small and gradually increase in size depending on how hard you press the pen to the paper. You would use the Size preset with the Pressure dynamic for this pen, and draw a smooth line upward from the left side of the graph to the right side. It would look something like this:
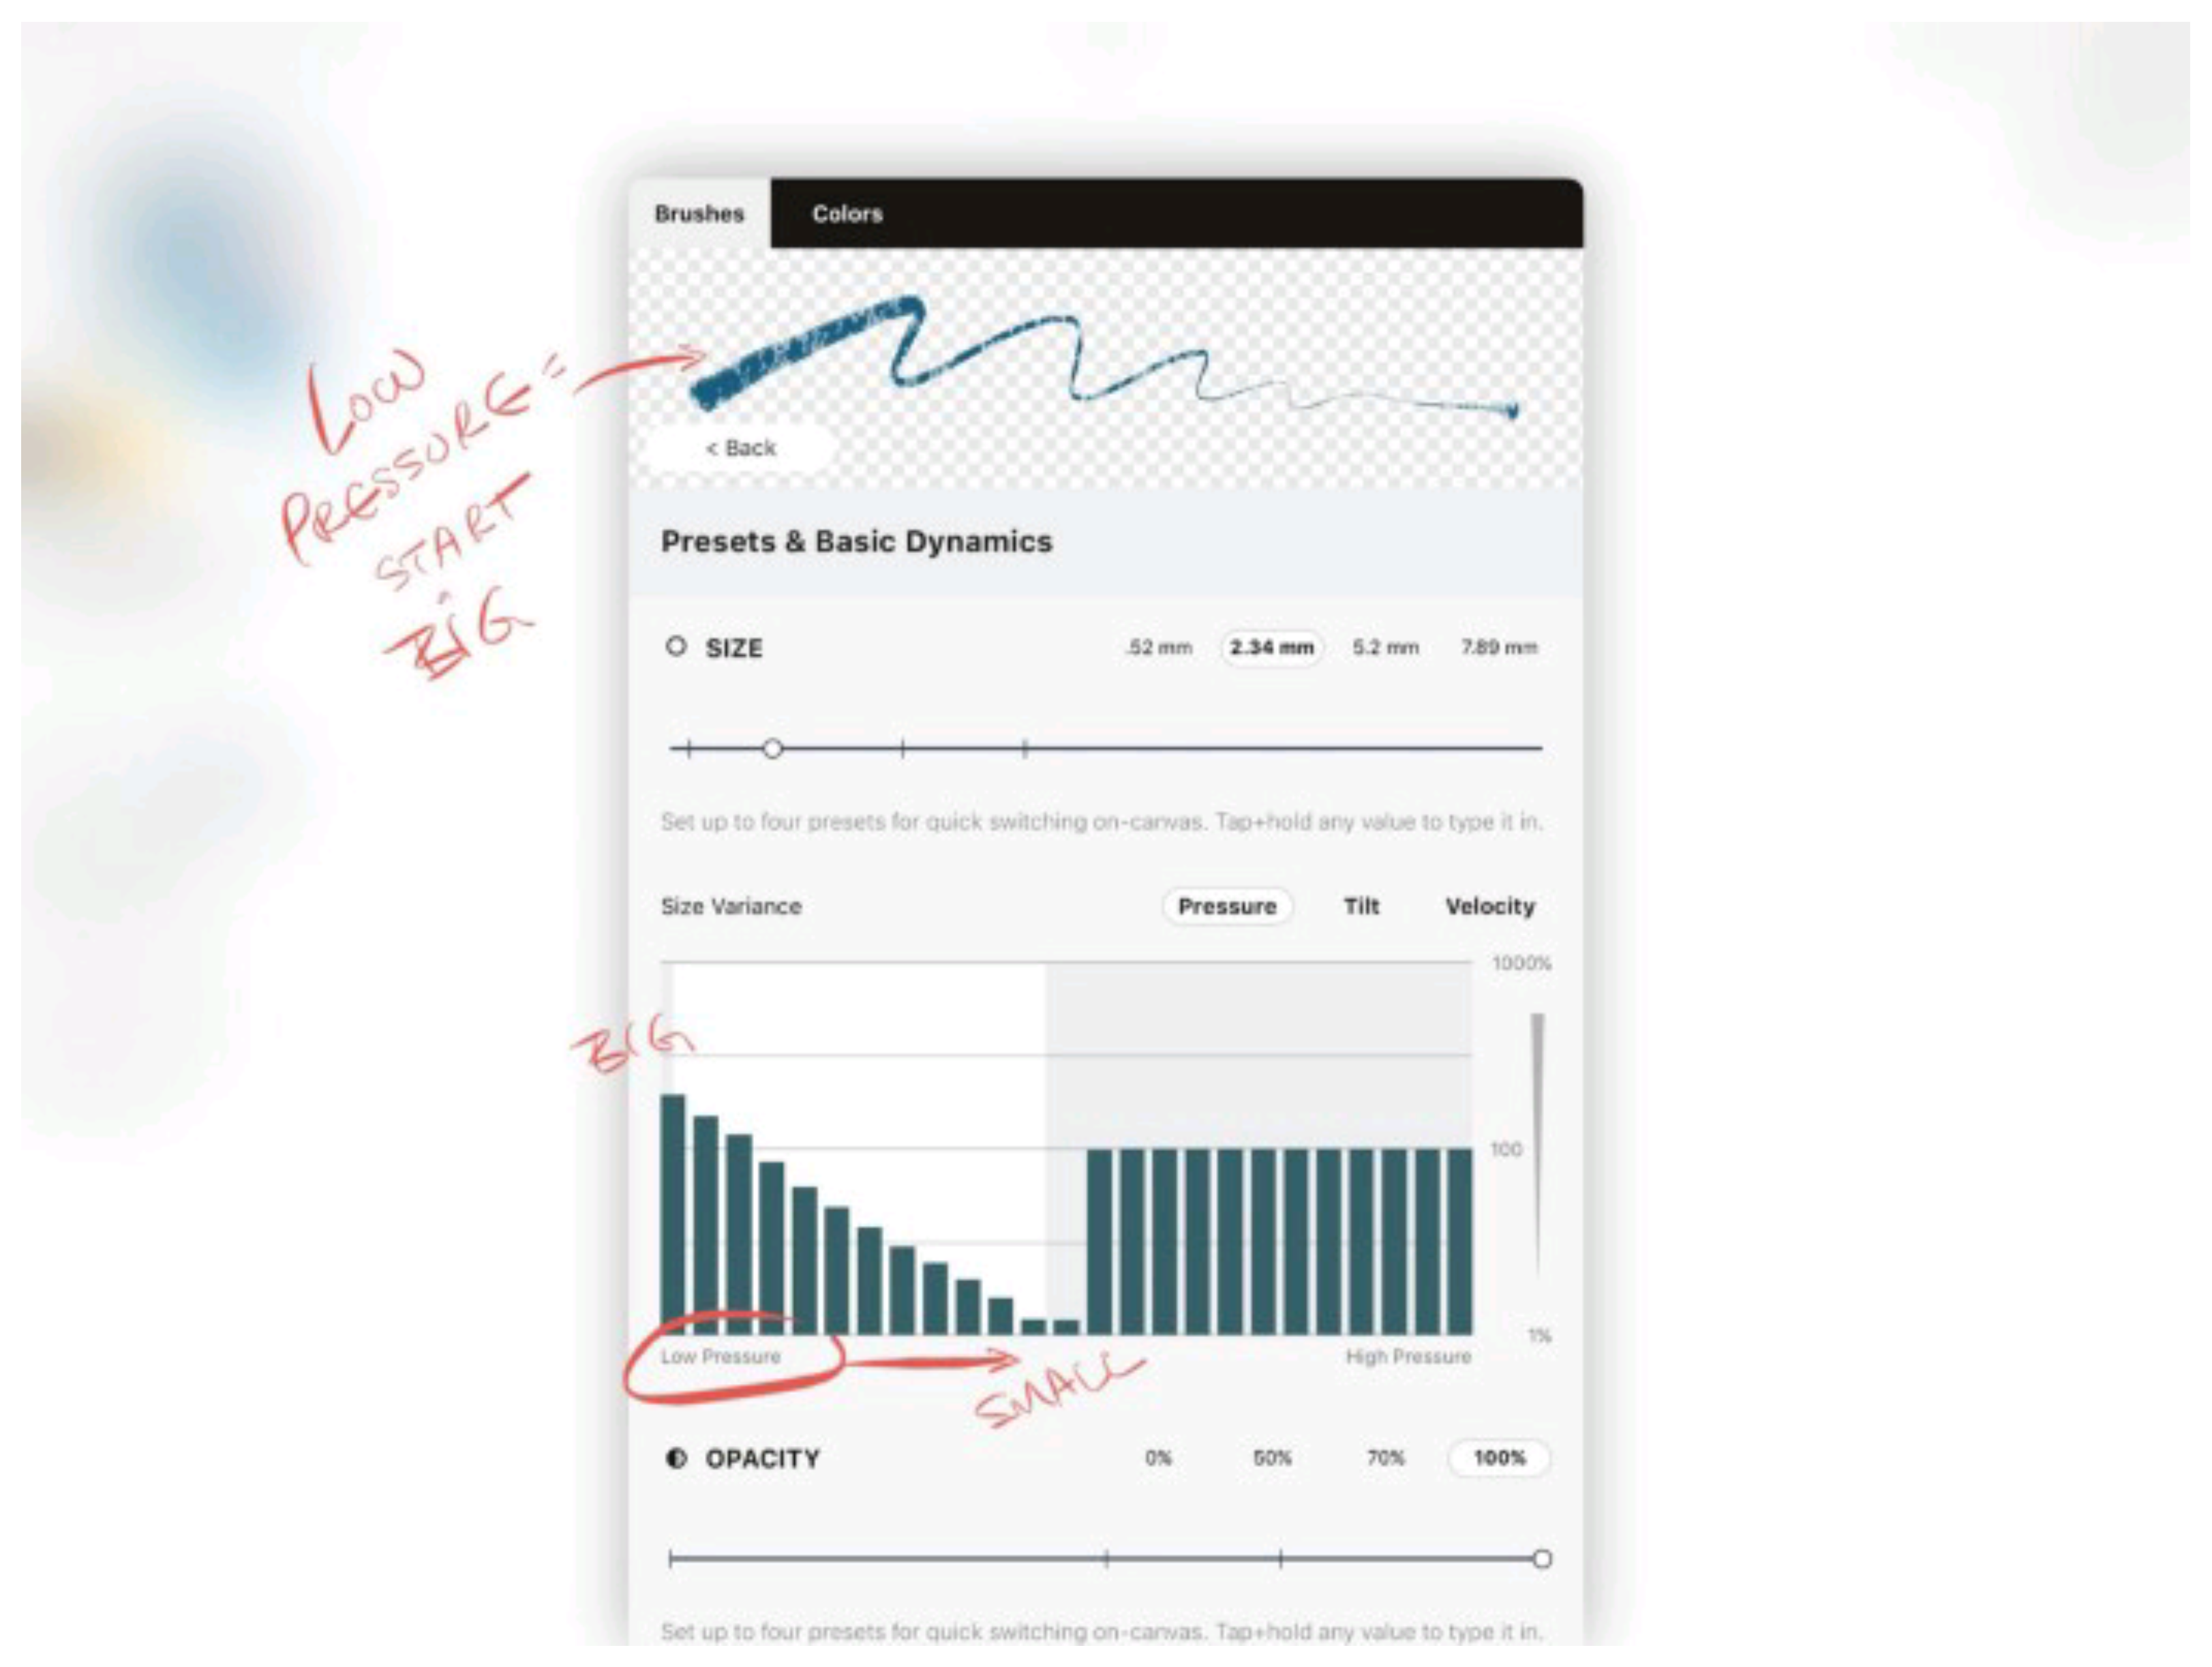
If you want the stroke to start wide and get narrower as you press or increase speed etc, you can draw the variance curve downward — bigger to smaller.
Applying extreme ups and downs to the bars in the middle of a stroke represent “accidental” or “unexpected” variations to your brush stroke. You might like these if you’re feeling artistic — try a “rough” graph and see what happens to the stroke in the viewer.
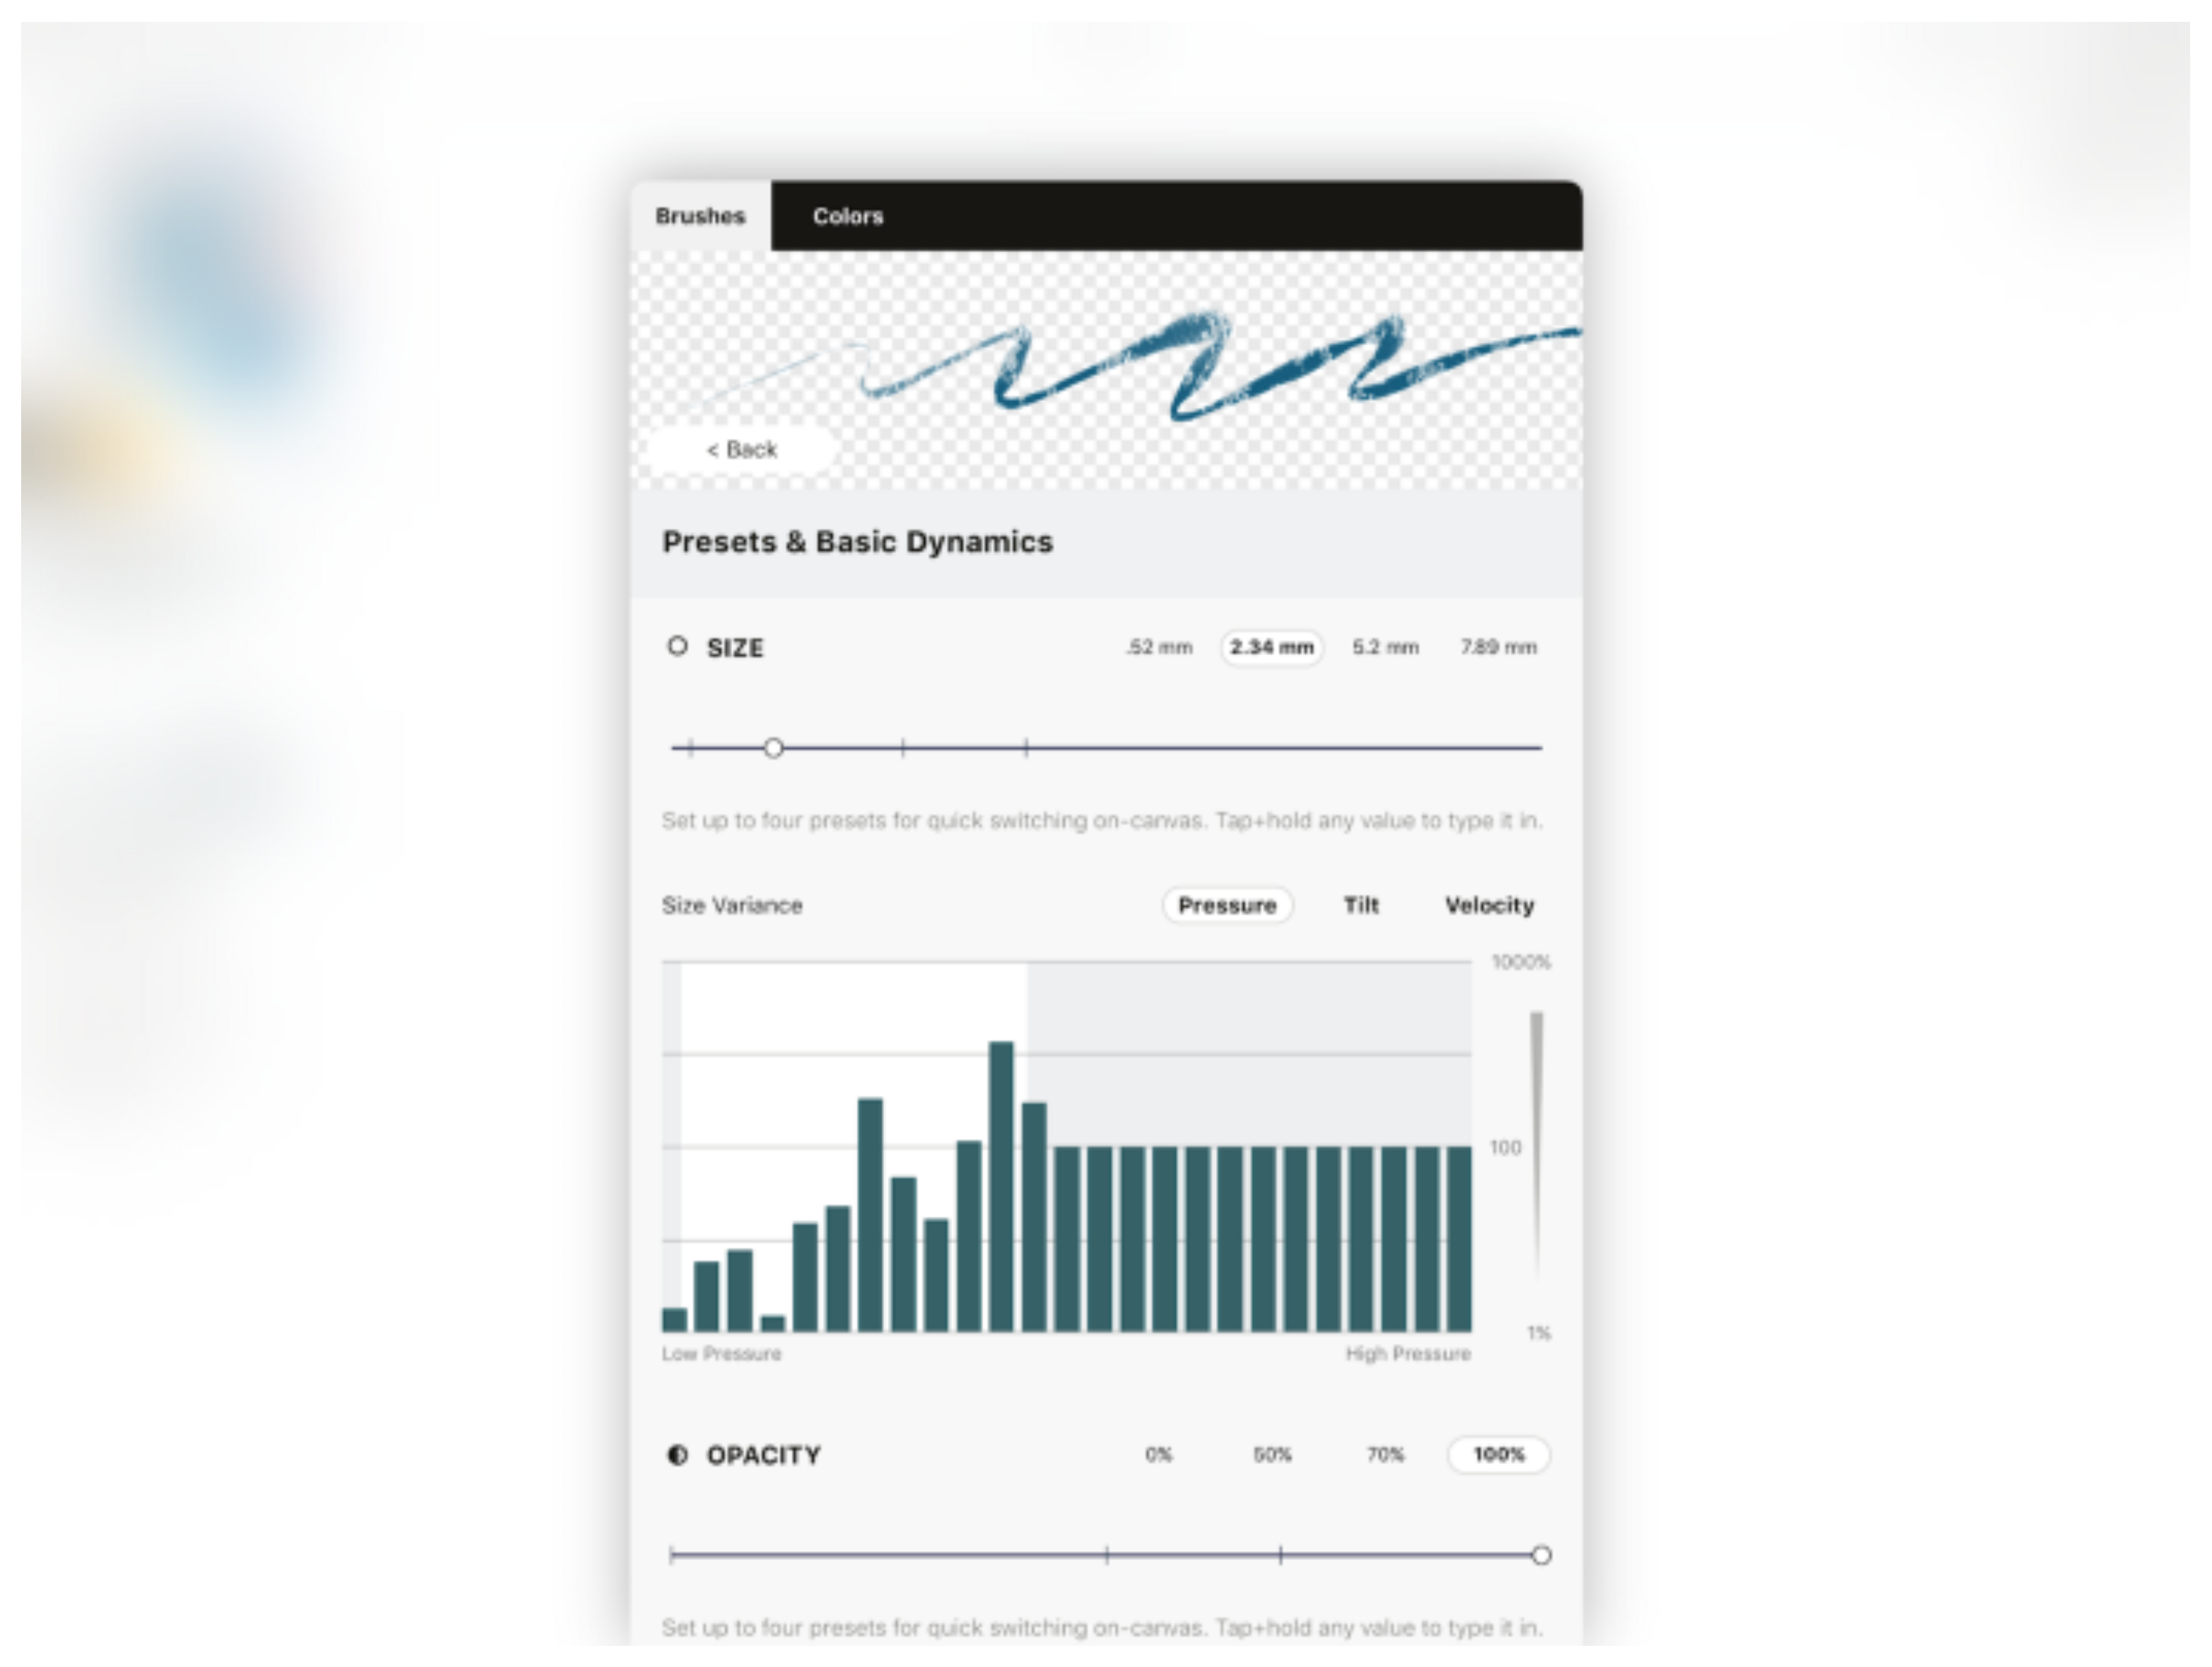
Generally, however, smooth is the norm. Just a fairly quick, simple upward or downward stroke along the graph will work fine.
To reset a graph, double-tap the vertical value axis (1% — 1000%) beside it.
Shape Controls
Here you’ll find controls that affect the spacing, scatter and rotation of your stamps. These are very fun to play with, you can get some exciting results as you see the stamps respond in the viewer.
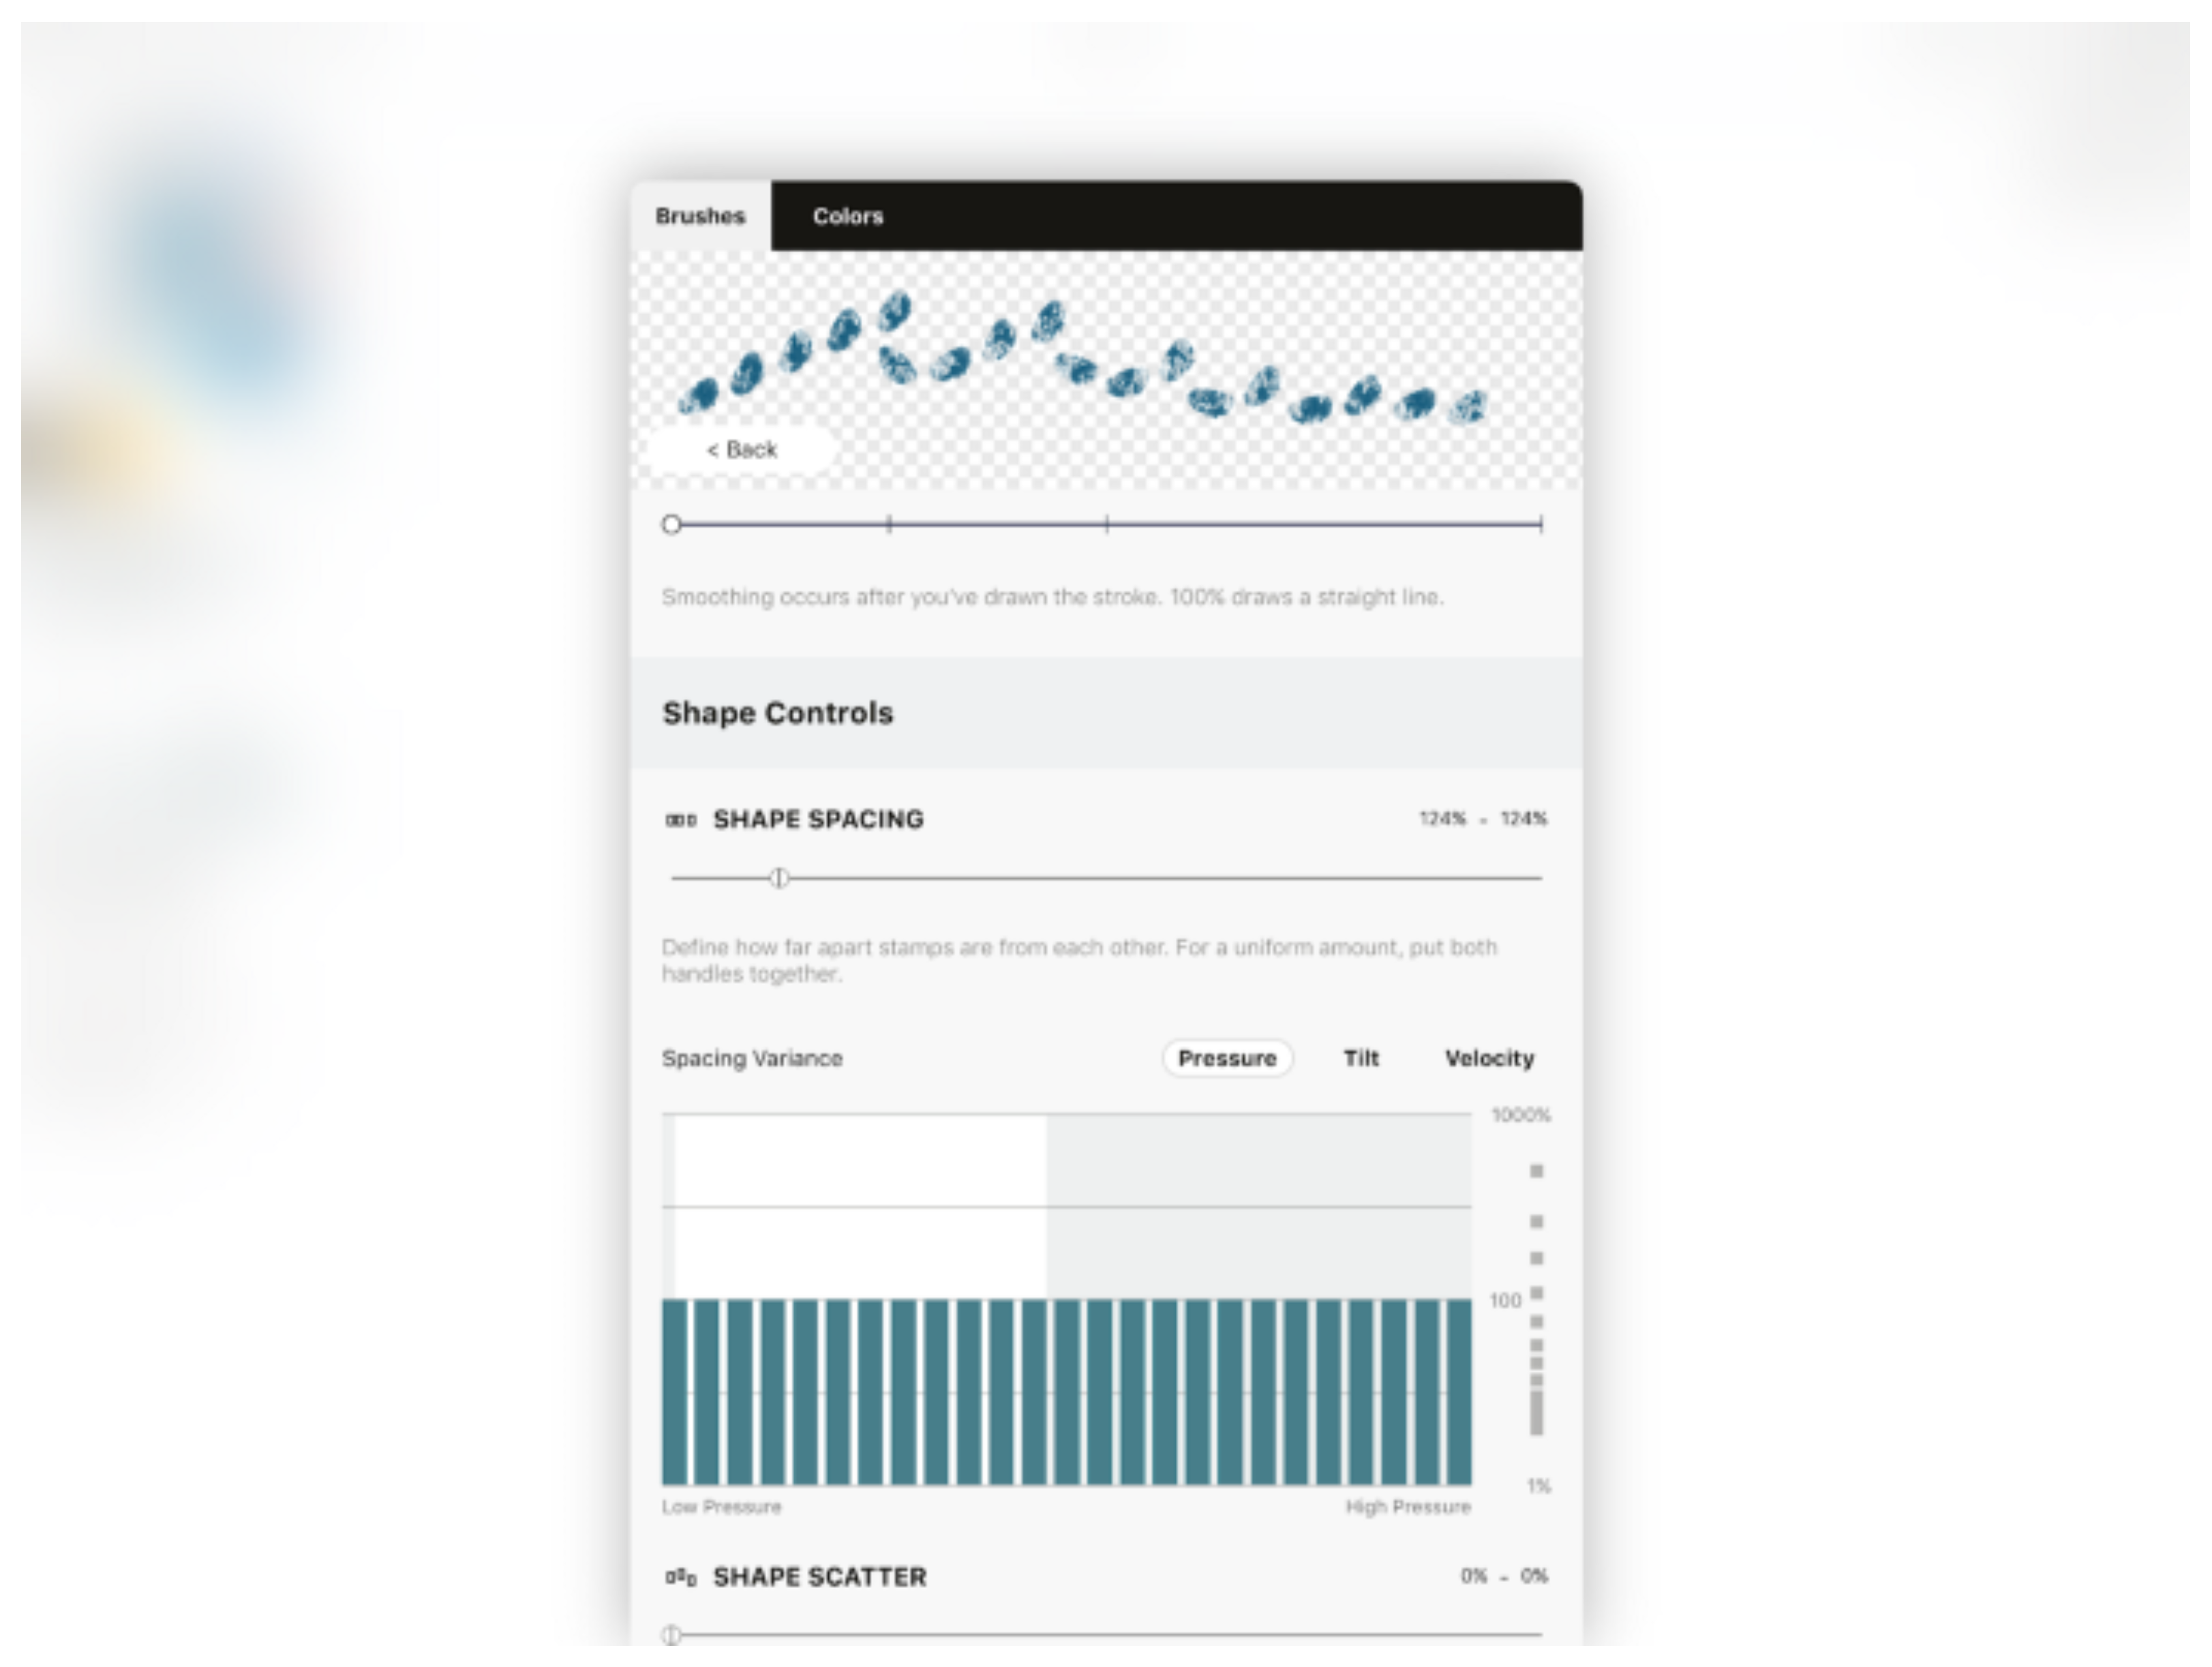
SHAPE SPACING
Drag one of the handles to the right or left and see how the stamps separate from each other. As you separate these handles, you create a percentage range that the stamps will randomly appear in along the stroke line.
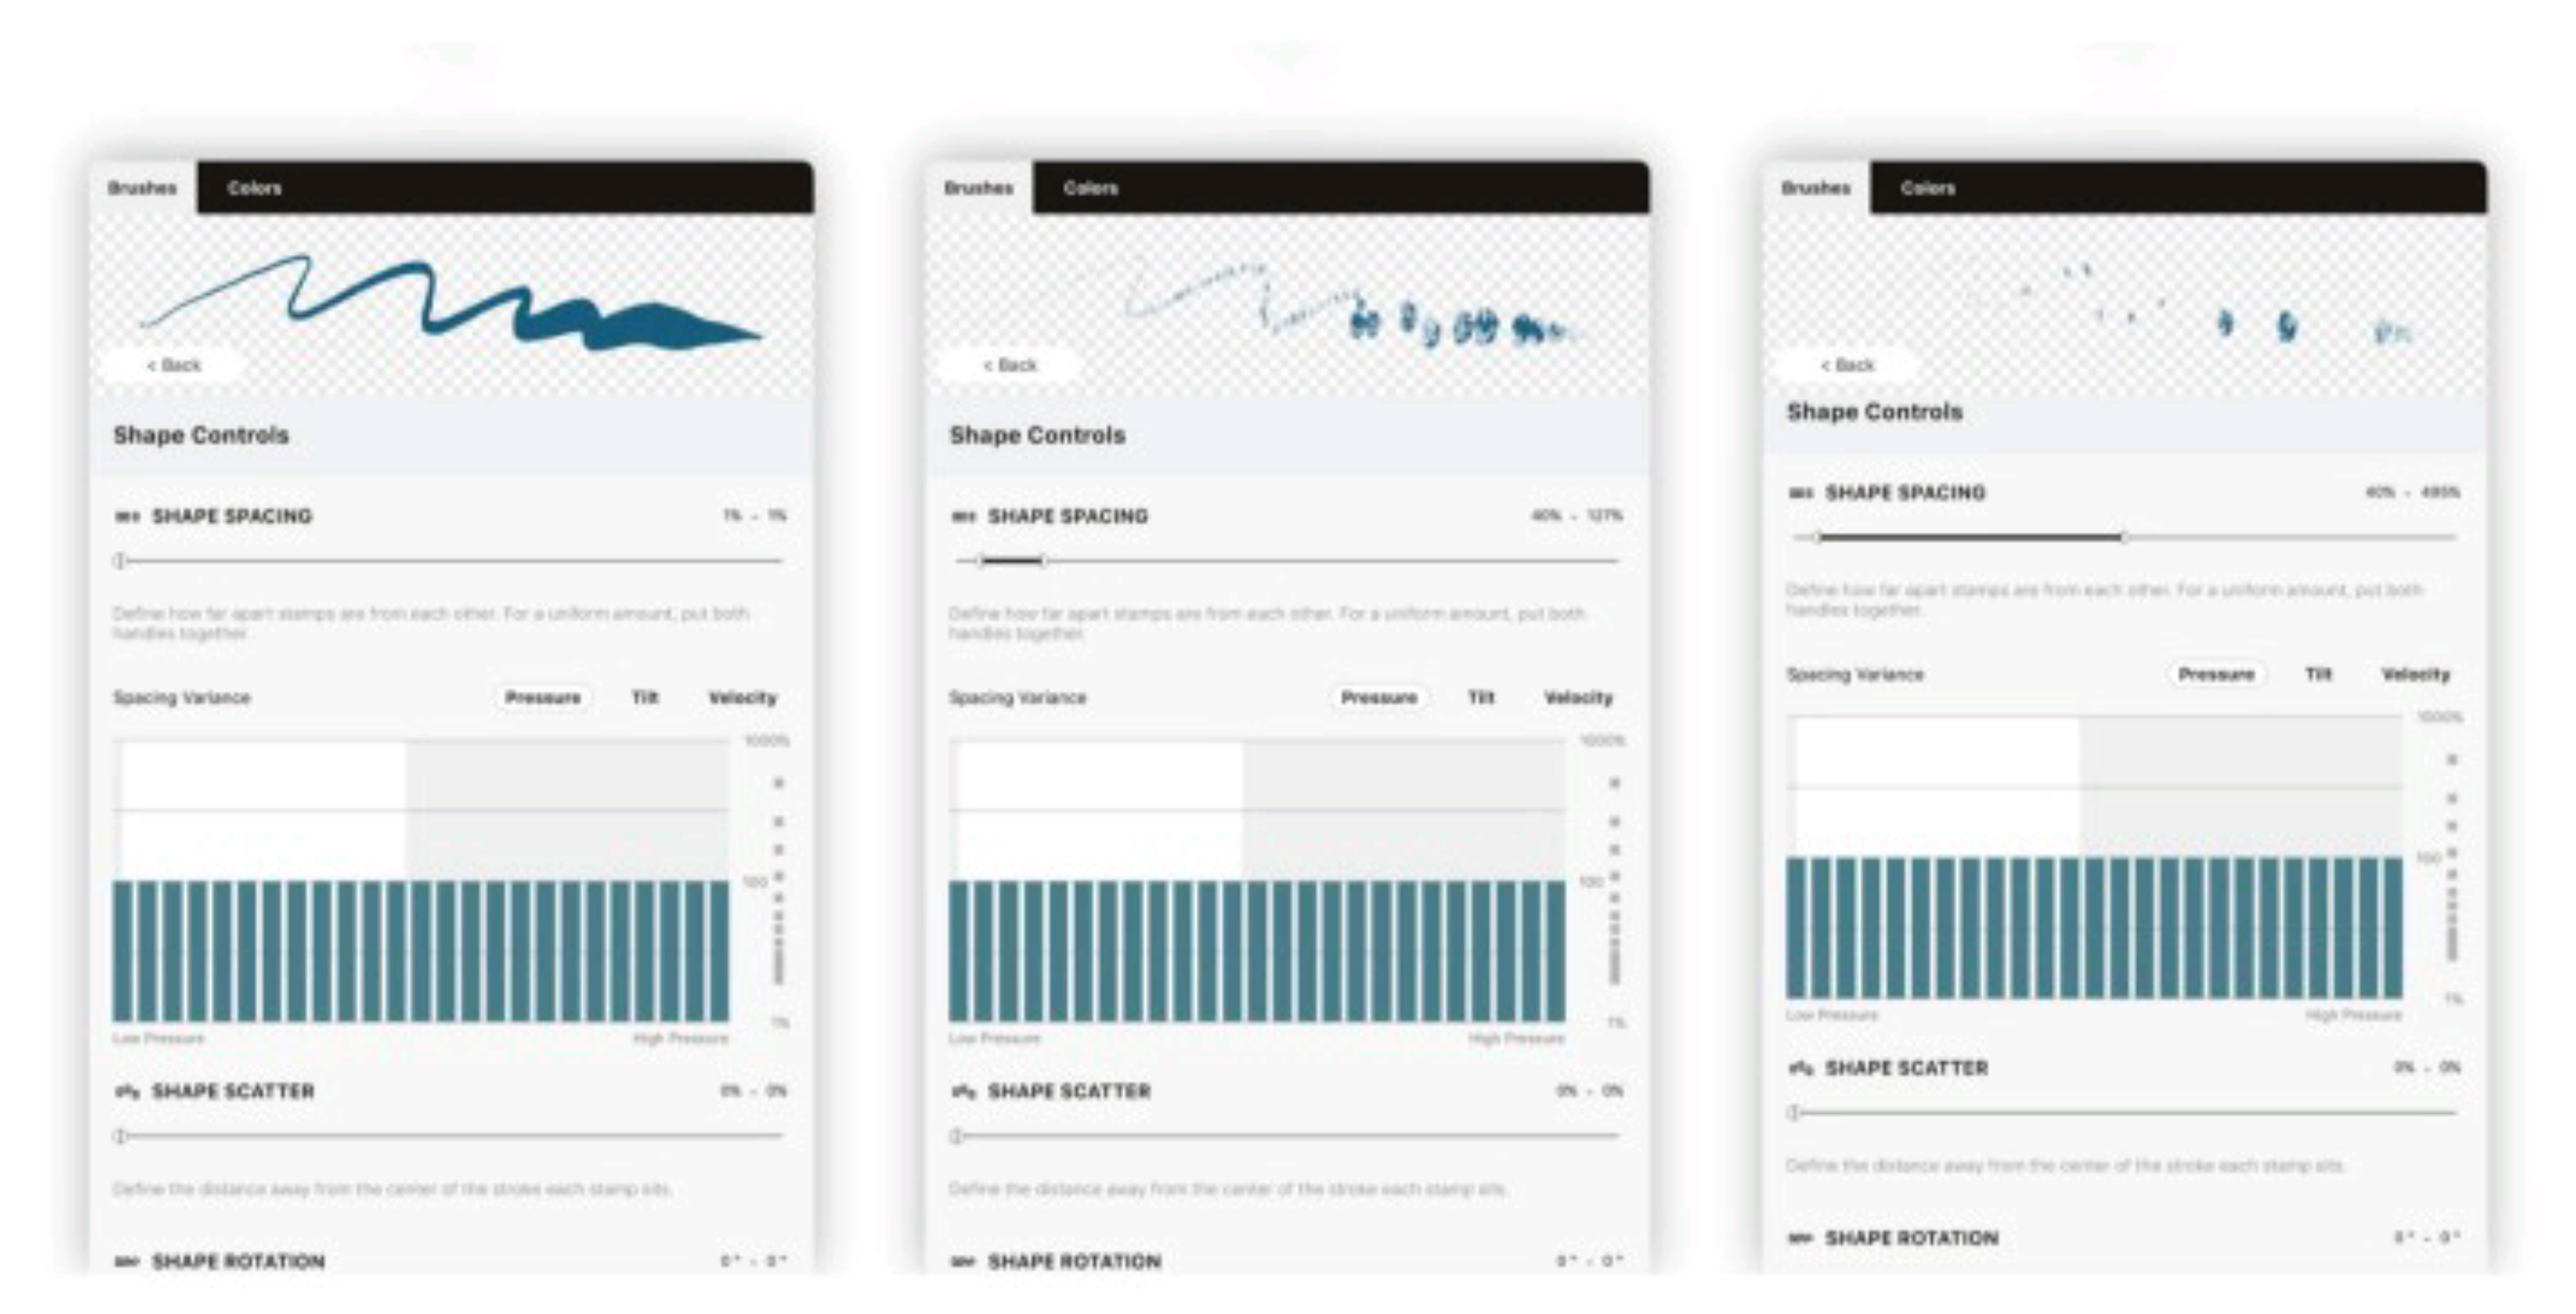
If you want the stamps exactly the same distance from each other, place both handles together. You can use this to get uniform dot or dash brushes, for example, or to create image brushes for flyer or artboard borders that repeat at intervals.
This same mechanism applies to each of the Shape Controls:
- Separate the handles to create a range of randomness.
- Place the handles together for even, non-random spacing.
Choose a shape spacing for your brush that appeals to you.
SHAPE SCATTER
Sliding the handles apart on the scatter slider will provide an additional range around the spacing within which your stamps can appear — they can roam about like cattle along the stroke path. A full range of 1–100% will give you some quite wild cattle, great for creating whimsical brushes or paint spatter.
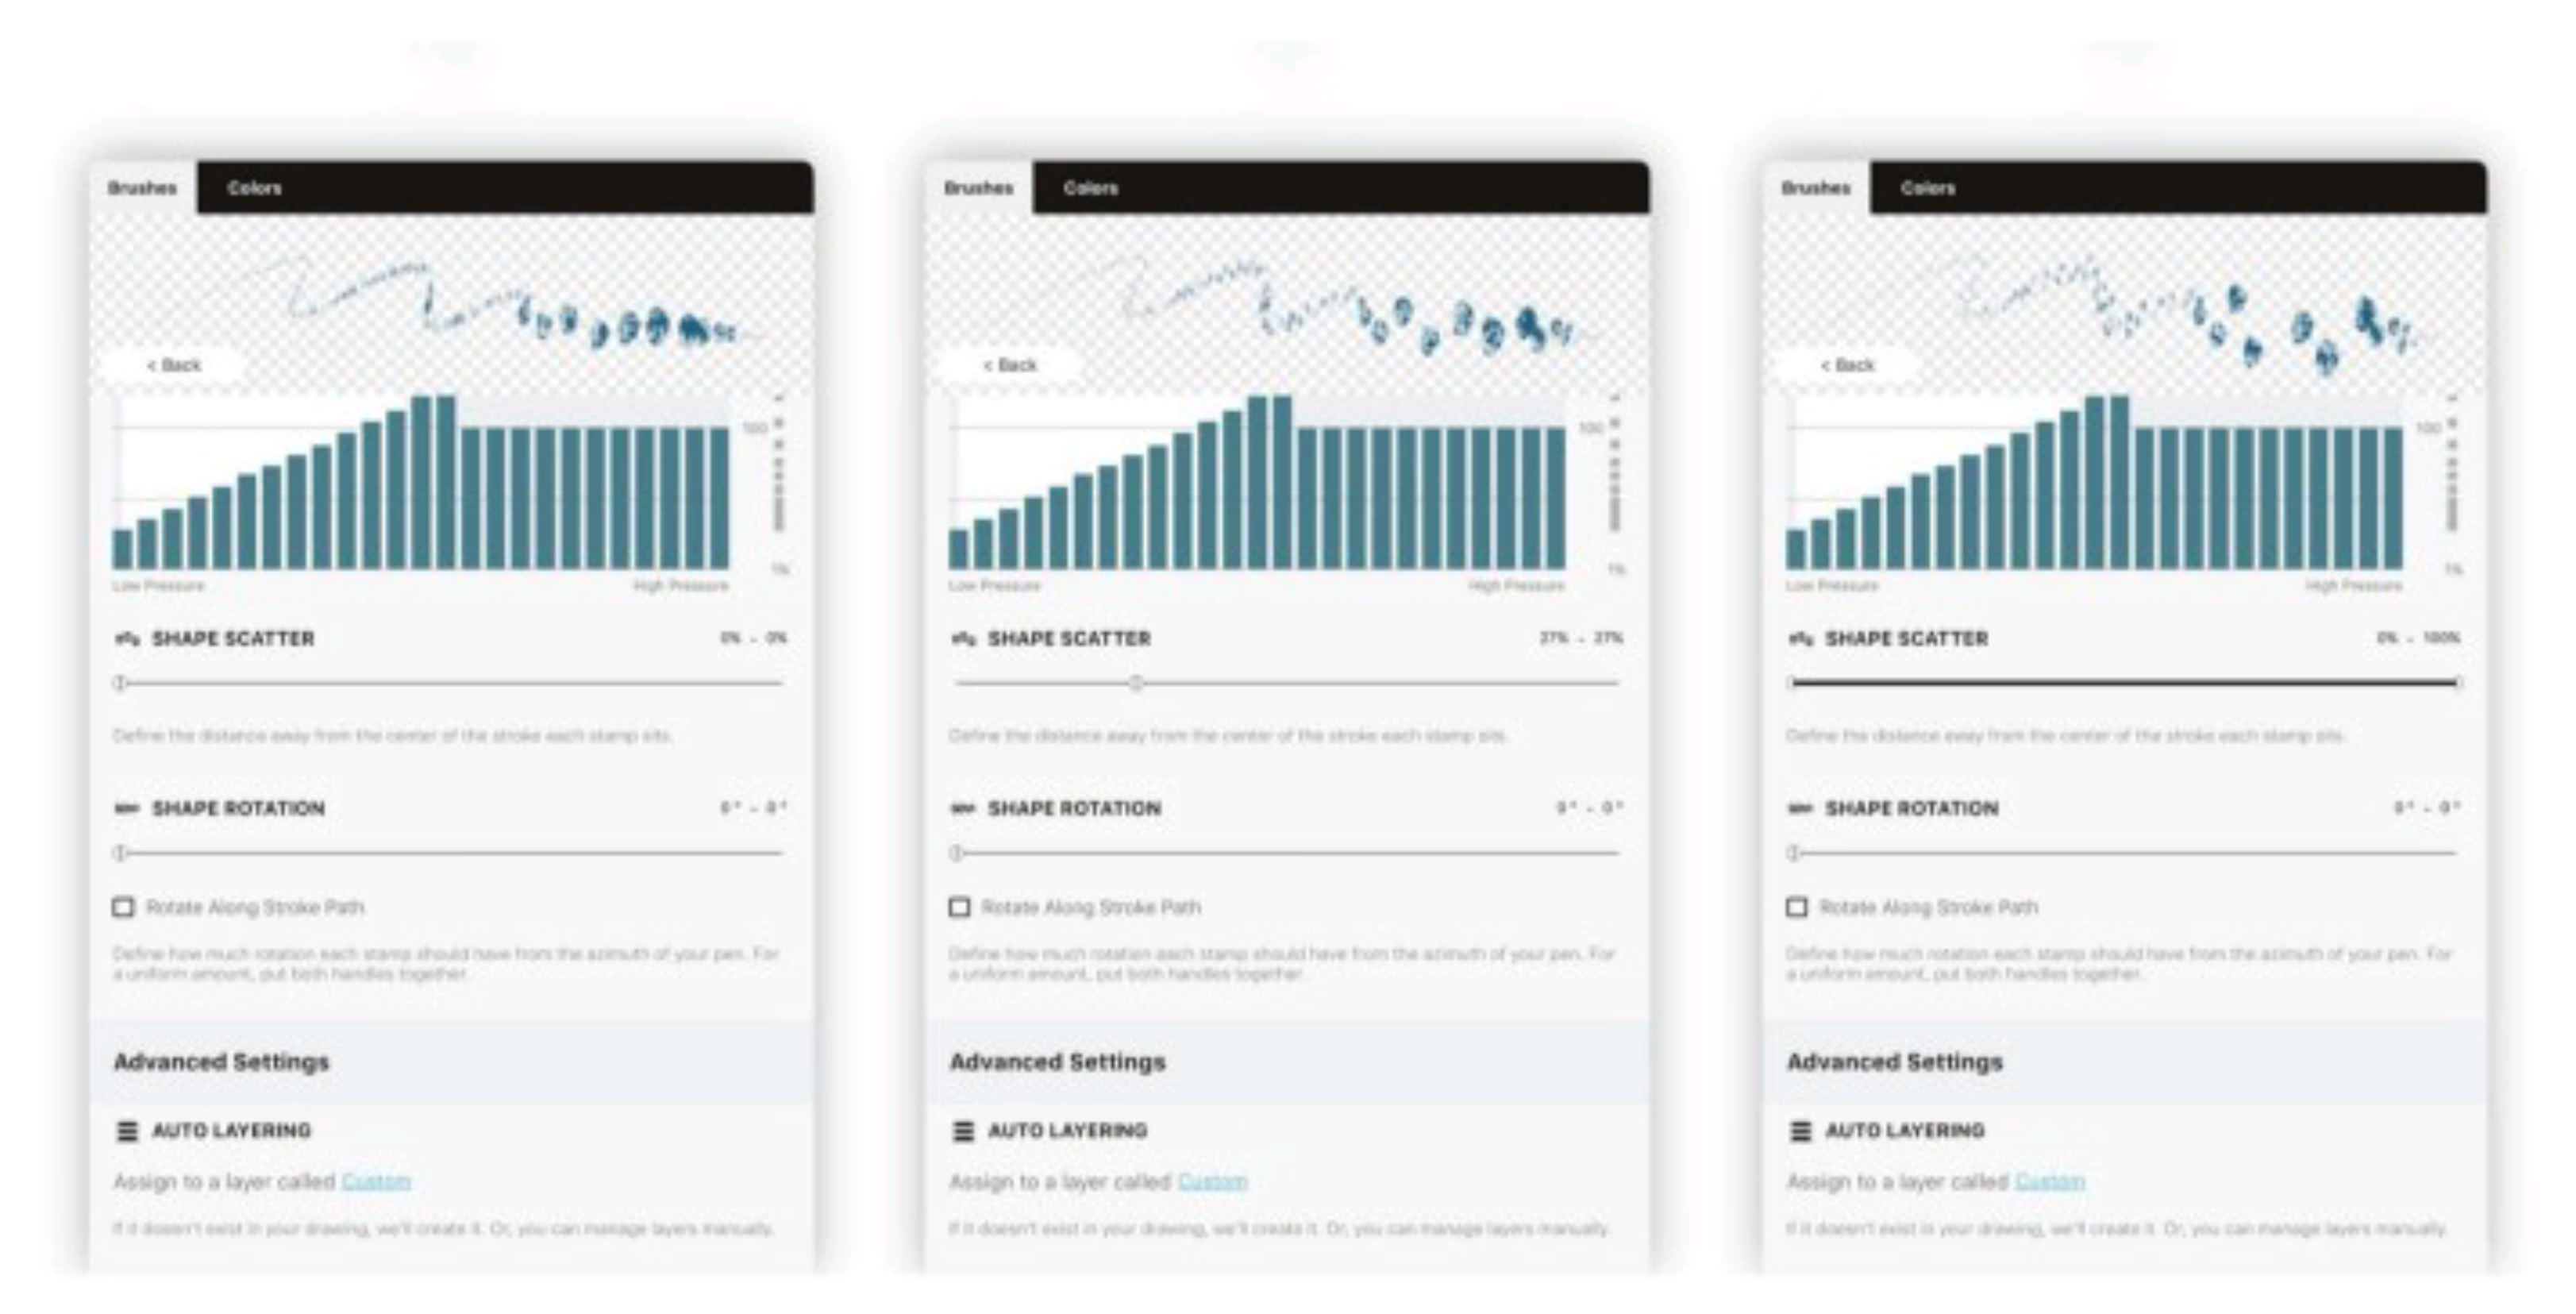
Put the handles together at 0% for zero scatter, put them together further along the bar for a non-random scatter, put the handles apart for a more random scatter. It helps to play with this when the stamps are further spaced so you can see what is affected in the live viewer.
Choose a shape scatter for your brush.
SHAPE ROTATION
Similarly, you can decide how much rotation your stamps will have along the stroke as you draw. A wider range allows the stamps to rotate randomly within the parameters. Placing the handles together gives no rotation; placing them together further along the bar starts and contains the rotation to a particular point of your choice.
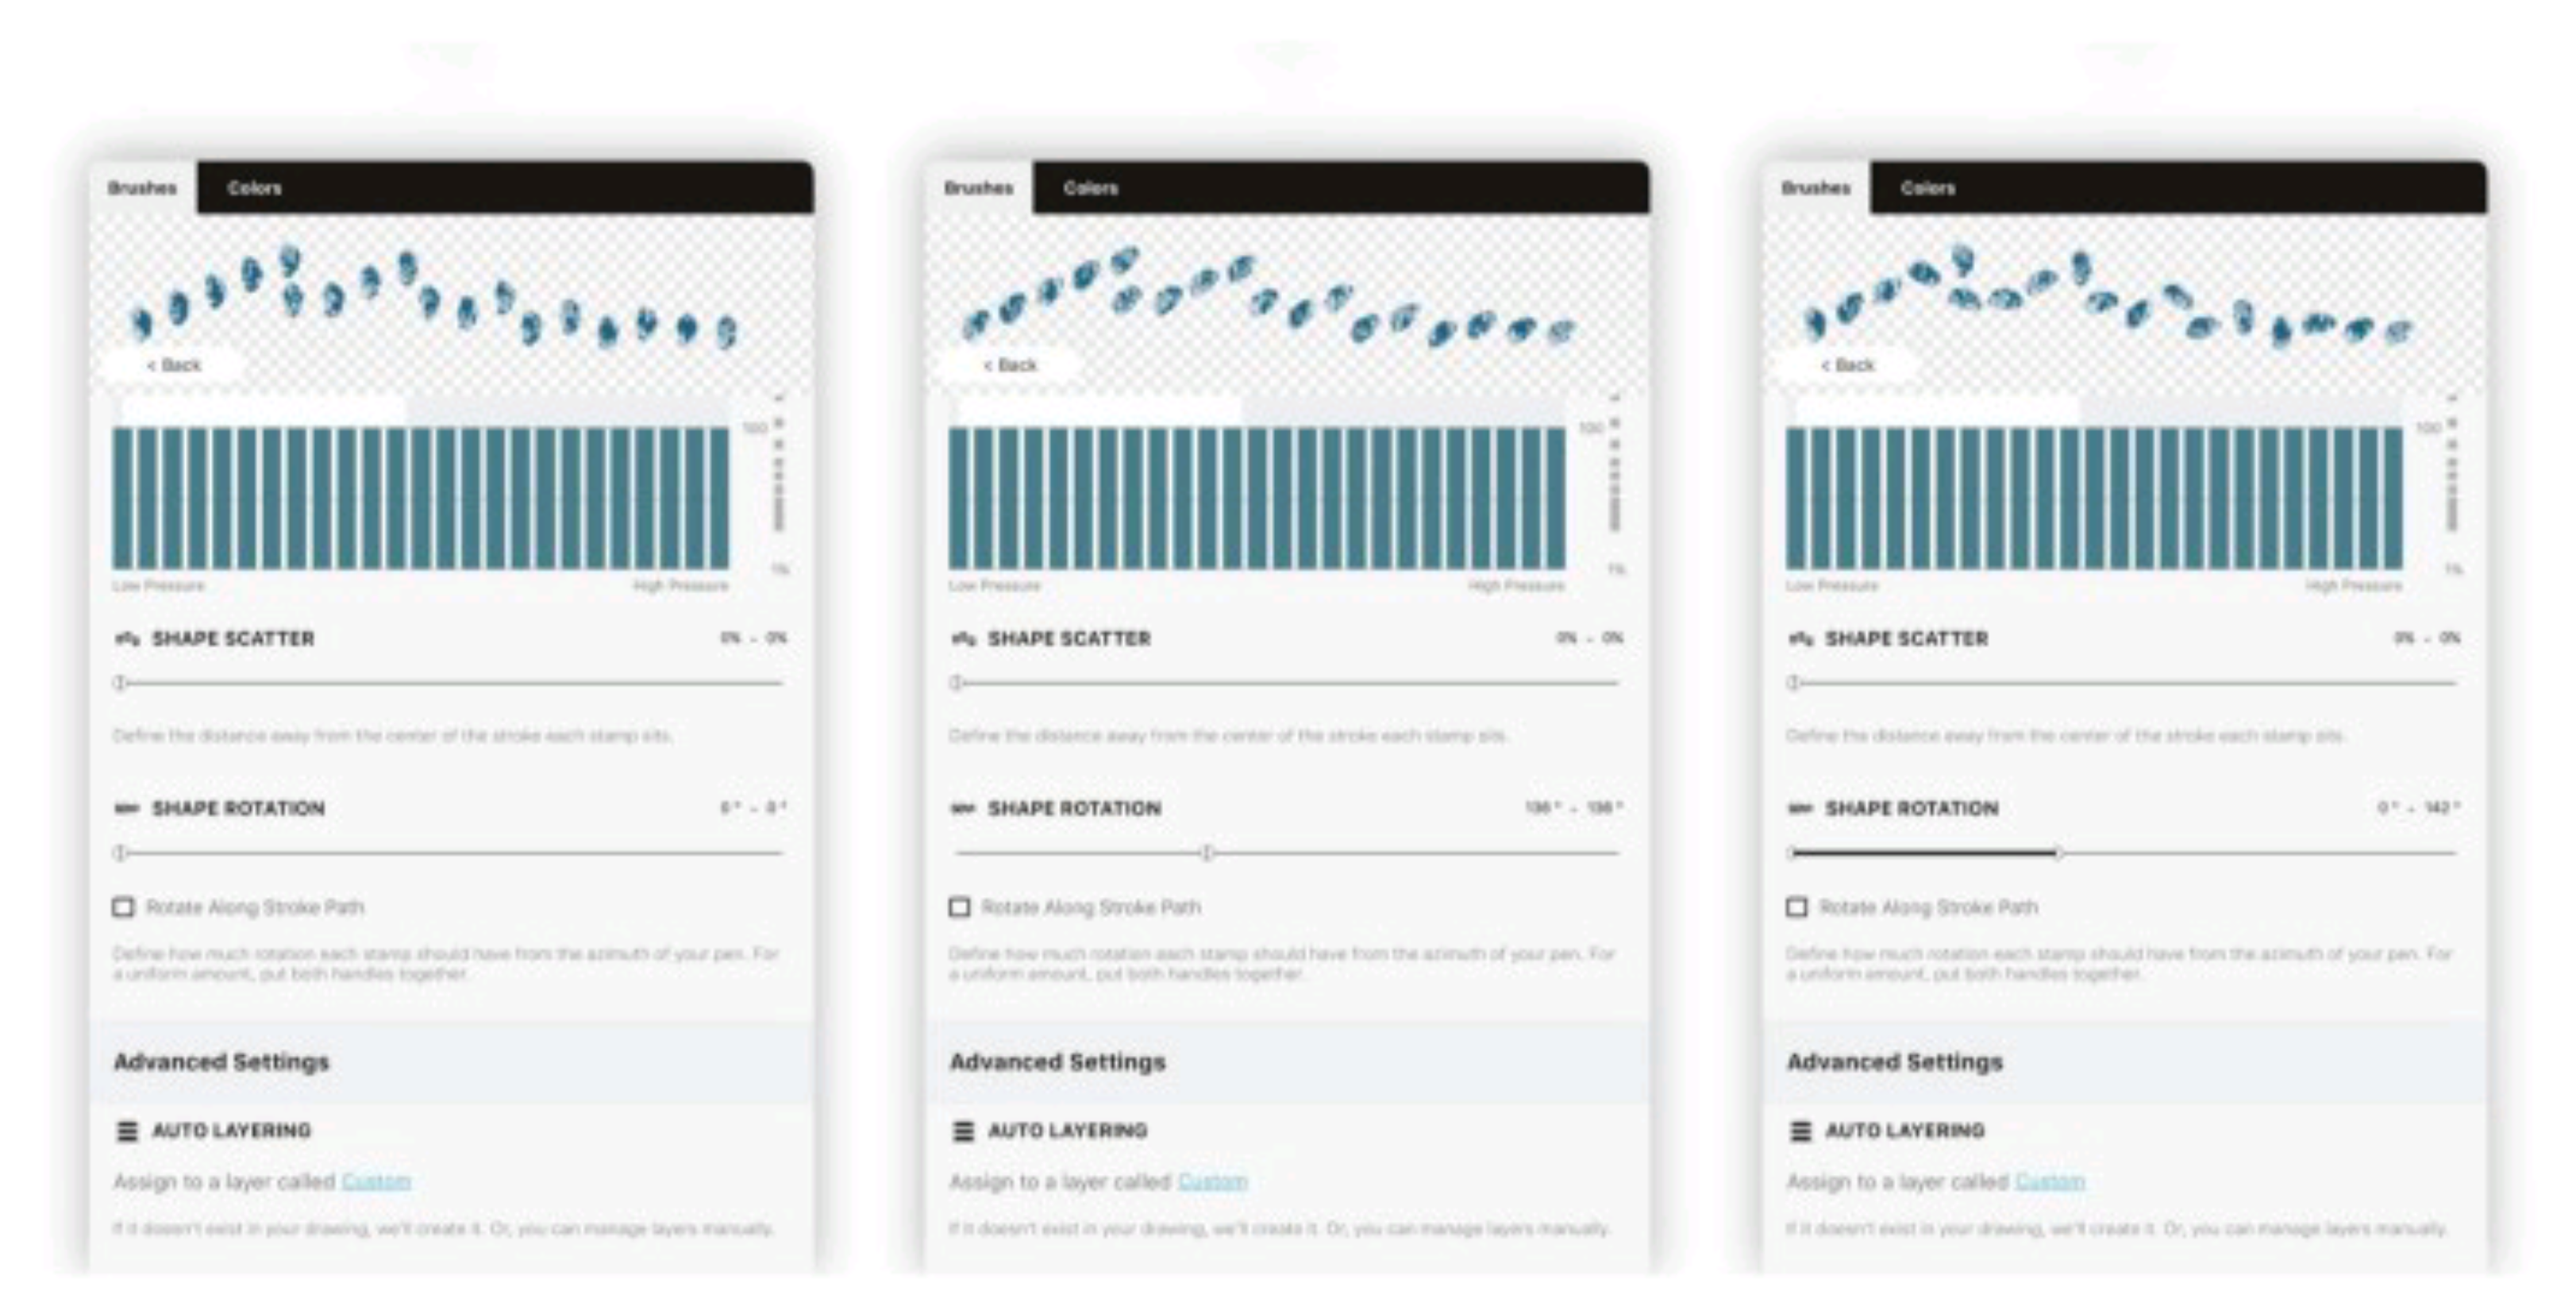
1 — No shape rotation. 2 — Non-random shape rotation (handles together). 3 — More random shape rotation (handles apart).
Below the shape rotation slider, you’ll see a box that says “Rotate Along Stroke Path.” By default, the stamp will follow the azimuth of your stylus when you draw, meaning the stamp rotates as the stylus tip rotates. If you want it to ignore the azimuth and draw in a straight “track” no matter how you rotate the stylus tip, check the “Rotate Along Stroke Path” box to disable it.
Play with these options and find a shape rotation for your brush that you like.
Advanced Settings
Finally, you can decide how you want your brush to be treated as a layer. This includes the brush layer’s name, and which type of layer you’d like it set to.
Tap the underlined layer label in “Assign to a layer called ___” and a keyboard will appear, as well as a number of pre-set choices.
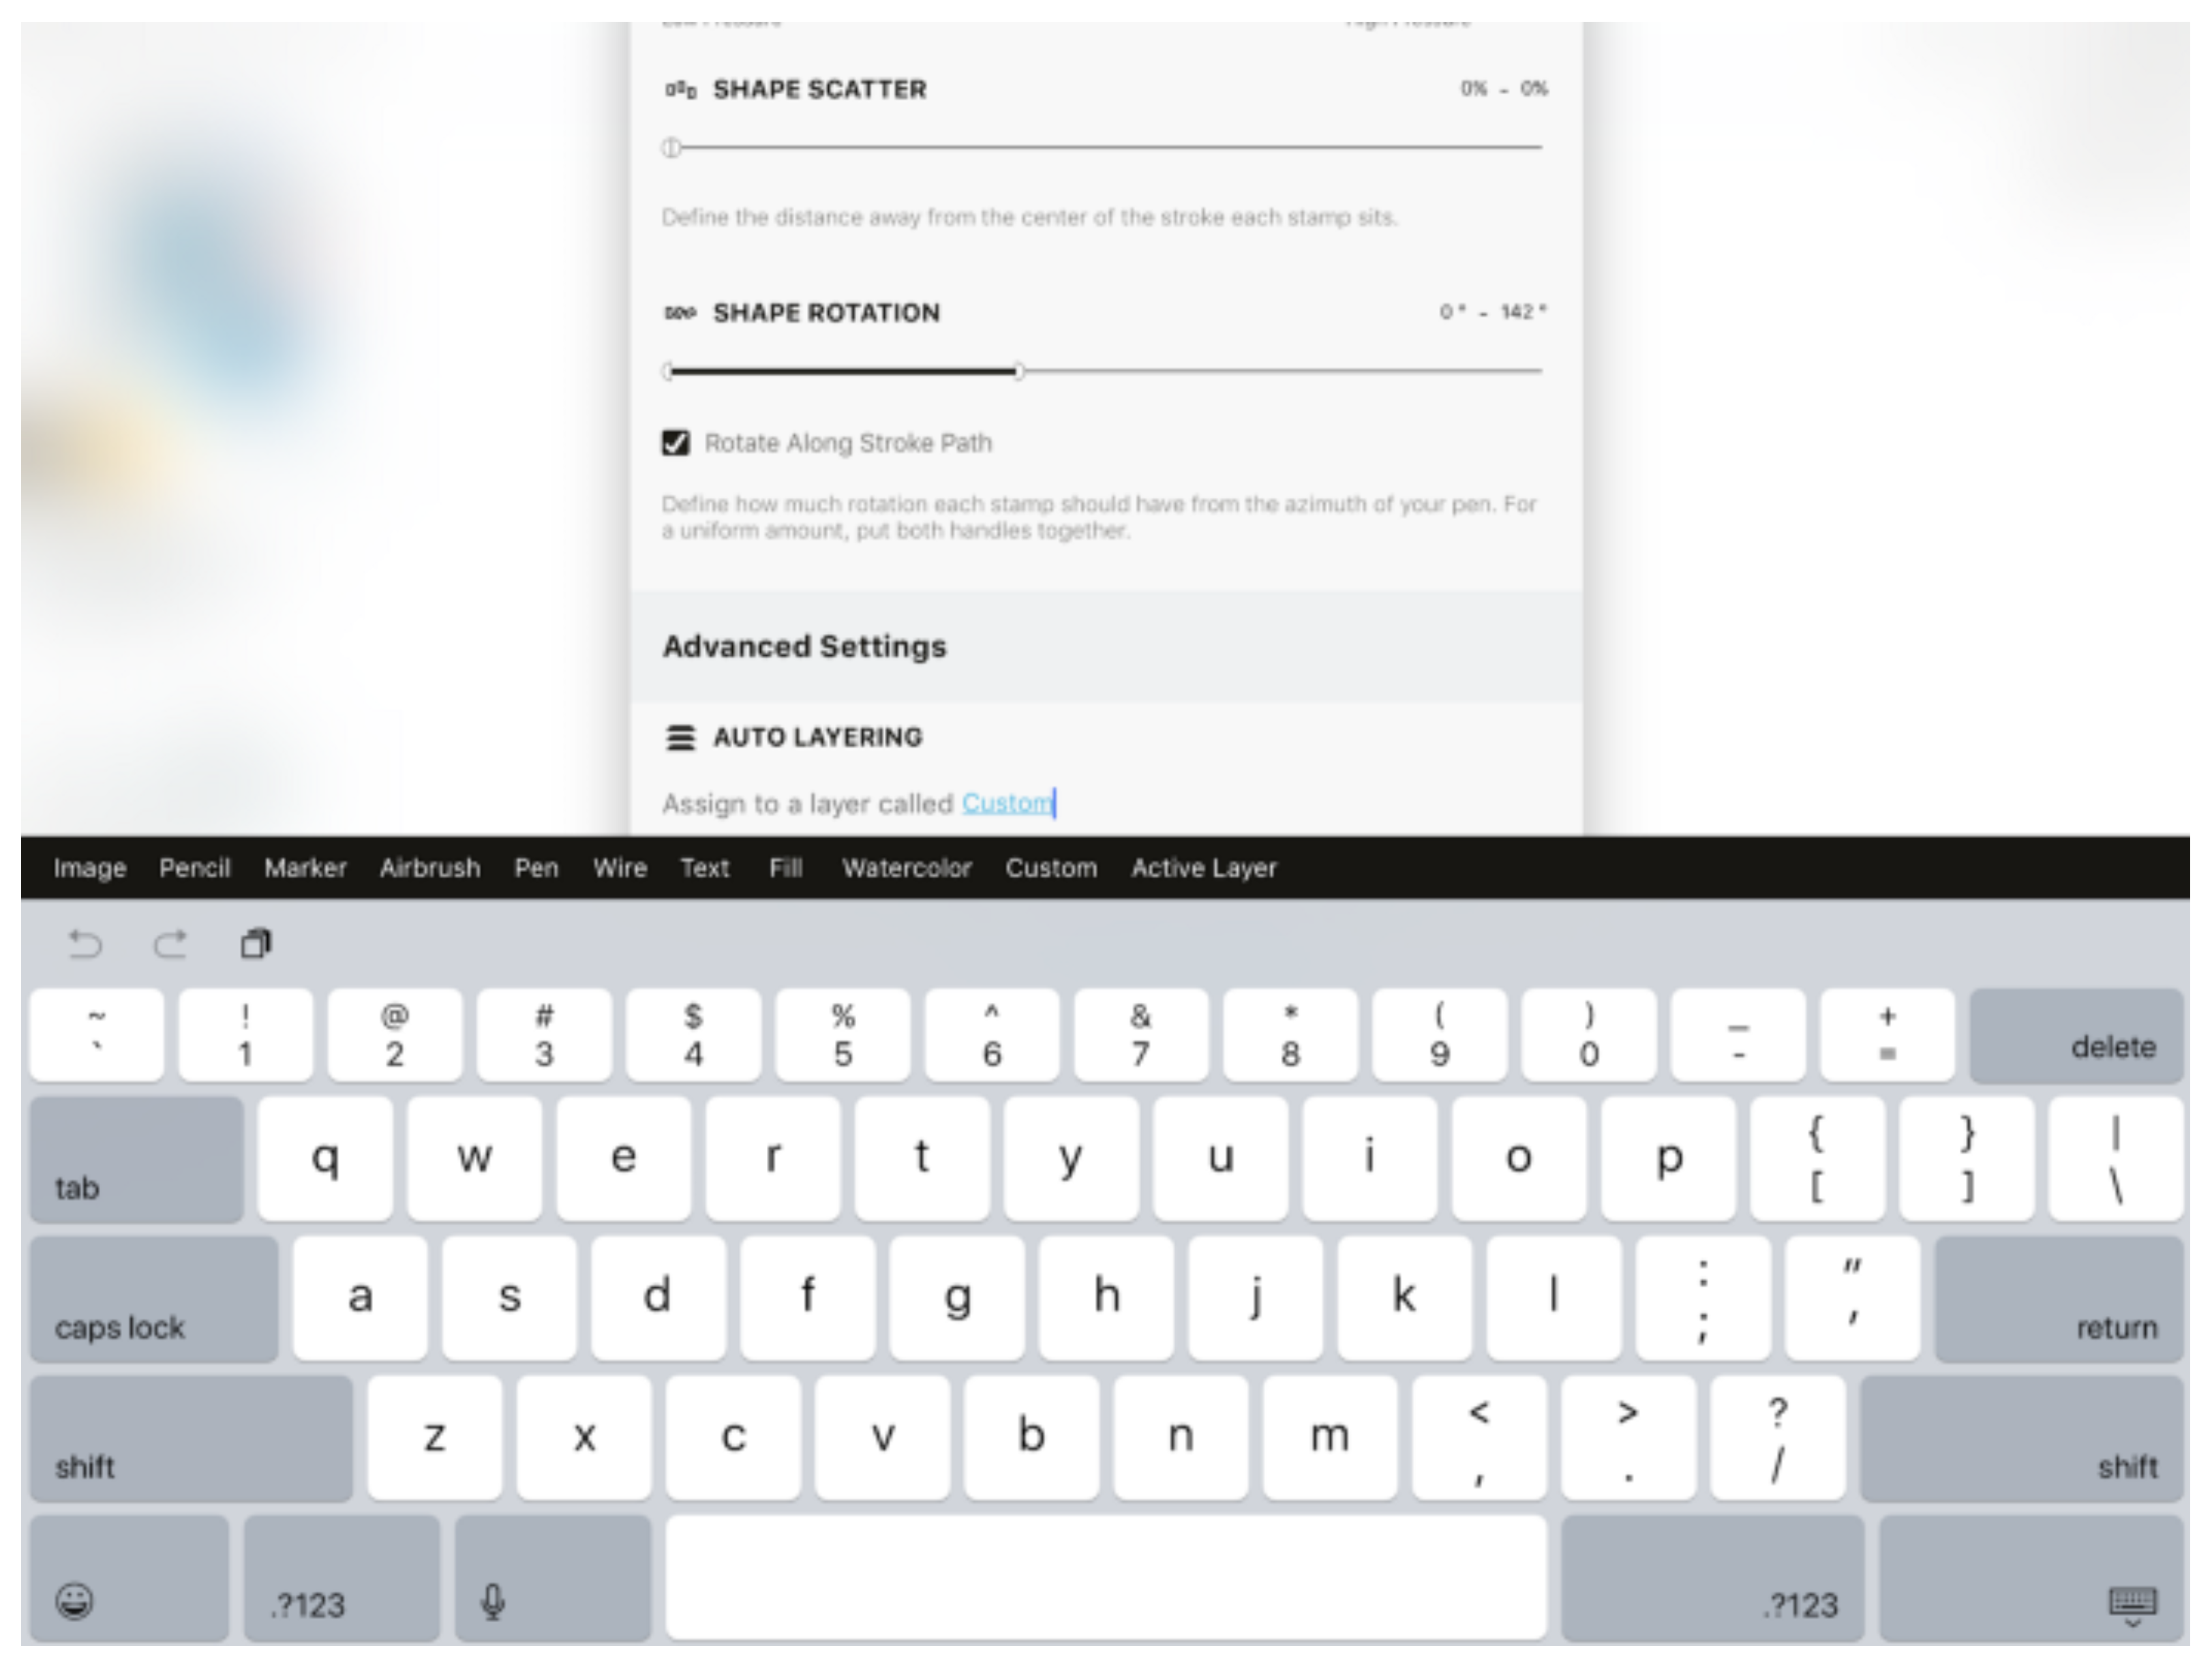
Automatic Layering in Concepts sorts your strokes by tool type, so you can assign your brush to any of the predefined layer types here, or give the layer its very own name.
If you choose Pen, for example, the brush will automatically appear with every other Pen you draw in that drawing. If you choose Active Layer, it will automatically draw in the Active Layer you are using.
Of course, you can always sort your layers manually as you draw and have multiple layers of the same tool type. It’s up to you.
Assign your brush a layer name.
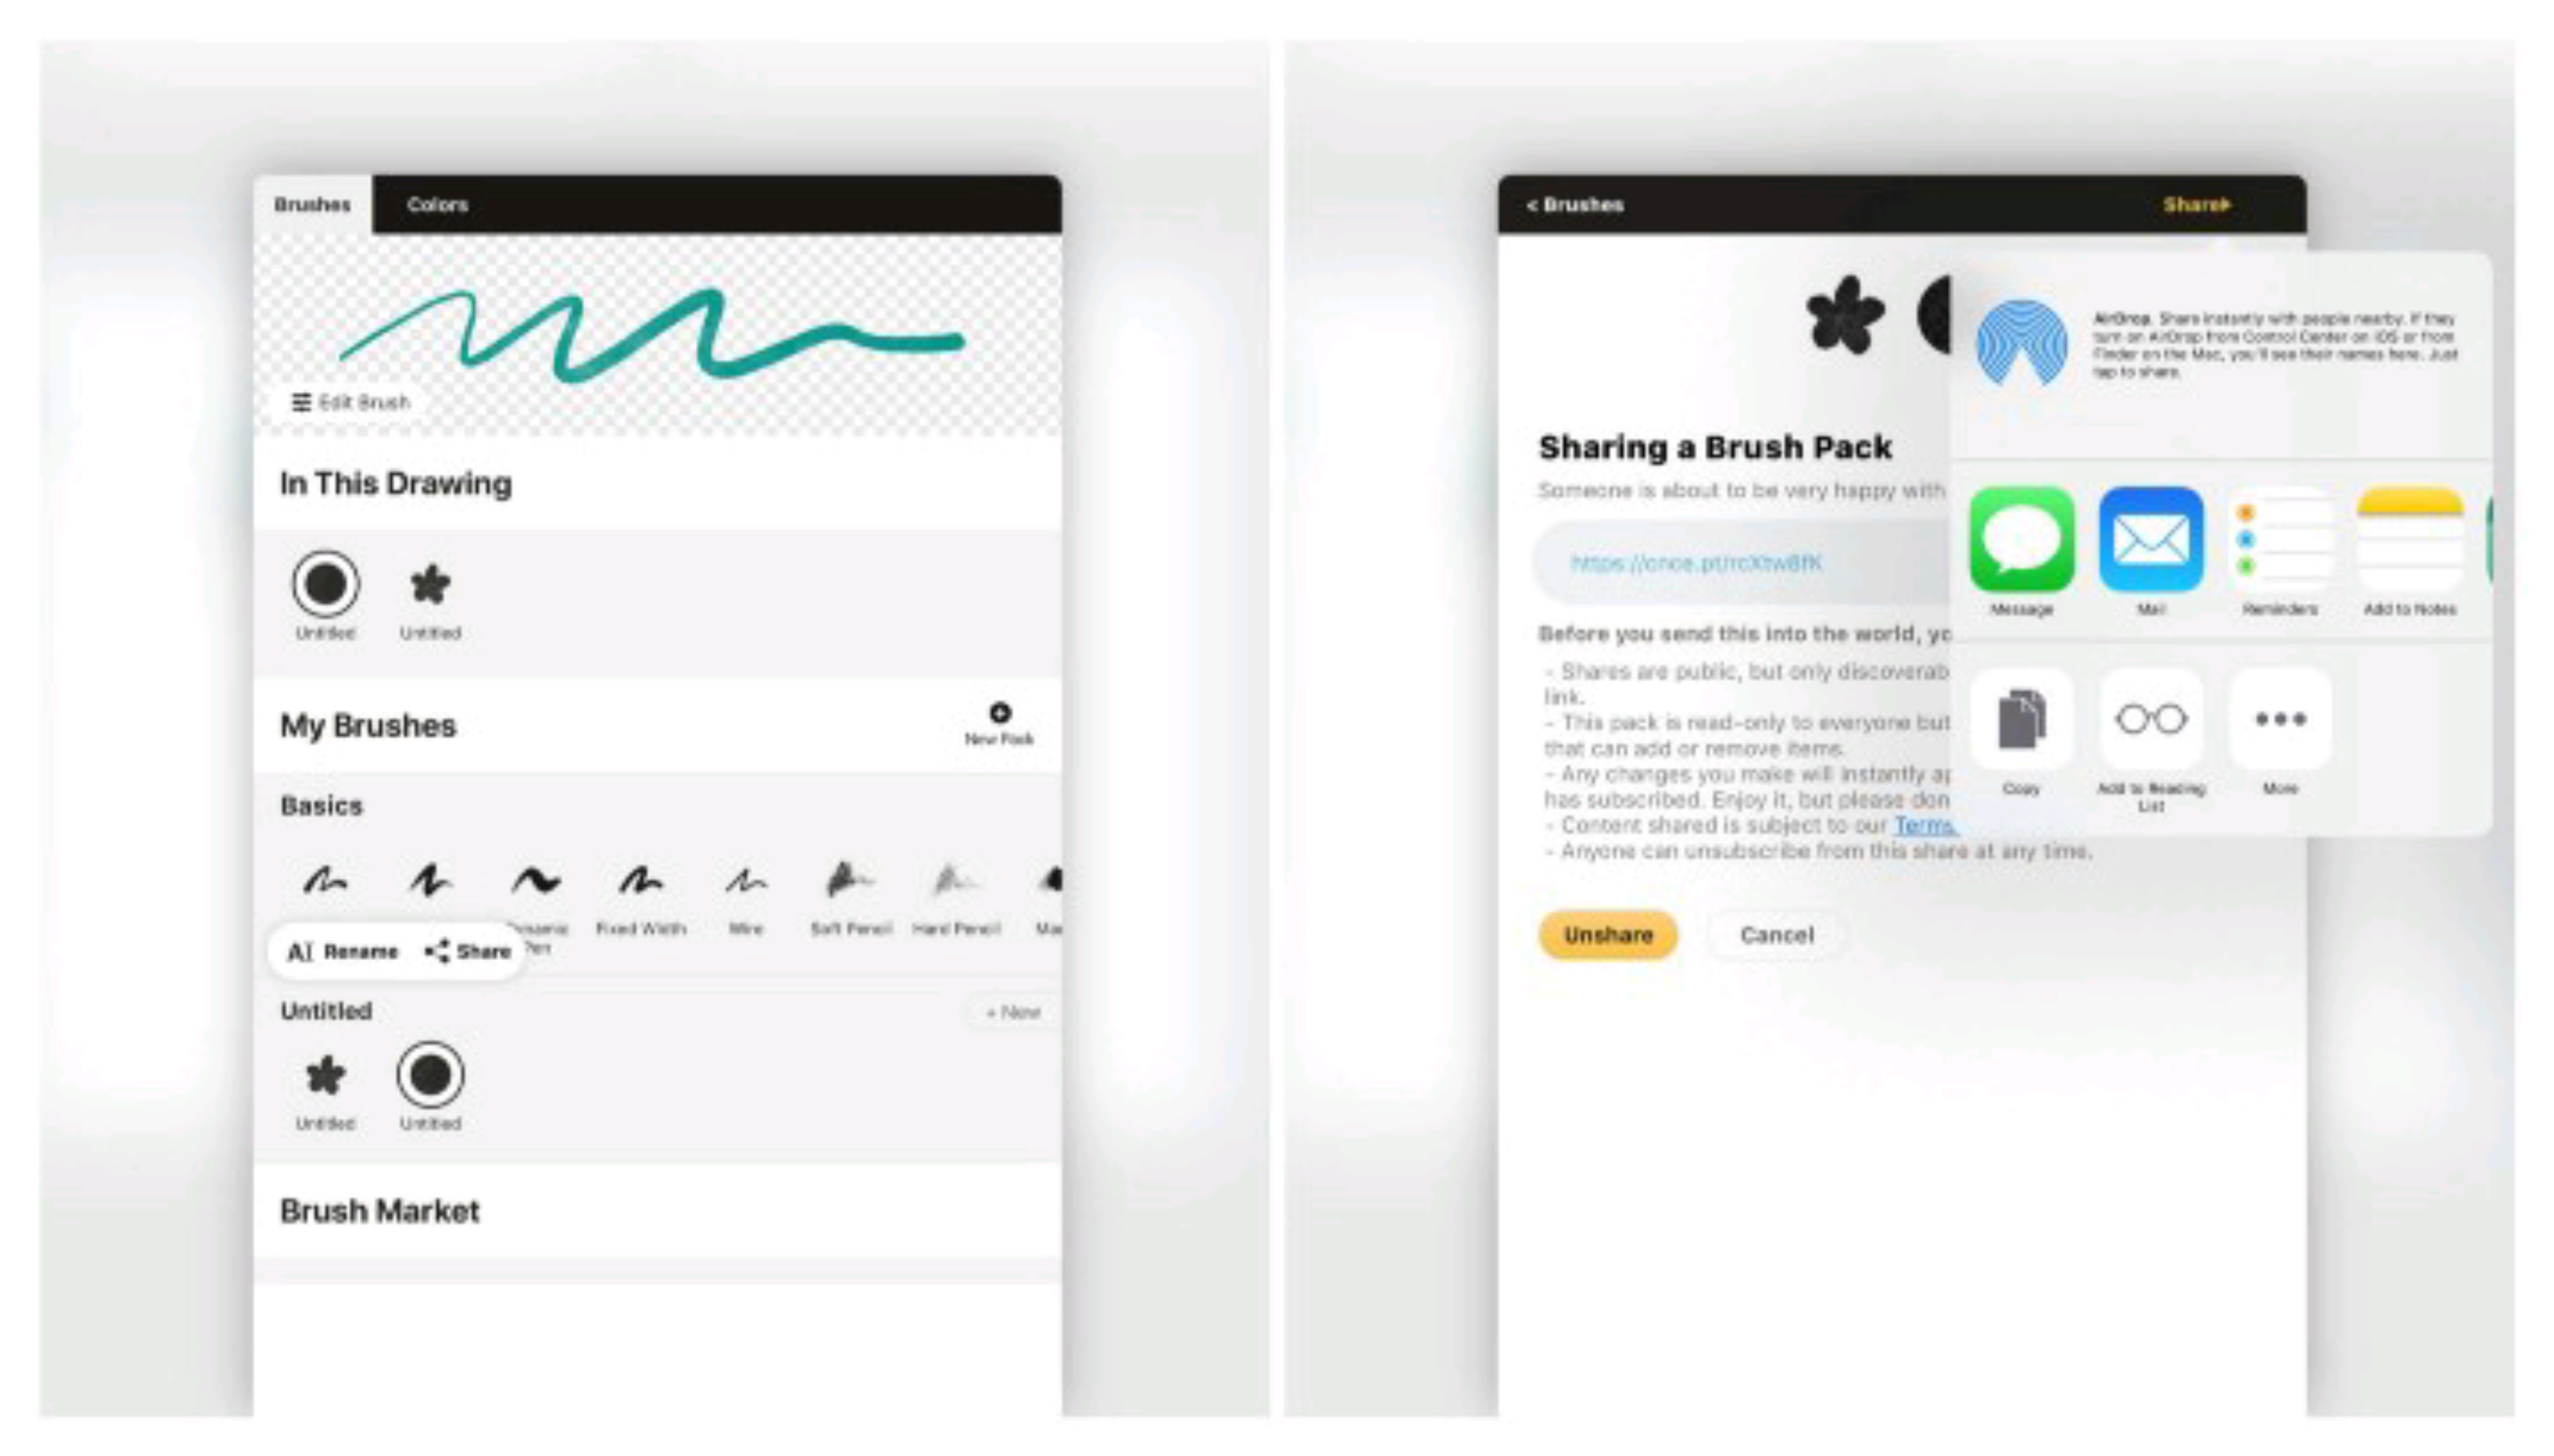
Brush Sharing
If you want to share your awesome brushes with friends and colleagues (anyone who has a free Concepts account), you can tap+hold on a brush pack or a brush and tap “Share”. Your friend will be given the option to accept the brushes. These are read-only, they can’t make updates to the brushes… but you can, and any change you make will be updated live for all.
You now know the secrets behind making your own digital brushes. You’re empowered to create any kind of brush you can imagine, from images to action to final appearance, and have a great new brush to start sketching with. We can’t wait to see what you create!
If you want more practice, try making your own fun, photo-based brush with this tutorial, and keep your eyes open for more brush tutorials coming your way.
Watch how to make your own brushes in our YouTube tutorial:

If you have further questions, please ask or send us an email to concepts@tophatch.com, and we’ll be happy to help.
By Erica Christensen
Recommended
Create a Photo-based Brush - Learn how to turn a photo into a custom brush in Concepts.
Digital Brush Design with a Splash - Artist Matthew Baldwin shares how he creates digital brushes for apps like Concepts and Procreate.
How to Make a Custom Brush Stamp and Grain - Learn how to make your own brush stamps and grains to create custom brushes in Concepts.