Learn to Draw Series
Proportions and Reference
Learning to see is just as important as learning to draw. Lasse Pekkala shares how to visualize objects as basic shapes and proportions you can sketch, and how to build your visual library.

Course Materials
Download Reference Photos (includes JPG, CPT and concepts files)
*Photos for course use only. Photo credits: Andrés Gómez, Ben Hershey, Boris Smokrovic, Bryan Hanson, Daniel Hjalmarsson, Federico Bottos, Jean-Louis Paulin, Lasse Pekkala, Margot Pandone, Olena Sergienko, Pravira Adam, Raspopova Marina.
Learn how to import and use your files below.
Tools
As you watch this video, we recommend you have a piece of paper and pencil or a digital tablet with a sketching app like Concepts on hand.
A stylus isn’t mandatory but it does help. In Concepts, pencils are pressure and tilt sensitive with a compatible stylus and work great for natural shading. To change your tool on the tool wheel, tap the active tool to bring up the Brushes menu and find one you like.
See below for a list of tools used in the video.
Set Up
If you have a comfortable space you like to spread out and think or sketch in, go ahead and set up there. If you're out and about, bring some paper and a couple of sketching pens in your bag, or your digital tablet and stylus, and find a spot where you can move your arm, shoulders and body comfortably.
If you’re using an iPad, you can watch the video and sketch at the same time using iOS’s split screen ability:
1. Open the video link.
2. Swipe upward from the bottom of the screen to bring up the command bar.
3. Tap+hold+drag your drawing app's icon and drag it upward to your preferred drawing side (right or left).
4. Expand it to split screen by tap+hold+dragging the inner side edge of the interface toward the center of the screen.
Sketching Tips
• Sketching is a two way street - what you visualize is what you draw, but you also learn what to look for while drawing. The practice of sketching is what teaches you how to draw convincingly.
• Take it one object at a time. Sketching is a connection between your idea, your mental visualization of the idea, your arm and the page. Try to connect each of these as you draw. Gradually, you will build up a mental vocabulary or “visual library” of objects you’re comfortable drawing.
• First, take a moment to hold, explore or understand the object you want to draw. This helps you create a mental picture of it. You can do this with real objects or with reference photos.
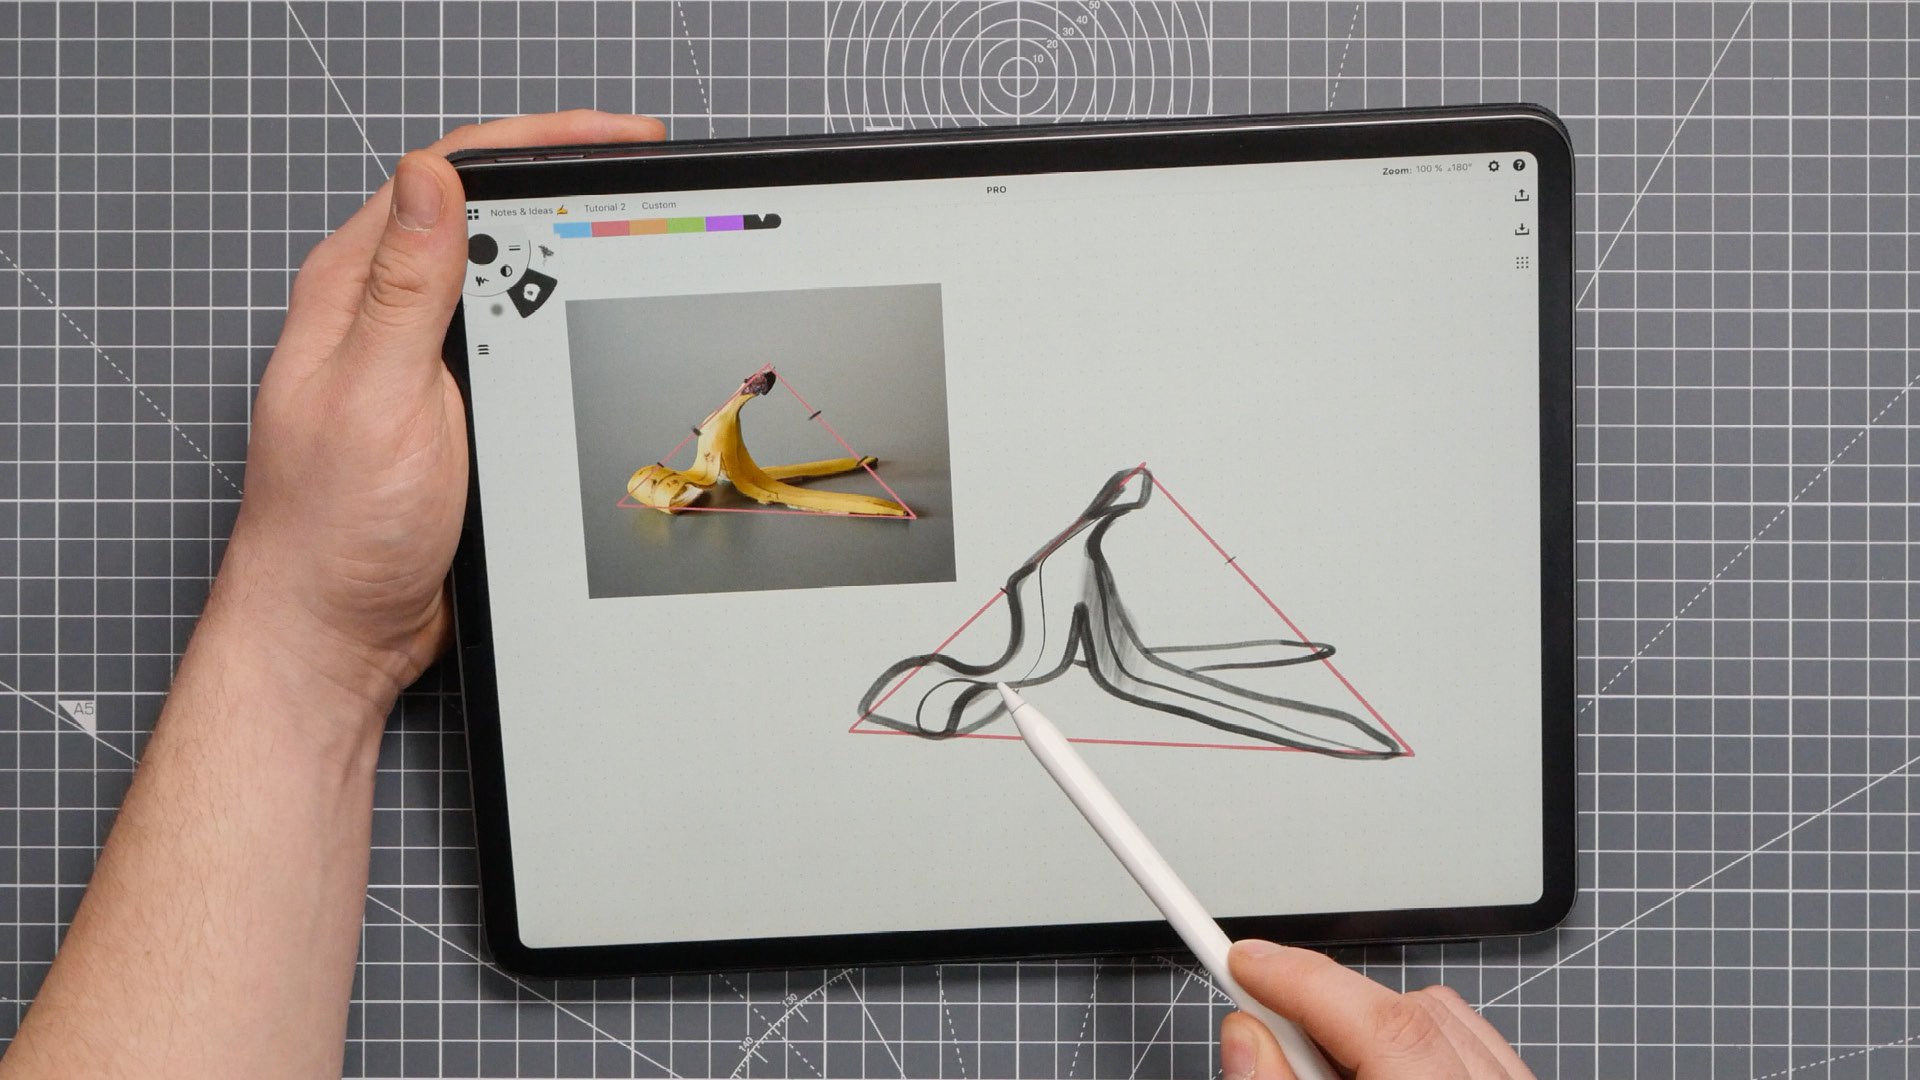
• Next, look at the object and give it a simple overall shape. This is the starting framework for your sketch. You will not always need to draw this - soon you will build the habit of referencing it in your mind. When you start with the big picture, you learn to sketch convincing structures without spending too much time on them. You want to be able to sketch your ideas quickly.
• From here, look at the object’s proportions and note the approximate sections on your framework. Where does the bulk of the object go? Sketch in the shape. Where do the smaller shapes fit? Add them in next. This helps build your framework’s inner structure.
• Finally, move to the details and pencil them in. Remember, though, that polish work belongs to your most convincing sketches. Get the forms down first. Once you’re happy with the form, add in the details.
• When you have a final sketch you like, you can confidently ink over it with the details you want to keep.
• In the video, you may see Lasse poke or “nudge” lines in the sketch while he is drawing on the iPad. Nudge is a tool in Concepts that lets you pull, push or adjust your lines like a piece of string. You can try it out by finding Nudge in the Tools menu (tap your active brush to open it).
• The other tool he takes advantage of is Line Smoothing - this gives your lines a little bit of extra polish while you draw. On the inner ring of the tool wheel are the brush’s presets - size, opacity and smoothing. Tap the smoothing icon (the wriggled line) and use the slider to choose a percentage - 0% is a raw line, 20% adds some gentle smoothness, 100% gives you instant straight lines.
• Digital tools are pretty amazing and can save you polishing time down the road so you don’t have to redraw when there is a deadline. But focus first on drawing confident forms and structures - this will save you the most time.
Course Materials
Download these images and use them as references for visualizing your frameworks and proportions. Look at them on your phone or tablet while sketching traditionally, import the files into a sketching app, or download a complete Concepts file of all images and sketch on the infinite canvas.
Download Reference Photos (includes JPG, CPT and concepts files)
*Photos for coursework use only. Photo credits: Andrés Gómez, Ben Hershey, Boris Smokrovic, Bryan Hanson, Daniel Hjalmarsson, Federico Bottos, Jean-Louis Paulin, Lasse Pekkala, Margot Pandone, Olena Sergienko, Pravira Adam, Raspopova Marina.
Importing Files
Tap the download link and choose your file type from among the options.
Downloading a JPG:
1. Download the file and choose whether to save it to your photo roll or files.
2. Drag the file onto the canvas from your photo library or files, or use the Import menu to open the file.
Downloading a CPT or concepts file:
1. Make sure Concepts is already installed on your device - choose your app version here. Download the CPT (Concepts for iOS) or concepts (Concepts for Windows, Android, Chrome OS) file onto this device.
2. Open the file. This will bring up an option to Open In your app of choice. Tap Concepts.
3. The file will automatically open for you as a new drawing in the app.
4. Use the infinite canvas to sketch each of the practice objects as many times as you need to fully explore the shape.
Concepts Drawing Tips
Using the Infinite Canvas for Practice
Concepts has an infinite canvas that lets you practice sketching objects on one giant sheet of paper. Here are some tips for using the infinite canvas:
• Use two fingers to scroll across the canvas in any direction.
• Rotate two fingers to turn the canvas.
• Pinch two fingers to zoom out, expand two fingers to zoom in.
• In the Tools menu (tap your active tool to bring it up), you’ll find a Pan tool. When this tool is active, you can navigate your drawing with one finger instead of two. It lets you explore your drawing without changing your rotation or zoom.
• At the top of the status bar you'll find a percentage field and an angle field. Tap+hold either of these to enter your own zoom scale or rotation angle for your canvas.
• If you move too far away from your drawing, a couple small arrows will appear at the edge of the screen, pointing the direction back to your sketch. Tap one to zoom back to the nearest stroke.
We have a fully illustrated tutorial on using the infinite canvas here.
Tools Used in the Video
- 0:00 - Felt Tip Marker
- 0:14 - Charcoal (25% smoothing)
- 0:48 - Brush Pen Firm
- 0:51 - Pen
- 0:56 - Dynamic Pen (20% smoothing)
- 1:01 - Brush Pen Medium
- 1:30 - Soft Pencil
- 4:45 - Charcoal (100% Smoothing)
- 5:07 - Charcoal (25% smoothing)
- 7:10 - Brush Pen Medium
- 7:37 - Charcoal (25% Smoothing)
- 9:28 - Soft Pencil
- 9:36 - Pen
- 10:07 - Felt Tip Marker
- 11:23 - Fixed Width (30% smoothing)
- 11:50 - Felt Tip Pen (100% smoothing)
- 12:00 - Fill Tool
- 12:03 - Soft Airbrush (24% opacity)
- 12:20 - Felt Tip Marker (31% smoothing)
- 13:05 - Charcoal (25% smoothing)
Do you have questions about the tutorial? Please email us at concepts@tophatch.com and we'll be happy to help. Comments and feedback are appreciated!
Learn to Draw Playlist on YouTube
Learn to Draw Video + Course Materials by Lasse Pekkala
New to Concepts? Try these YouTube tutorials:
Learn Concepts for Android & Chrome OS
Recommended
How to Use Layers to Take Notes, Illustrate and Design