Concepts is an infinite, flexible creative tool for all your good ideas. Available on iOS, Windows and Android.
How to Virtual Whiteboard on Your iPad
Connect your iPad or iPhone to video conferencing apps and sketch live with Concepts.
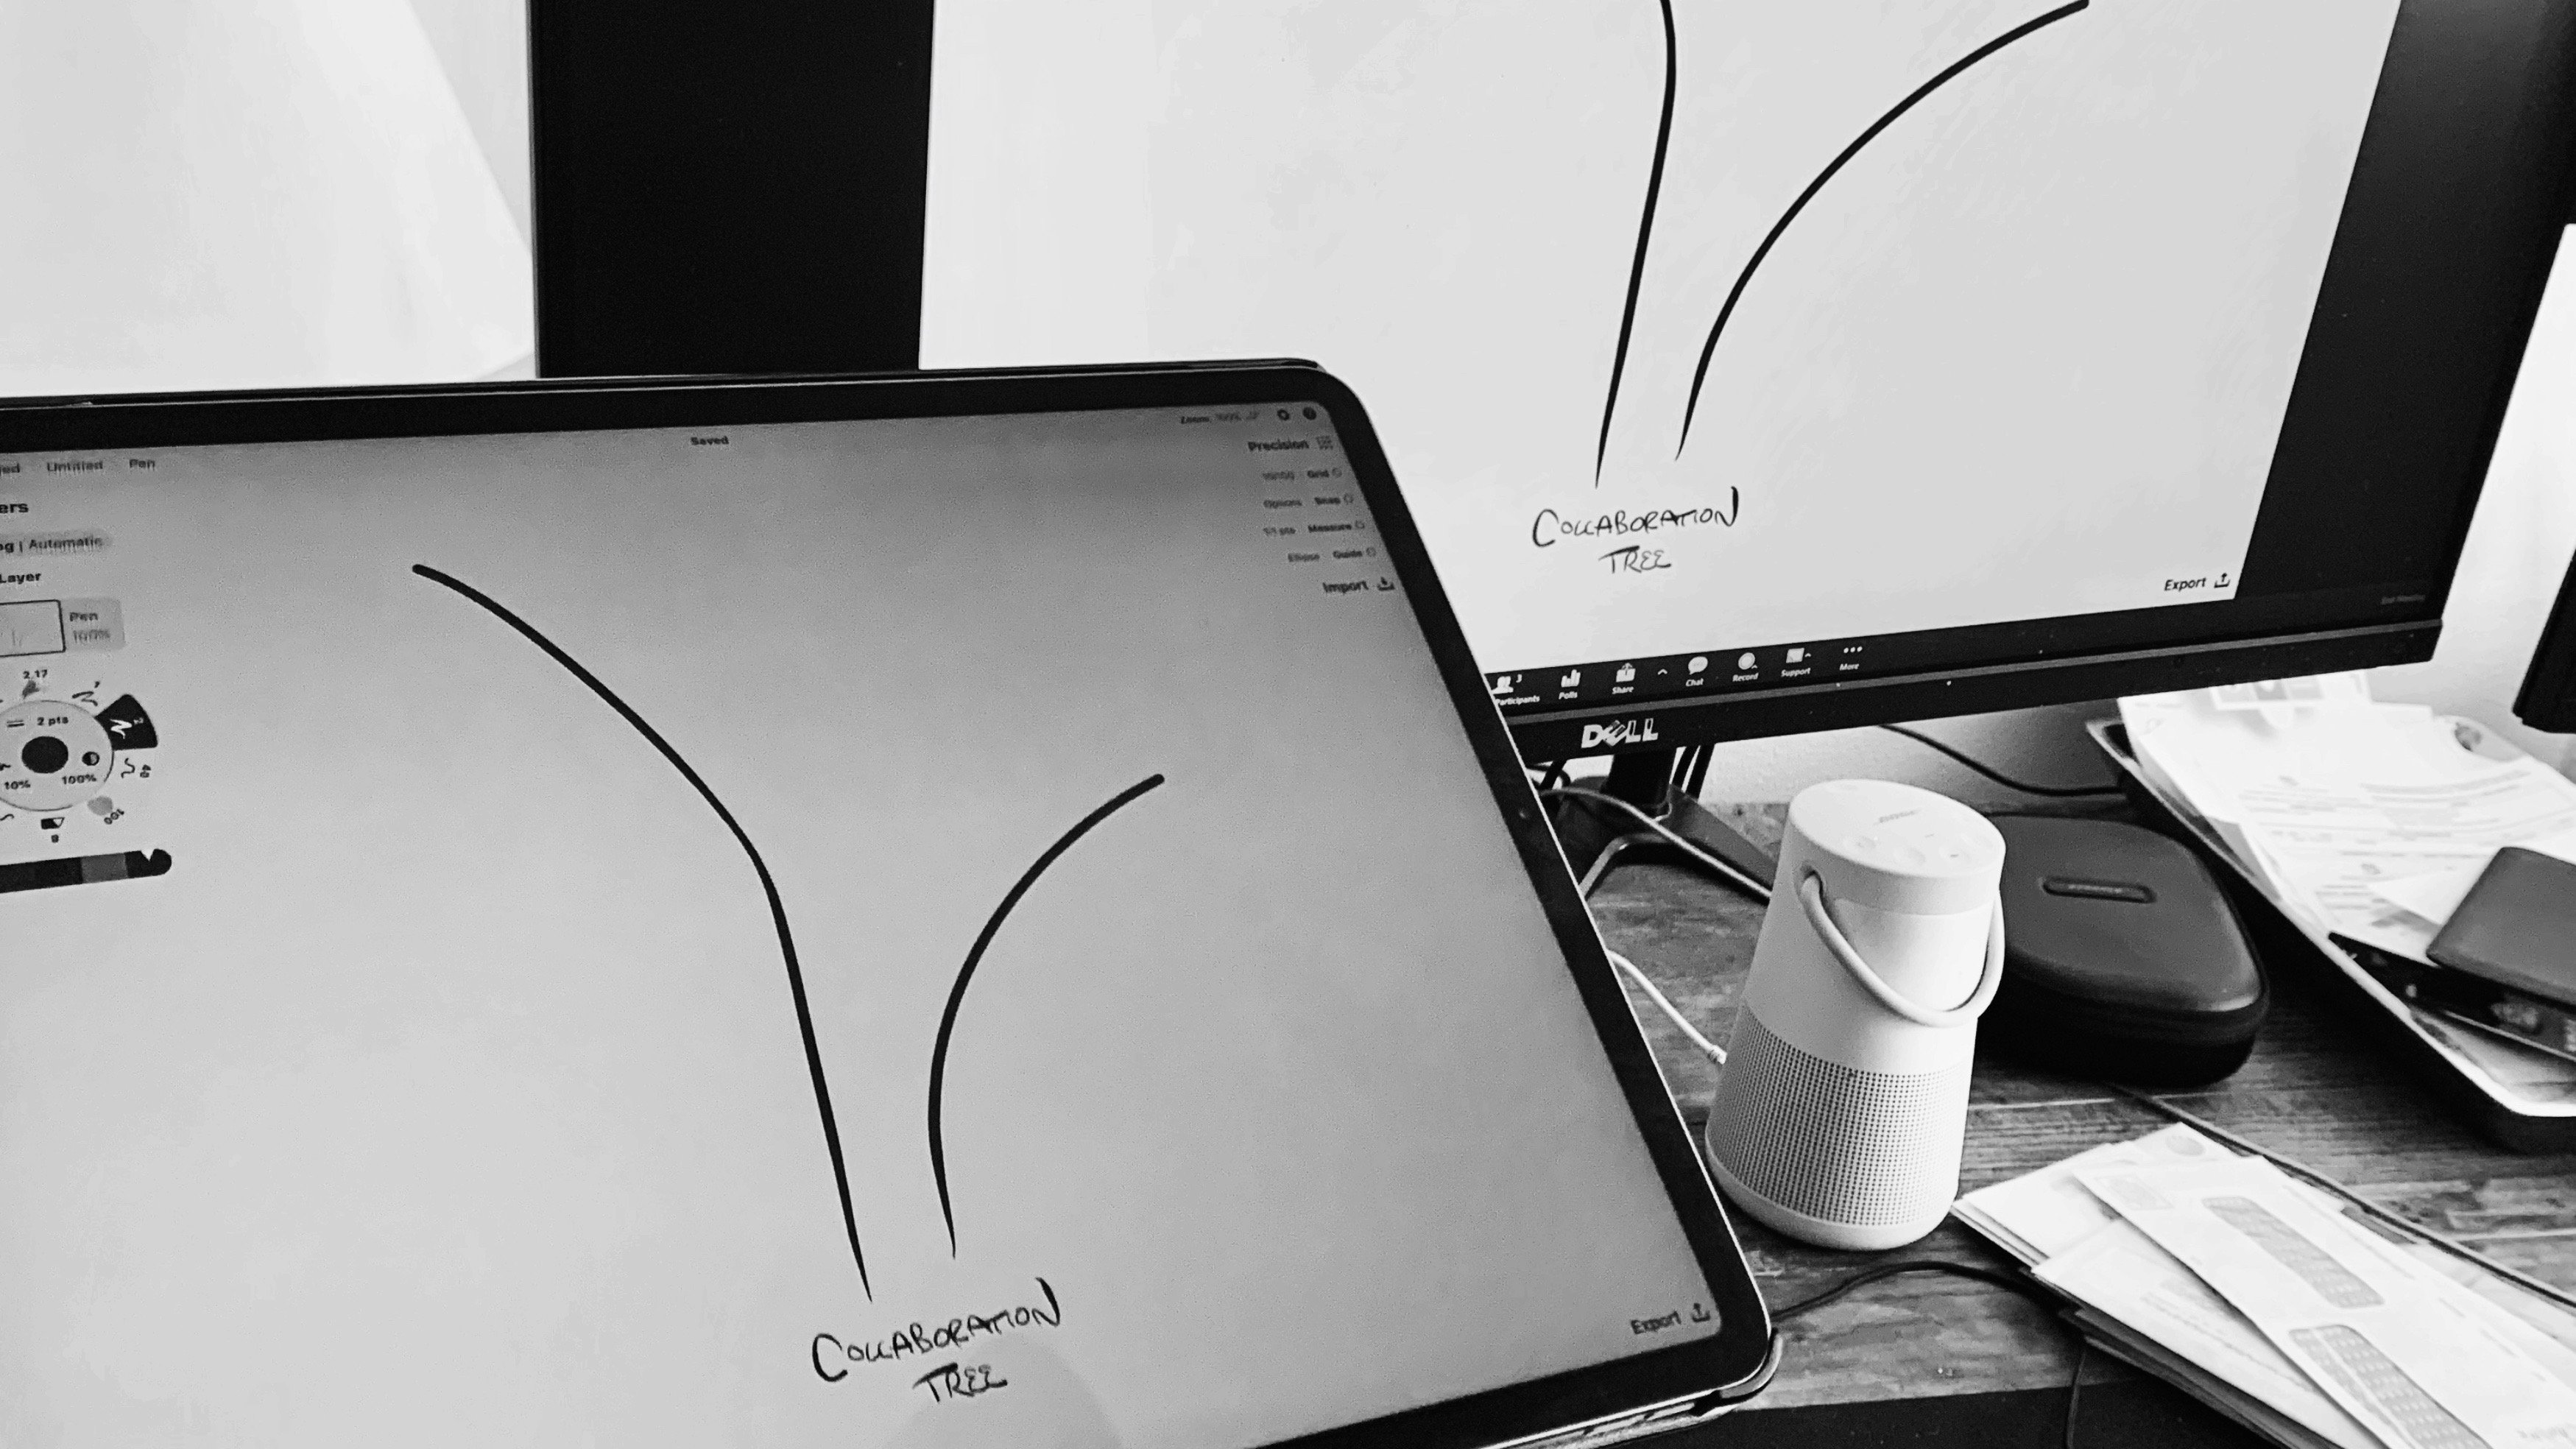
As more of our team and company workflows become remote, the need for clear communication skyrockets upward. Visual thinking techniques like mind mapping, strategizing and graphic recording pull team thinking and core messaging together. Adding an infinite whiteboard to your video conferencing helps to sell your ideas and cement your team vision. Concepts' fluid pens and markers in professional COPIC colors, endless zoom and flexible workspace provide an ideal toolset for sketching live.
Here is how to connect your iPad or computer to apps like Zoom, Reflector or QuickTime and video conference with Concepts.
Using Concepts with Zoom on Your iPad
Zoom is a popular conferencing app that allows you to connect with multiple people and share your screen. The app is free for personal use, or upgrade with small team, business and enterprise options. Other apps like Google Meet and Slack also allow for screen sharing.
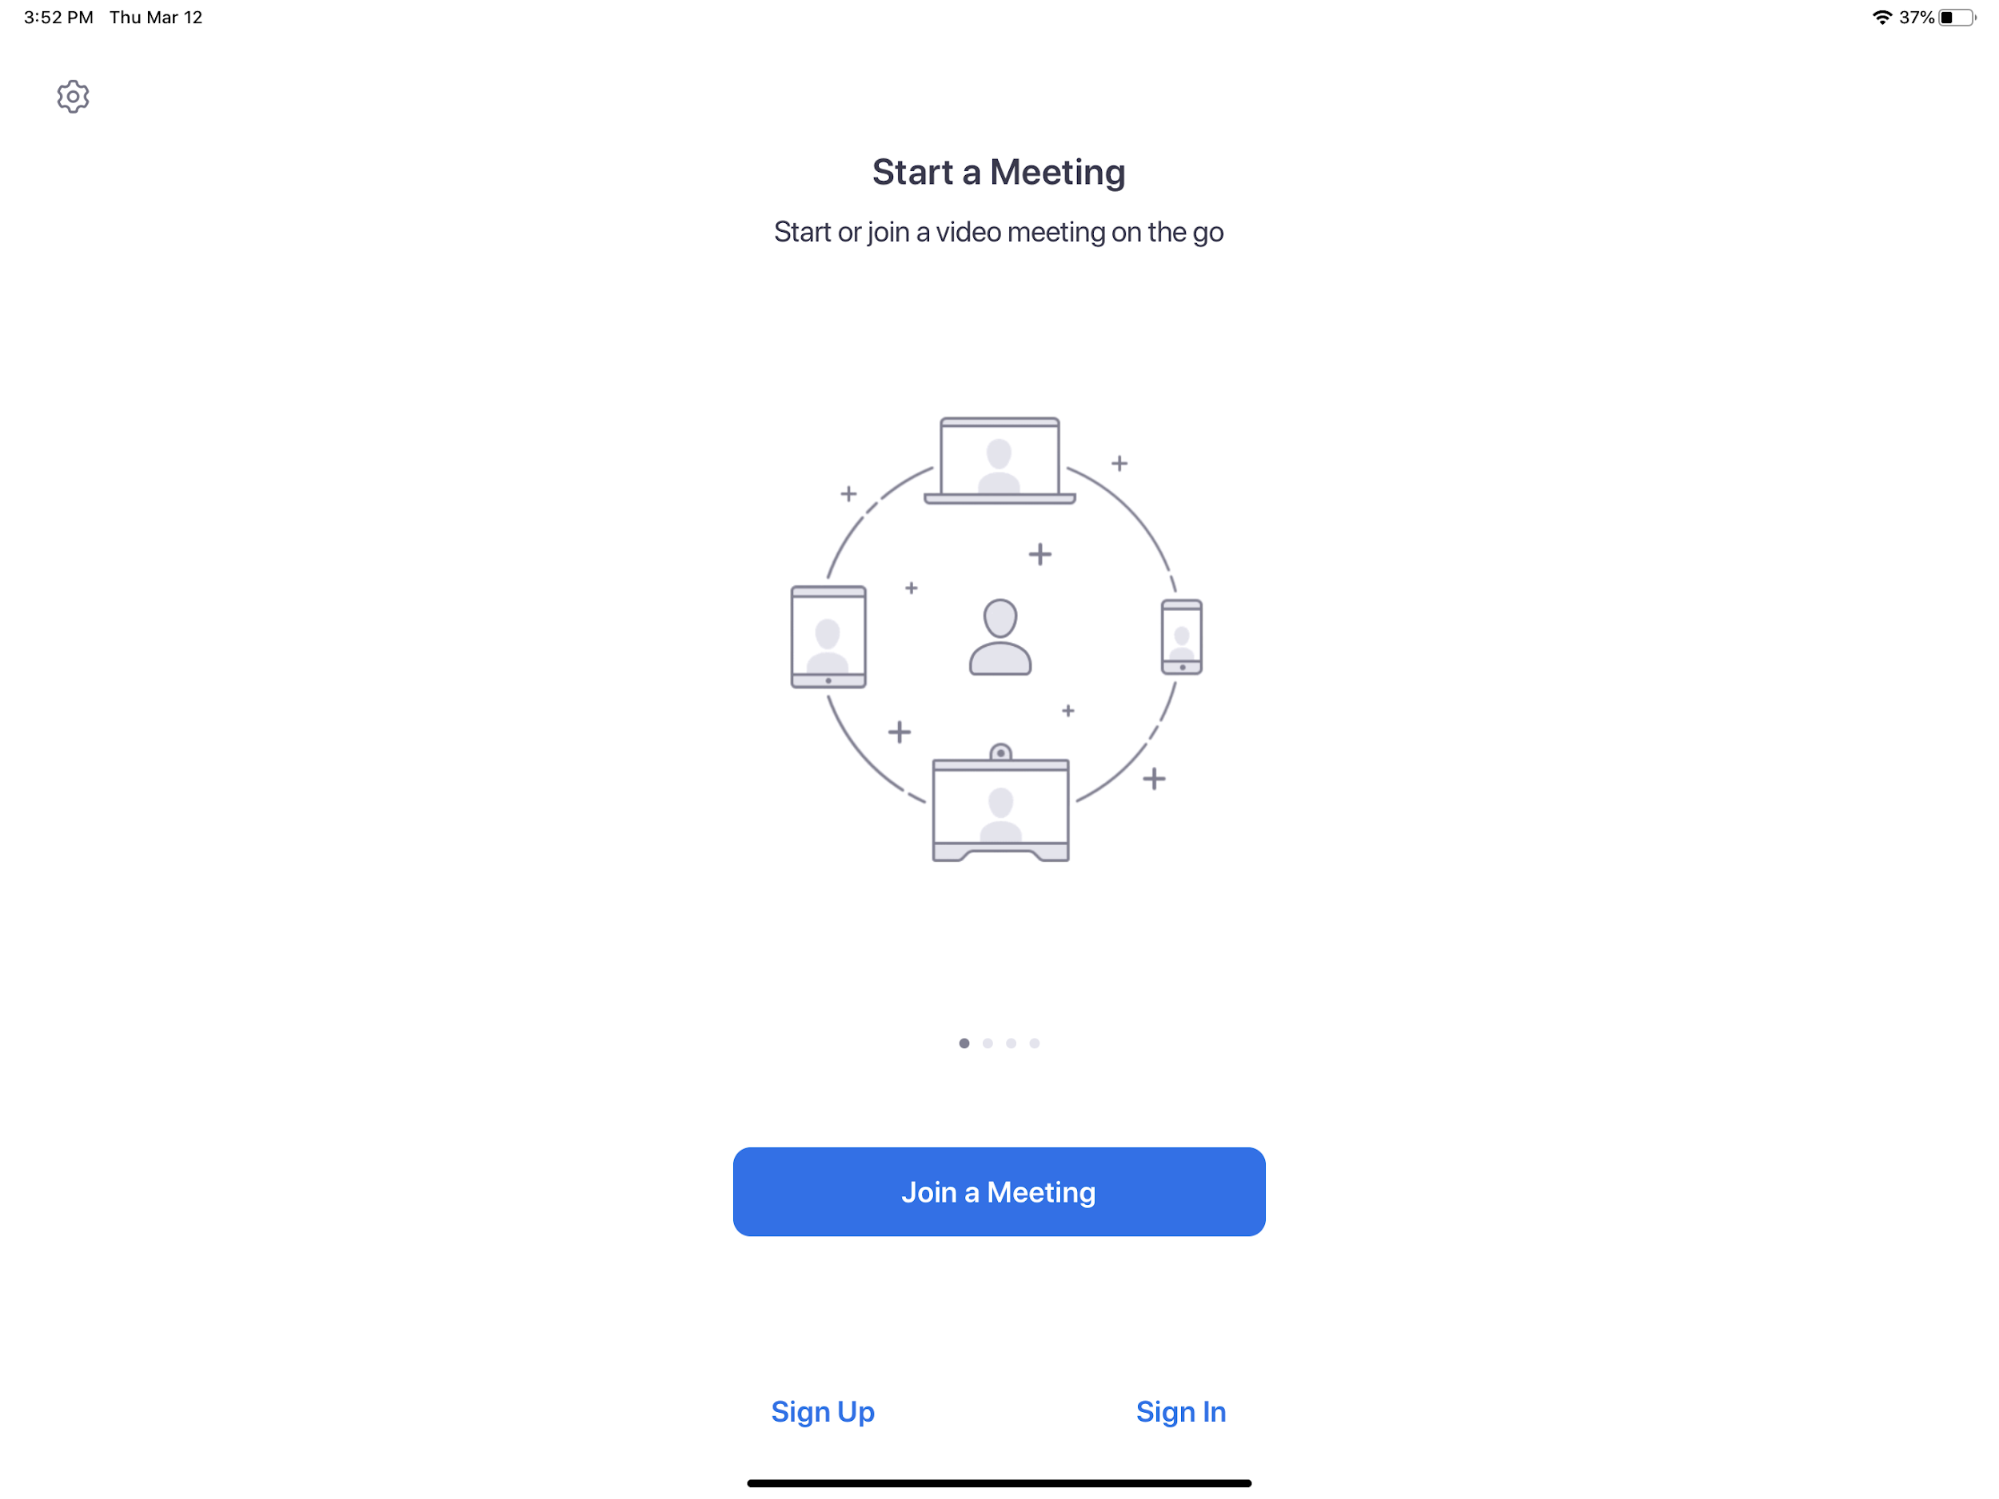
1. Open the Zoom app.
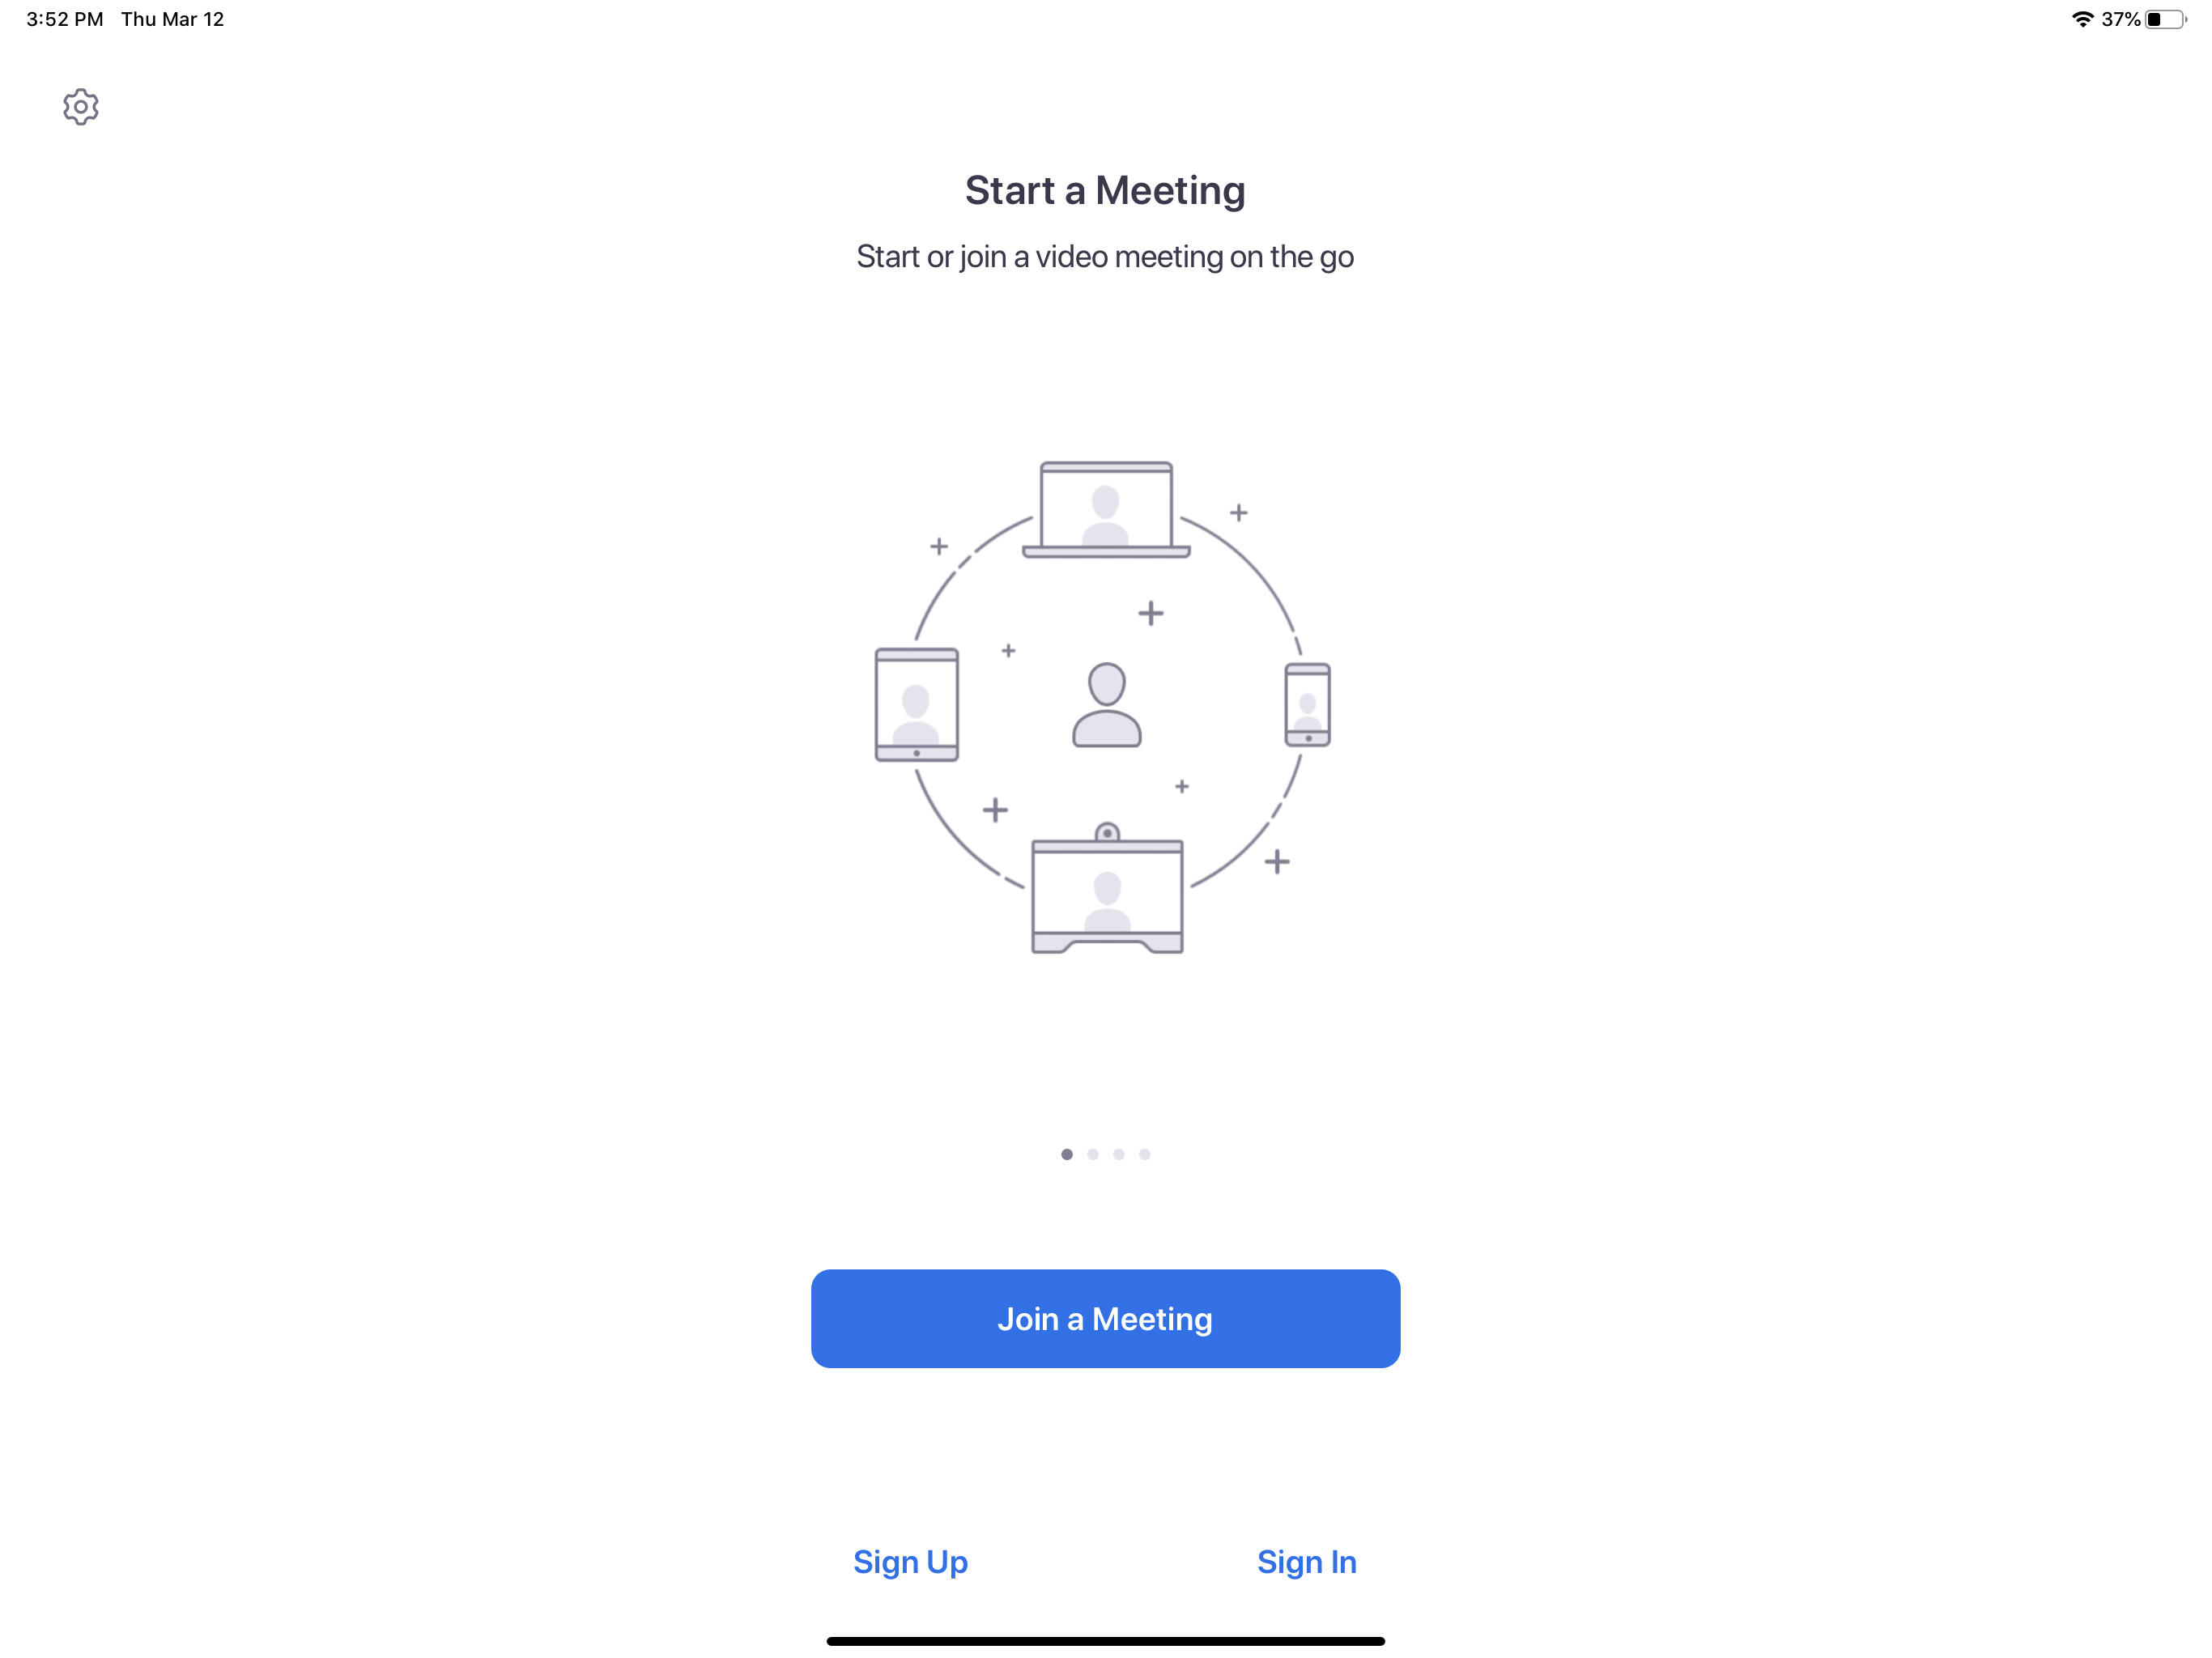
2. Join or start a Zoom call.
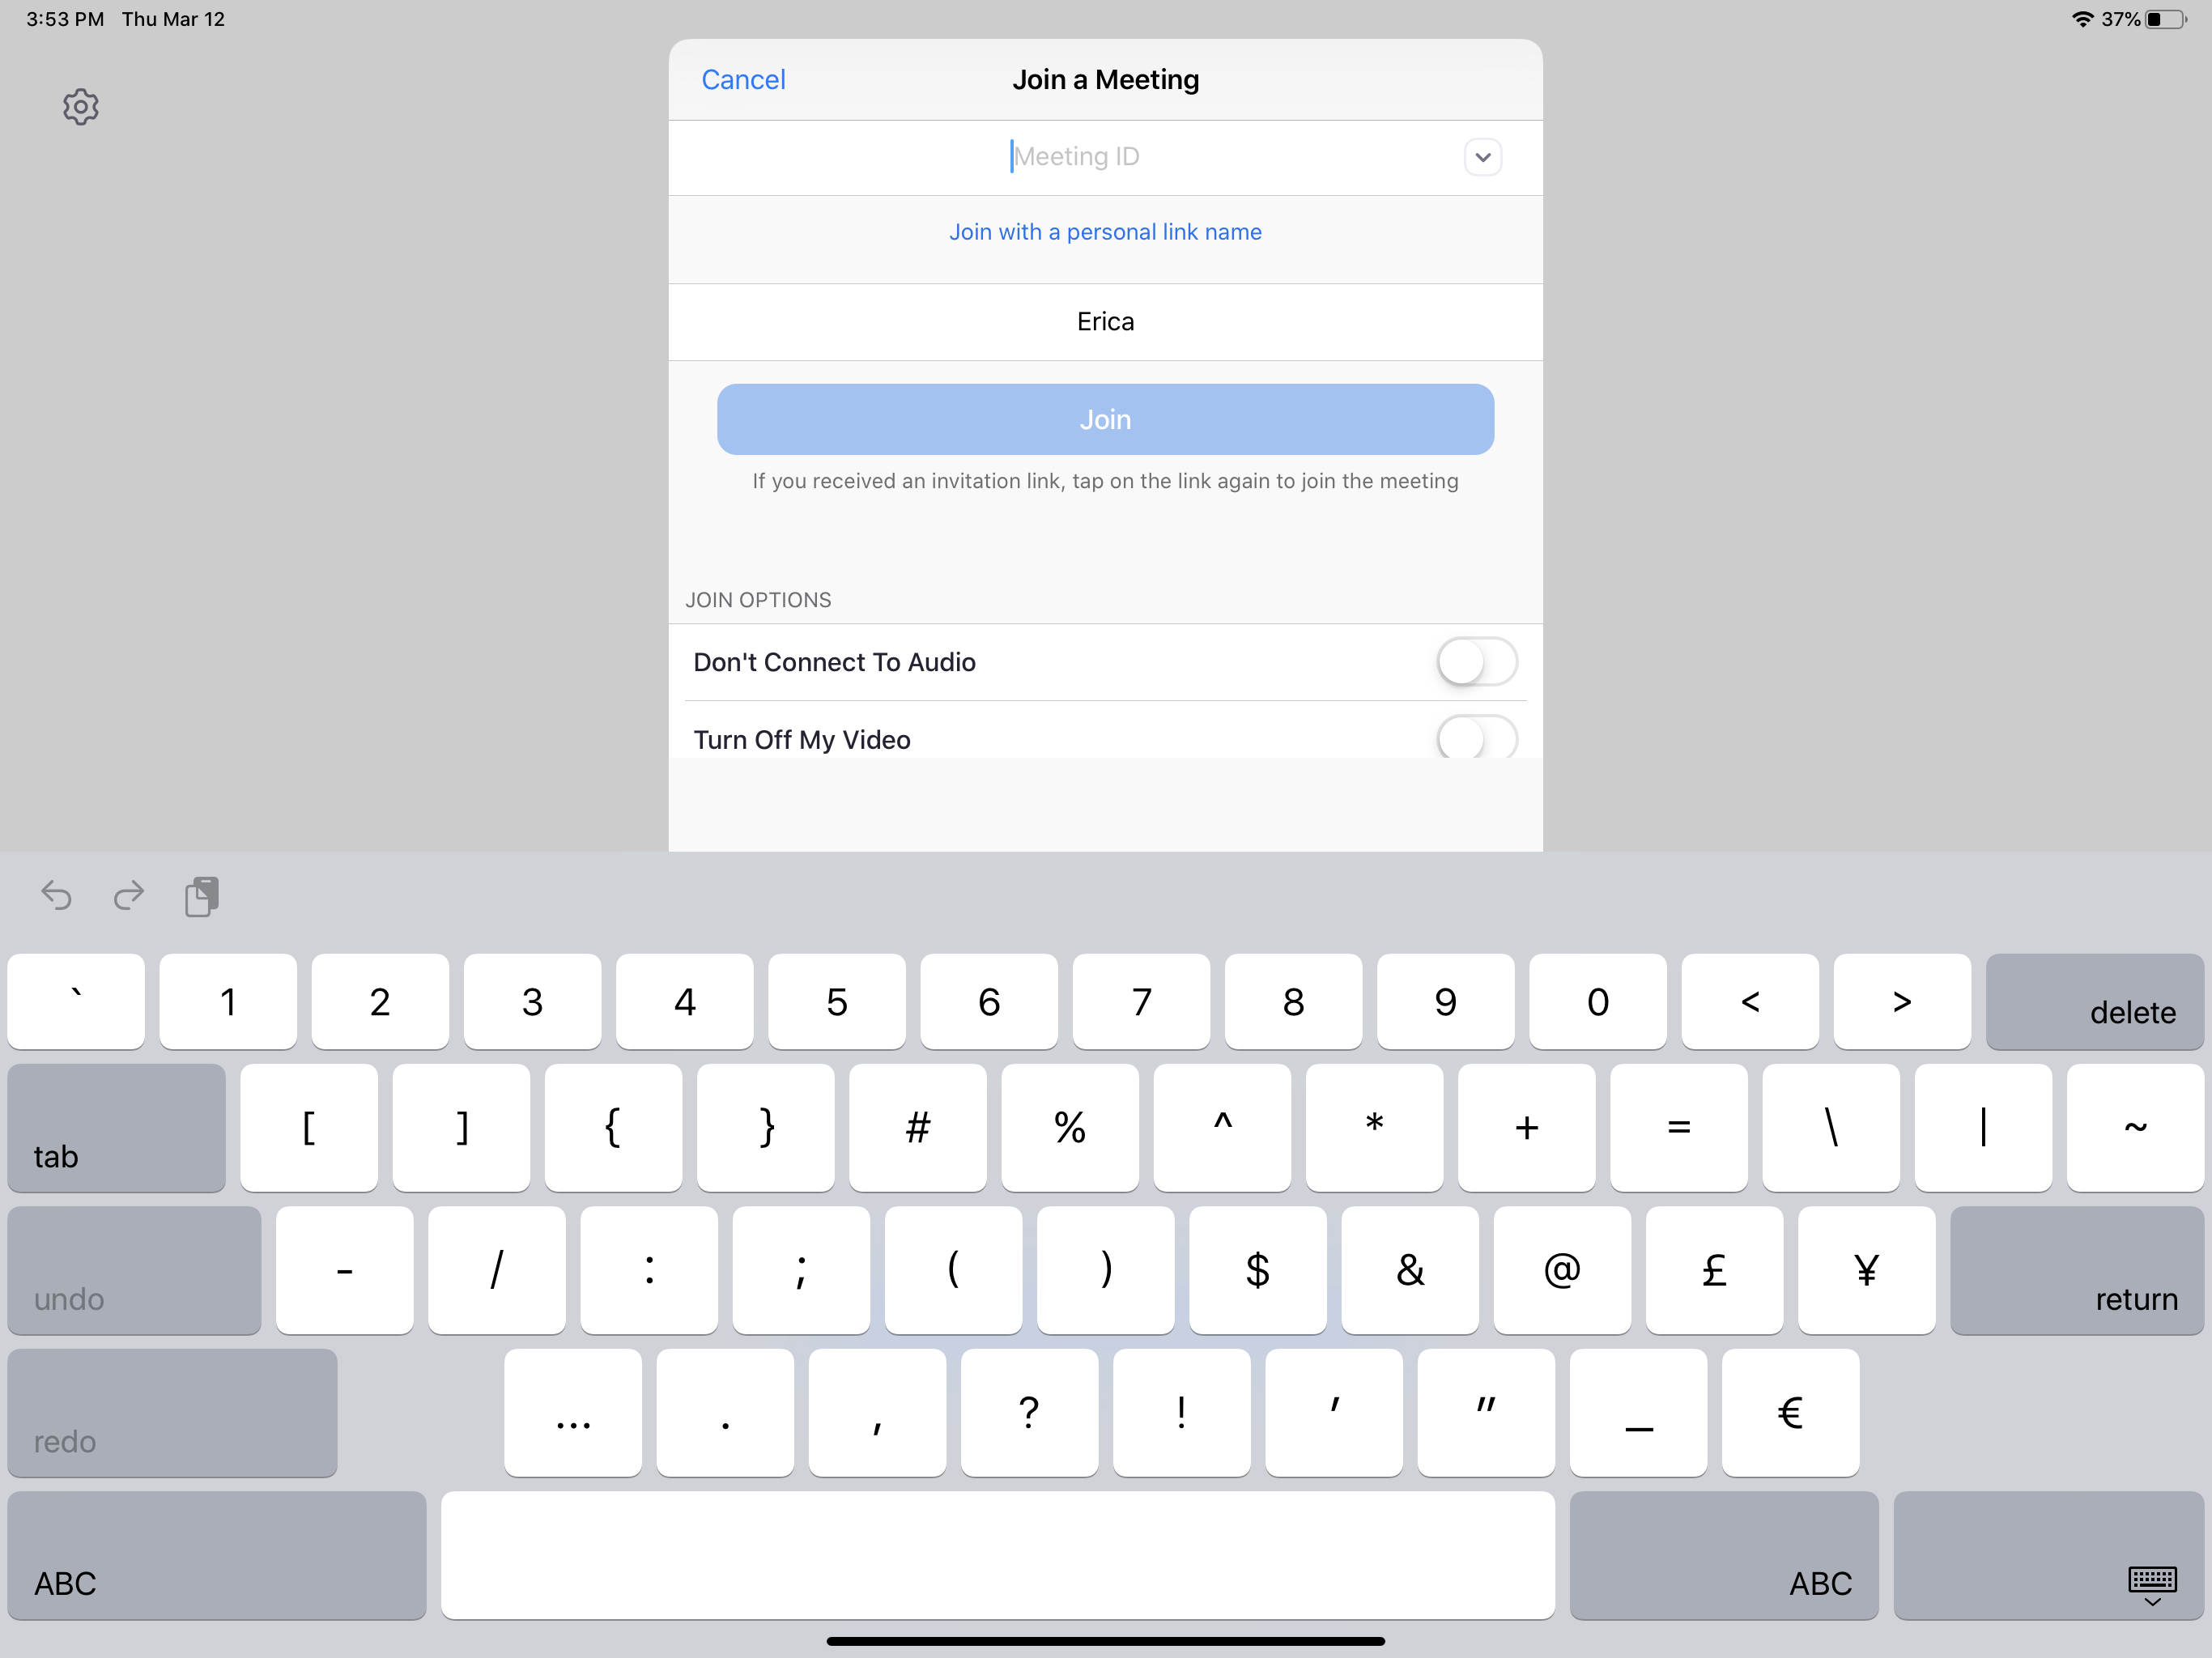
3. Once you’re on the call, tap “Share Content” icon. You’ll see a list of options appear. Select “Screen”.
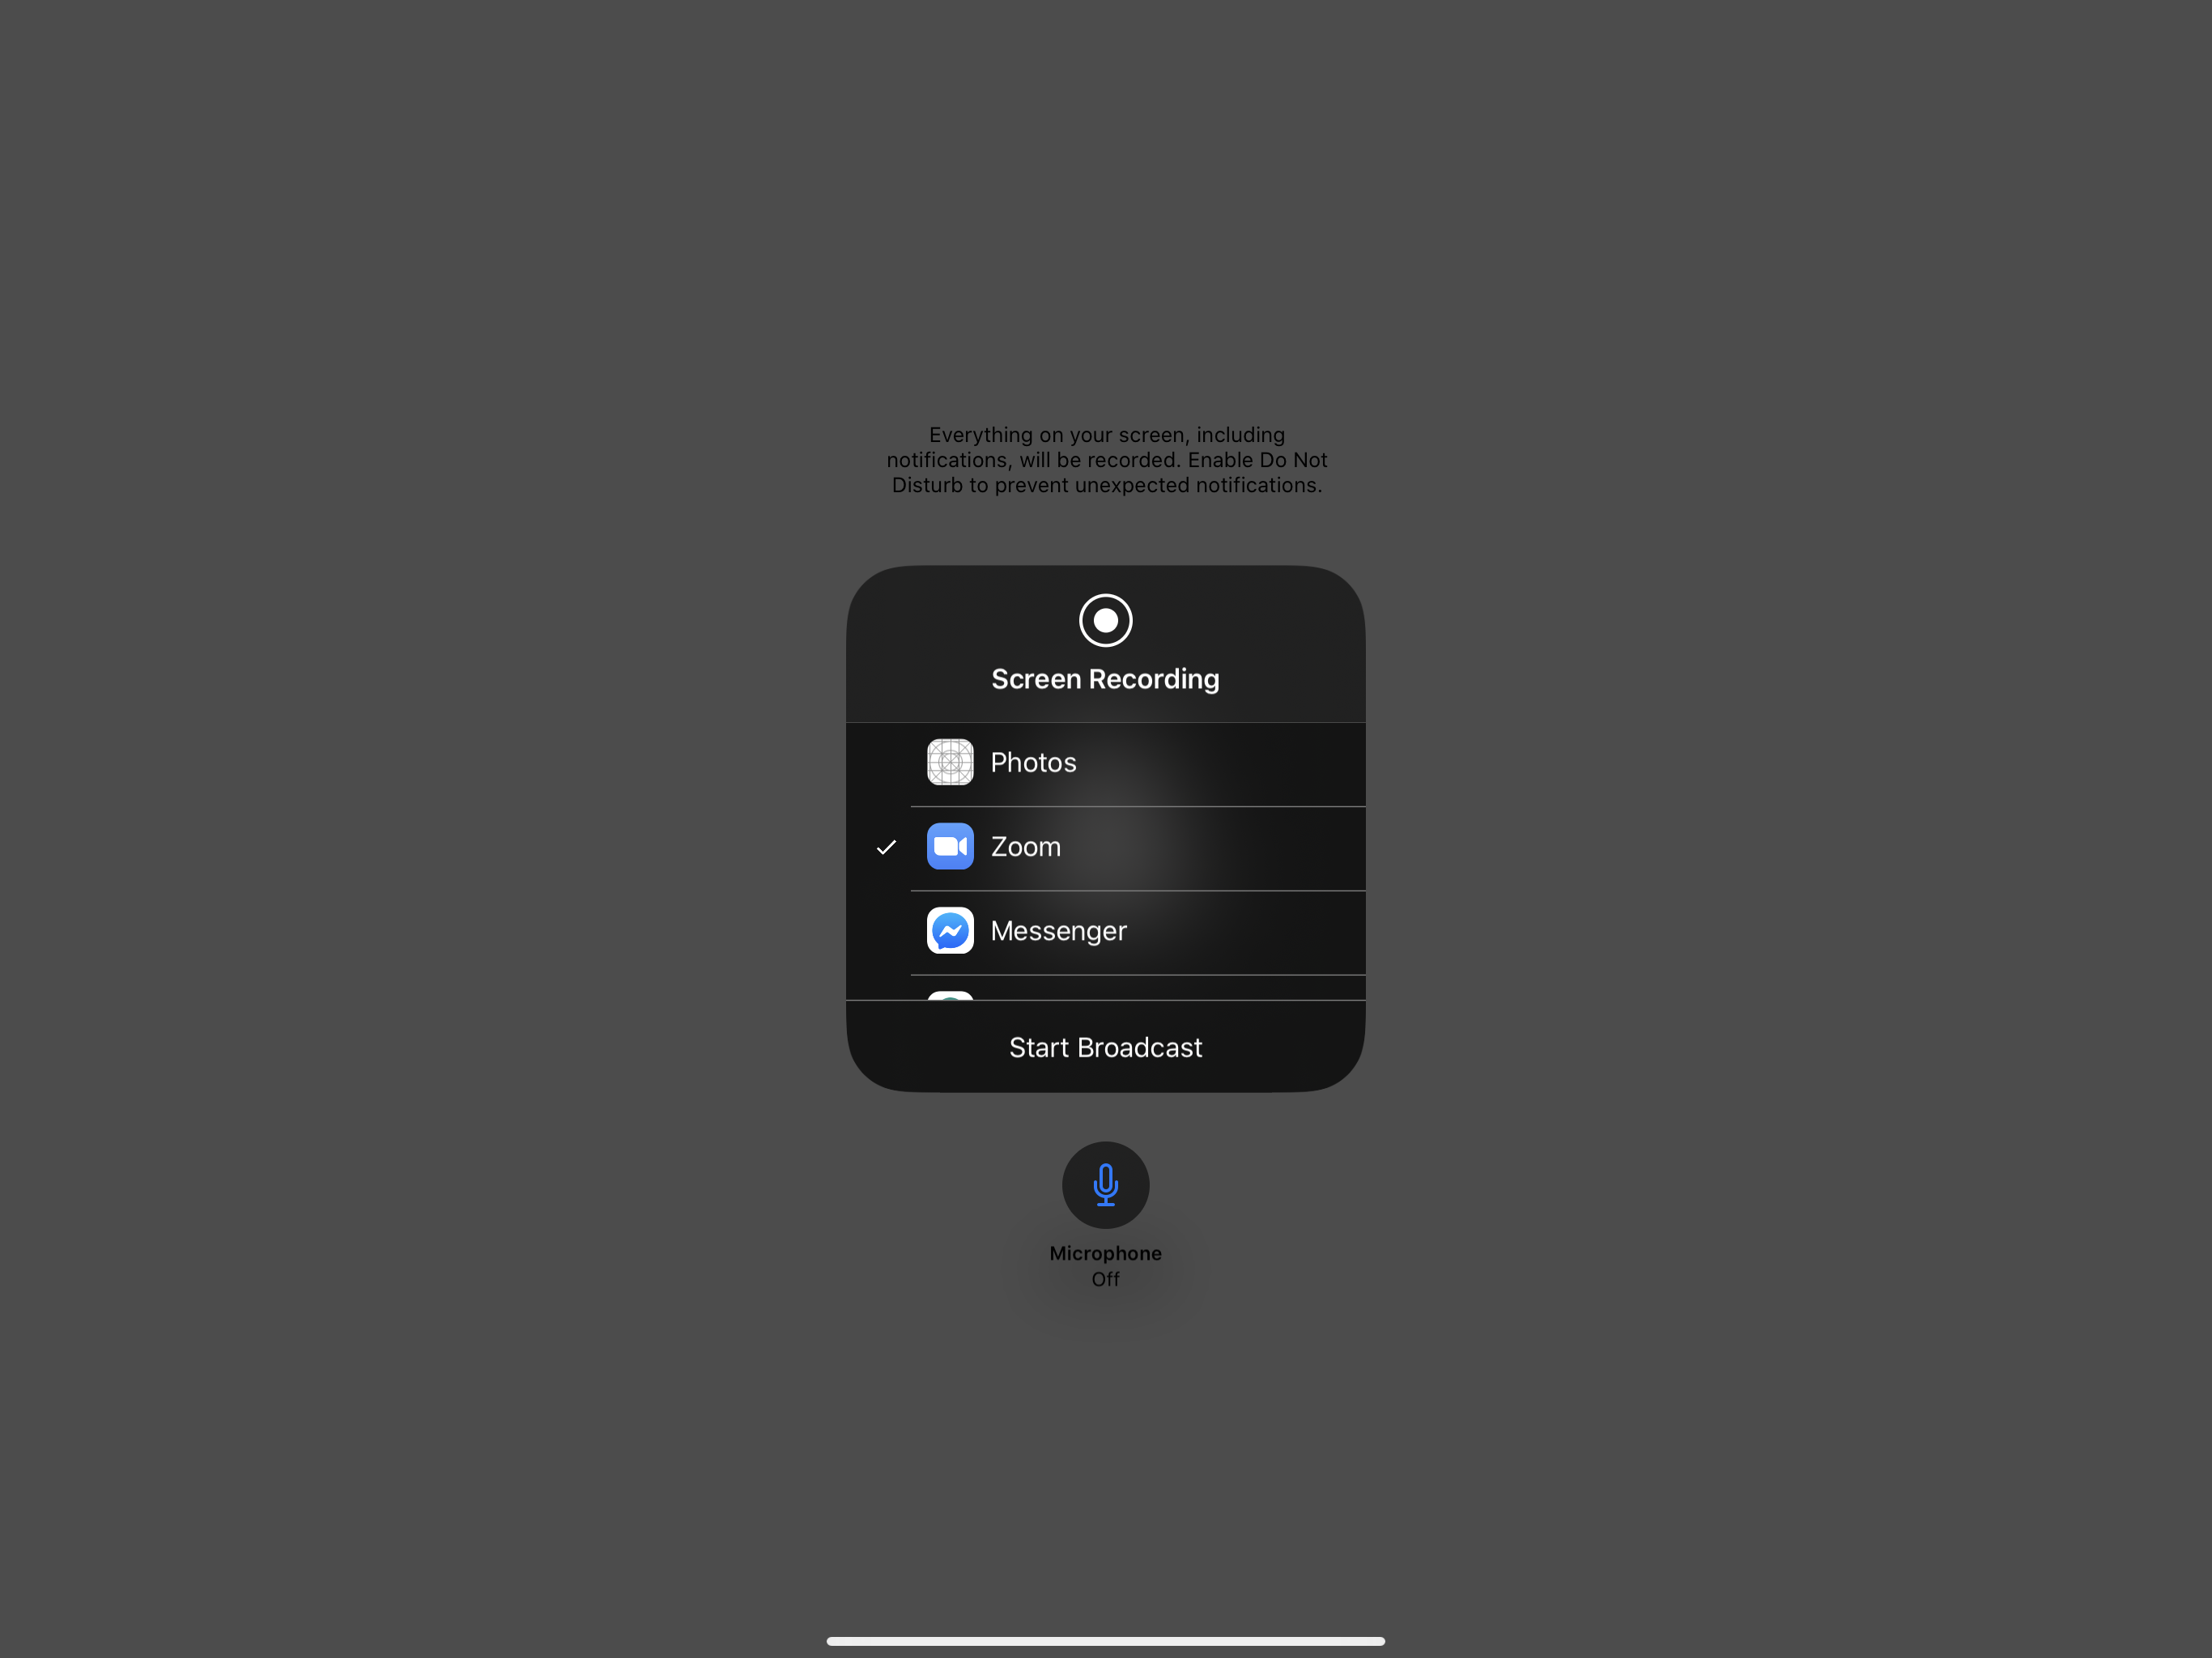
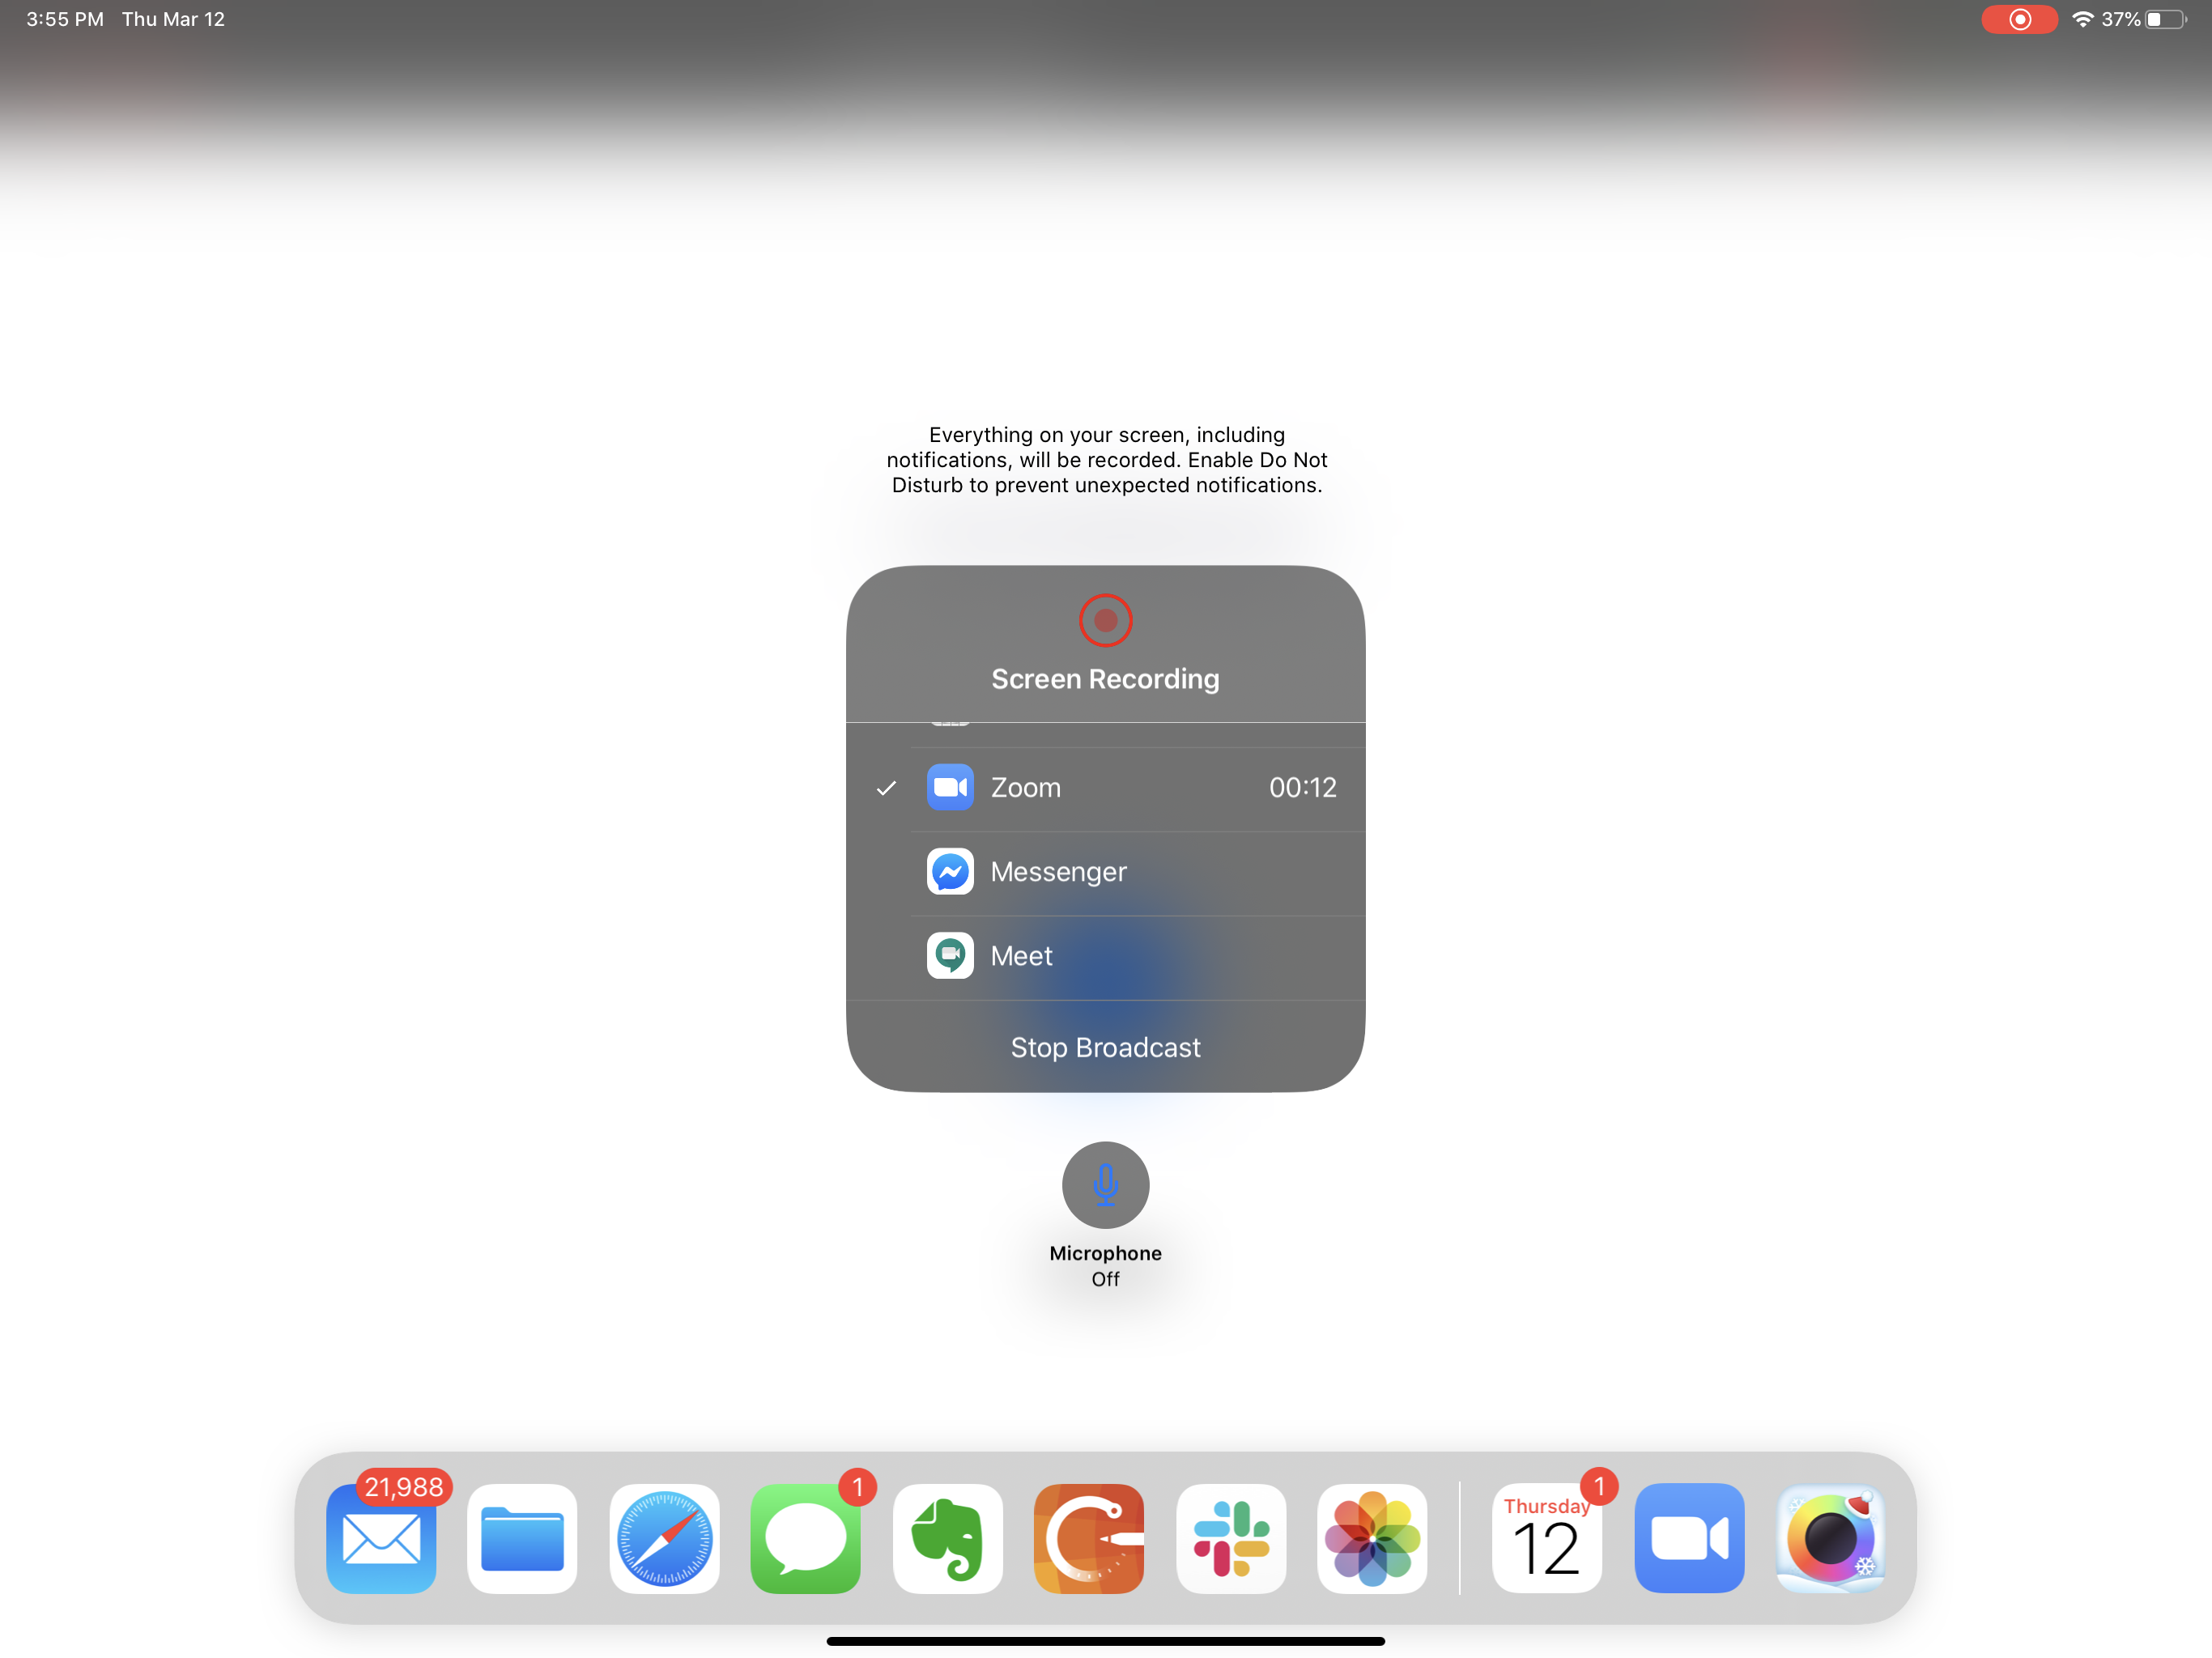
4. Select Zoom from the Screen Broadcast list. The red recording button will indicate your screen is being shared.
5. Swipe up from the bottom of your screen to open the app control center and open Concepts.
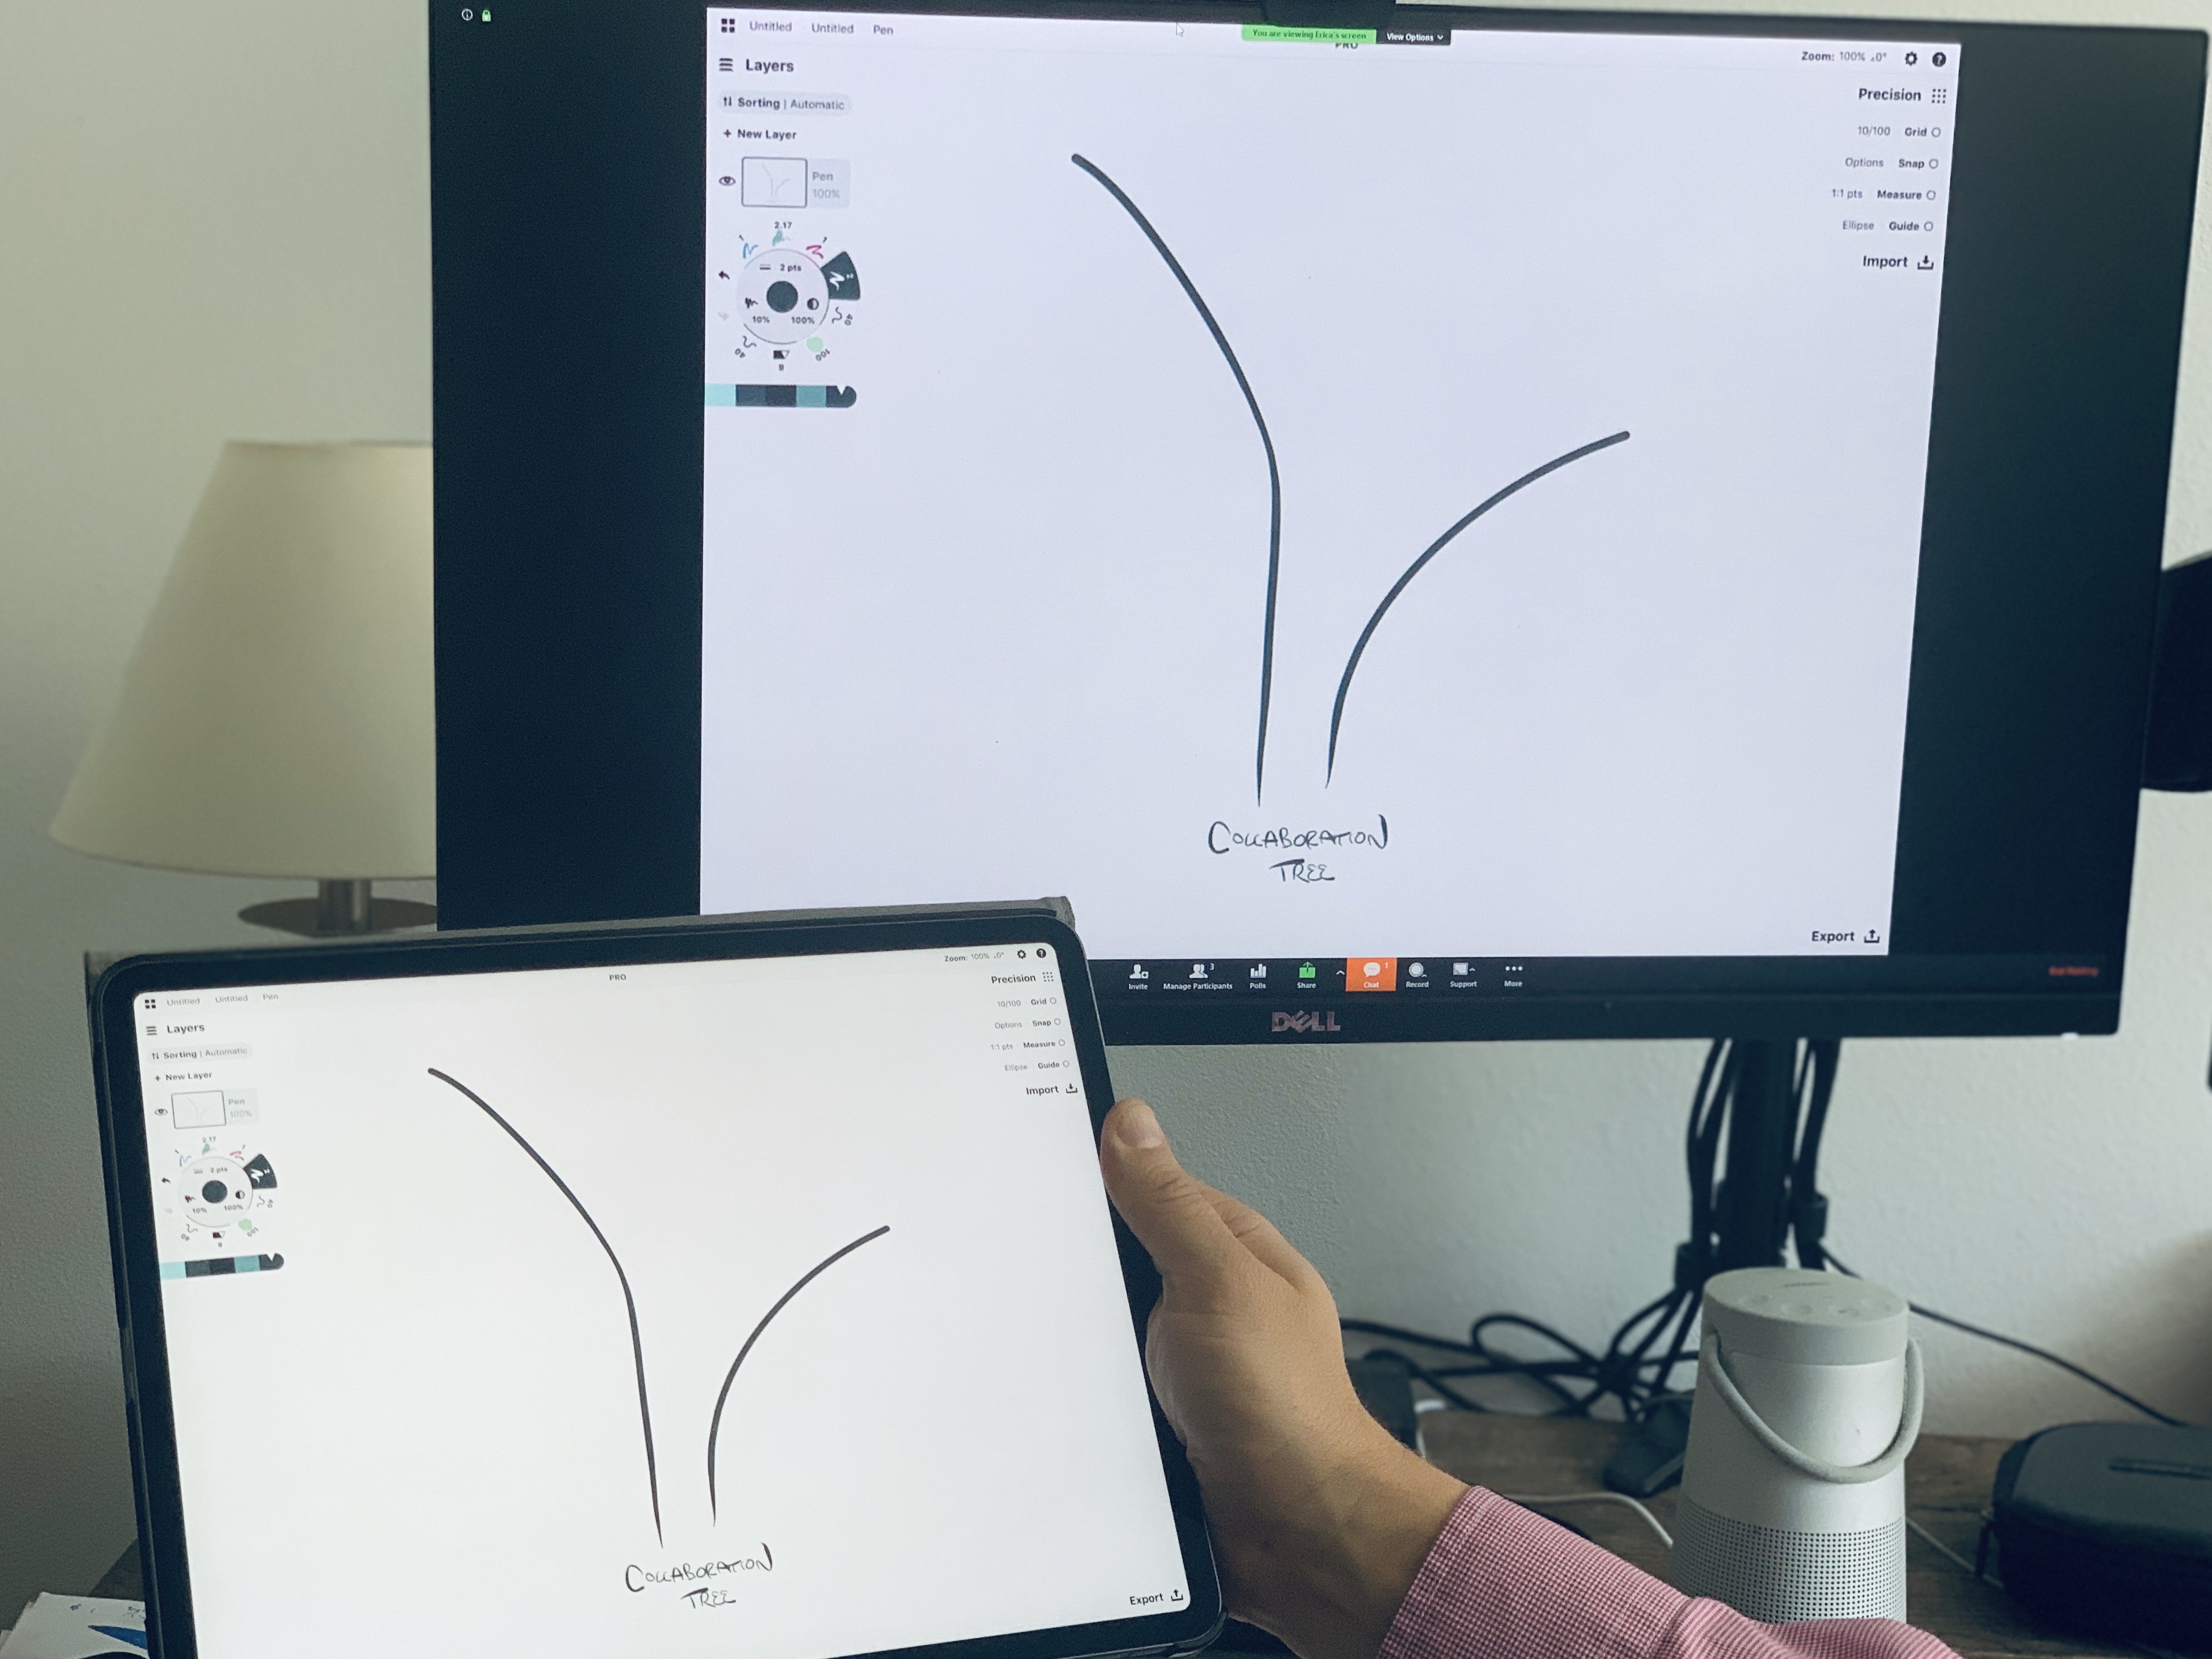
6. Open a drawing and sketch or present your content live with your team.
Once finished, switch back to the Zoom app and tap “Stop Share”.
Using Concepts with Zoom on Your Computer
1. Join or start a Zoom call on your computer.
2. Once you’re on the call, tap the "Share” icon at the bottom of the screen. A list of options will appear, including iPhone/iPad via AirPlay, and iPhone/iPad via Cable.
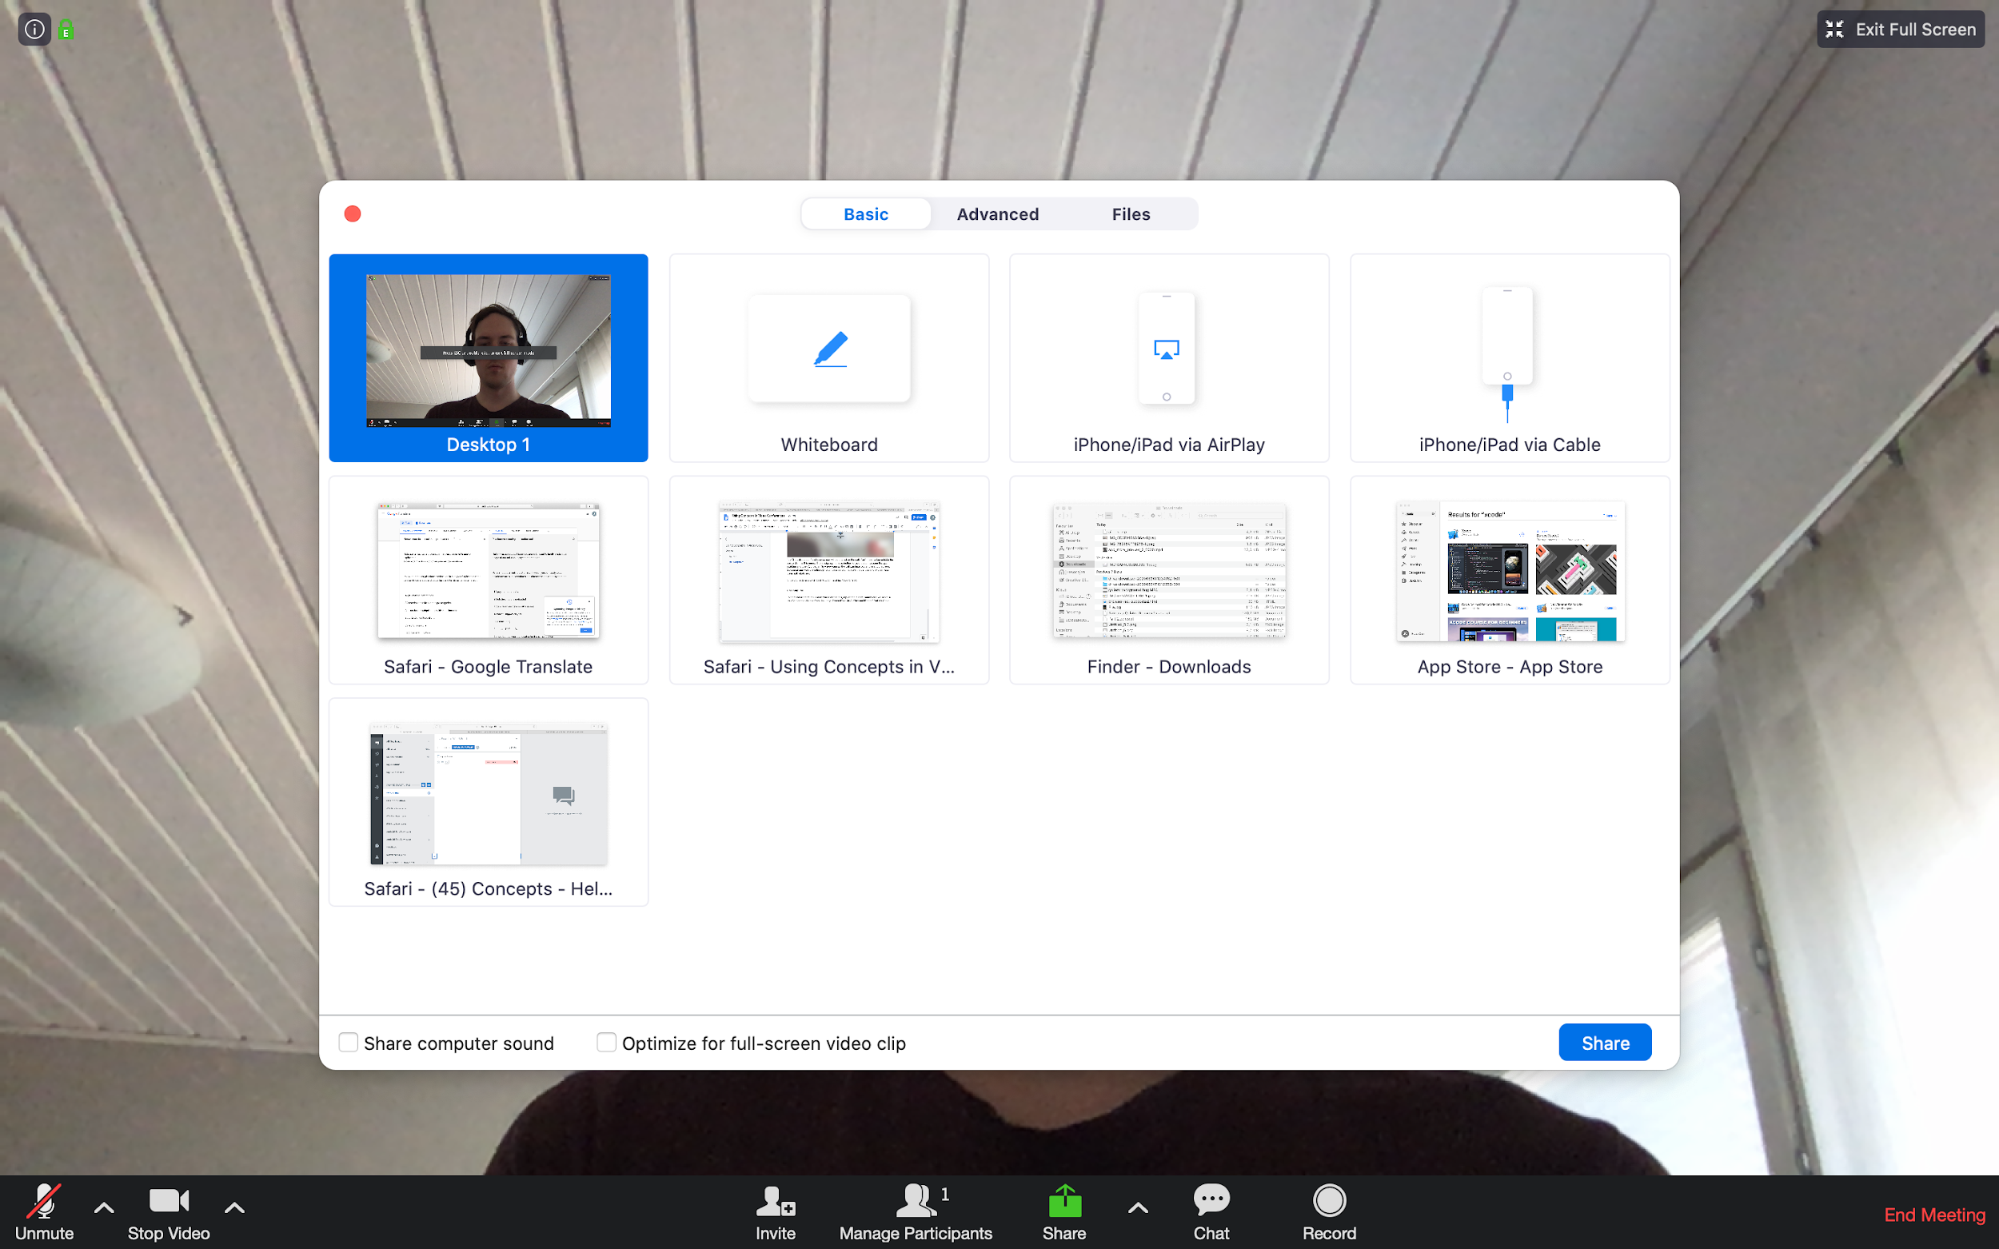
3. Select the option that works for you. You’ll see instructions on how to connect your iPad or iPhone.
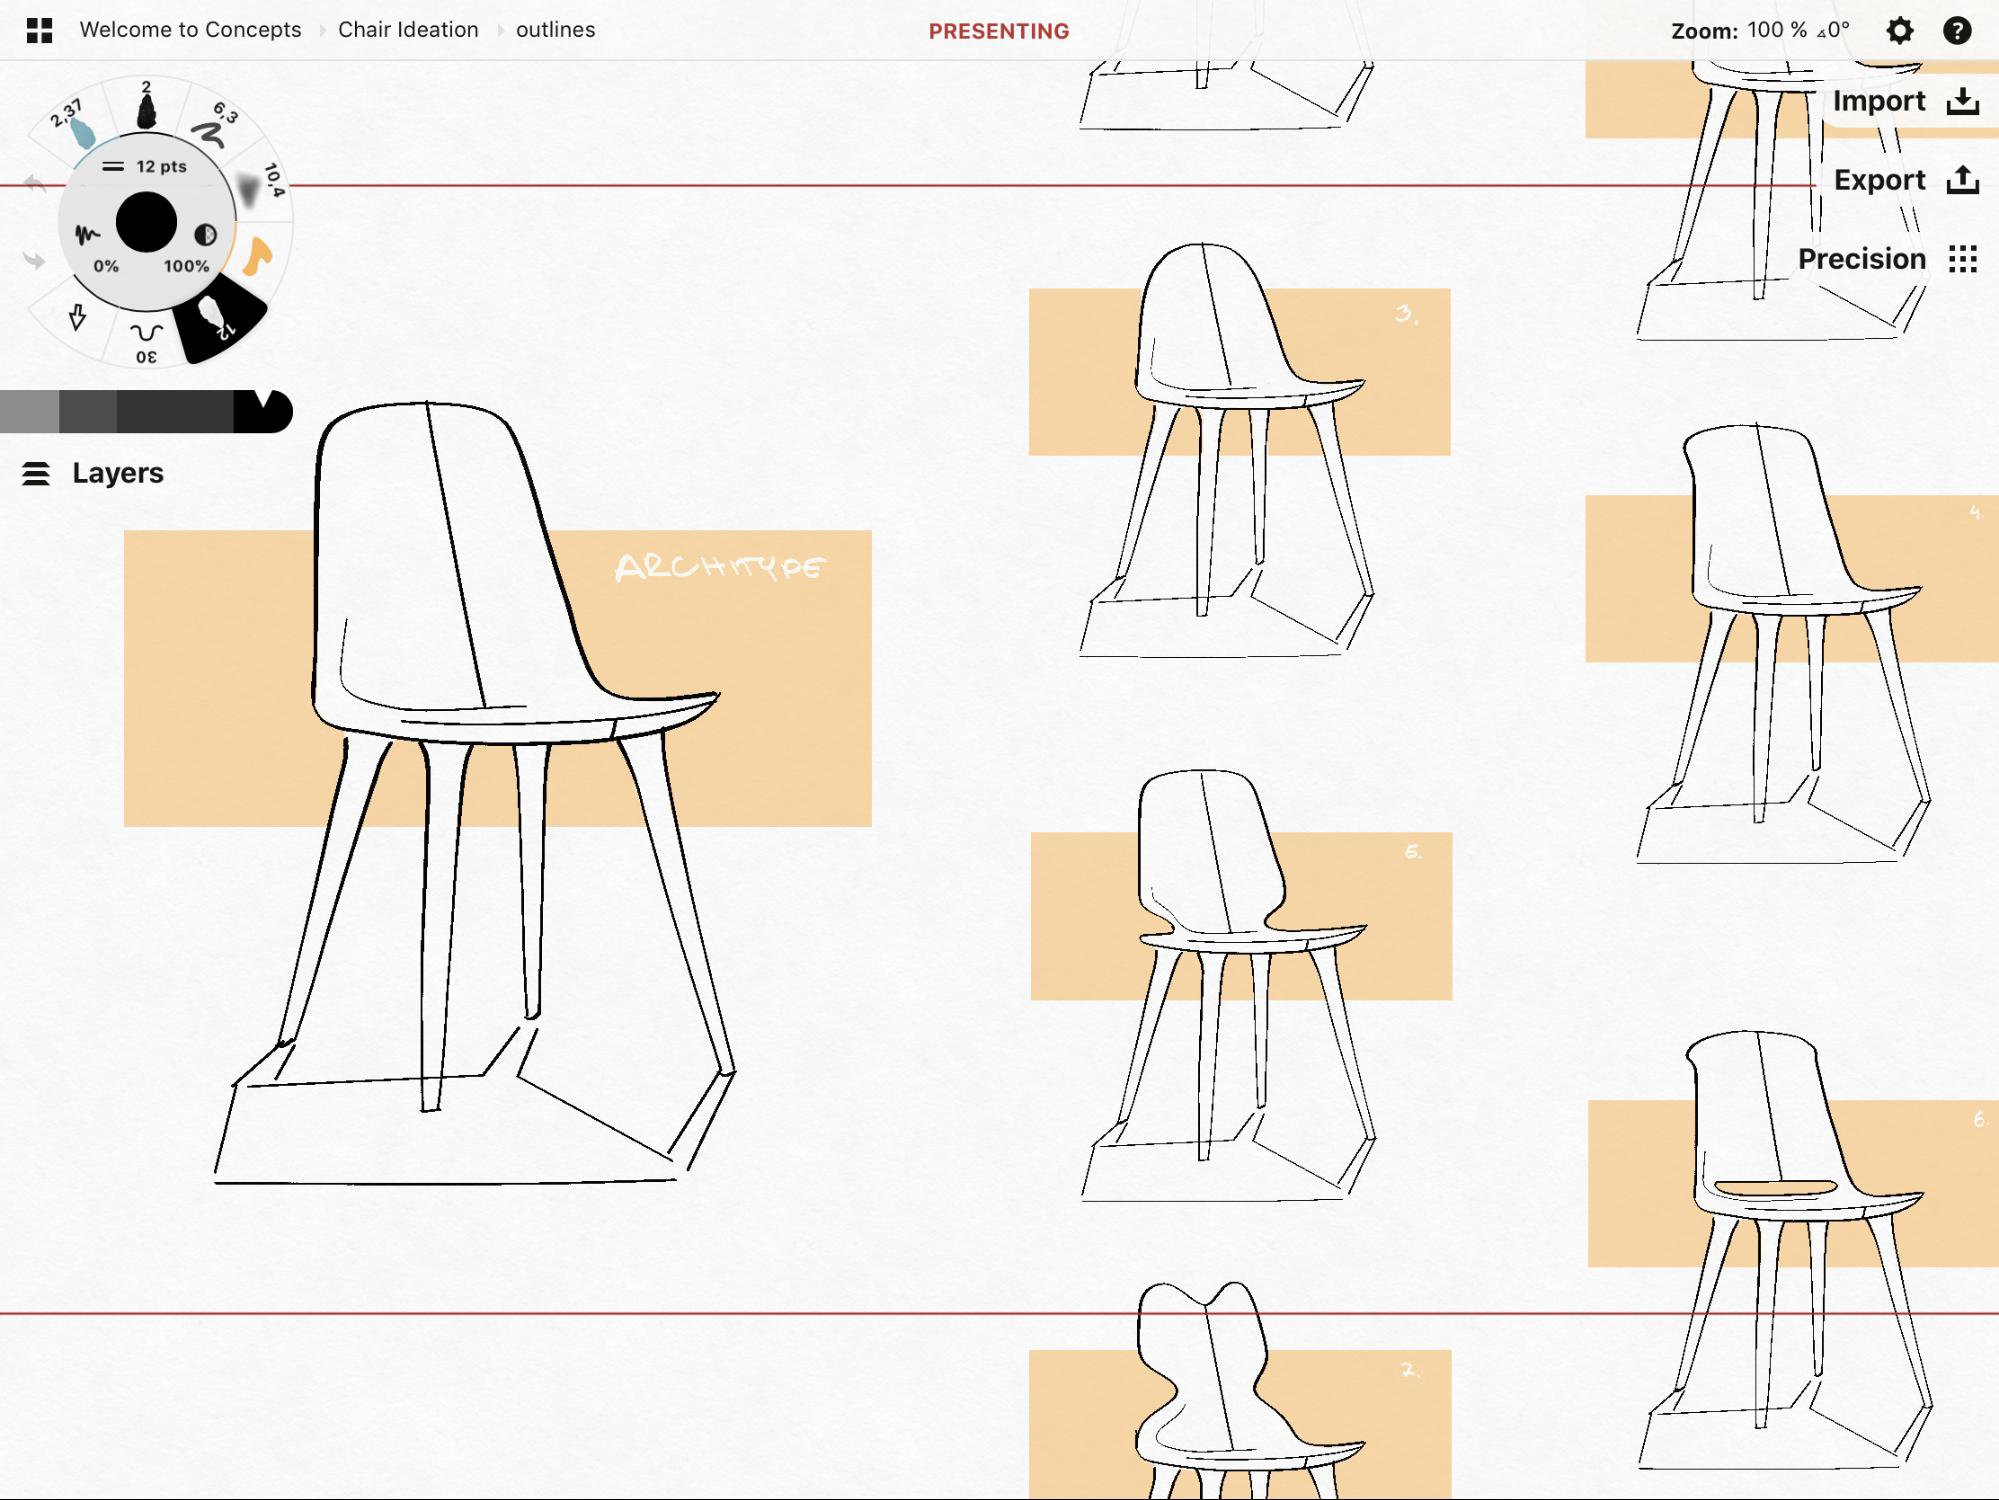
When you connect via Airplay, Concepts' Presentation Mode will automatically kick in. This mode allows you to share your screen content without the UI. Presentation Mode is not available when connecting via cable.
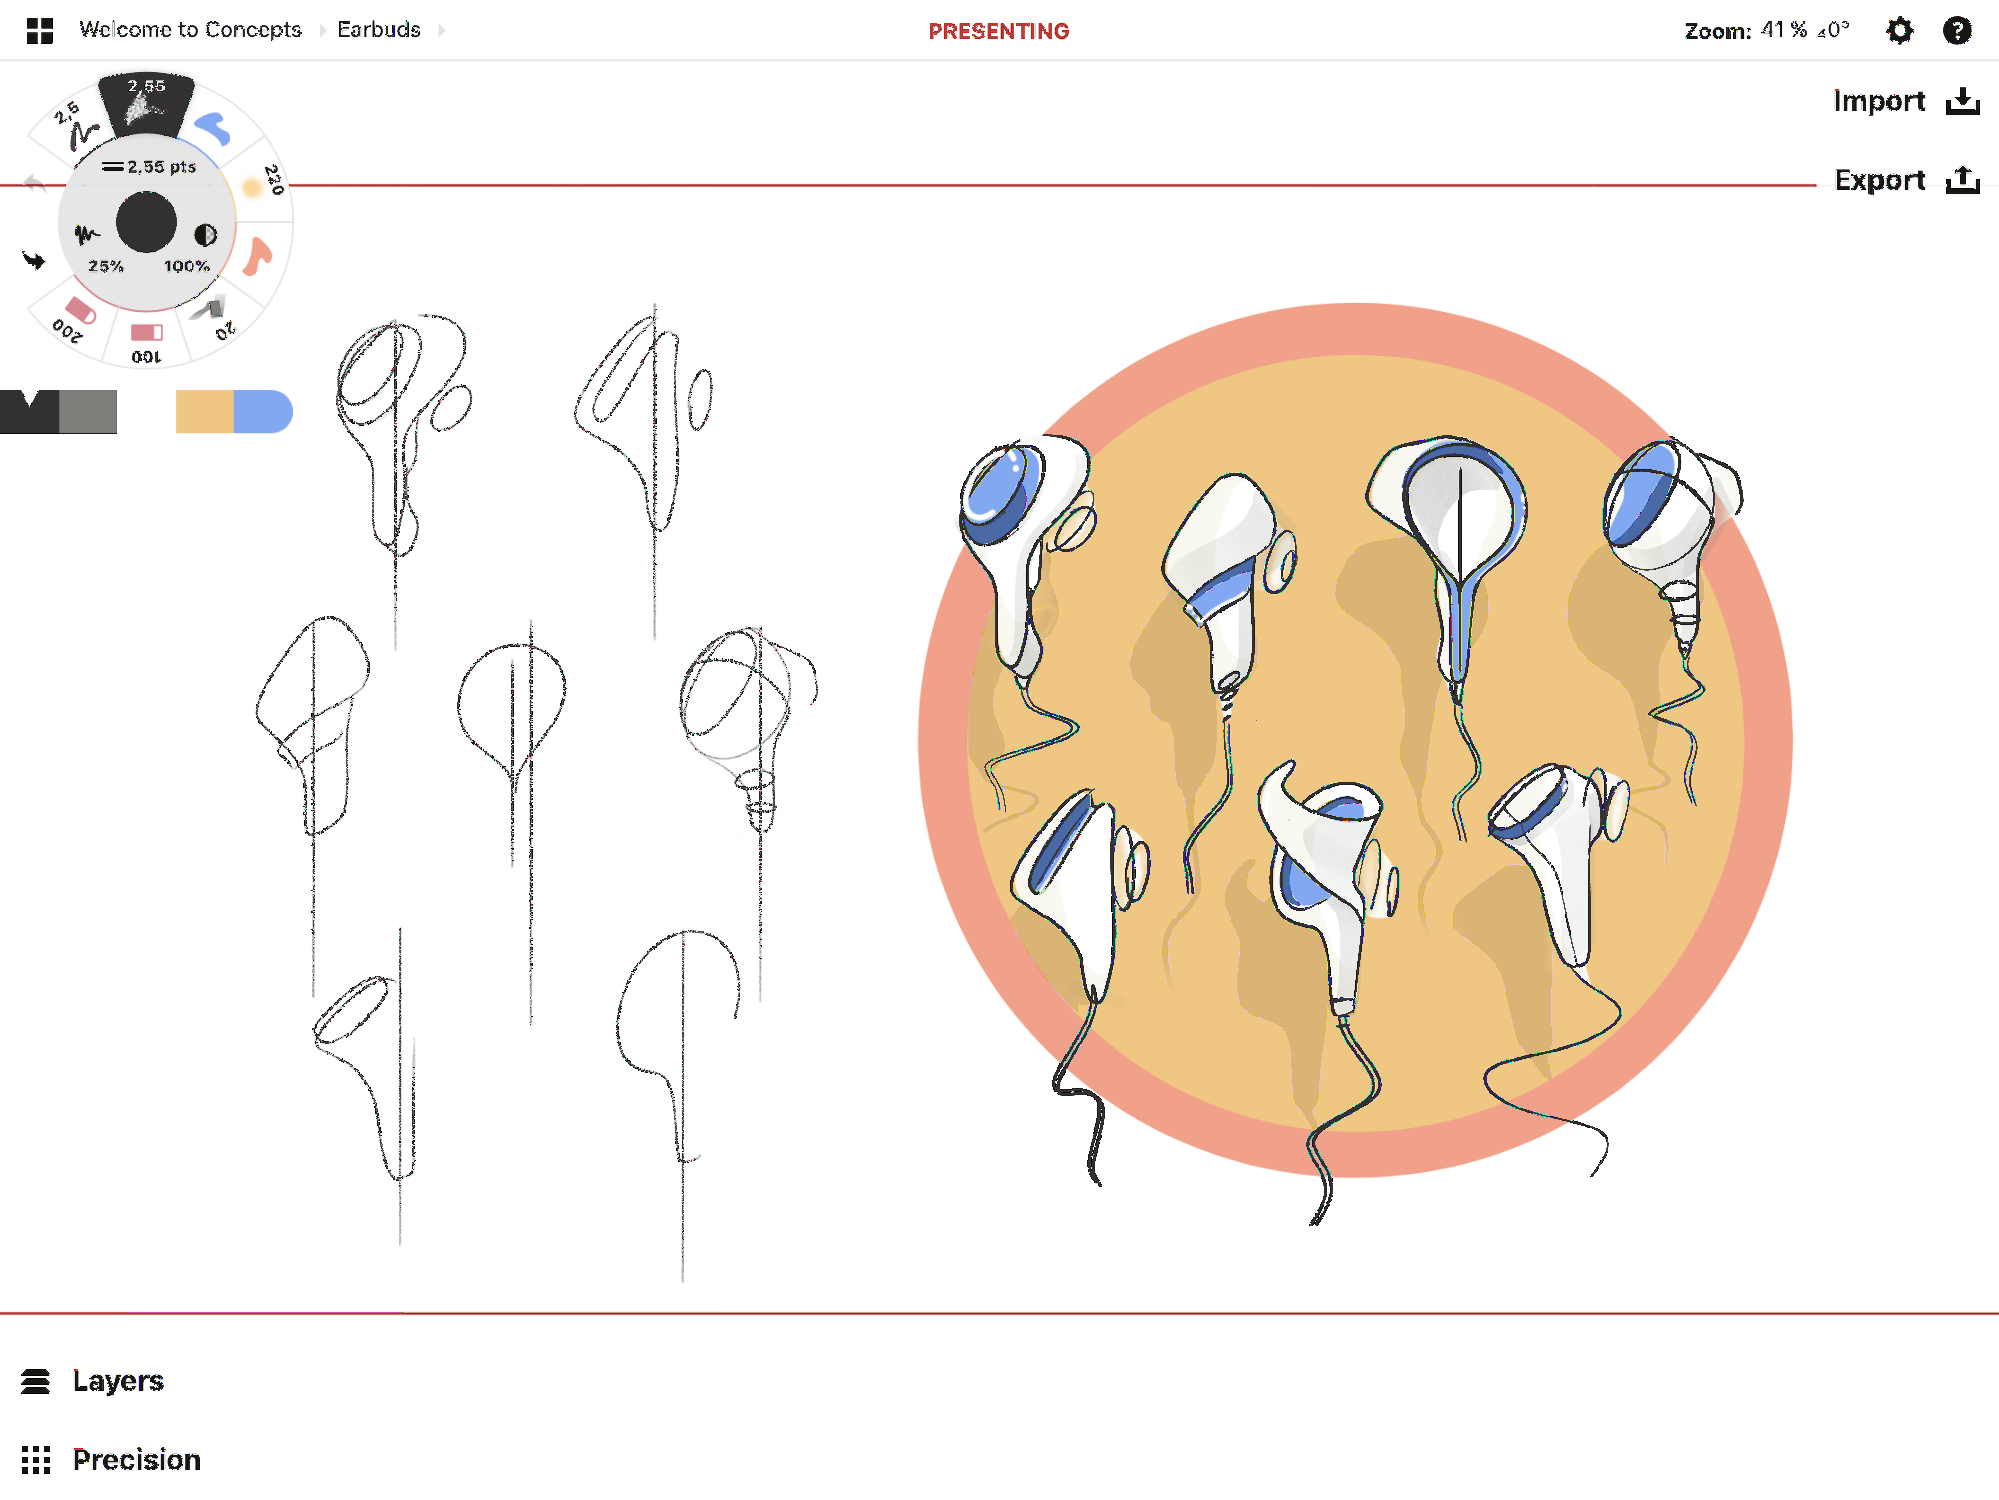
This is how Presentation Mode looks on your iPad - the red borders mark the shared area.
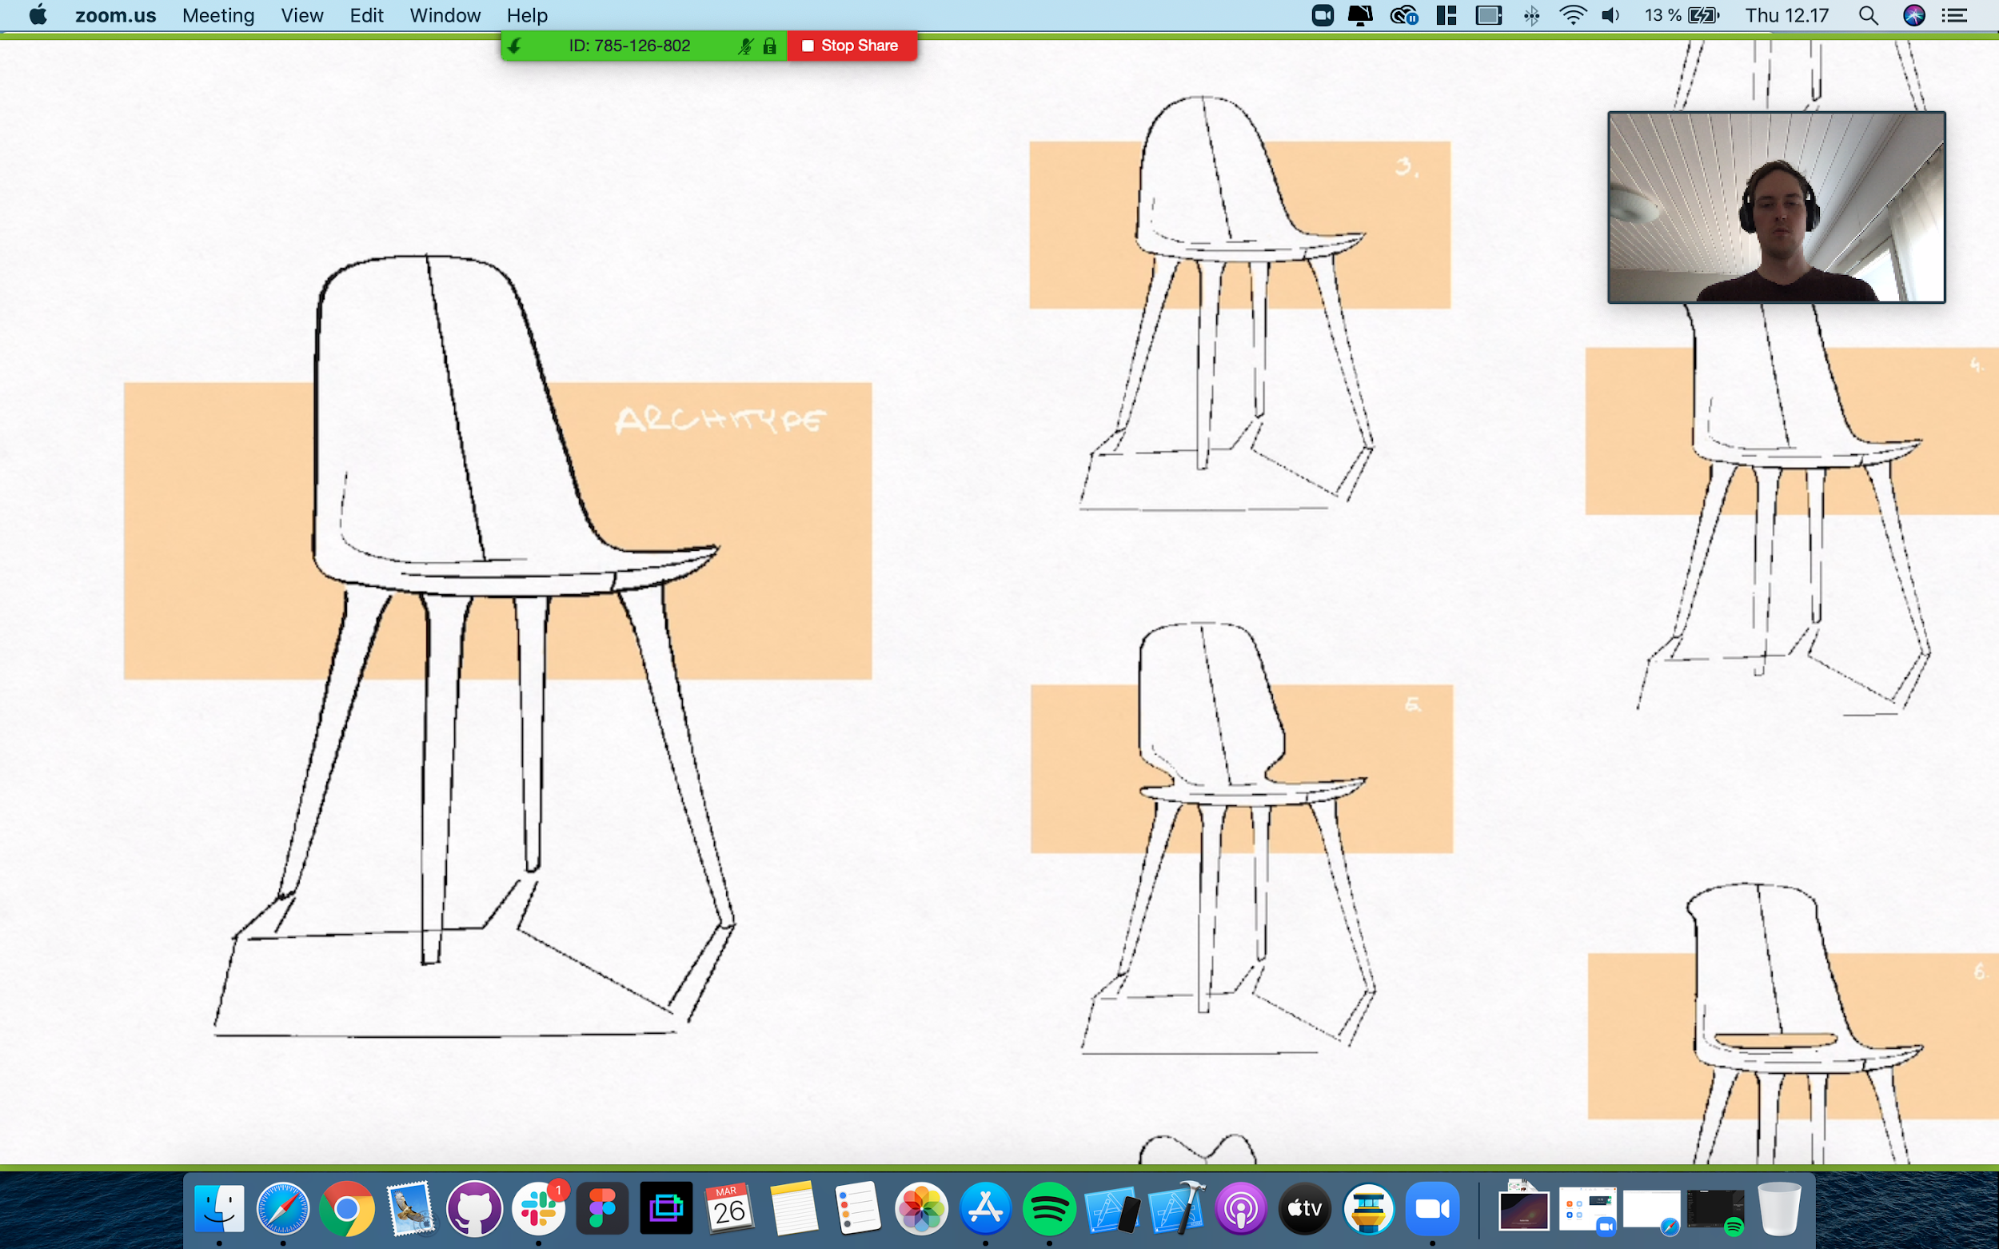
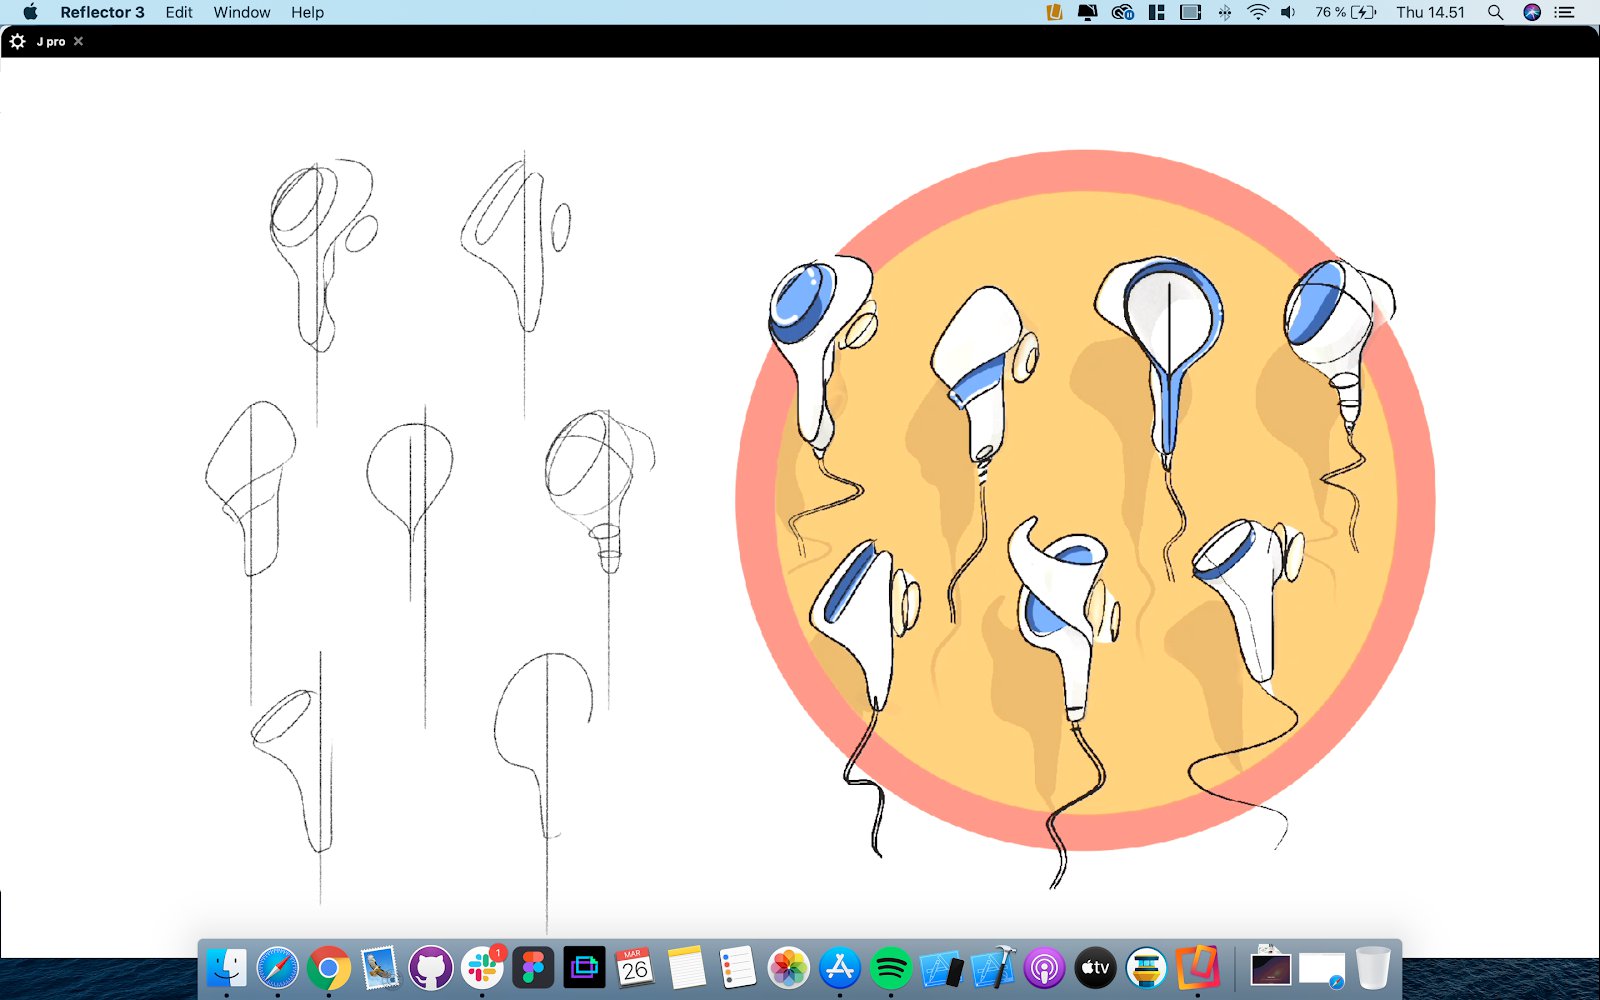
On the computer screen, it shows only what is inside the red borders.
If you want to show the UI as well, tap the red “PRESENTING” text at the top of the status bar to open your presentation settings.
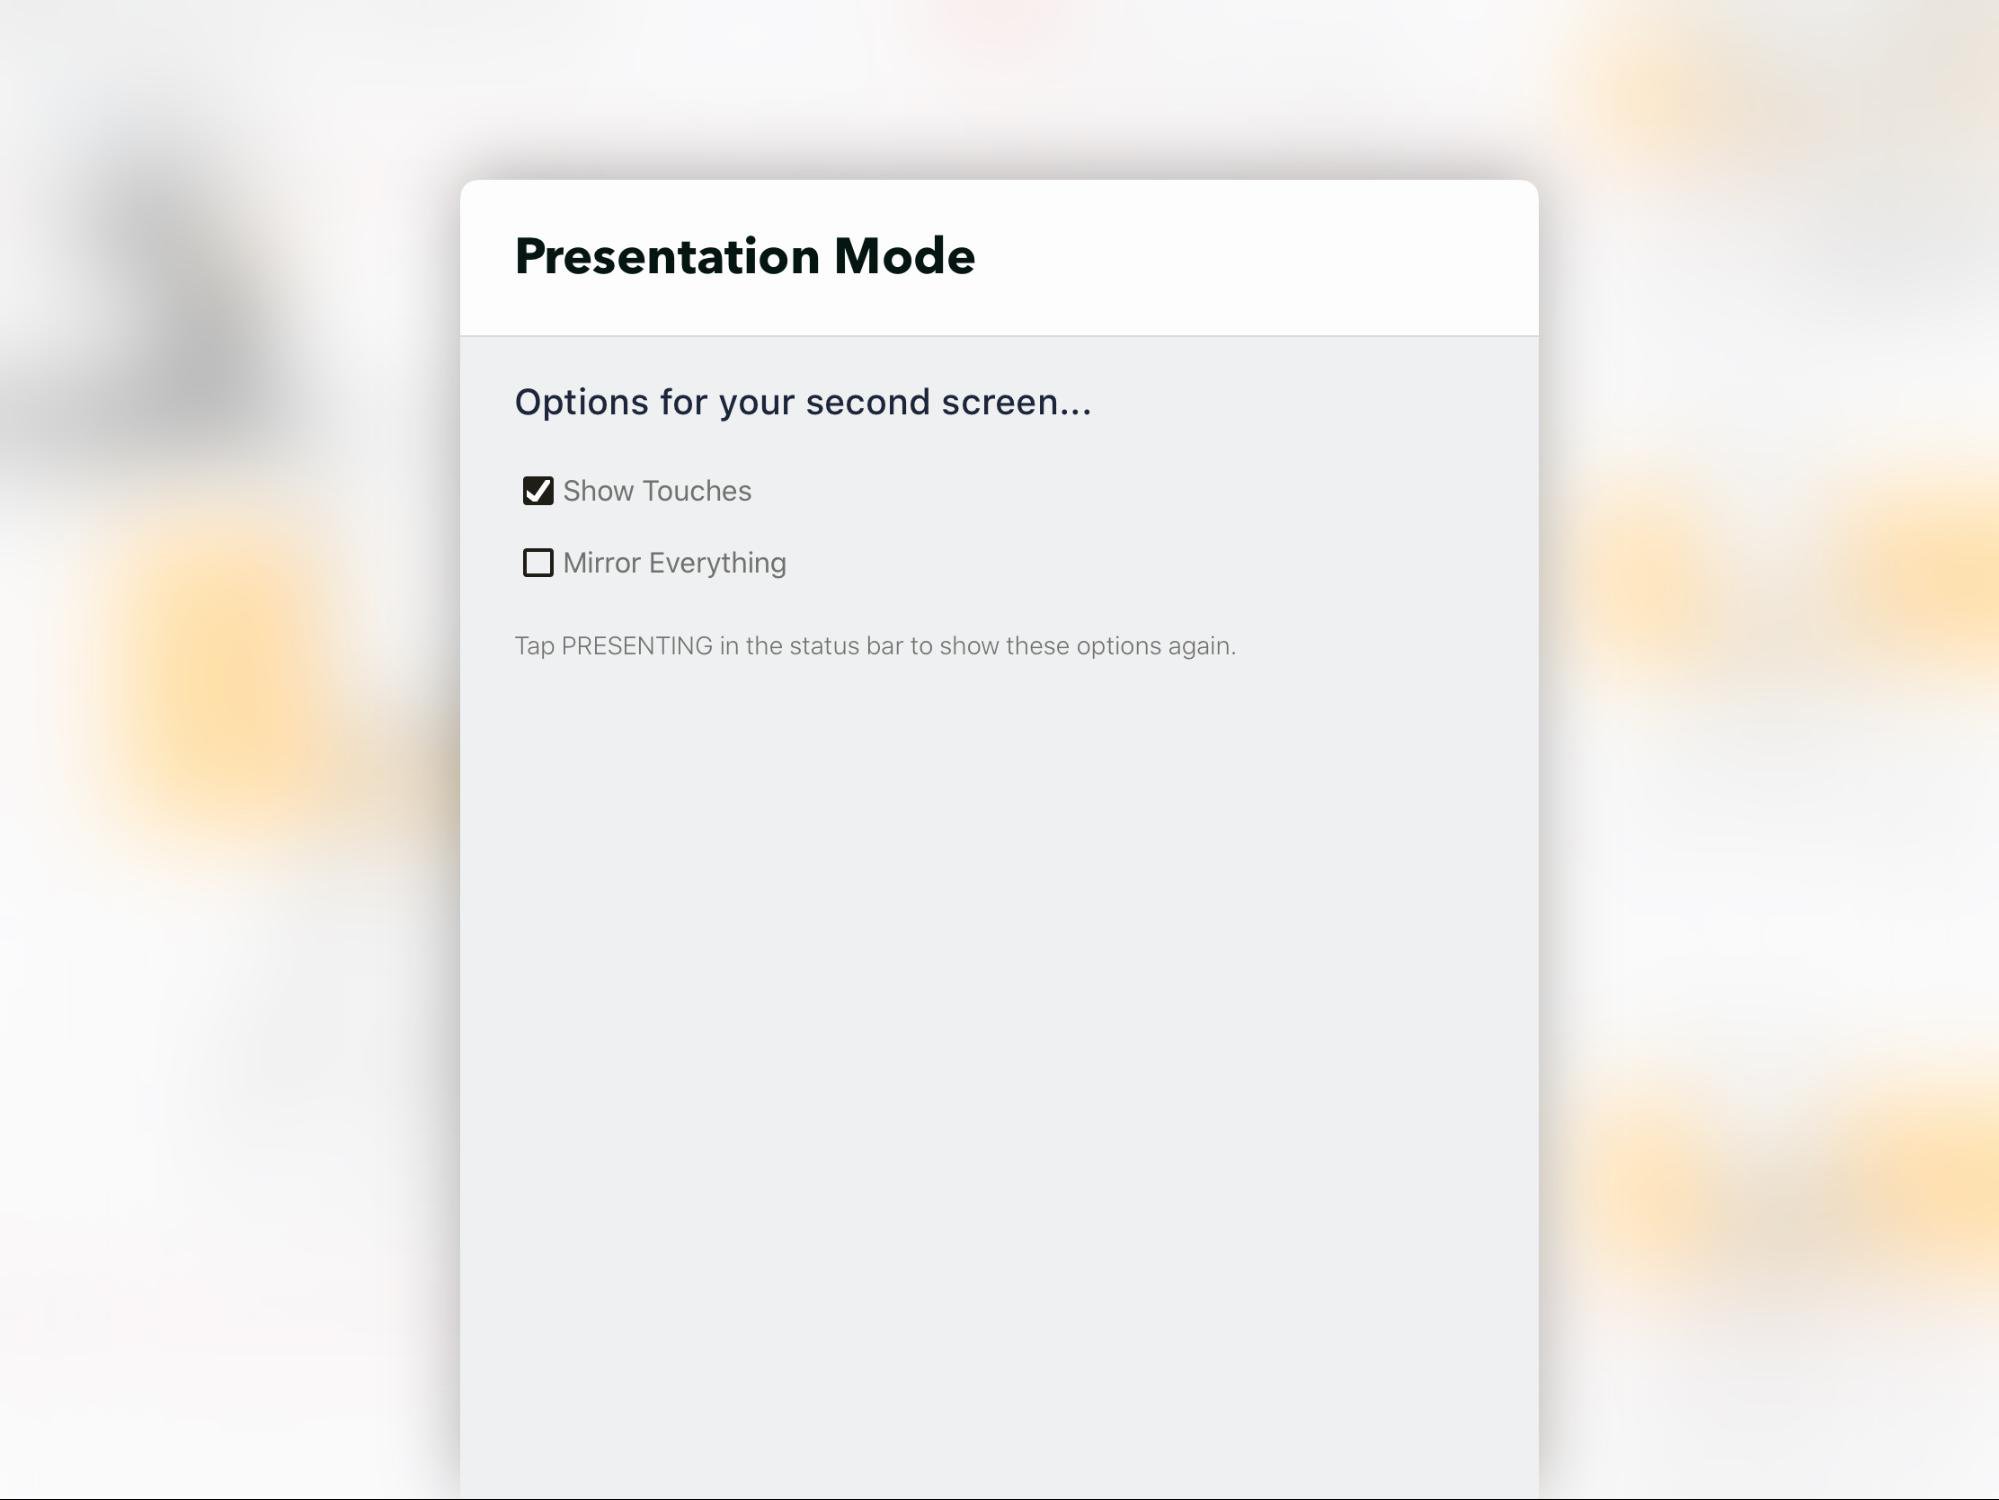
Choose to mirror the entire UI, and decide whether to show your touches while presenting.
Once finished, return to the Zoom app and click “Stop Sharing” at the top of the window.
Connecting Your iPad to Your Computer and Sharing Your Screen
If you are using a video call platform that doesn’t directly support sharing your iPad, you can mirror your iPad to your computer, then share your screen. Here are two options for doing this, using Reflector 3 and QuickTime Player.
Using AirPlay with a Screen Mirroring App
There are several screen mirroring apps available. Reflector 3 is an excellent option - it requires a subscription but offers a free 7 day trial. Here’s how to get started.
1. Install and launch Reflector 3.
2. Open the command center on your iPad. In iOS 13, drag downward from the top right corner of your screen) and tap “Screen Mirroring”.
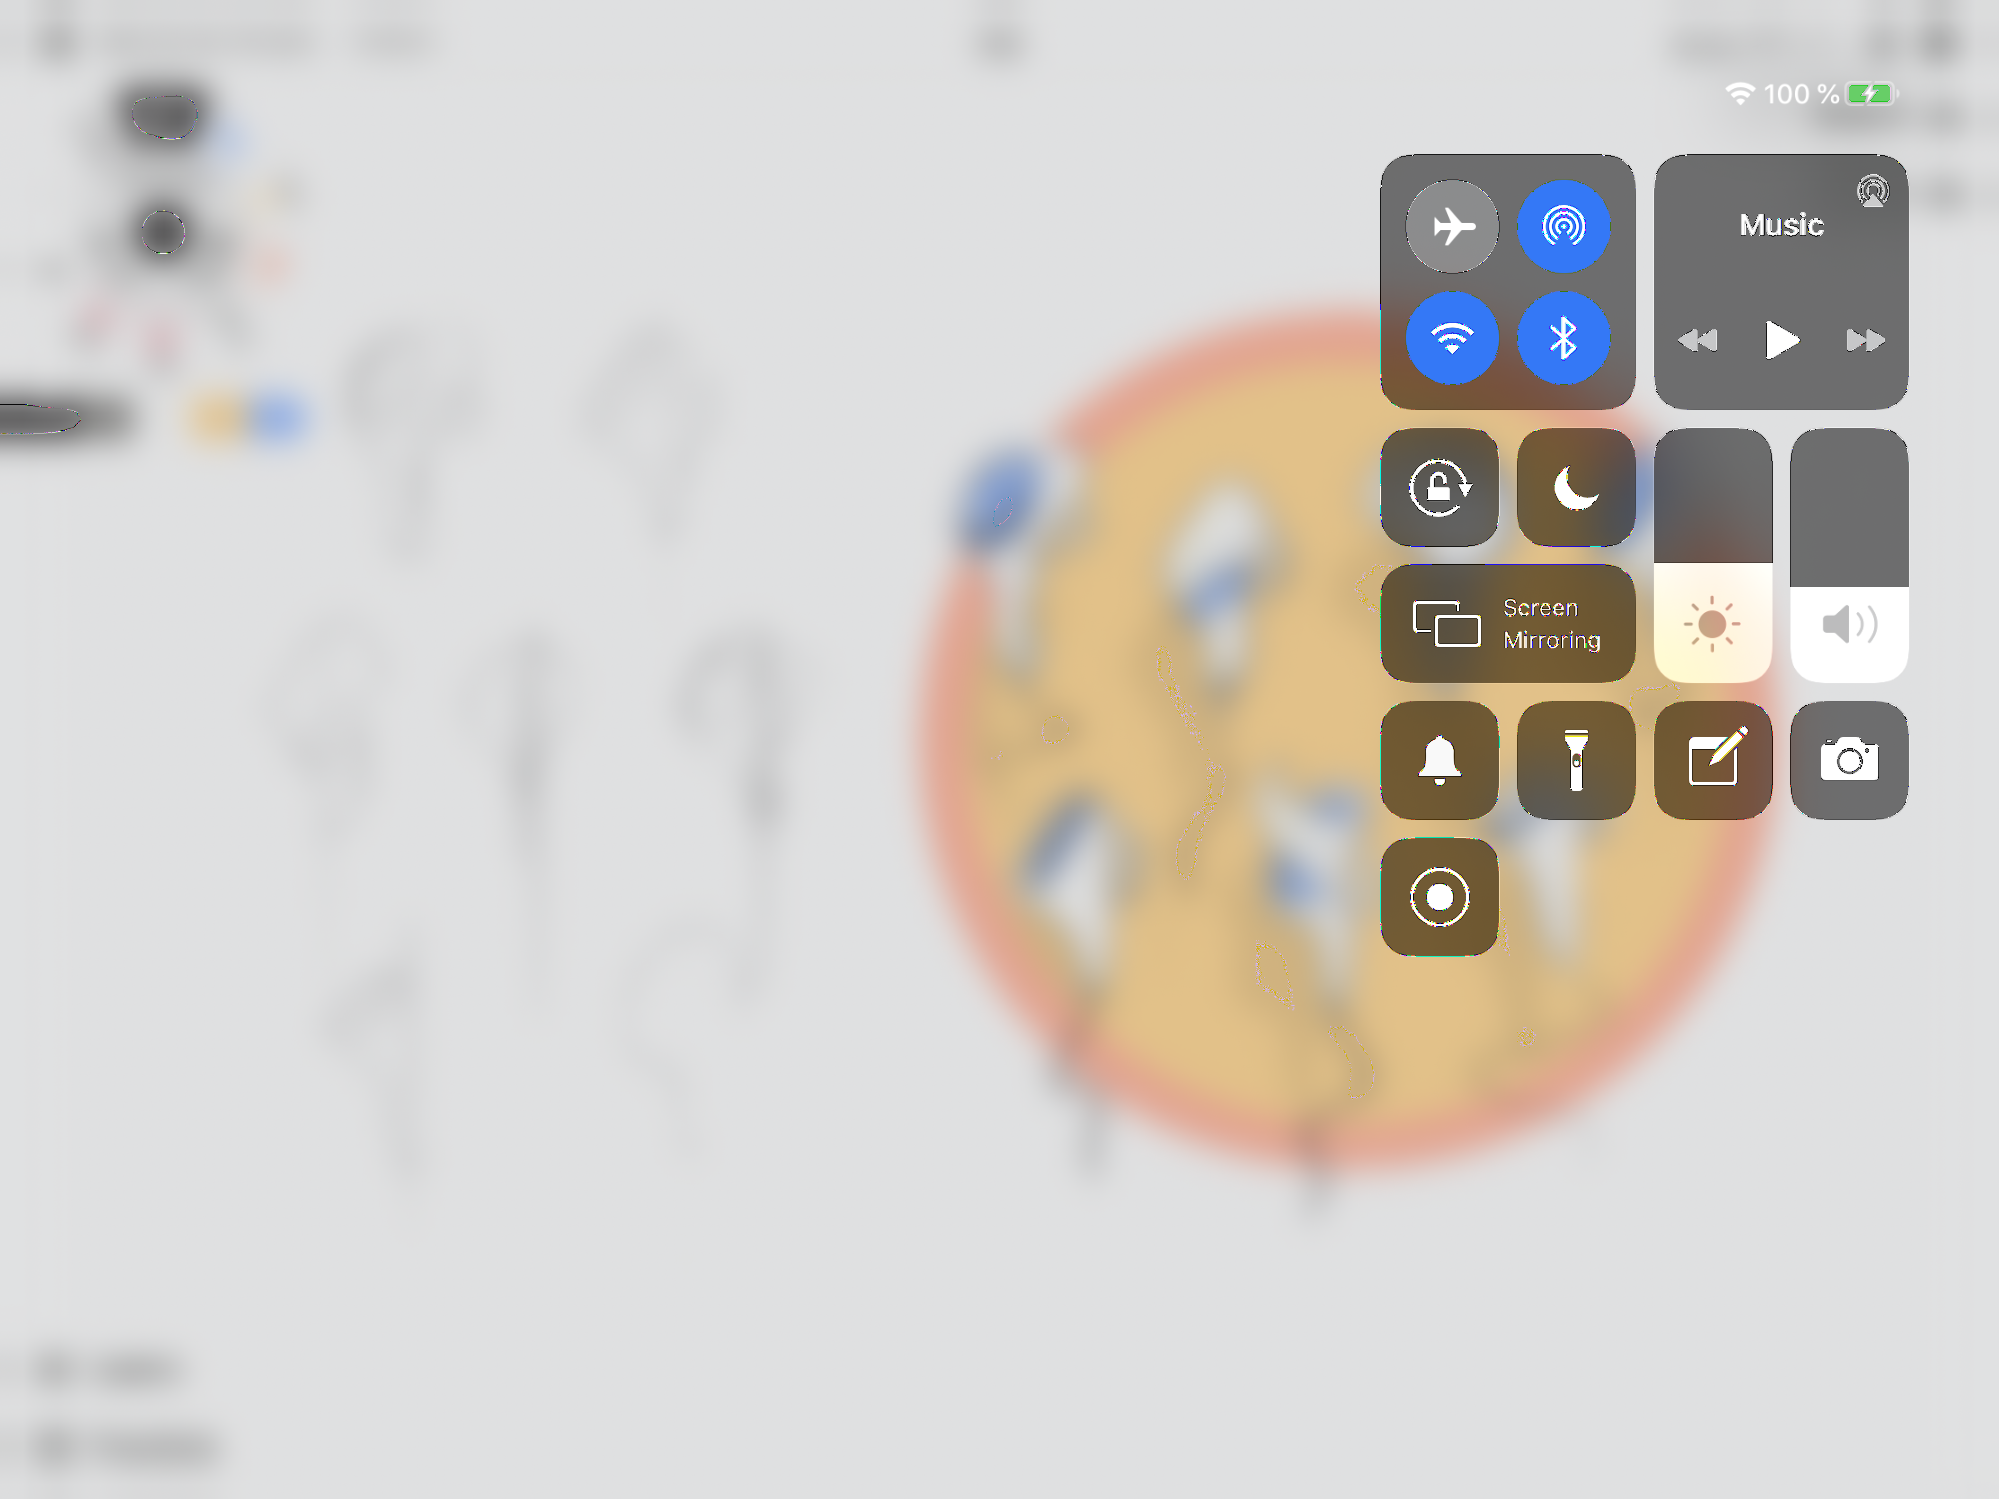
The available screen options will appear.
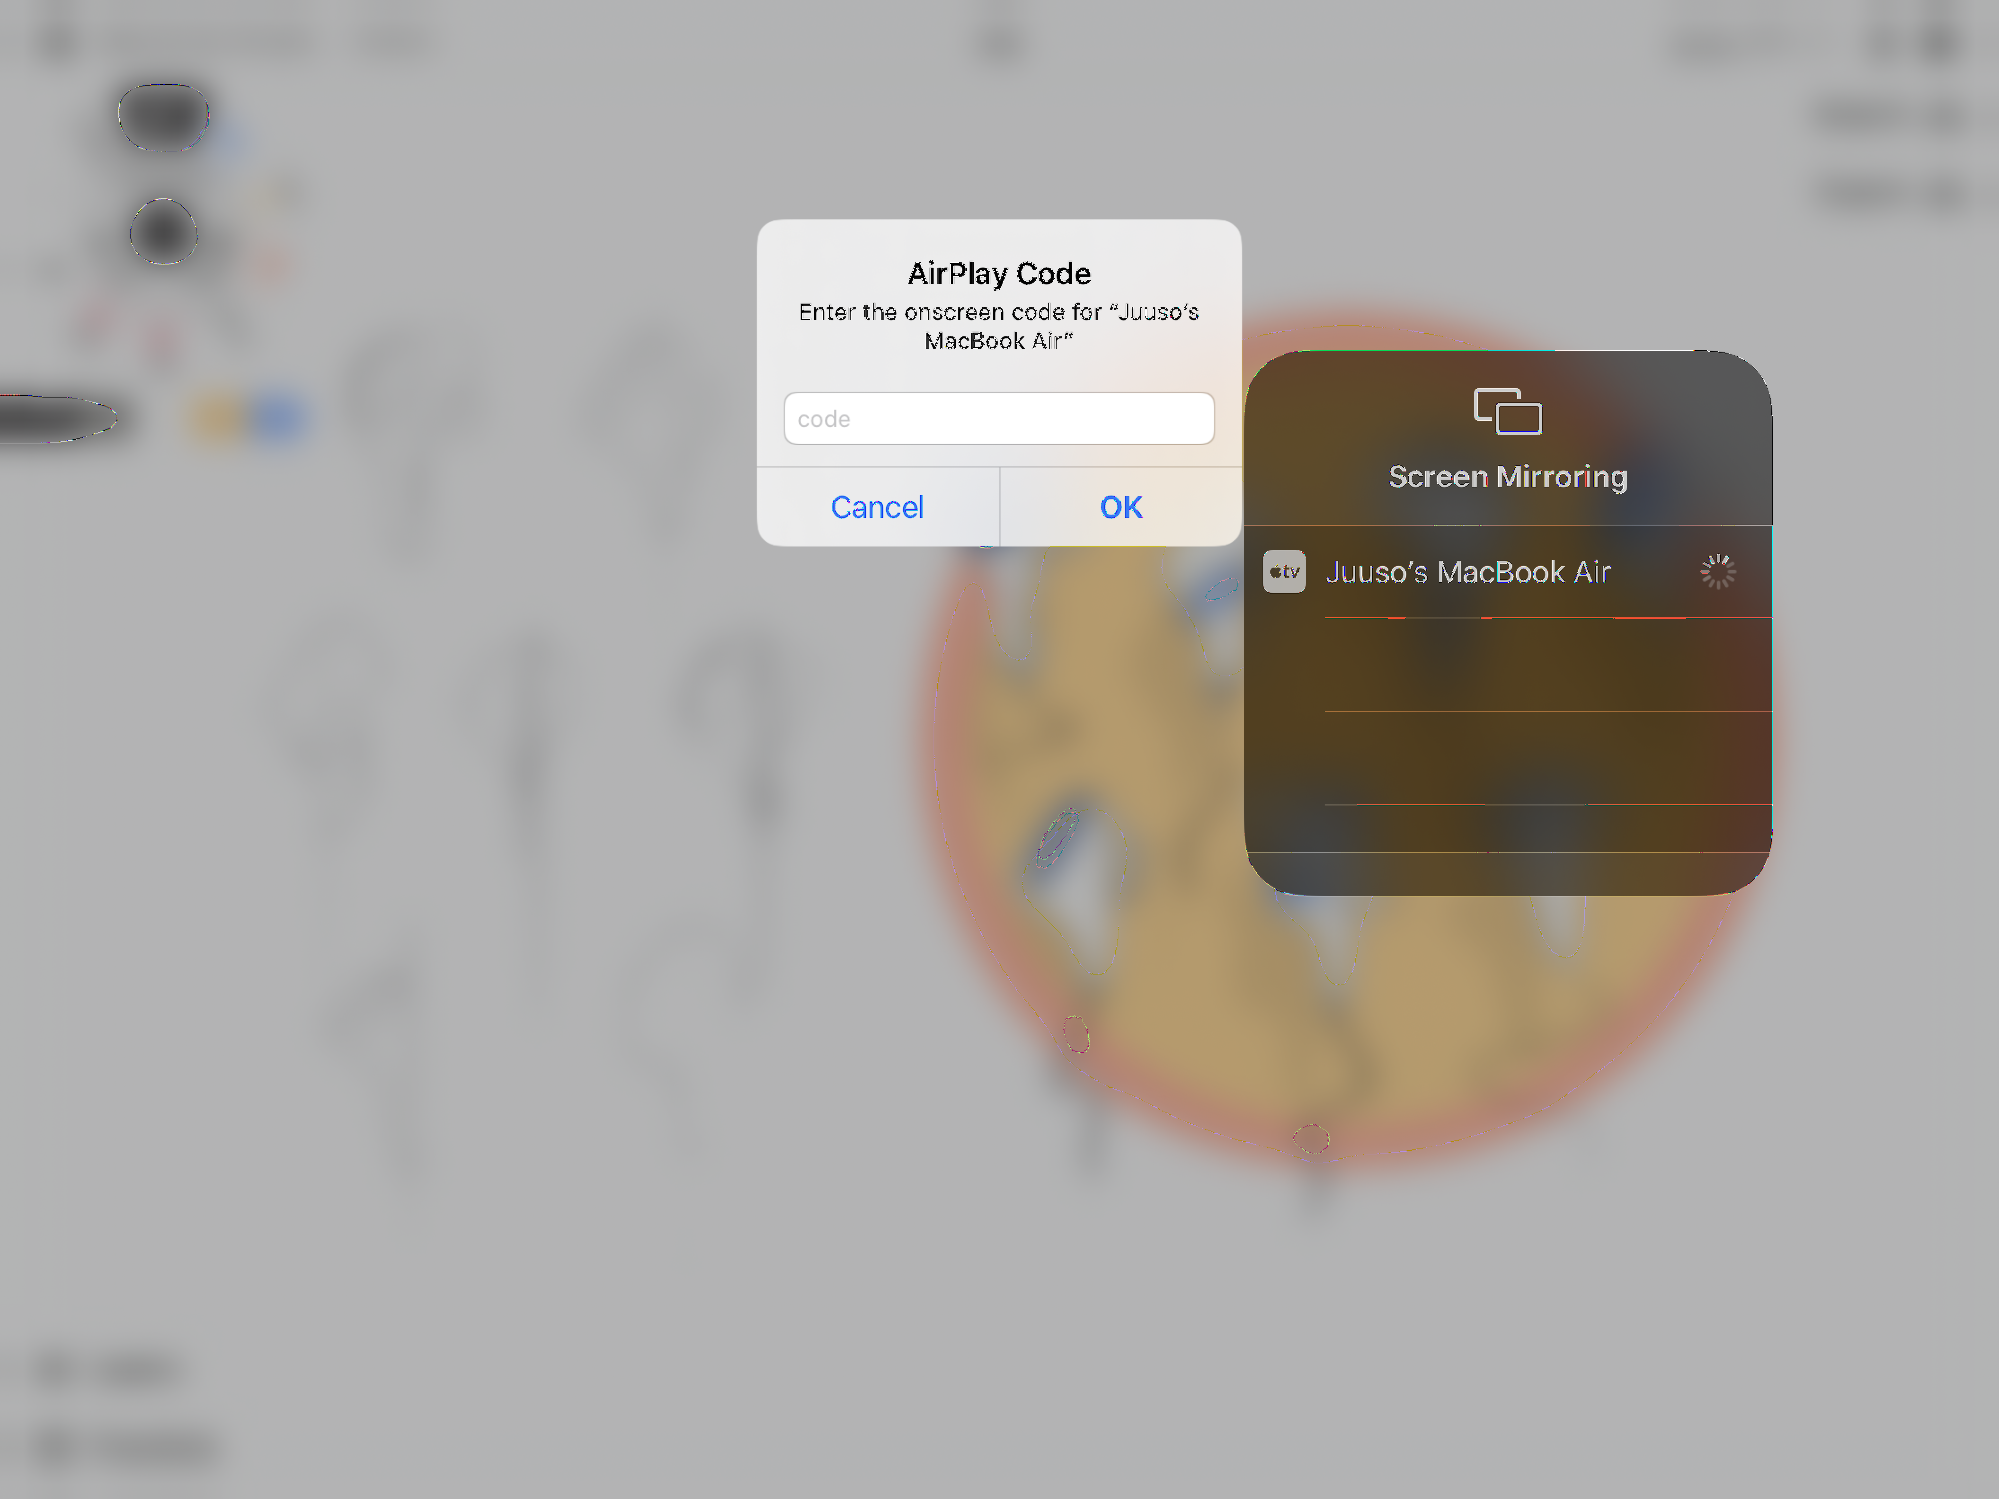
If you’ve never connected your device to that computer before, select the device name that appears. A code will appear on your computer screen. Enter the code into your iPad and the devices will pair.
3. You'll be taken back to your main screen and will see your iPad screen displayed on the secondary source, sharing in Presentation Mode. If you haven’t already, open Concepts and enter a drawing. You'll see two red lines marking your shared area. This is what it looks like on your iPad:
And this is what it looks like on your computer. You'll see there is no UI on the secondary screen.
If you'd like to share the UI or show your touches while presenting, tap the red "PRESENTING" text at the top of the status bar in Concepts to bring up the Presentation settings, and make your selections.
Go ahead and share your ideas real-time with your team.
When you're done presenting, open your iPad's control center and tap “Stop Mirroring”.
Mirroring Your iPad on Your Computer Using QuickTime Player
You can also share your iPad screen without using a screen mirroring app. All you need is a cable to connect your iPad to your computer, and an app called QuickTime Player.
1. Connect your iPad with your computer using your cable.
2. Open QuickTime Player, and open File > New Movie Recording. A recording screen will open.
3. Click the small arrow next to the Record button to open a list of options. Your iPad name will appear under Camera.
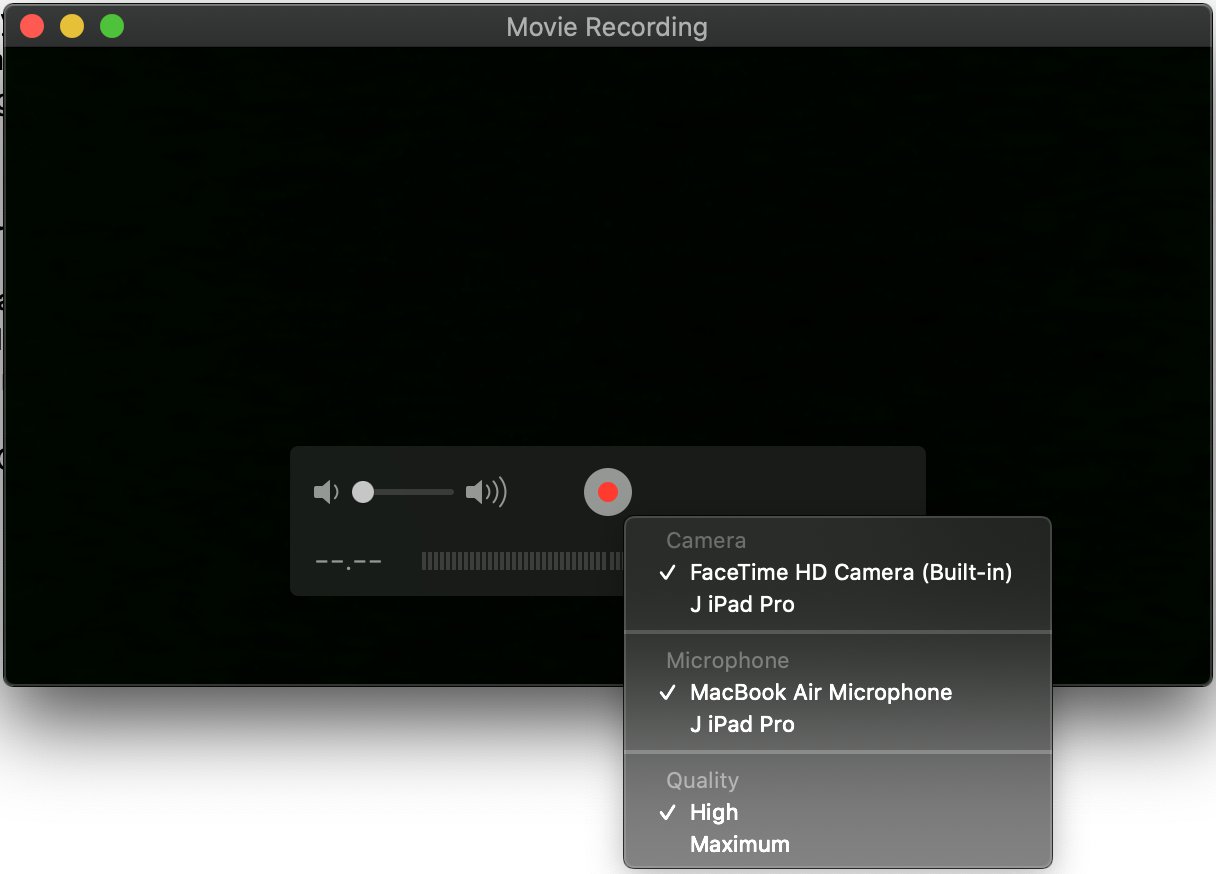
4. Select the iPad, and you’ll immediately see the iPad screen appear on your computer.
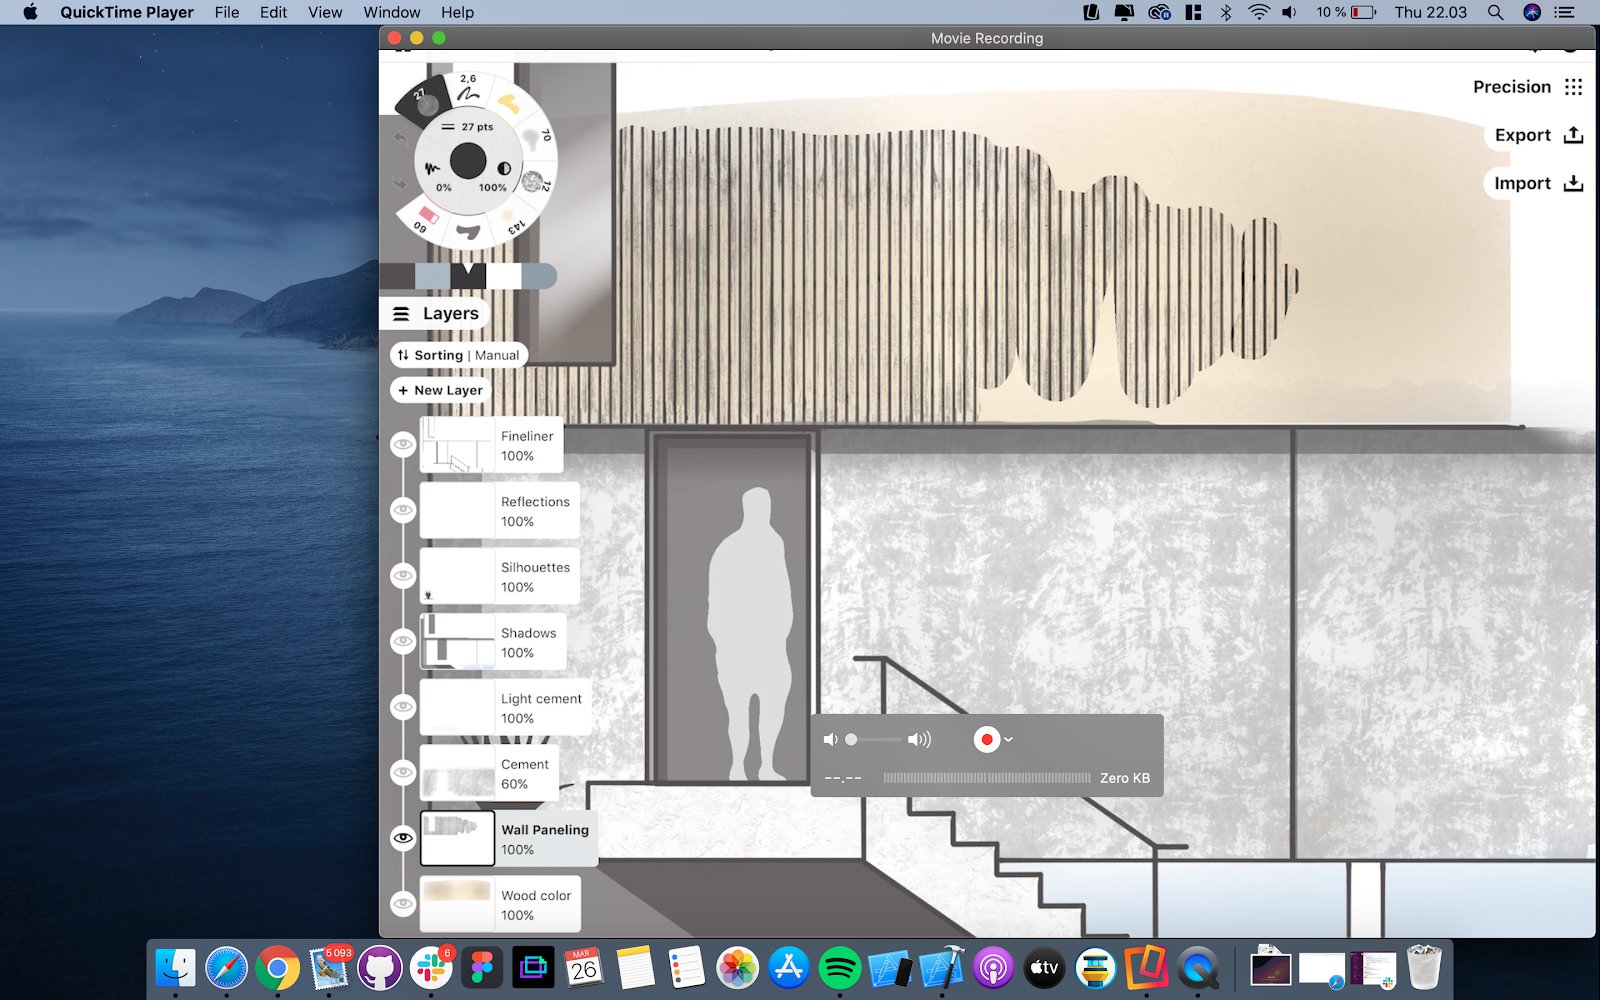
To stop sharing, end the recording and exit the QuickTime Player app.
Once you're finished presenting, export your file and drag+drop straight to email, text, Cloud and social for instant follow up.
We hope these screen-sharing solutions will help you connect and share with your teams, colleagues and friends. If you have any questions, please email us at support@concepts.app or head in-app to Ask Us Anything and chat with us directly - we're happy to help.
By Juuso Cajan and Erica Christensen