Concepts is an infinite, flexible creative tool for all your good ideas. Available on iOS, Windows and Android.
How to Create Lined Paper
Learn how to set up lined paper for note taking and handwriting on your infinite canvas.
A great addition to the infinite canvas for freehand note taking and sketching, Concepts offers an elegant, customizable Lined Paper grid you can use to keep your notes tidy. From narrow rule for deep thoughts to wide, elementary-style lines just right for a child's handwriting practice, you can keep your note taking in perfect line.
Here's how you can set up a personalized style of Lined Paper on your infinite canvas, how to set up an actual paper-sized artboard, and how to export and print your notes for later reference.
Setting Up Your Lined Paper
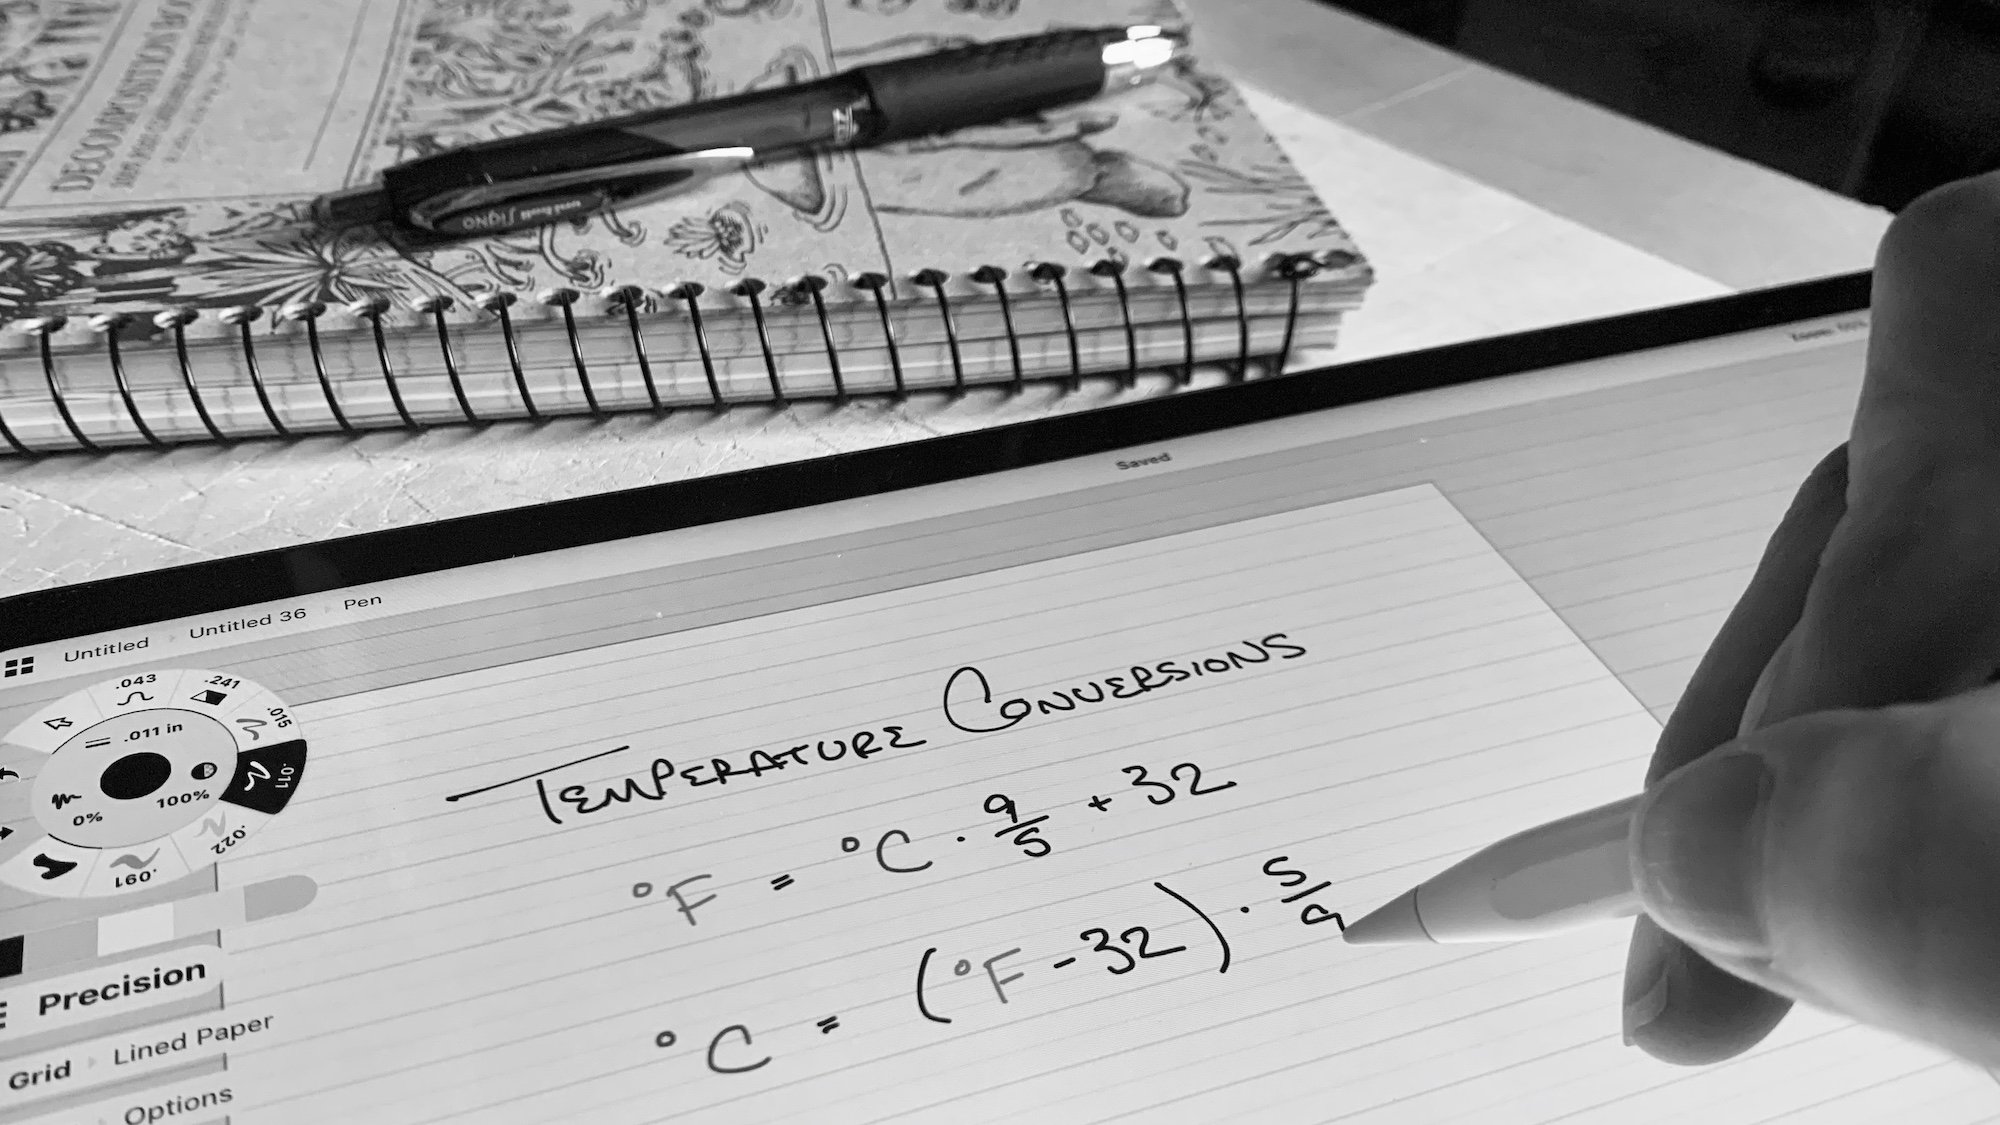
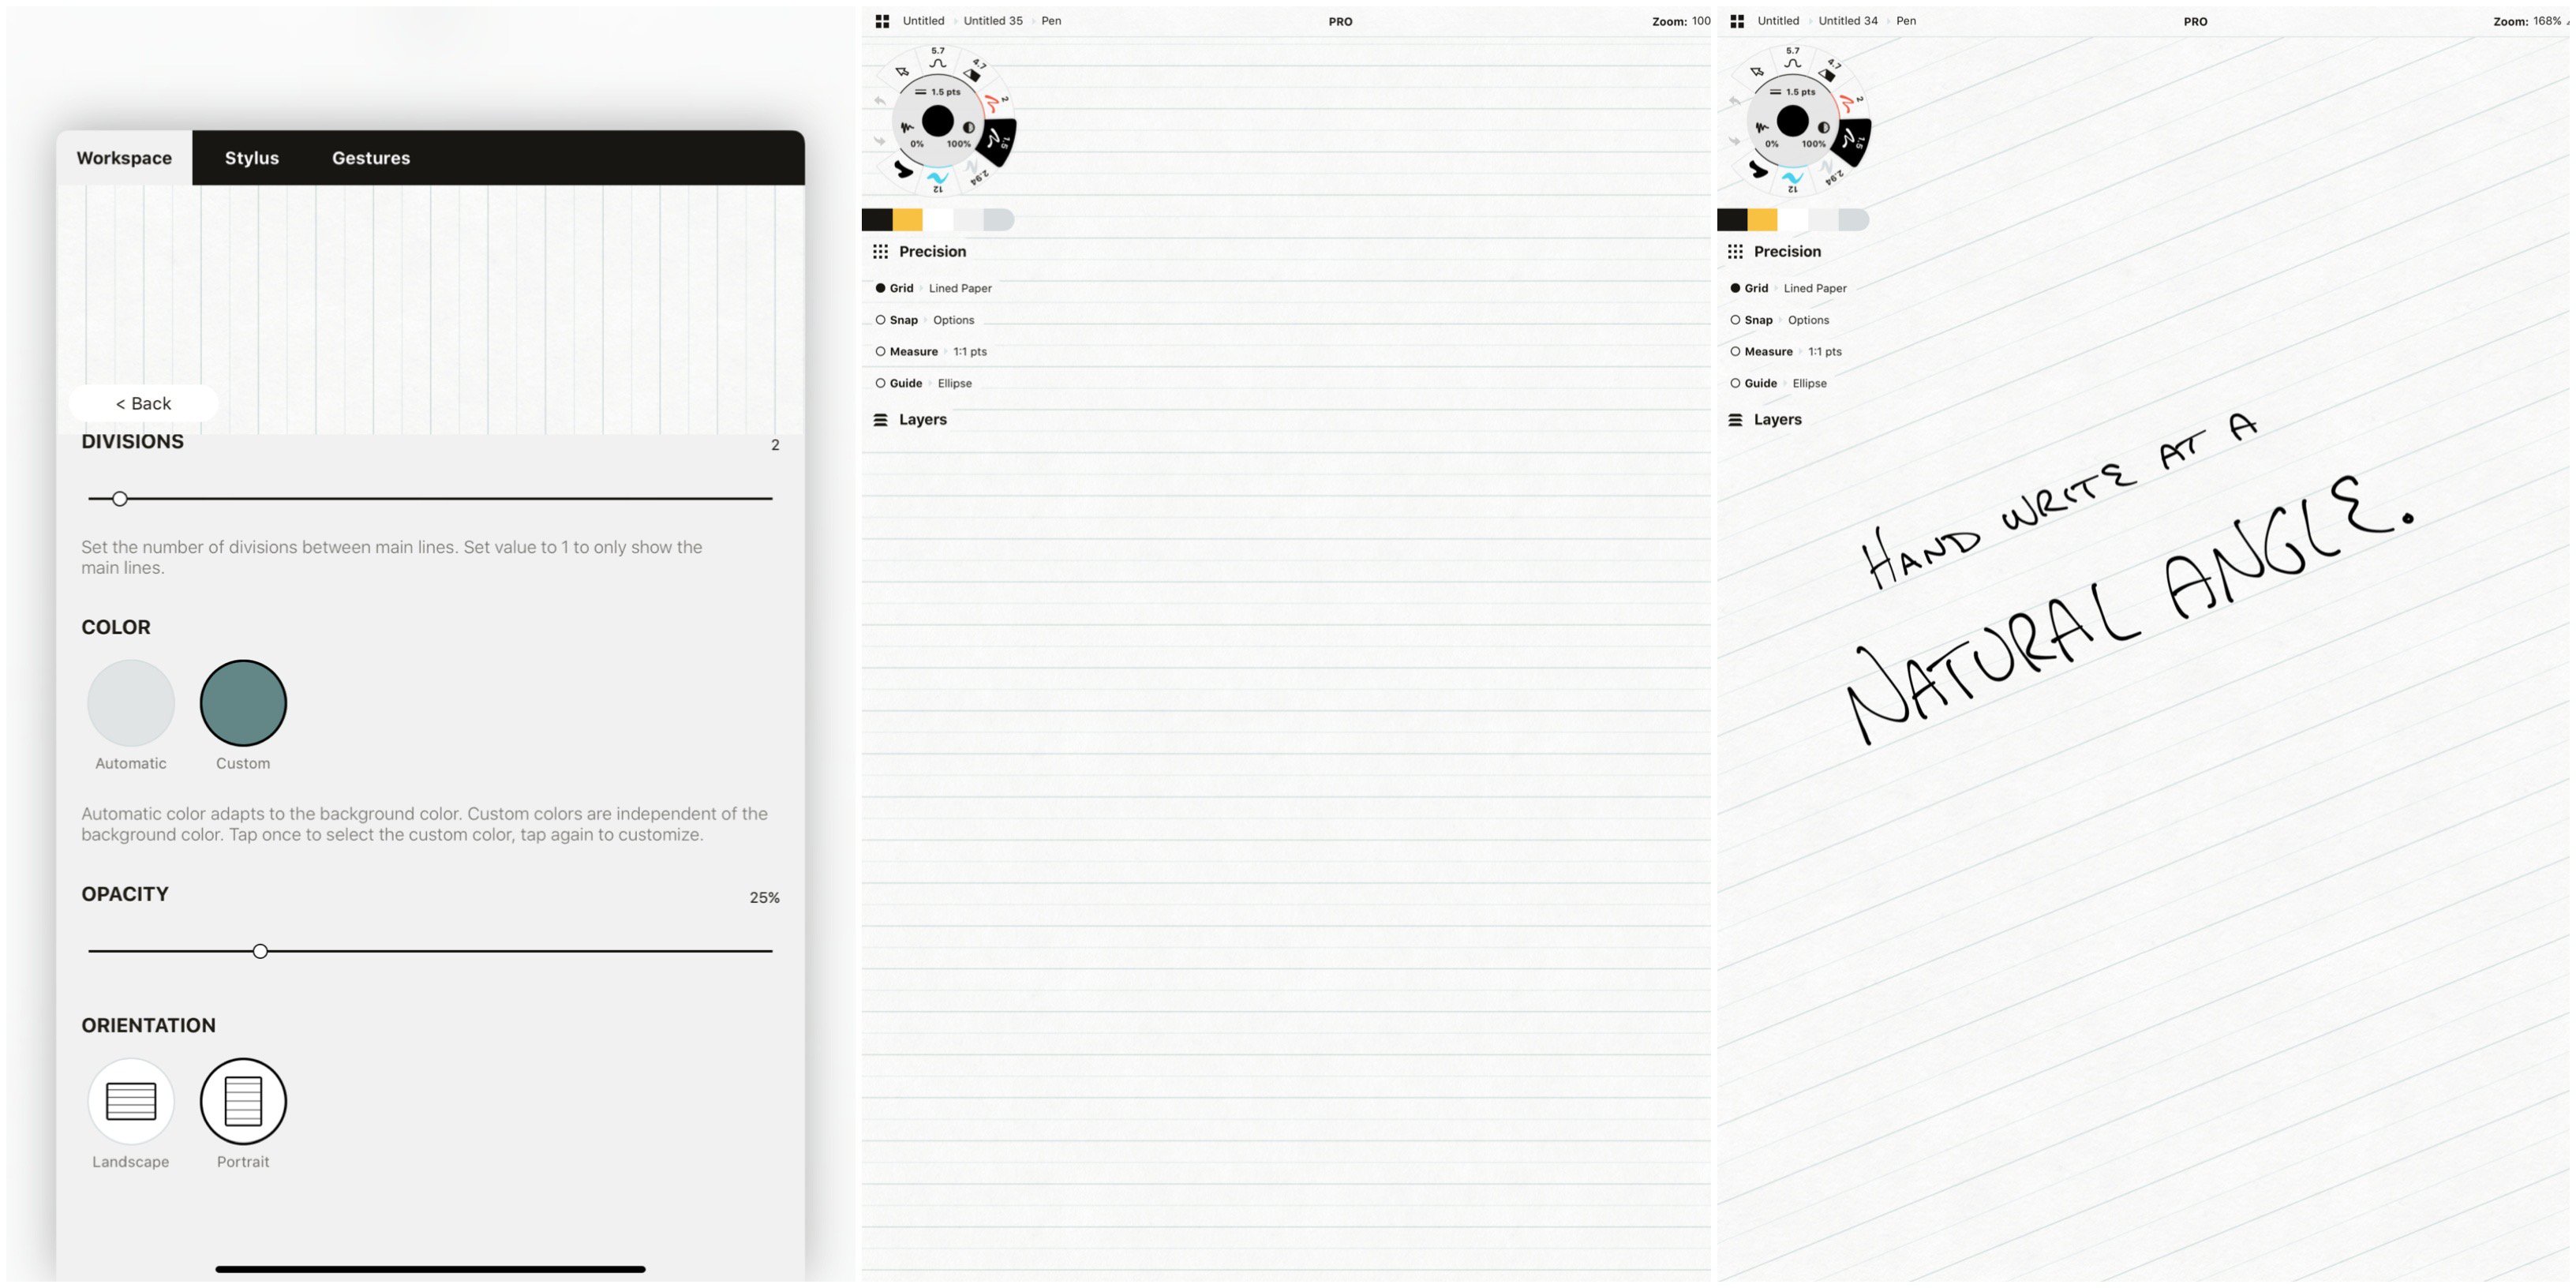
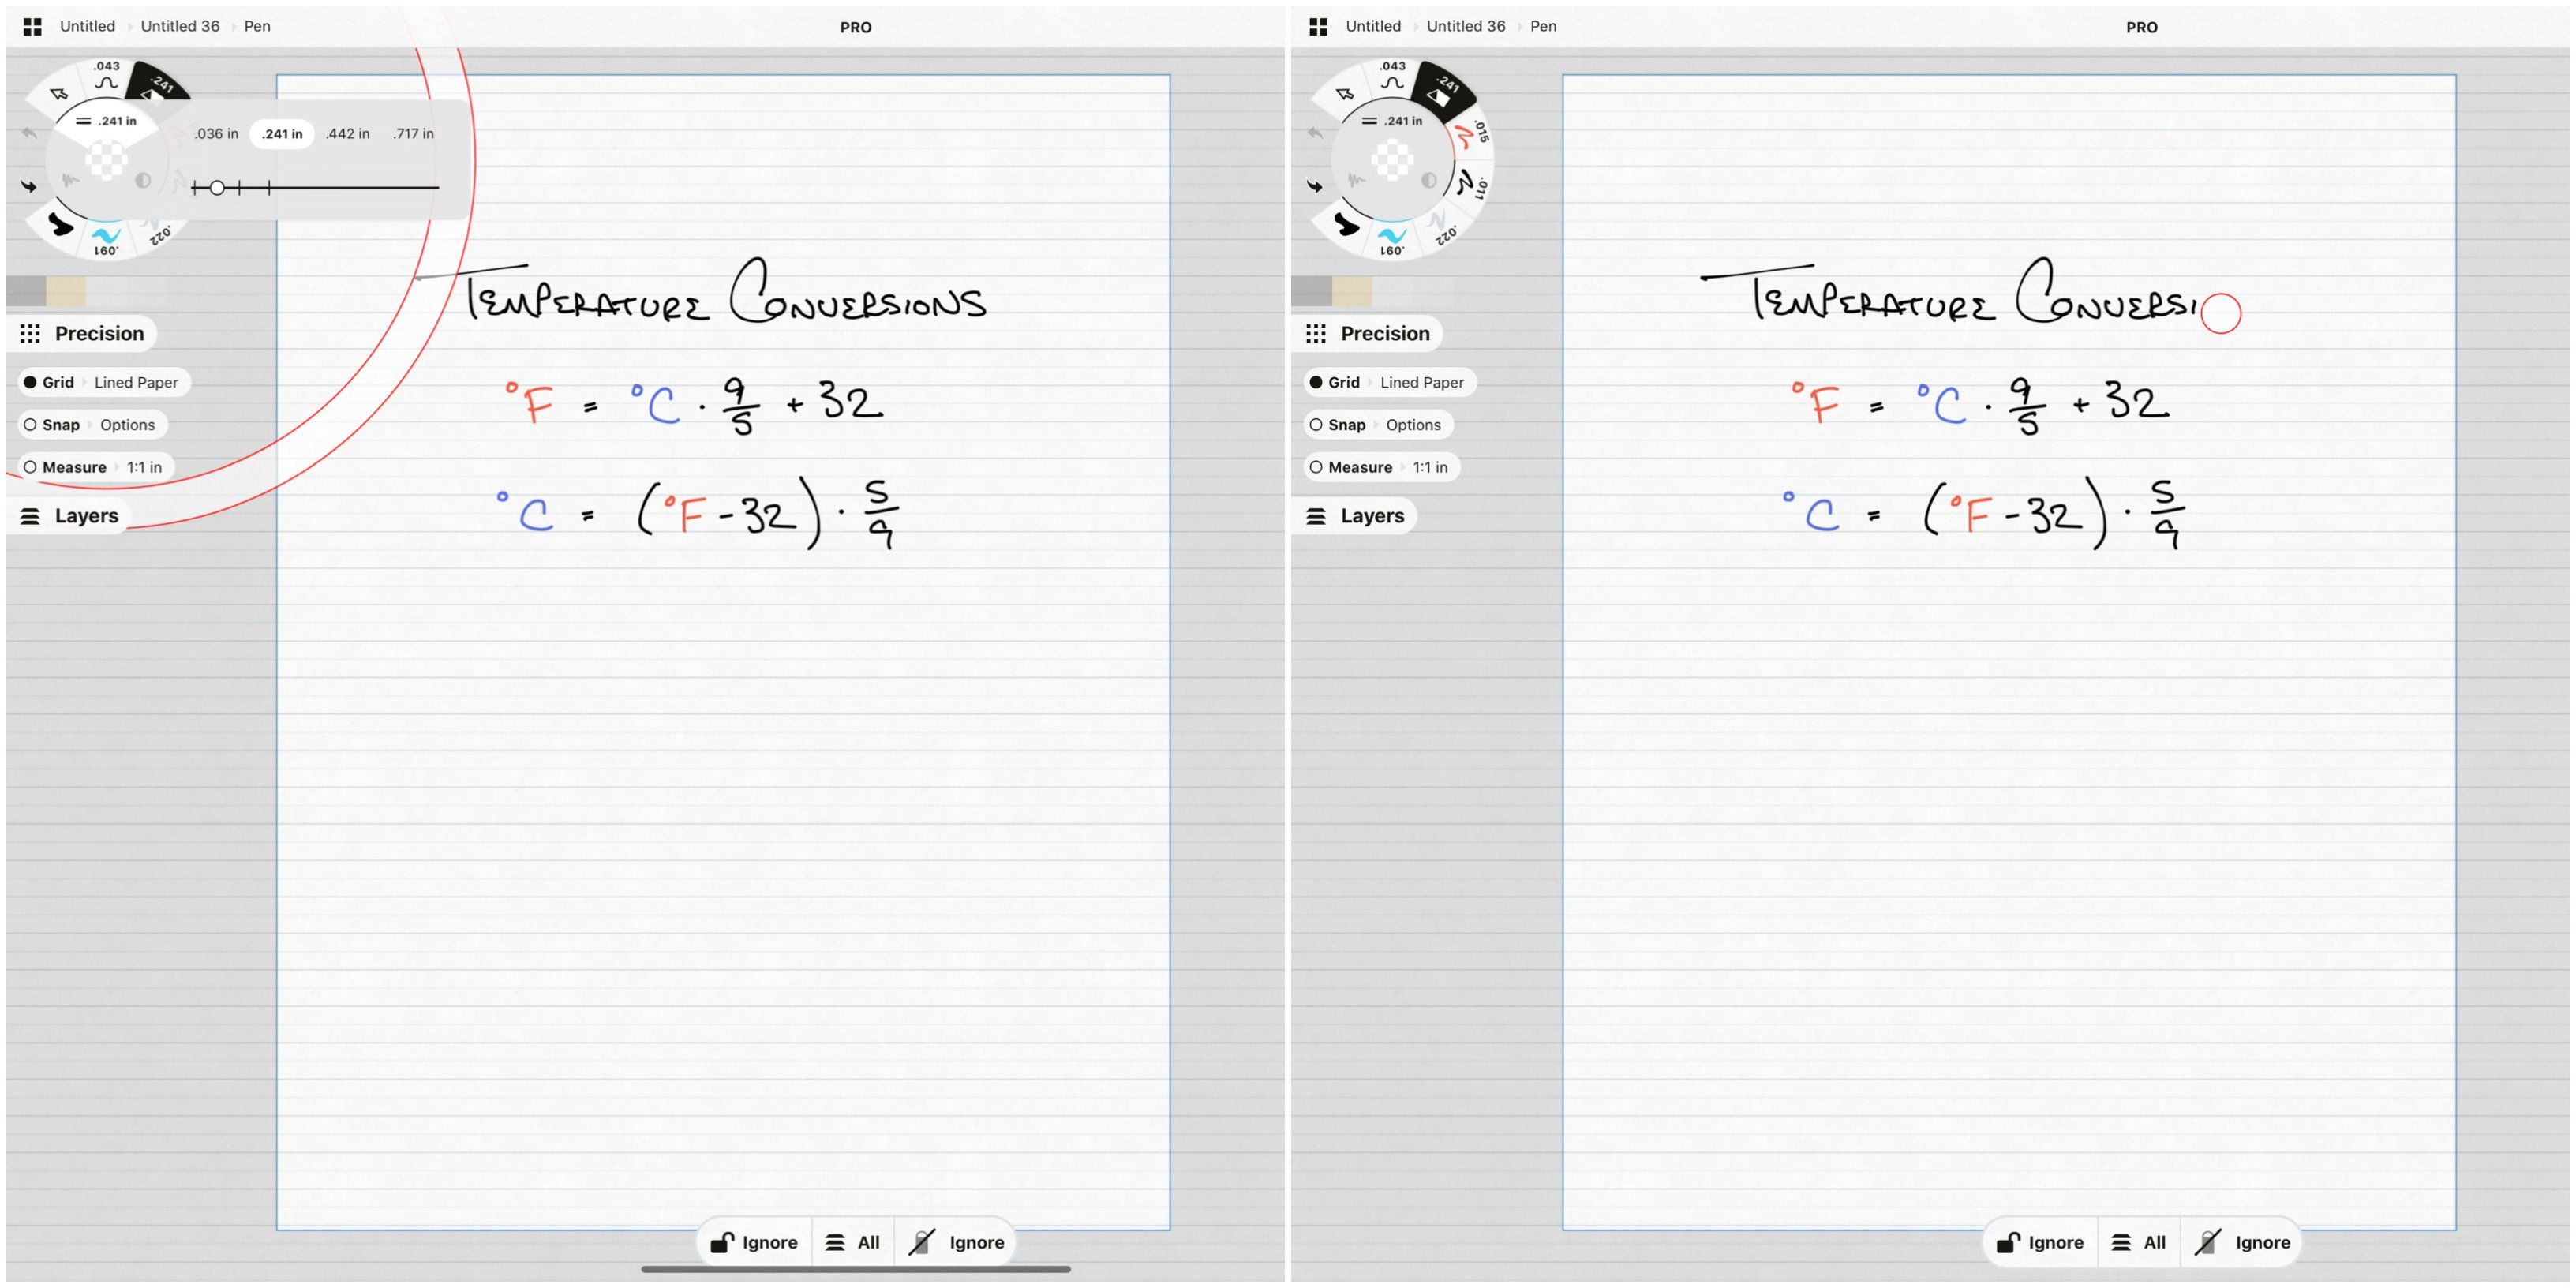
1. In a new drawing, open the Settings menu. Under Grid Type, select Lined Paper.
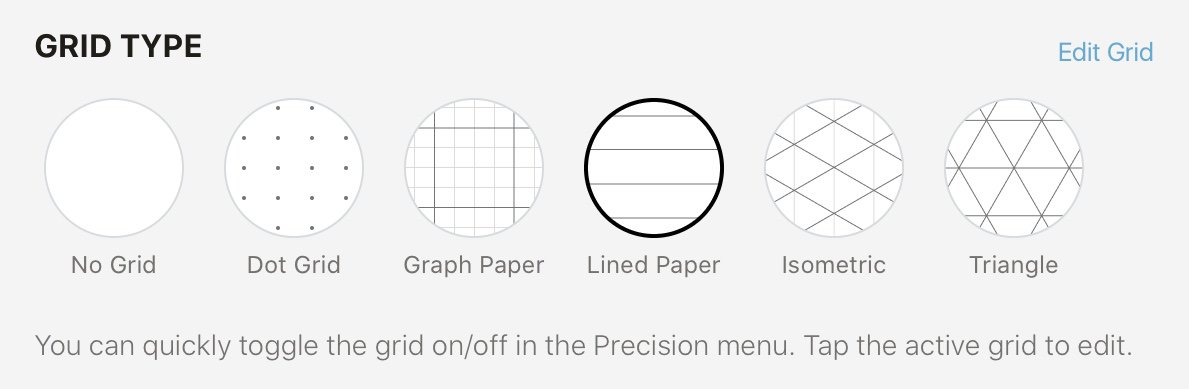
Concepts' Lined Paper grid.
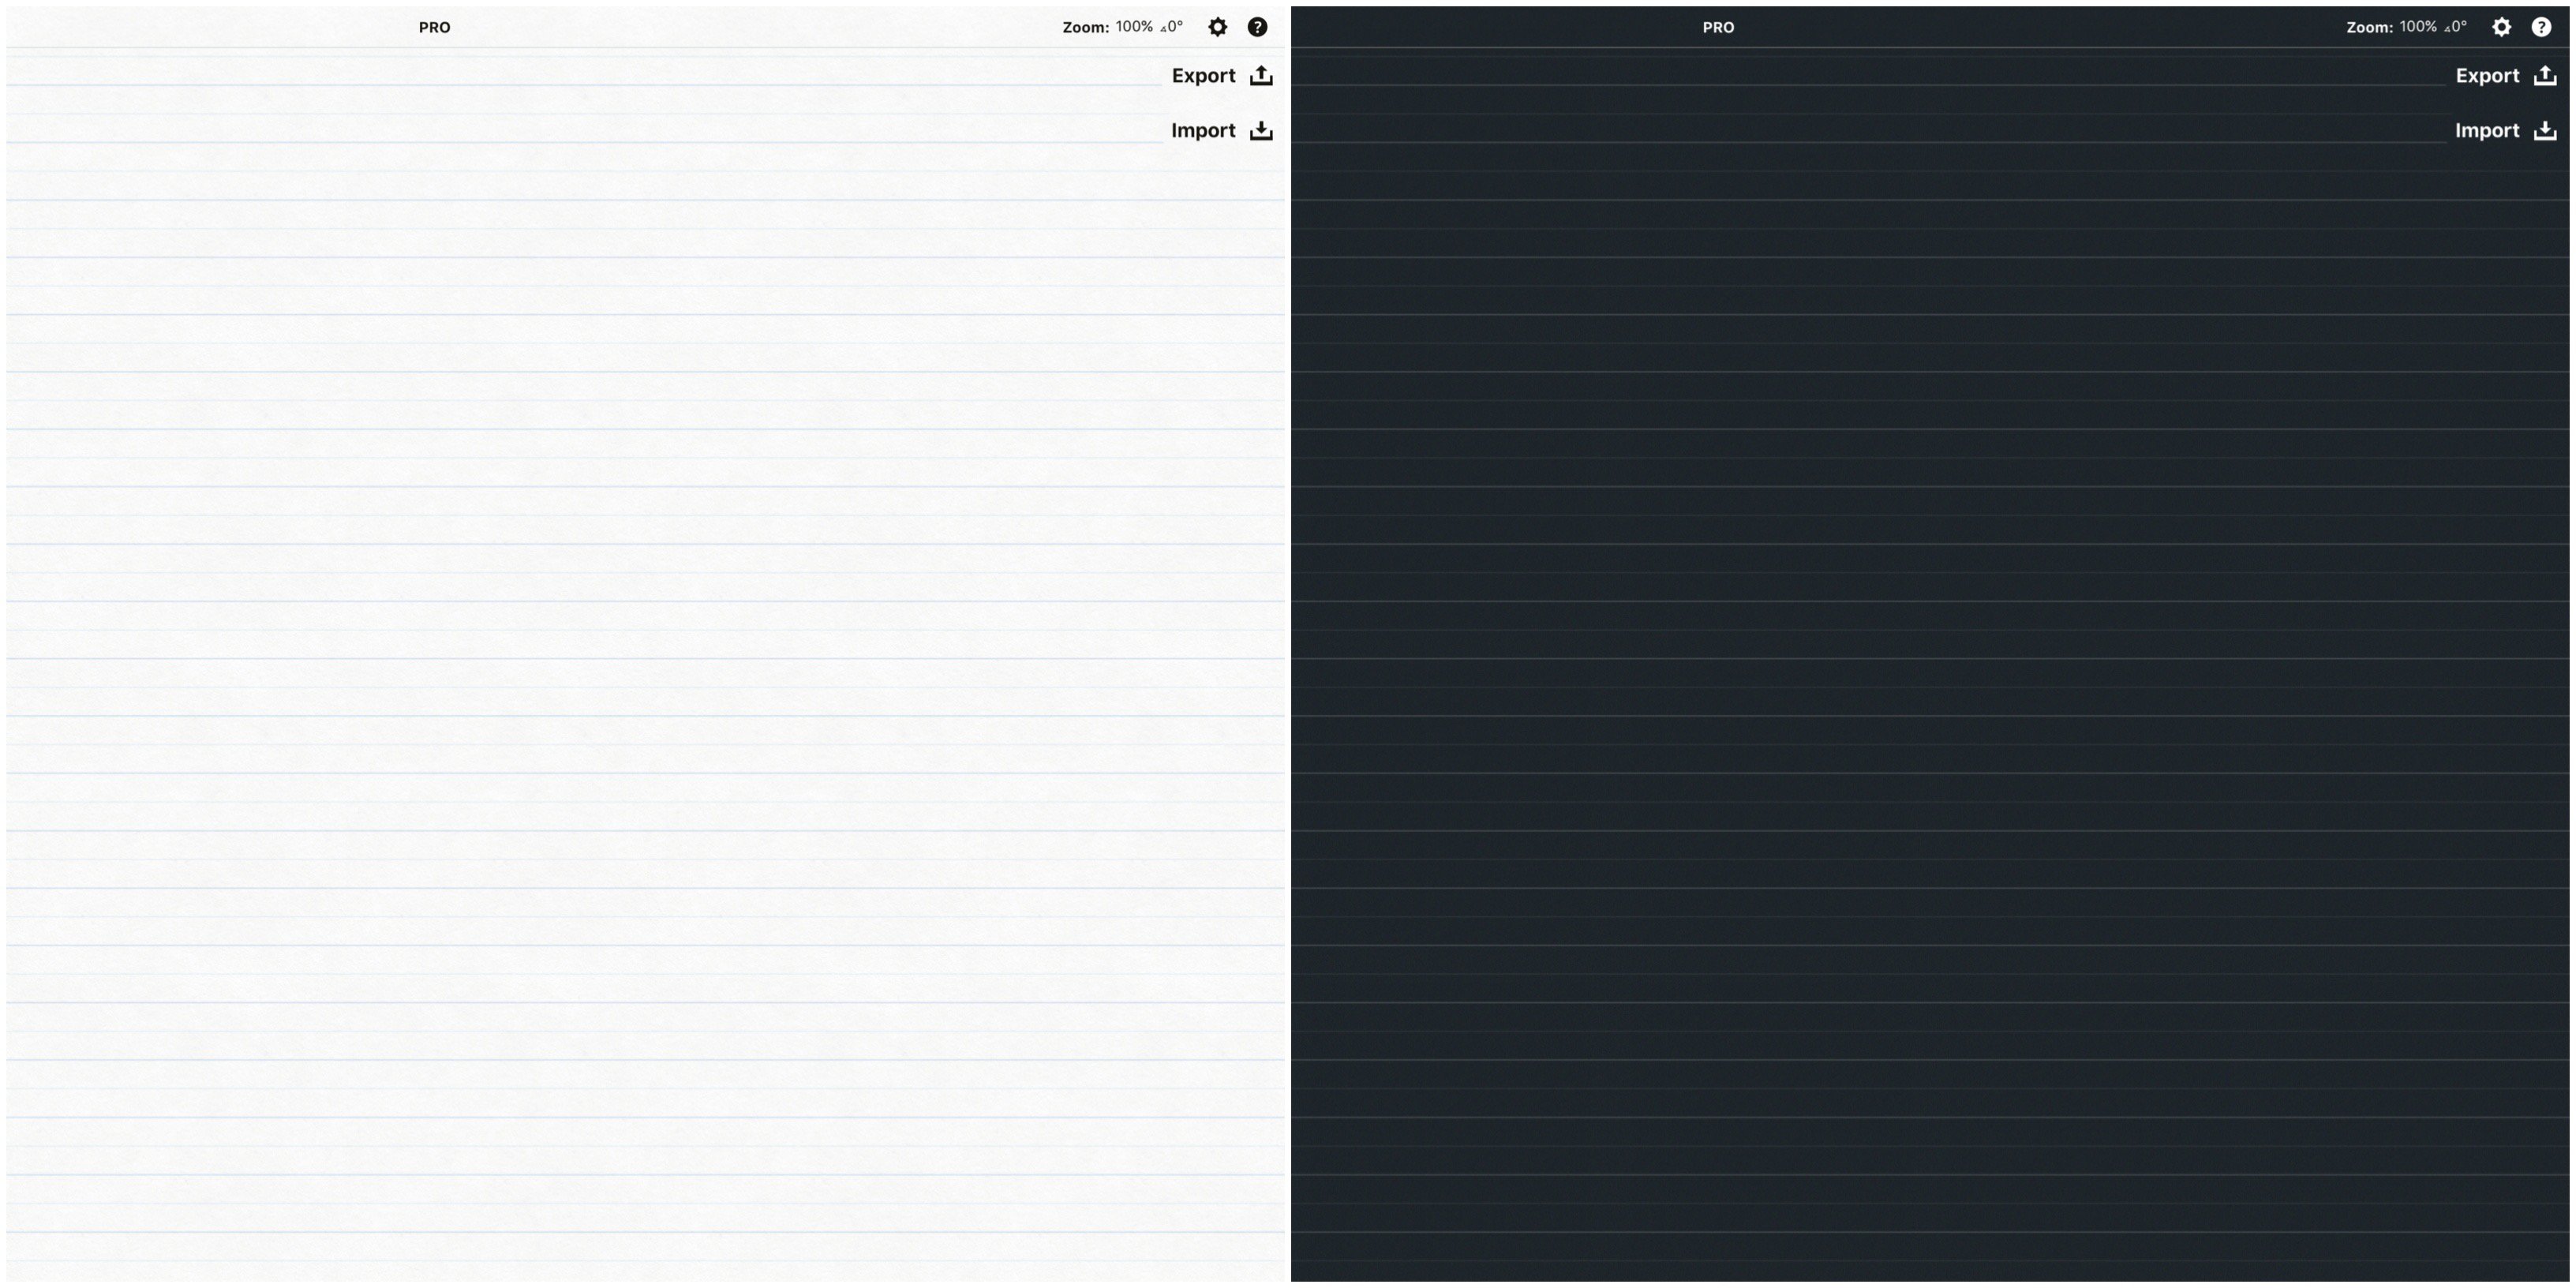
2. The default setting when you return to the canvas is a nice, narrow ruled lined paper at 100% zoom. Just zoom in on the canvas to see it a little wider or write a little bigger.
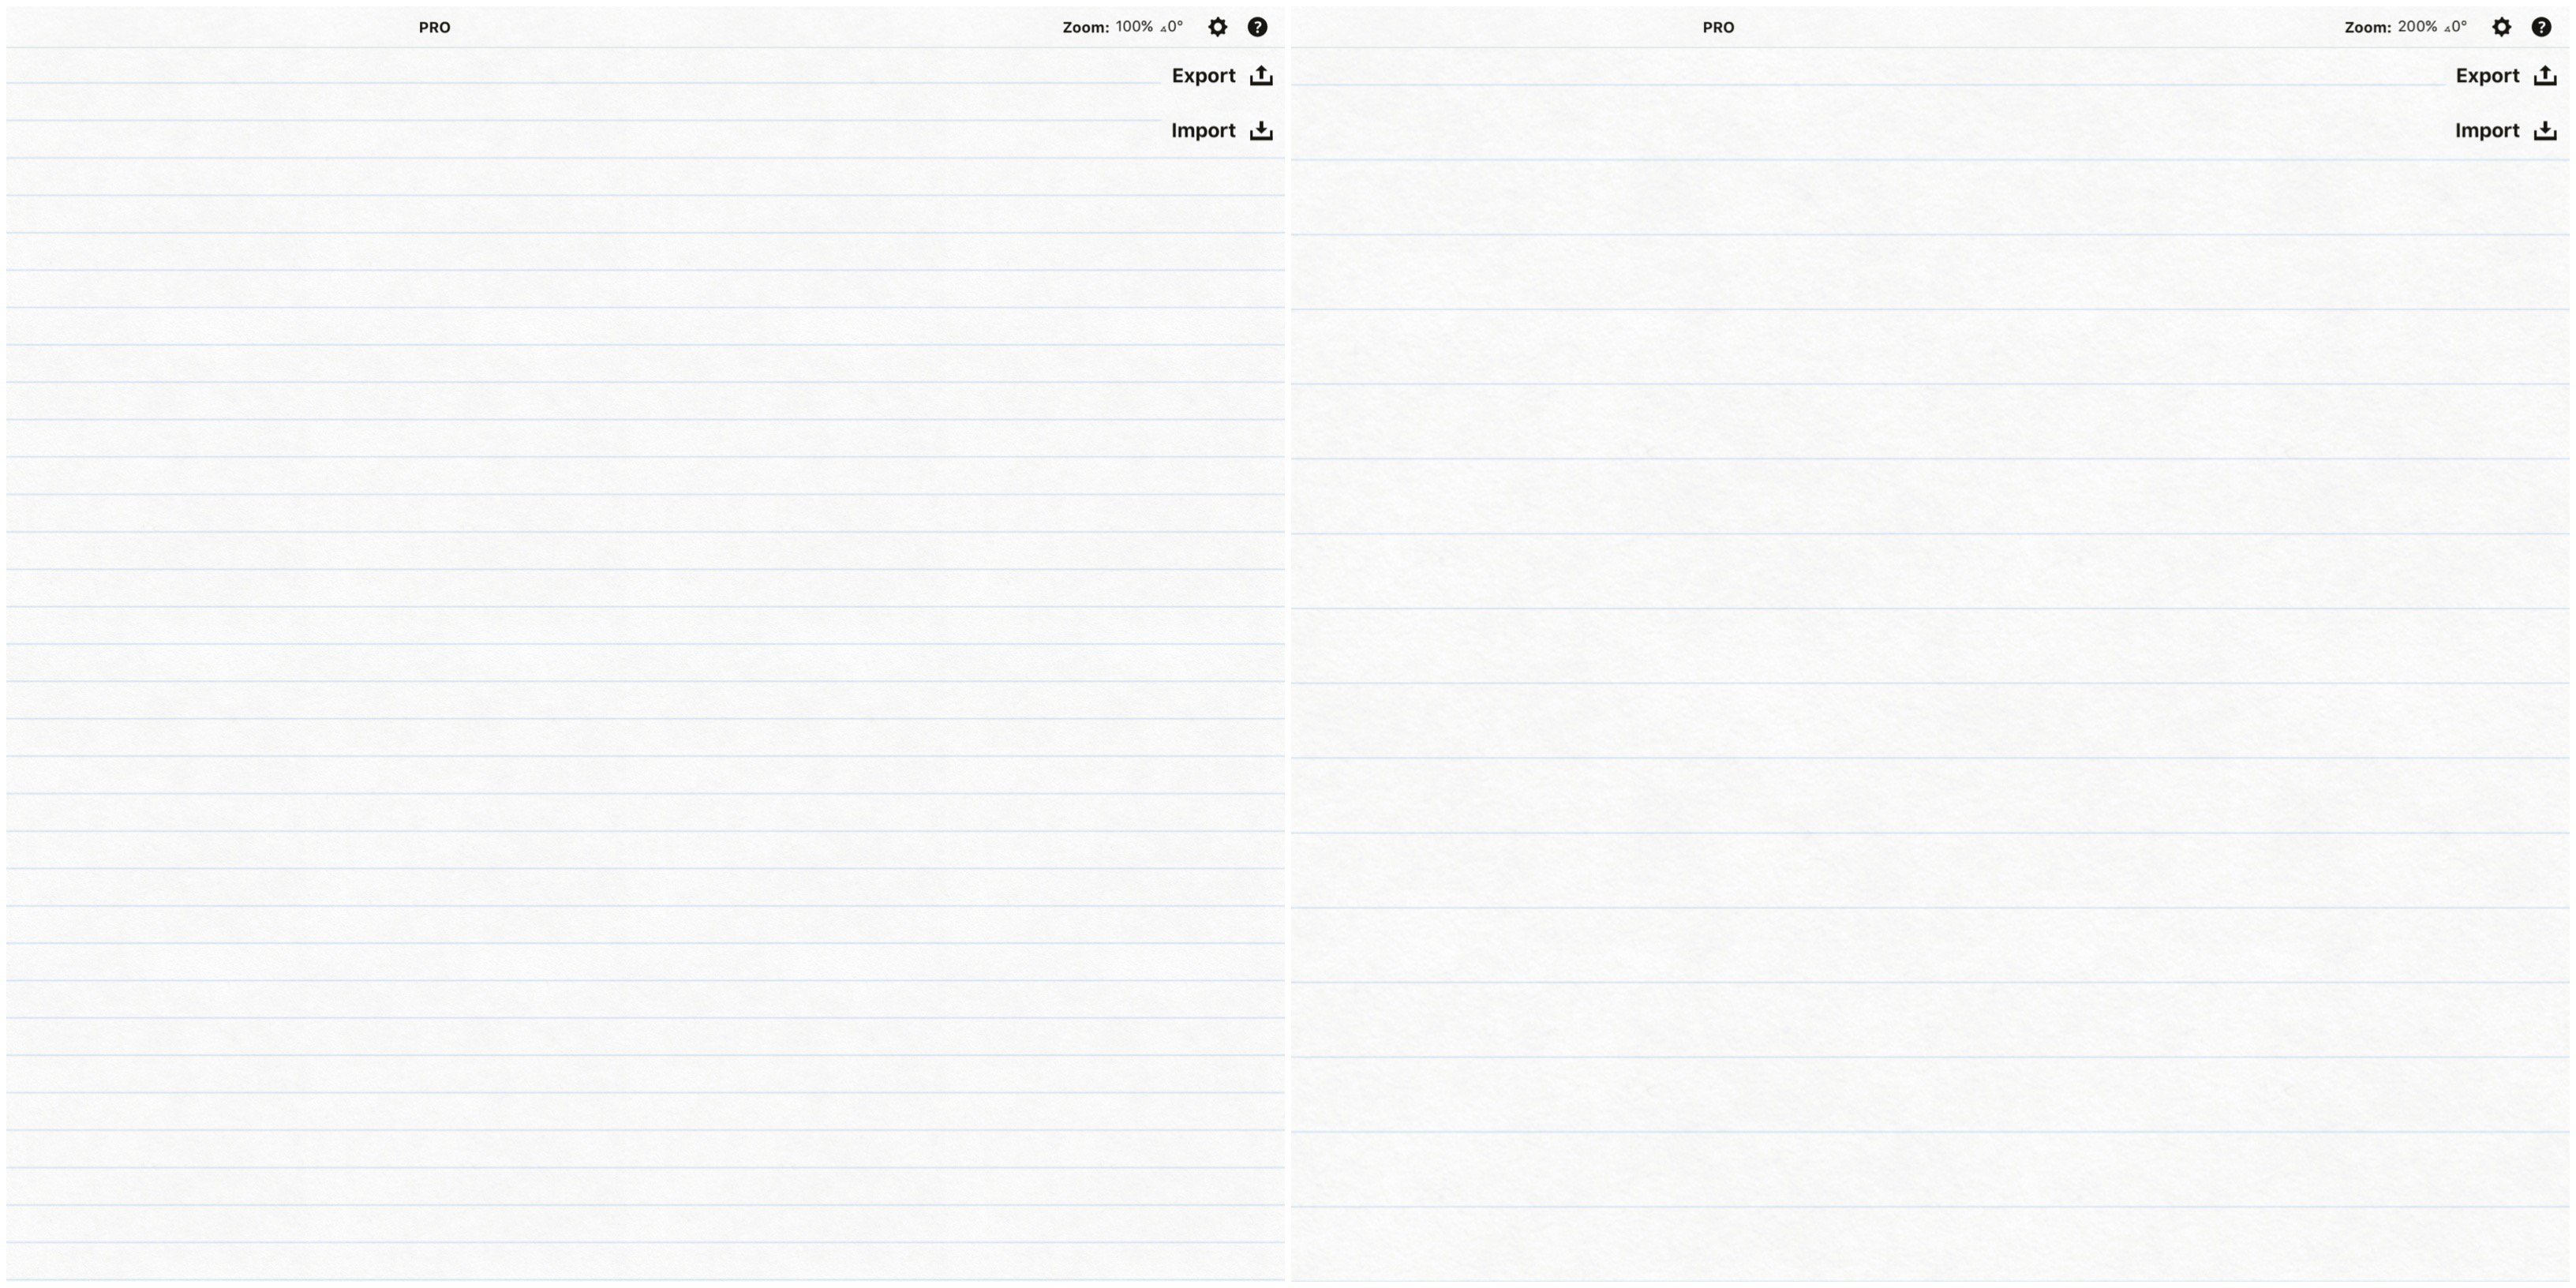
Narrow Ruled lined paper at 100%, and zoomed in to 200%.
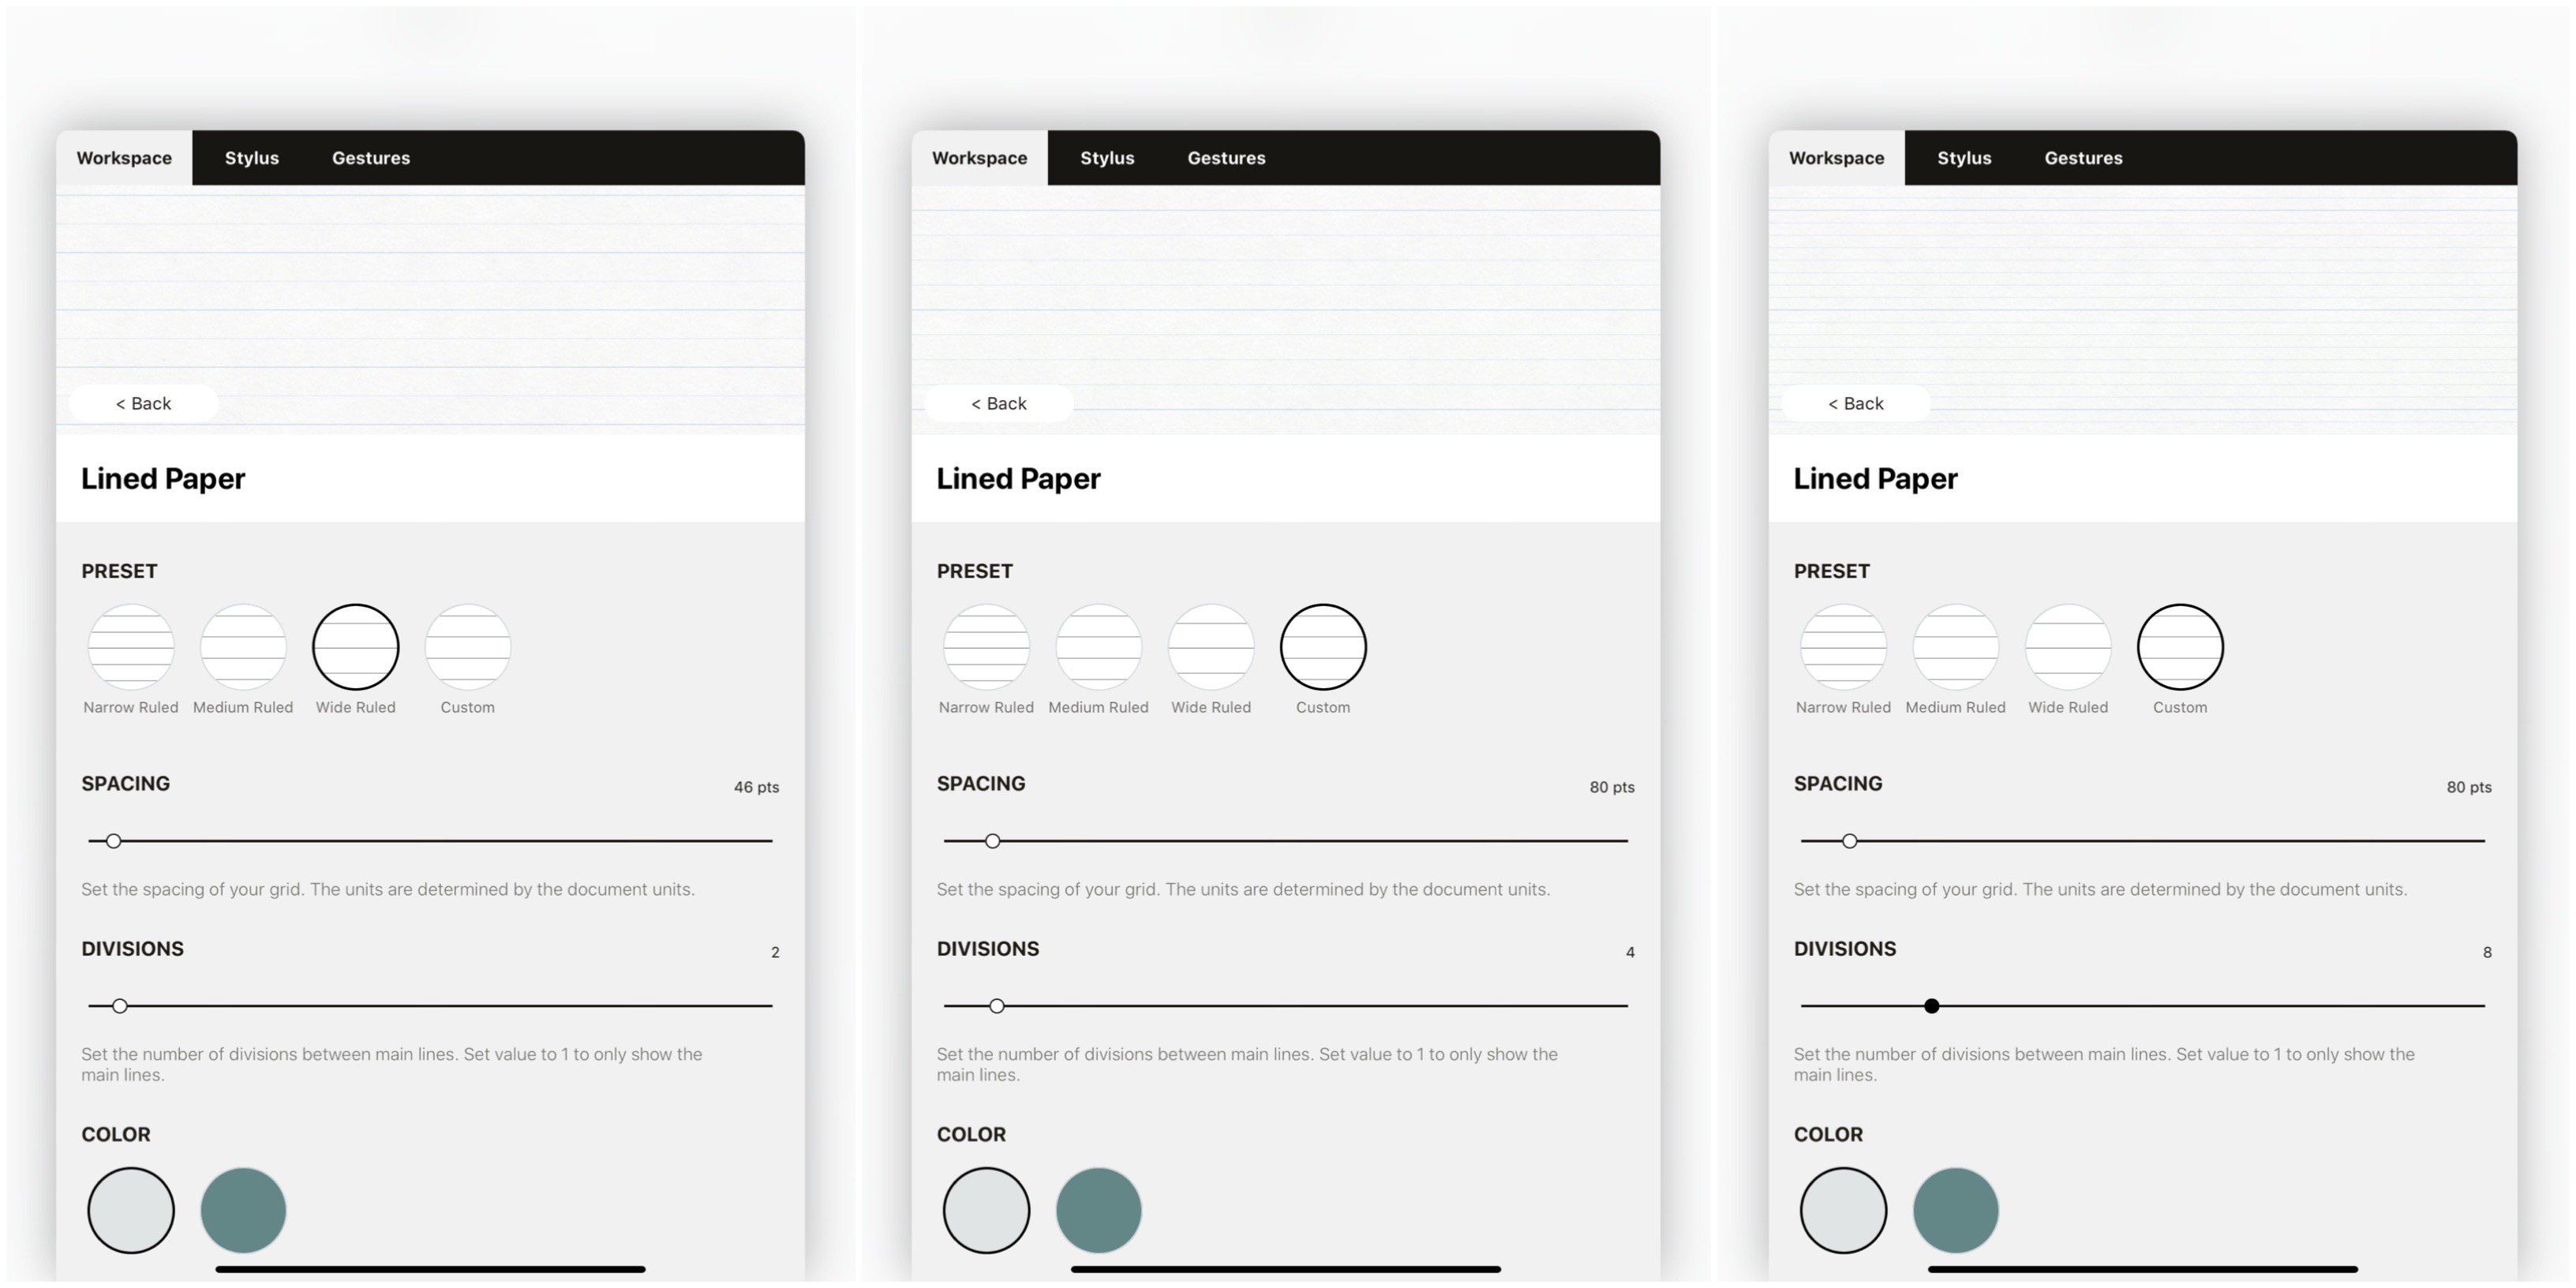
3. Tap the Lined Paper icon again or tap Edit Grid to customize your lined paper. Choose from Narrow Ruled, Medium Ruled, Wide Ruled or Custom line presets. Wide Ruled is equivalent to Elementary school style lining, with a faint line centered between two darker lines.
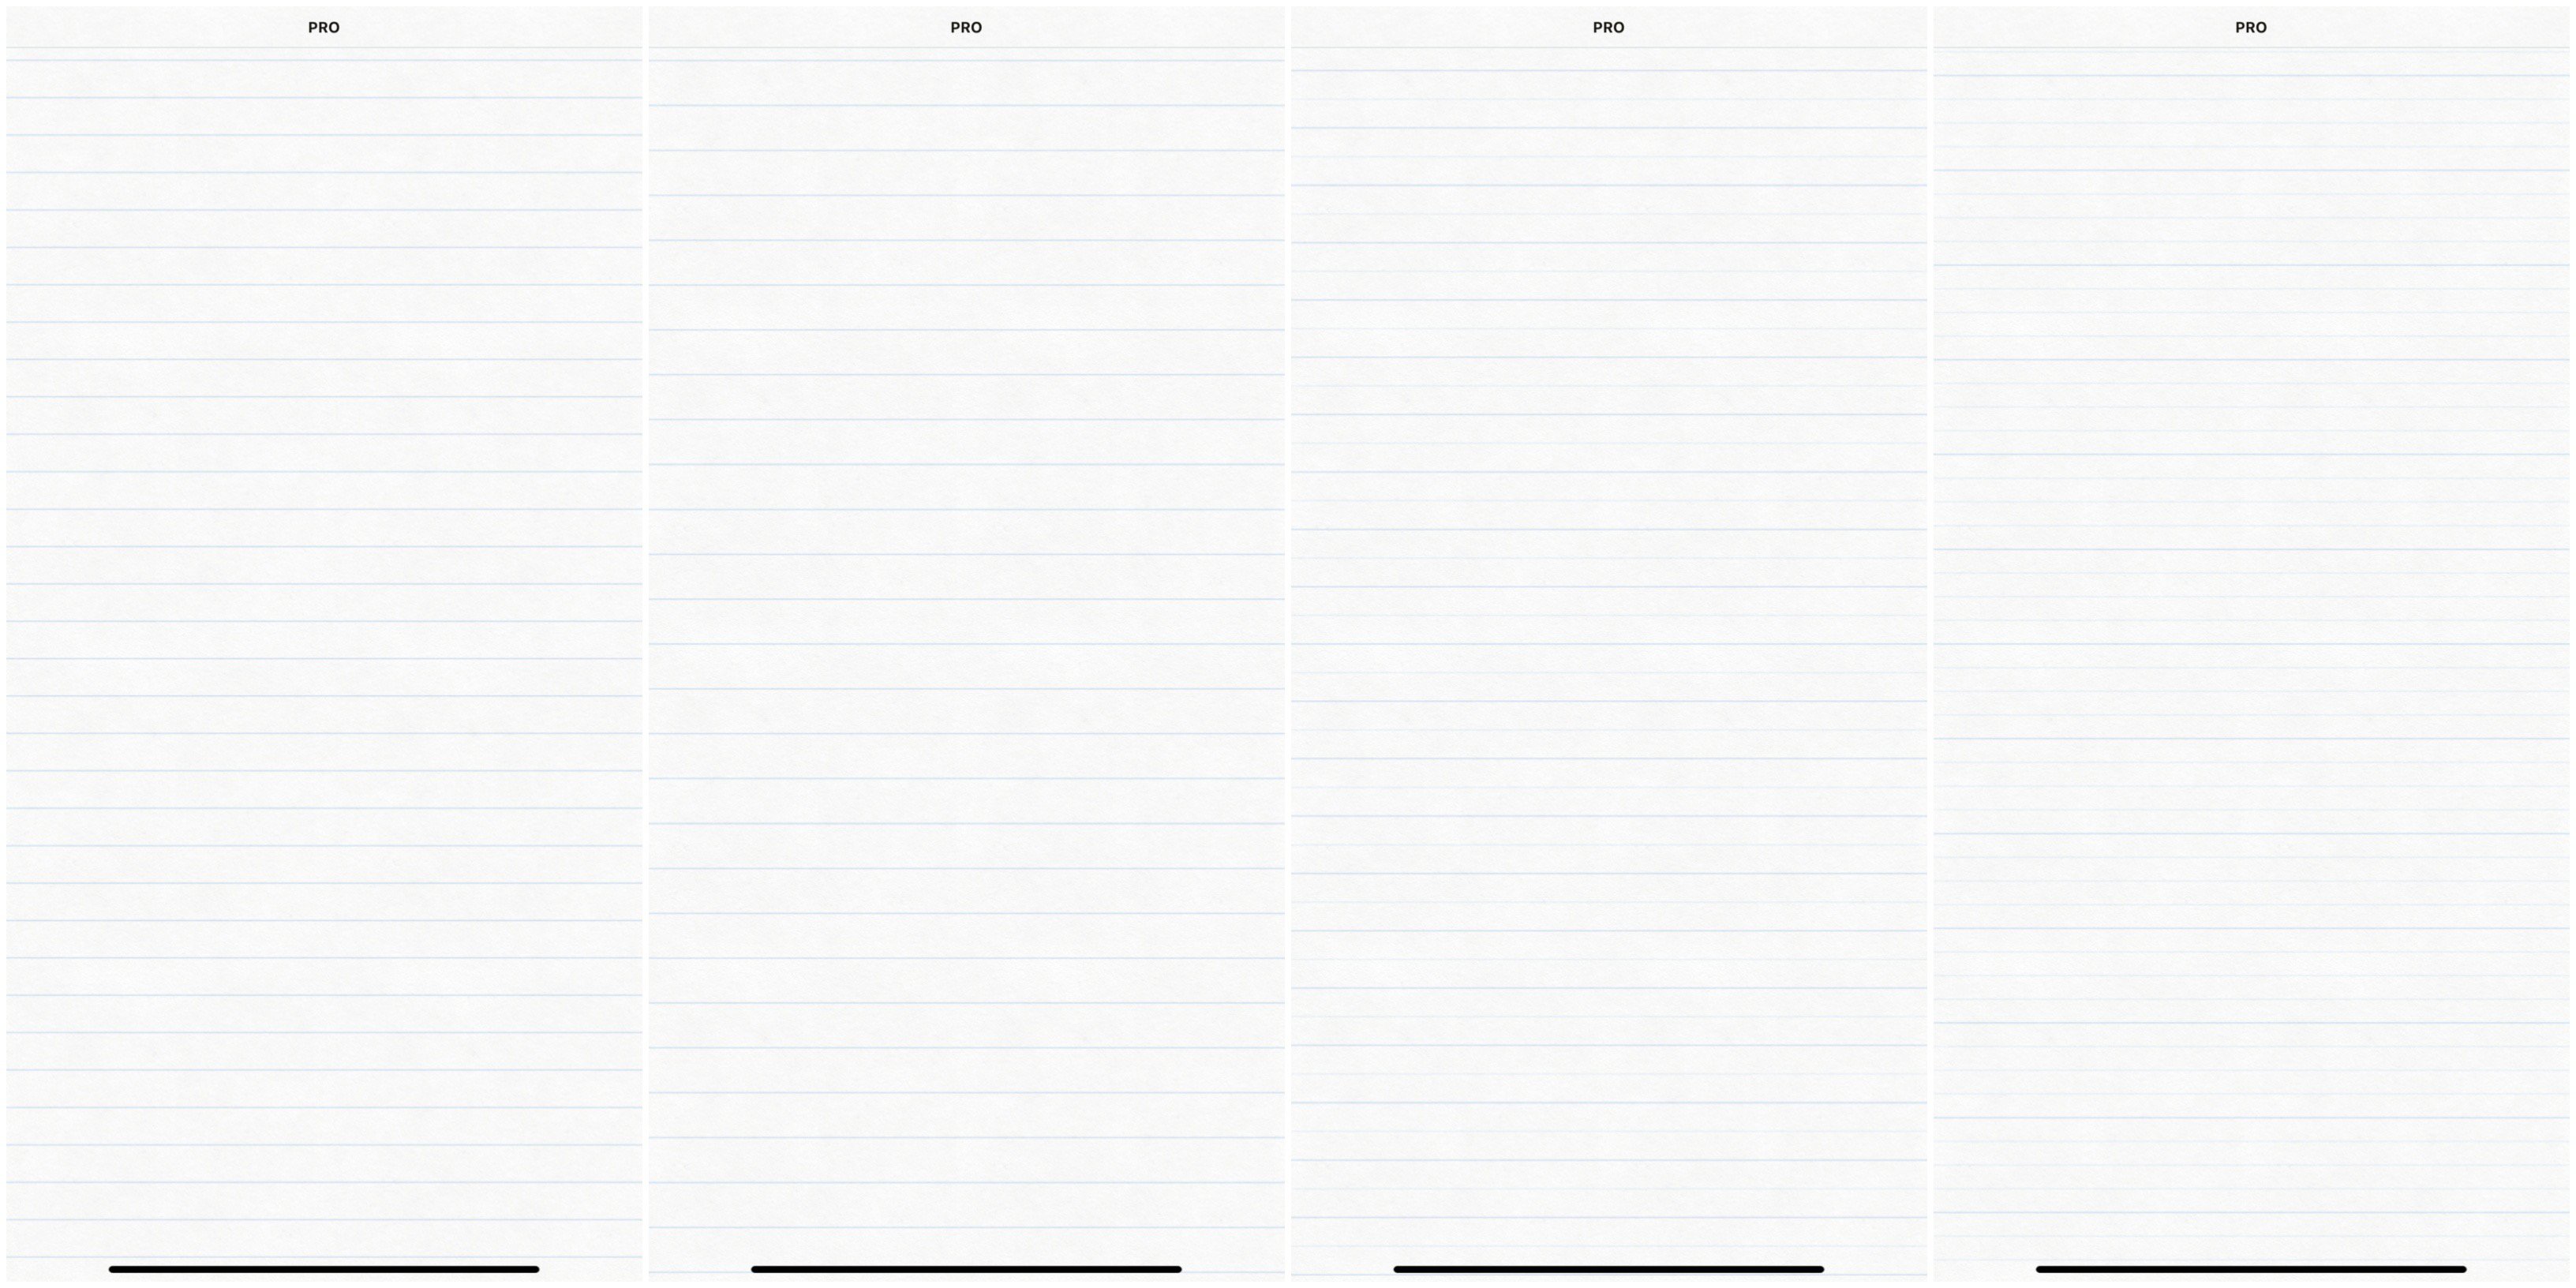
From left to right: Narrow, Medium, Wide and Custom type lined papers.
4. Each preset at the top of the menu allows you to adjust its spacing, divisions, color and orientation. Once you change settings, it will change to a Custom line style. Choose a preset as a starting place, then customize it as you prefer.
Spacing
Use the Spacing slider to increase or decrease the distance between lines. As with any field in the app, you can tap+hold the preset value to bring up a keyboard and type in a distance. Distance units correspond to the Units style you have set in the Settings menu.
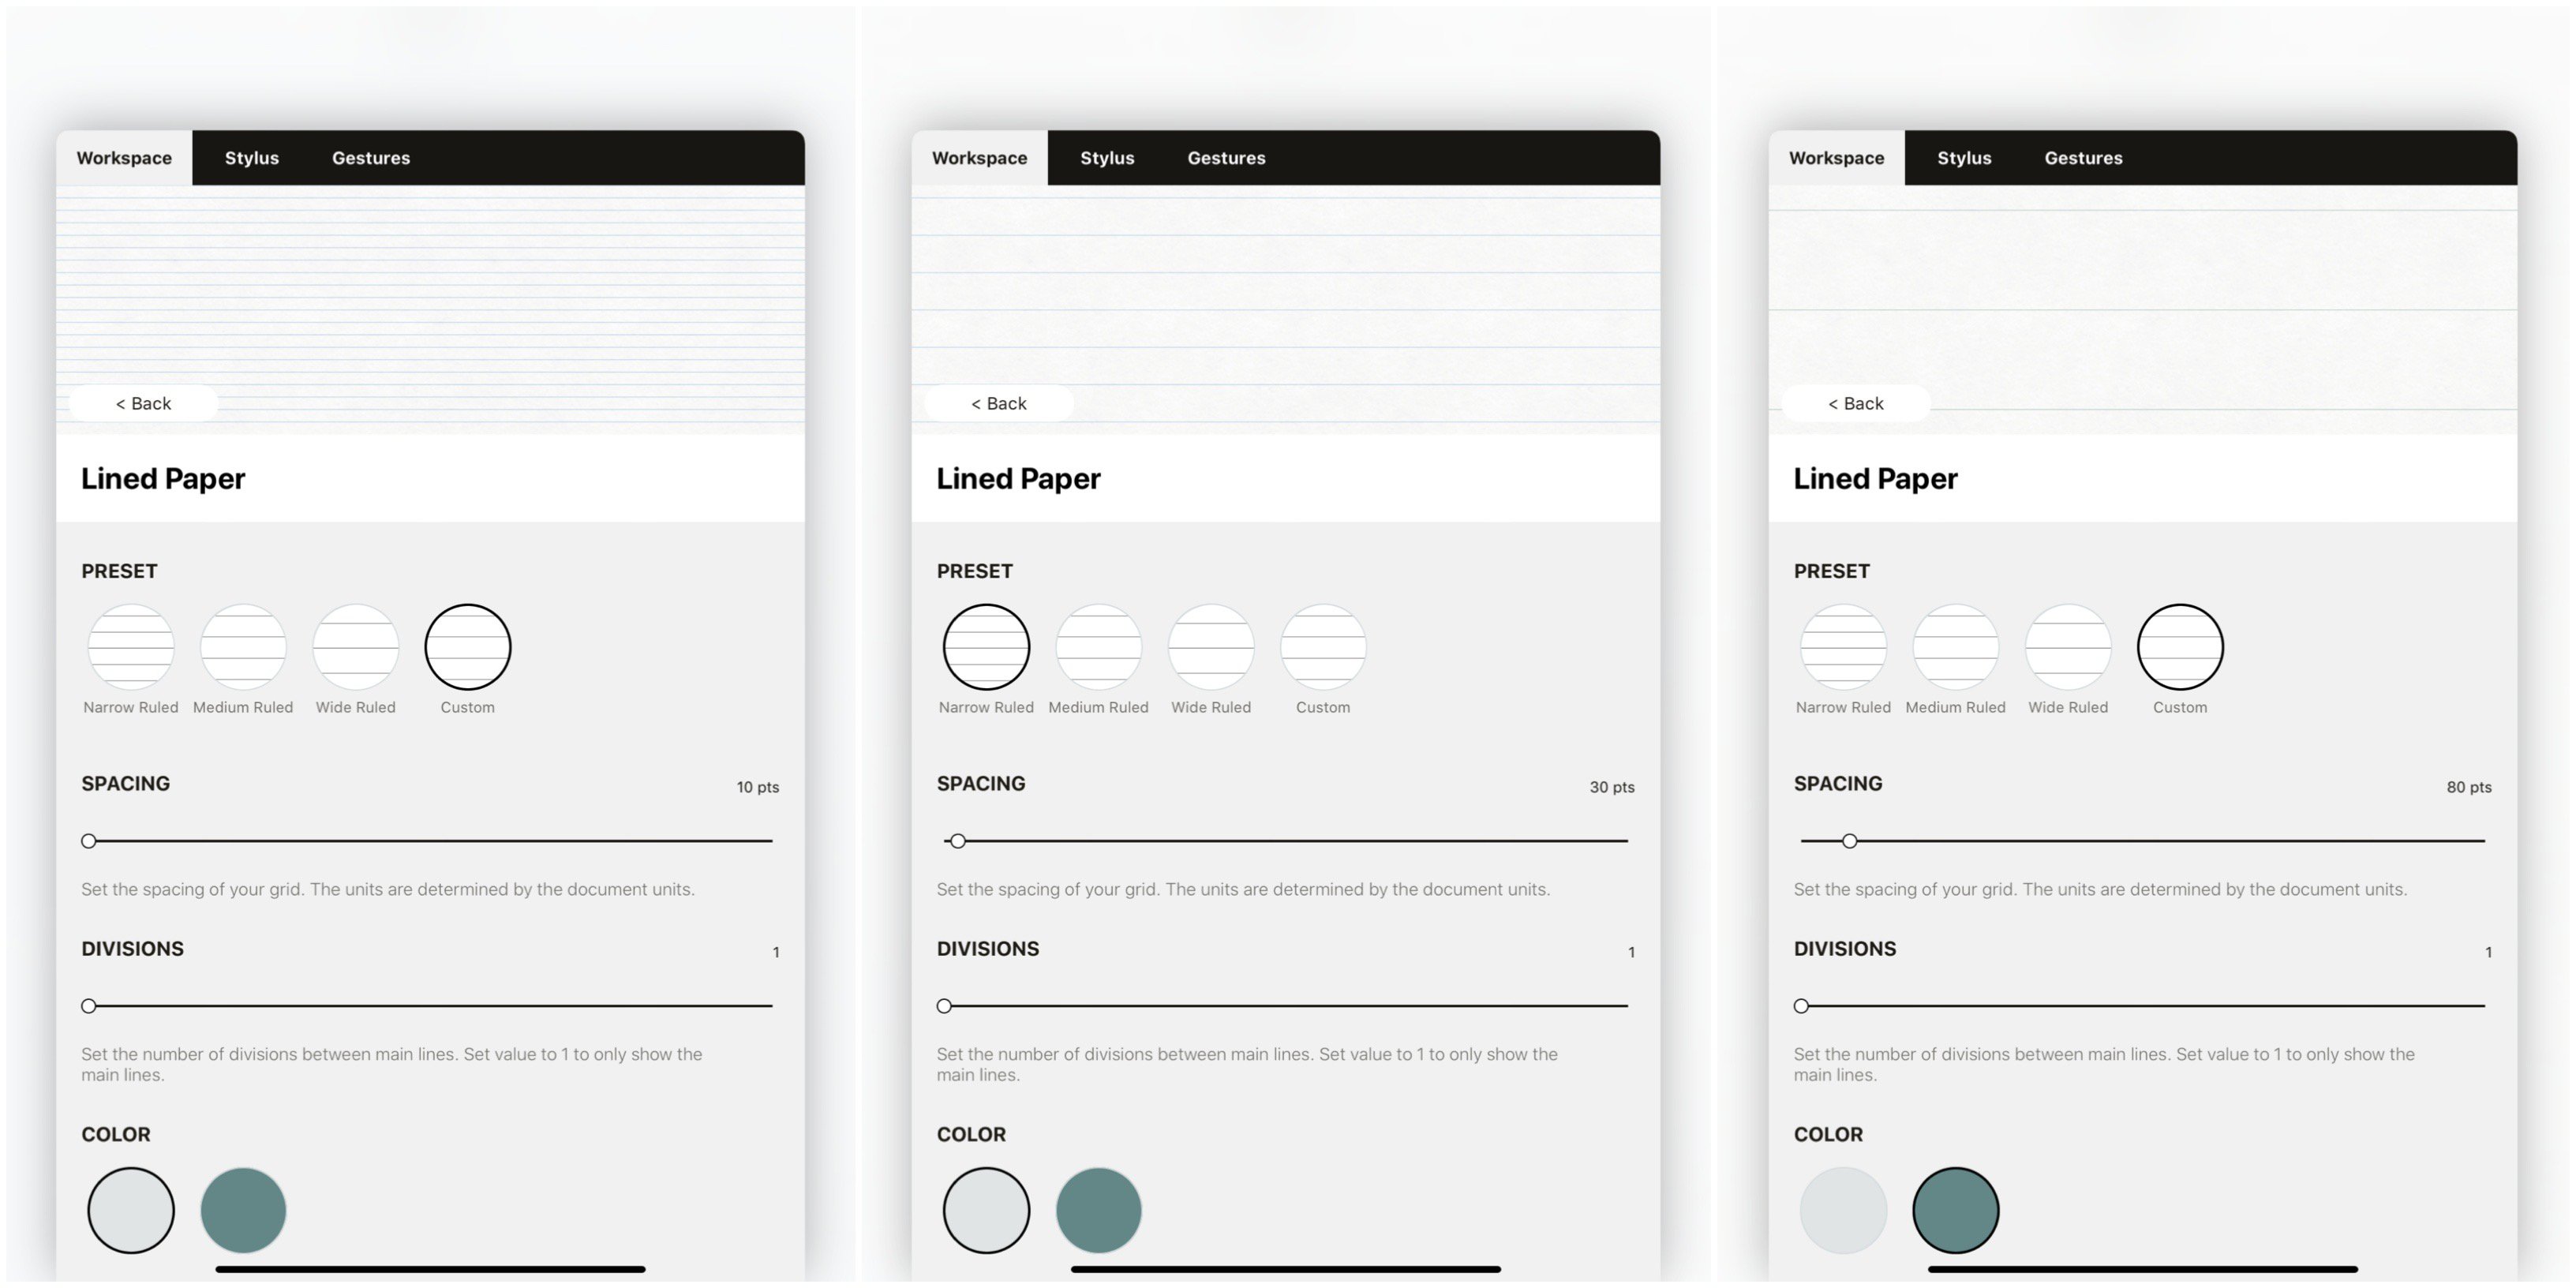
Divisions
Use the Divisions slider to increase the number of divisions between your lines. This can be useful for creating outlines or helping you to organize your thoughts within a space.
Color
You also have the option to change the color of your lines. The Automatic color setting will adapt to the background color of your canvas, so if you're using Darkprint, for example, the lines will lighten to accomodate. If you choose a custom color, it will remain that color regardless of paper background.
To change the color of your lines, tap Custom to select the option (allowing for quick-toggle between types), then tap it again to bring up the color wheel and choose your new color.
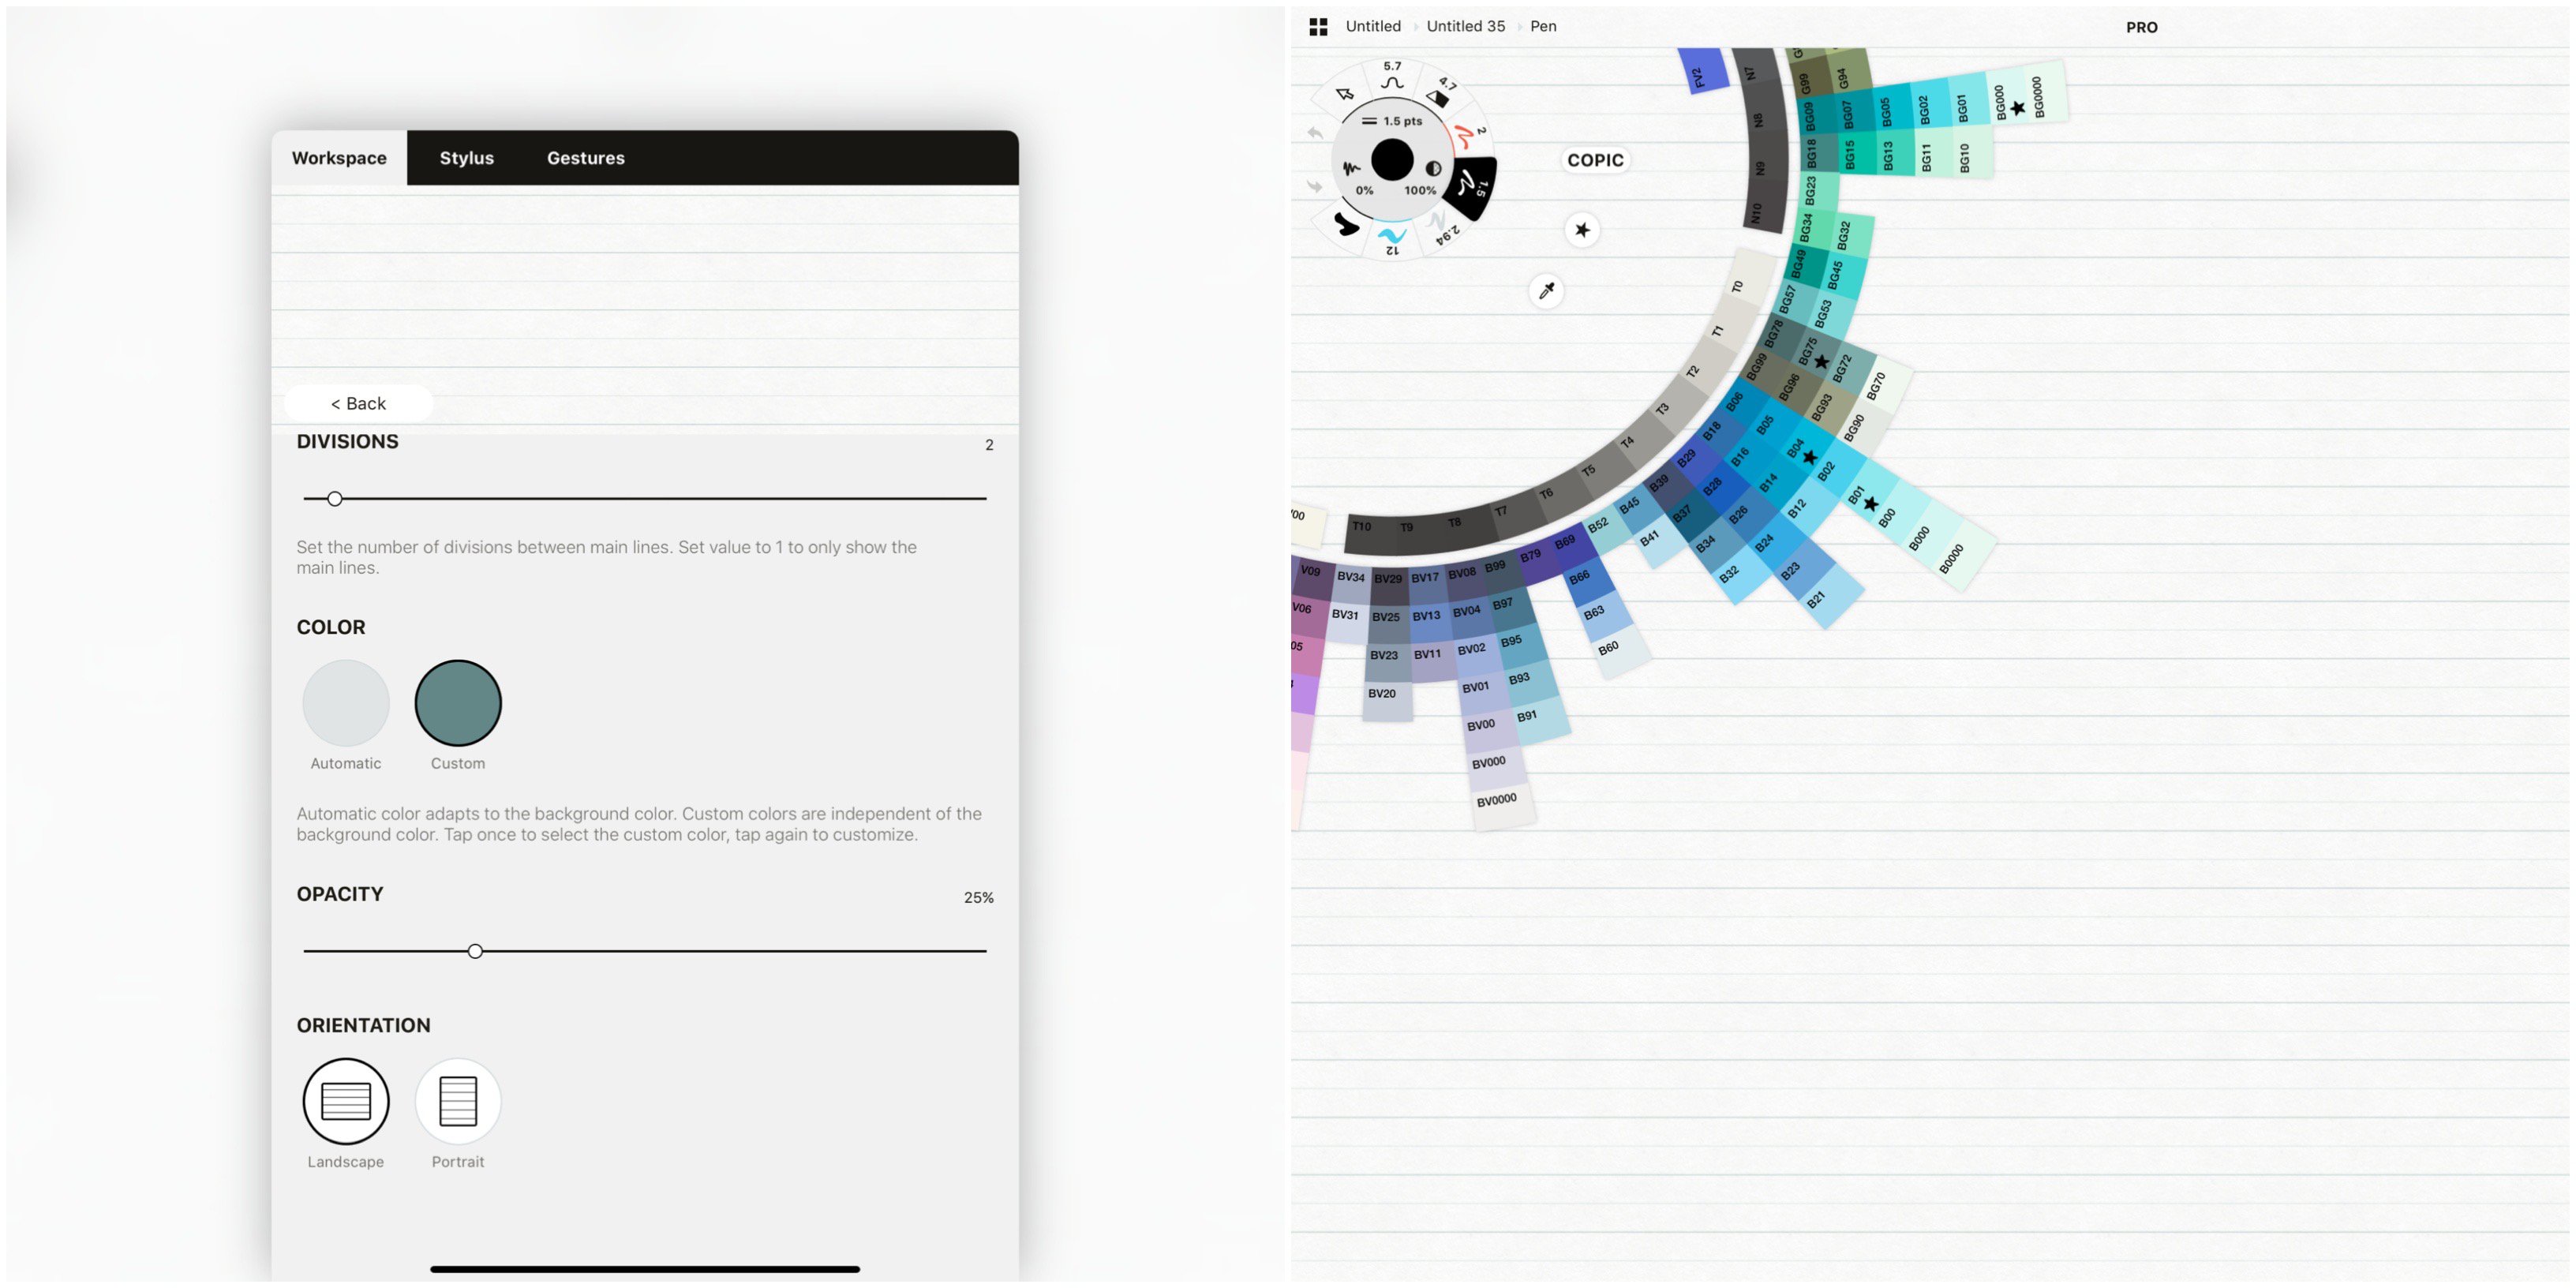
Opacity
Lower or raise the opacity of the lines to suit your style. Keep it low as a subtle underlay, or raise it to create very clear, visible lines on your canvas.
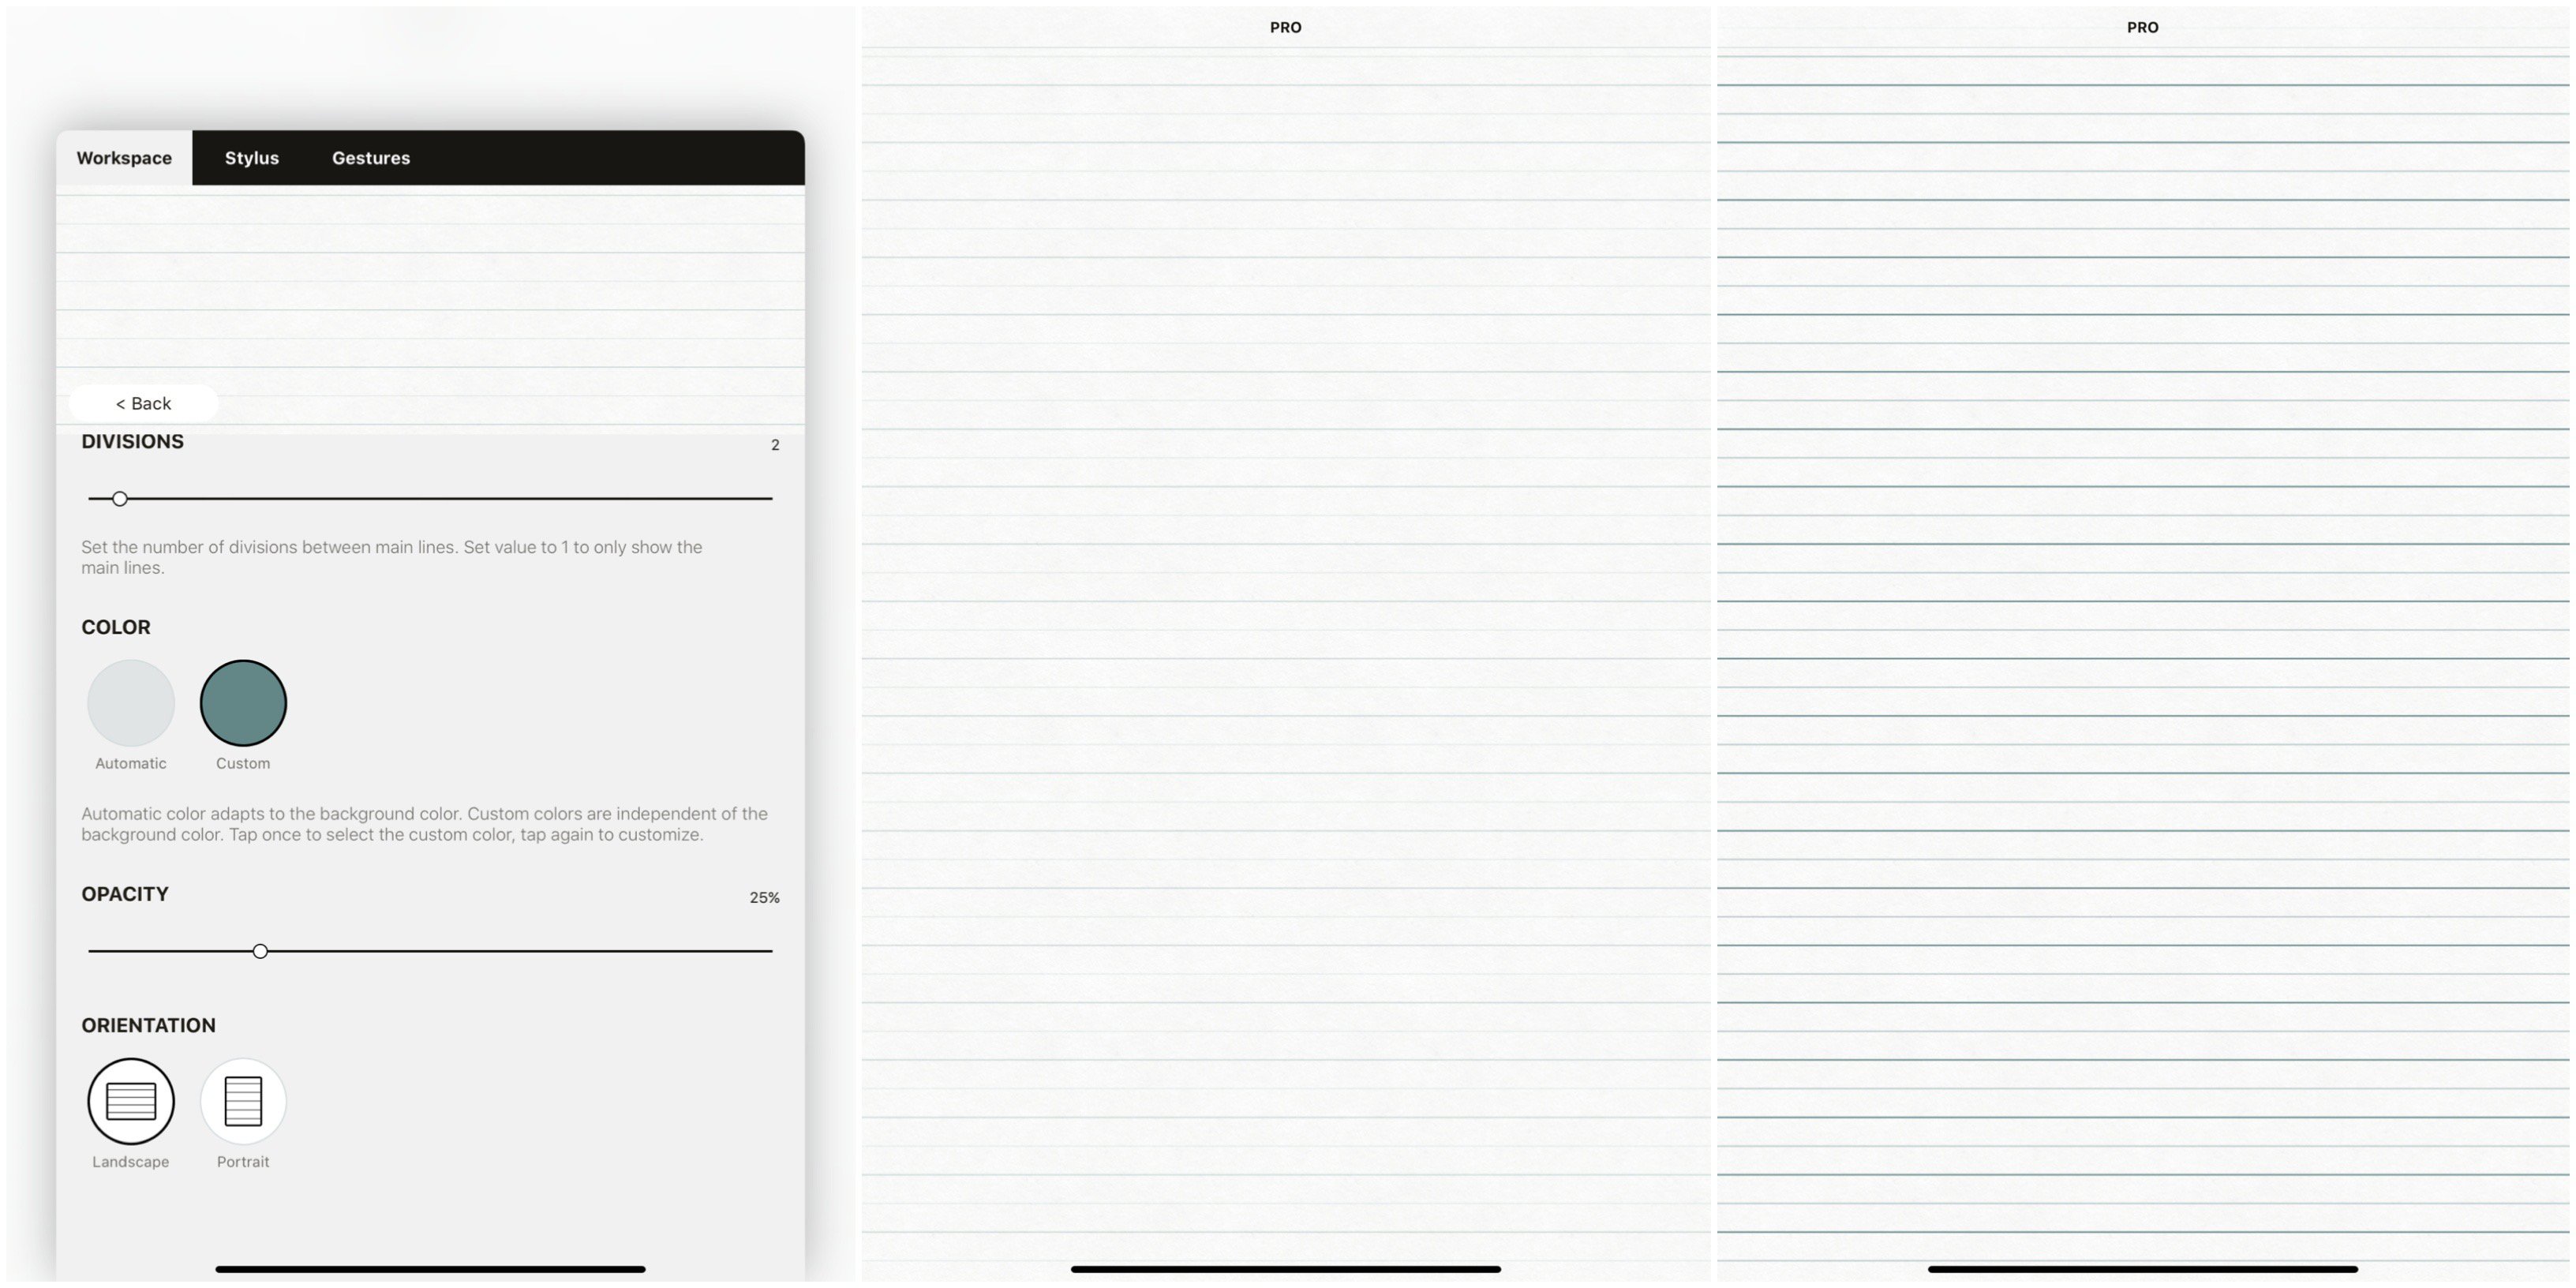
Orientation
Finally, choose your paper orientation. Both landscape and portrait mode will remain in their orientation when you turn the iPad. That said, you can rotate the paper with your fingers and snap it into its alternate orientation at any time, or even treat it like a normal piece of paper and leave it slightly diagonal while you write.
You can customize these settings for any of Concepts' other grids (dot, graph, isometric or triangle), as well.
Adding a Paper-Sized Artboard
Concepts' artboards are easy to set up and are scaled to real-life dimensions, so if you want to export and print your notes, all you have to do is set one up in the Settings menu. You can set it up at any time in your note taking process, scale your notes to the artboard, or even move the artboard around to capture just the notes you want. You can read all about working with the infinite canvas and artboards here.
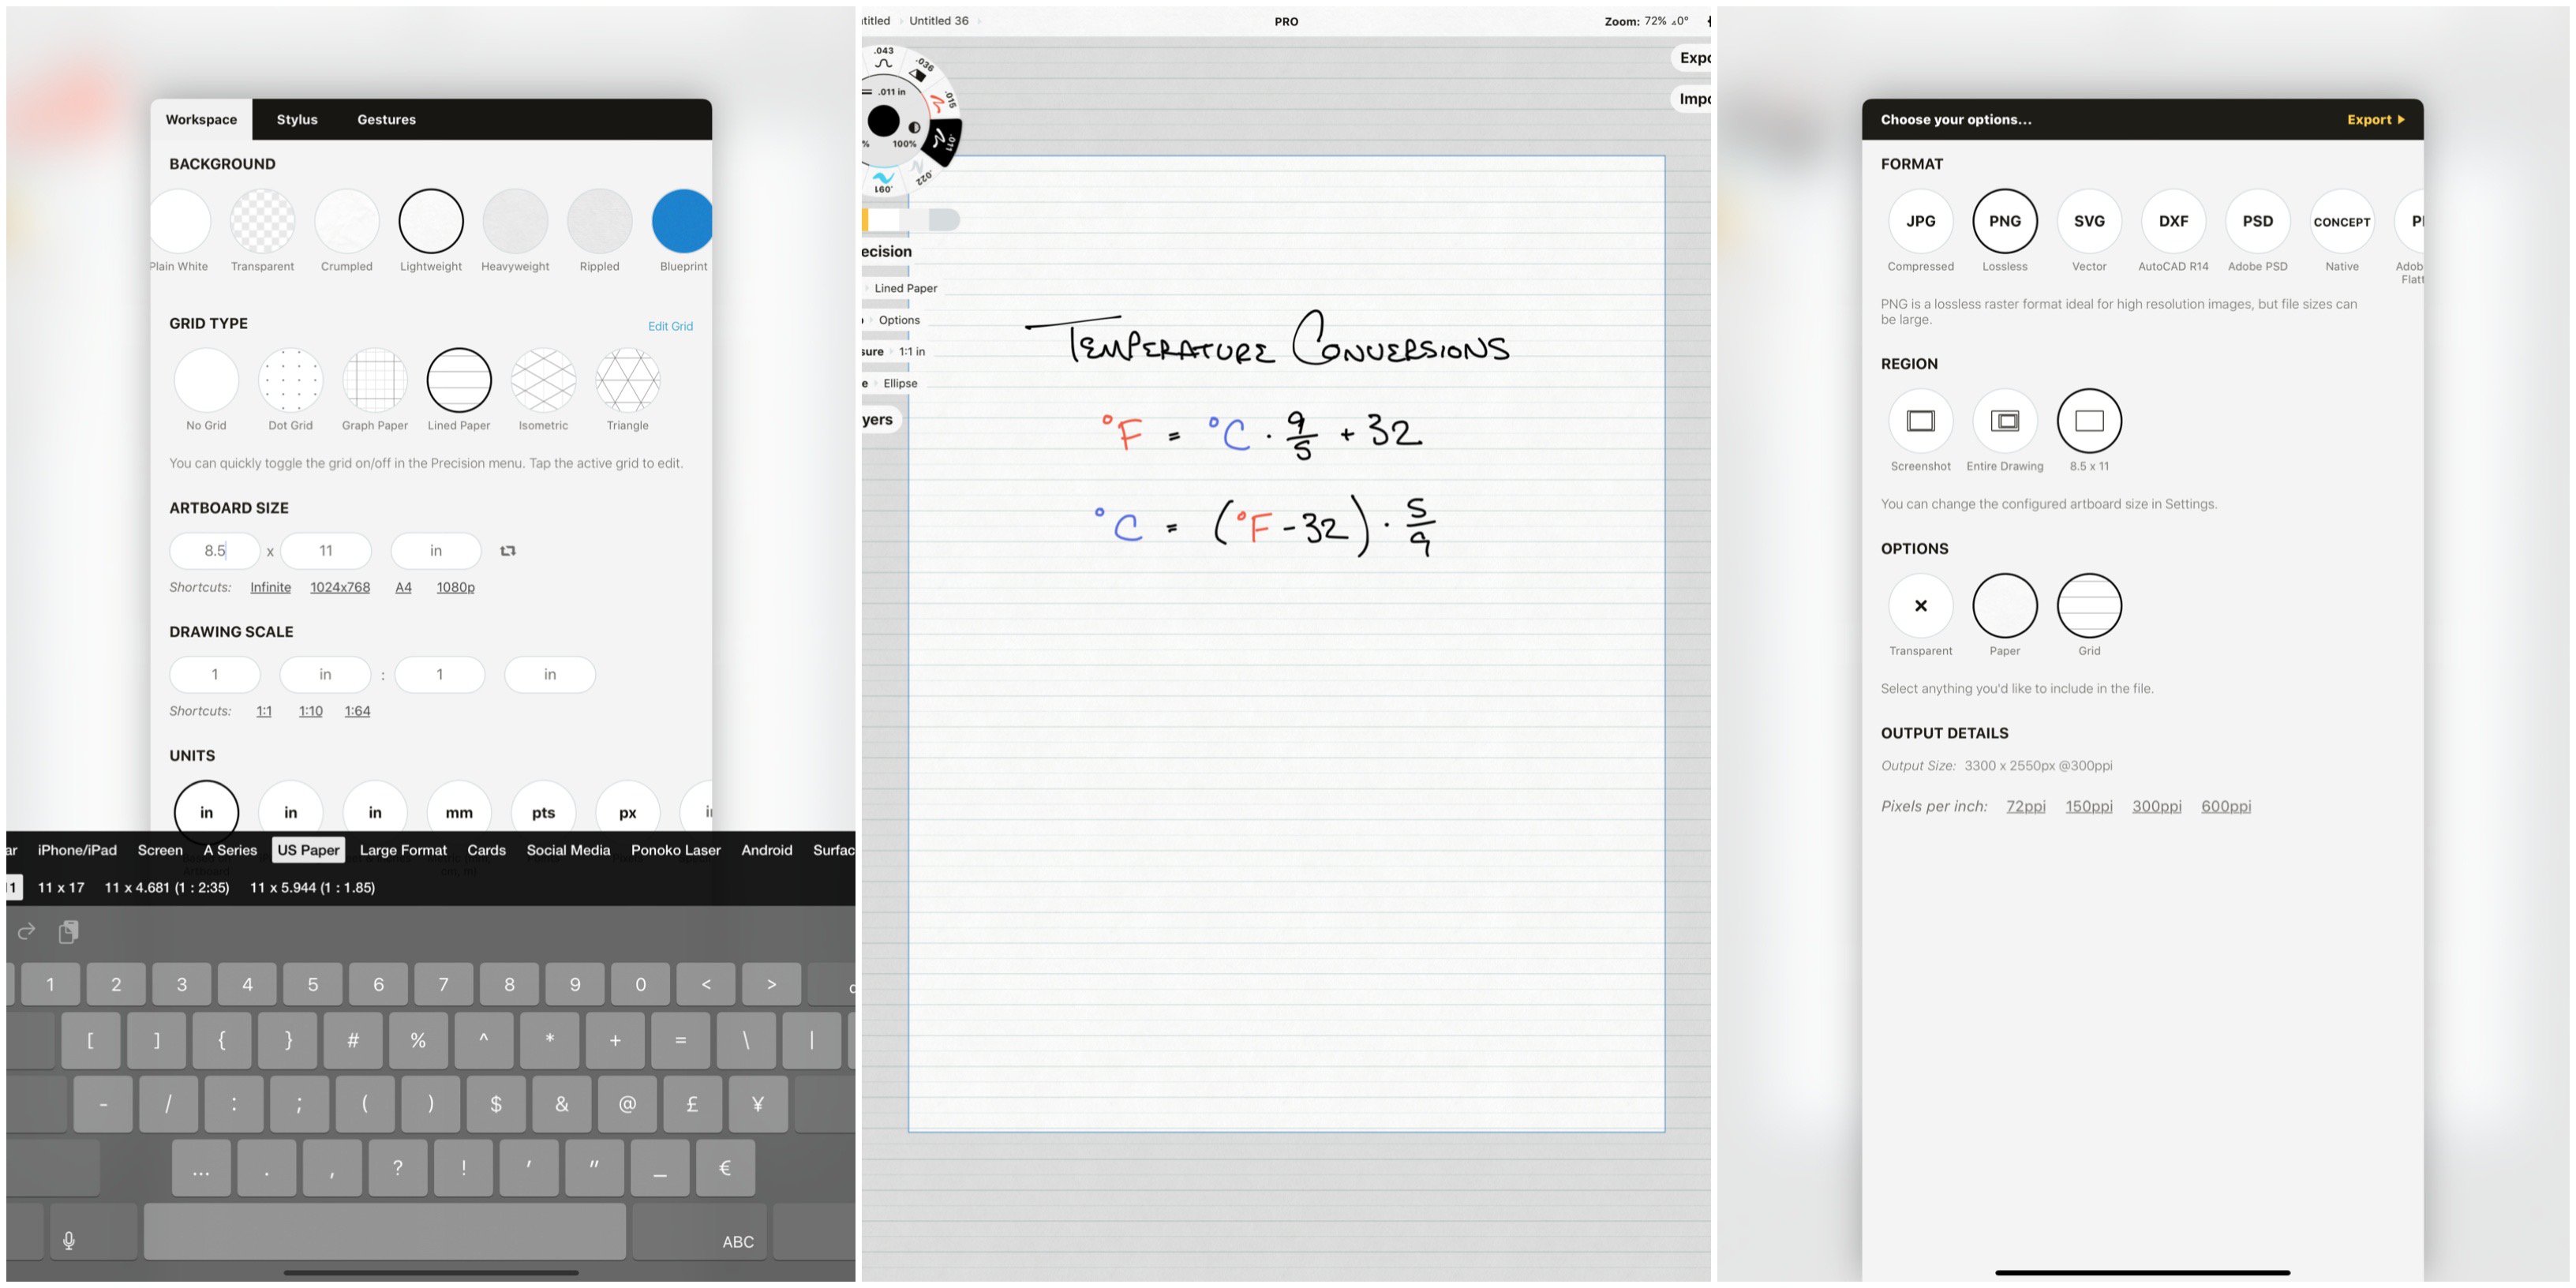
To set up an artboard, head to Settings > Artboard and tap a field. Find your paper size from among the shortcuts above the keyboard or type it in (for example, US Paper > 8.5" x 11", or A Series > A4).
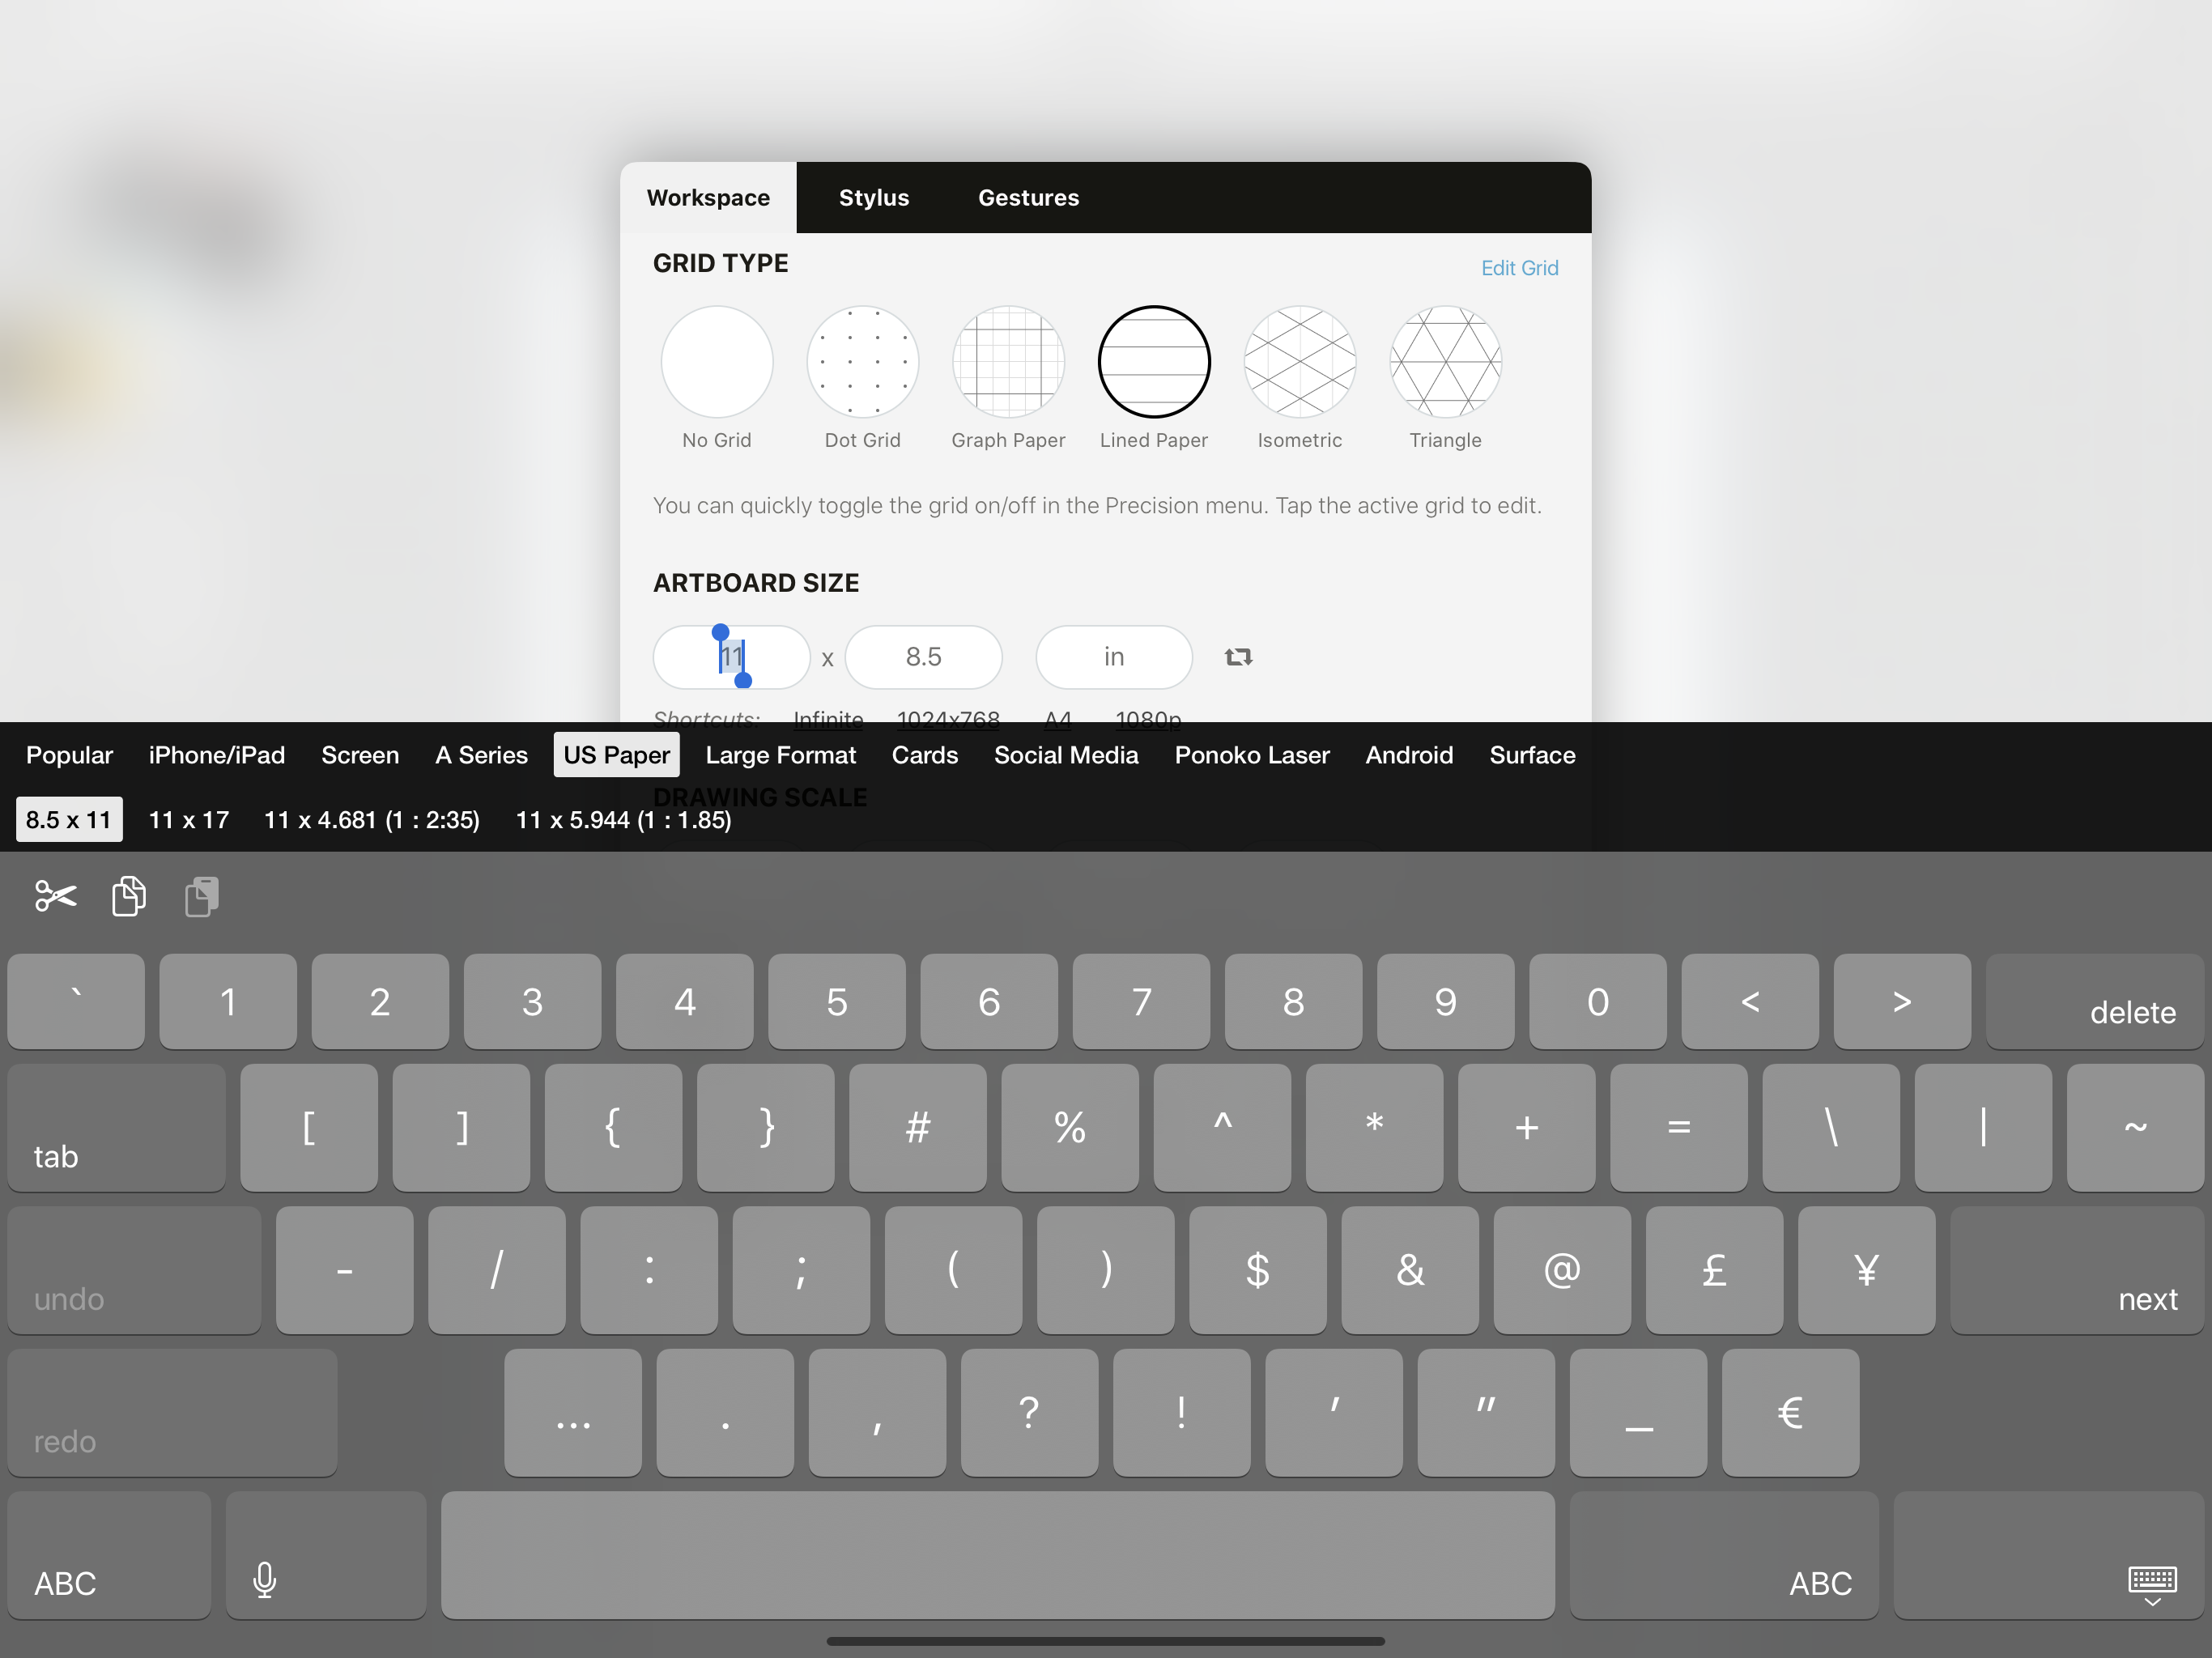
Back on the canvas, you'll see the artboard outline scaled to the dimensions you entered. Tap+hold+drag on the artboard boundary edge to drag it around your canvas. If your notes are too large or too small to fit inside the artboard, select them and scale them to size (read how to Select here). Selection is also a great way to edit or reorganize notes that have morphed or spread around the canvas.
A couple tips:
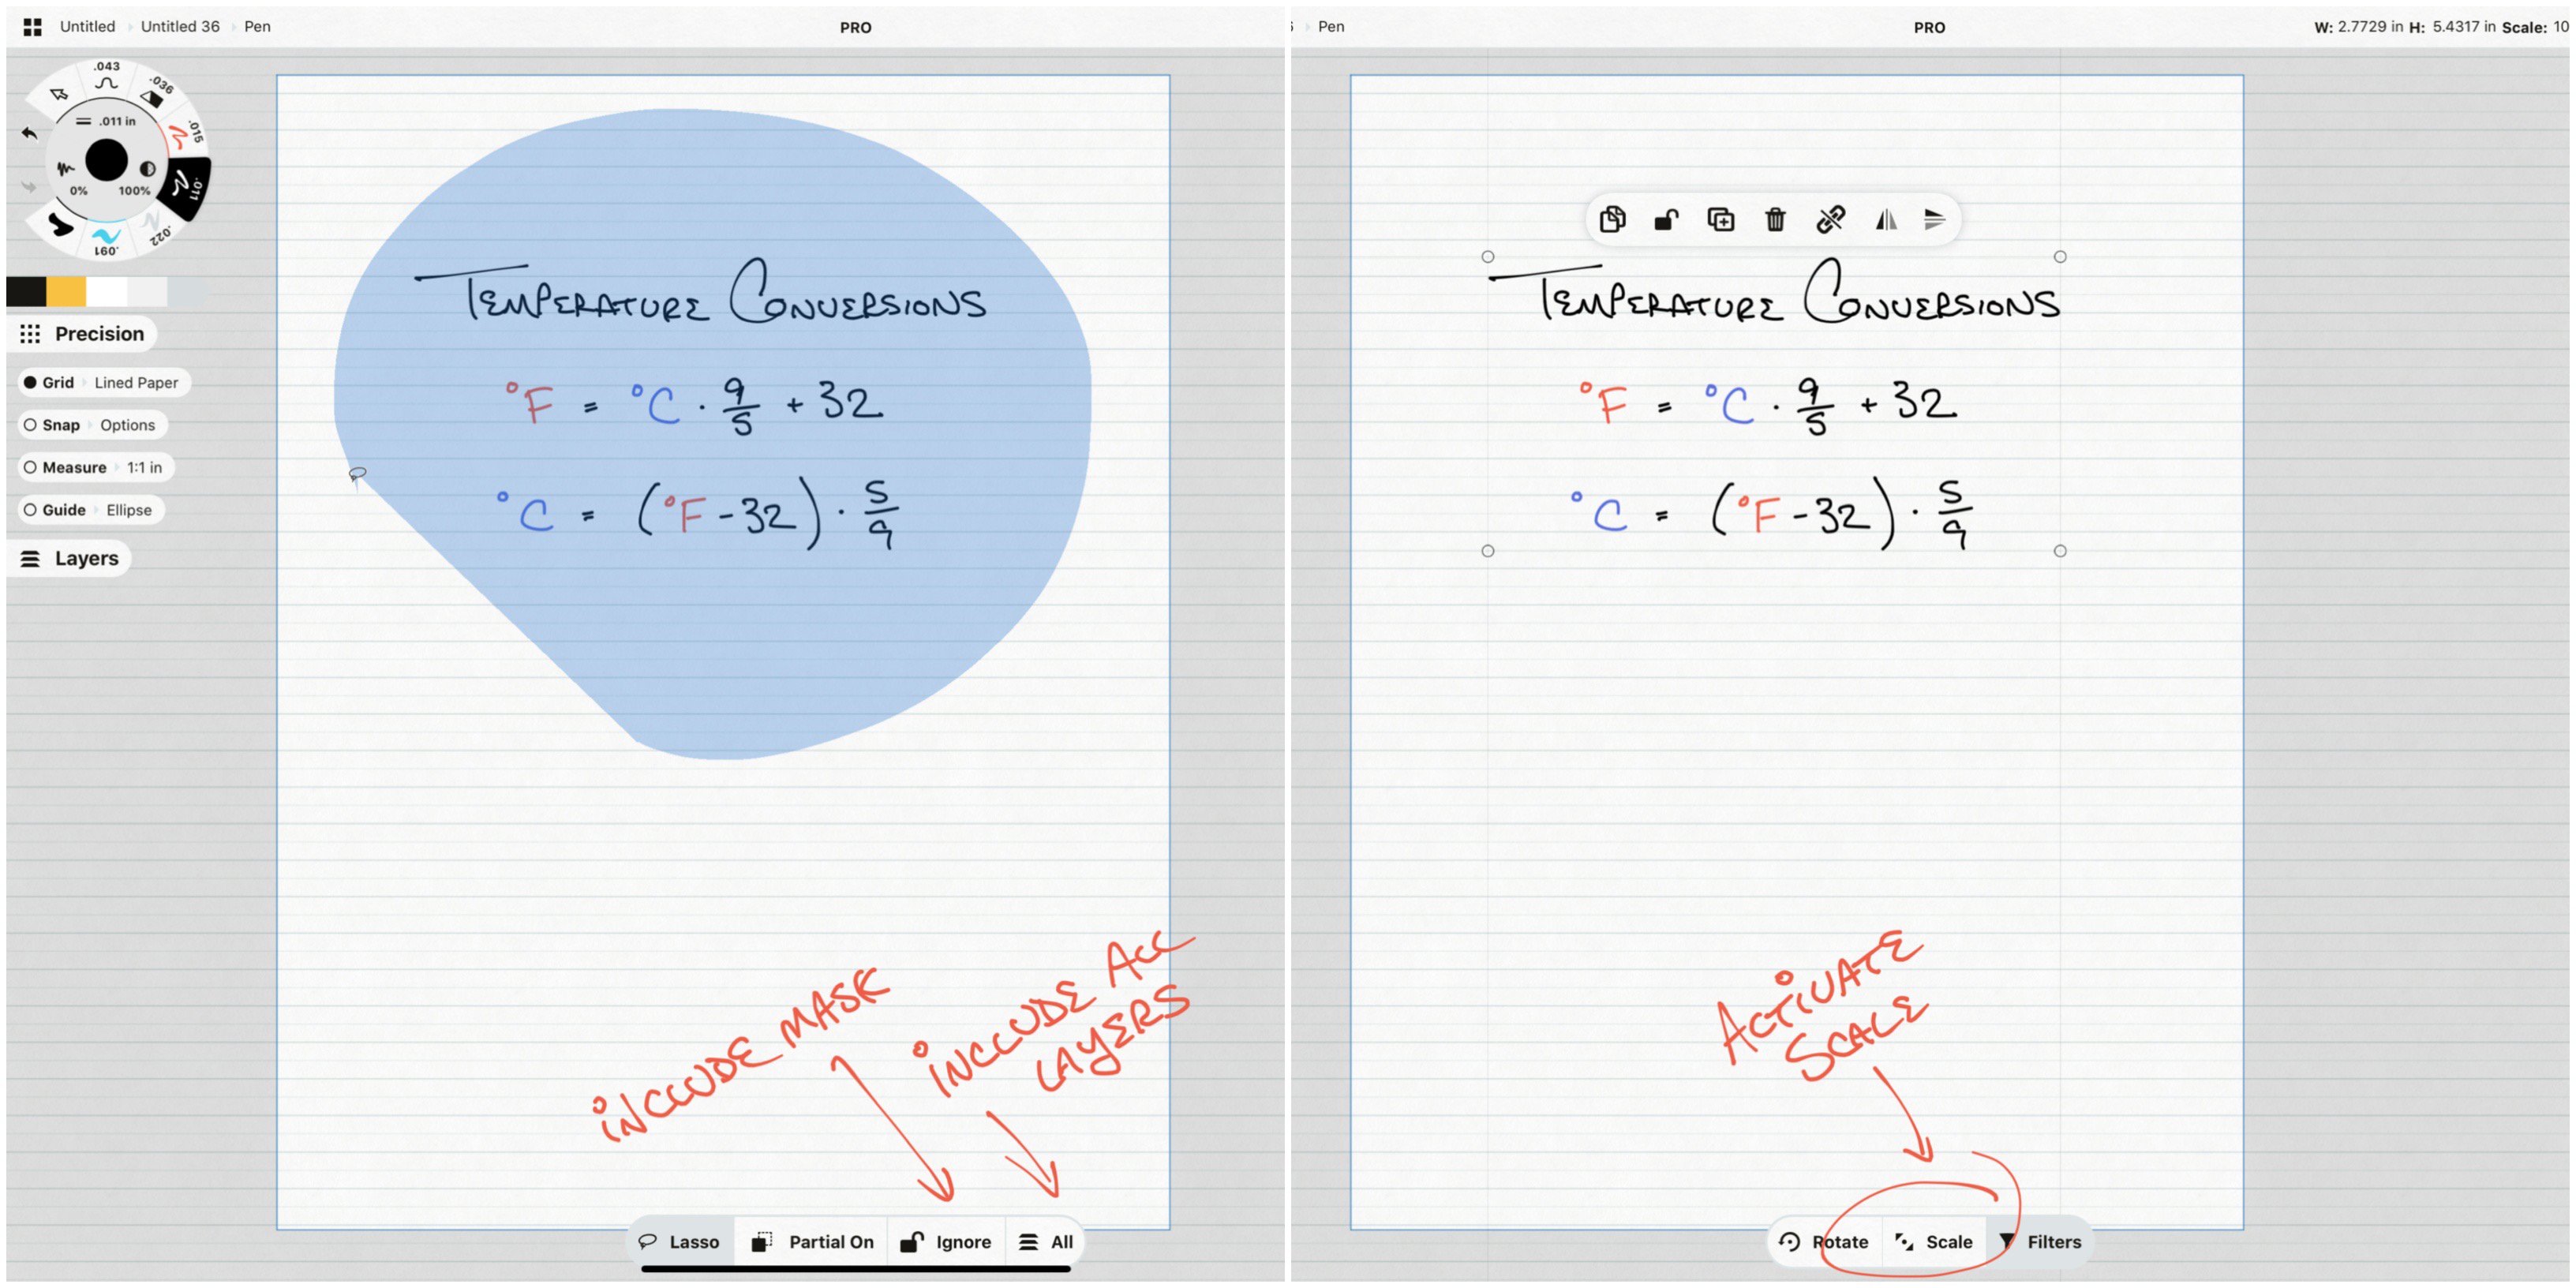
Remember to activate Scale and All Layers in the Selection menu to scale them appropriately. If you've used a mask, remember to include it in the selection as well by unlocking it in the same menu.
If you're erasing regularly, the Slice tool set to a larger size is an excellent permanent eraser.
Printing Your Notes
Once your notes are how you like them, tap the Export menu. Choose your file type, the Custom region if you've set up an artboard, your background type and resolution. Then tap Export in the top right corner of the menu. (You can learn more about the app's exporting options in our tutorial, Tips for Exporting Your Designs.)
From here, you can email or text your notes directly to your teacher or friends, share them to your social account, save them in a Cloud file labeled for your work project or your child's homework practice, or print them to turn in as homework assignments.
Send your notes straight to a printer from Concepts if your iPad and printer are set up with AirPrint, or export your page to email, text, files or image library and print from there.
If you have questions about setting up your Lined Paper grid, please head in-app to Help > Ask Us Anything or email us at support@concepts.app. We'll be happy to help.
By Erica Christensen
Recommended
Setting Up Your Menus, Brushes and Presets - Learn how to customize your canvas layout, menus, tool wheel and brush presets.
Working with Your Infinite Canvas - Explore your ideas, sketch everywhere, and export just what you need on Concepts' infinite canvas.
Creating a Project Template - Instead of changing tools every time you change direction, save yourself some valuable sketching time by creating a template for your project. Free template downloads included.
The Slice Tool: Divide and Conquer Your Ideas - Learn how to use Slice to trim, cut and erase your sketch.
Tips for Exporting Your Designs - Learn how to flexibly format your notes and sketches for export.