Learn to Draw Series
Master Your Line Work
Lines are powerful tools for visualizing shape, texture and dimension in your drawings. Learn how to apply simple dynamics to your line work to give form to your ideas in this tutorial with TopHatch designer Lasse Pekkala.

Course Materials
Download Course Materials (includes JPG, transparent PNG, PDF and concepts)
Learn how to import and use your files below.
Tools
To follow along with this tutorial, you'll need just a pen and pencil and a piece of paper or digital drawing app like Concepts.
Set Up
If you have a comfortable space you like to spread out and think or sketch in, go ahead and set up there. If you're out and about, bring some paper and a couple of sketching pens in your bag, or your digital tablet and stylus, and find a spot where you can move your arm, shoulders and body comfortably.
If you’re using an iPad, you can watch the video and sketch at the same time using iOS’s split screen ability:
1. Open the video link.
2. Swipe upward from the bottom of the screen to bring up the command bar.
3. Tap+hold+drag your drawing app's icon and drag it upward to your preferred drawing side (right or left).
4. Expand it to split screen by tap+hold+dragging the inner side edge of the interface toward the center of the screen.
Sketching Tips
For this tutorial, you only really need one tool. There are so many ways to visualize things by just using lines. Lines can define space, shape and volume. They can be precise, relative, implied... measured, directional or symbolic. By varying the dynamics of your lines, they can be used to suggest the importance of an idea - its value, texture or emotion. This tutorial will help you to understand the key applications of lines, to help you solidify your designs and communicate your ideas efficiently to others.
Dynamics and Line Control
• Any drawing tool can give you several types of strokes when you vary the pressure, sharpness or angle you hold the tool.
• Each stroke type serves different purposes. Consciously experiment with the pencil you are using and pay attention to how flow, width, and speed vs stopping deliberately affects the look of your strokes.
• Slow, smooth and steady lines will give the impression of solidity, while flowing, quick or curving lines tend to indicate dynamic movement.
• Pay attention to how adding contrast in your line work and varying your strokes will help add realism to your sketch.
Hierarchy
• Architects apply a specific hierarchy of lineweights to their design sketches. They will block out an initial composition with thin lines so it’s easy to make changes and figure things out without too much commitment. Then they add thicker lines to give a sense of depth to the drawing. Thicker lines are the ones that stand out most and appear to be closest to you.
• The same principle applies to graphic layouts where the bold title stands out, and lighter lines represent texture or deeper information.
• Use different line weights to direct the viewer's attention in your sketch.
Adding Depth
• You can also apply line weight to perspective drawing to add dimension to your shapes. (We discussed perspective drawing in the last tutorial here.)
• If you draw a cube, it might look fine in terms of perspective but still appear flat on the page and floats. Adding a horizontal line behind the cube establishes a sense of space with a ground level. When you define the cube with a thicker line weight, your eyes will be drawn to the thicker, cleaner lines.
• One way of showing design perspective in a drawing is to keep any inner lines thinnest in line weight. Outer edges will be thickest where they are in contact with another surface. These are the areas where light will struggle the most to get into.
Depicting Form
• When adding additional dimension to objects, drawing thinner, inside lines to reinforce the outer form will add strength and dimension to the overall form. These are sometimes referred to as panels or cross-sections. Seams, stitches, car panels all add inner detail to add form to the structure of the object.
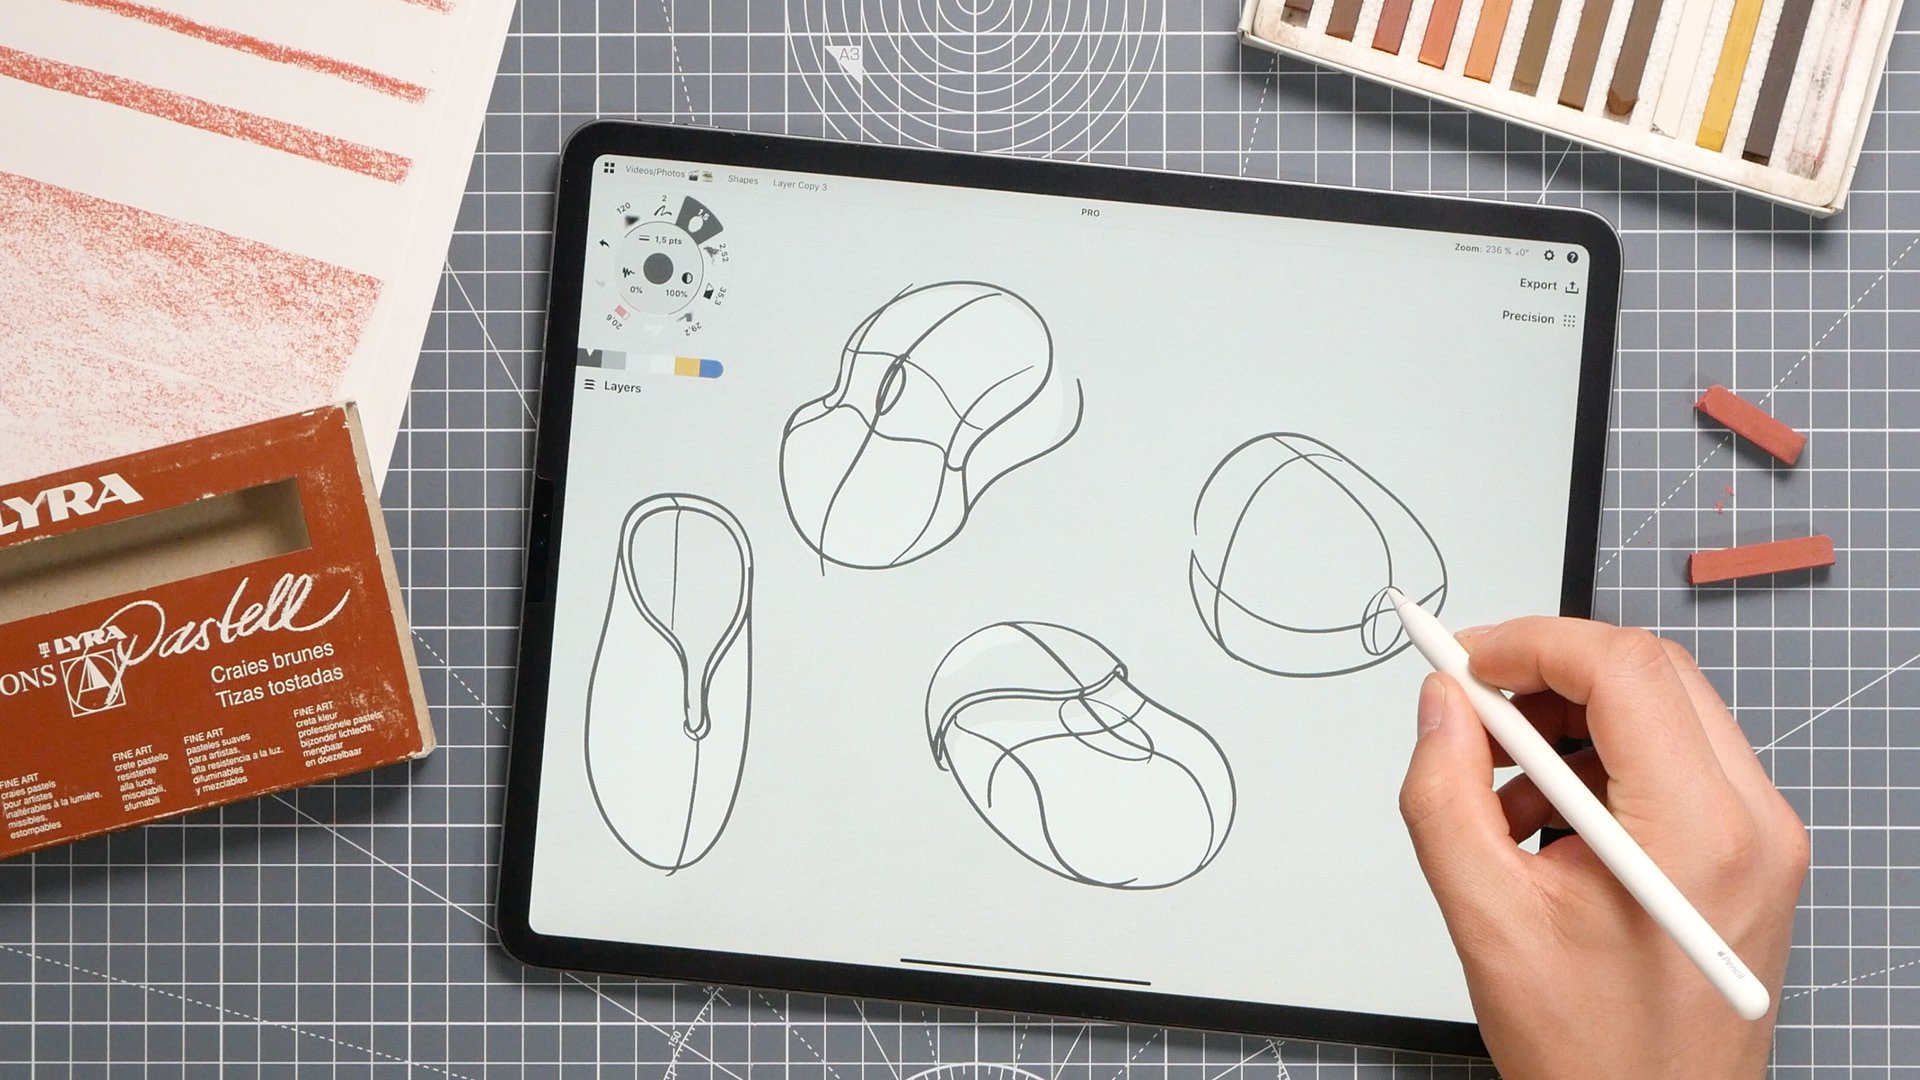
• In the design world, you use lines as guides to show orientation, indents, angle etc. Contour lines shine in particular with organic forms. They add quick dimension when drawing unrecognizable 2D blobs into clearly readable 3D forms like potatoes (see downloadable content below).
Getting started with drawing exercises can be the hardest thing, so feel free to download Lasse's homework files from below. Use the 3D volumes file to practice adding line weights and variance that give your shapes depth. Use the 2D blobs file to practice adding contour lines that fill them out into 3 dimensional shapes.
Course Materials
Download Course Files (includes JPG, transparent PNG, PDF and concepts)
Importing the File
Tap the download link and choose your file type from among the options.
Downloading a JPG, PNG or PDF file:
1. Download the file and choose whether to save it to your photo roll or files.
2. Drag+drop the file onto the canvas from your photo library or files, or use the Import menu to open the file.
Downloading a CPT or concepts file:
1. Make sure Concepts is already installed on your device - choose your app version here. Download the CPT (Concepts for iOS) or concepts (Concepts for Windows, Android, Chrome OS) file on this device.
2. Tap open the file. This will bring up an option to Share or Open In your app of choice. Tap Concepts.
3. The file will automatically open for you as a new drawing in the app.
4. Sketch right on top of the file or use layers to organize your work (below).
Concepts Drawing Tips
Line Smoothing
You can create smoother lines or 100% straight lines using Concepts' Line Smoothing preset. Every tool has this option (along with options for size and opacity) found in the inner wheel in the Tool Wheel. Activate your pen, find the wriggled line, then tap or slide it to find your Smoothing Presets. You can set up to four presets by using the slider to adjust, or by tap+holding the preset value and entering your percentage. Lines with 10 - 25% smoothing will smooth out rough edges, mid-range line smoothing will gently curve your lines, and lines with 100% smoothing applied will be completely straight.
Nudge Tool
You'll notice that Lasse will occasionally double-tap his 2018 Apple Pencil and nudge the end of a line in place. You can set your double-tap gesture to Nudge by tapping Settings > Stylus and choosing your double-tap gesture. If you'd like to see the Nudge tool in action, check out Lasse's video on creating icons with Nudge here.
Do you have questions about the tutorial? Please email us at concepts@tophatch.com and we'll be happy to help. Comments and feedback are appreciated!
Learn to Draw Playlist on YouTube
Learn to Draw Video + Course Materials by Lasse Pekkala
New to Concepts? Try these YouTube tutorials:
Learn Concepts for Android & Chrome OS
Recommended
How to Make Icons in Concepts for iOS - Make the same great icons we use to design Concepts' UI using the Slice and Nudge tools.
3 Ways to Draw a Straight Line - Three ways to draw a straight line in Concepts and when to sketch it.
How to Edit Your Grid - Learn how to set up and customize grids in Concepts.