Concepts is an infinite, flexible creative tool for all your good ideas. Available on iOS, Windows and Android.
Working with Your Infinite Canvas
Sketch everywhere, explore your ideas, and export just what you need on Concepts' infinite canvas.
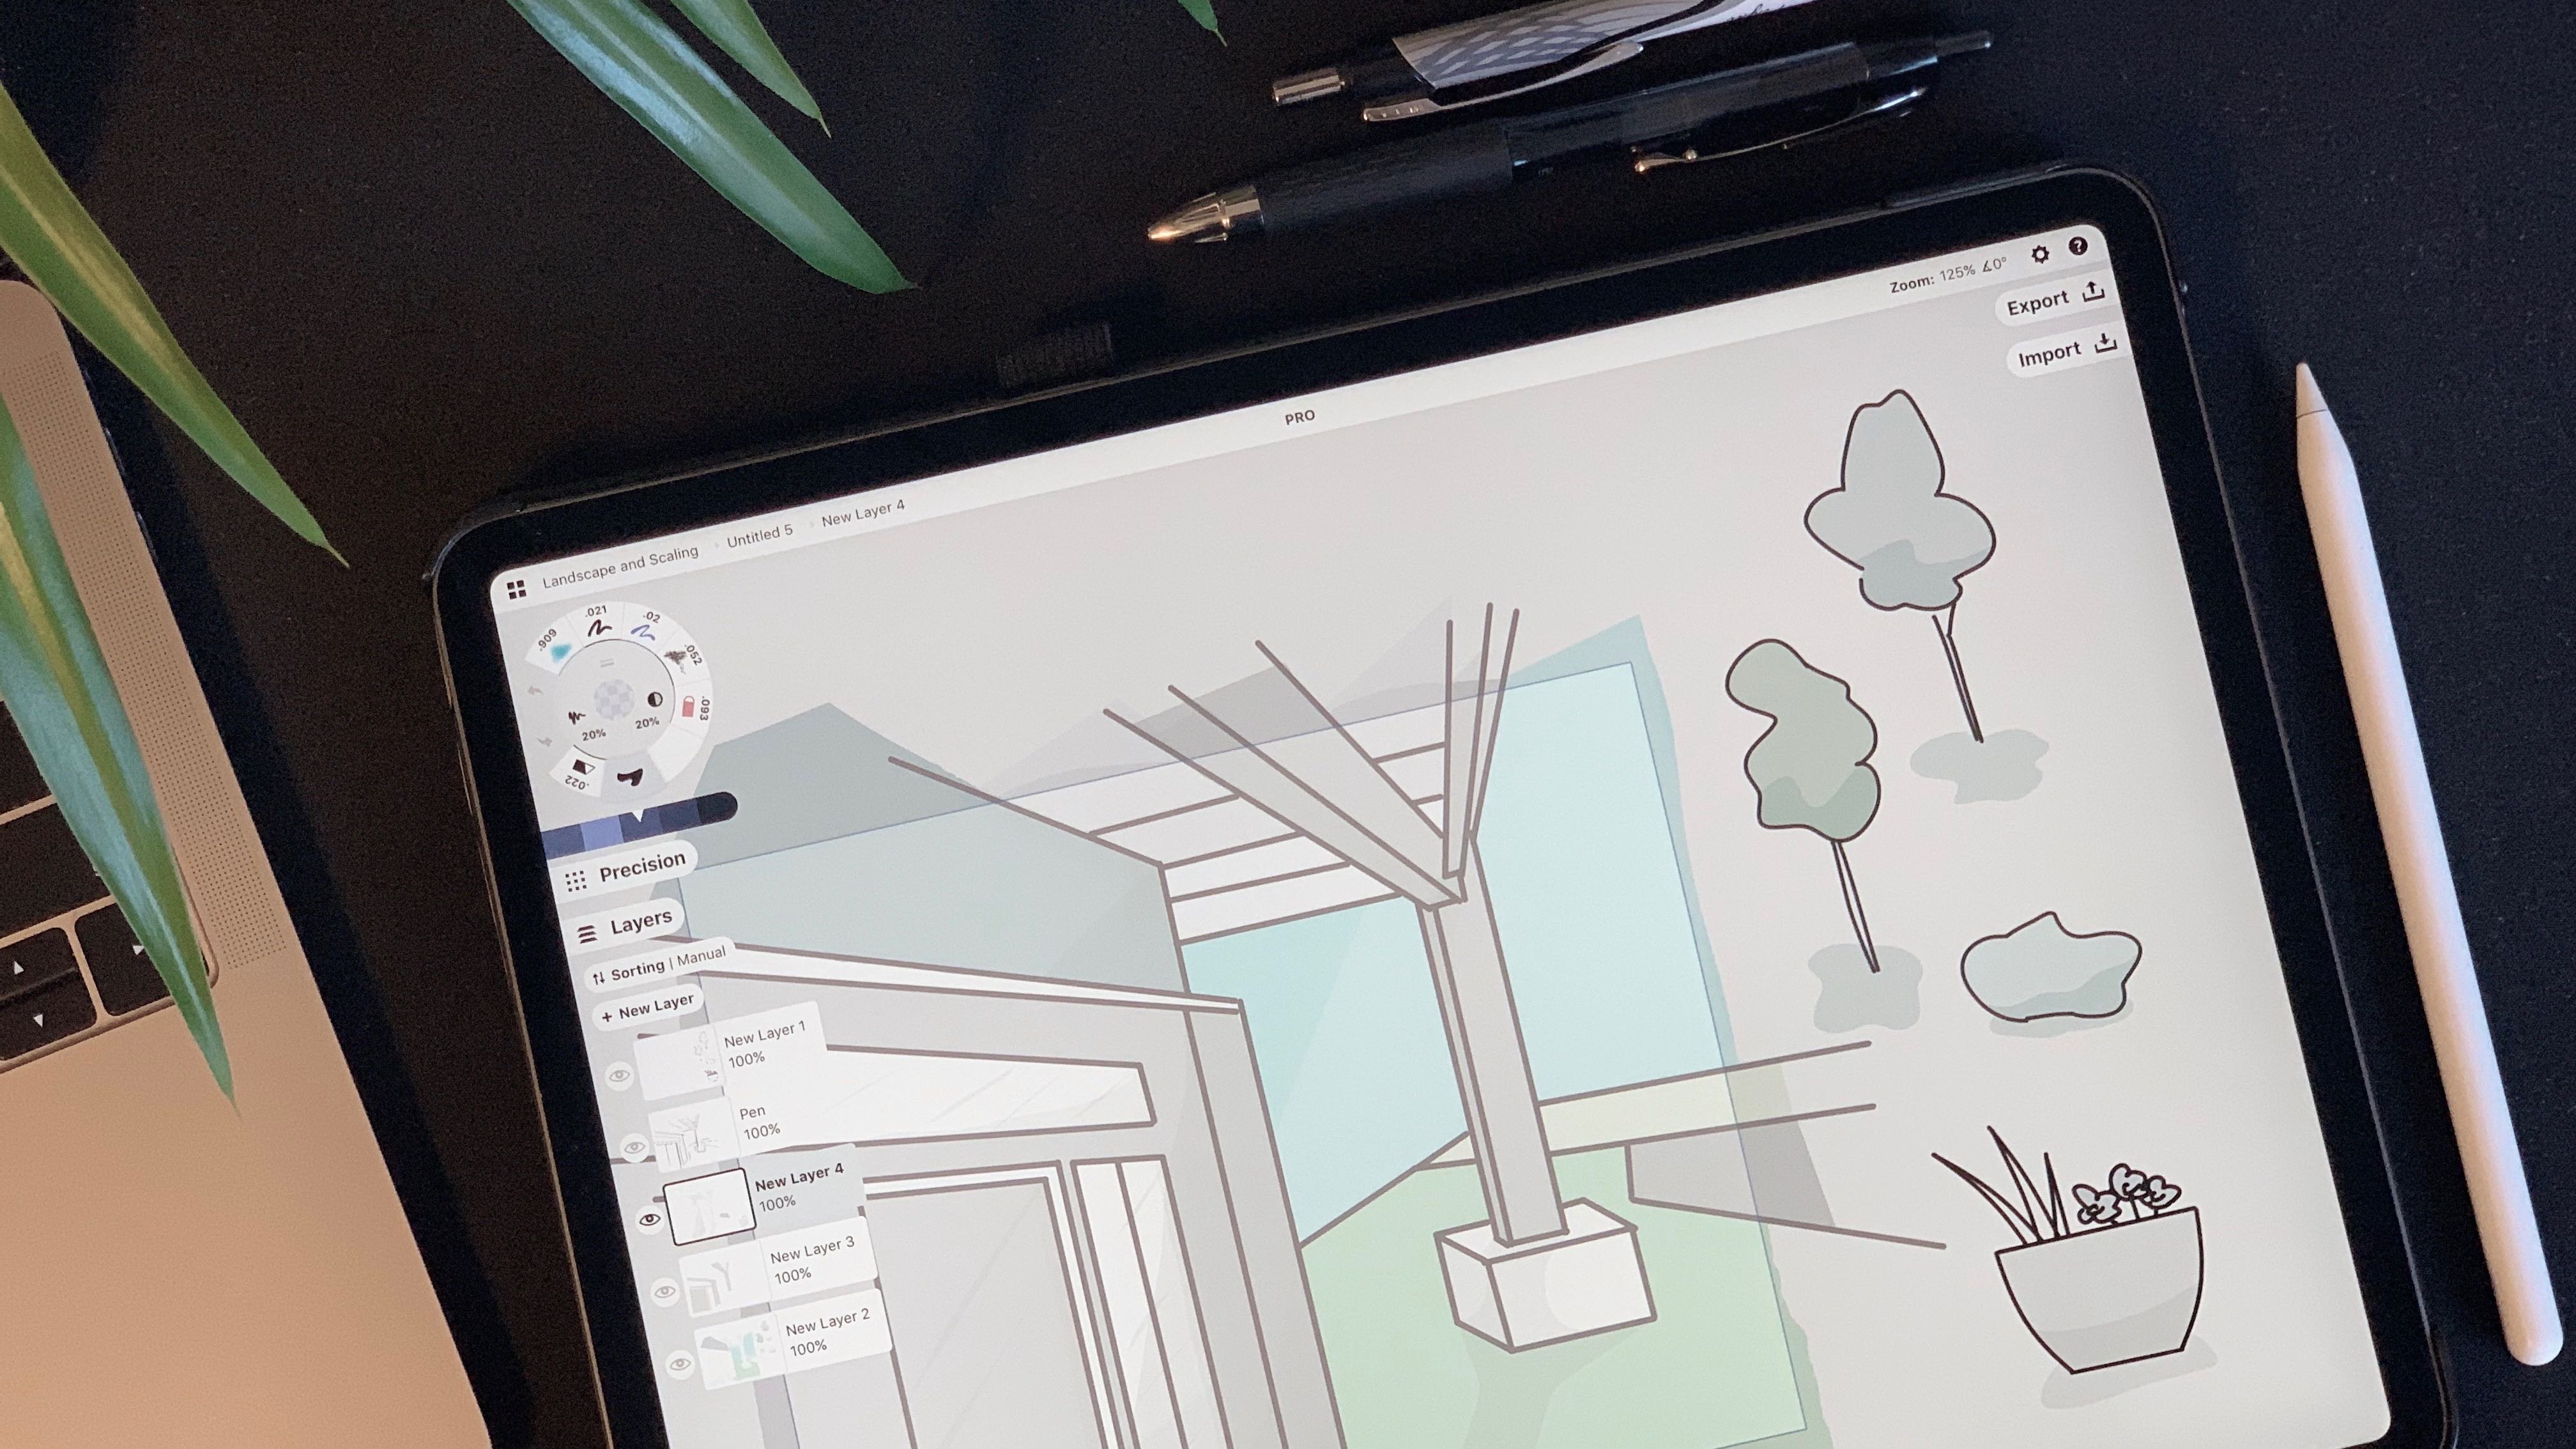
Concepts’ infinite canvas gives you plenty of space to roam with your ideas, take notes, sketch character studies or share design options. Sometimes a limitless sketching space is exactly what you need. At other times, you need to define the boundaries for a clear, real-time drawing reference.
We designed Concepts’ infinite canvas to give you infinite flexibility for your projects. You can configure your workspace any way you need it before, during or after you draw. We’d like to share some techniques for working with your canvas so you can sketch your great ideas with great results.
*Note: The workflows described in this tutorial are the same across iOS, Windows and Android platforms. Screenshots are taken on an iPad Pro.
The Infinite Canvas
When you first enter a drawing, you’ll see a workspace that looks like this.
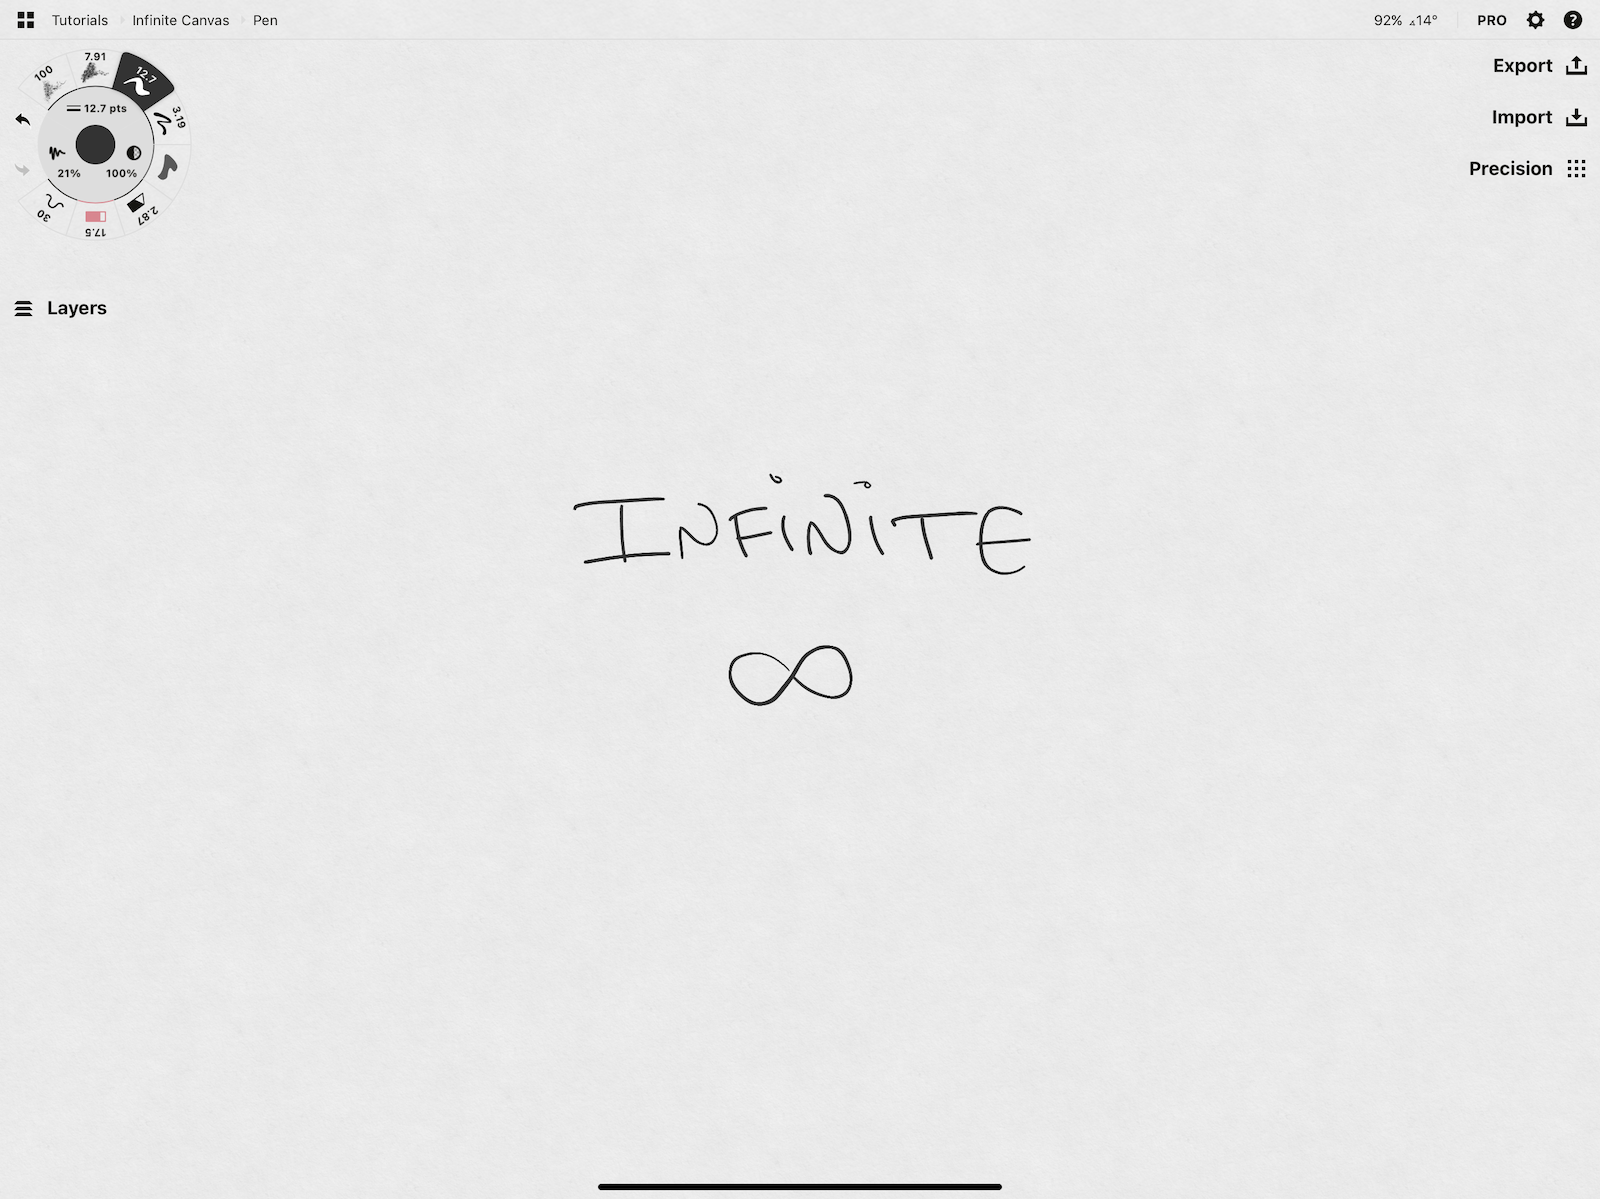
All of your menus are movable. You can learn more about them in our tutorial Setting Up Your Menus, Brushes and Presets - this how-to is about the canvas.
To interact with the canvas, use two fingers.
Touch two fingers to the screen and slide them here or there to move around. You can move and sketch as far from where you started as you want - this is the “infinite” capacity of the canvas.
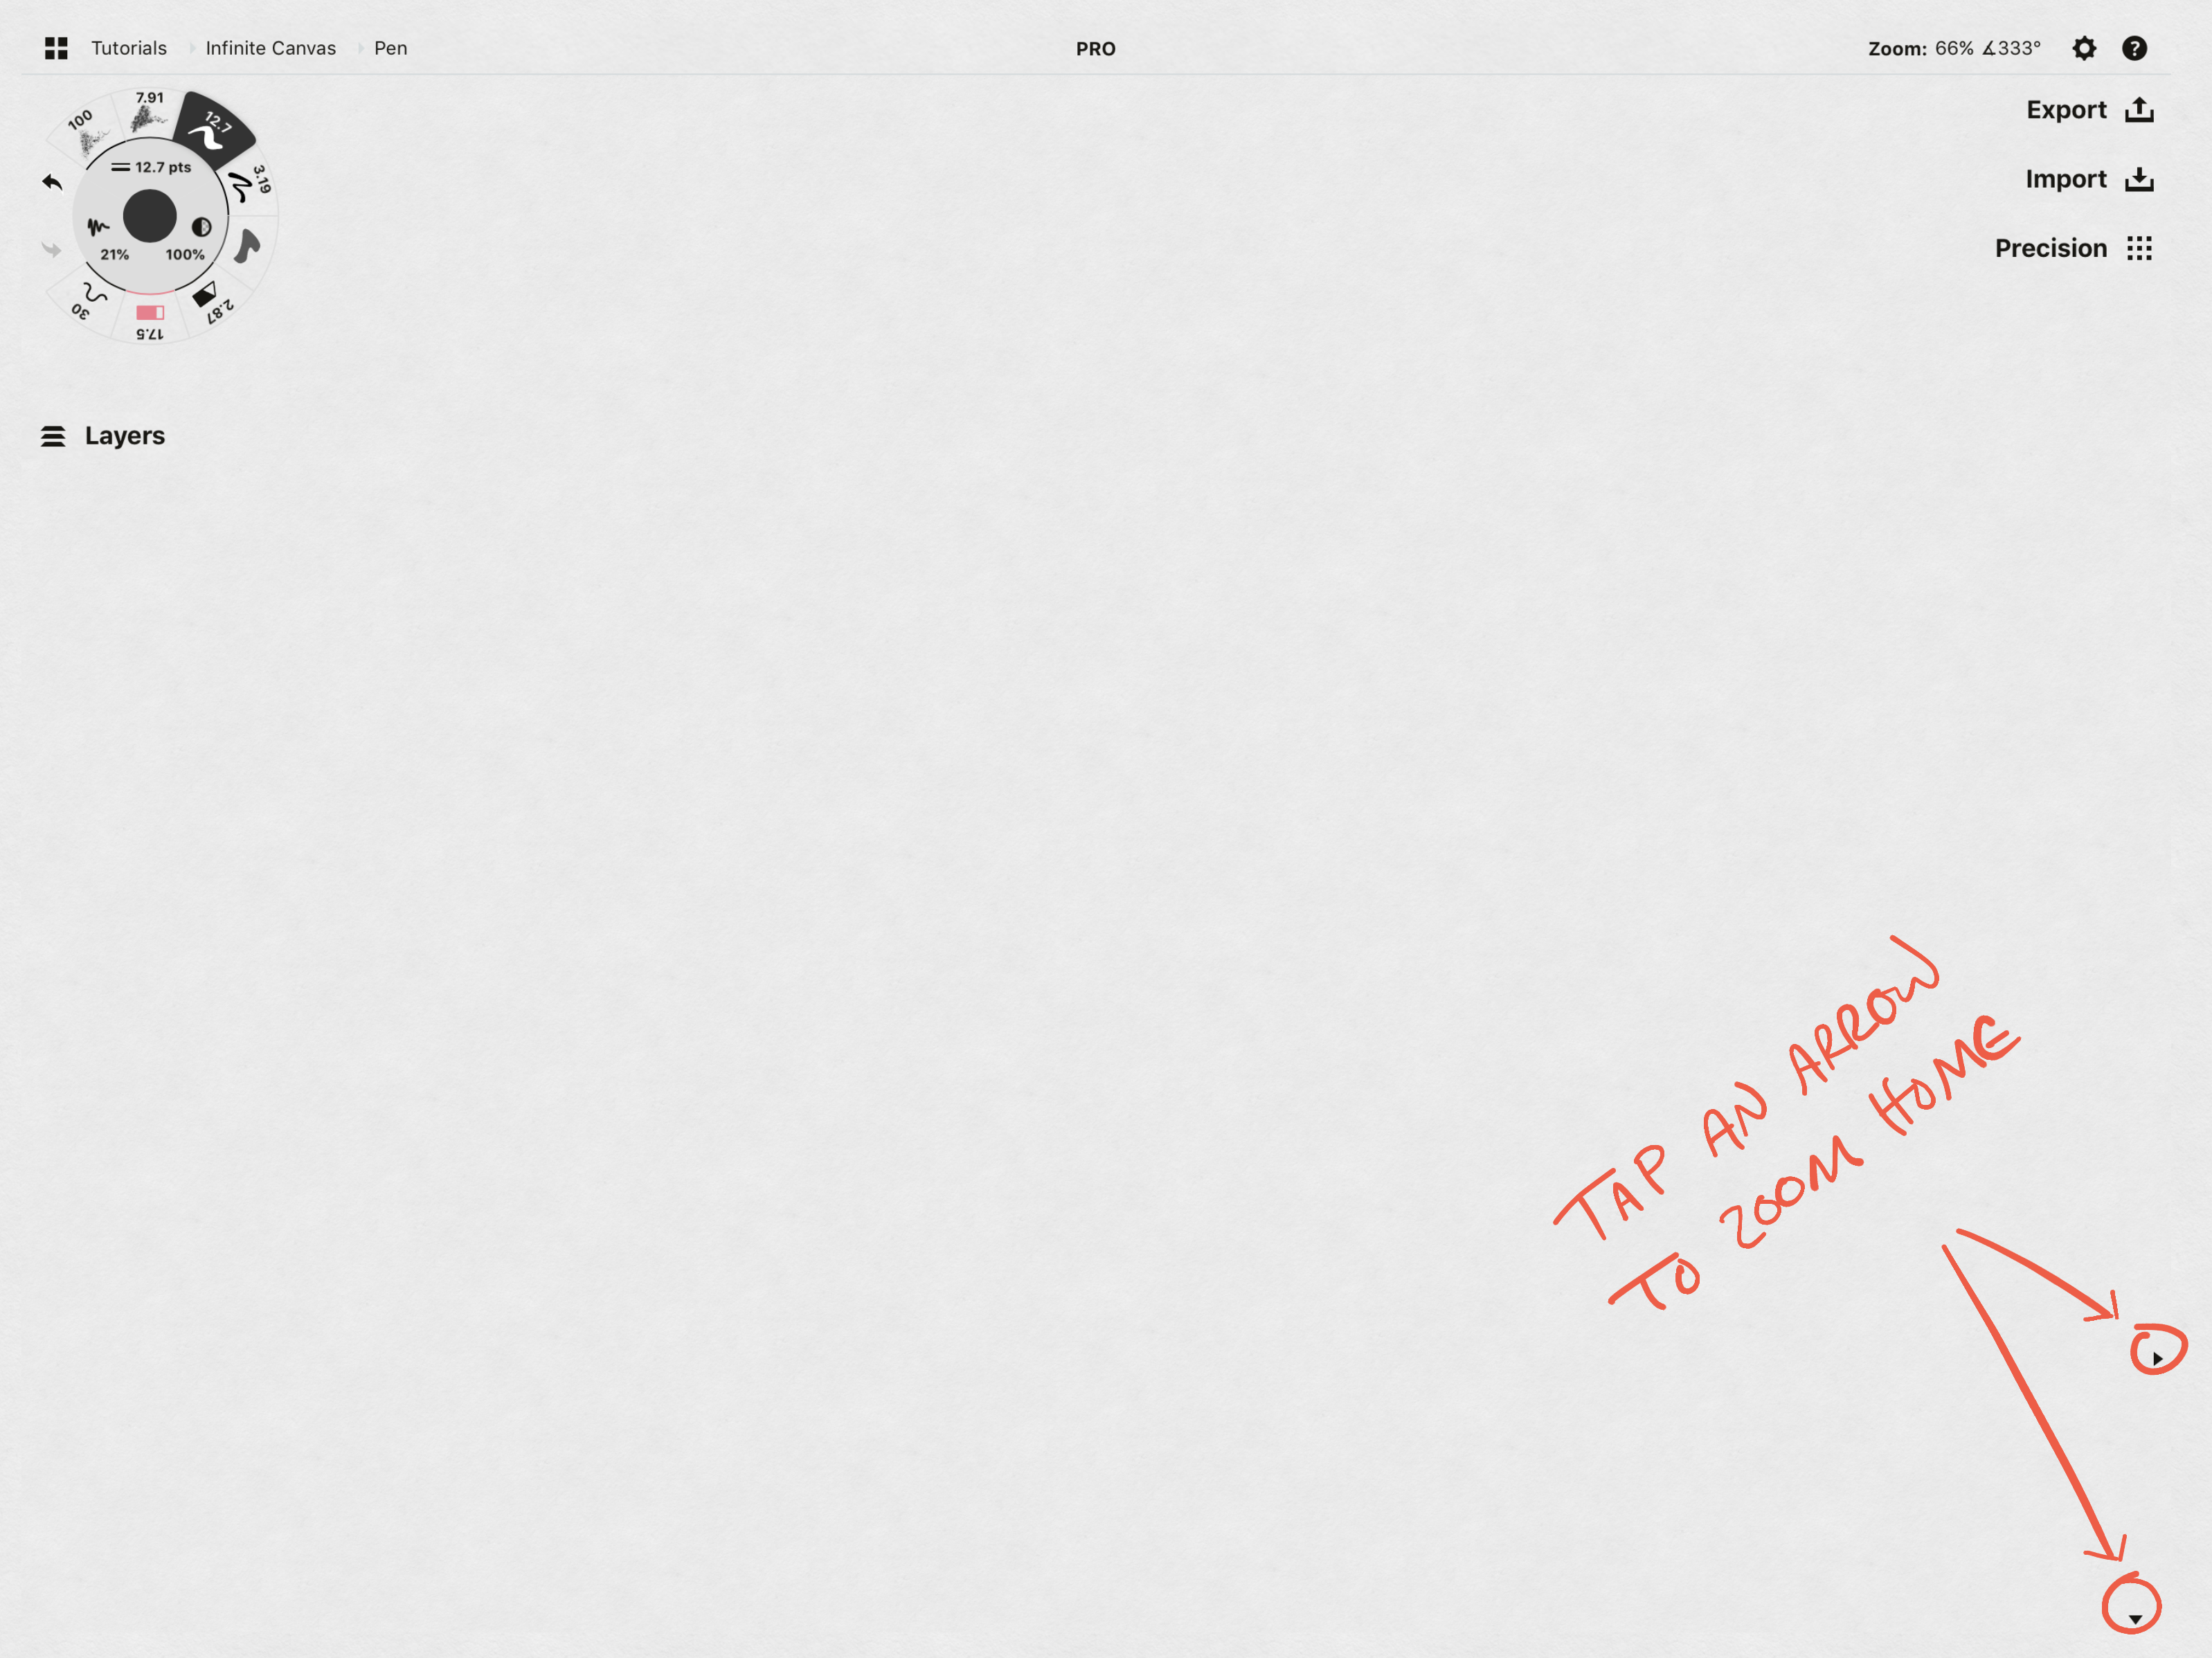
If you get lost (infinite is quite big), on iOS you can use the little arrows at the edge of the screen to get back to where you started - just tap one and you’ll zoom home. *This feature is not yet available on Android and Windows, but you can easily get back to your work by double-tapping zoom, located on the top right side of your canvas.
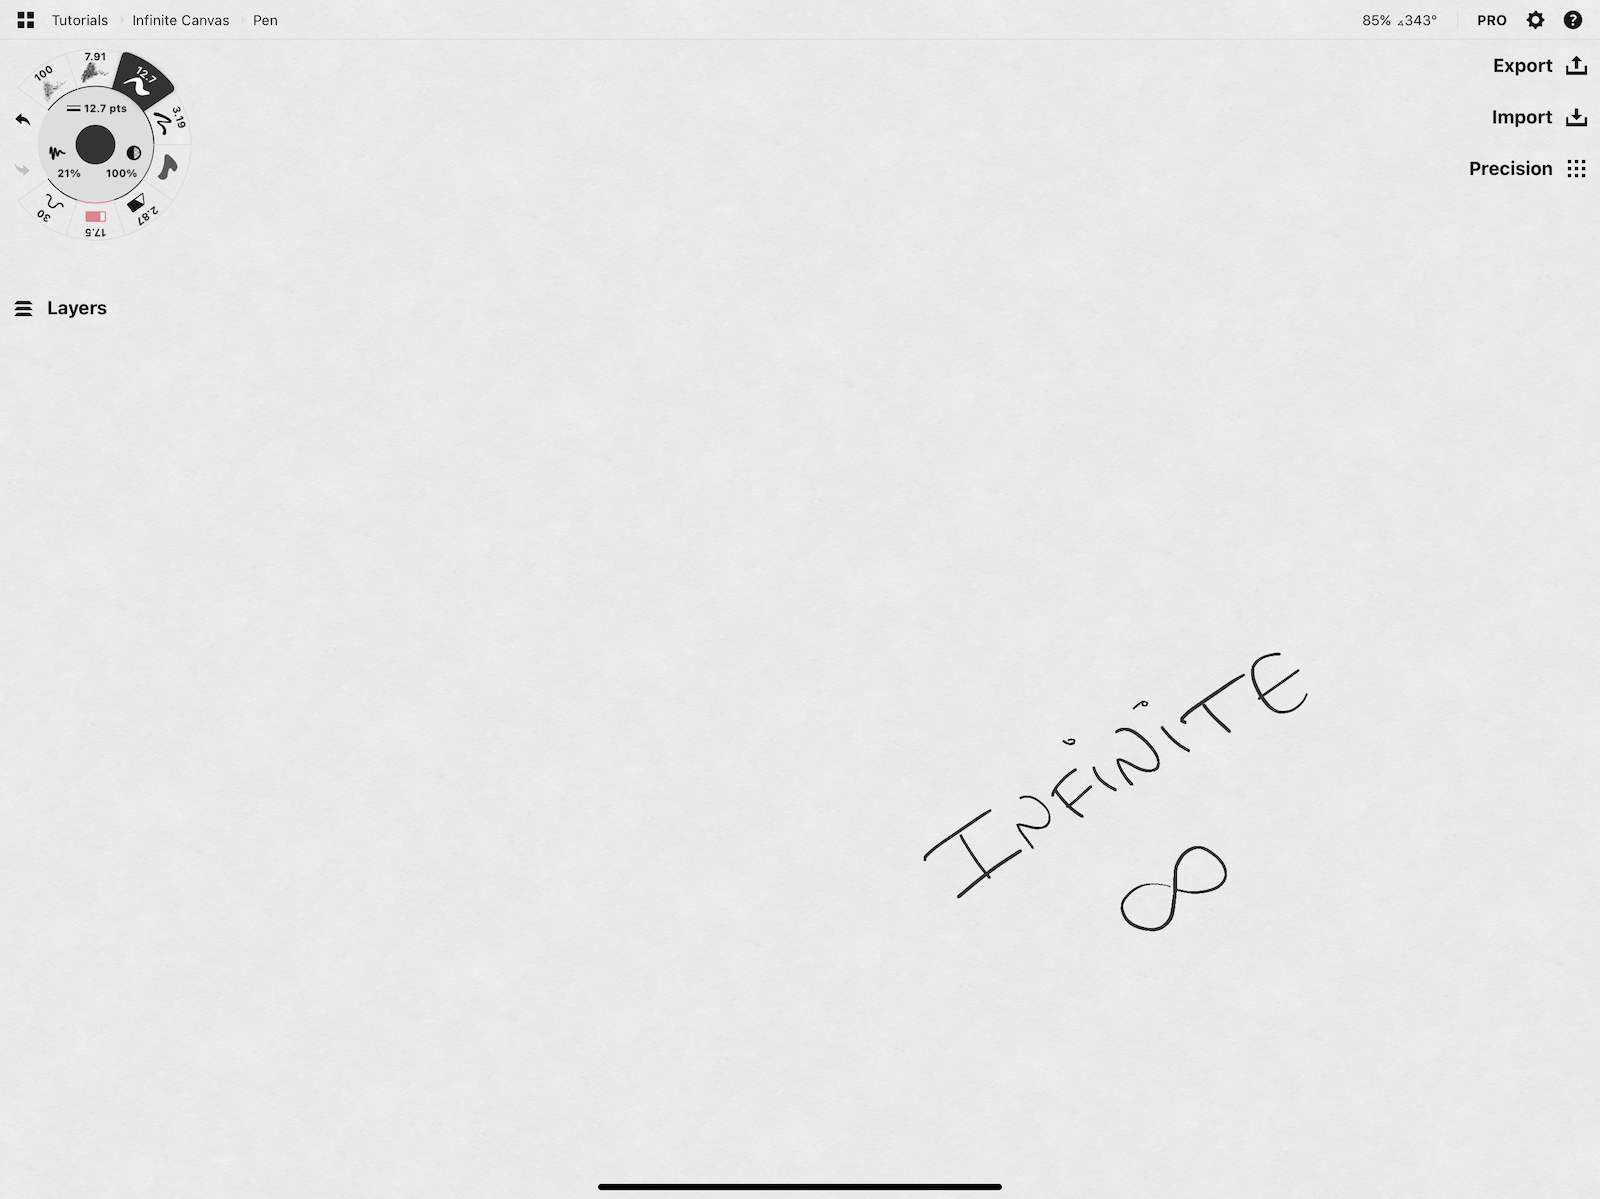
Rotate two fingers to rotate the canvas.
Pinch two fingers to zoom out on the canvas.
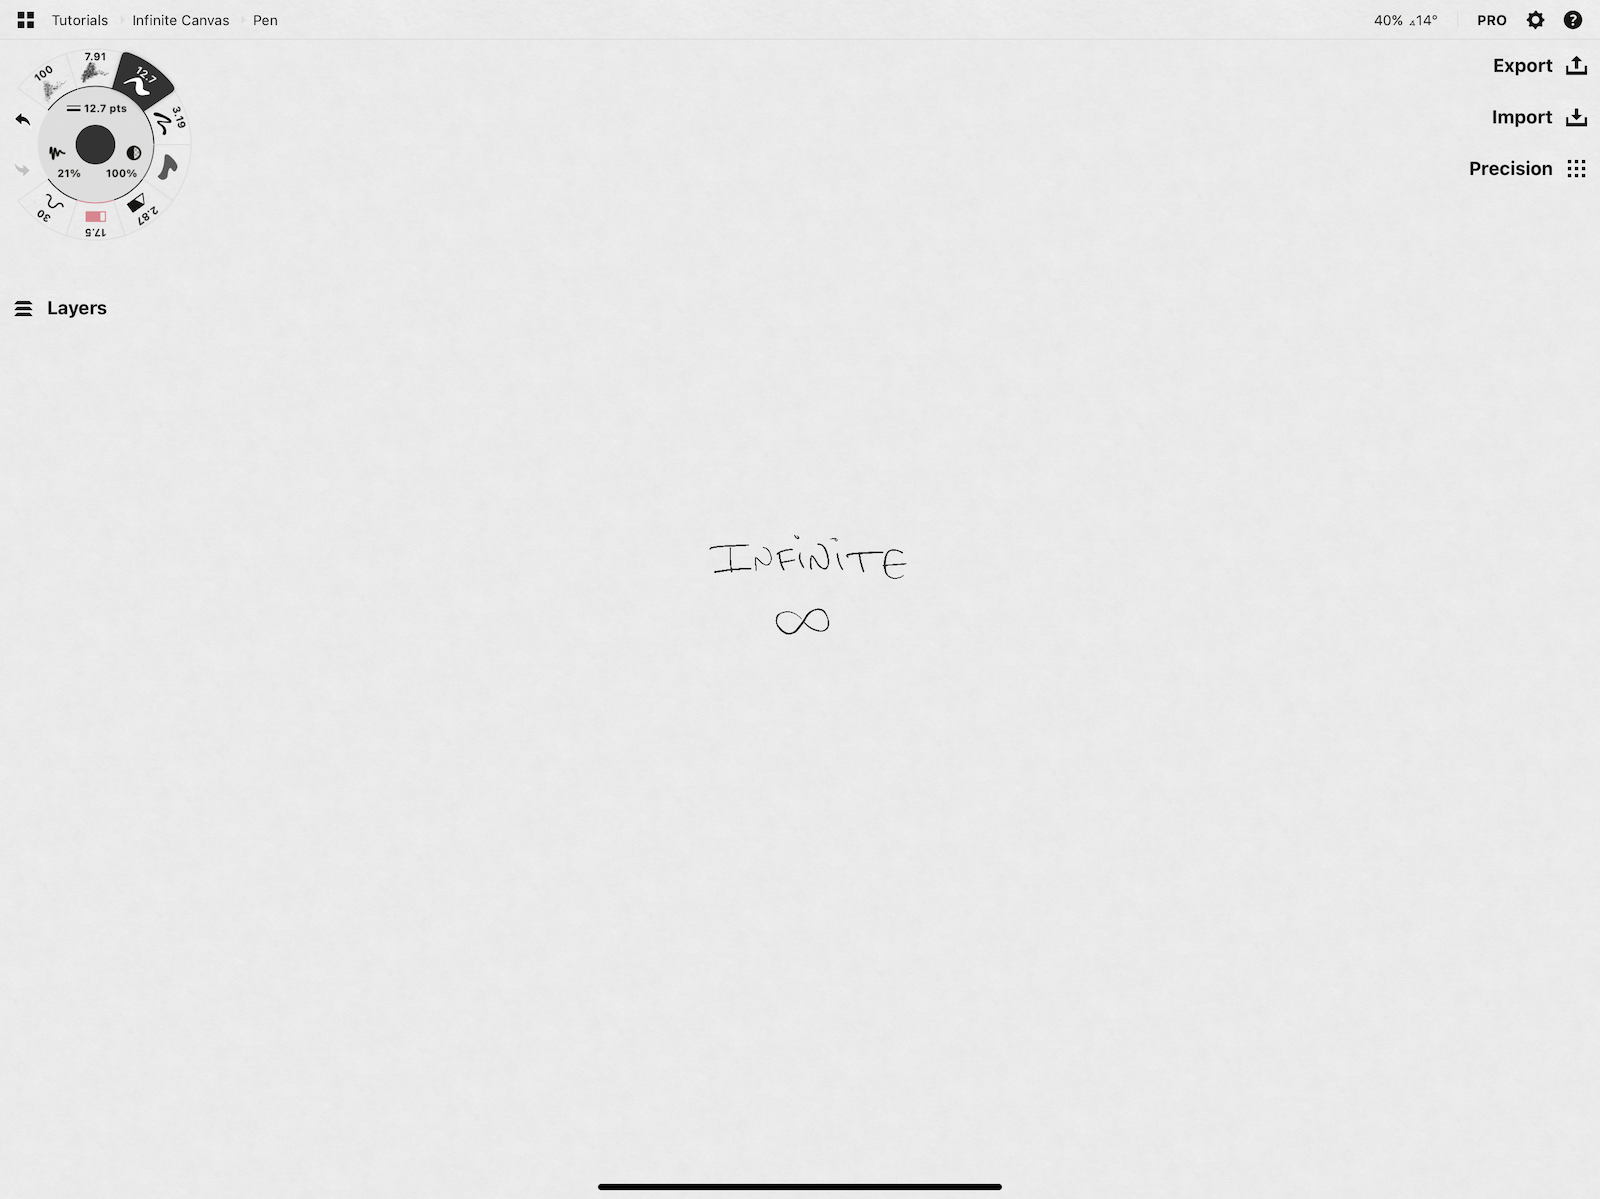
Spread two fingers apart to zoom in on the canvas. You can see your zoom level up in the status bar. If you need a particular level, you can tap+hold the percentage and enter your own value.
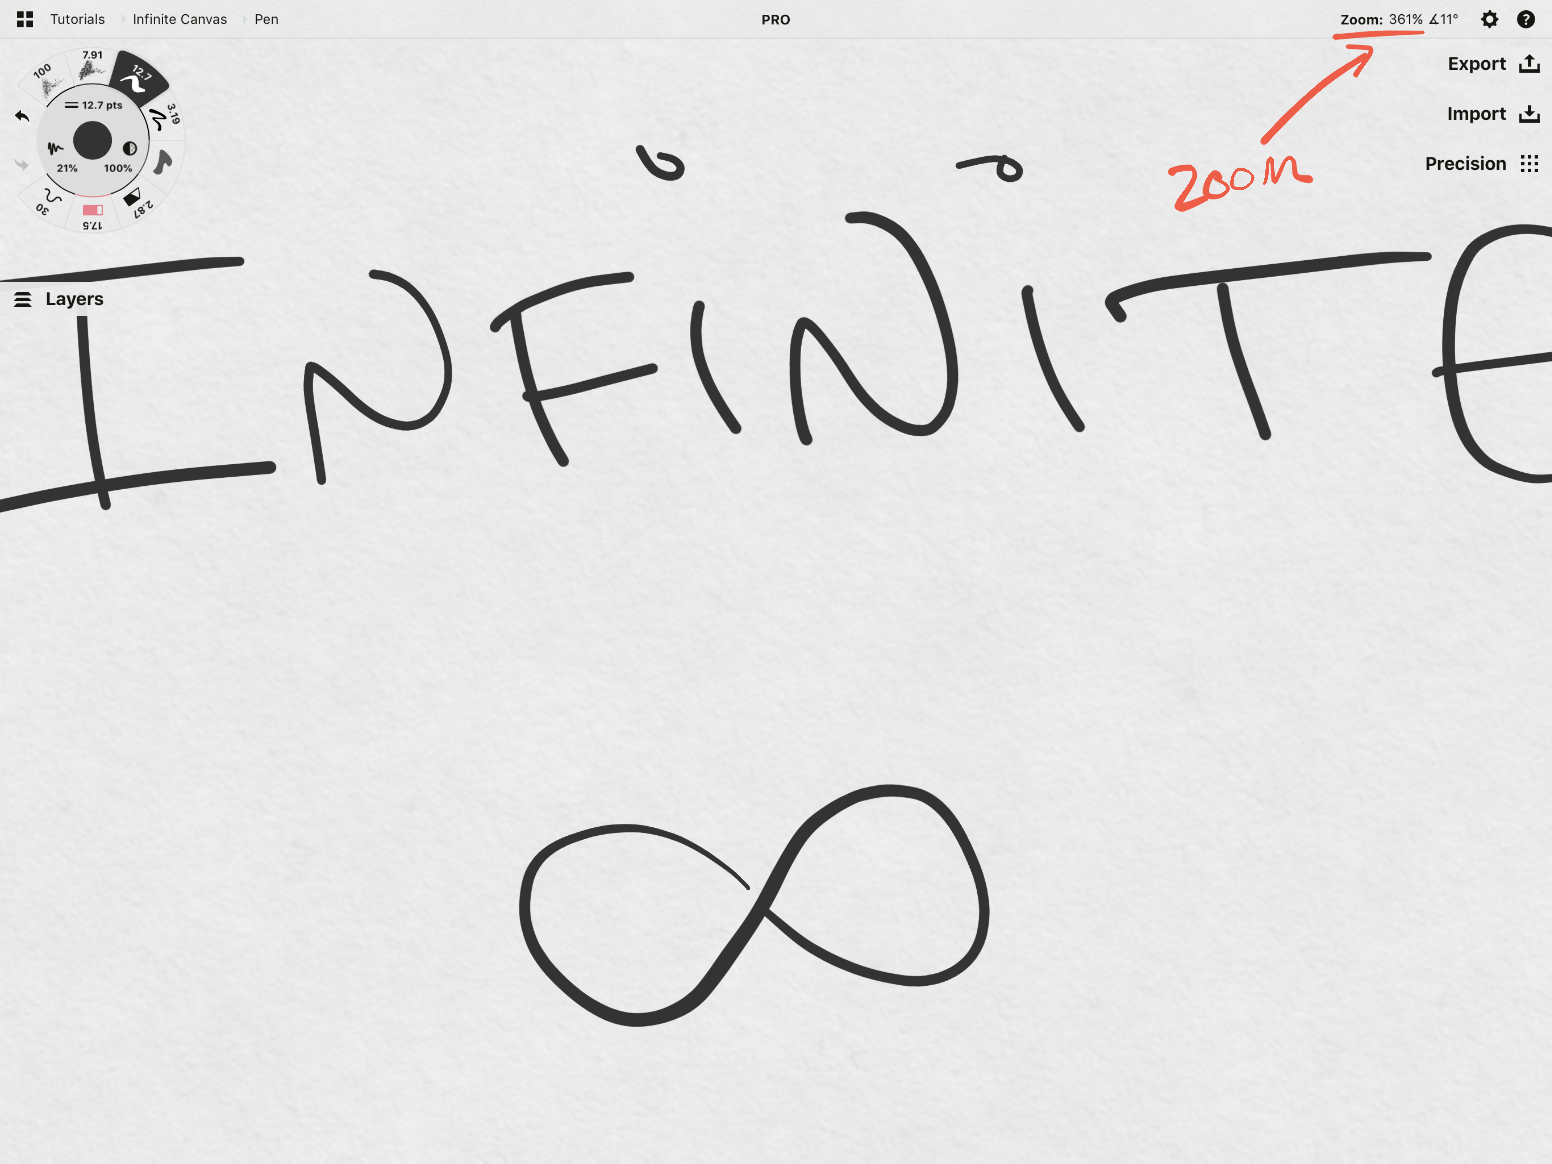
One of the “infinite” advantages of sketching with vectors is that your tools will remain crystal clear no matter how far you zoom in or out.
Customizing your Canvas Interaction
Beyond these basics, you have a bit of room to customize how you interact with the canvas using your stylus and fingers. You can change these at any time in the Settings menu under the Workspace, Stylus or Gestures tabs.
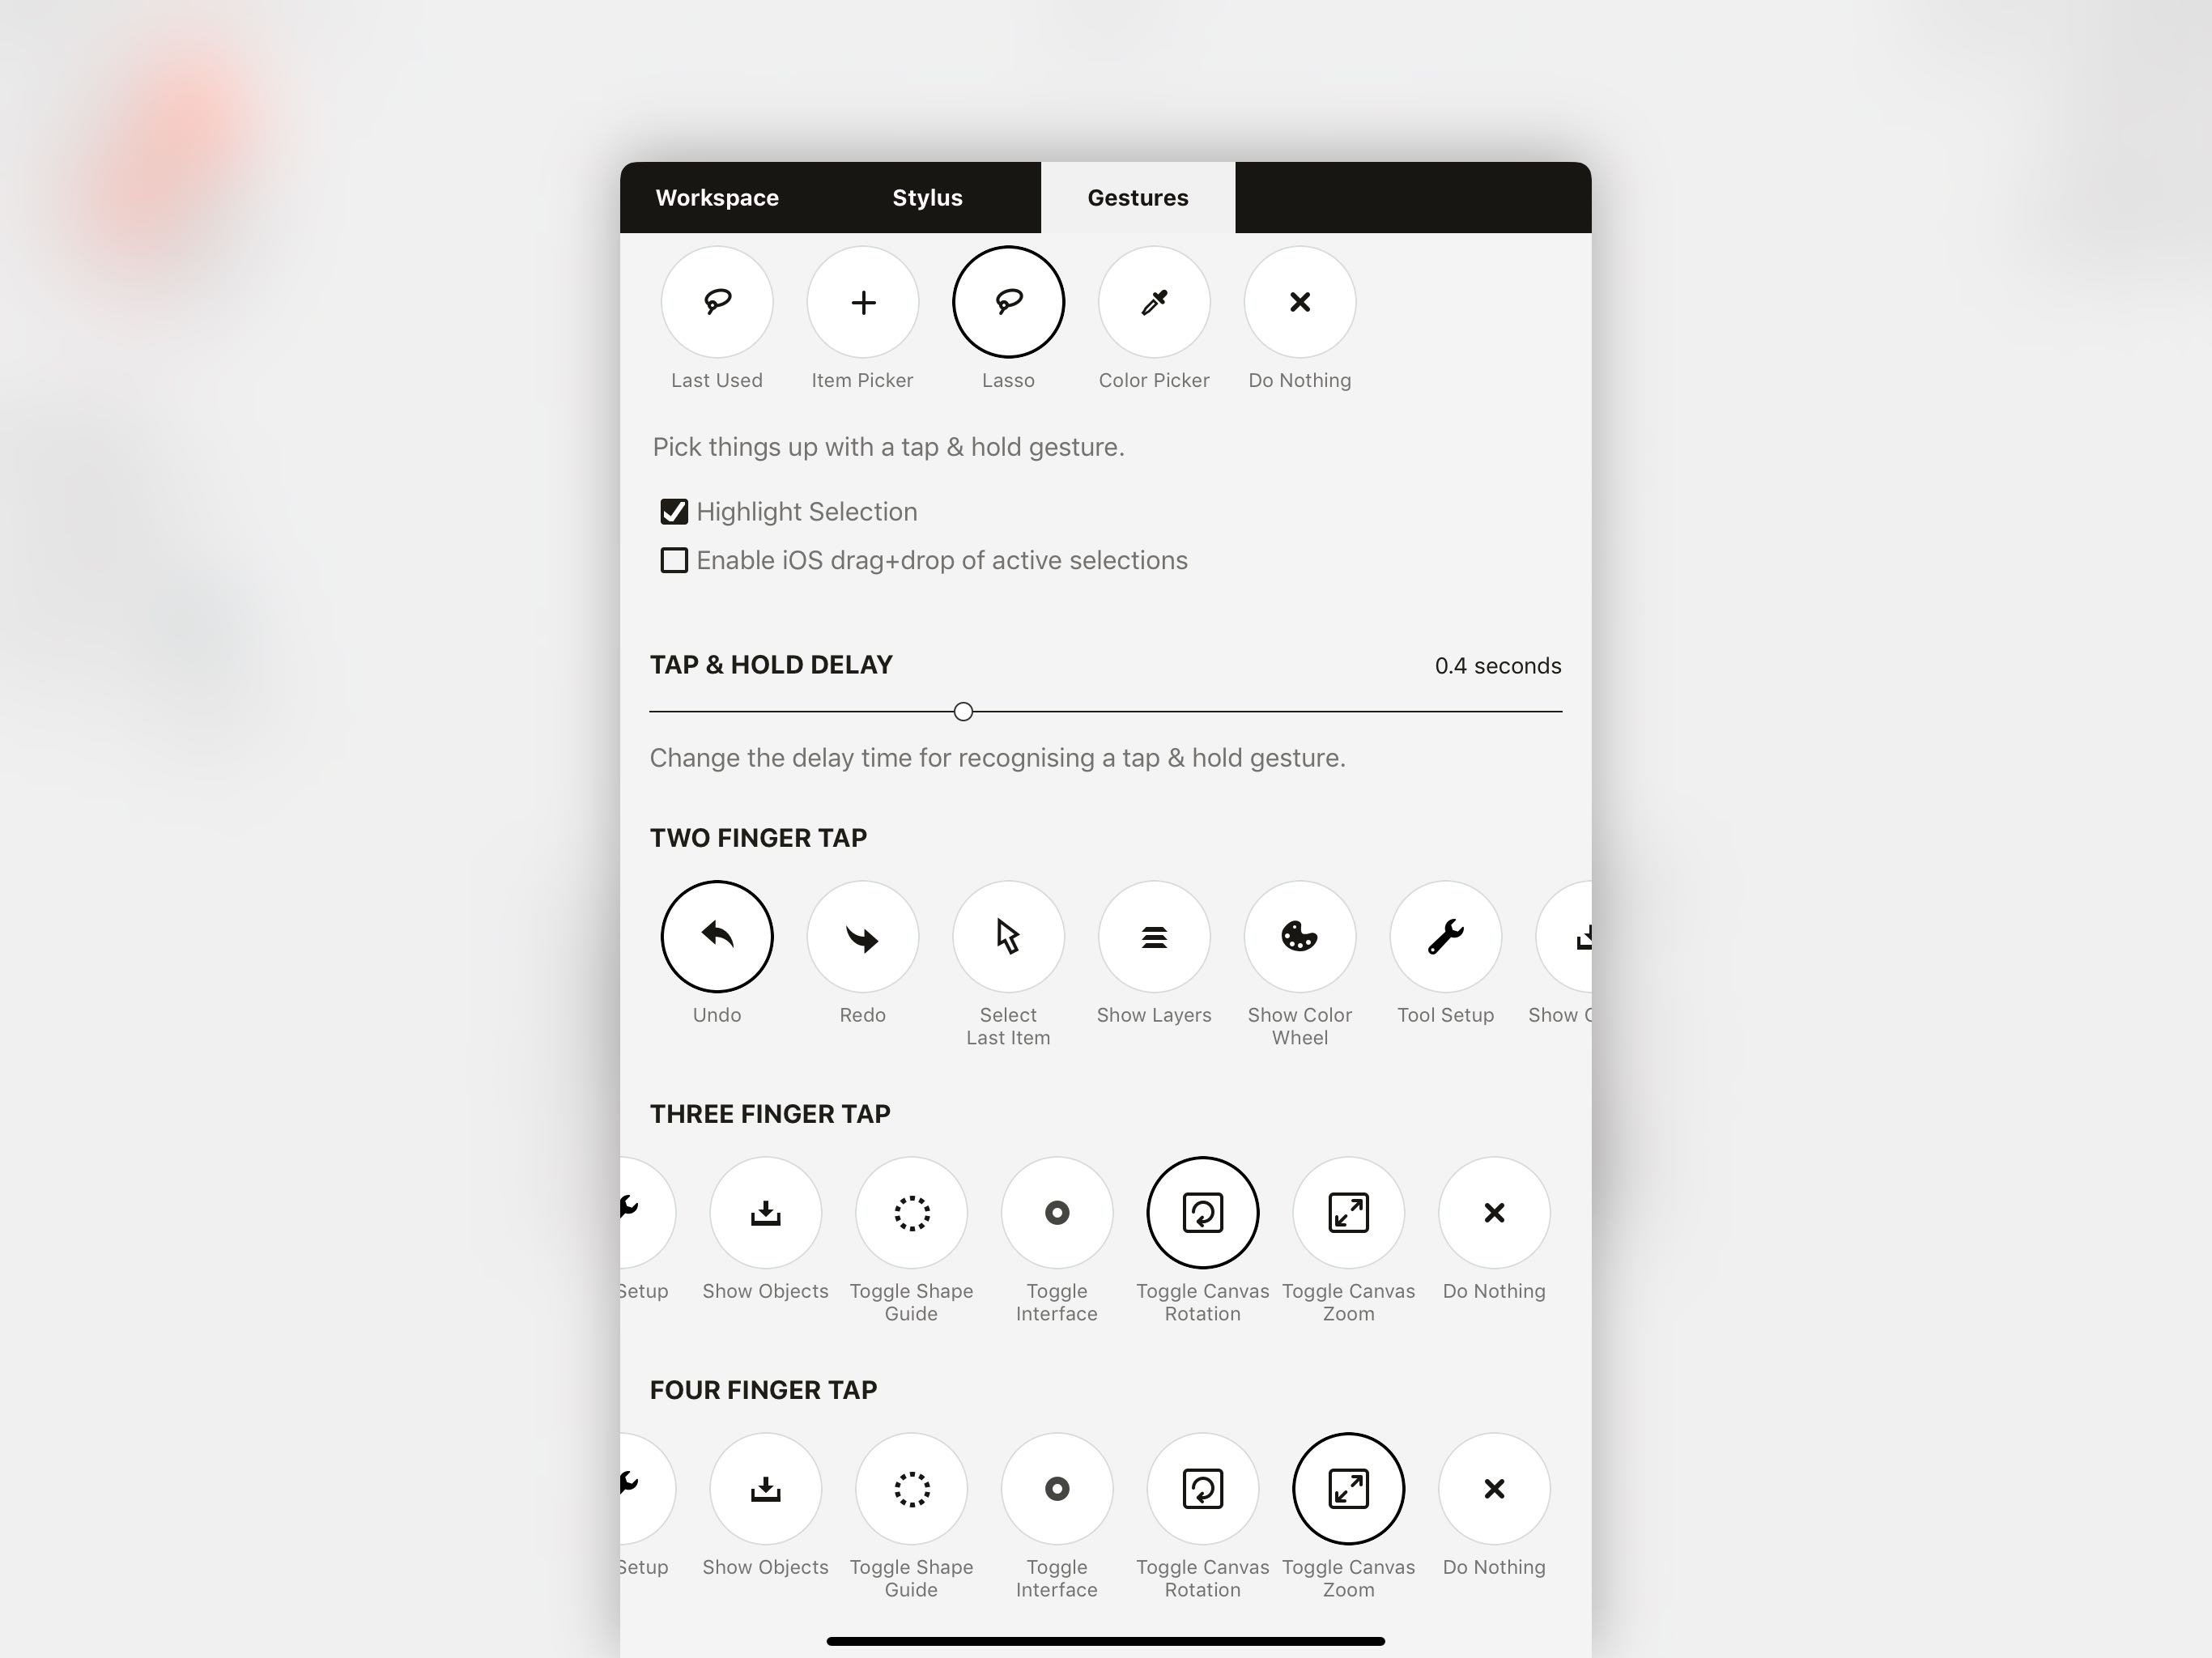
Gesture options for toggling rotation and zoom.
- The Pan tool lets you pan the canvas with just one finger or stylus. This is helpful for exploring or sharing your sketch without disturbing your work. To set Pan to your tool wheel, open the Brushes menu by tapping your active tool and find it under “Tools”. Activate Pan whenever you like.
- If you use an Apple Pencil, you can Pan the canvas separately from your stylus with a finger. Head to Settings -> Stylus -> Finger Action, and choose Pan as the option.
- Along with the default two-finger zoom and pan gesture, the canvas will also rotate (like rotating a piece of paper). If you want to lock your canvas from rotating, head to Settings -> Gestures and uncheck "Enable Canvas Rotation". If flexibility is important, you can also use a three or four-finger tap to toggle the lock. In the same menu, scroll down to your preferred gesture and set it to “Toggle Canvas Rotation”.
- You can also toggle your canvas zoom on and off. Go to Settings -> Gestures and uncheck "Enable Canvas Zoom", or choose your gesture and set it to “Toggle Canvas Zoom”.
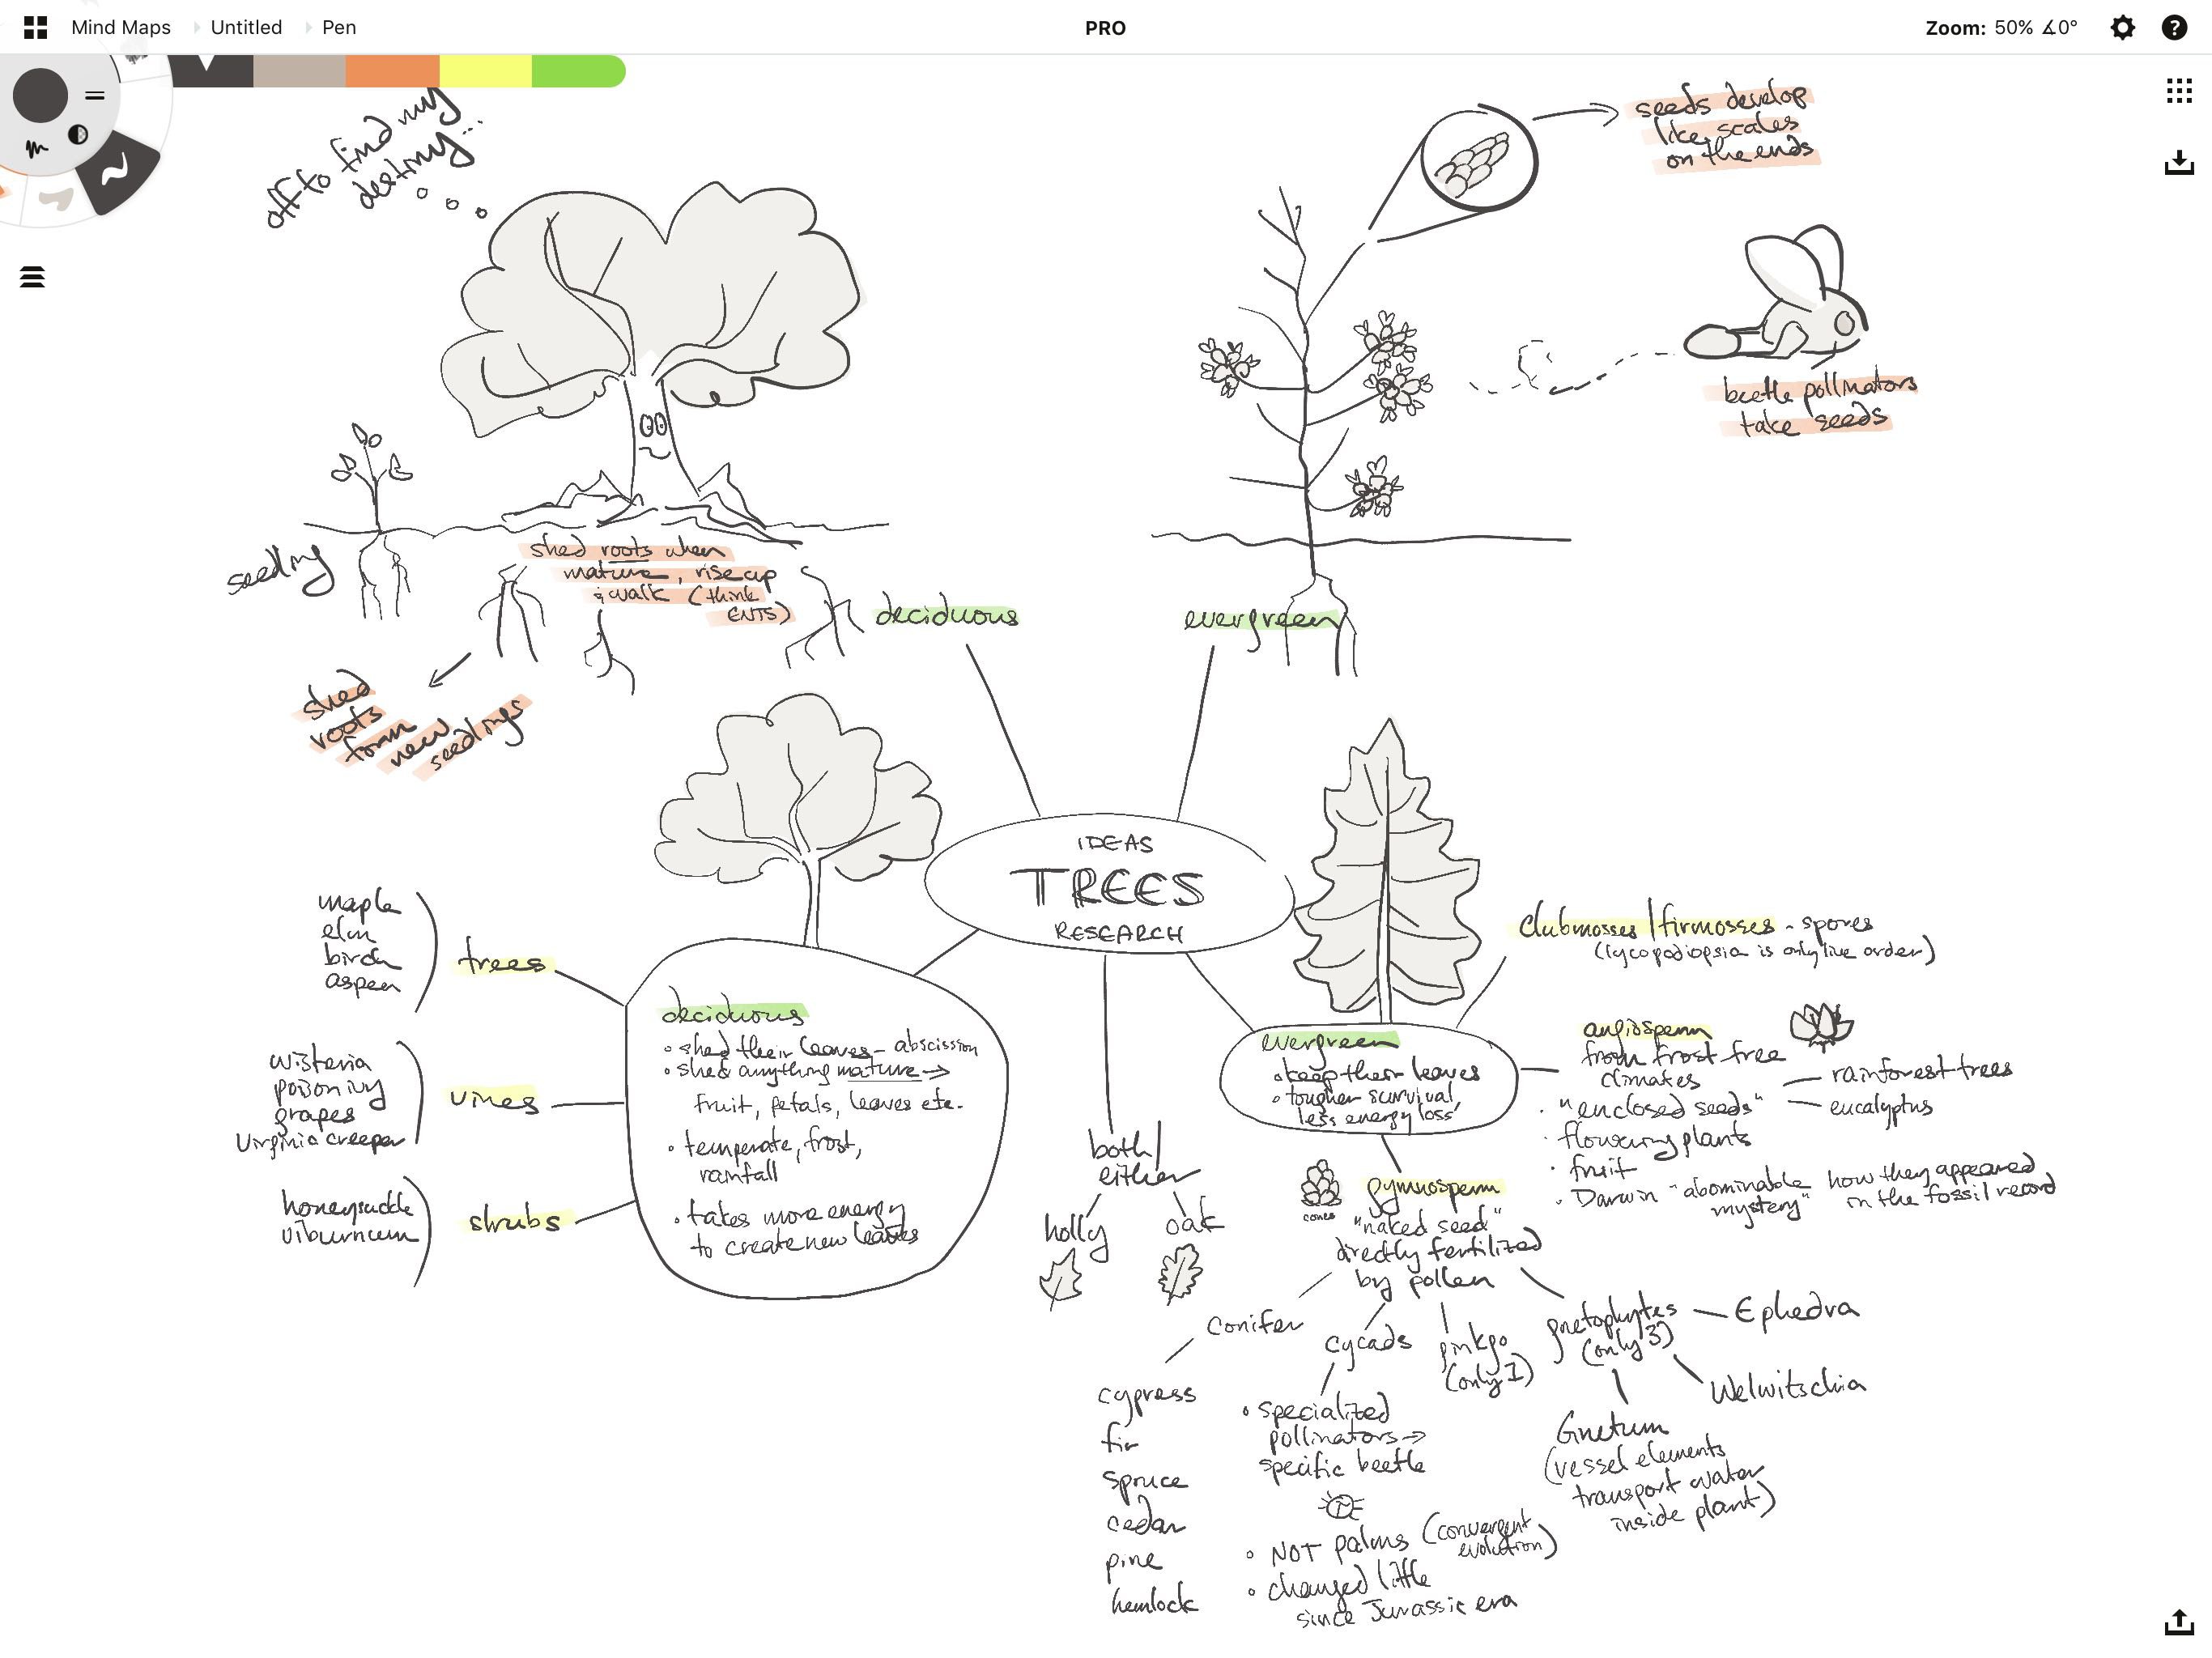
Take notes and explore your ideas on the infinite canvas.
On a canvas without boundaries, you can sketch... and just keep sketching.
Setting Up an Artboard
For some types of projects, you need boundaries to help you know how your final image will look, for image clarity or to match size specifications.
To add an artboard to your canvas, tap the Settings icon on the status bar (the gear). You’ll be brought to an overlay that looks like this. Check that you’re in the “Workspace” tab.
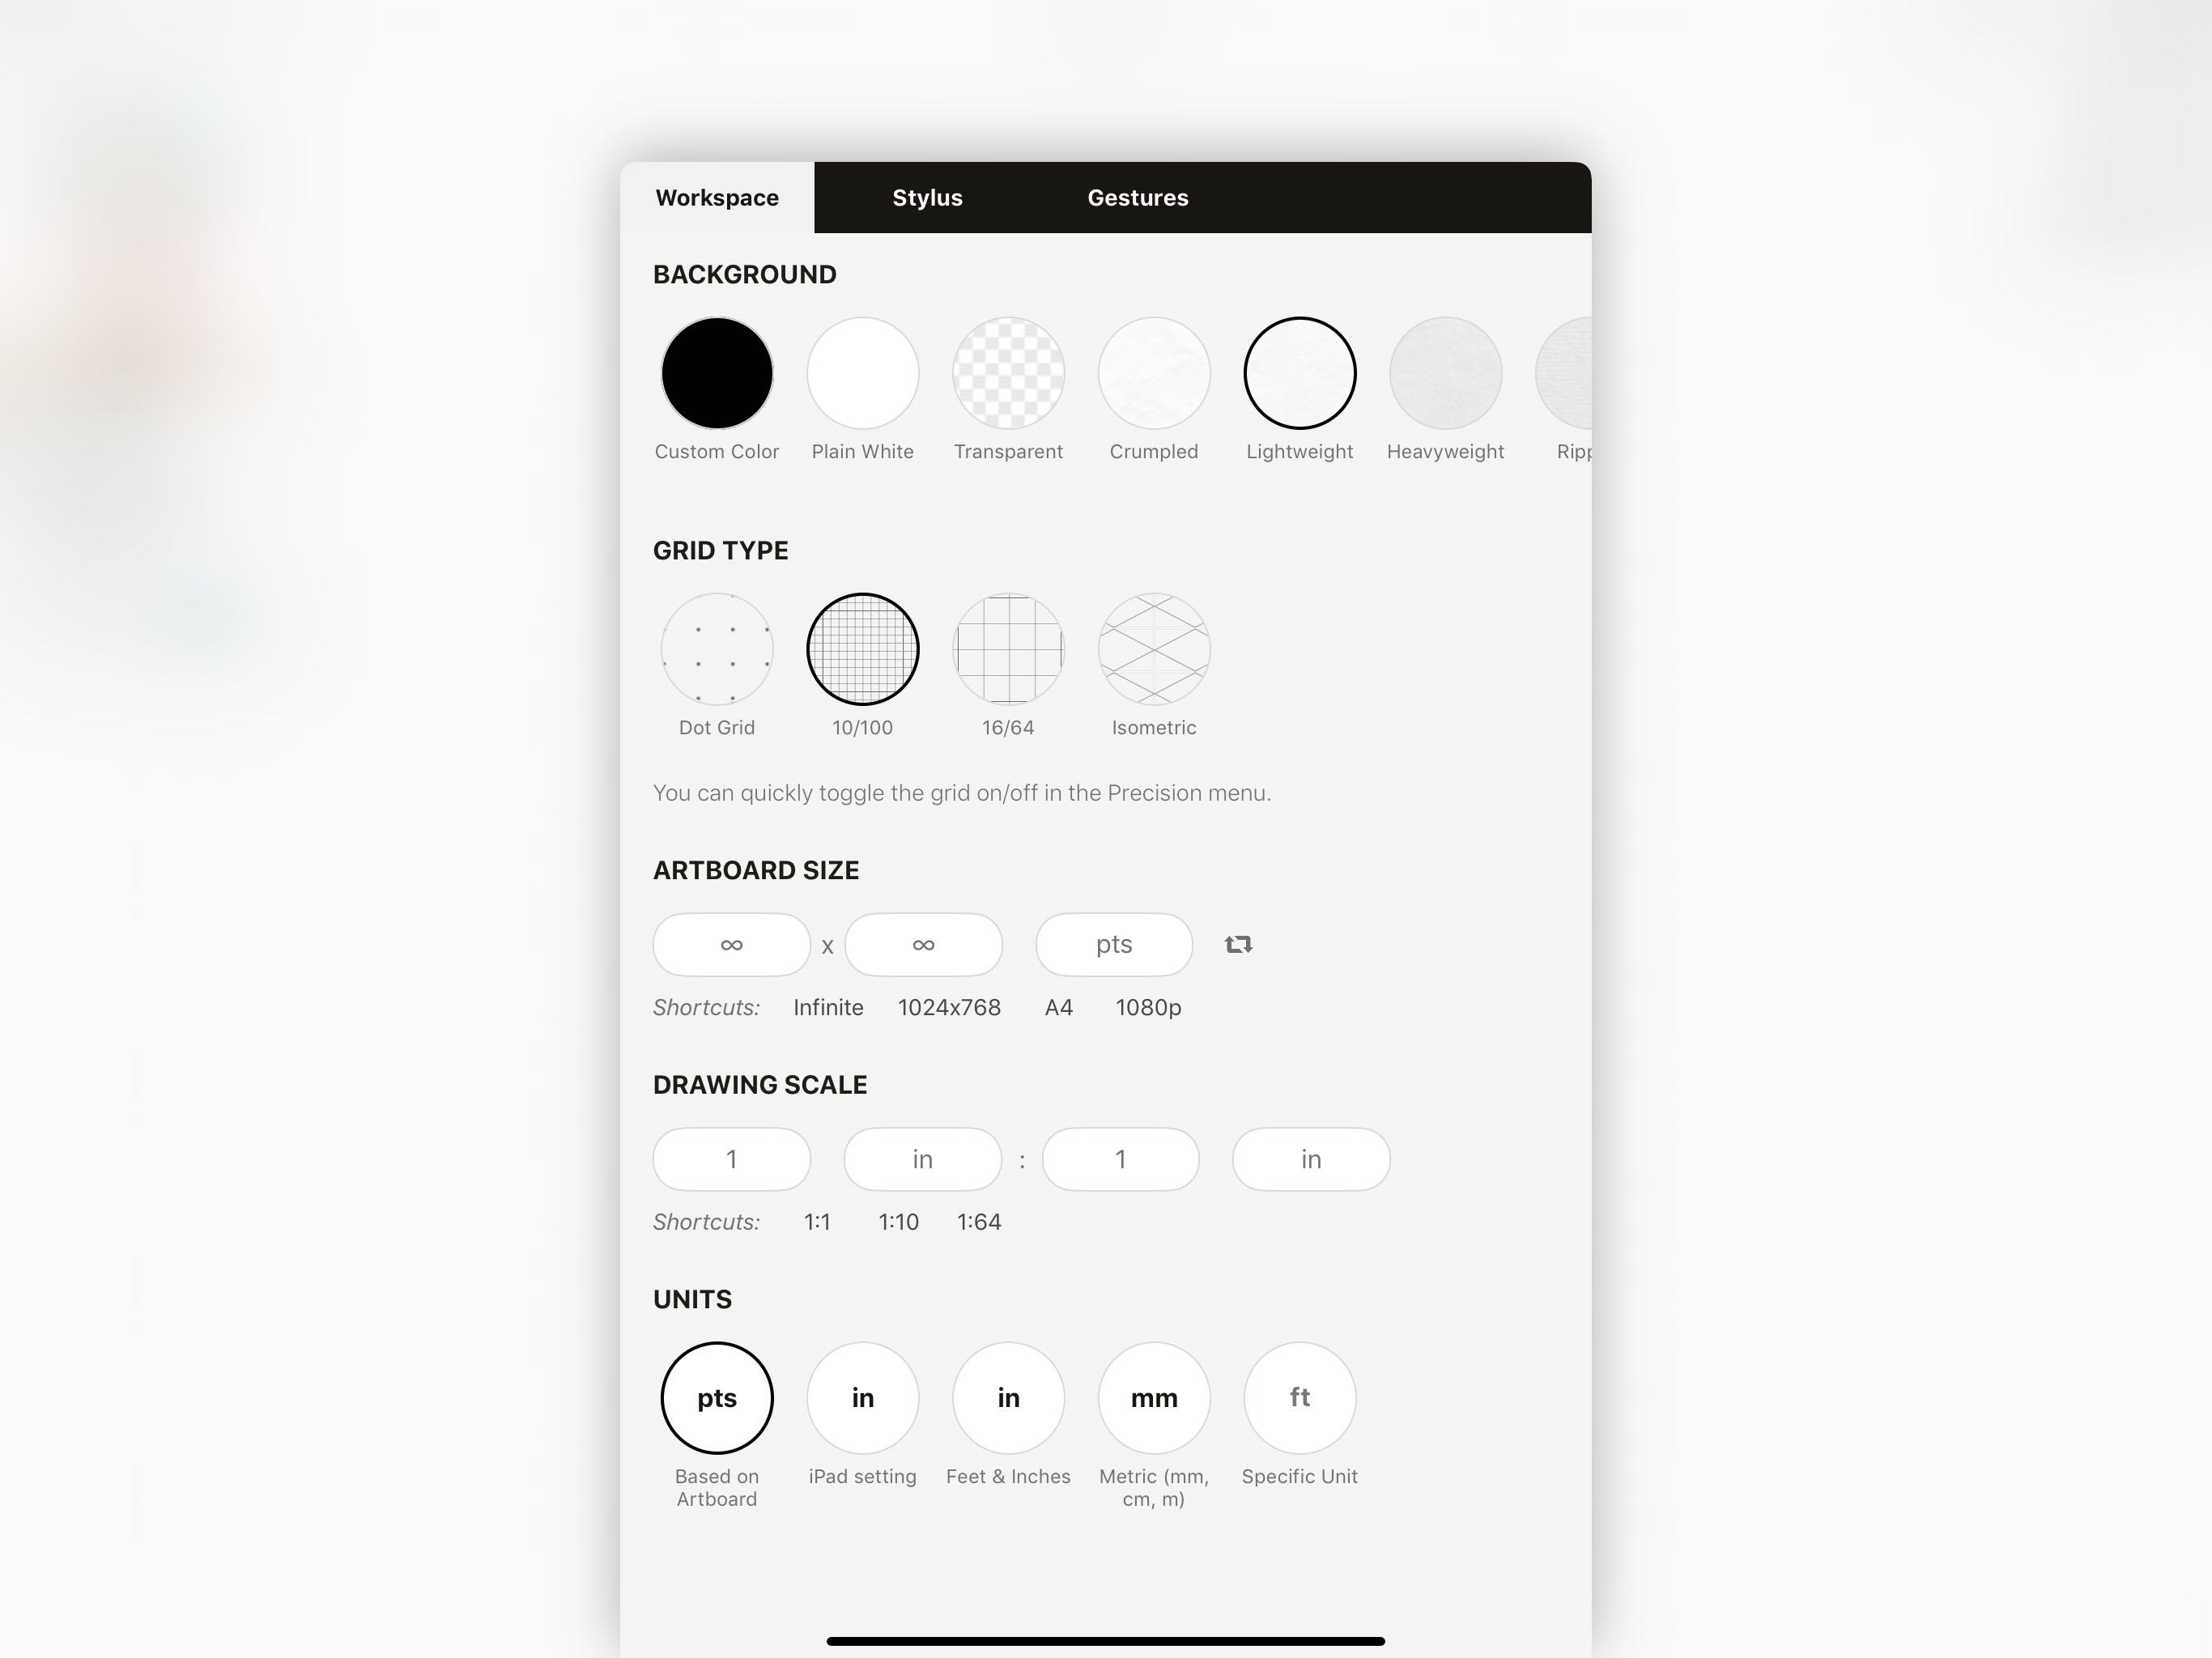
Here you can choose from different paper types, grids, scale and tool metrics... and set up an artboard. Find “Artboard Size”.
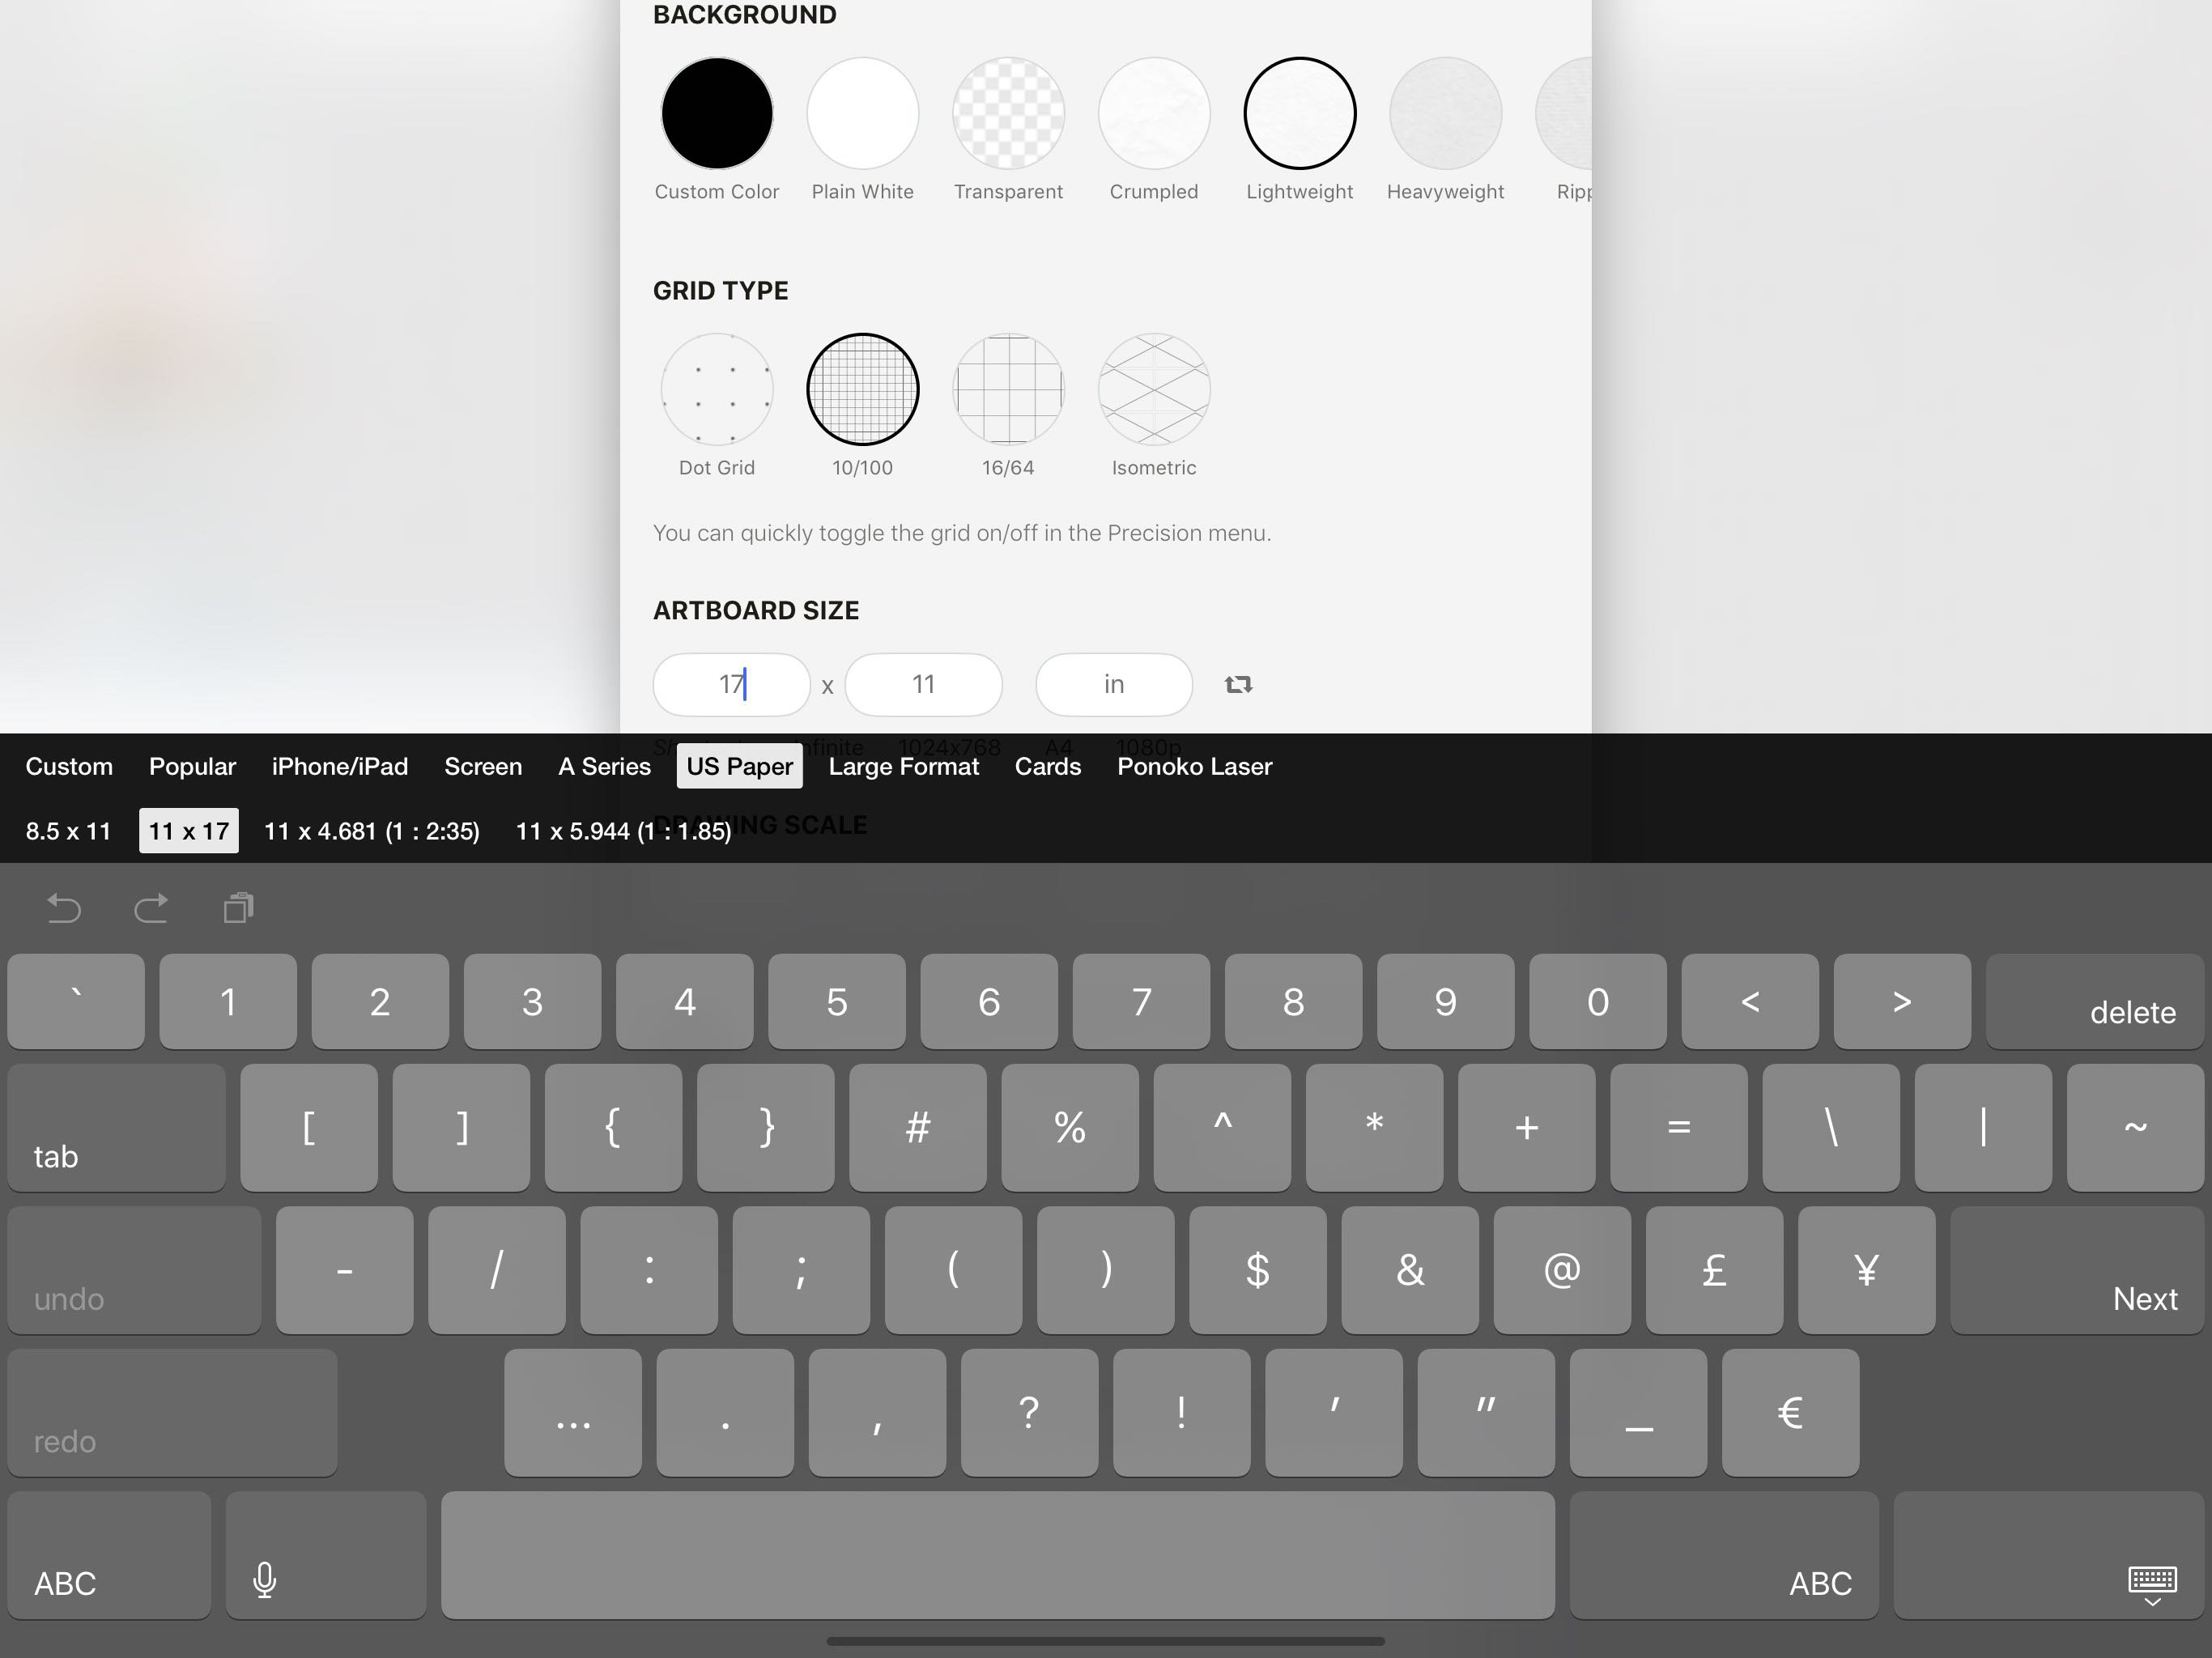
Tap a field and the keyboard will appear. Above the keyboard you’ll see many preset options available to choose from, from large to business card size, various screen sizes, and US or European paper types. You can browse through these and tap one to choose it, or if you know your boundaries, go ahead and enter them with the keyboard.
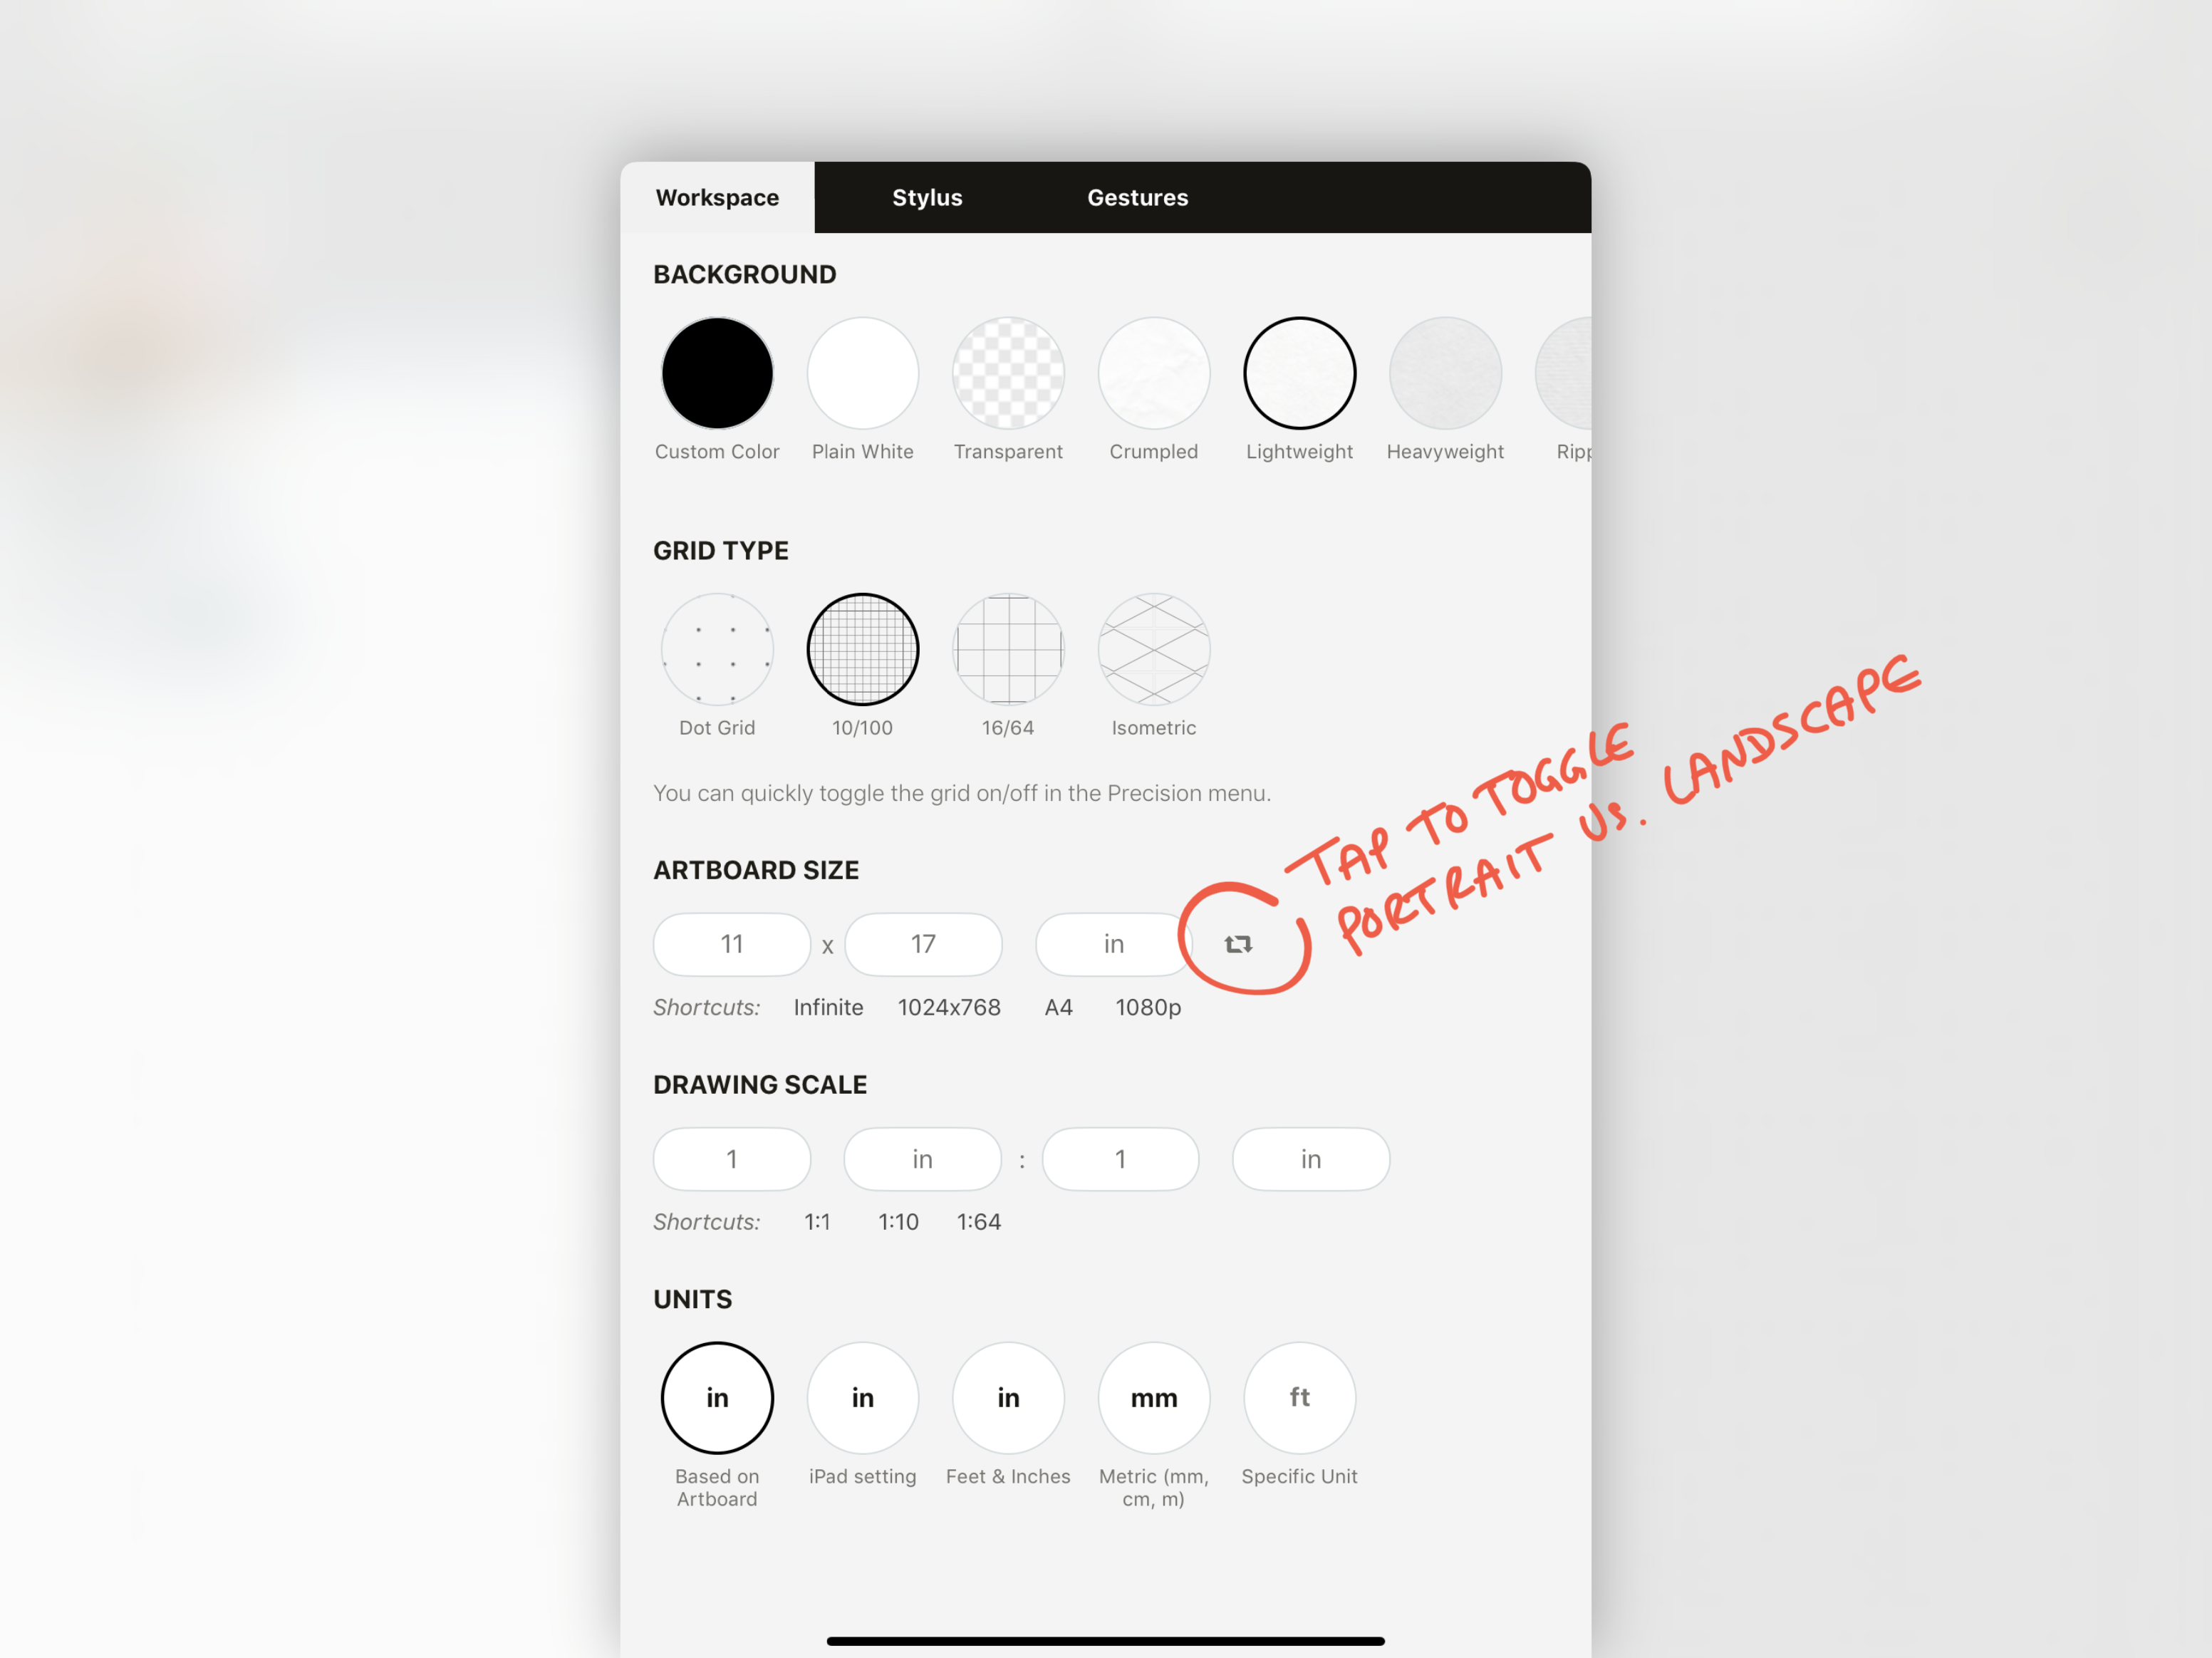
The arrows beside the fields lets you toggle between portrait and landscape modes (aka rotate the canvas 90 degrees).
Once you’re good with the size, tap outside the overlay to return to the canvas.
You’ll see a blue border has appeared. This is your lovely, very flexible artboard. Everything inside the border is lit, everything outside is lightly greyed out.
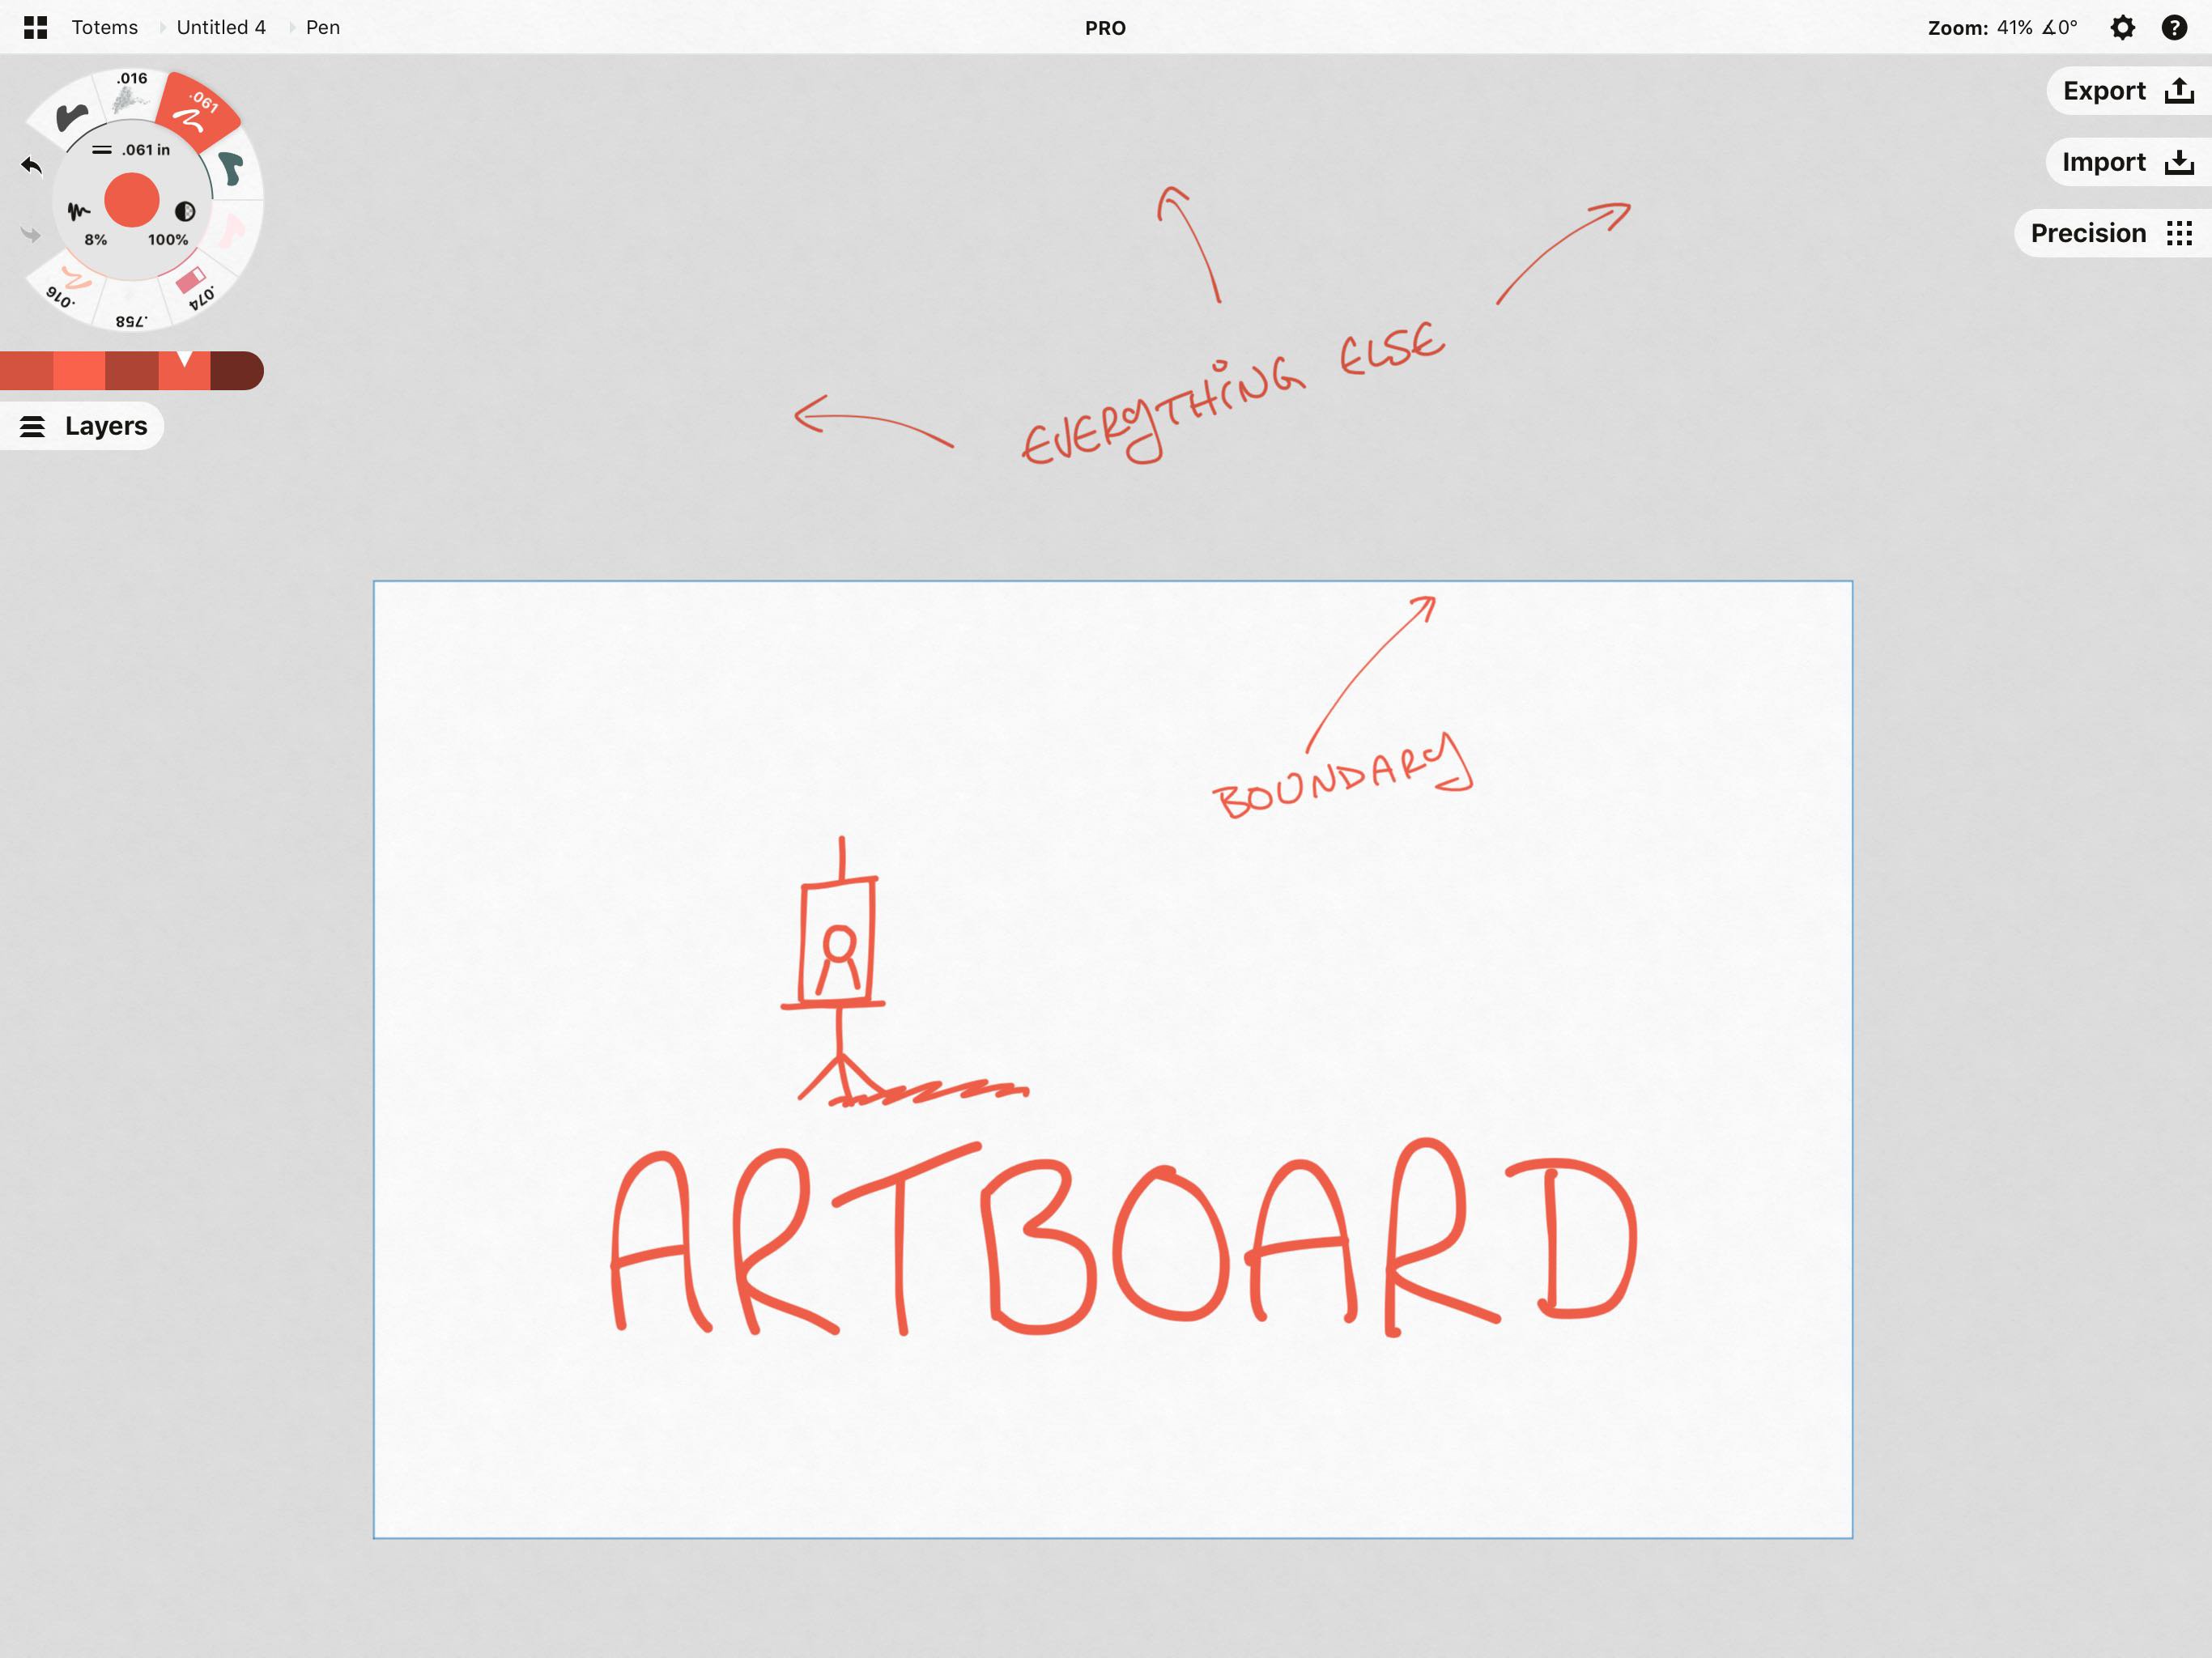
When you are ready to export, everything inside this artboard will be exported according to the actual, real-world dimensions you set in Settings.
Moving Your Artboard
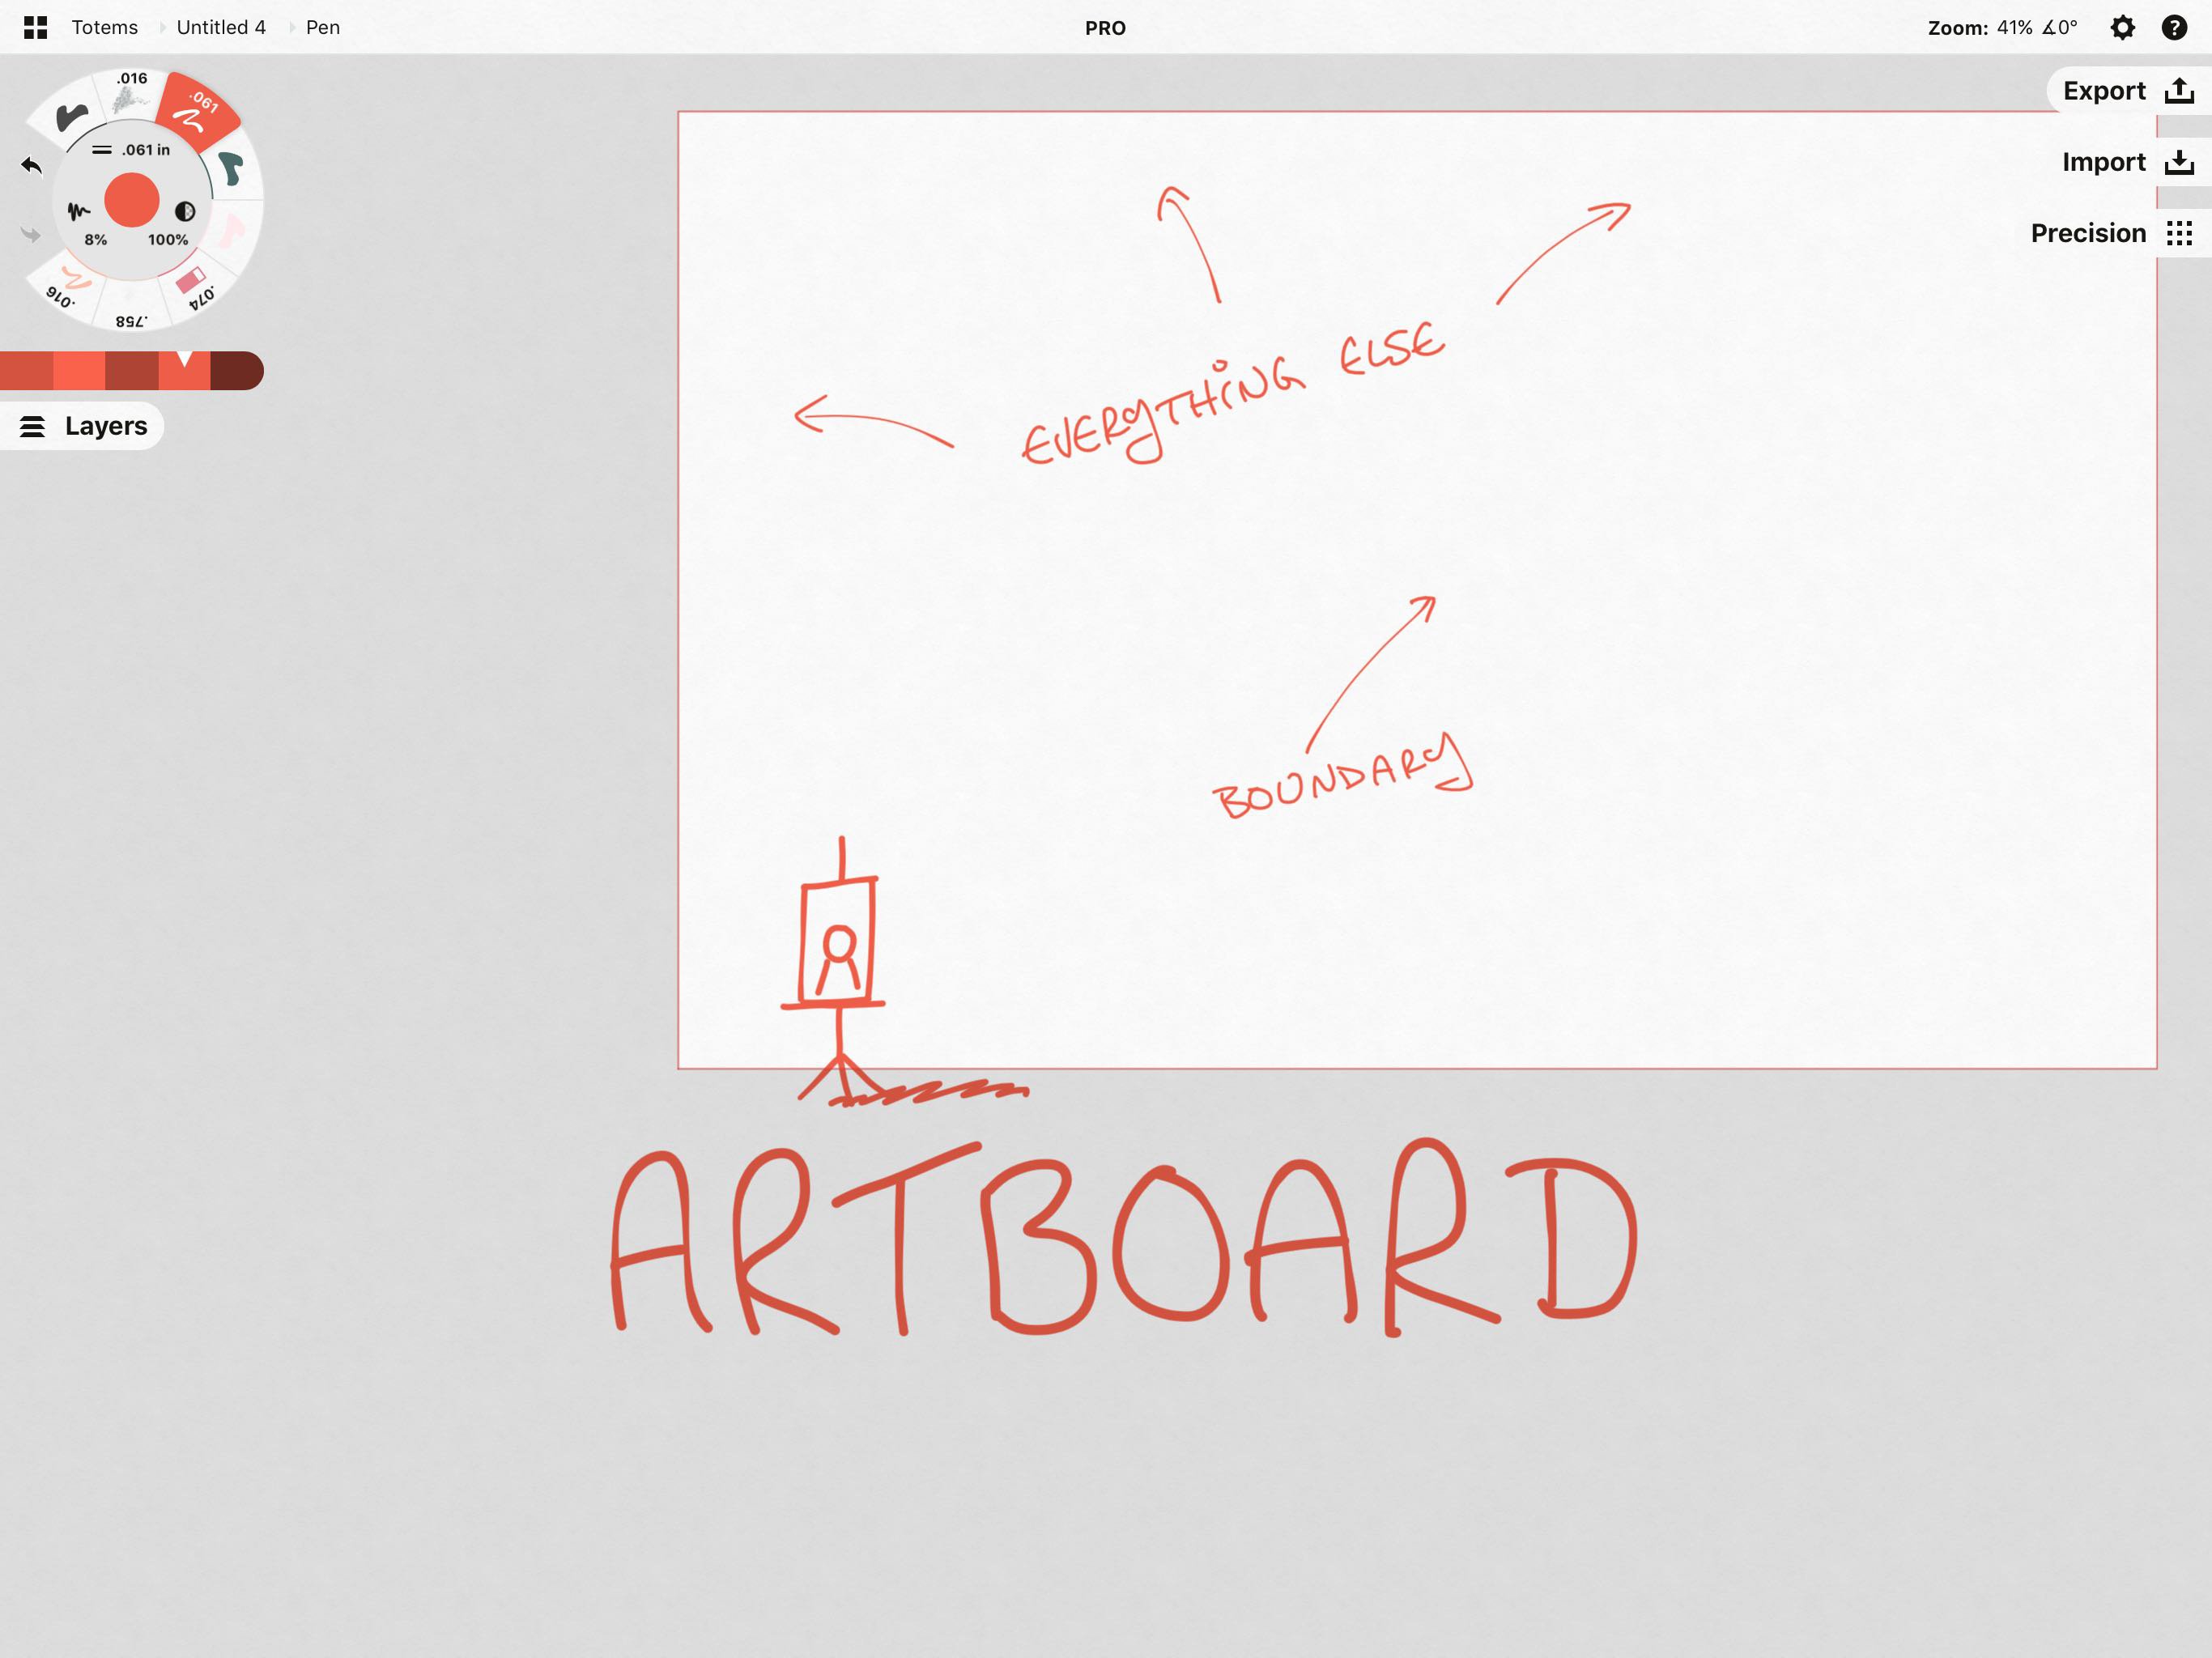
You can move your artboard anywhere on the infinite canvas. The flexible boundary lets you control exactly what you want to export at any time, no matter what you’ve drawn.
Tap+hold the artboard boundary. The blue frame will turn red. Drag it around any part of your sketch to frame it.
If your drawing appears too big for the artboard, you can select your drawing and scale it down to the proper size.
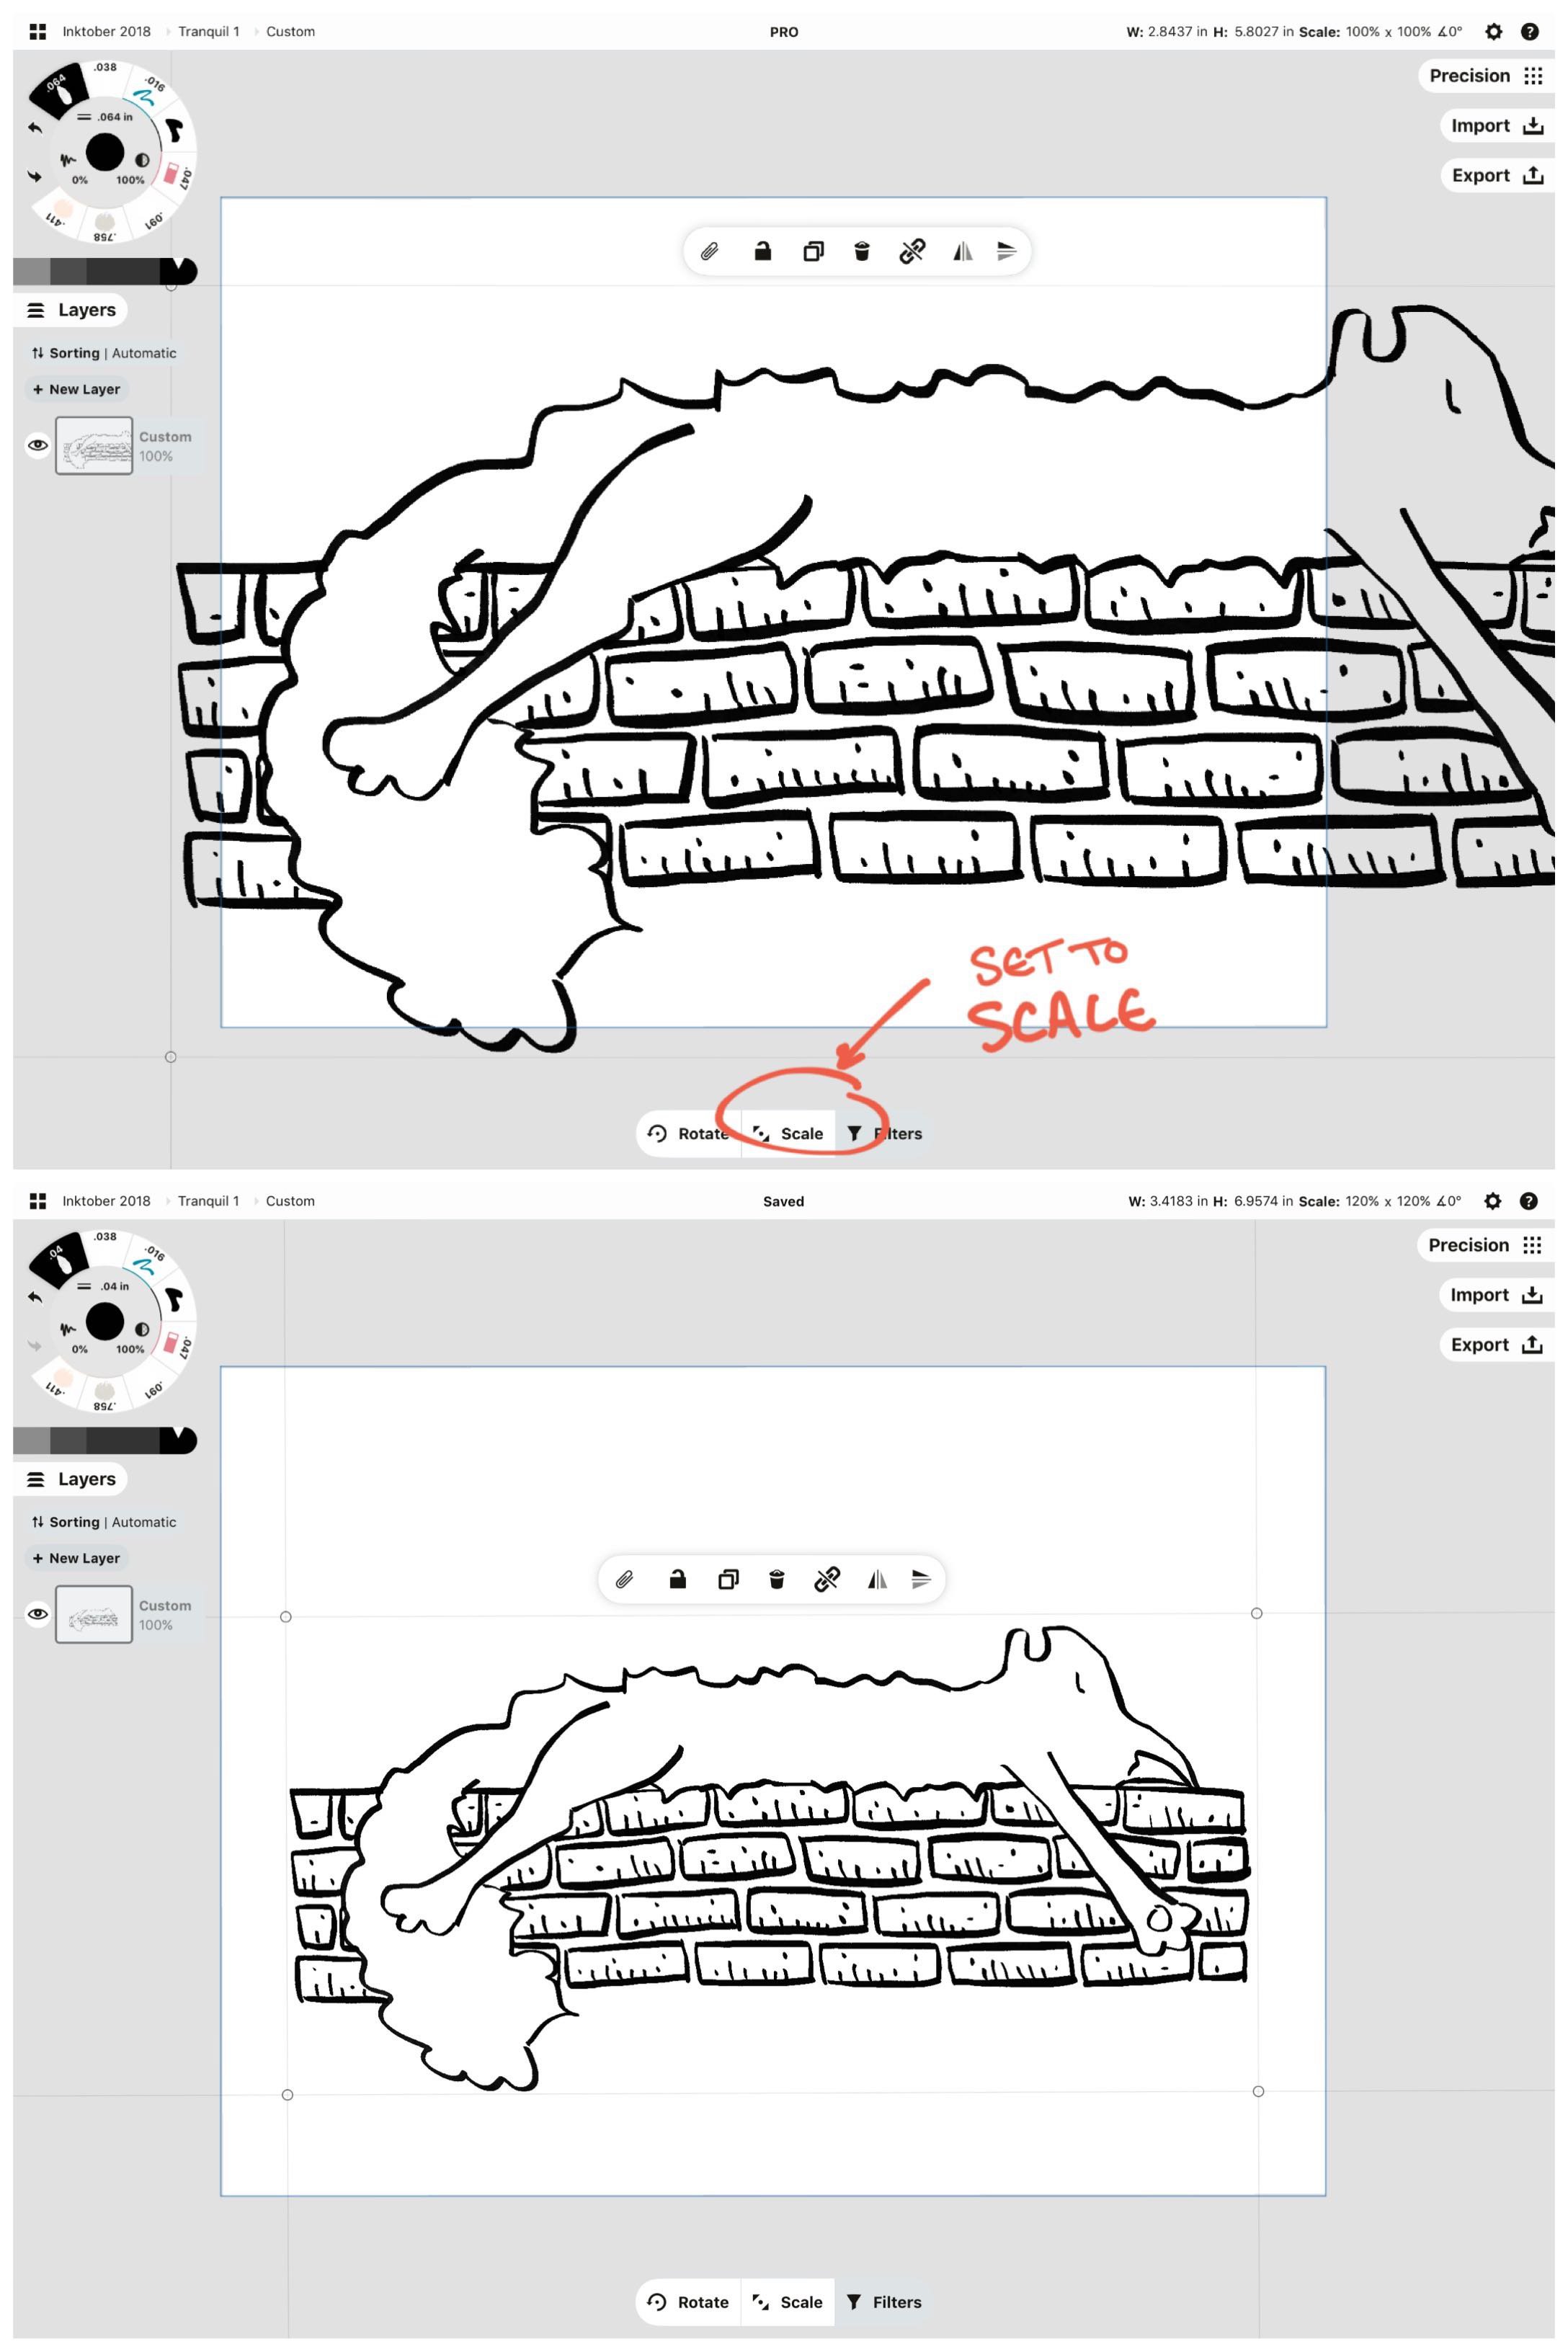
Select your drawing in All layers and make sure Scale, not Stretch, is active on your Selection menu.
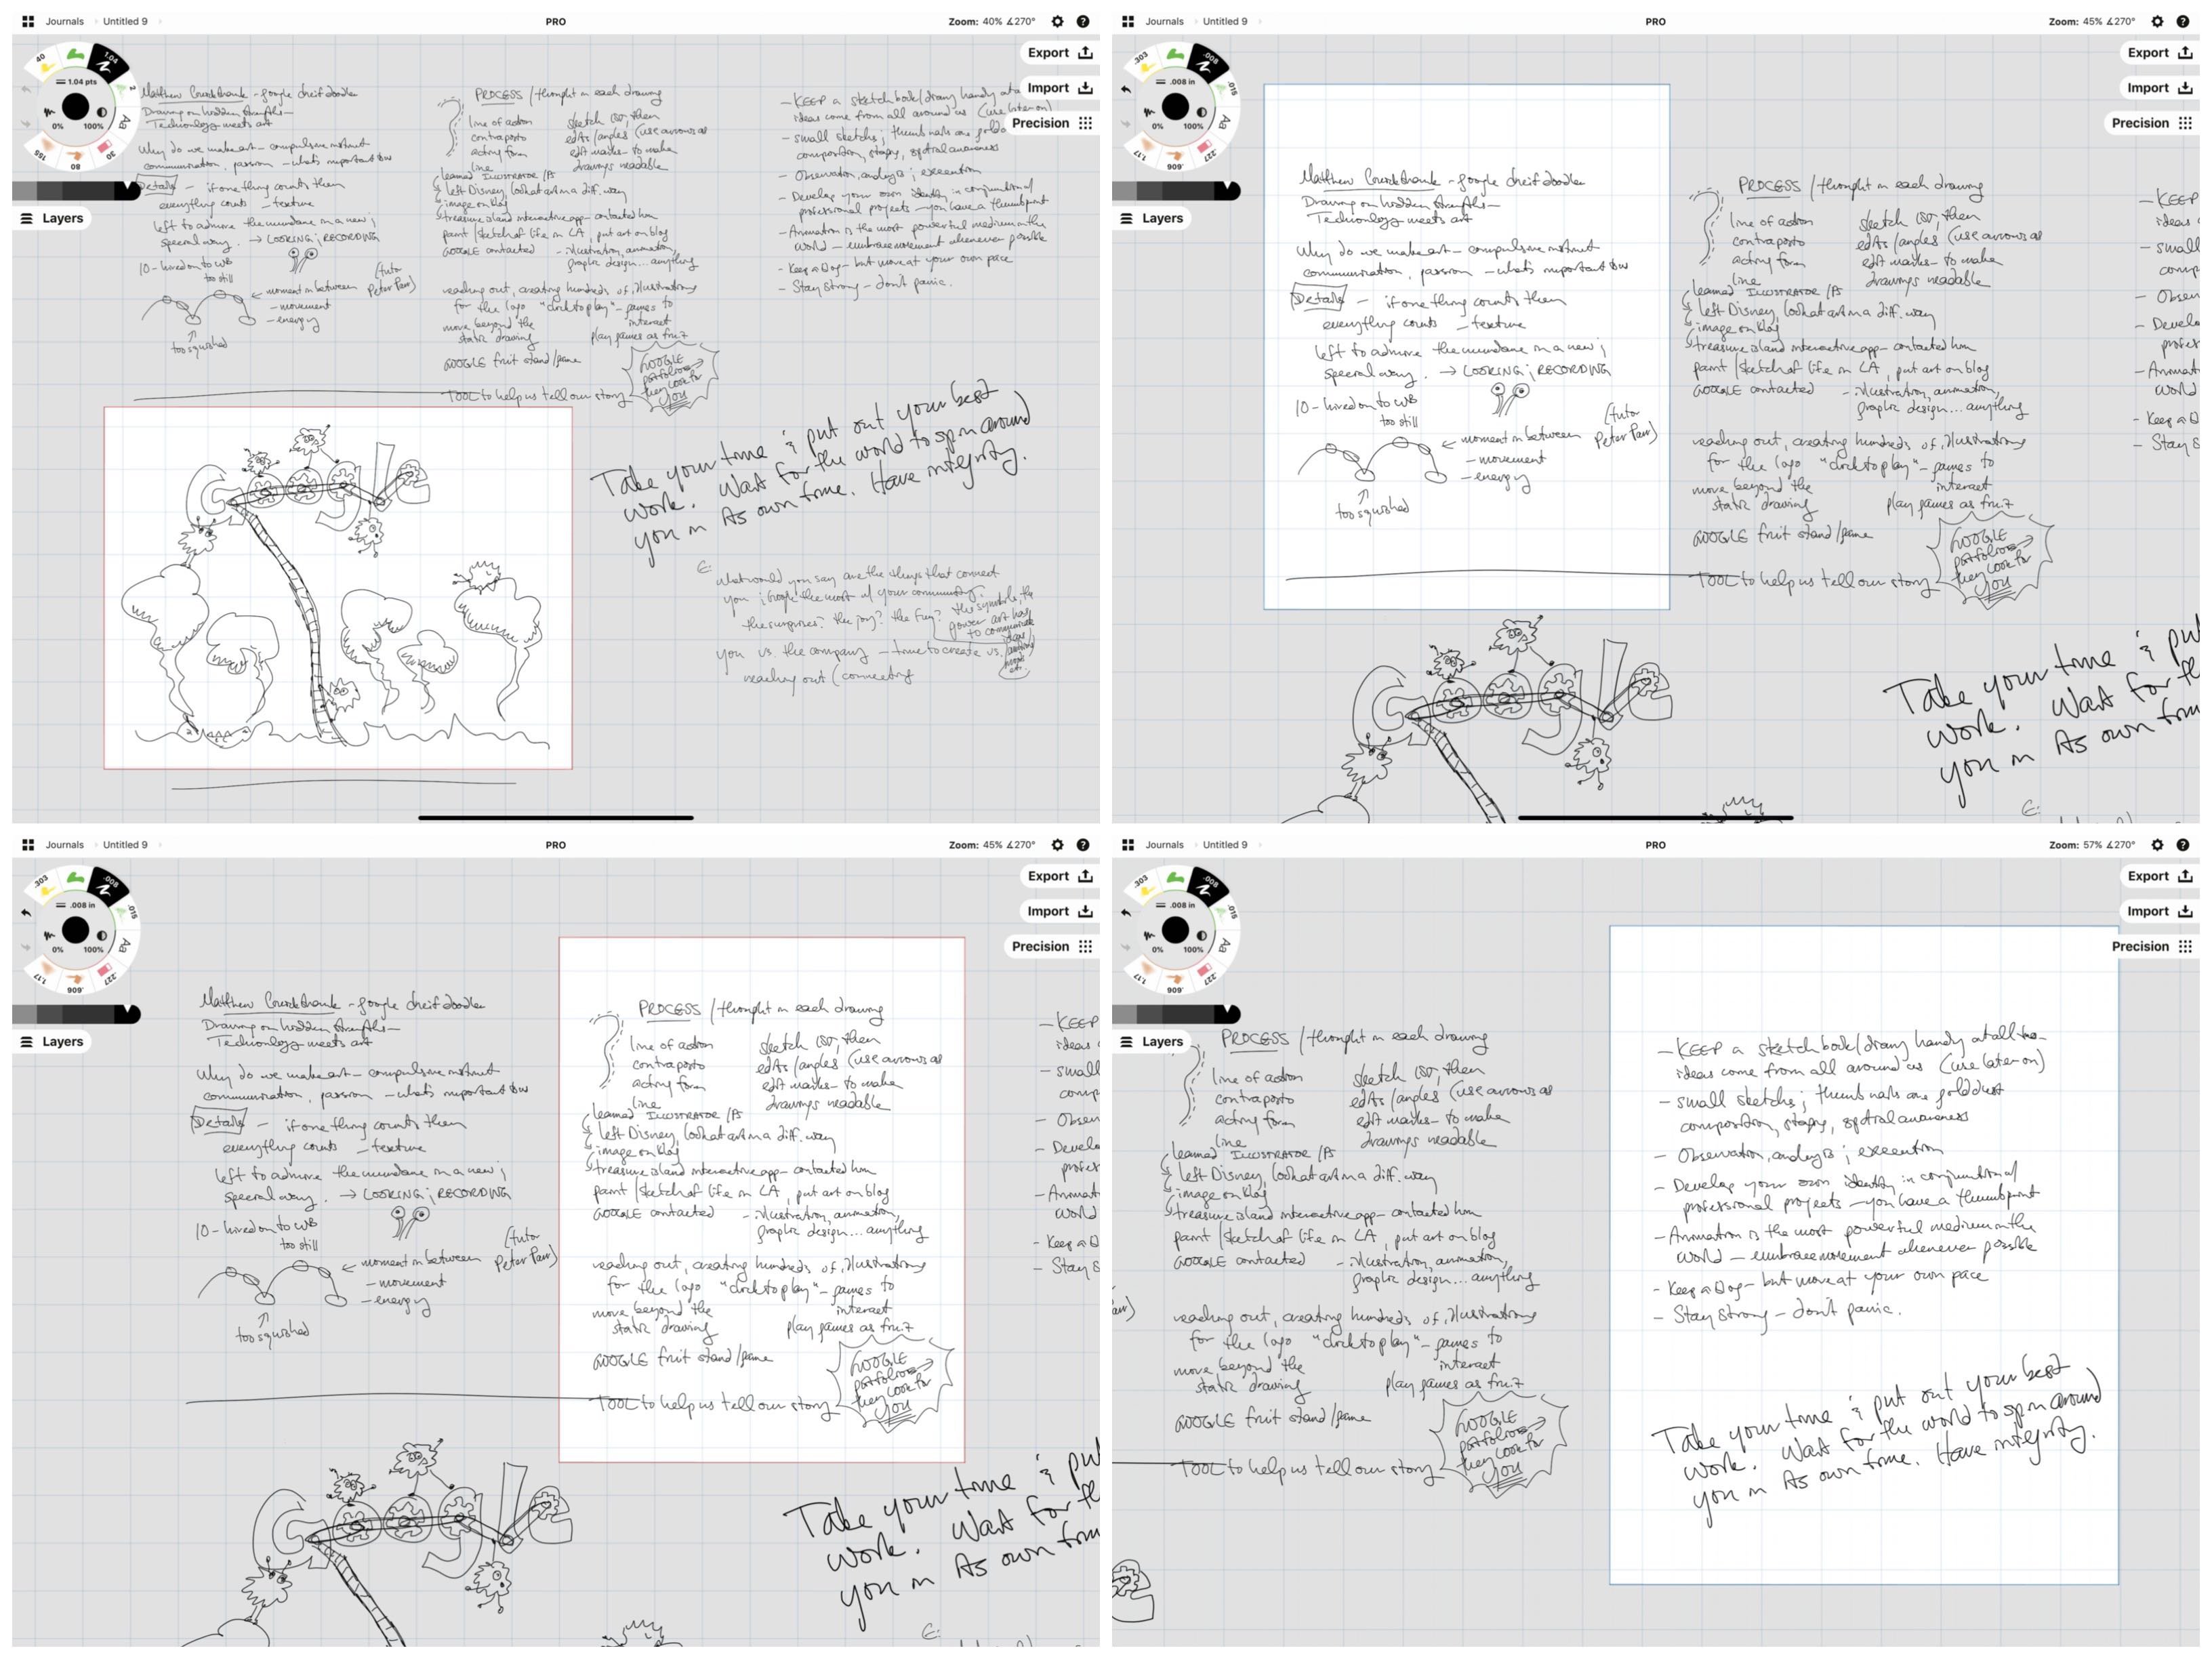
To frame a smaller portion of your drawing, center the artboard on the area you want. Select and scale your drawing larger or smaller to fit. If you’re a big note taker, you can export and share different parts of your notes, even if you’ve sketched all over the page.
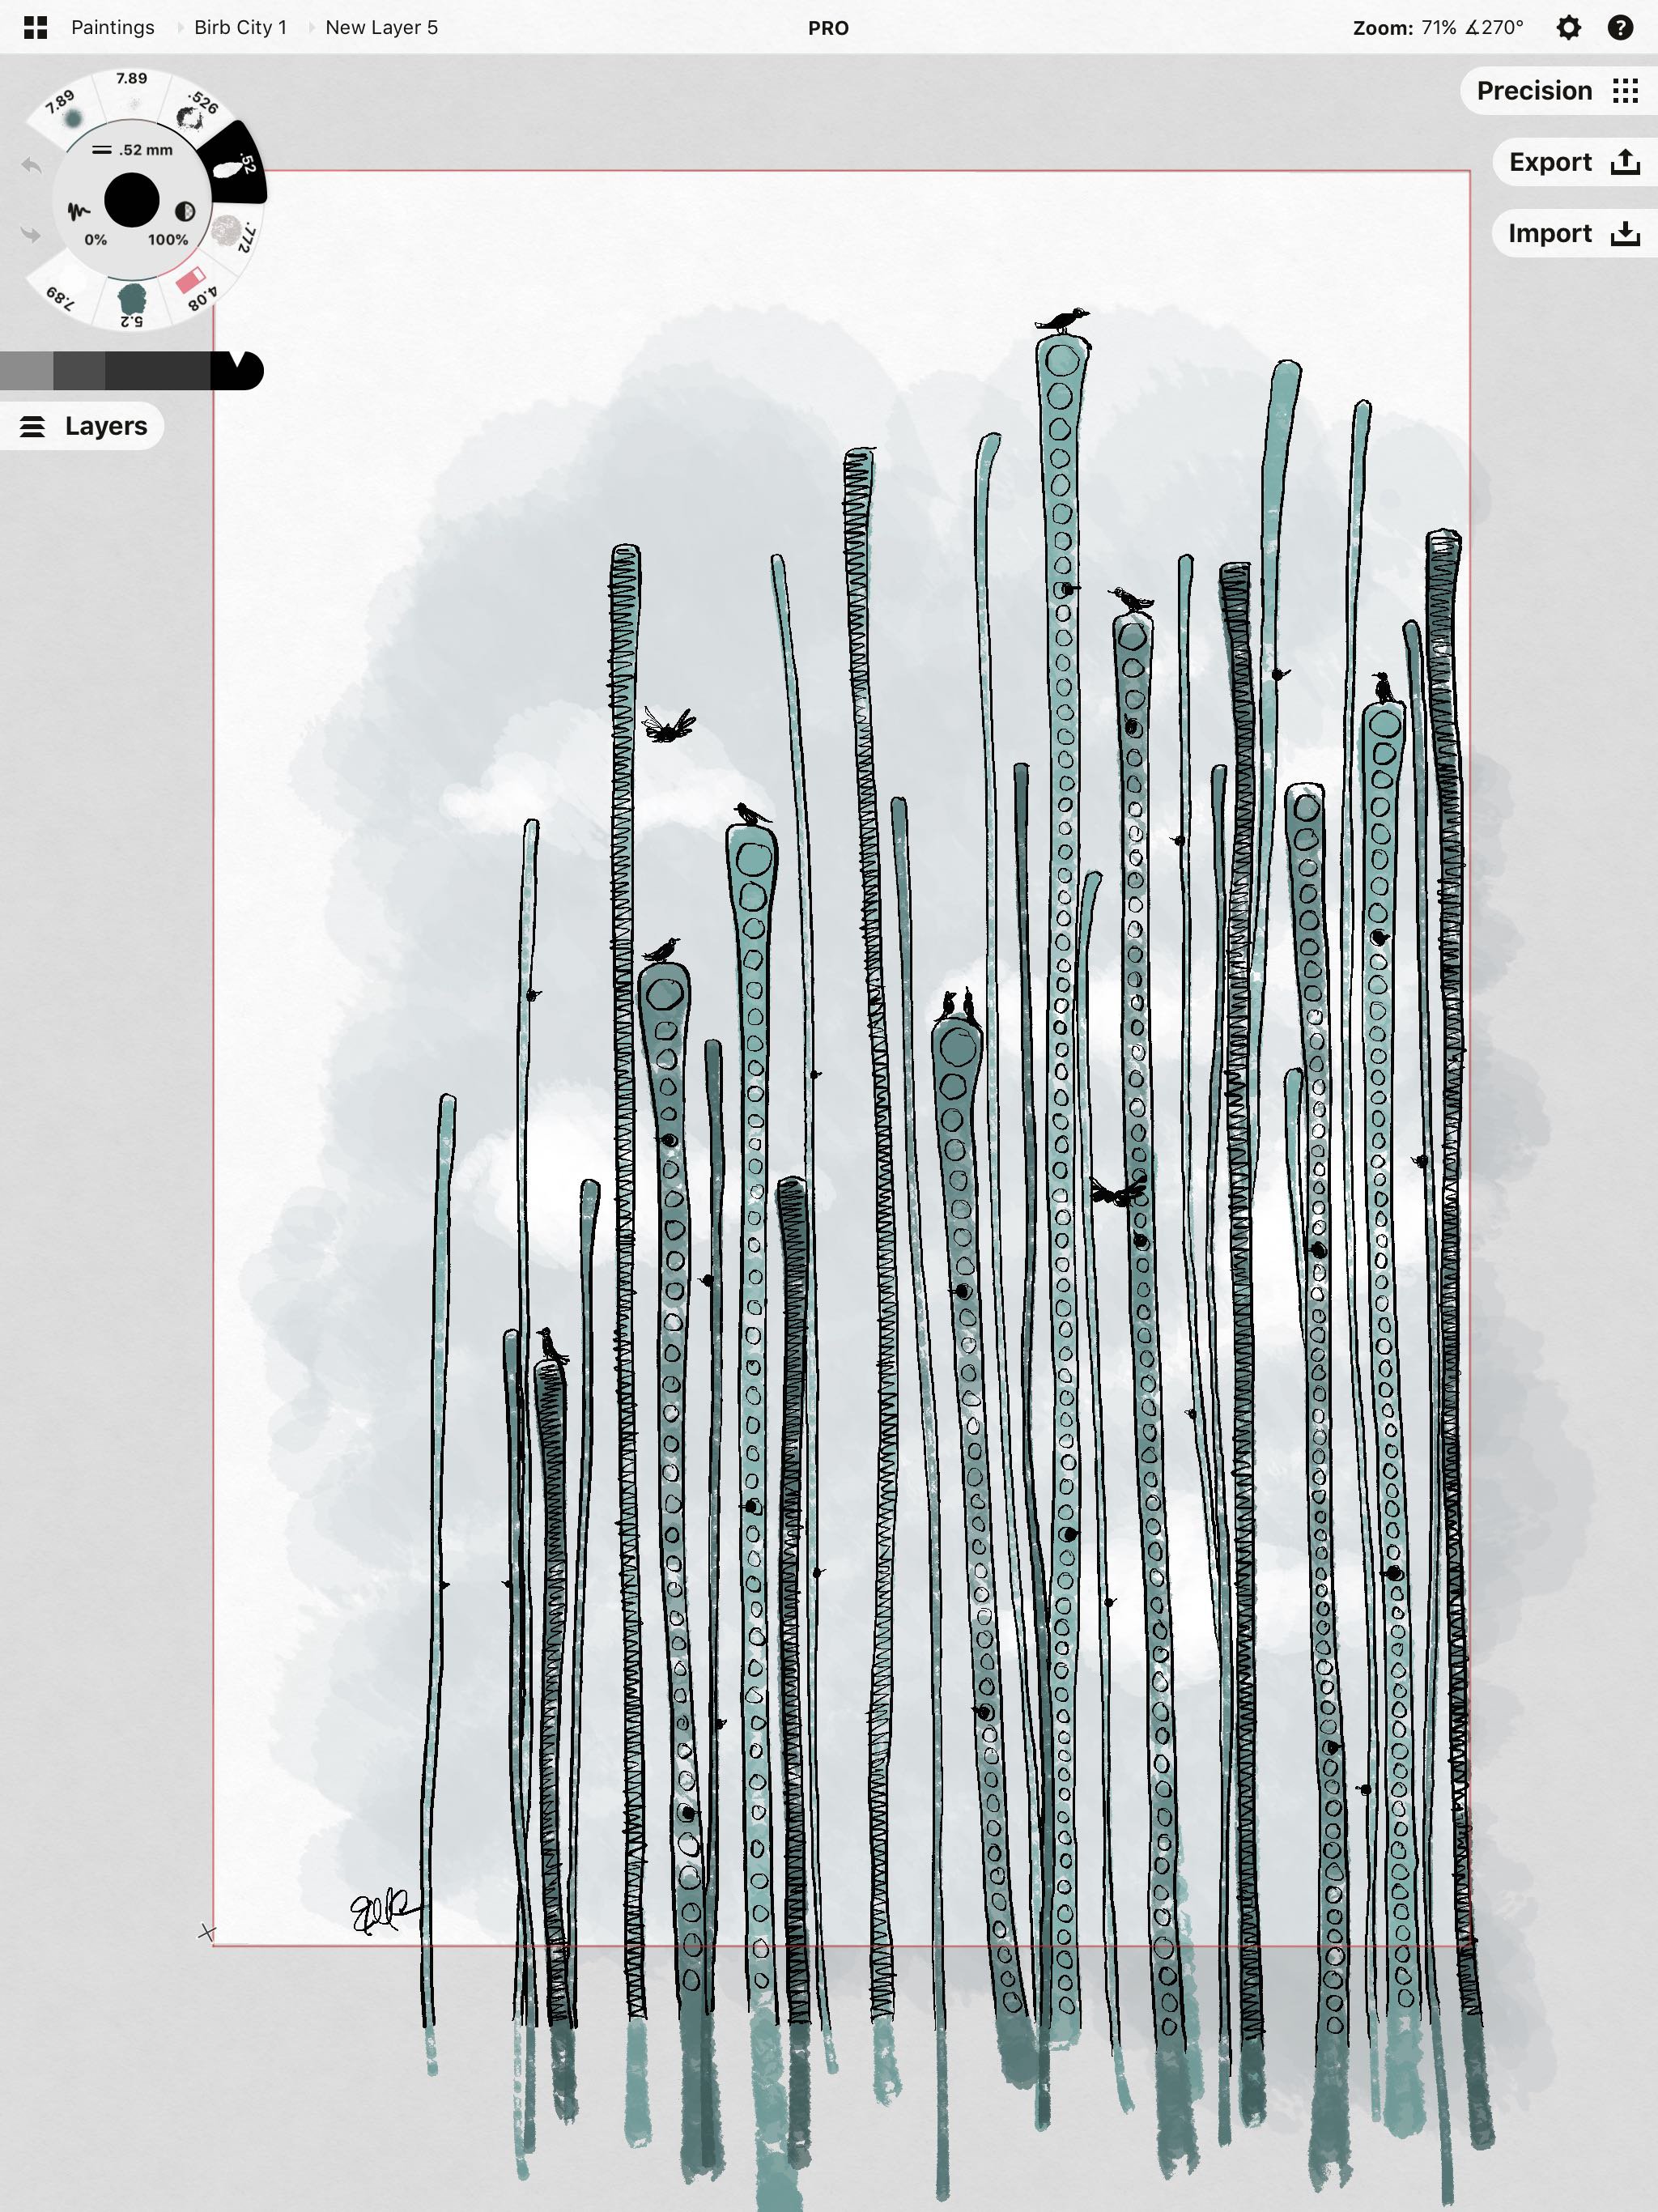
If you’re one to illustrate the full picture, this allows you to paint “outside the lines” and experiment with storytelling freely, then frame the image where it makes sense.
Once you’re ready to export, tap the Export button and choose the Artboard Size aka Custom Size option.
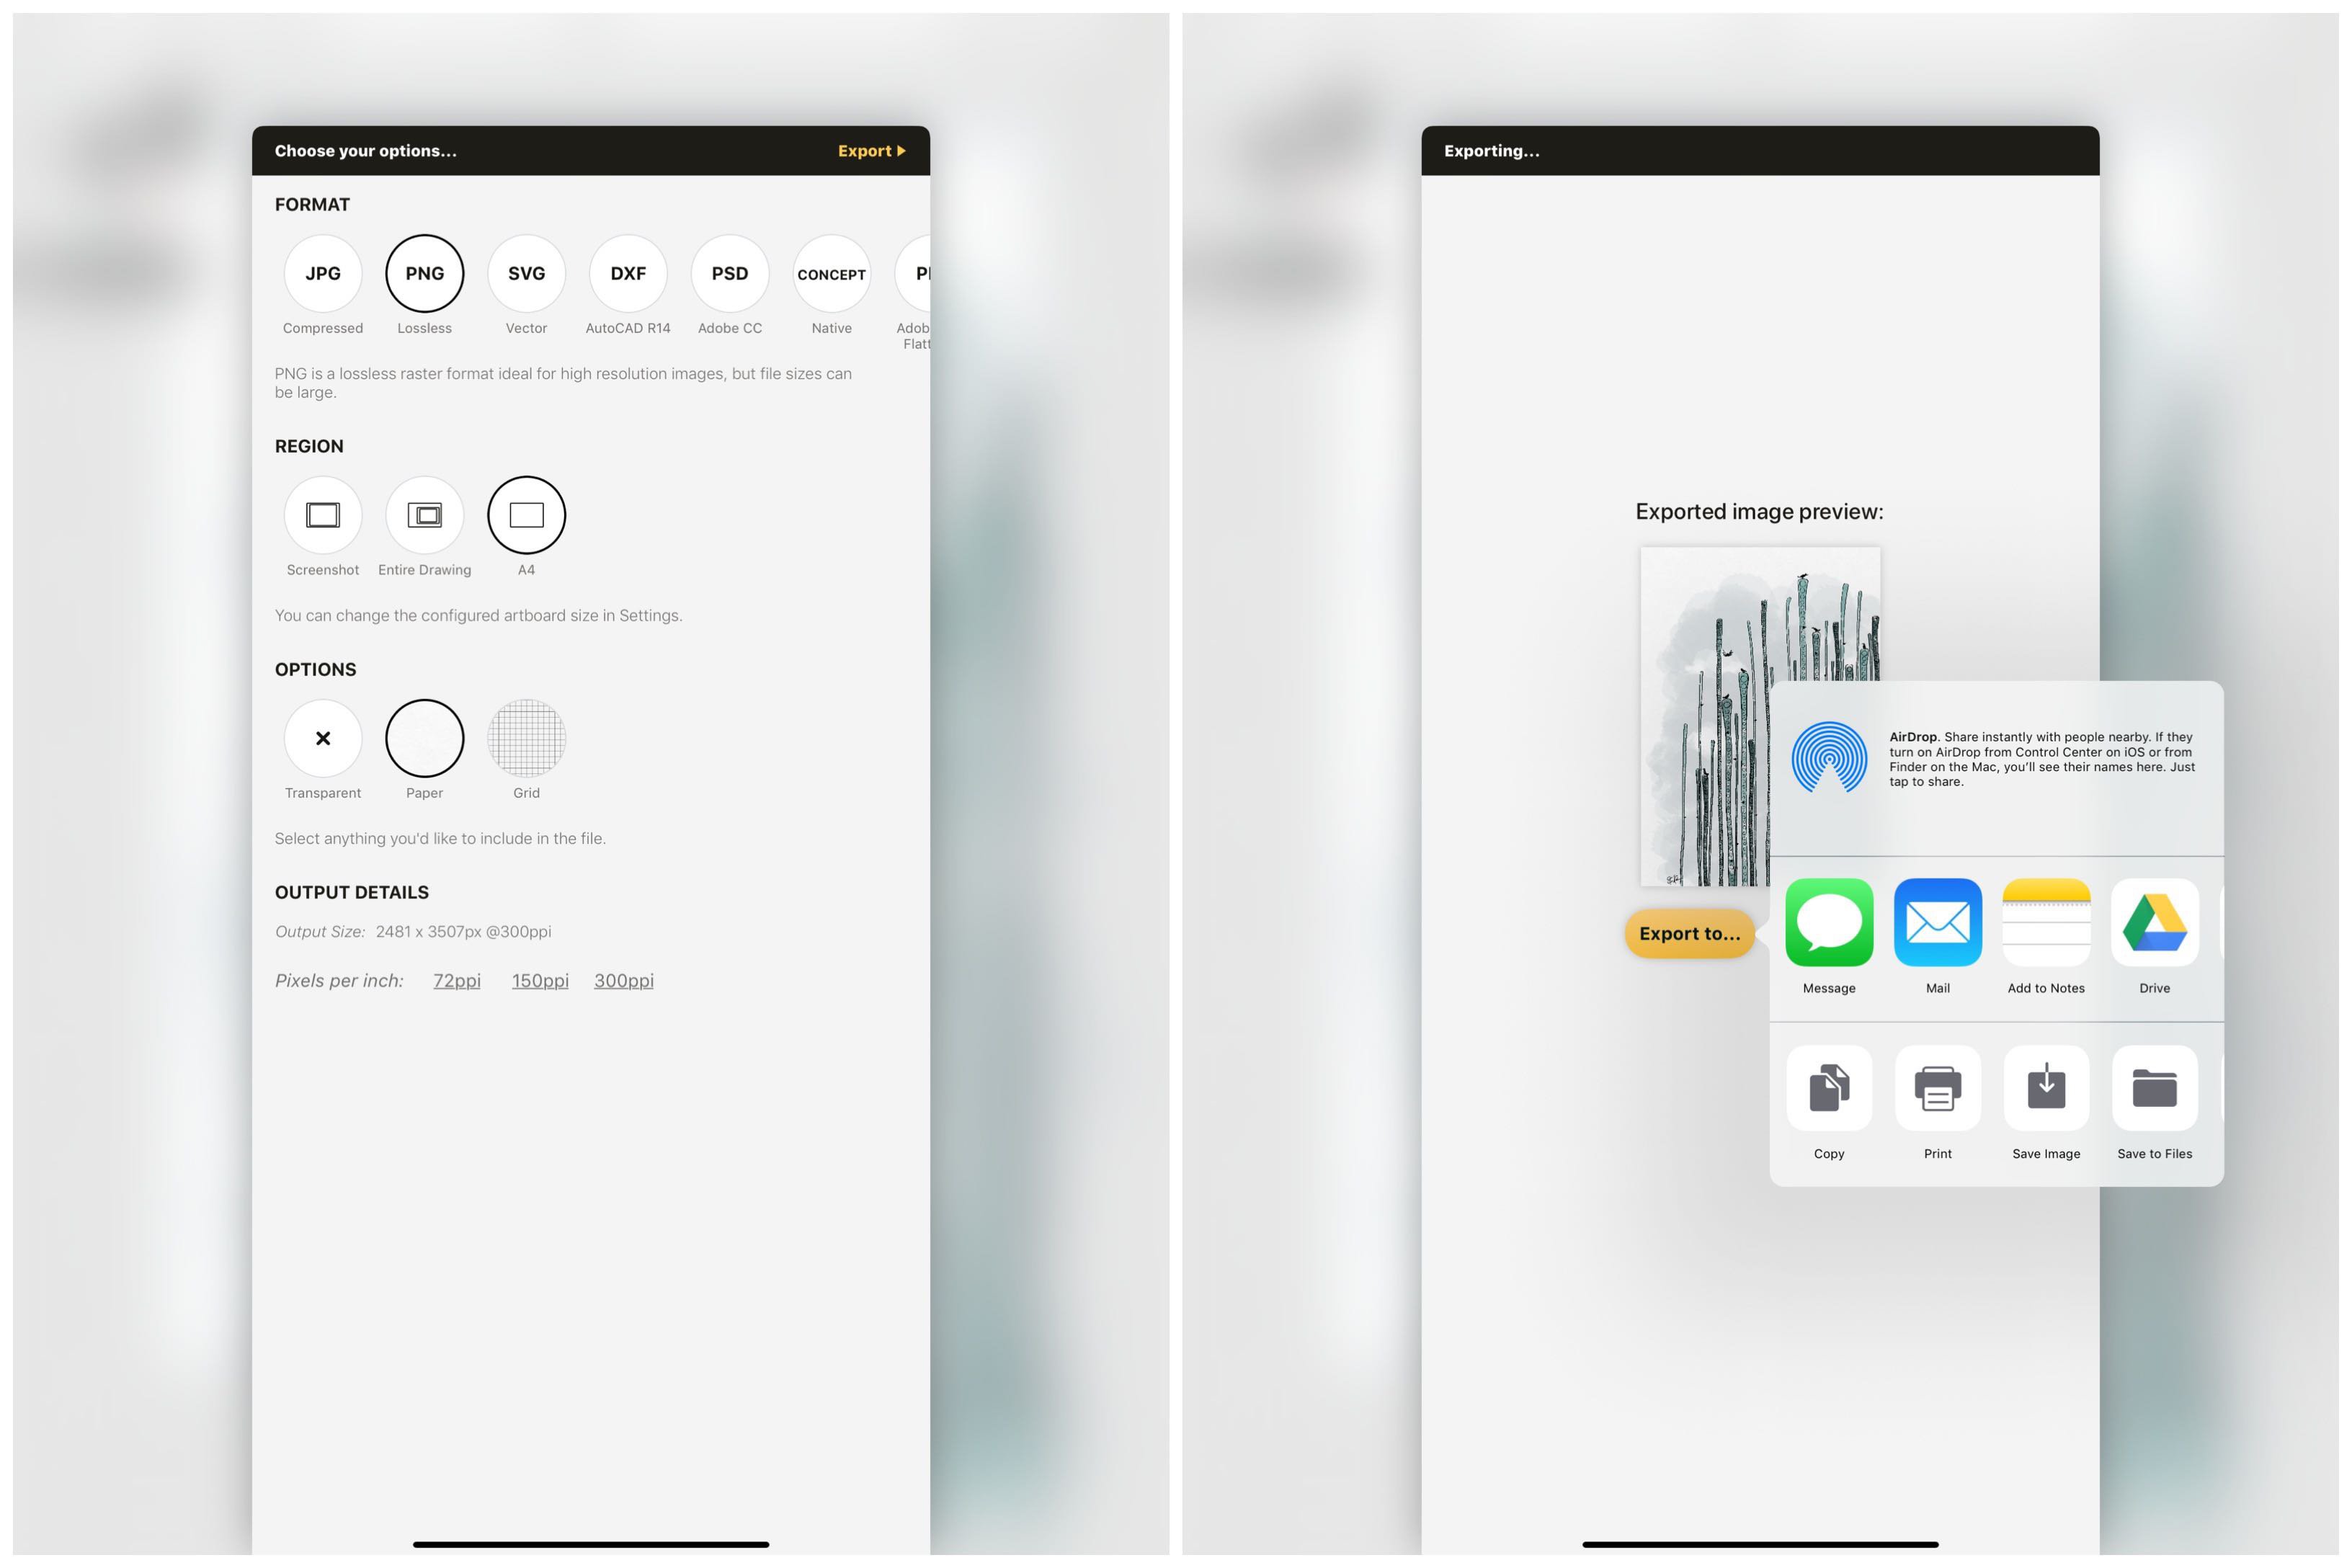
This exports exactly what is inside the artboard boundary. For more on how to frame and export your drawings, check out our tutorial Tips for Exporting Your Designs.
Working Outside the Artboard
The great thing is, even if you’ve defined an artboard for your project, you can still work outside the artboard on the infinite canvas.
Sketch notes, ideas and perspectives beside your photo or plan.
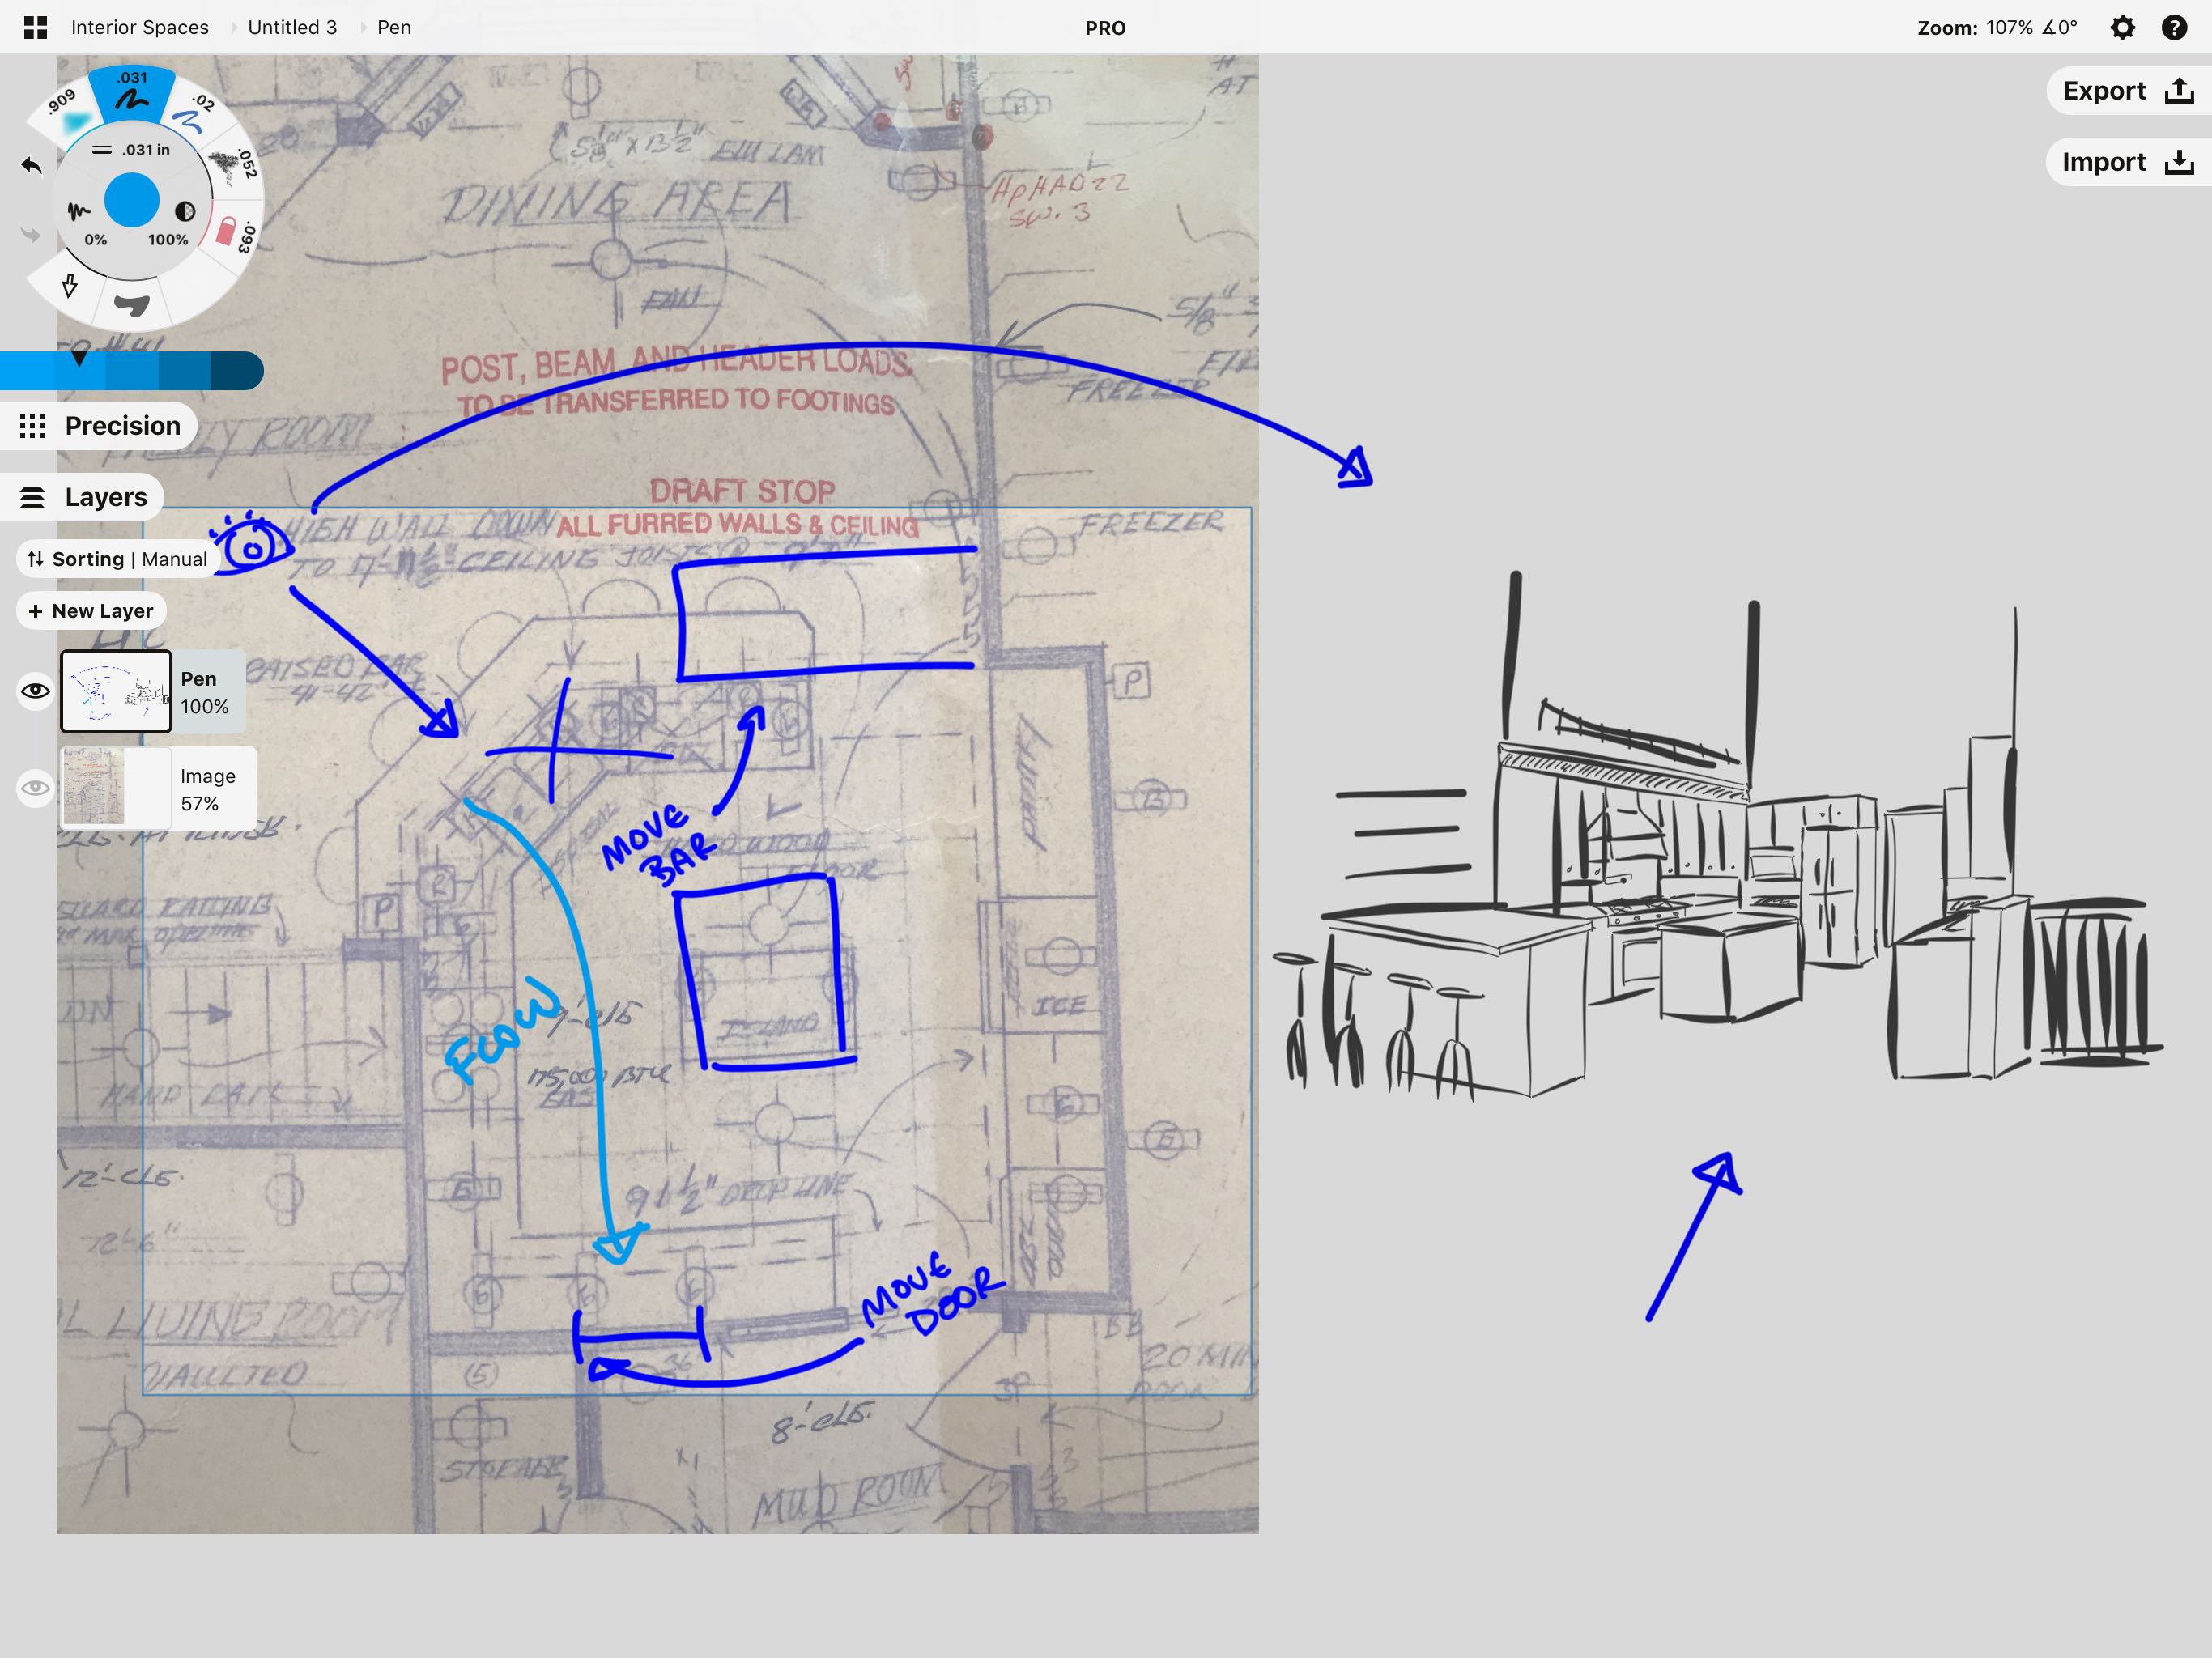
I used this artboard to isolate the kitchen area of an old blueprint for planning a renovation. To the side, I sketched in viewpoints to help visualize the new flow.
Create drawing elements separately from the artboard, then select and drag them onto your canvas.
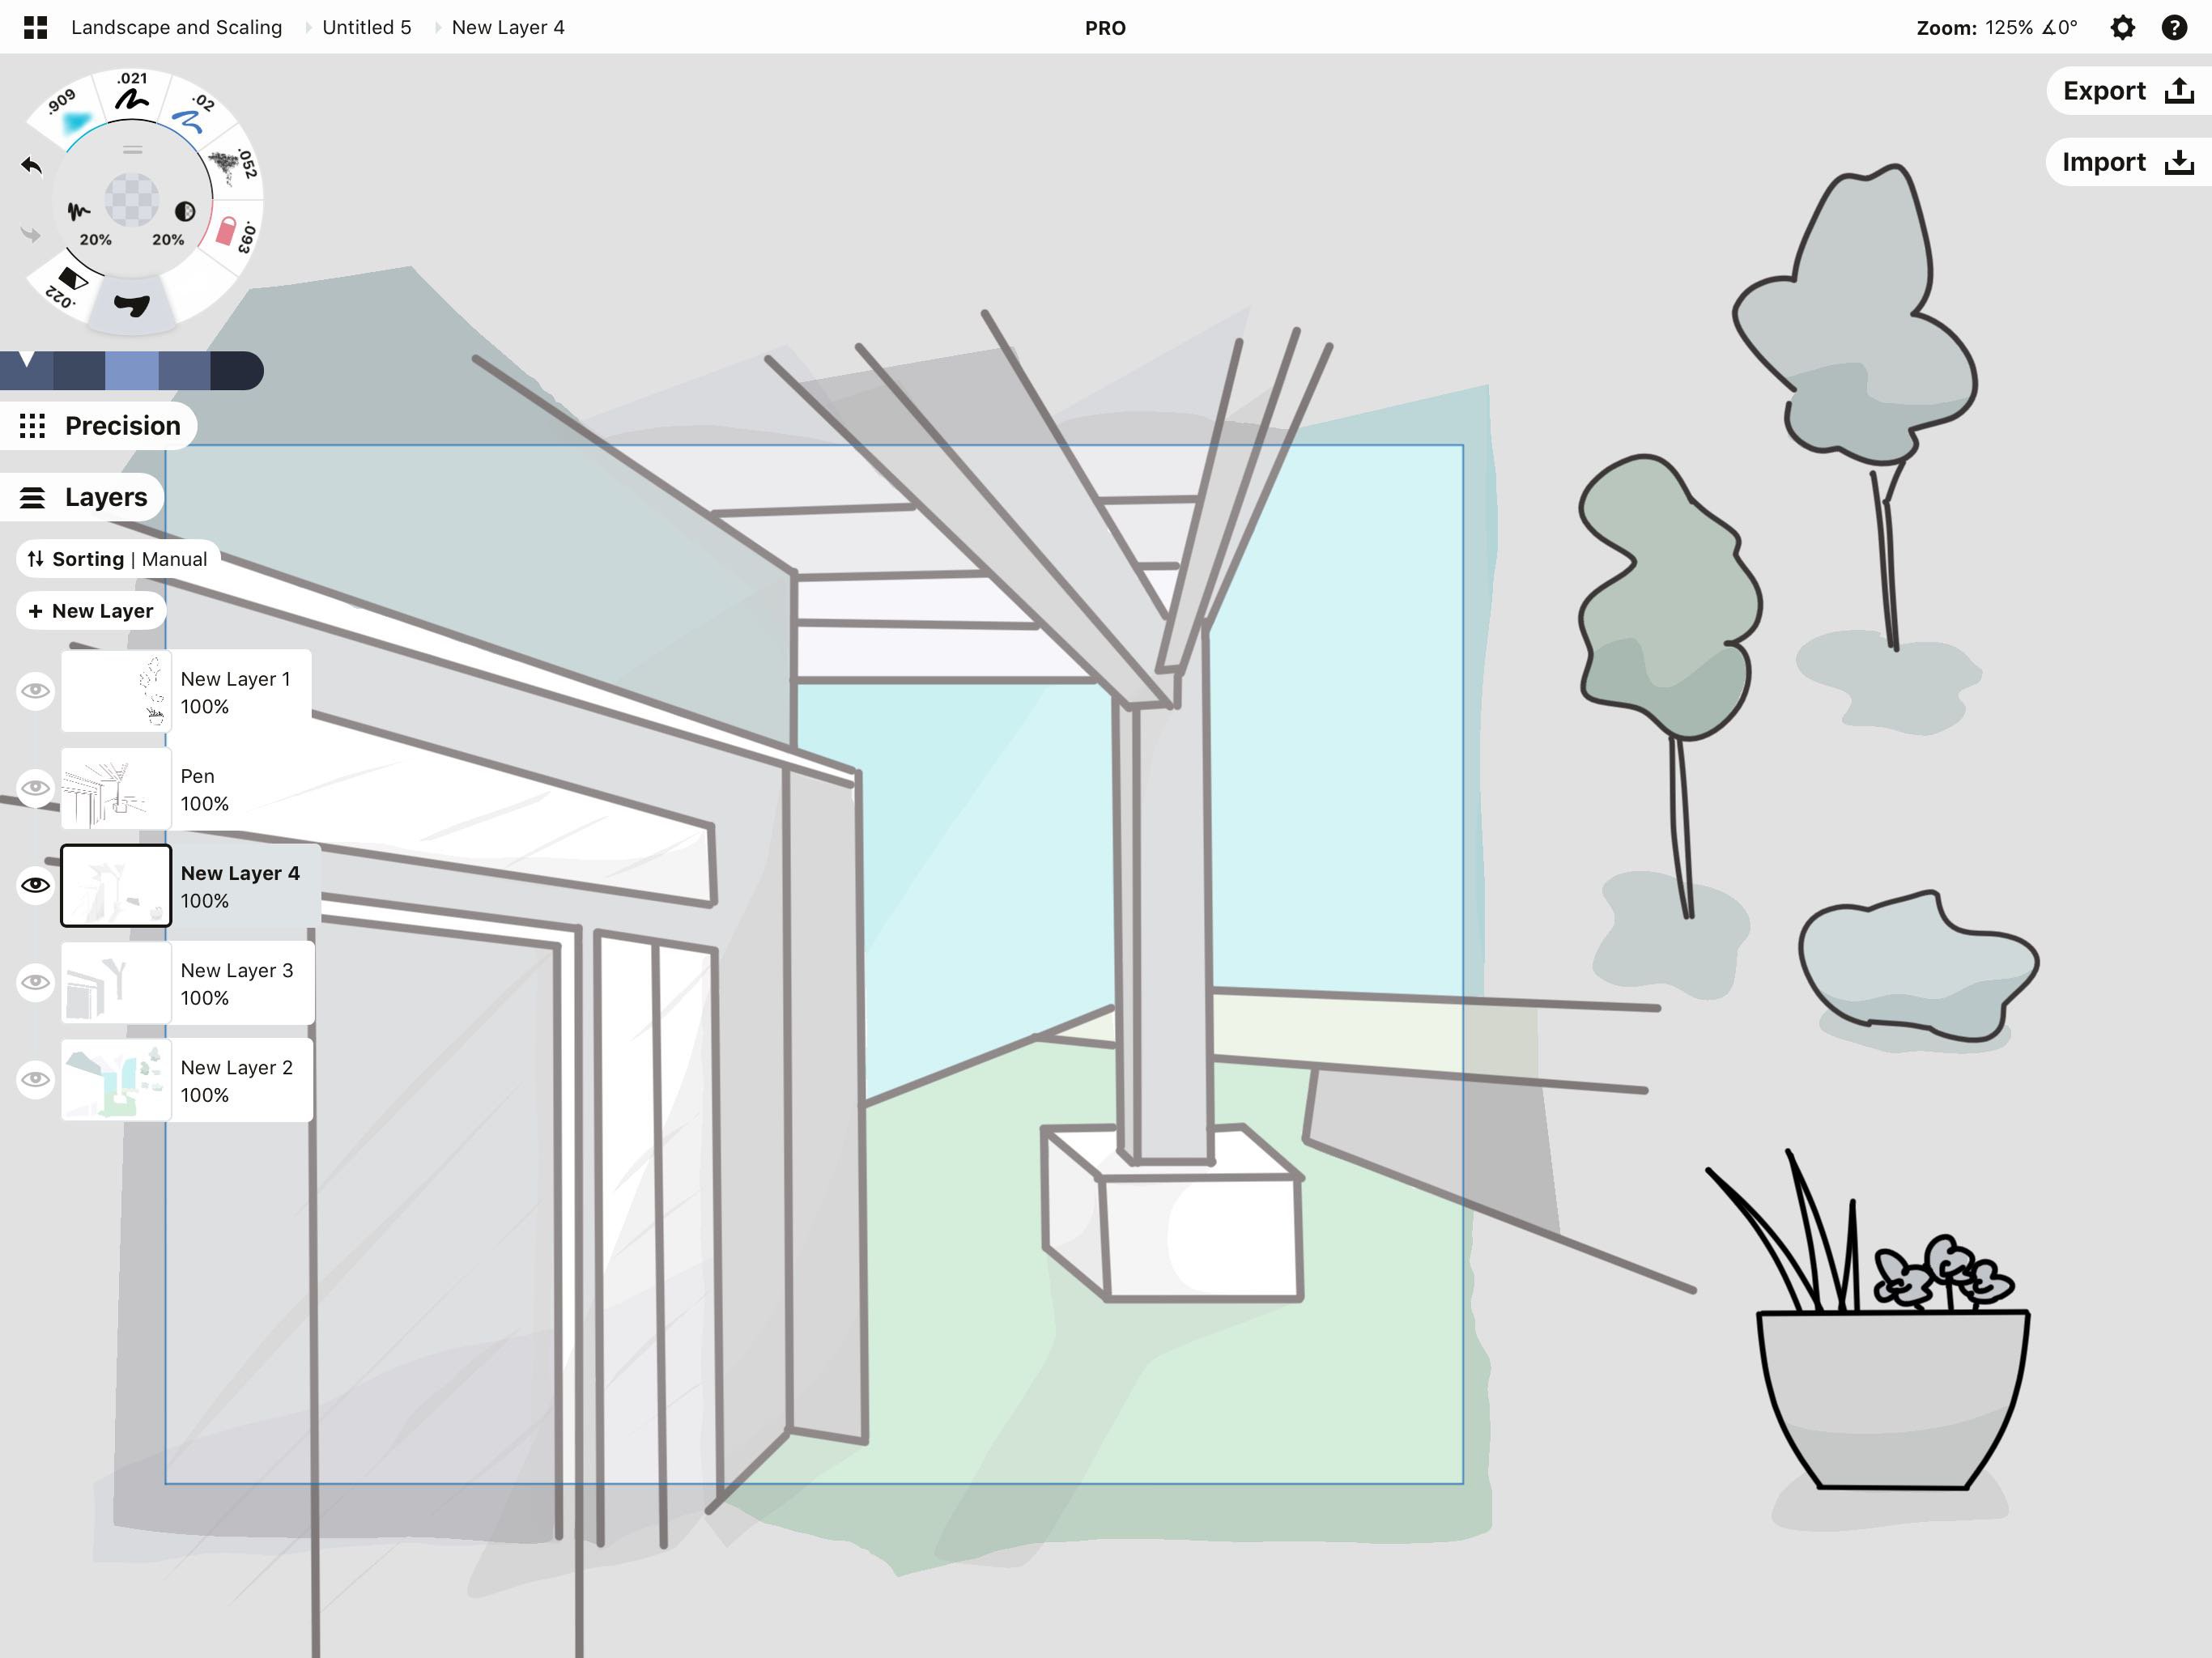
Try sketching elements outside the plan, then position them into the drawing. It can be easier to draw them separately, then duplicate and scale them to the sizes you need.
Drag+drop reference images from your photo library, Pinterest or Google Images outside the artboard where they won’t interfere with your drawing. It’s handy to have everything you need inside your workspace, regardless of whether it’s on the final export.
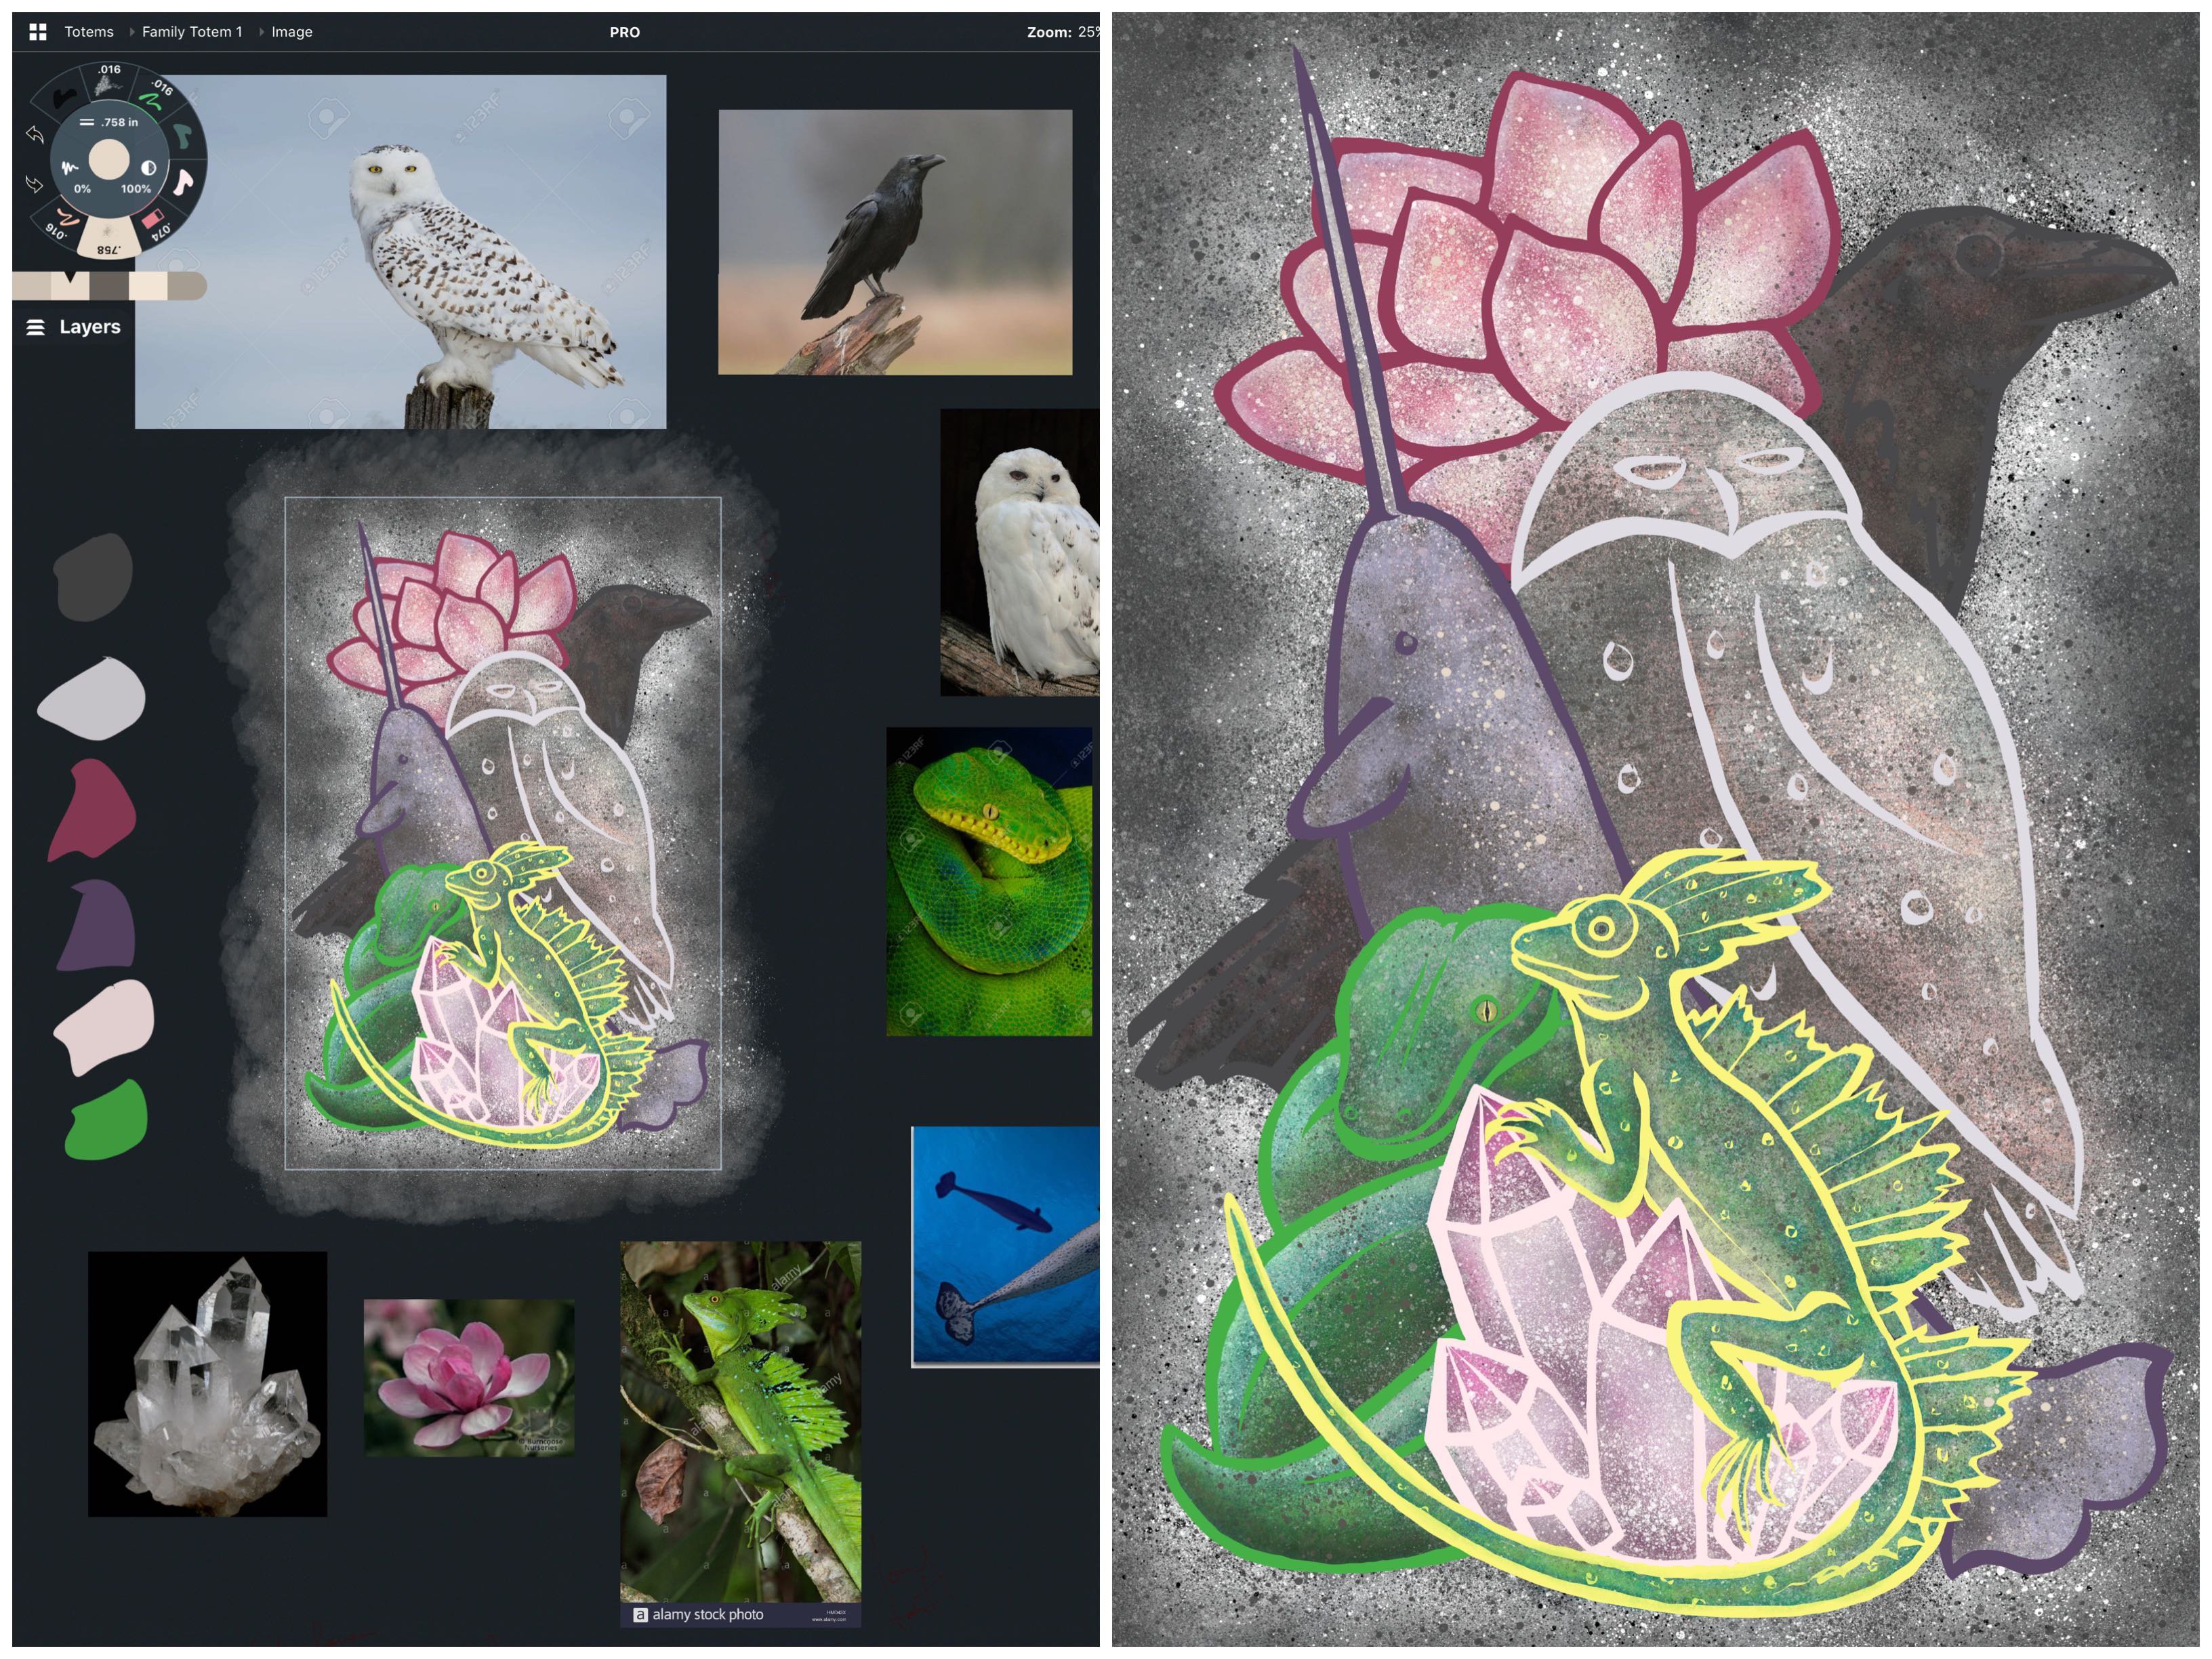
Images pulled from Google Images as reference only, rights belong to their owners. Artwork by Erica Christensen.
We hope this gives you many ideas for how Concepts’ flexible, infinite canvas can help you work better. Explore your ideas, sketch everywhere, and export just what you need. Drawing without boundaries allows you to imagine and create bigger.
Do you have questions about working with the infinite canvas? Talk with our team at concepts@tophatch.com and we’ll be happy to help.
By Erica Christensen
Recommended
Tips for Exporting Your Designs - Flexibly format your drawings for export in Concepts.
How to Edit Your Grid - Learn how to set up and customize grids in Concepts.
The Nudge Tool - Learn how to pull, poke and stretch your lines with Concepts' Nudge Tool.