Select and Edit Your Notes, Drawings and Designs
Learn how to select, edit, transform and reorganize anything you sketch in Concepts.
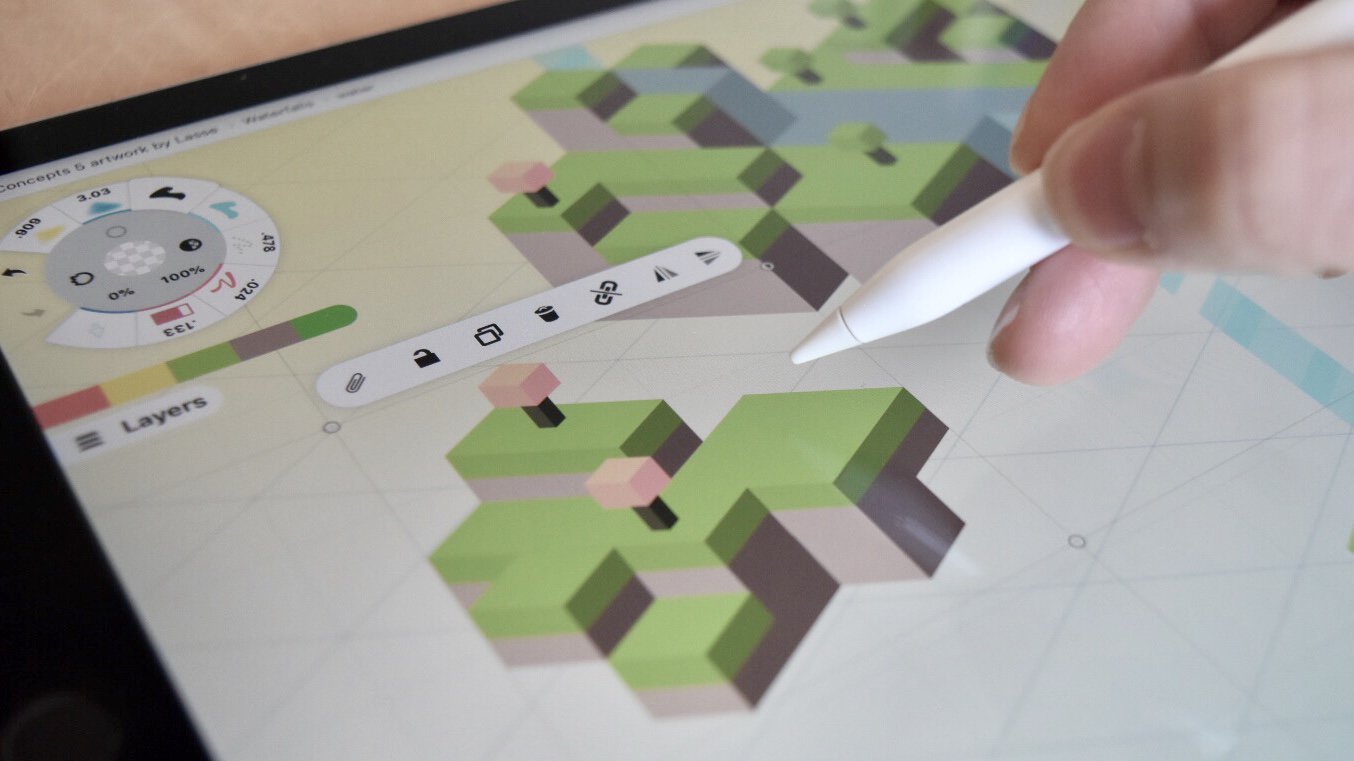
The ability to edit your drawings, notes and plans after you’ve drawn them is one of the great reasons we chose to base our sketching app Concepts on vectors instead of pixels.
This flexibility maximizes your creative time. Your sketch becomes an interactive puzzle where you can literally play with the pieces to find the best solution. You can move ideas about with natural hand gestures on the infinite canvas, change what you’ve drawn, and iterate on and perfect your work quickly and efficiently.
You may have worked with other art or design programs where selection is part of the editing process. Here is what Selection looks like in Concepts, and how you can use it to edit every element of your sketch in just a few seconds.
*Note, while screenshots were taken on an iPad Pro, Selection works the same across all iOS, Windows and Android devices.
Selecting a Stroke
To “select” a stroke or “make a selection” means you pick it up from the canvas so it’s ready to work with. Once a stroke (or several) is selected, you can change, tweak, move, transform, duplicate it and so forth. It opens the door for every edit you want to make.
You can select your brush strokes in a couple ways.
1. Tap+hold the screen. By default, when you tap+hold a finger or stylus on the screen for half a second, you’ll activate Selection. Drag that same finger across the canvas and you’ll see a blue Lasso follow your fingertip. Any stroke the lasso touches is “selected” when you lift your finger from the screen.
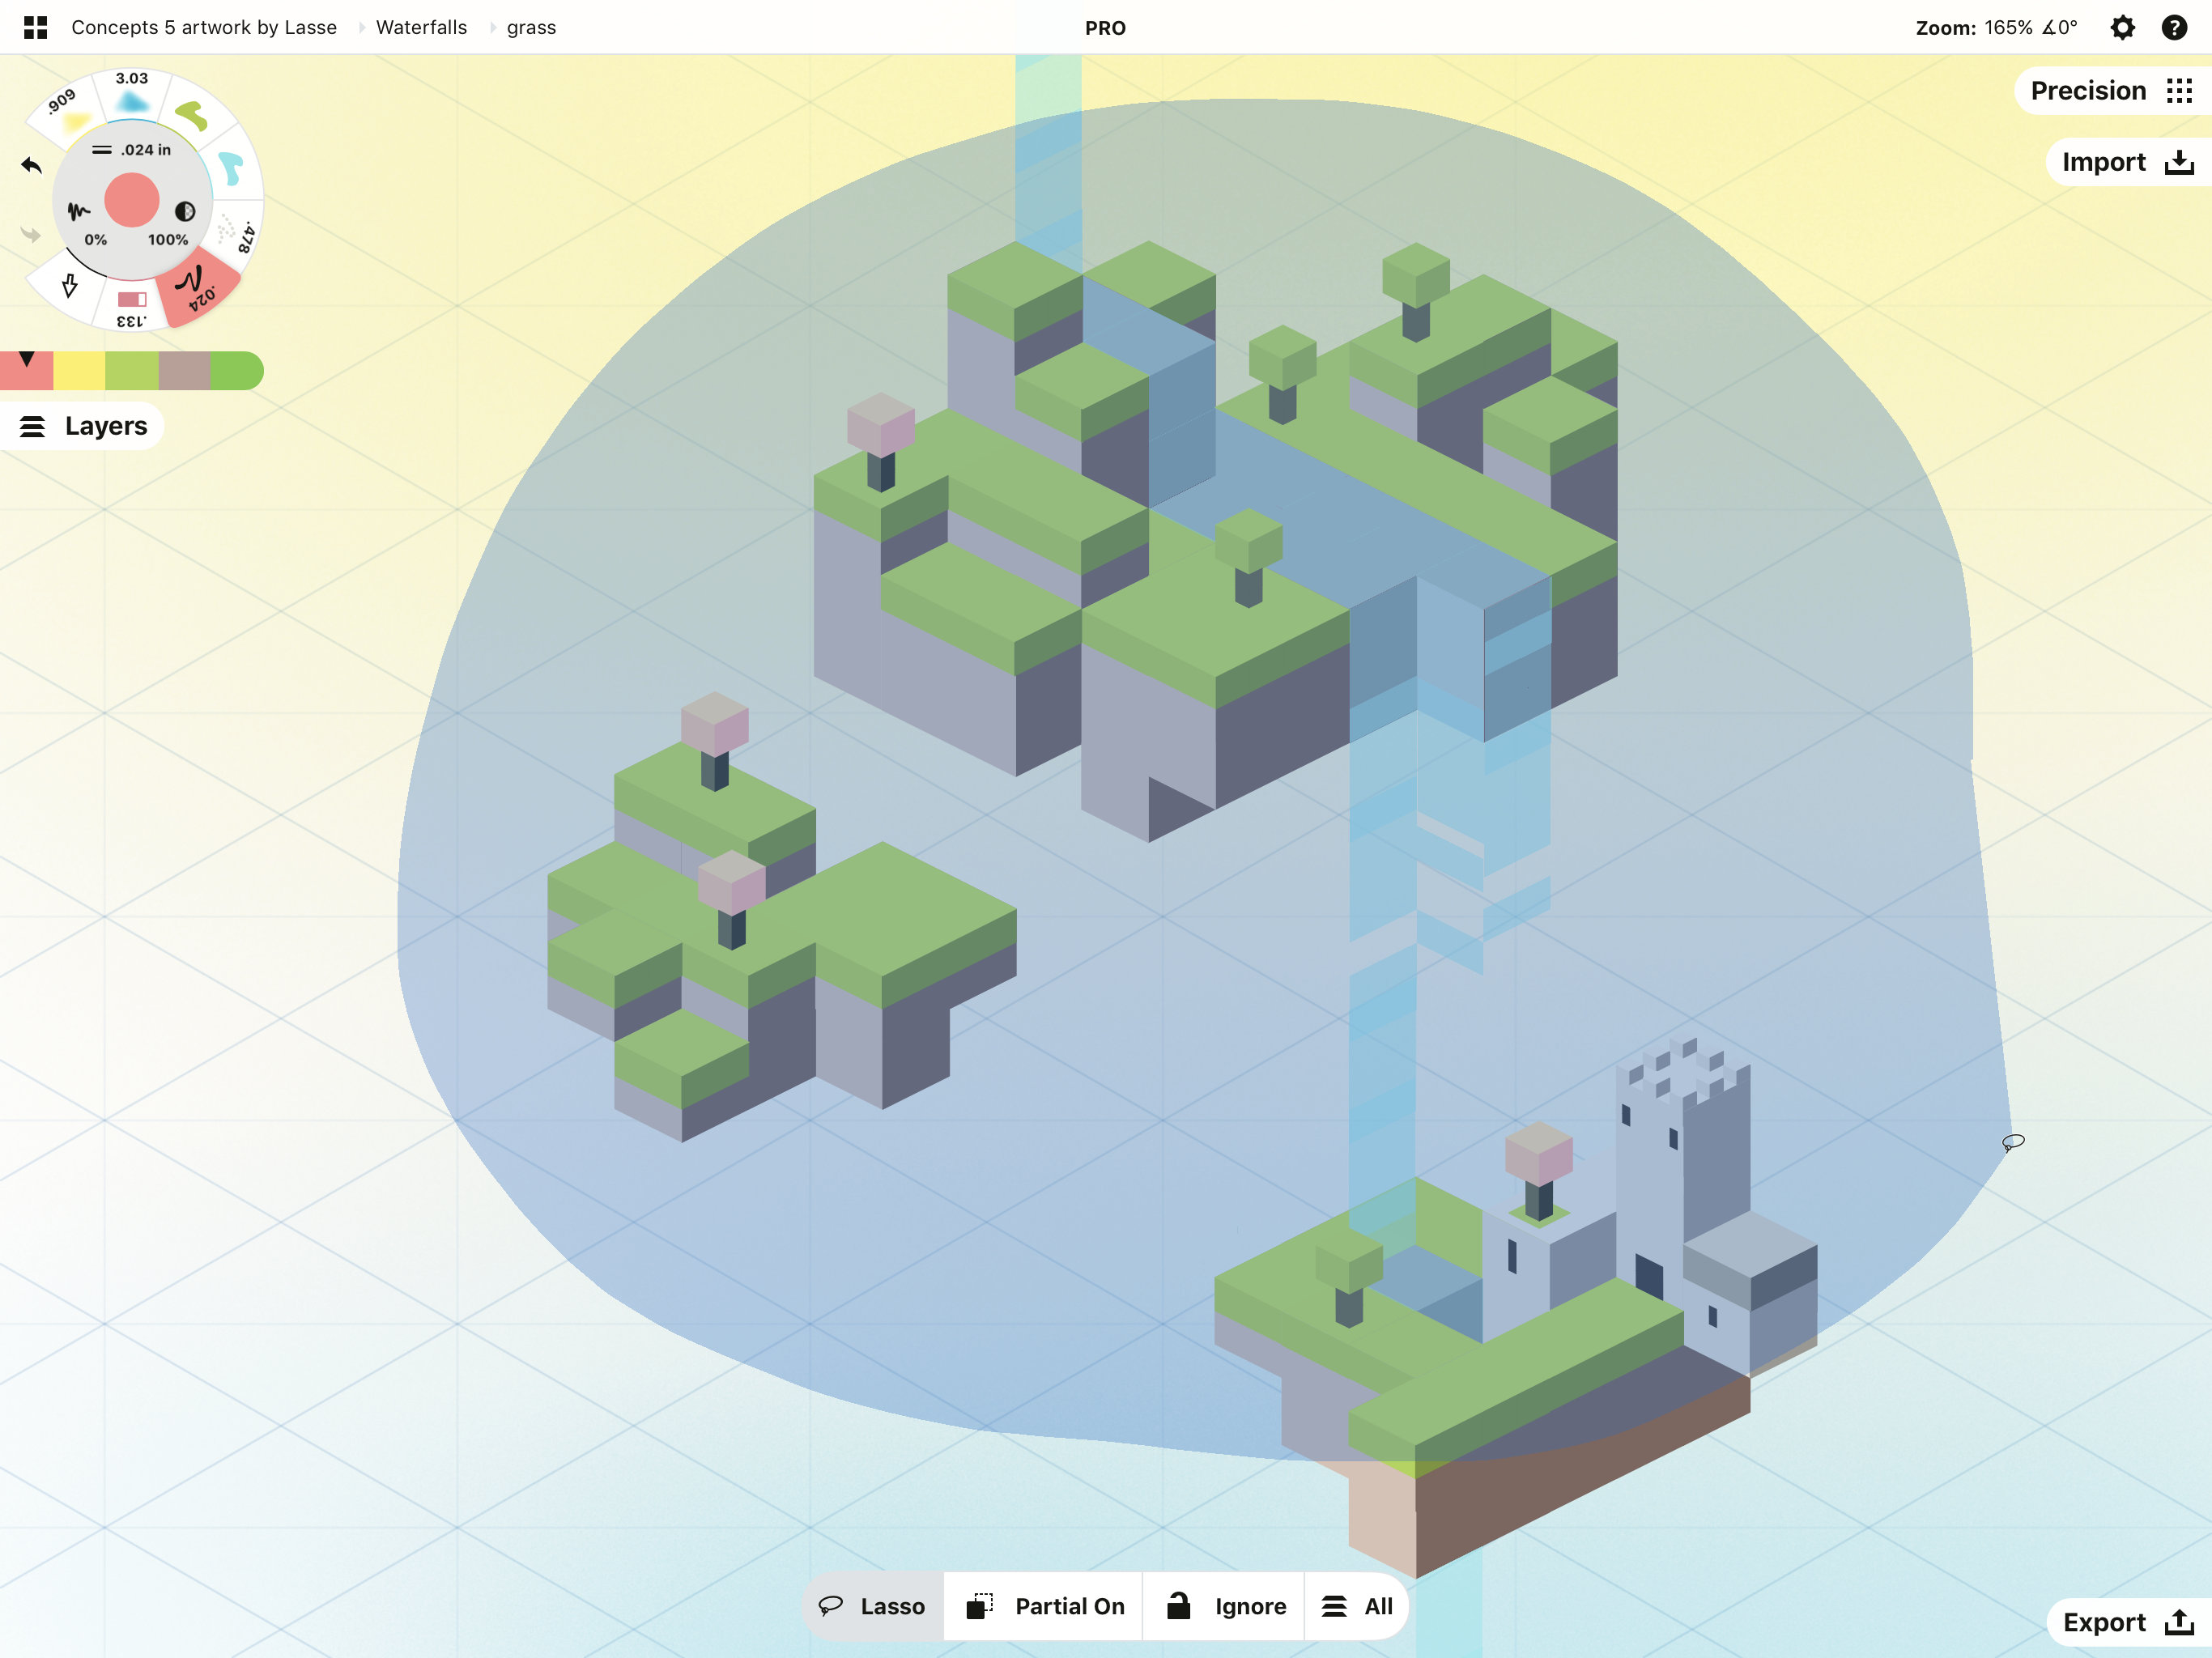
Lasso isn’t the only selection tool. You can also select with an Item Picker and a Color Picker. We’ll talk more about those below.
2. Use the Selection tool. Use this tool to make selections without having to tap+hold the screen first. You can find this tool in the Brushes menu. Tap your active tool to open the menu, then find the Selection arrow under the Tools section. Tap the arrow to set it to your tool wheel and exit the menu.
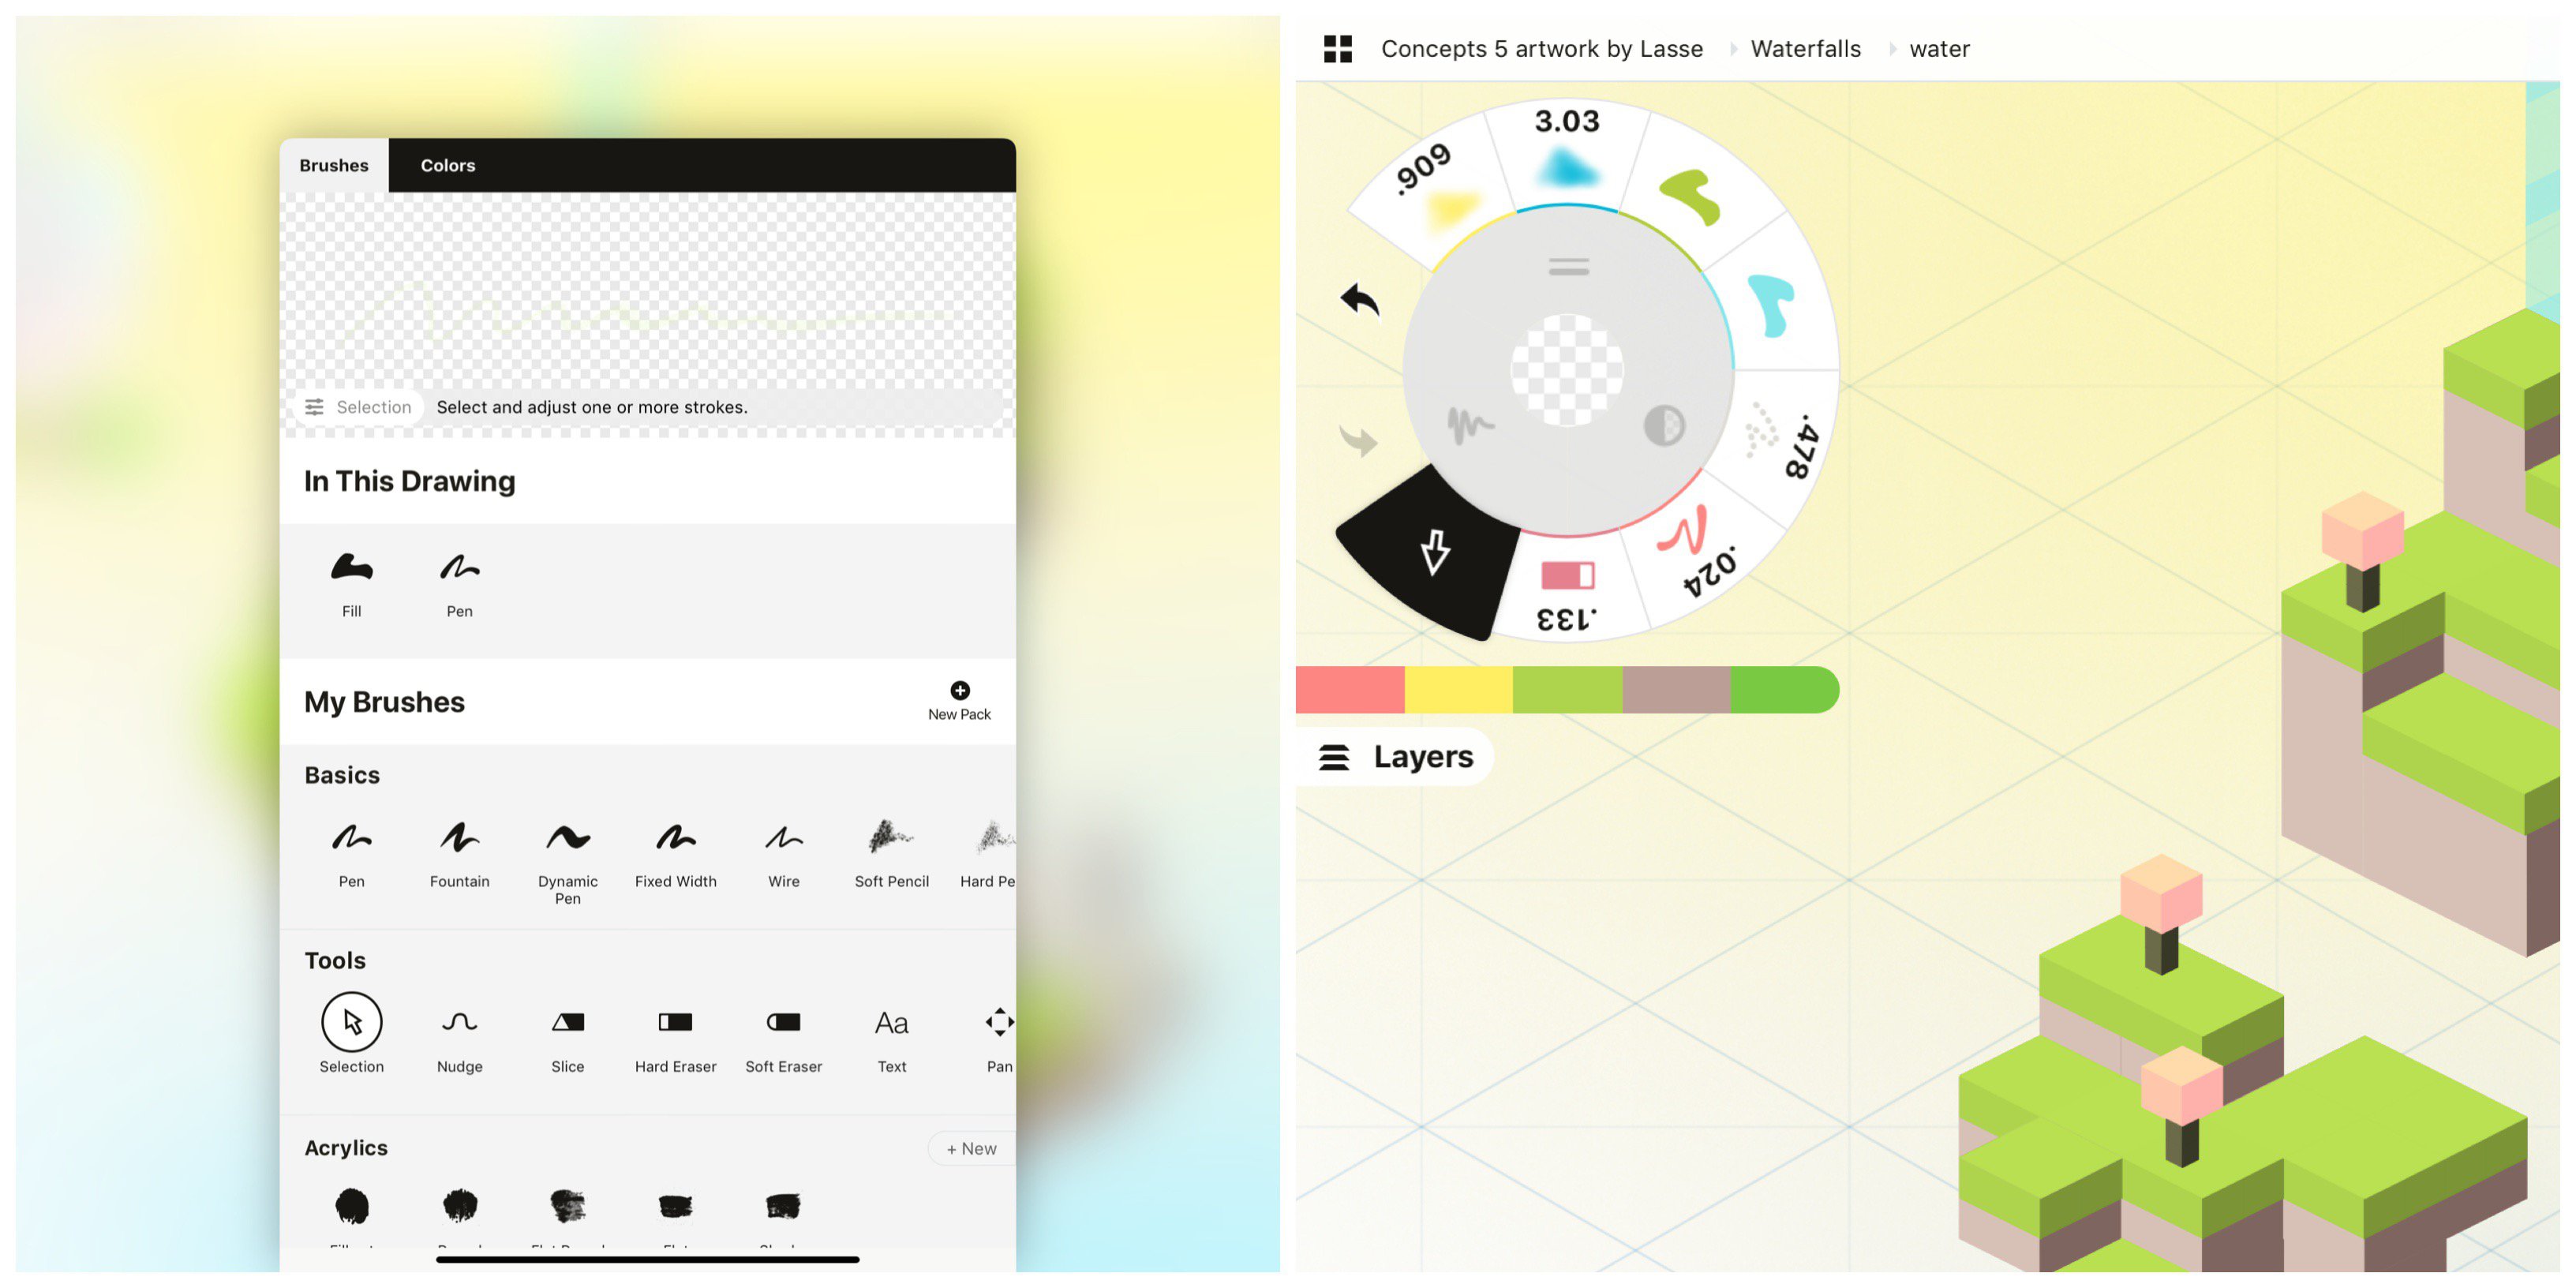
Here you can see 1) the selection arrow in the Brushes menu under Tools, and 2) the arrow applied to the Tool Wheel. Tap the tool to activate Selection when you want to make an edit to your drawing.
The Selection Menu
Whichever method you prefer - gesture or tool - you’ll see a menu appear at the bottom of your canvas when Selection is activated. This is your Selection menu.

This menu lets you toggle among your Selection filters. The filters from left to right include:
• Selection Type. Lasso vs Item Picker vs Color Picker.
• Partial vs Complete Strokes. Partial means your lasso only has to touch part of the stroke to select it instead of the entire thing.
• Locked Items. Tap this toggle to include or ignore locked strokes in your selection.
• Layers. Select in All layers or the Active layer only.
To switch filters, tap a toggle on this menu. You can even change filters in the middle of a selection.
Selecting with Lasso
As described above, the Lasso allows you to select one or multiple strokes at a time just by dragging your finger across them. It lets you quickly choose a chunk of text or sketch in an area so you can edit them all at once.
• Tap+hold+drag a finger across your strokes to use the Lasso.
• If you’re using the Selection tool, remember you don’t have to tap+hold; just drag across the strokes to select them.
If you drag across a stroke a second time within the same drag motion, the strokes will deselect.
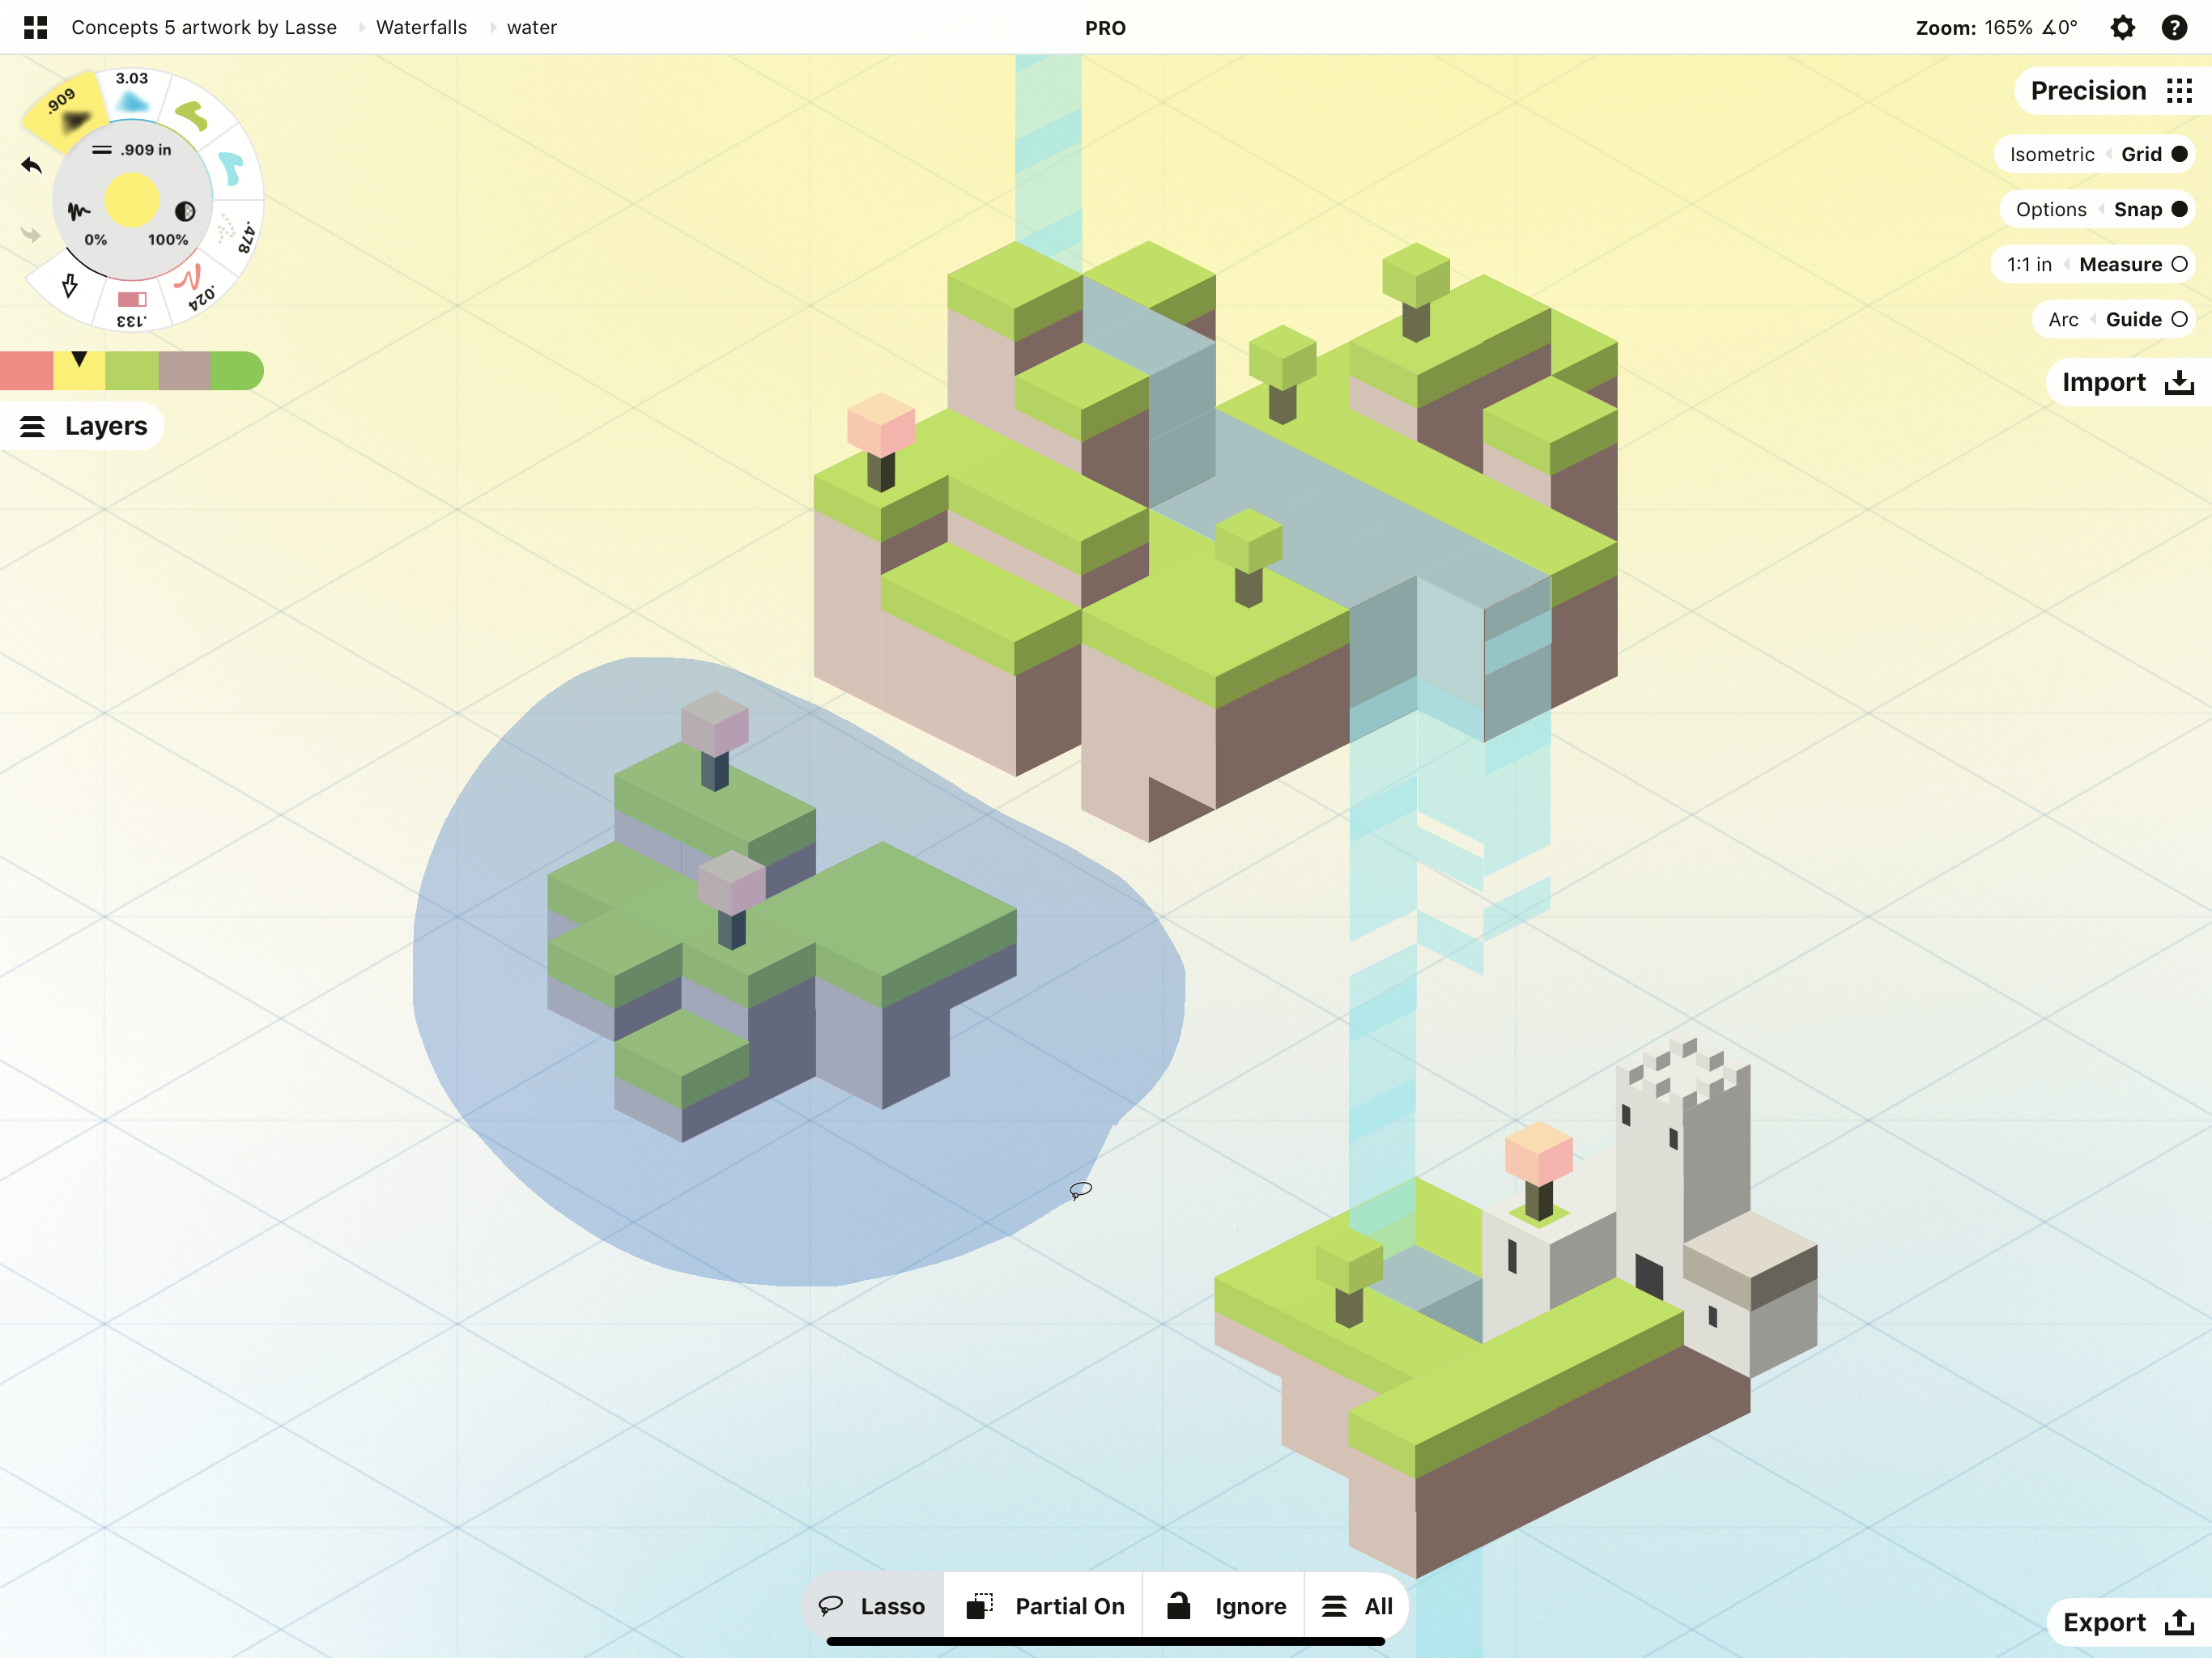
Tap the Lasso toggle on the popup at the bottom of the screen to switch over to Item Picker.
Selecting with Item Picker
The Item Picker lets you add or subtract one stroke at a time to your selection using a crosshair. When the crosshair touches an available stroke, the stroke will highlight. Tap the screen to accept the selection.
• When you are selecting with the tap+hold gesture, use a second finger to tap the screen, as lifting your first finger will deactivate the Selection mode.
• When using the Selection tool, just tap the screen to add the stroke to your selection.
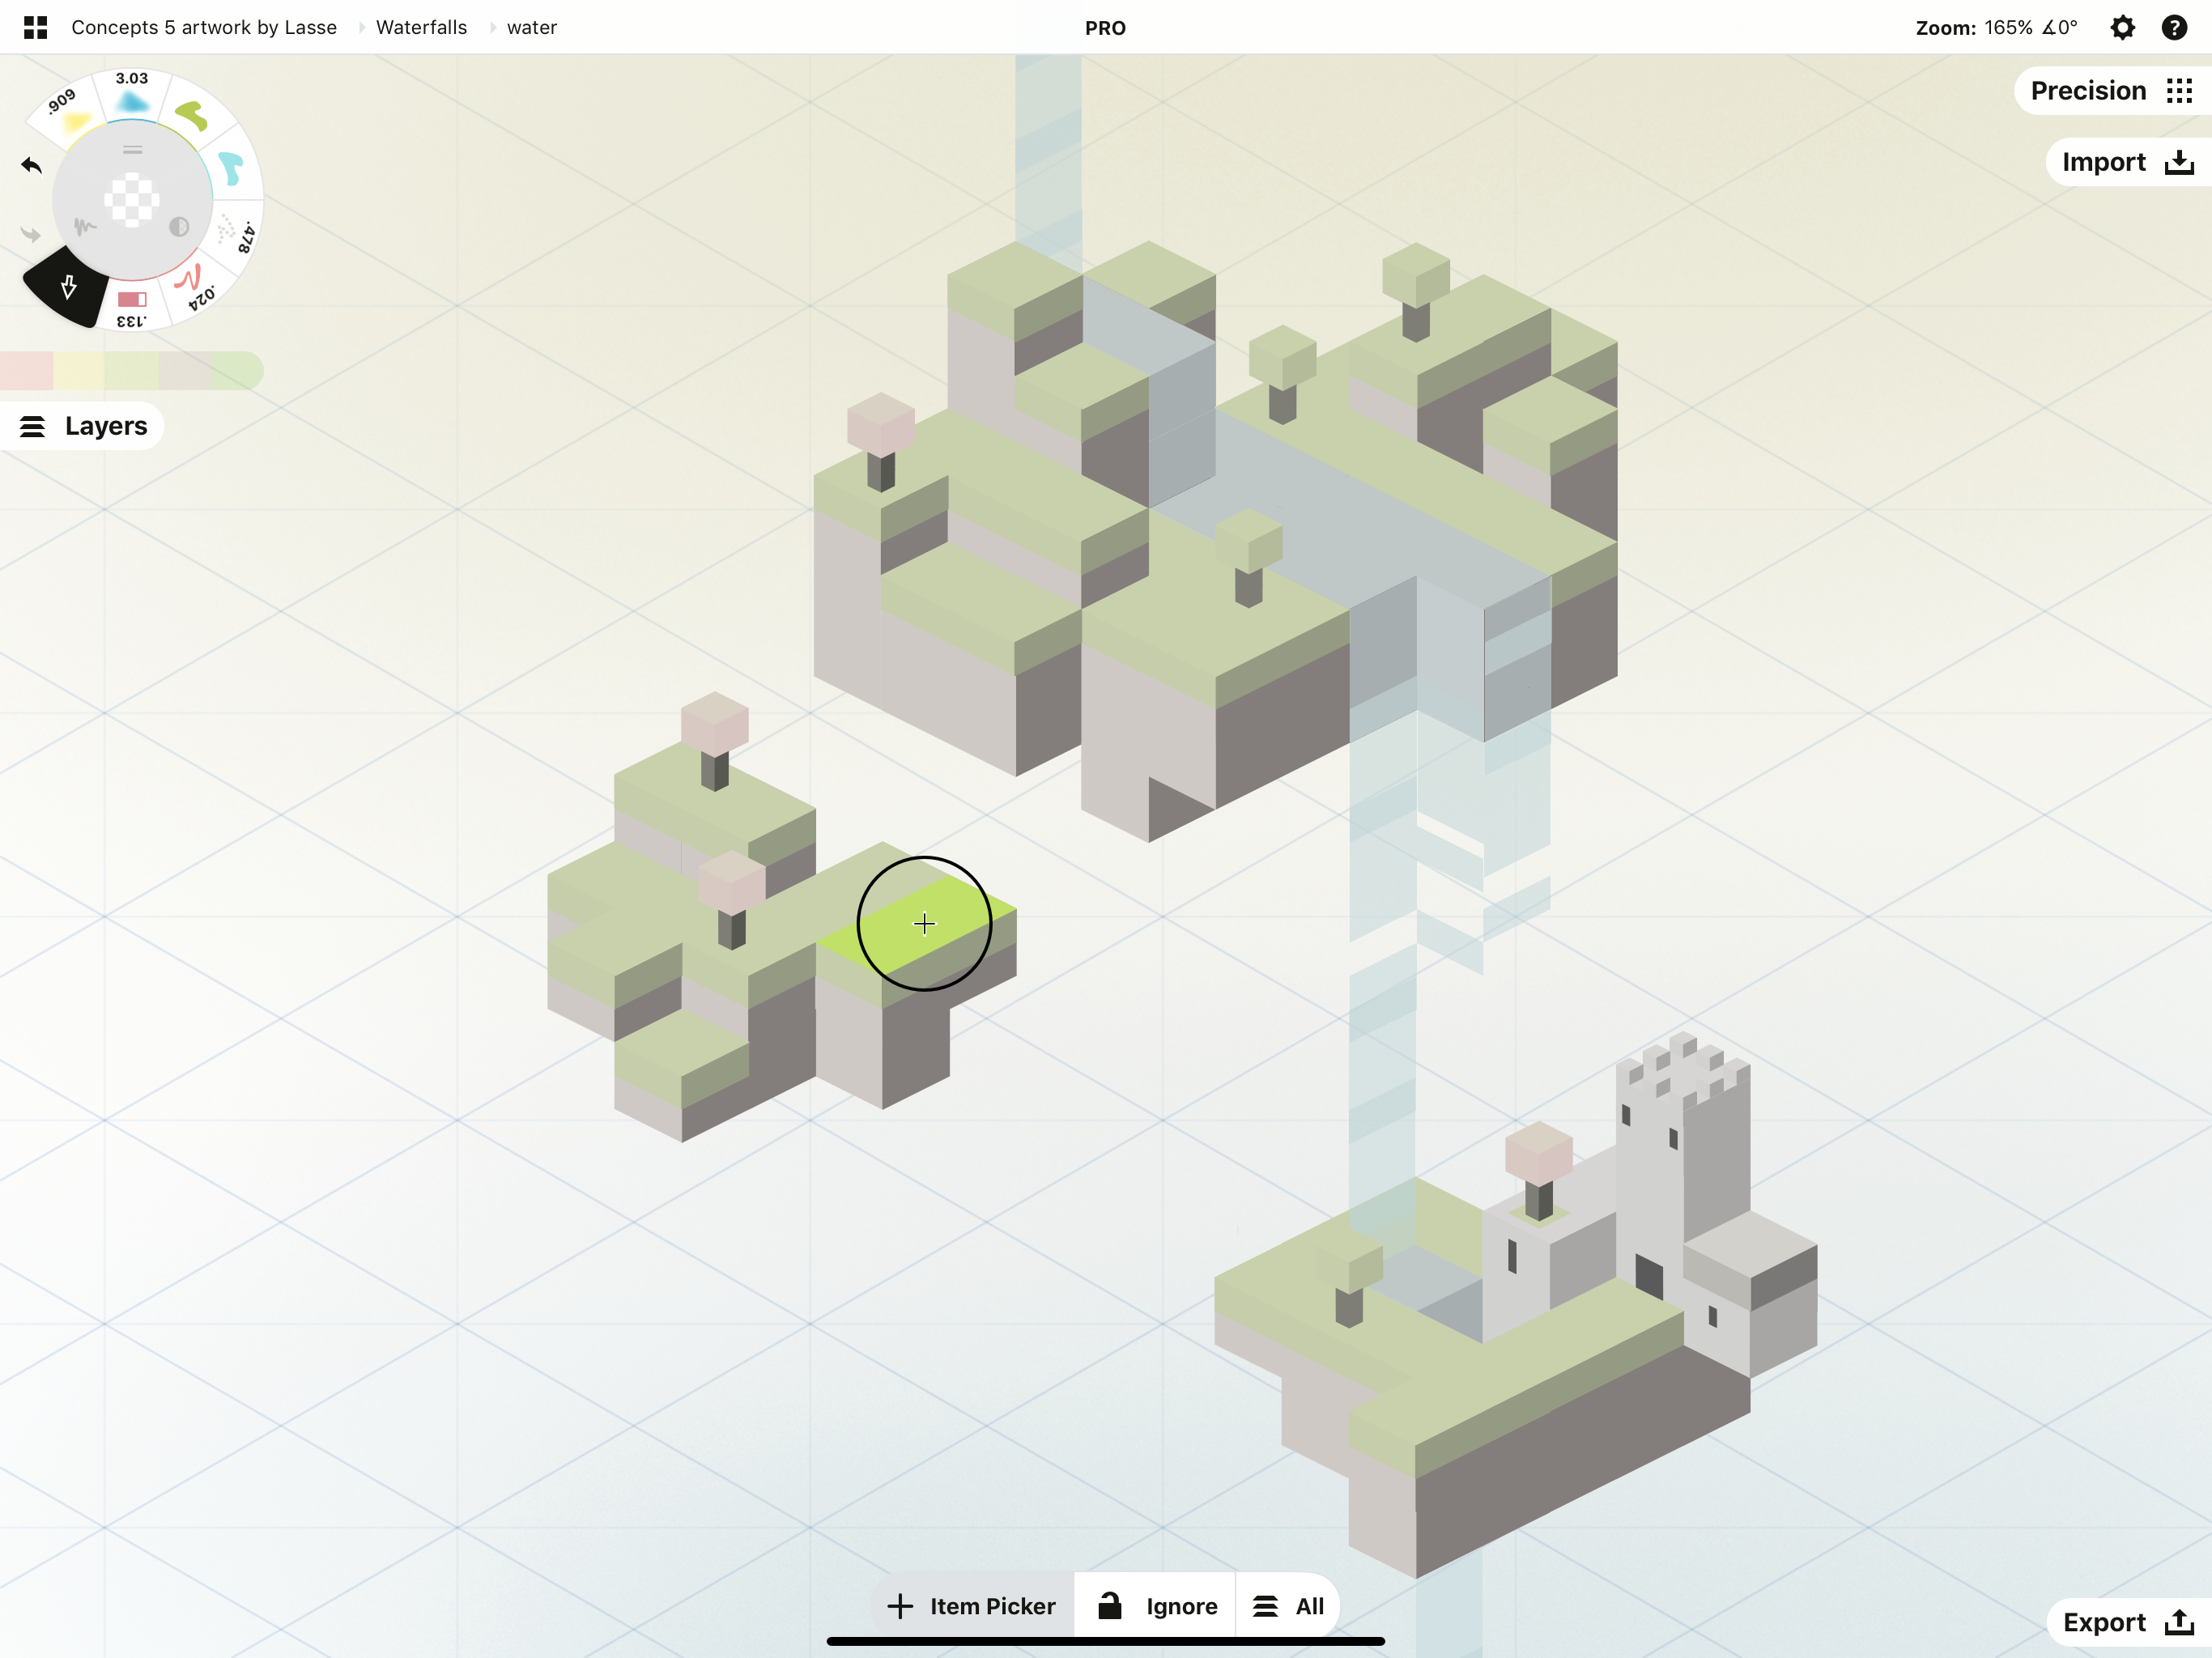
You can add more than one stroke to a selection at a time with this tool. Continue using the picker to hover over strokes and tap the screen each time to add them in. This can become a very quick motion.
If you hover over an already-selected stroke, the plus at the center of the crosshairs will turn to a minus, and you can tap the screen to deselect the stroke.
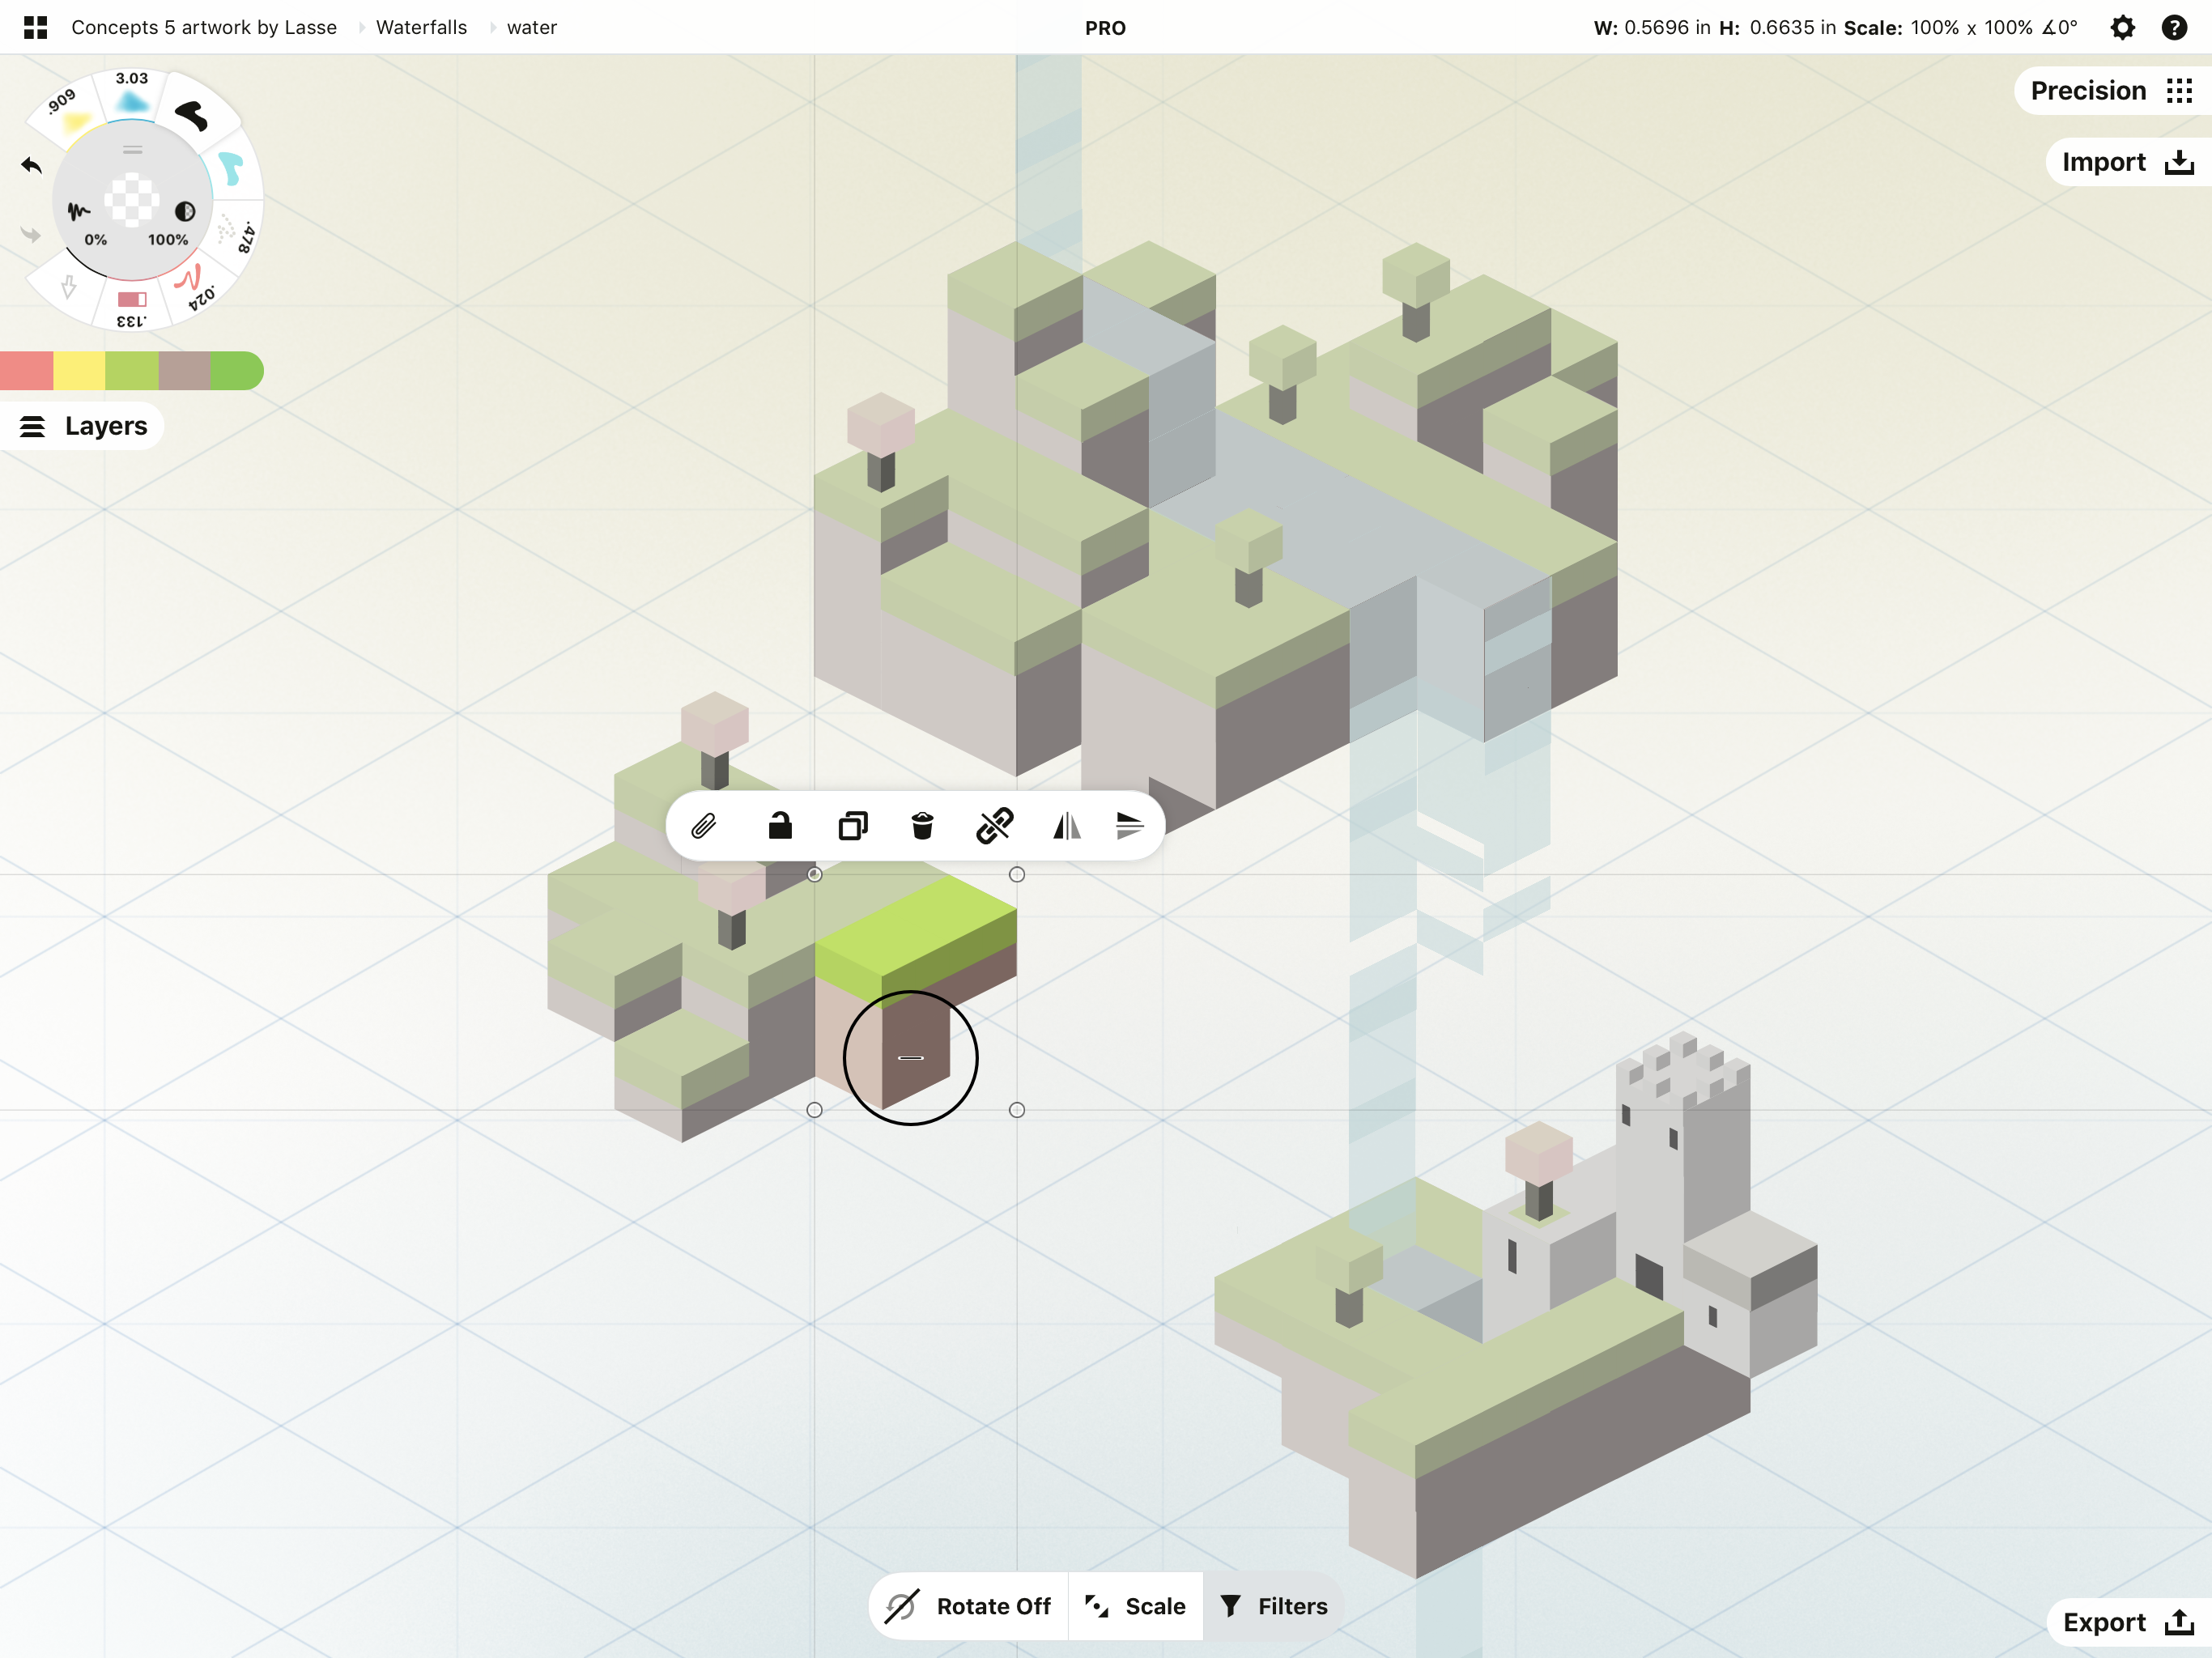
At any time while selecting, you can switch tools. If you decide you need the Lasso again, tap the left-most toggle on the Selection menu until you find it.
Also, if you’ve lifted your finger from the screen and your item is selected, you can set your finger back on the screen outside the box aka selection boundary, and continue adding or subtracting from your selection. To see your Selection filters again, tap the Filters tab on the menu to return to the usual toggles.
Selecting with Color Picker
The Color Picker selection mechanism is somewhat different from the other two, as it allows you to pick colors and tools rather than strokes. This is a simple tool but it really deserves its own tutorial apart from stroke selection. We have a tutorial just for Color Picker here.
What Selection Looks Like
Once you’ve selected a stroke by either Lasso or Item Picker, you’ll see a few things have happened to your sketch.
- Your stroke(s) is now surrounded by a box.
- There is a popup above your selection.
- The Selection menu at the bottom of the canvas has new toggle options.
Look for these every time you make a selection. They mean that it worked.
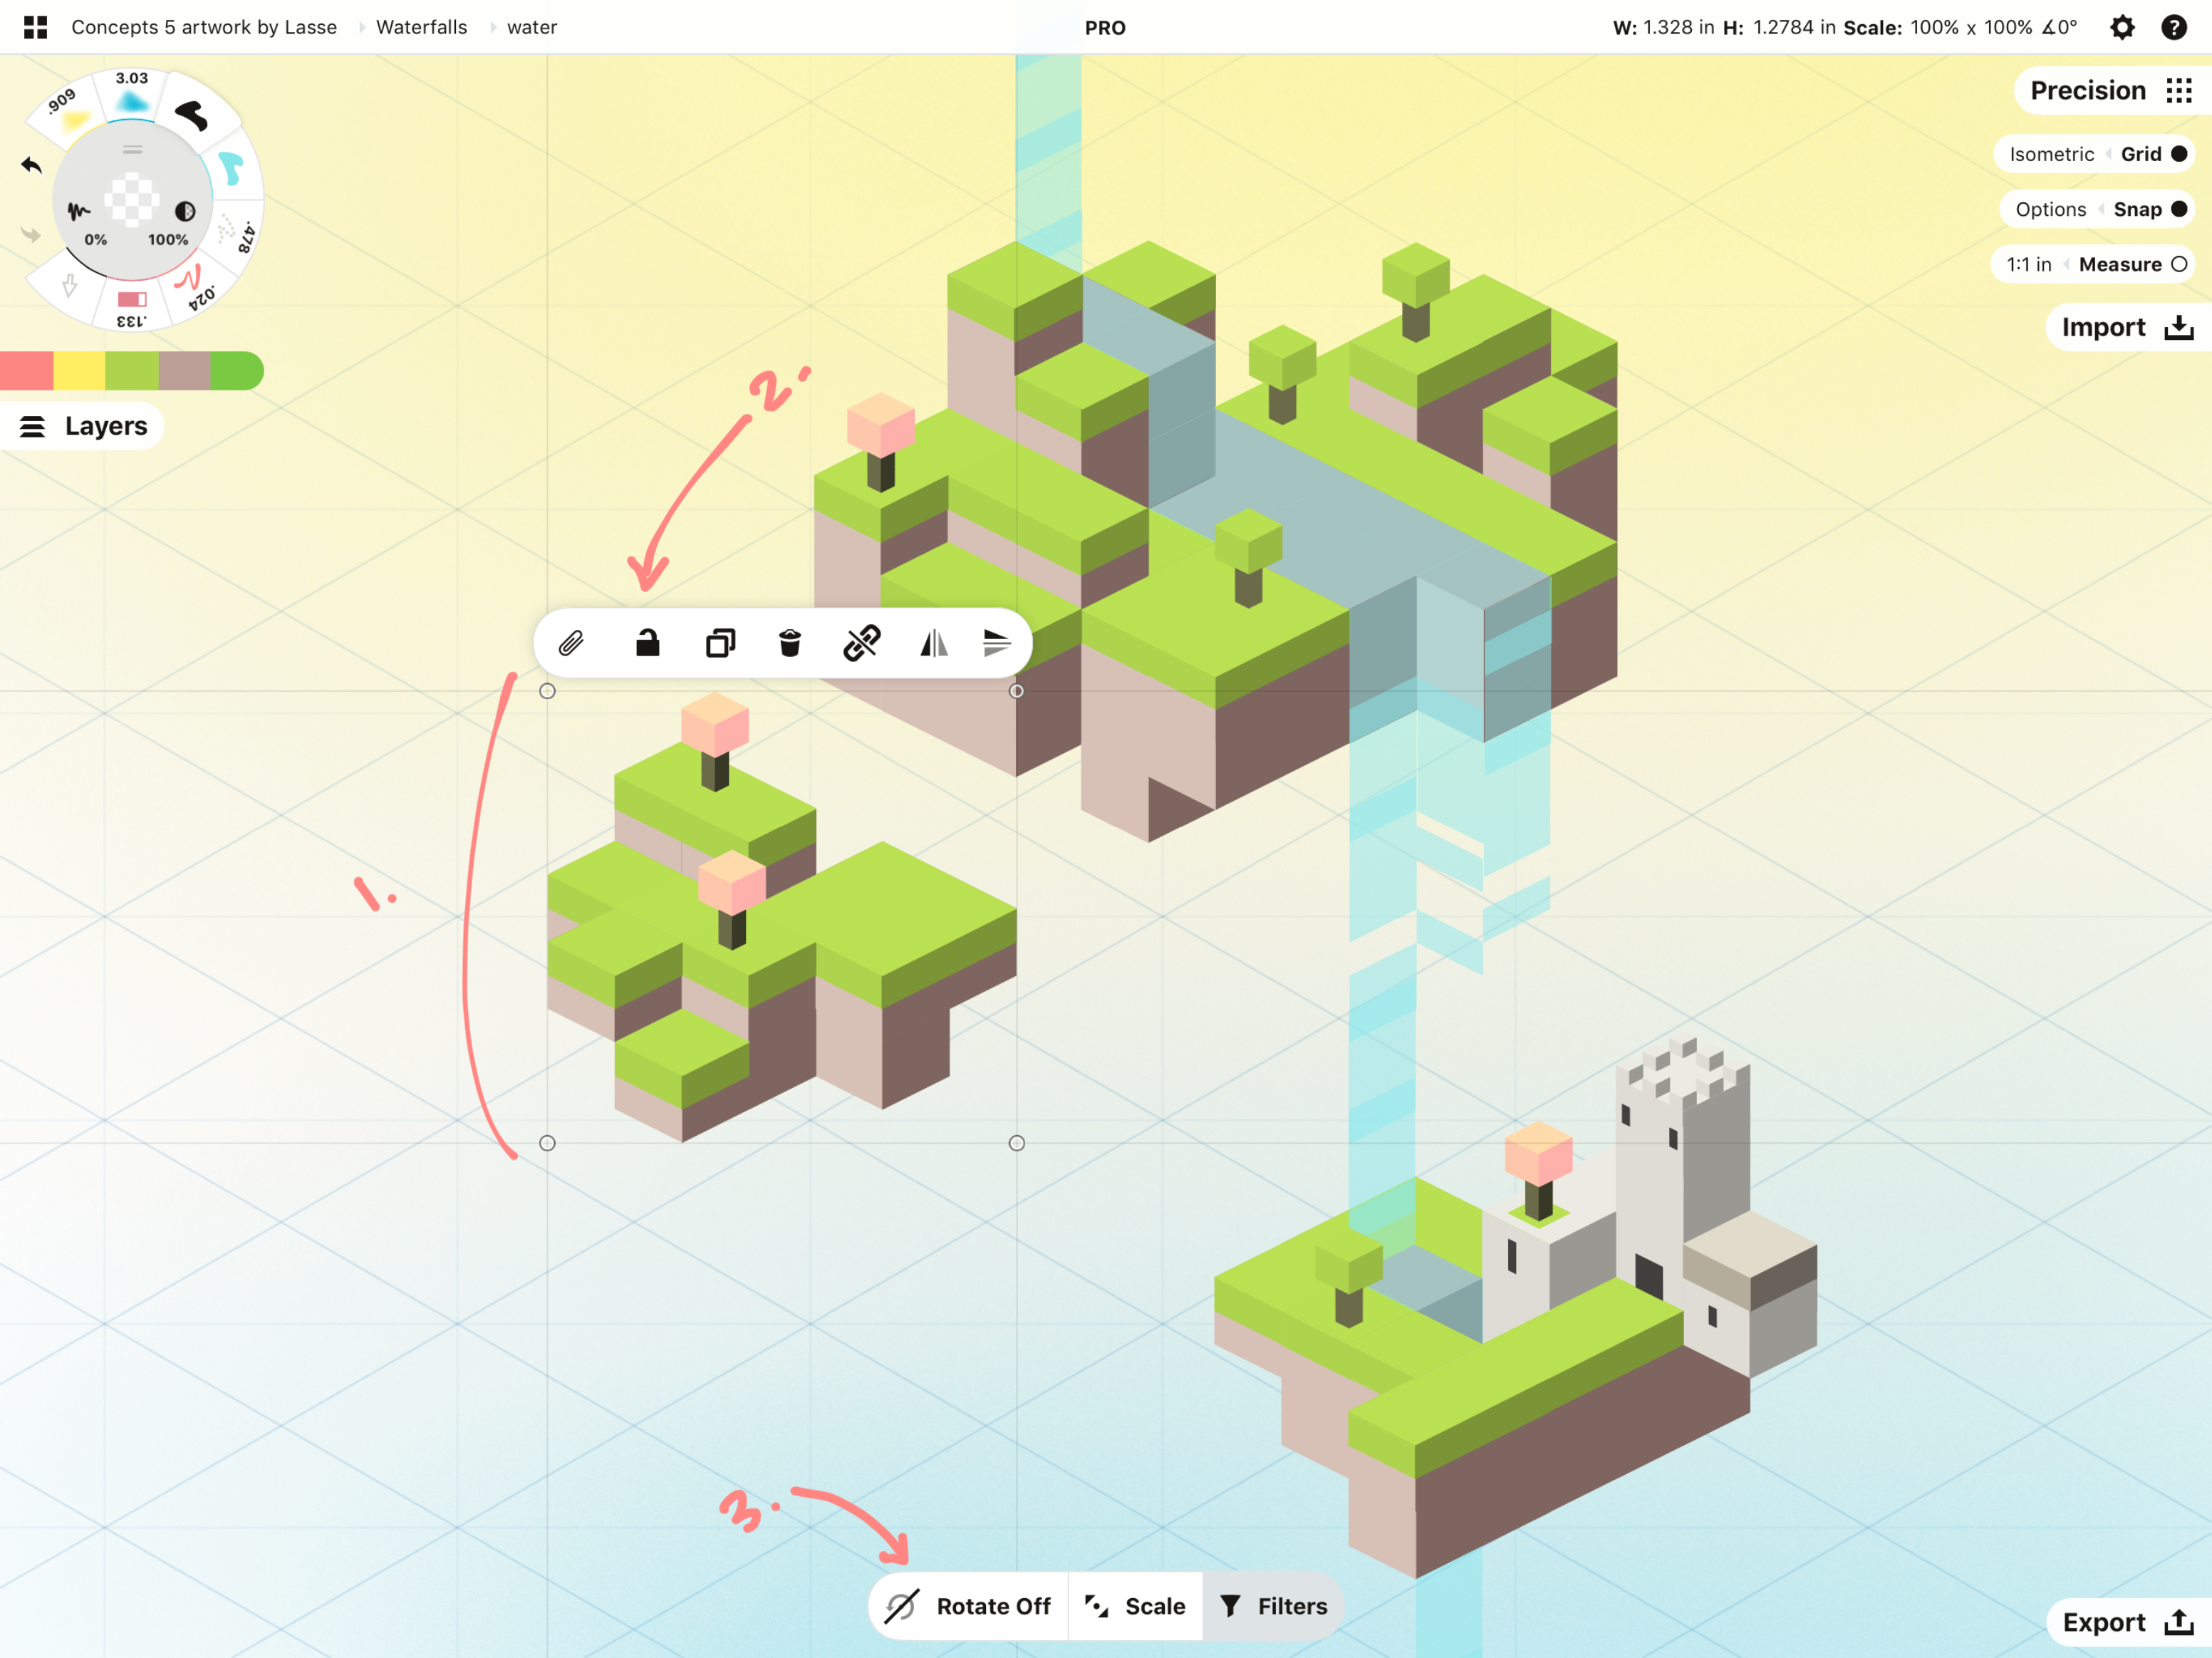
In the image above, you'll see the following:
1. The box. This box shows you the outer bounds of your selection. You may also see some circles at the corners - these are your control points for transforming your selection. More on those below.
2. The popup. The popup above your selection shows you options for working with your strokes, like duplicating, grouping and mirroring them. More on these below, too.
3. The menu. The new options in this menu allow you to toggle rotation and scaling settings for your selection. Tap the Filters button to return to the Selection filters.
Editing Your Selection
Now that you have a Selection, you can pretty much do anything you want with it. Let’s take a look at what you can do.
Move, resize and rotate. Anything you select can be moved around on the canvas with one finger, rotated with two fingers, and resized aka Scaled or Stretched by pinching or expanding two fingers. As mentioned above, you can lock or unlock these latter two features down in the Selection menu.
- Rotate. Toggle this button to lock or unlock rotation. Sometimes you want to turn it, sometimes you want to move it without changing the angle.
- Scale / Stretch / Off. “Scale” makes every part of your selection grow or shrink in direct proportion to how the strokes were originally drawn. “Stretch” maintains the tool’s size but lets you increase or shorten the length. “Off” keeps your selection from changing size at all.
You can switch among these settings at any time. Sometimes you want to rotate without changing the size of the object. Sometimes you want to scale your selection without rotating it. These buttons make it easy to set your preferences.
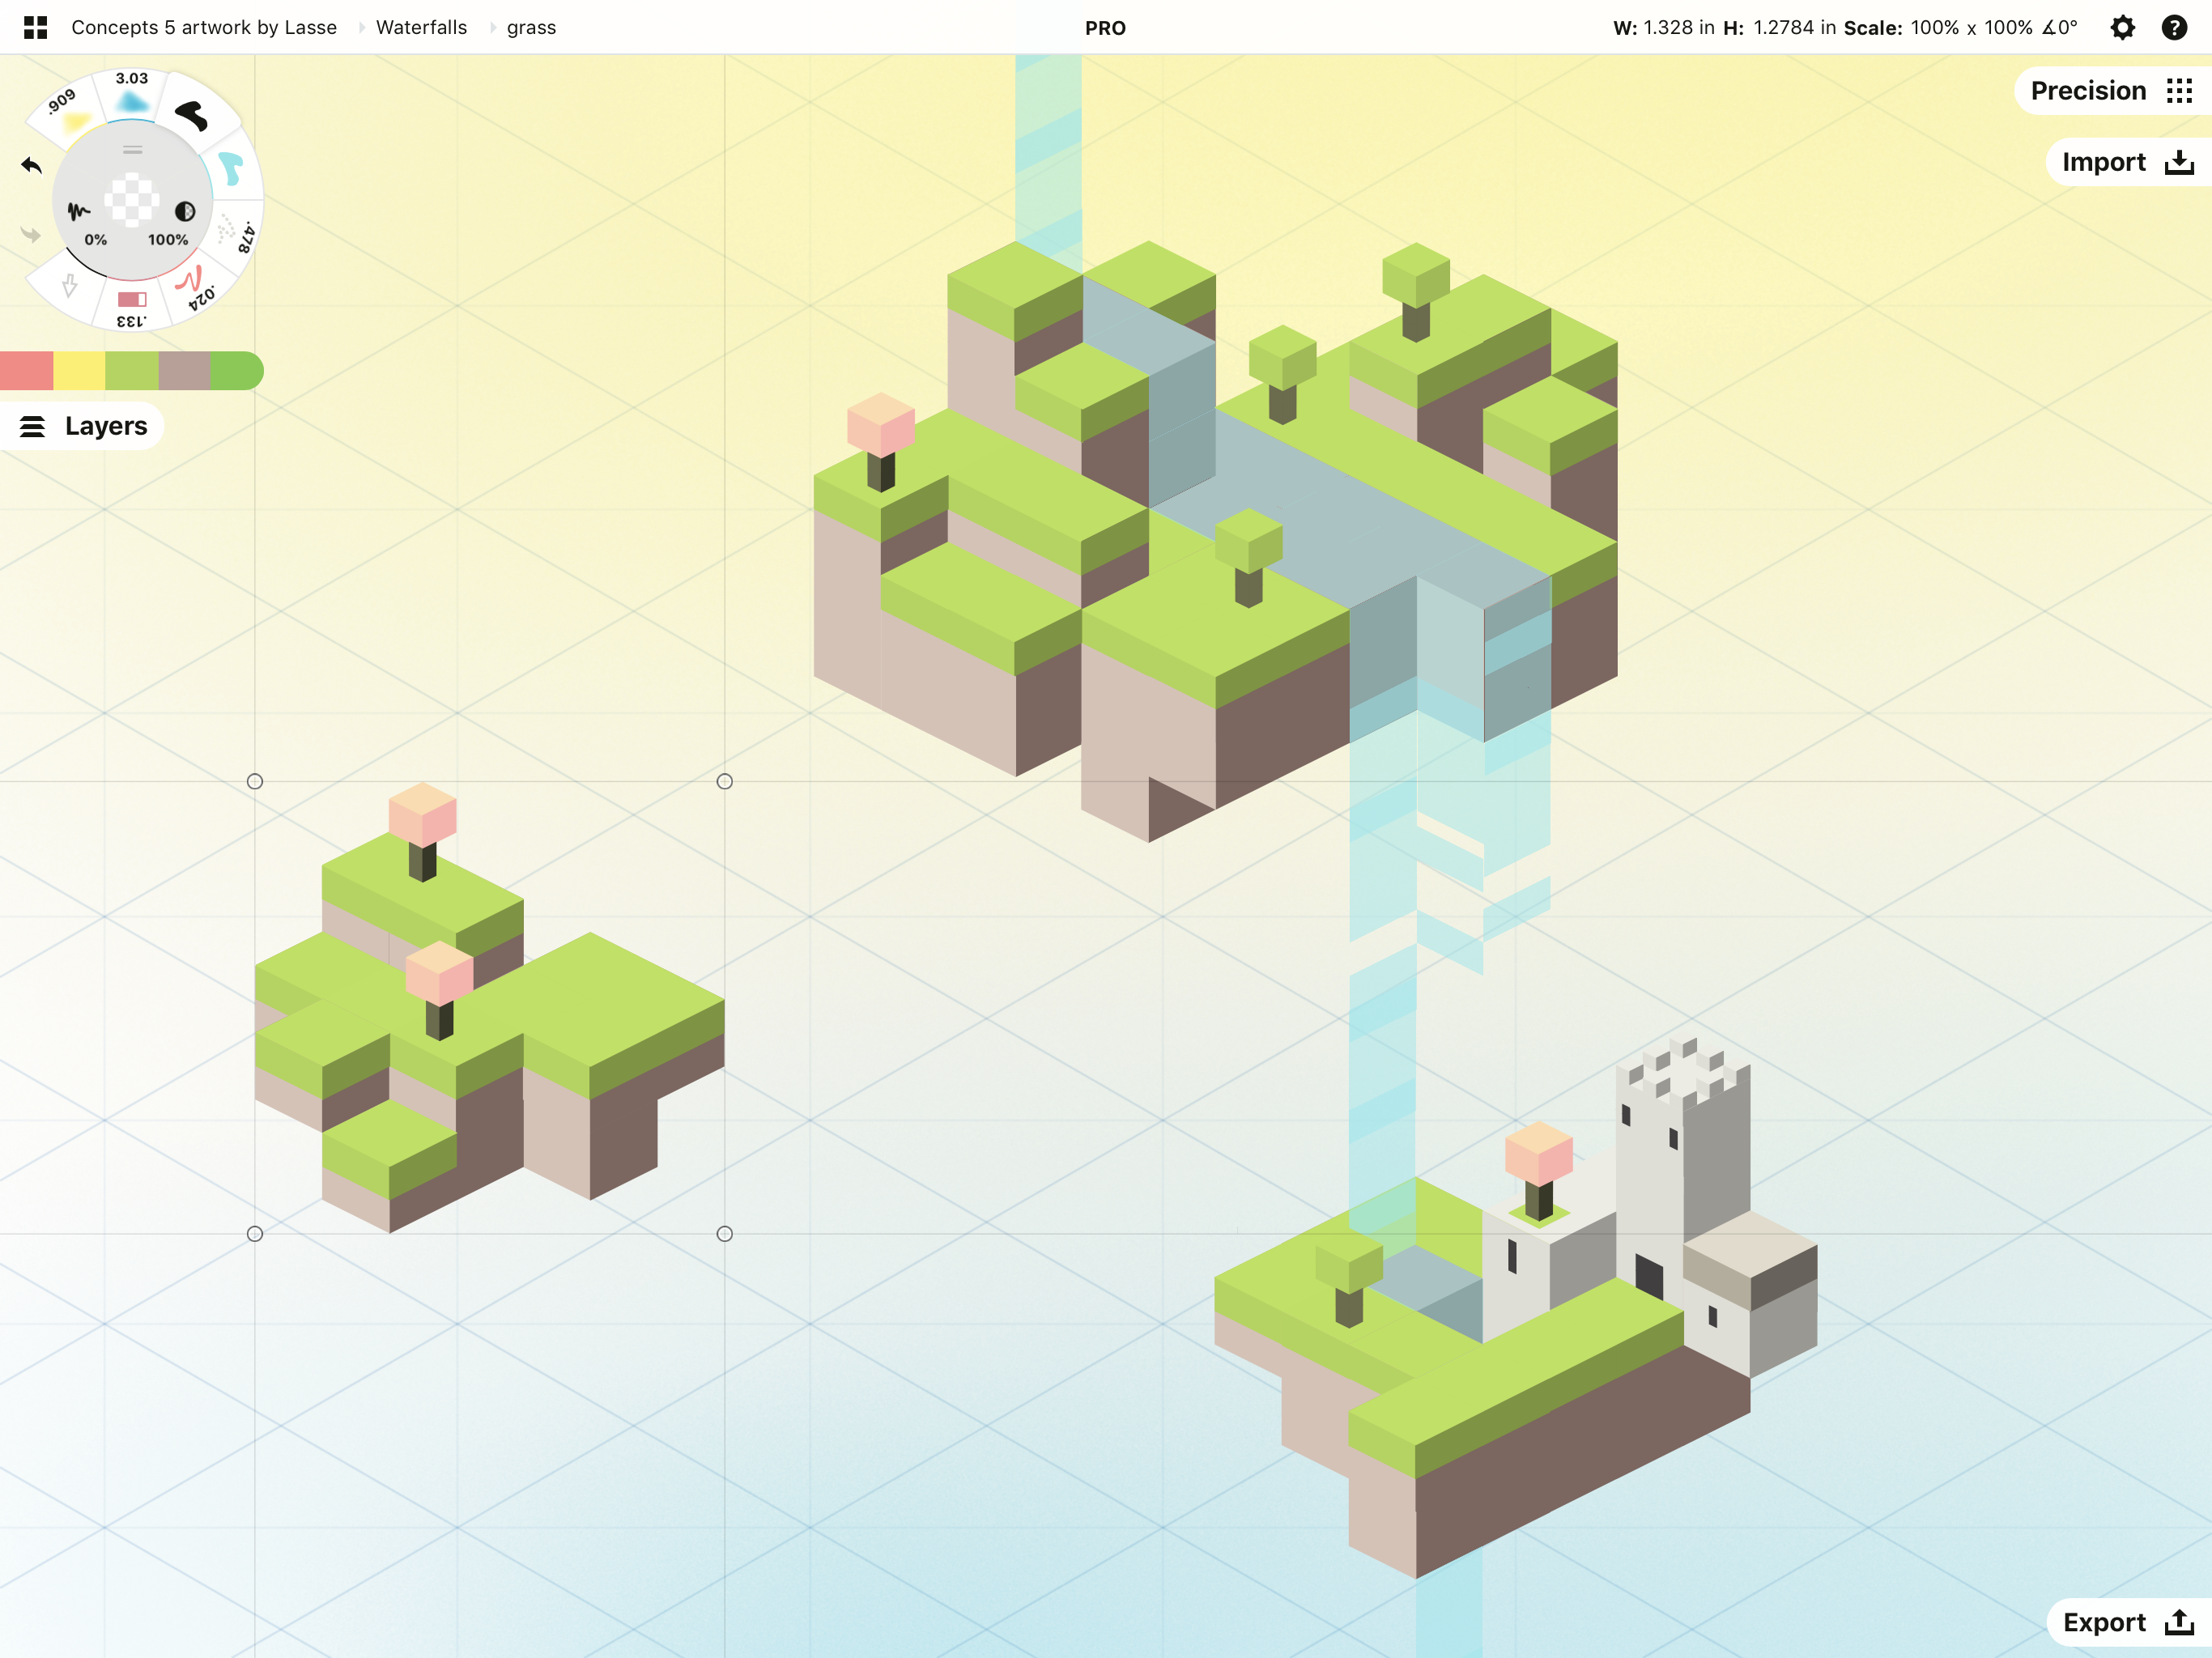
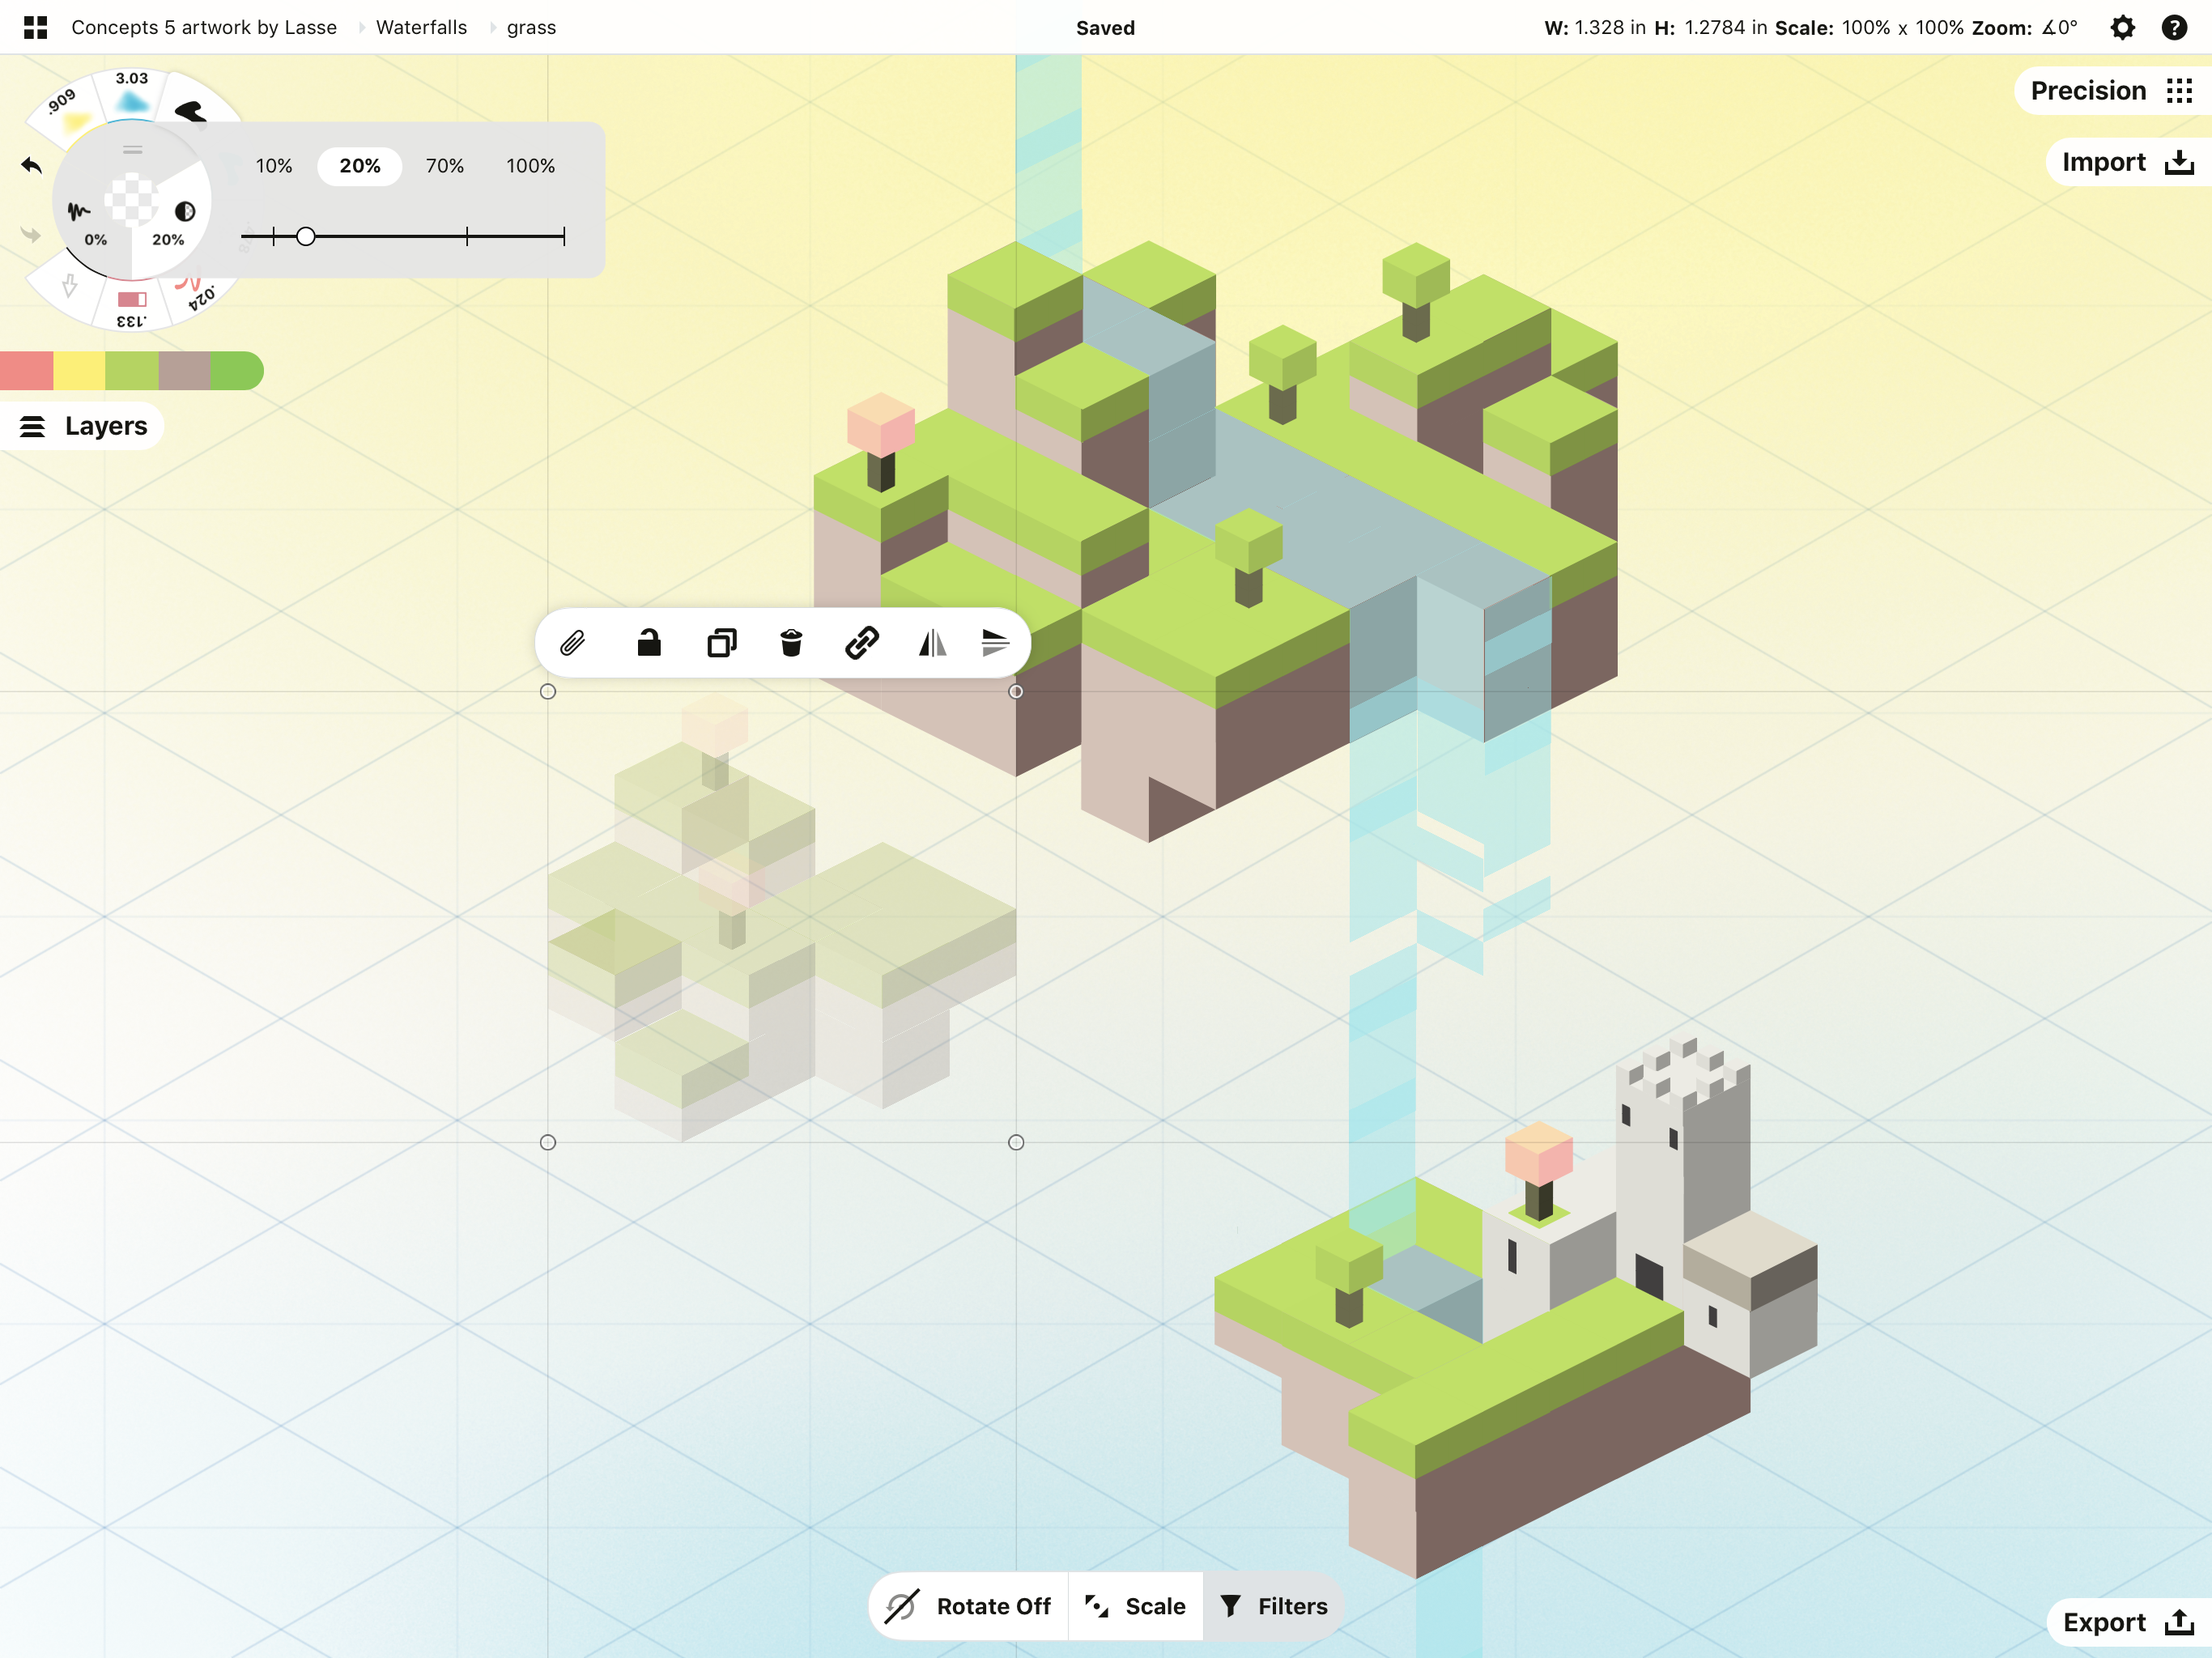
Change the brush size, opacity or smoothing. If your line weight is too thick or too narrow, your ink too opaque or transparent, or your sketching too shaky or smooth, you can select your drawing and change these elements using the options on the inner ring of the tool wheel. Note that this changes your selection only, it doesn’t change the tool’s original presets.
Change the tool. By tapping a different tool on the wheel when your strokes are selected, you can change their tool type.
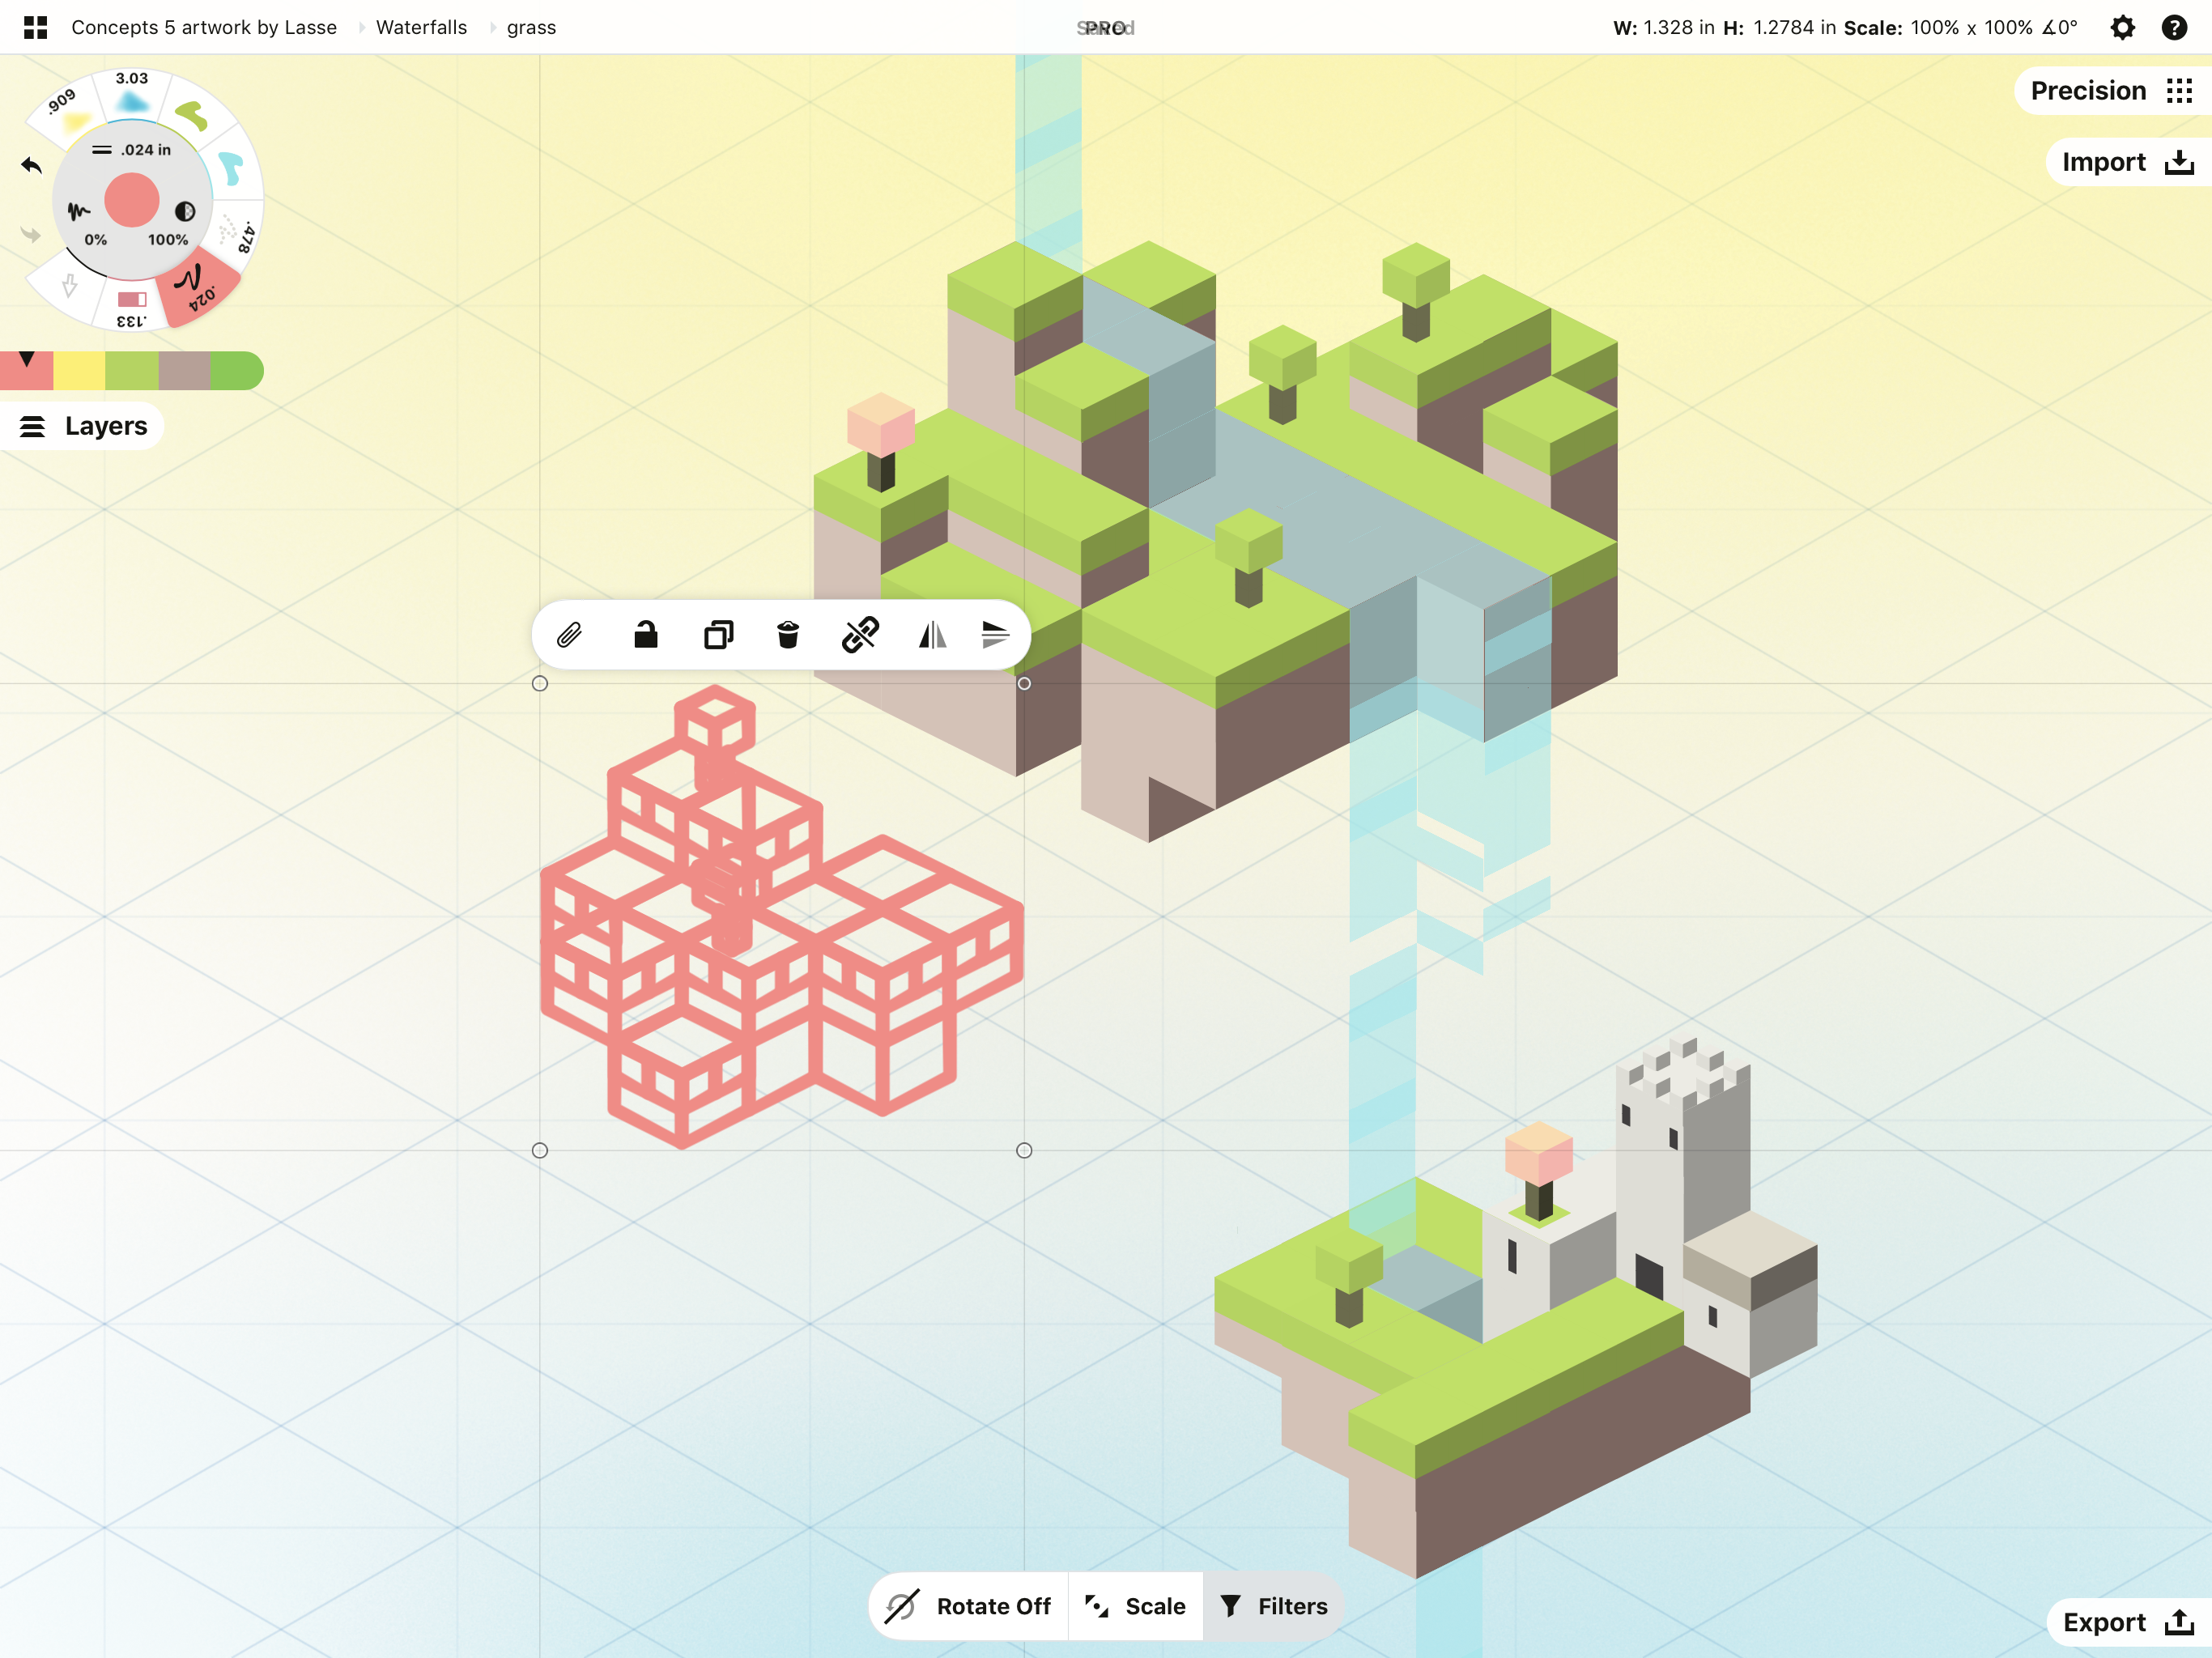
Change the color. Tap the color dot at the center of the tool wheel to bring up the Copic color wheel and choose a new color for your selection.

The Selection Popup
The popup hovering above your selection puts other changes within easy reach.

From left to right, these options are:
Clipboard. The paperclip copies your selection to your device clipboard. It makes it easy to transfer work between apps like email and text, and between drawings and projects in app. You can also find the paperclip in the Gallery, in your Imports menu and with your Object library (iOS only).
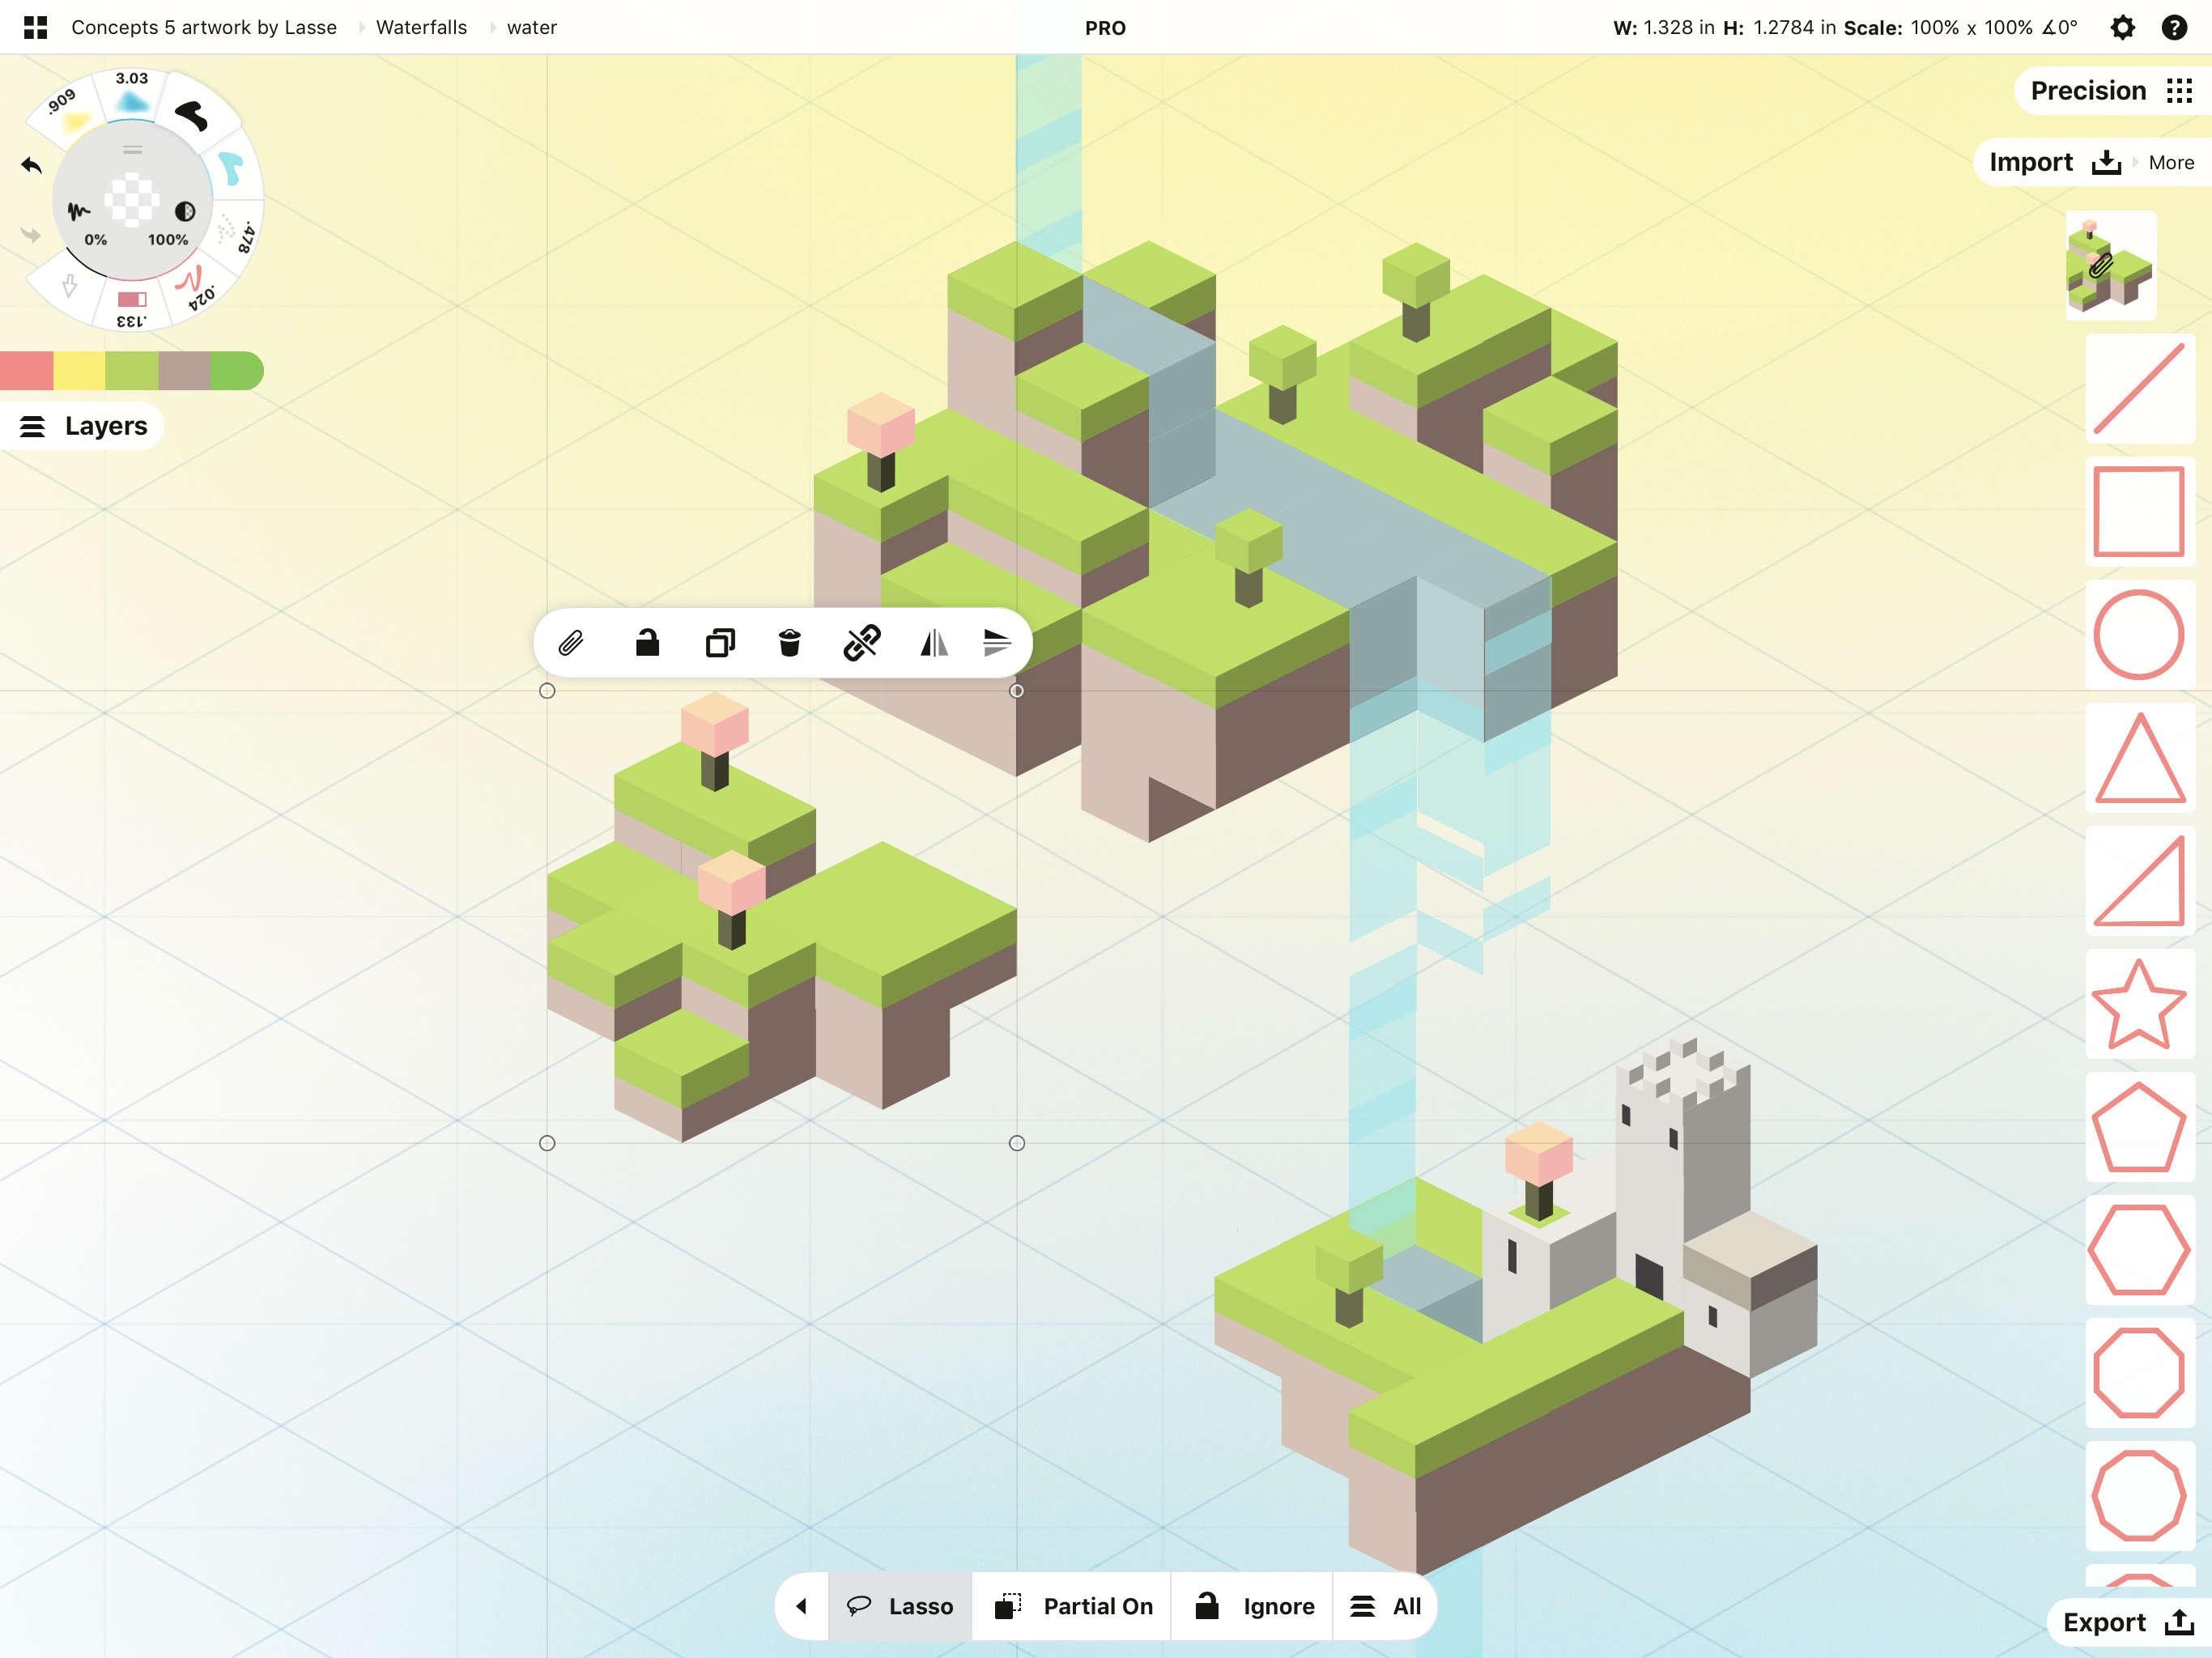
You can see the selection clip at the top of the Imports library.
On iOS, tap+hold the canvas when you have a selection clipped and a clipboard will appear - tap it to paste your selection to the canvas.
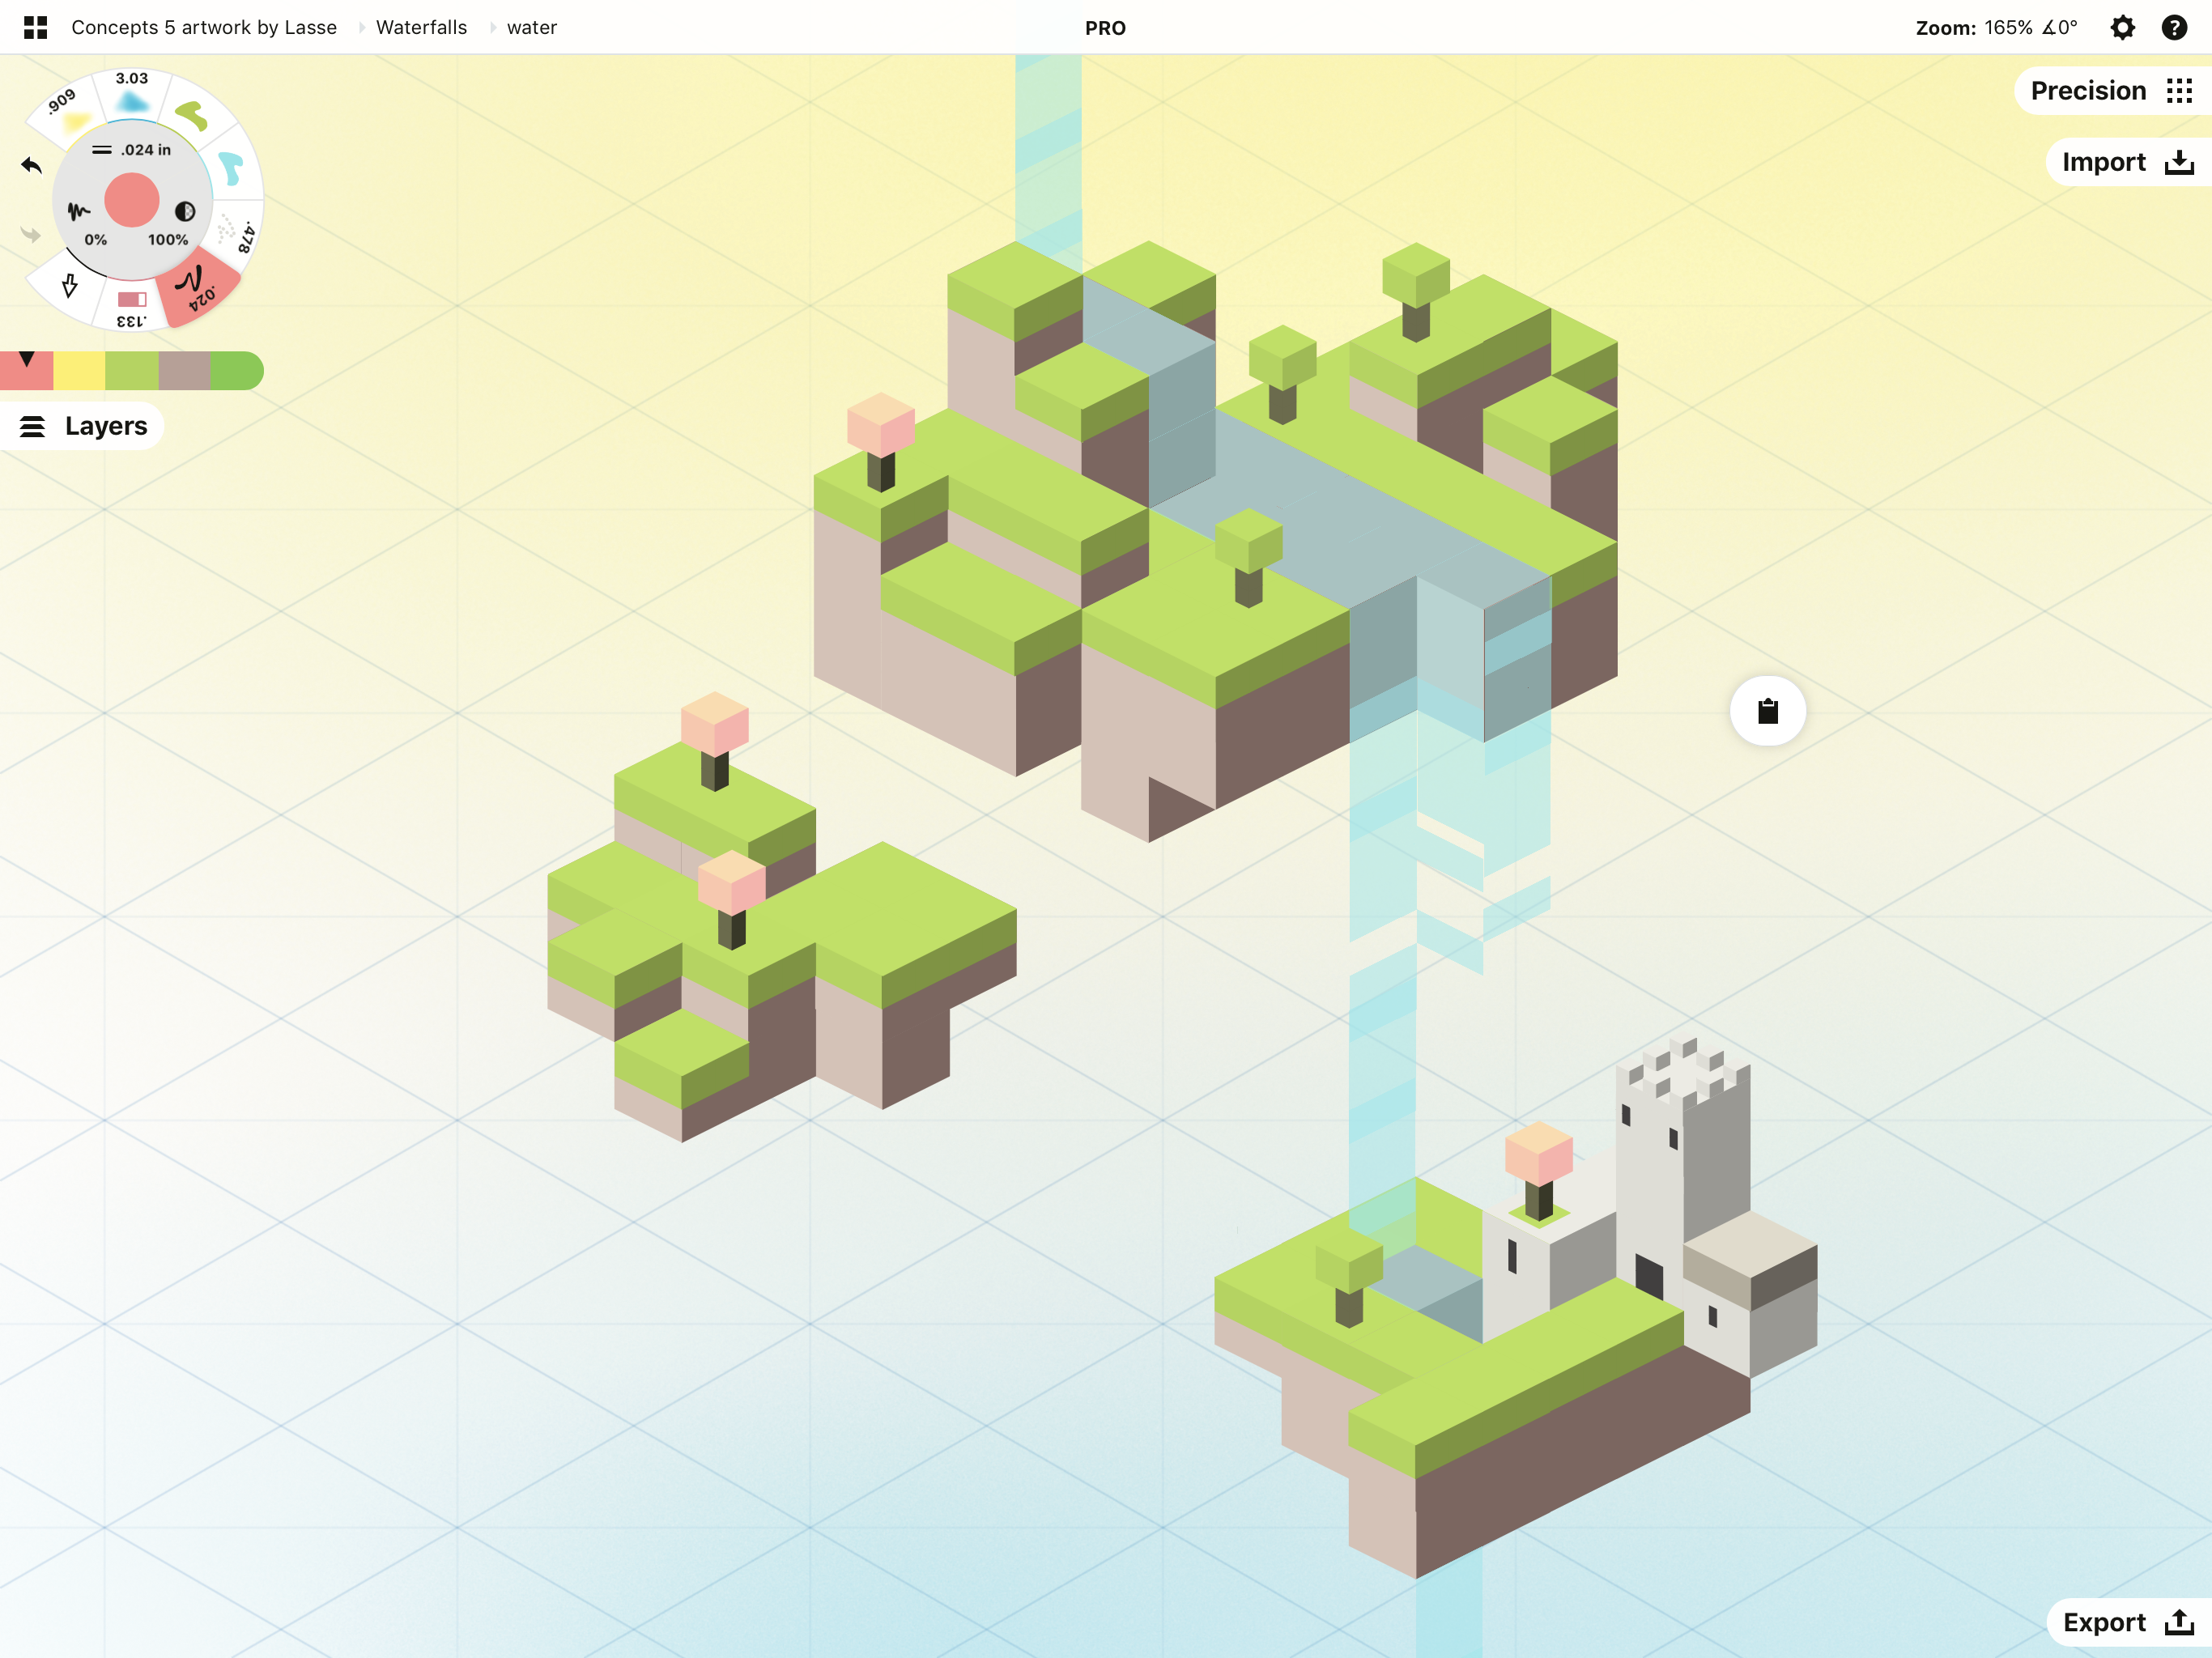
Lock. Tap the lock to lock your selected strokes from future selections or changes. Double-tap to undo this immediately, or you can always select the same group and unlock them with the same button later.
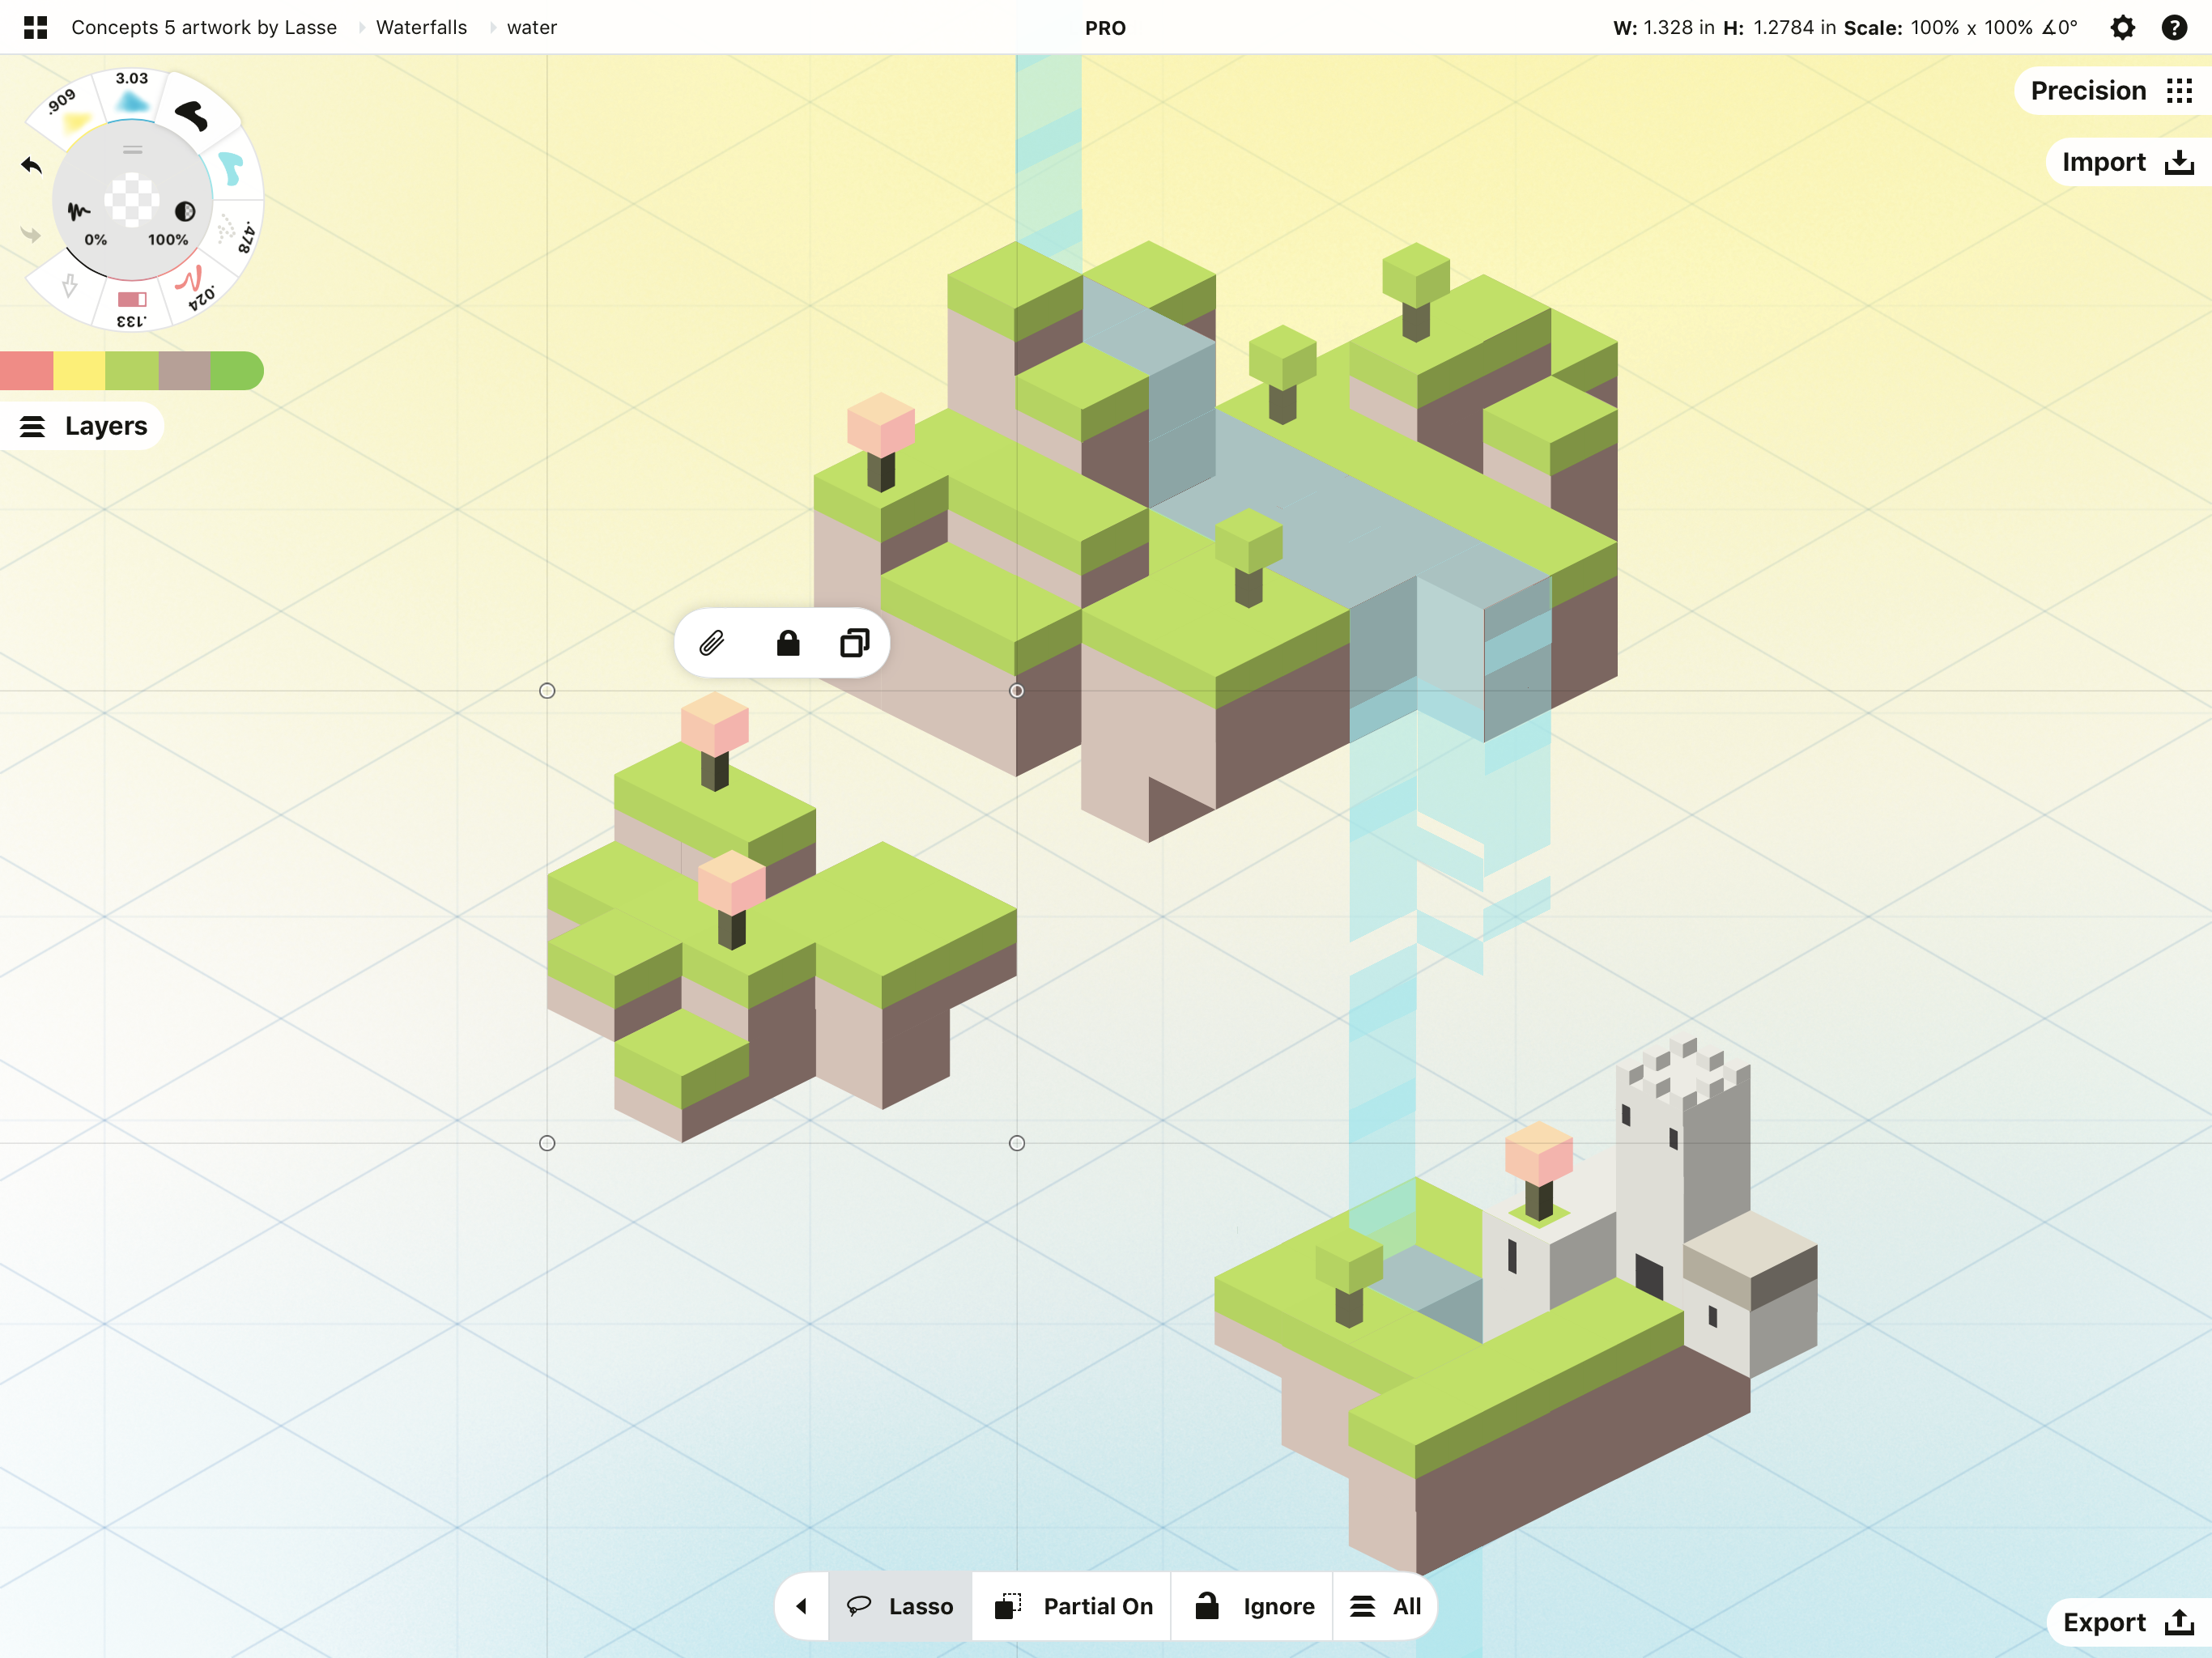
The selection popup has fewer choices now that the selection is locked. Tap the lock to unlock it again.
Duplicate. Incredibly handy for quick iterations, select anything you draw and duplicate it as many times as you’d like. This gives you the freedom to not only make multiple copies, but to experiment without touching the original.
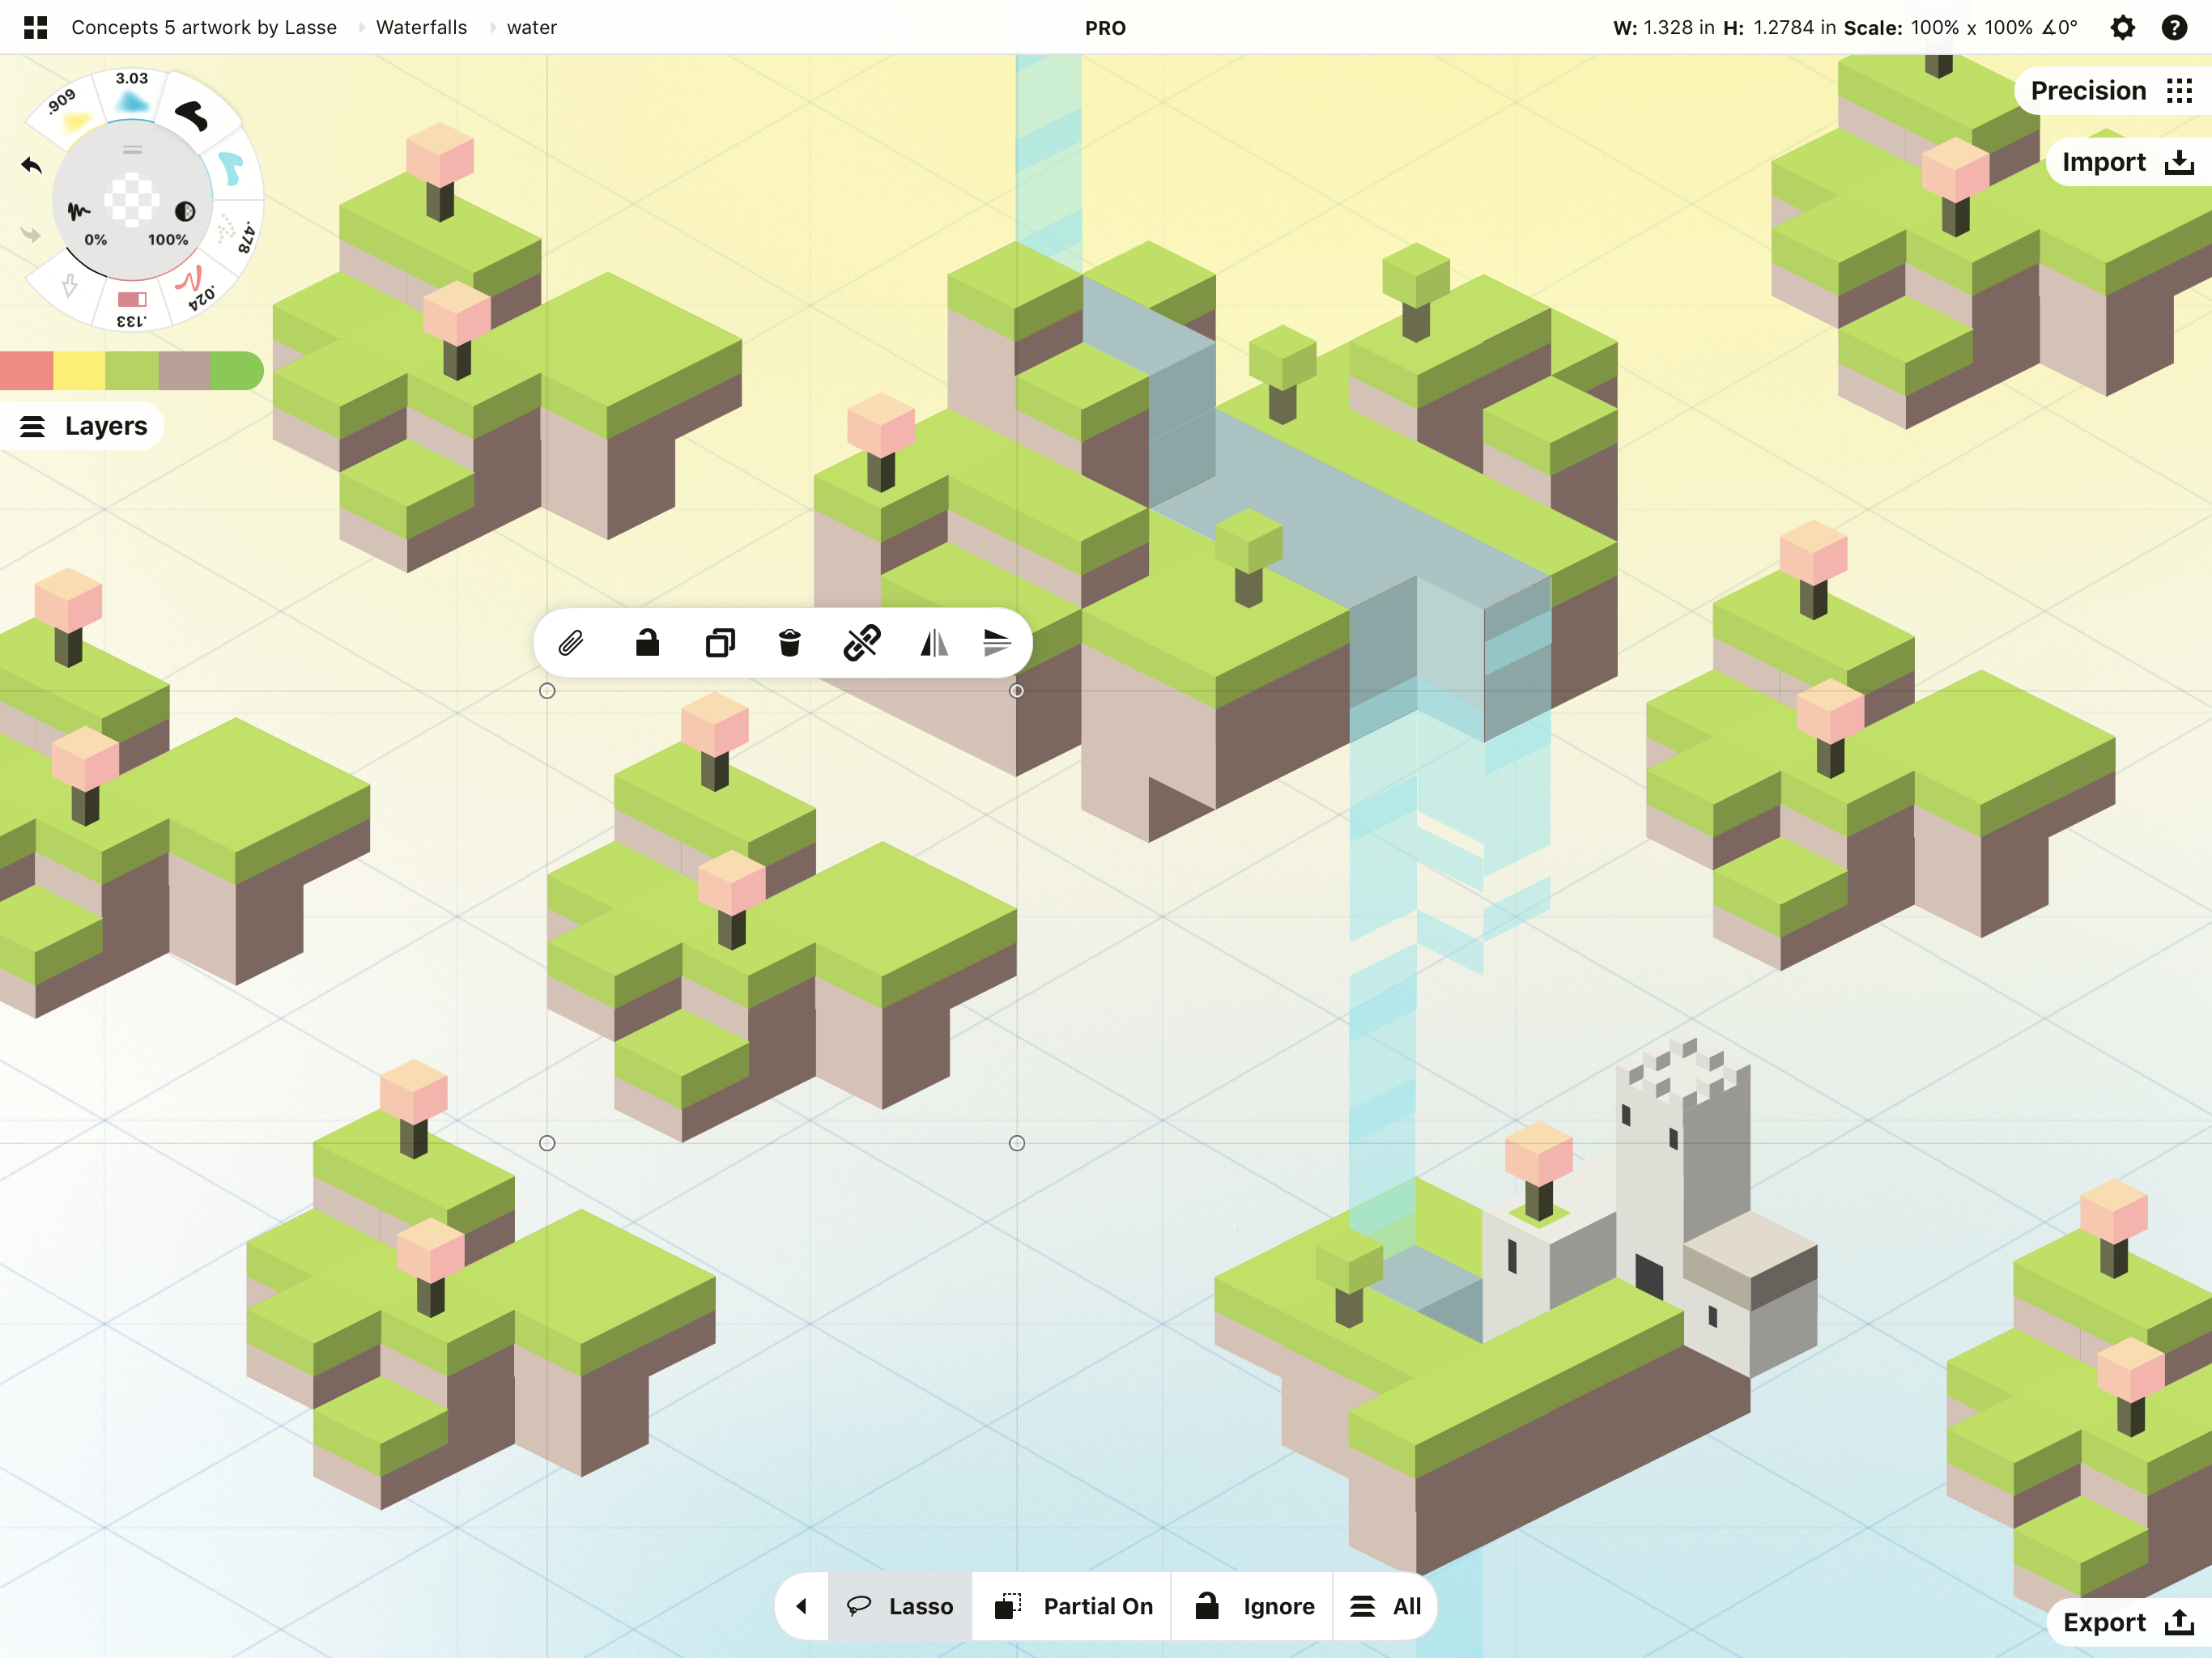
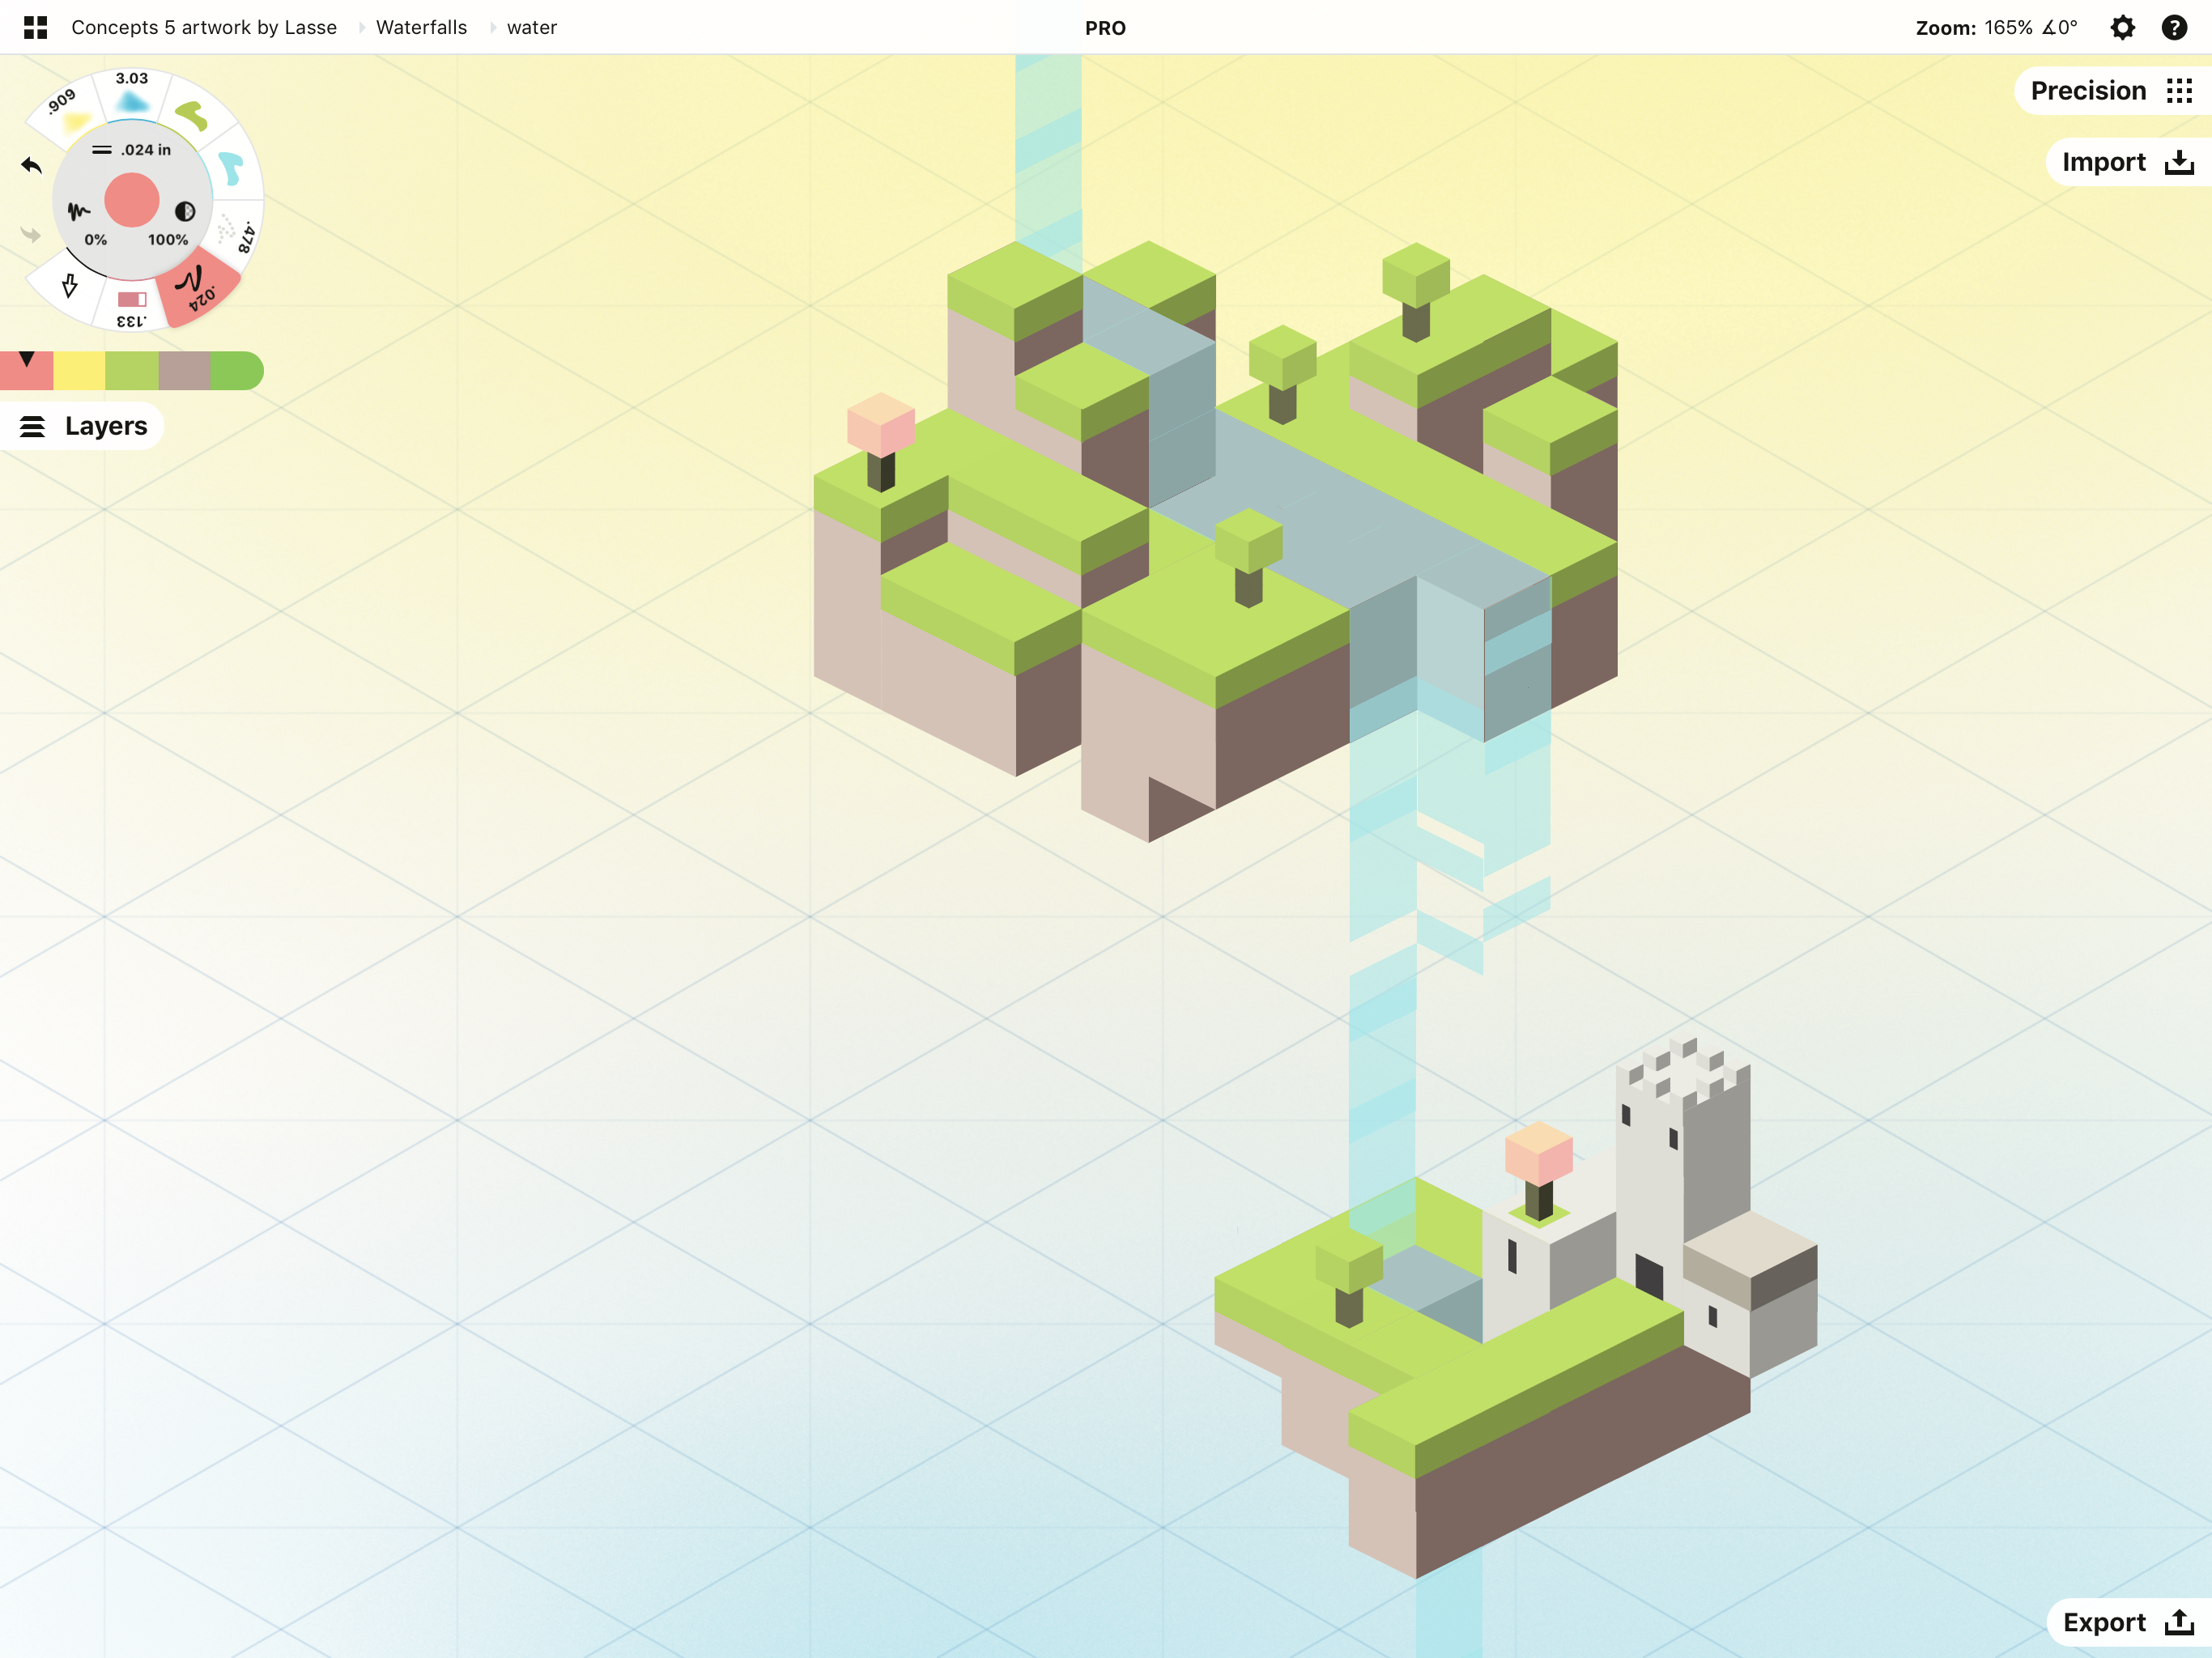
Delete. The fastest way to get rid of a stroke is to select and delete it. Tap the waste can to say good-bye to your strokes.
Group. The link button allows you to group your strokes into a single “object”. This is very handy for working with elements of your drawing. It means when you go back to select and work with the object, the app treats it as a single selectable entity instead of a series of strokes. This keeps you from reselecting every stroke each time you want to scale or move the object around. Select the object and tap the link again to ungroup it if you need to alter individual elements.
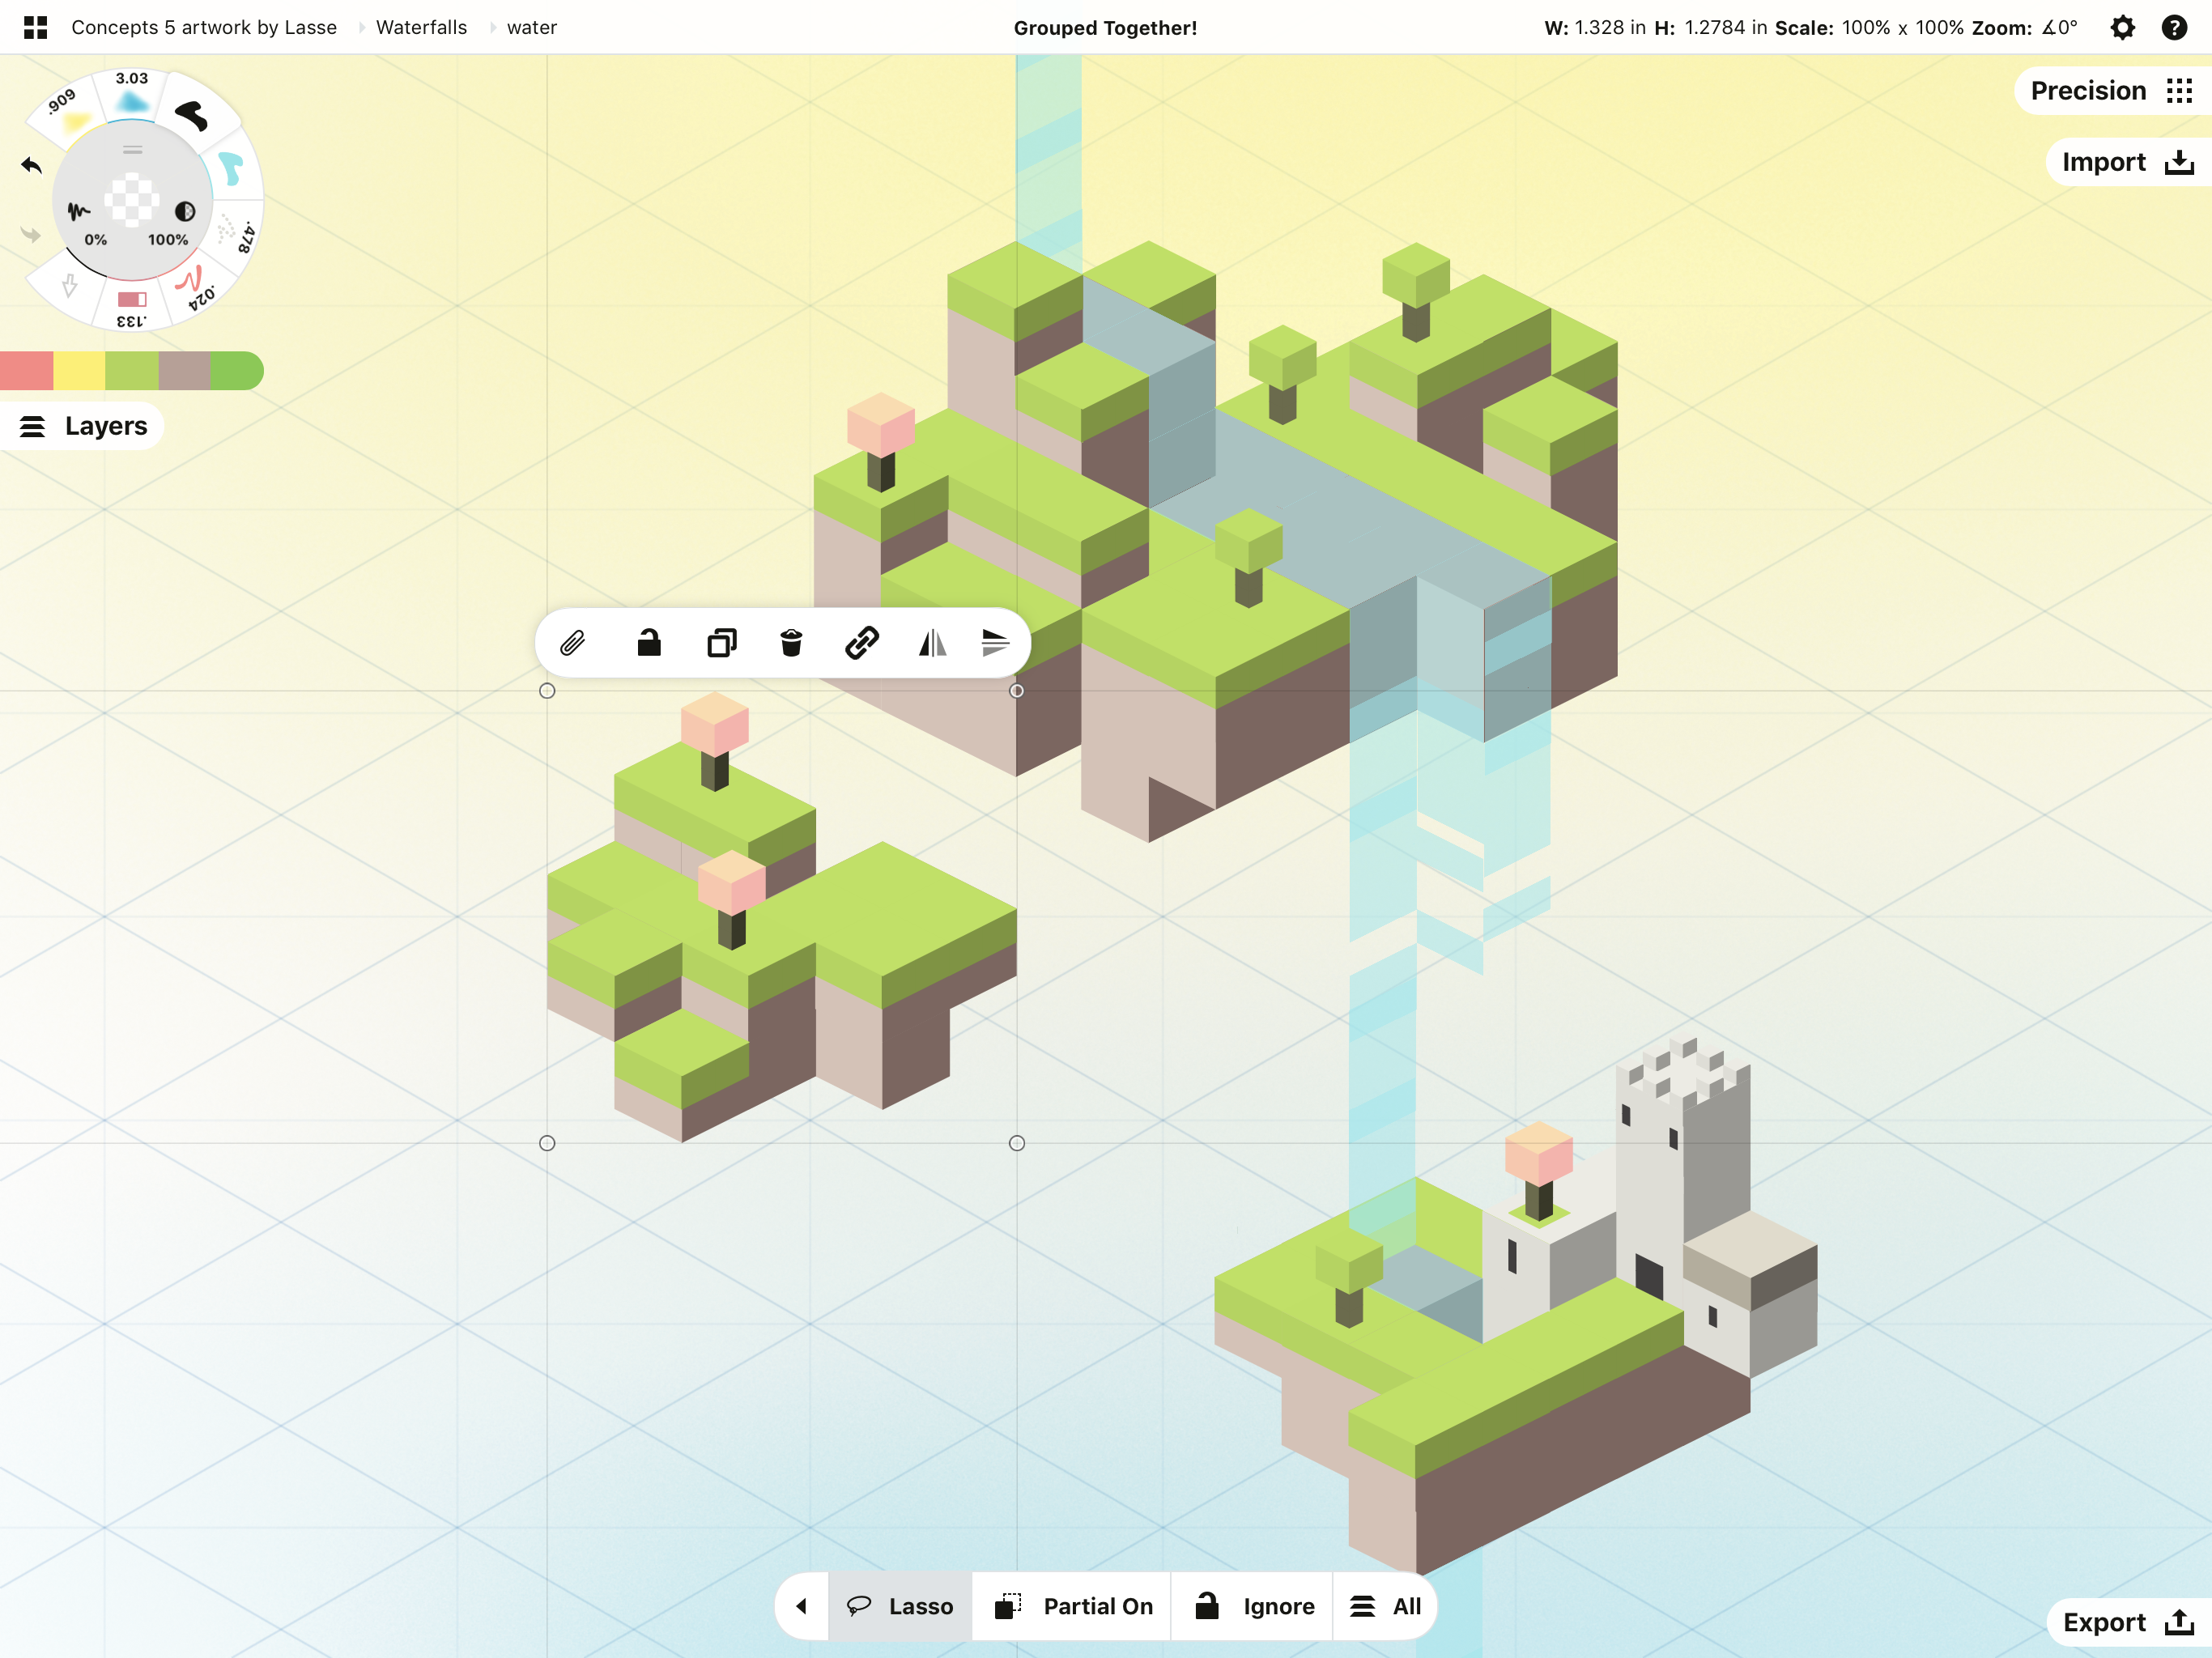
The link is now closed on the popup and the status bar says “Grouped Together!”
Flip. Use flip to flip your selection horizontally across the canvas. If you’re drawing a portrait, select your drawing on all layers and flip the drawing for that extra editor’s eye - this helps you check that your composition is on target.
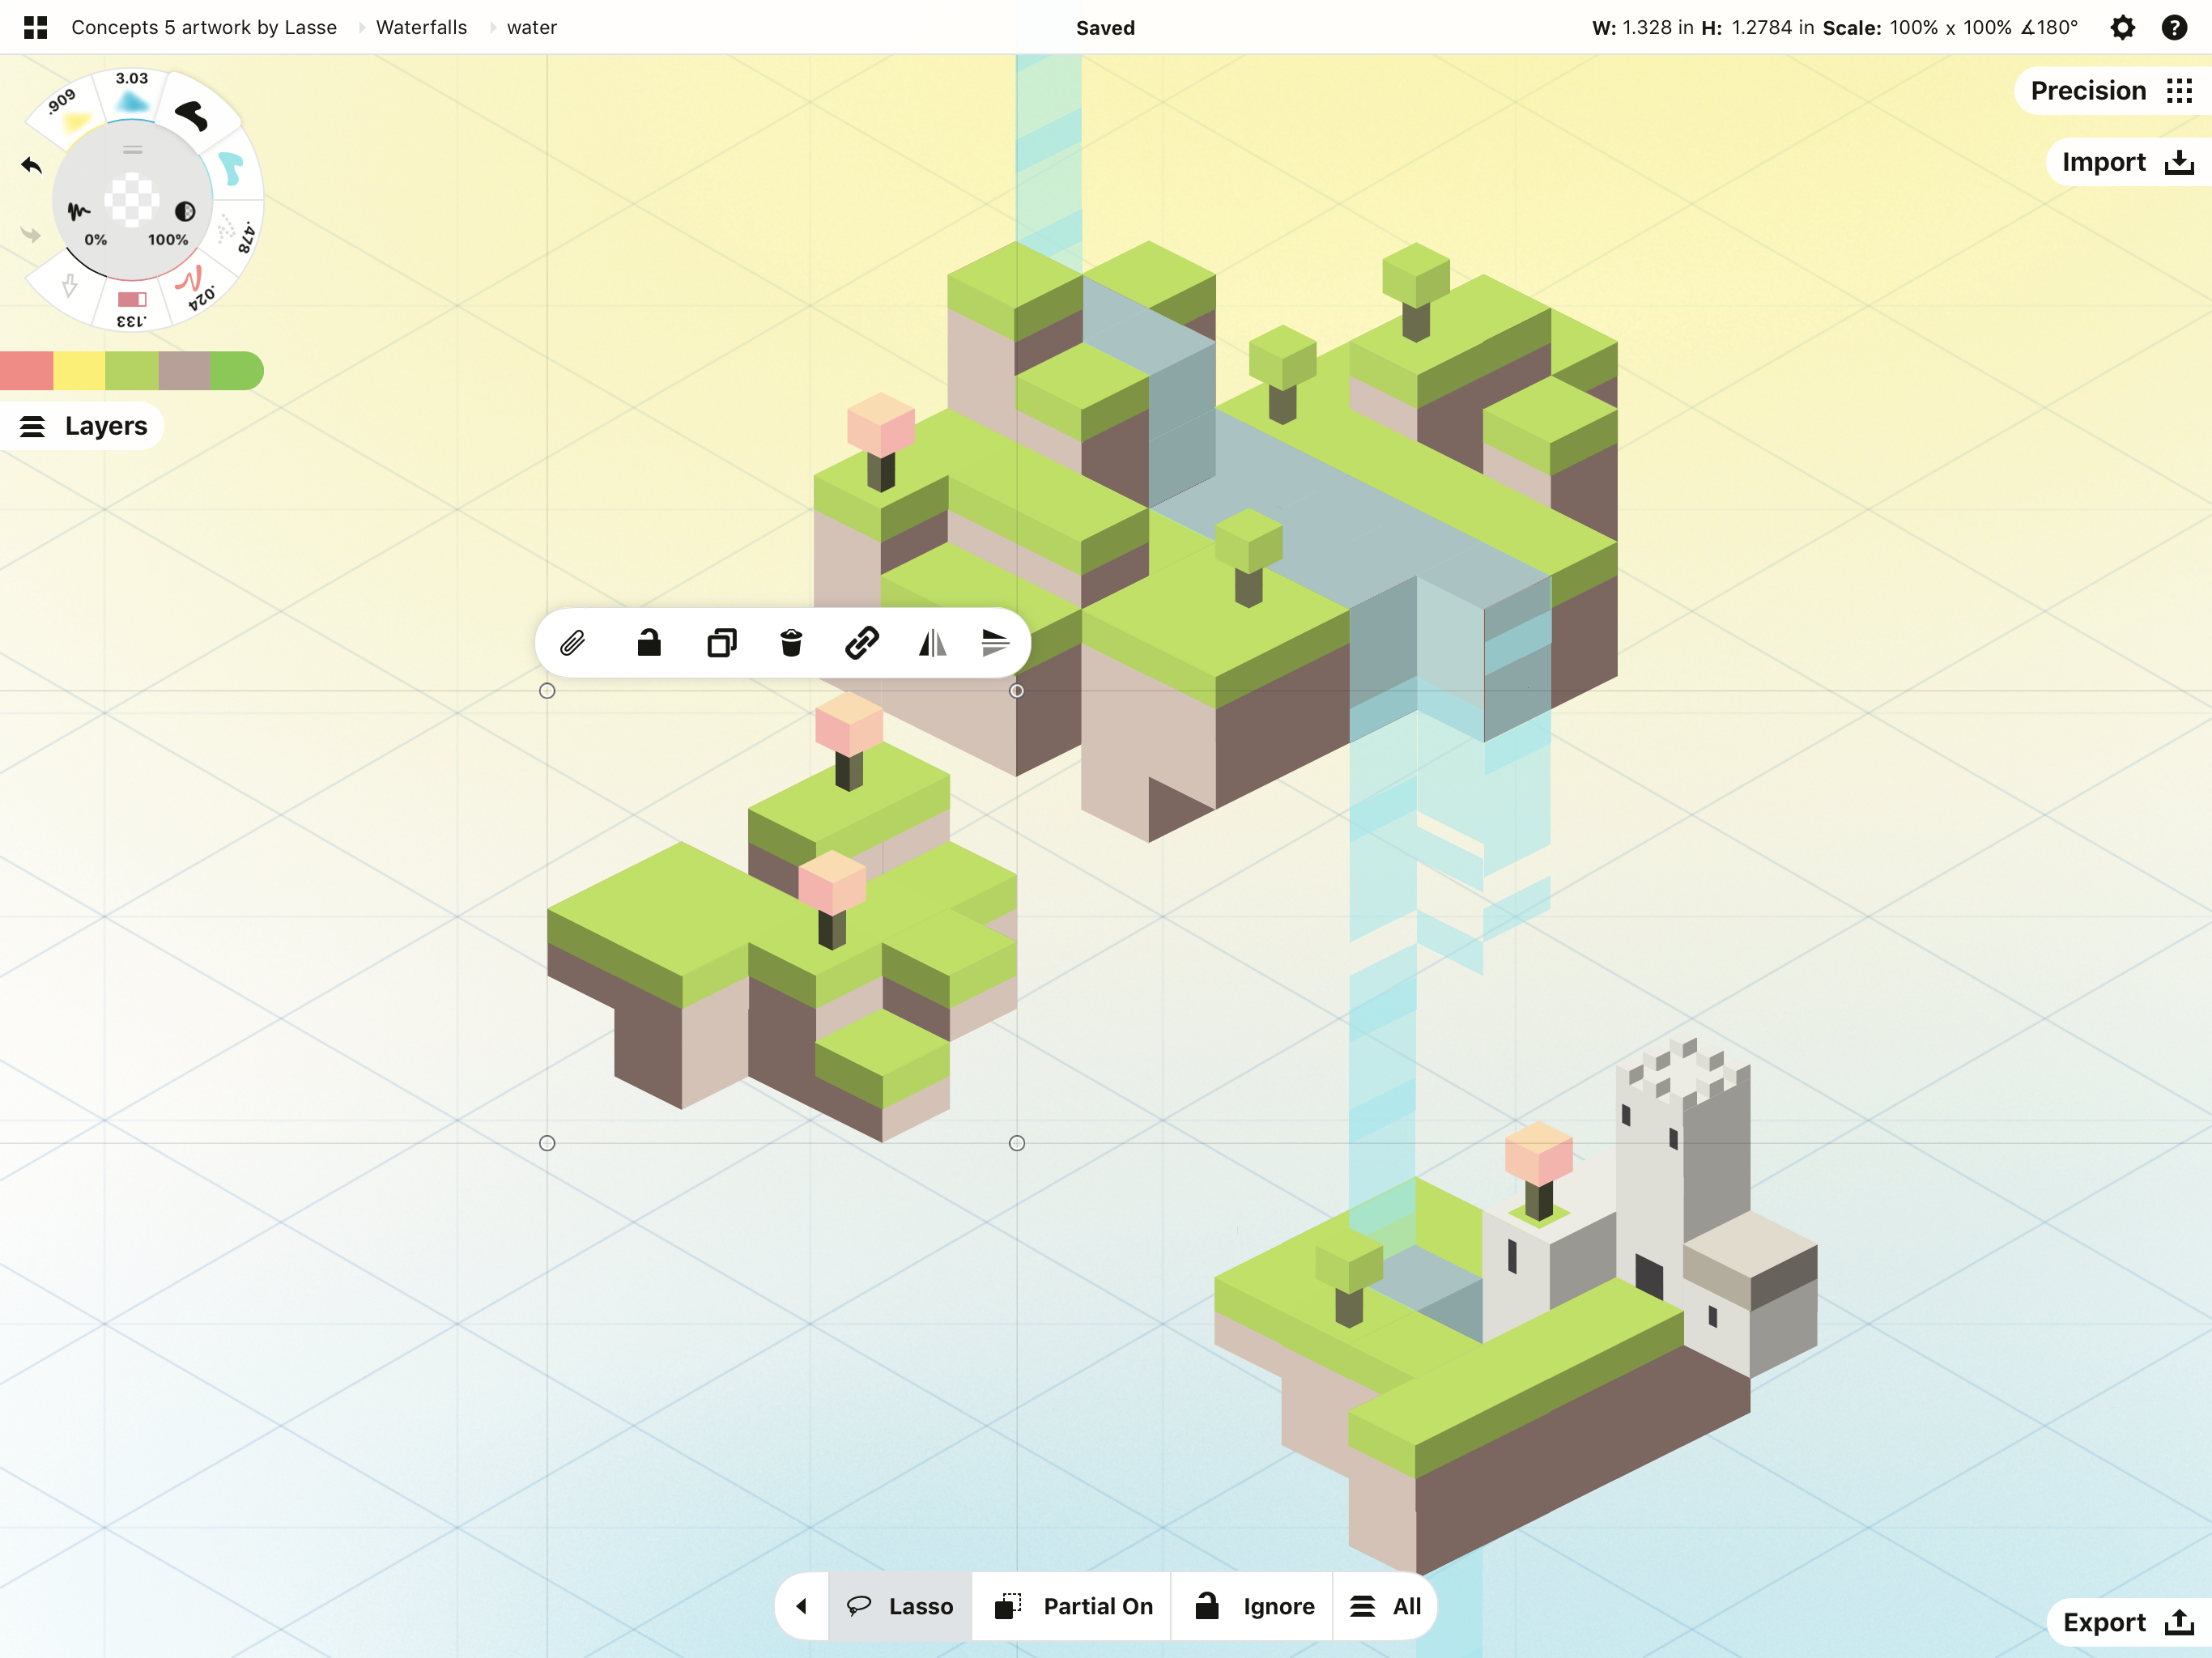
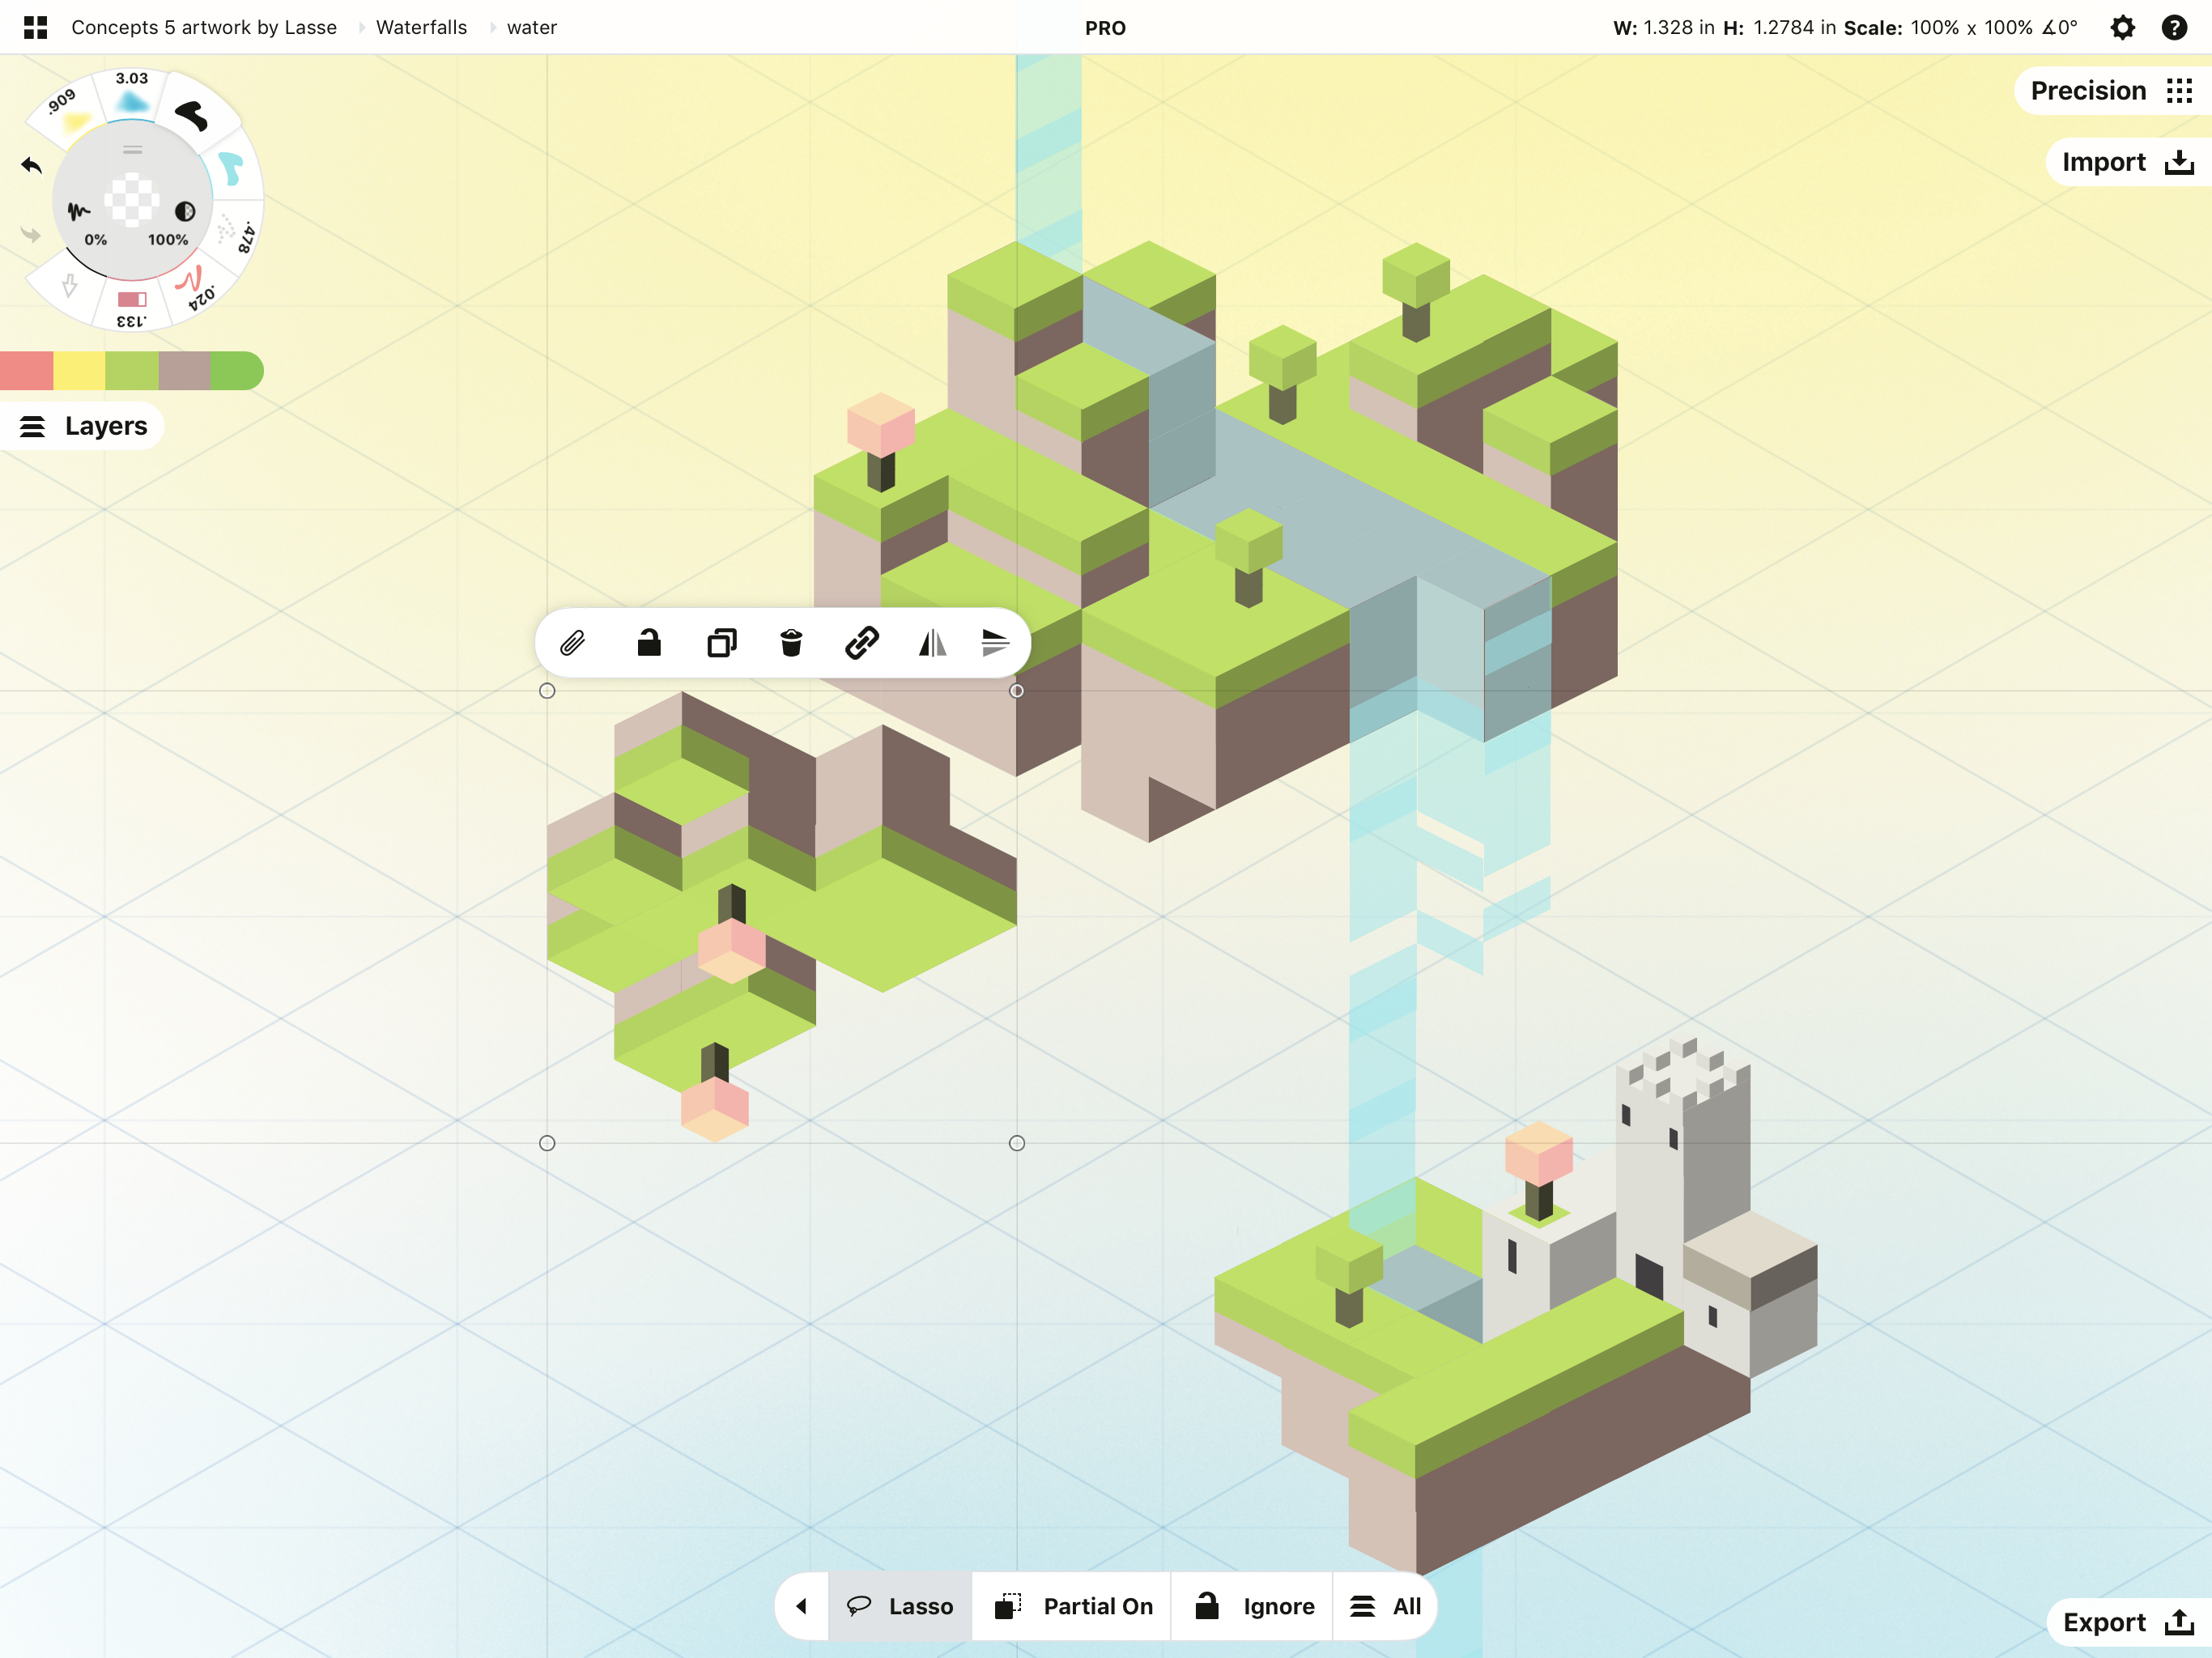
Mirror. Use Mirror to flip your selection vertically. Duplicate your selection and mirror it to create instant reflections or shadows that you can soften with a lowered opacity or Soft Eraser.
Transforming a Selection
The control points on the corners of your bounding box allow you to distort, warp and skew your selection. These abilities are sometimes called Advanced Transforms. If you tap one or two of the points, the circles will turn dark. Use one finger to pull at a corner, or two fingers to manipulate the boundary between the points. Tap a point again or tap outside the box to deselect the corners.
Distort. Tap one corner and drag it to distort the selection.
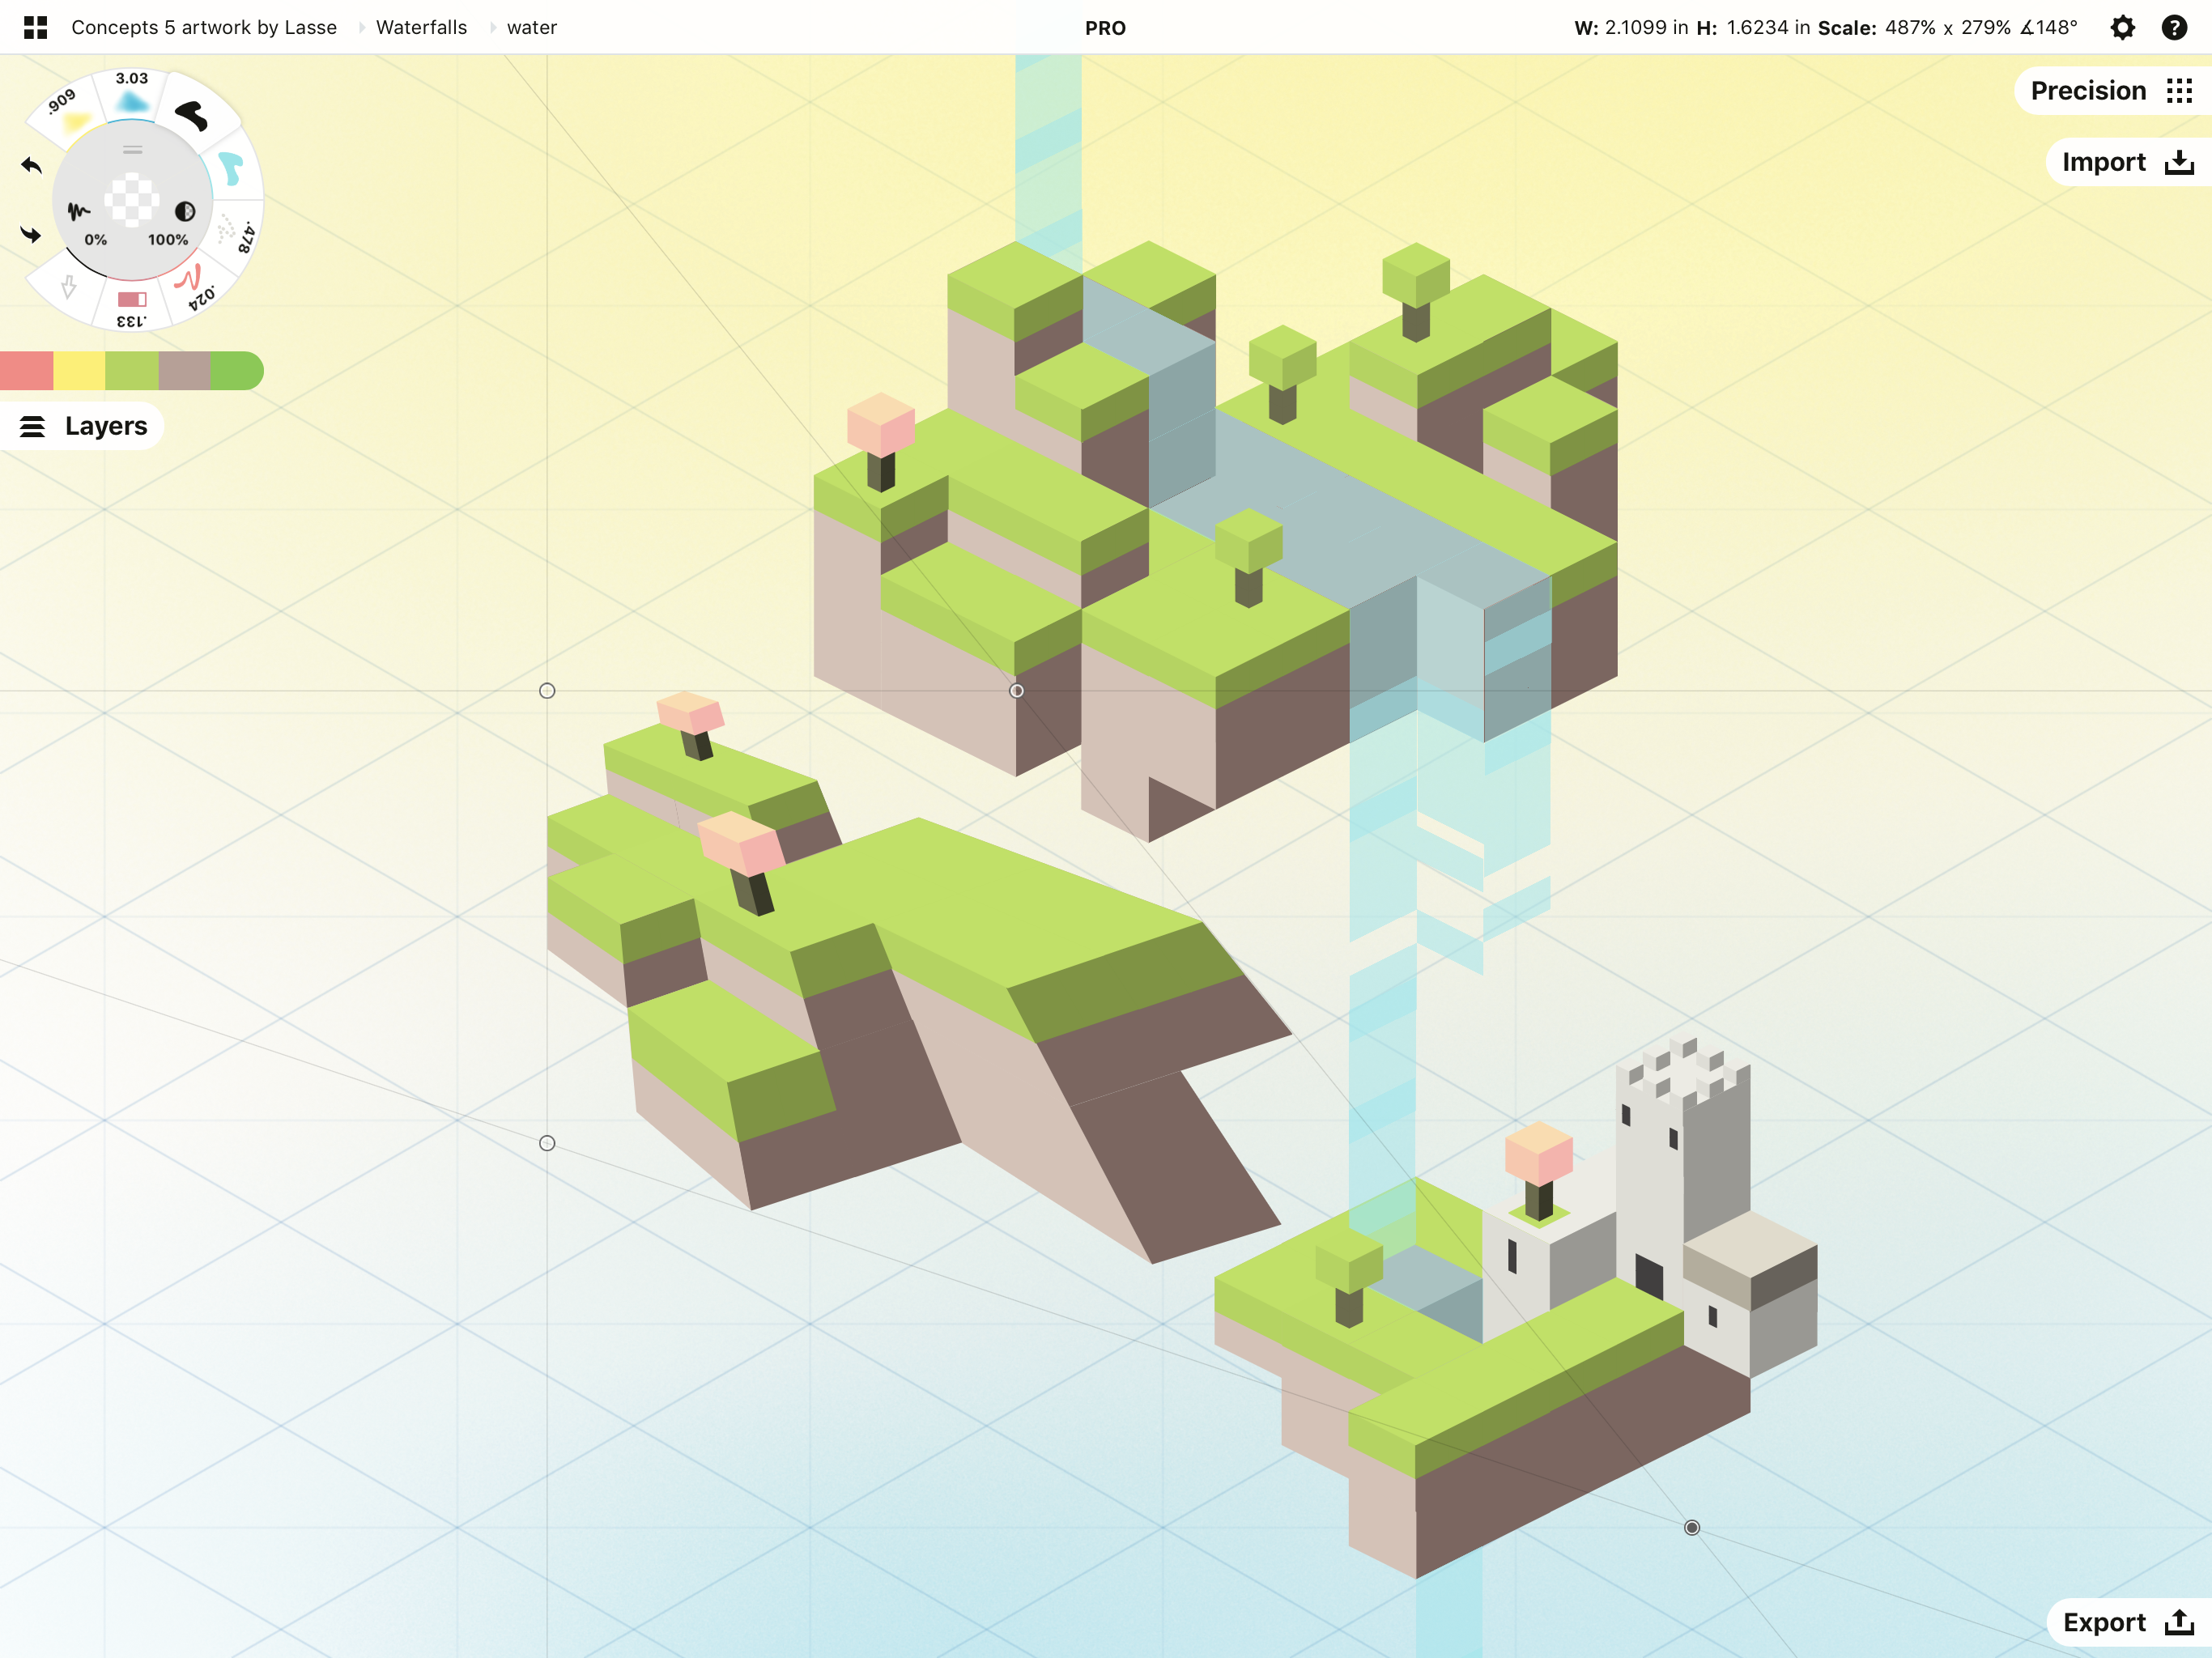
Skew. Tap two corners and drag with one finger to skew it along one side.
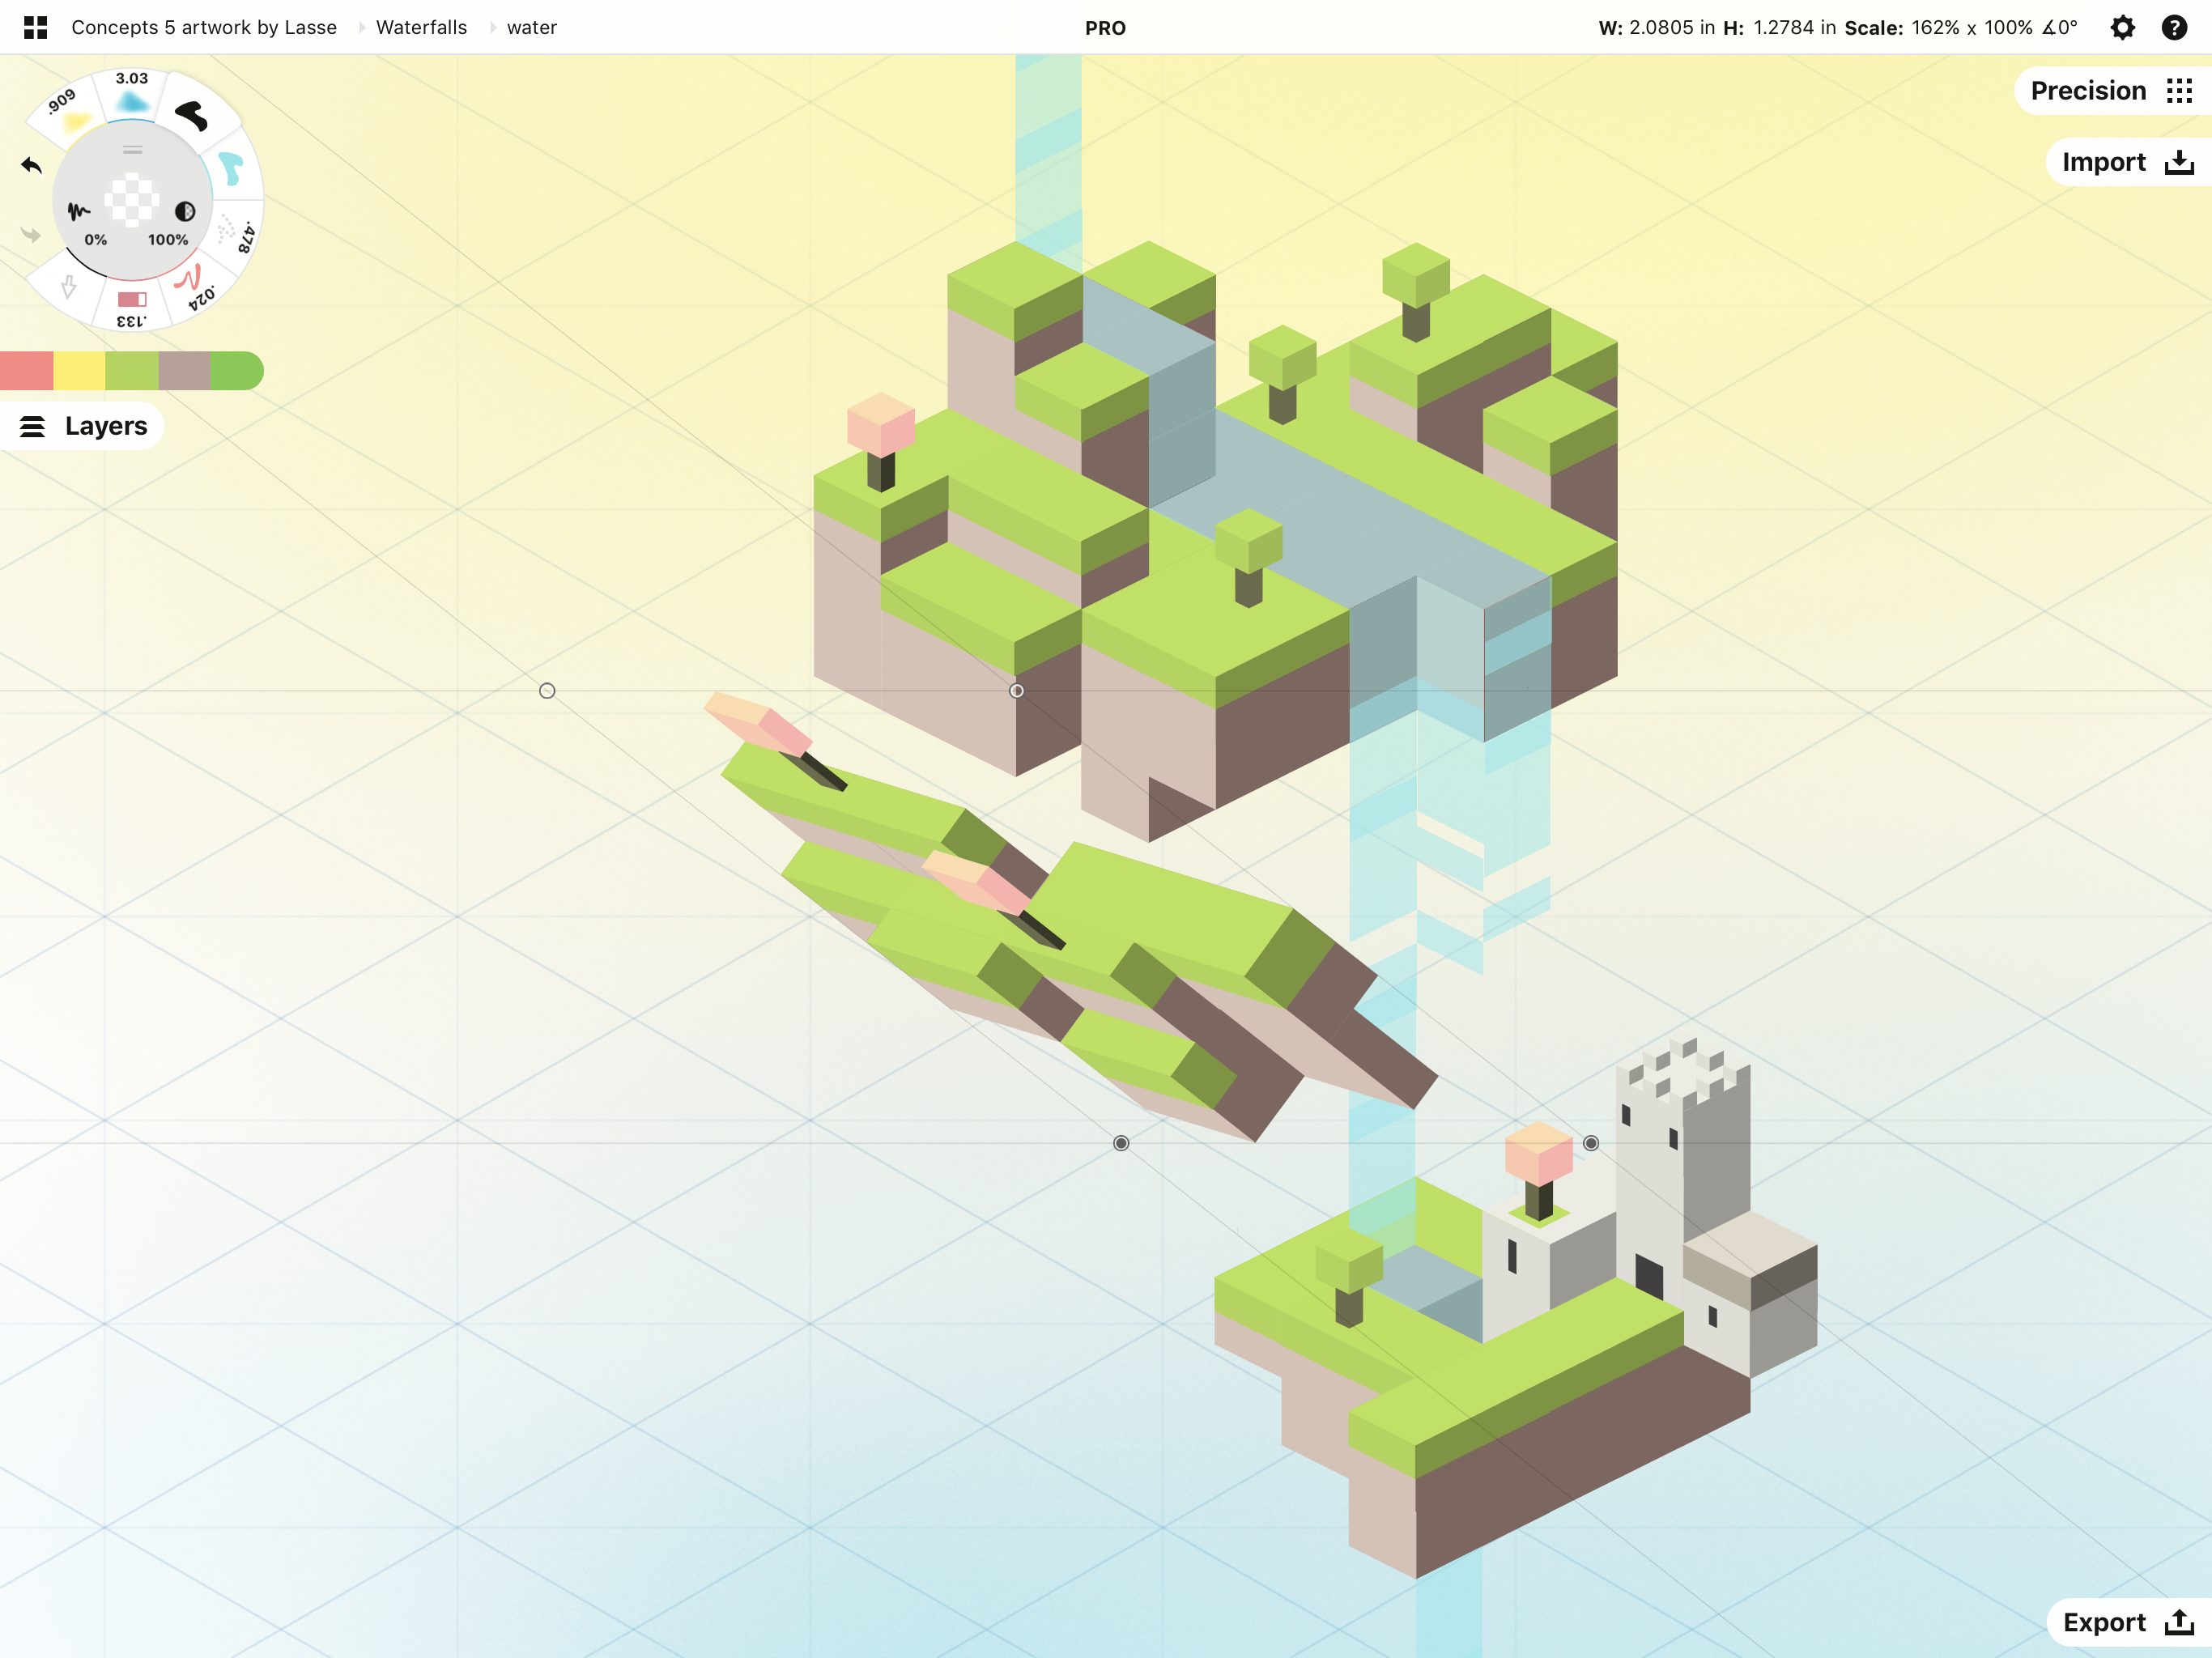
Warp. Tap two corners and drag with two fingers to warp the boundaries up, down, outward or inward.
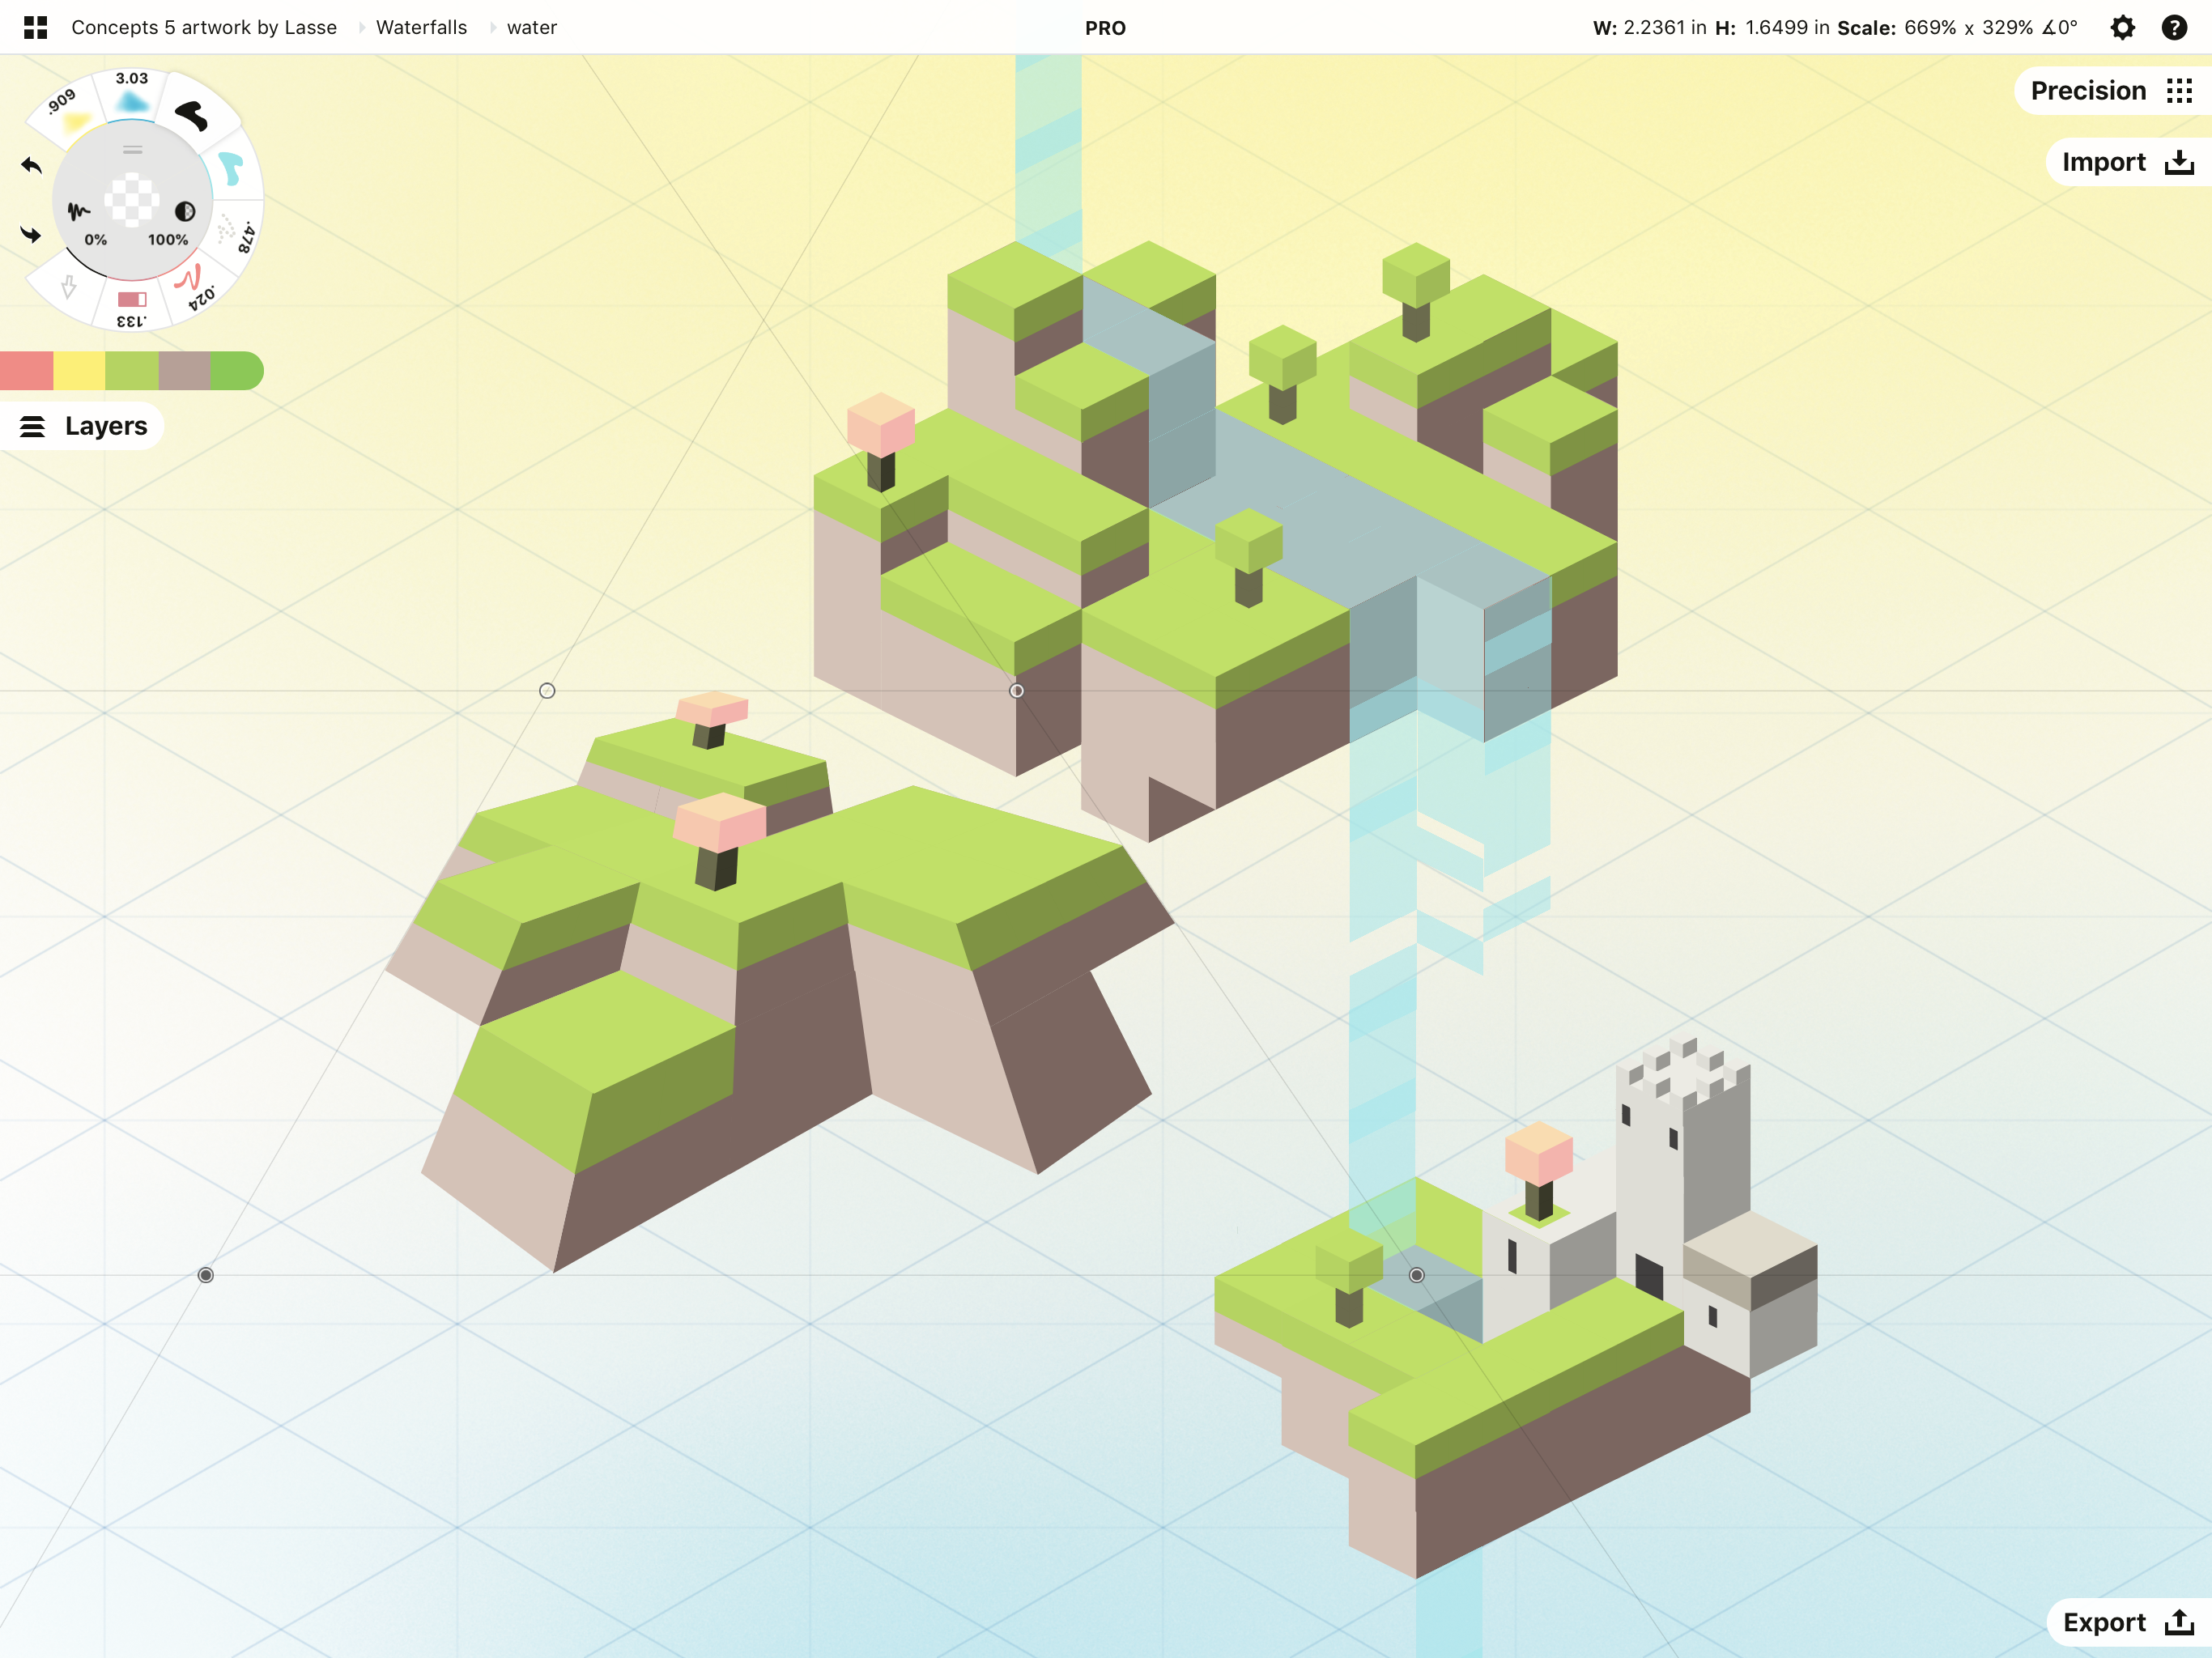
If you tap opposing corners, the interactions will occur between these points. Drag with one finger to get one effect, drag with two fingers to get another.

These transforms are very organic, you’ll get the hang of them quickly just by trying them.
Other Selection Abilities
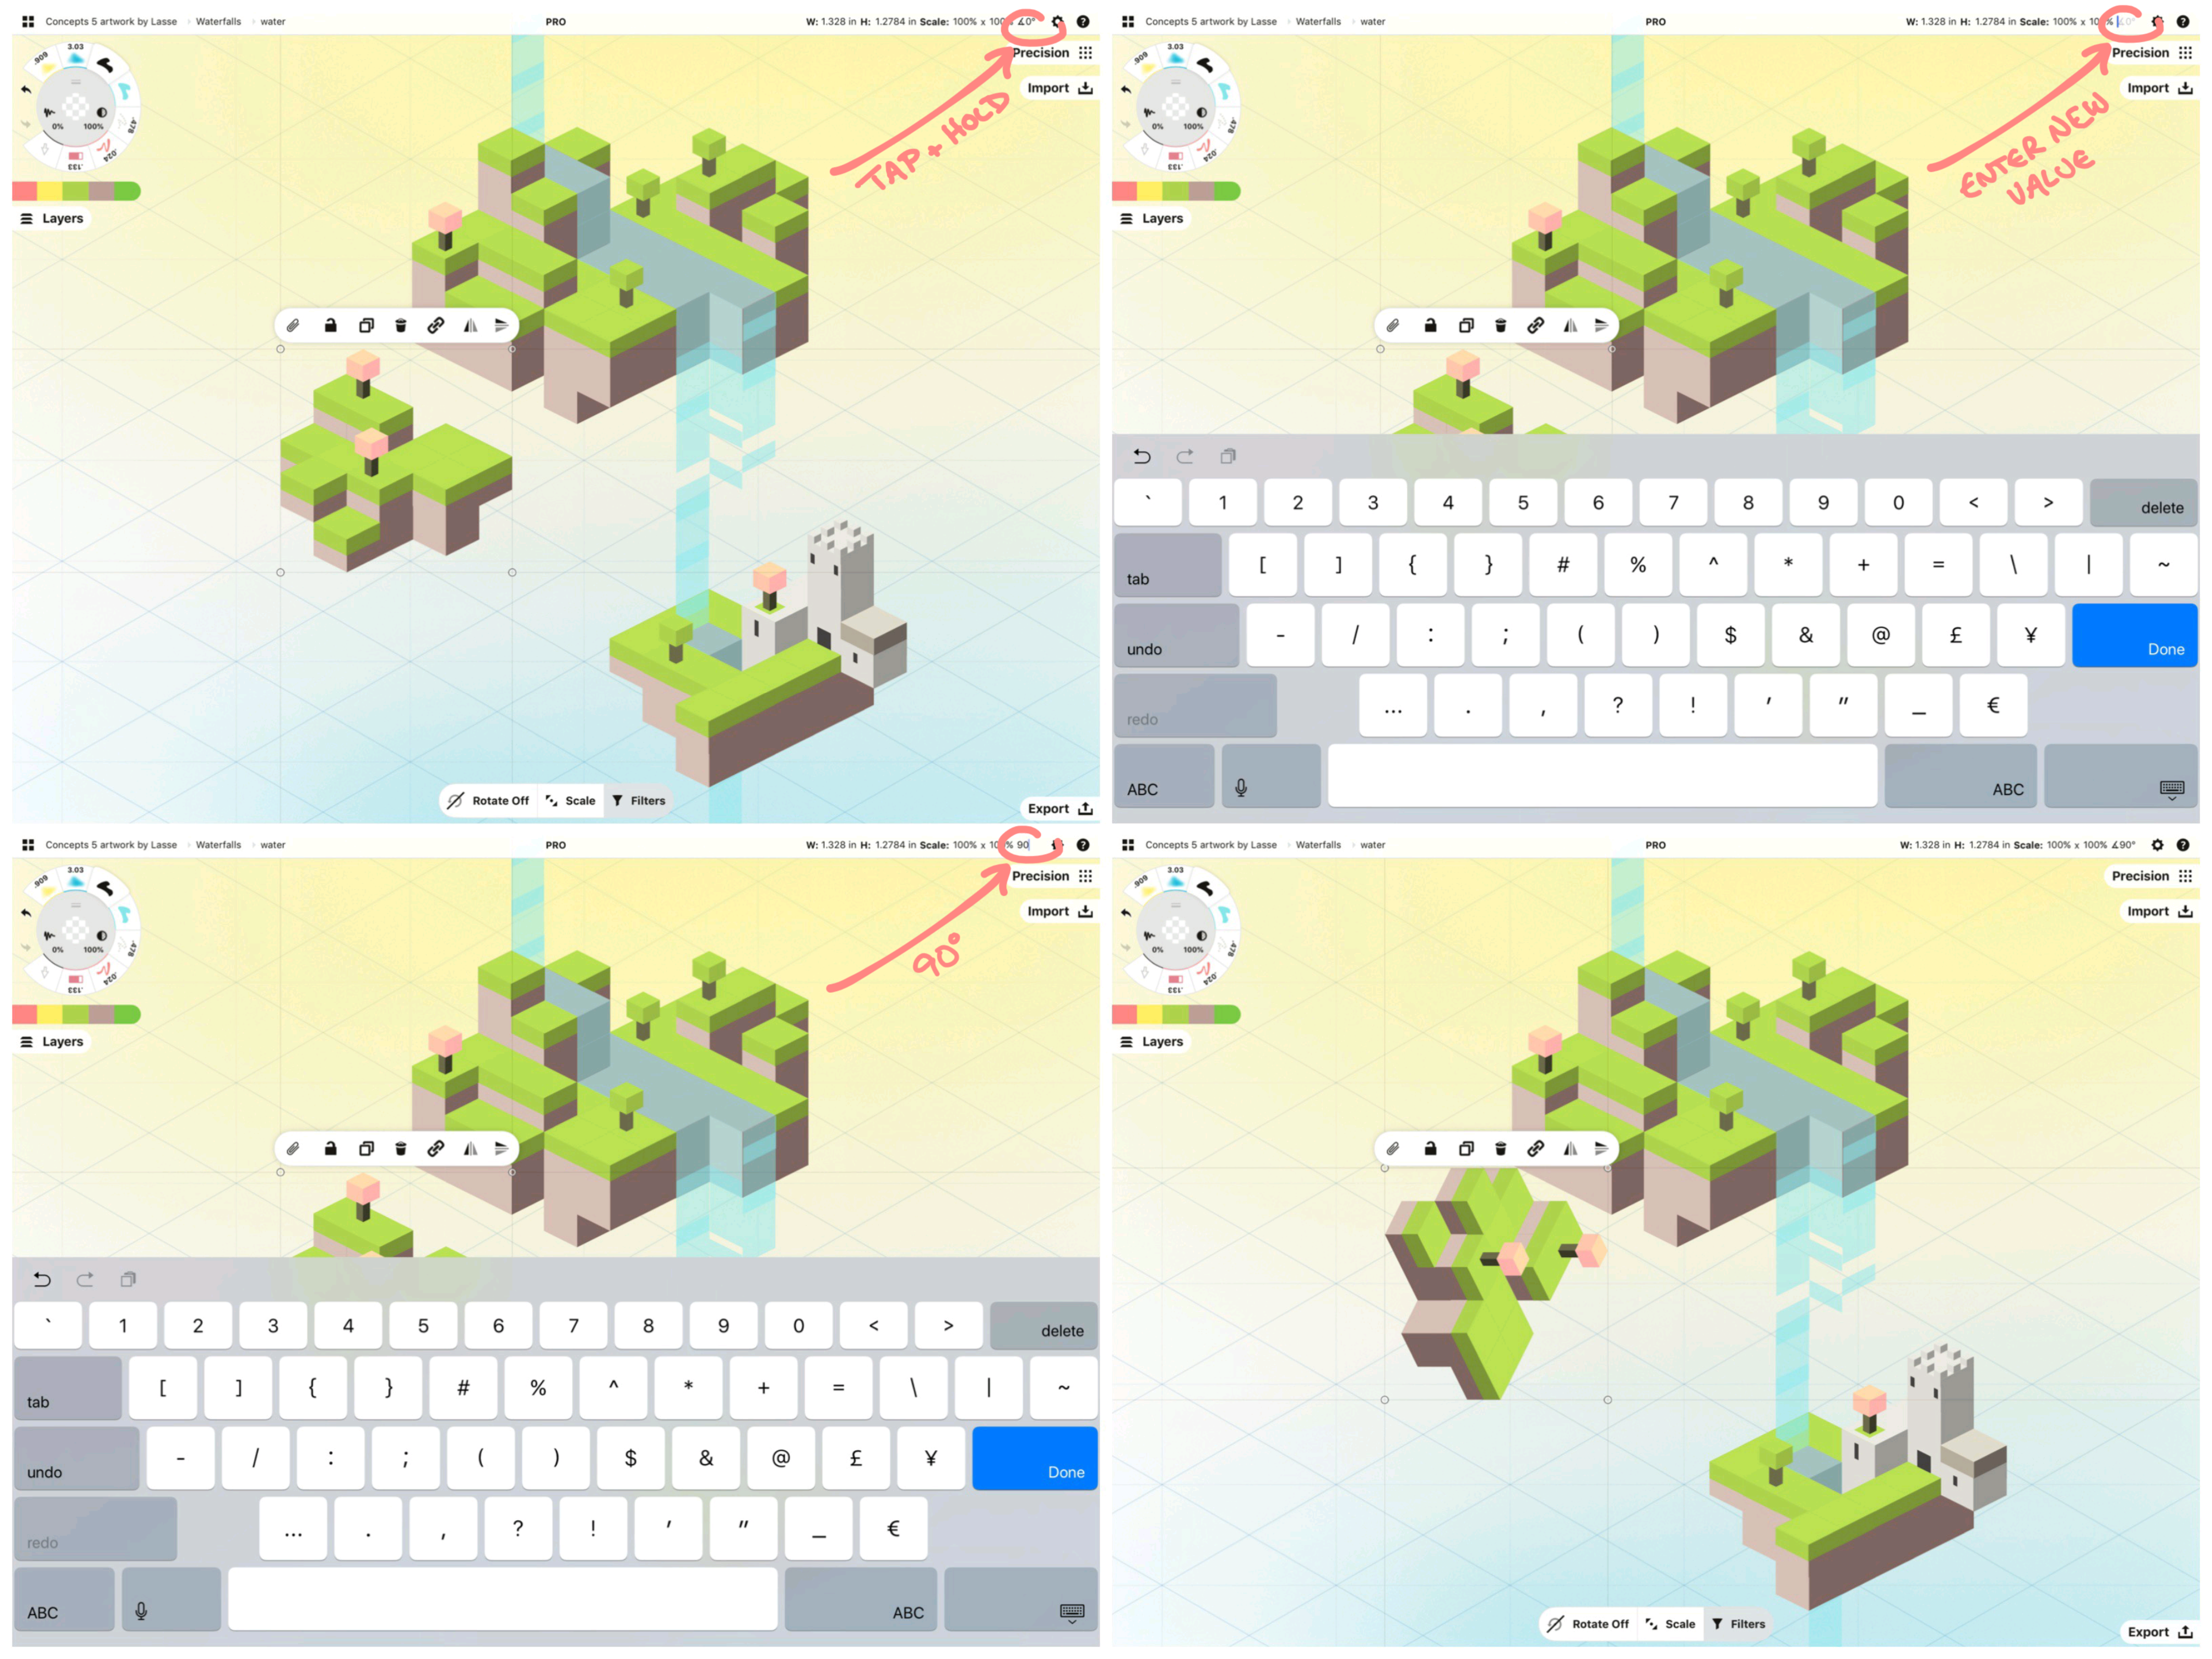
Rotation angle. If you want to rotate a line or object a certain number of degrees, you can select it, then tap+hold the percentage field in (iOS) or beneath (Windows, Android) the status bar at the top of the screen. Enter in your value and tap Done. The selection will rotate the exact number of degrees you typed into the field. Lock rotation in the selection menu to retain the angle when you move it around.
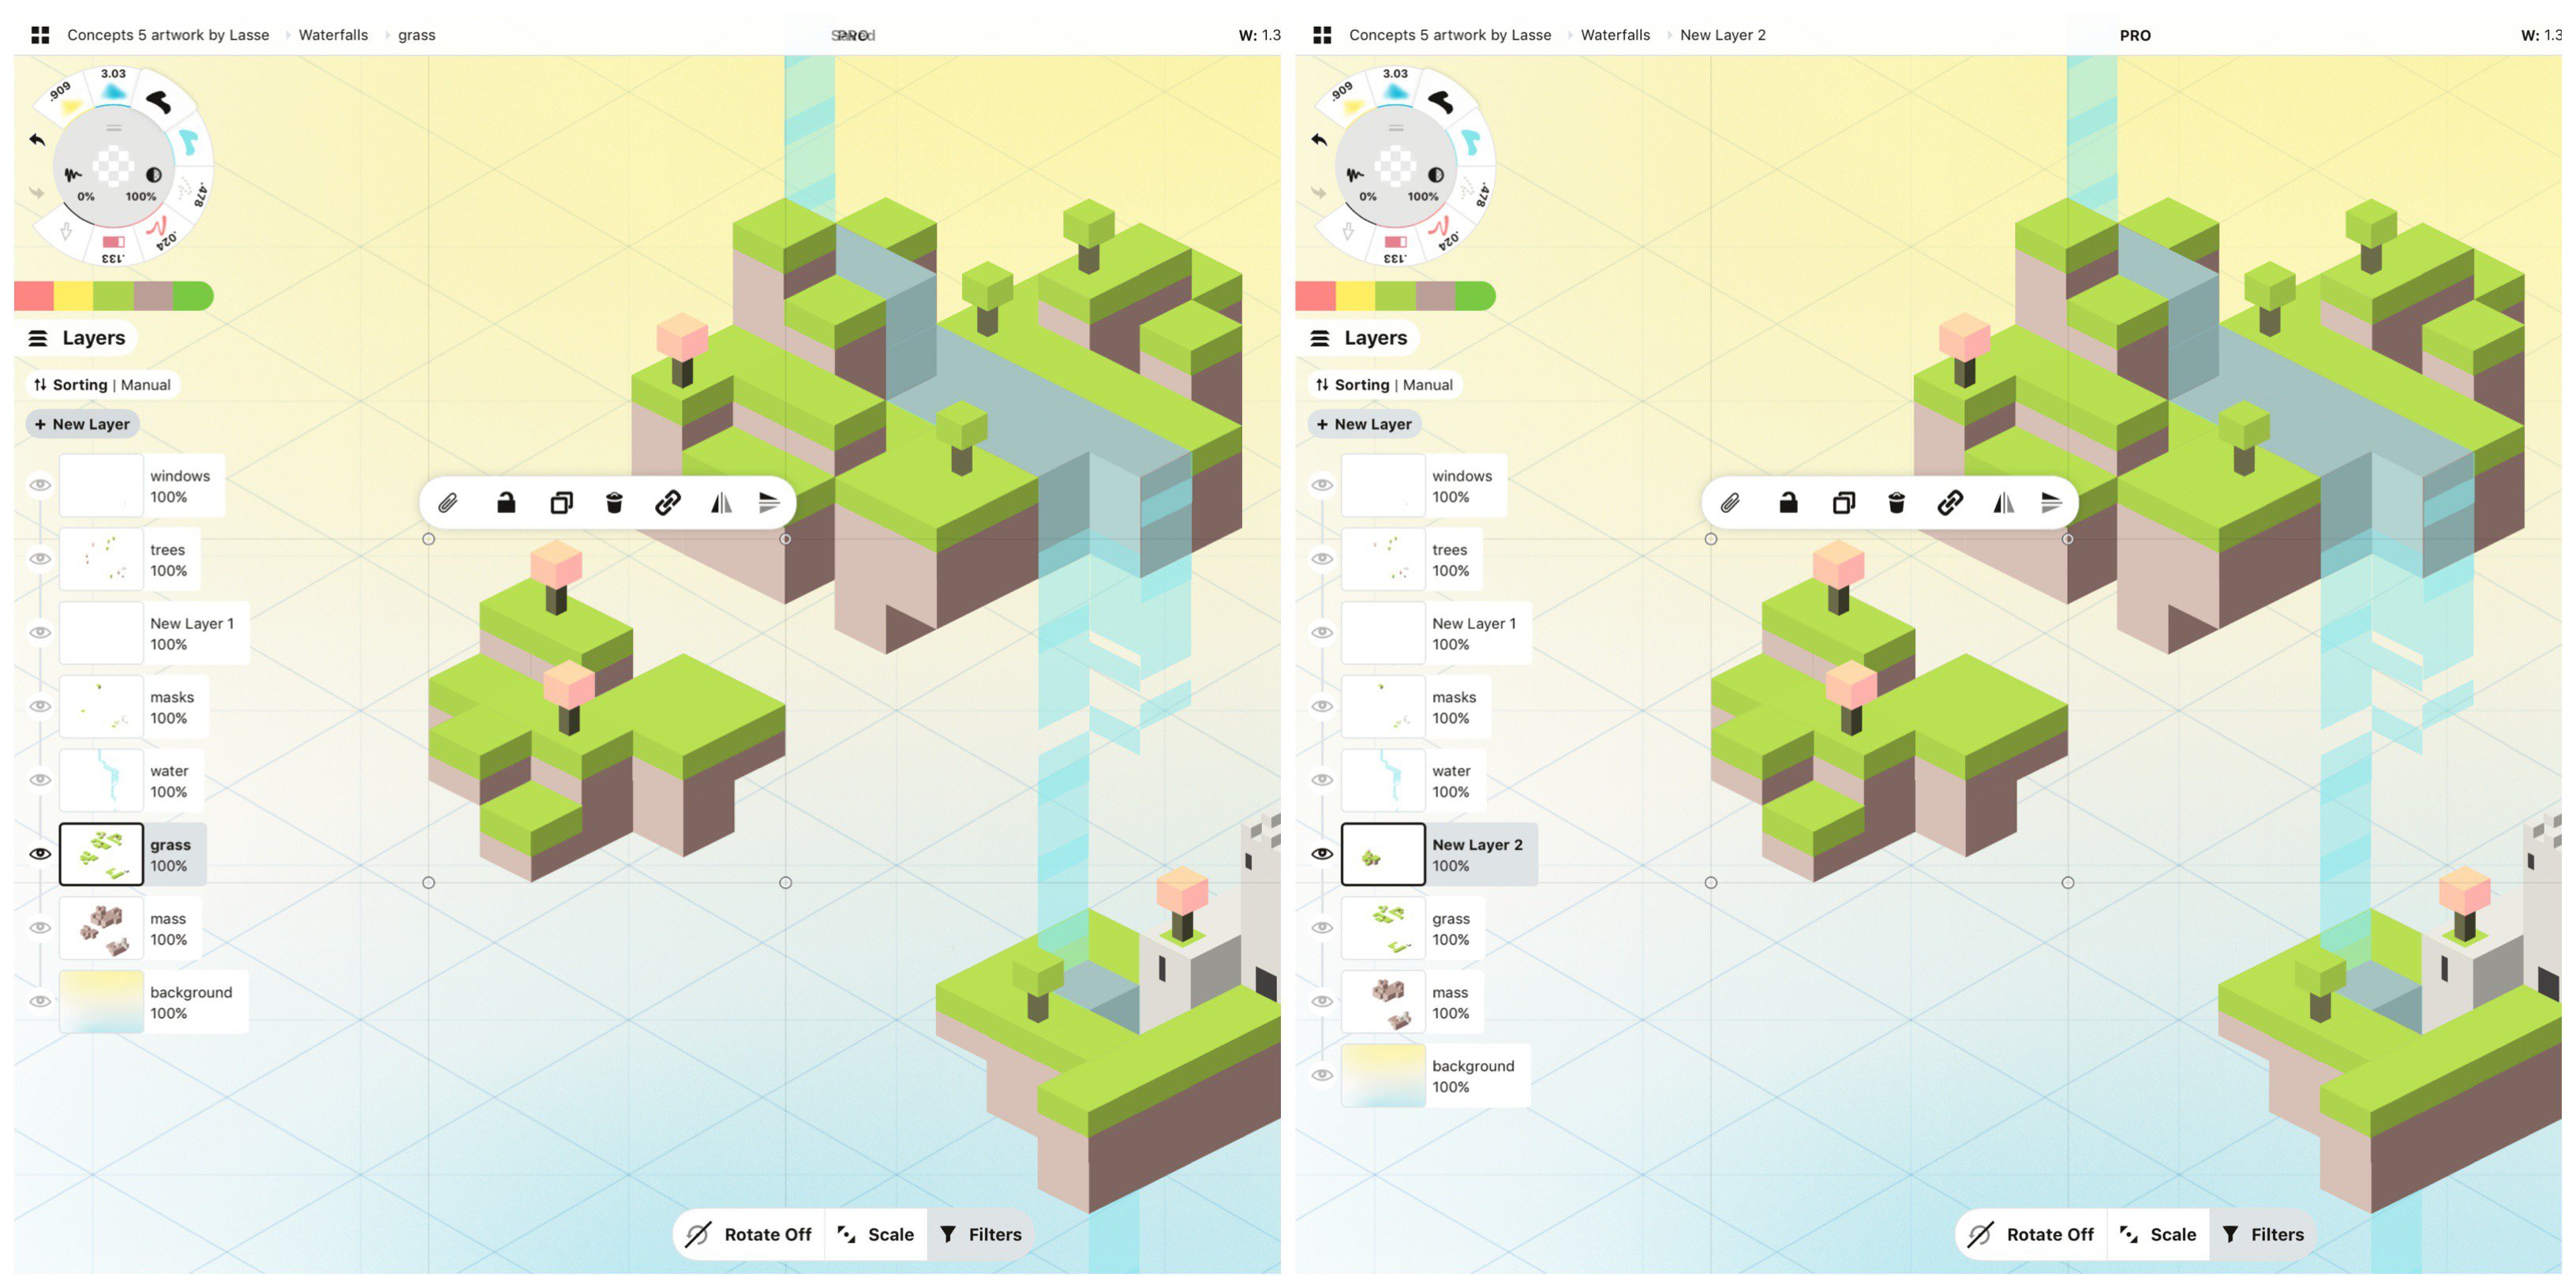
Changing layers. If you want to move work you’ve drawn to a different layer, select your sketch, drag it to “+ New Layer” or another layer thumbnail, and lift your finger. The selection will return to its original place on the canvas but now exist in the new layer.
Gesture and stylus settings. In the Settings menu, you’ll find you can customize gesture and stylus settings to complement your style.
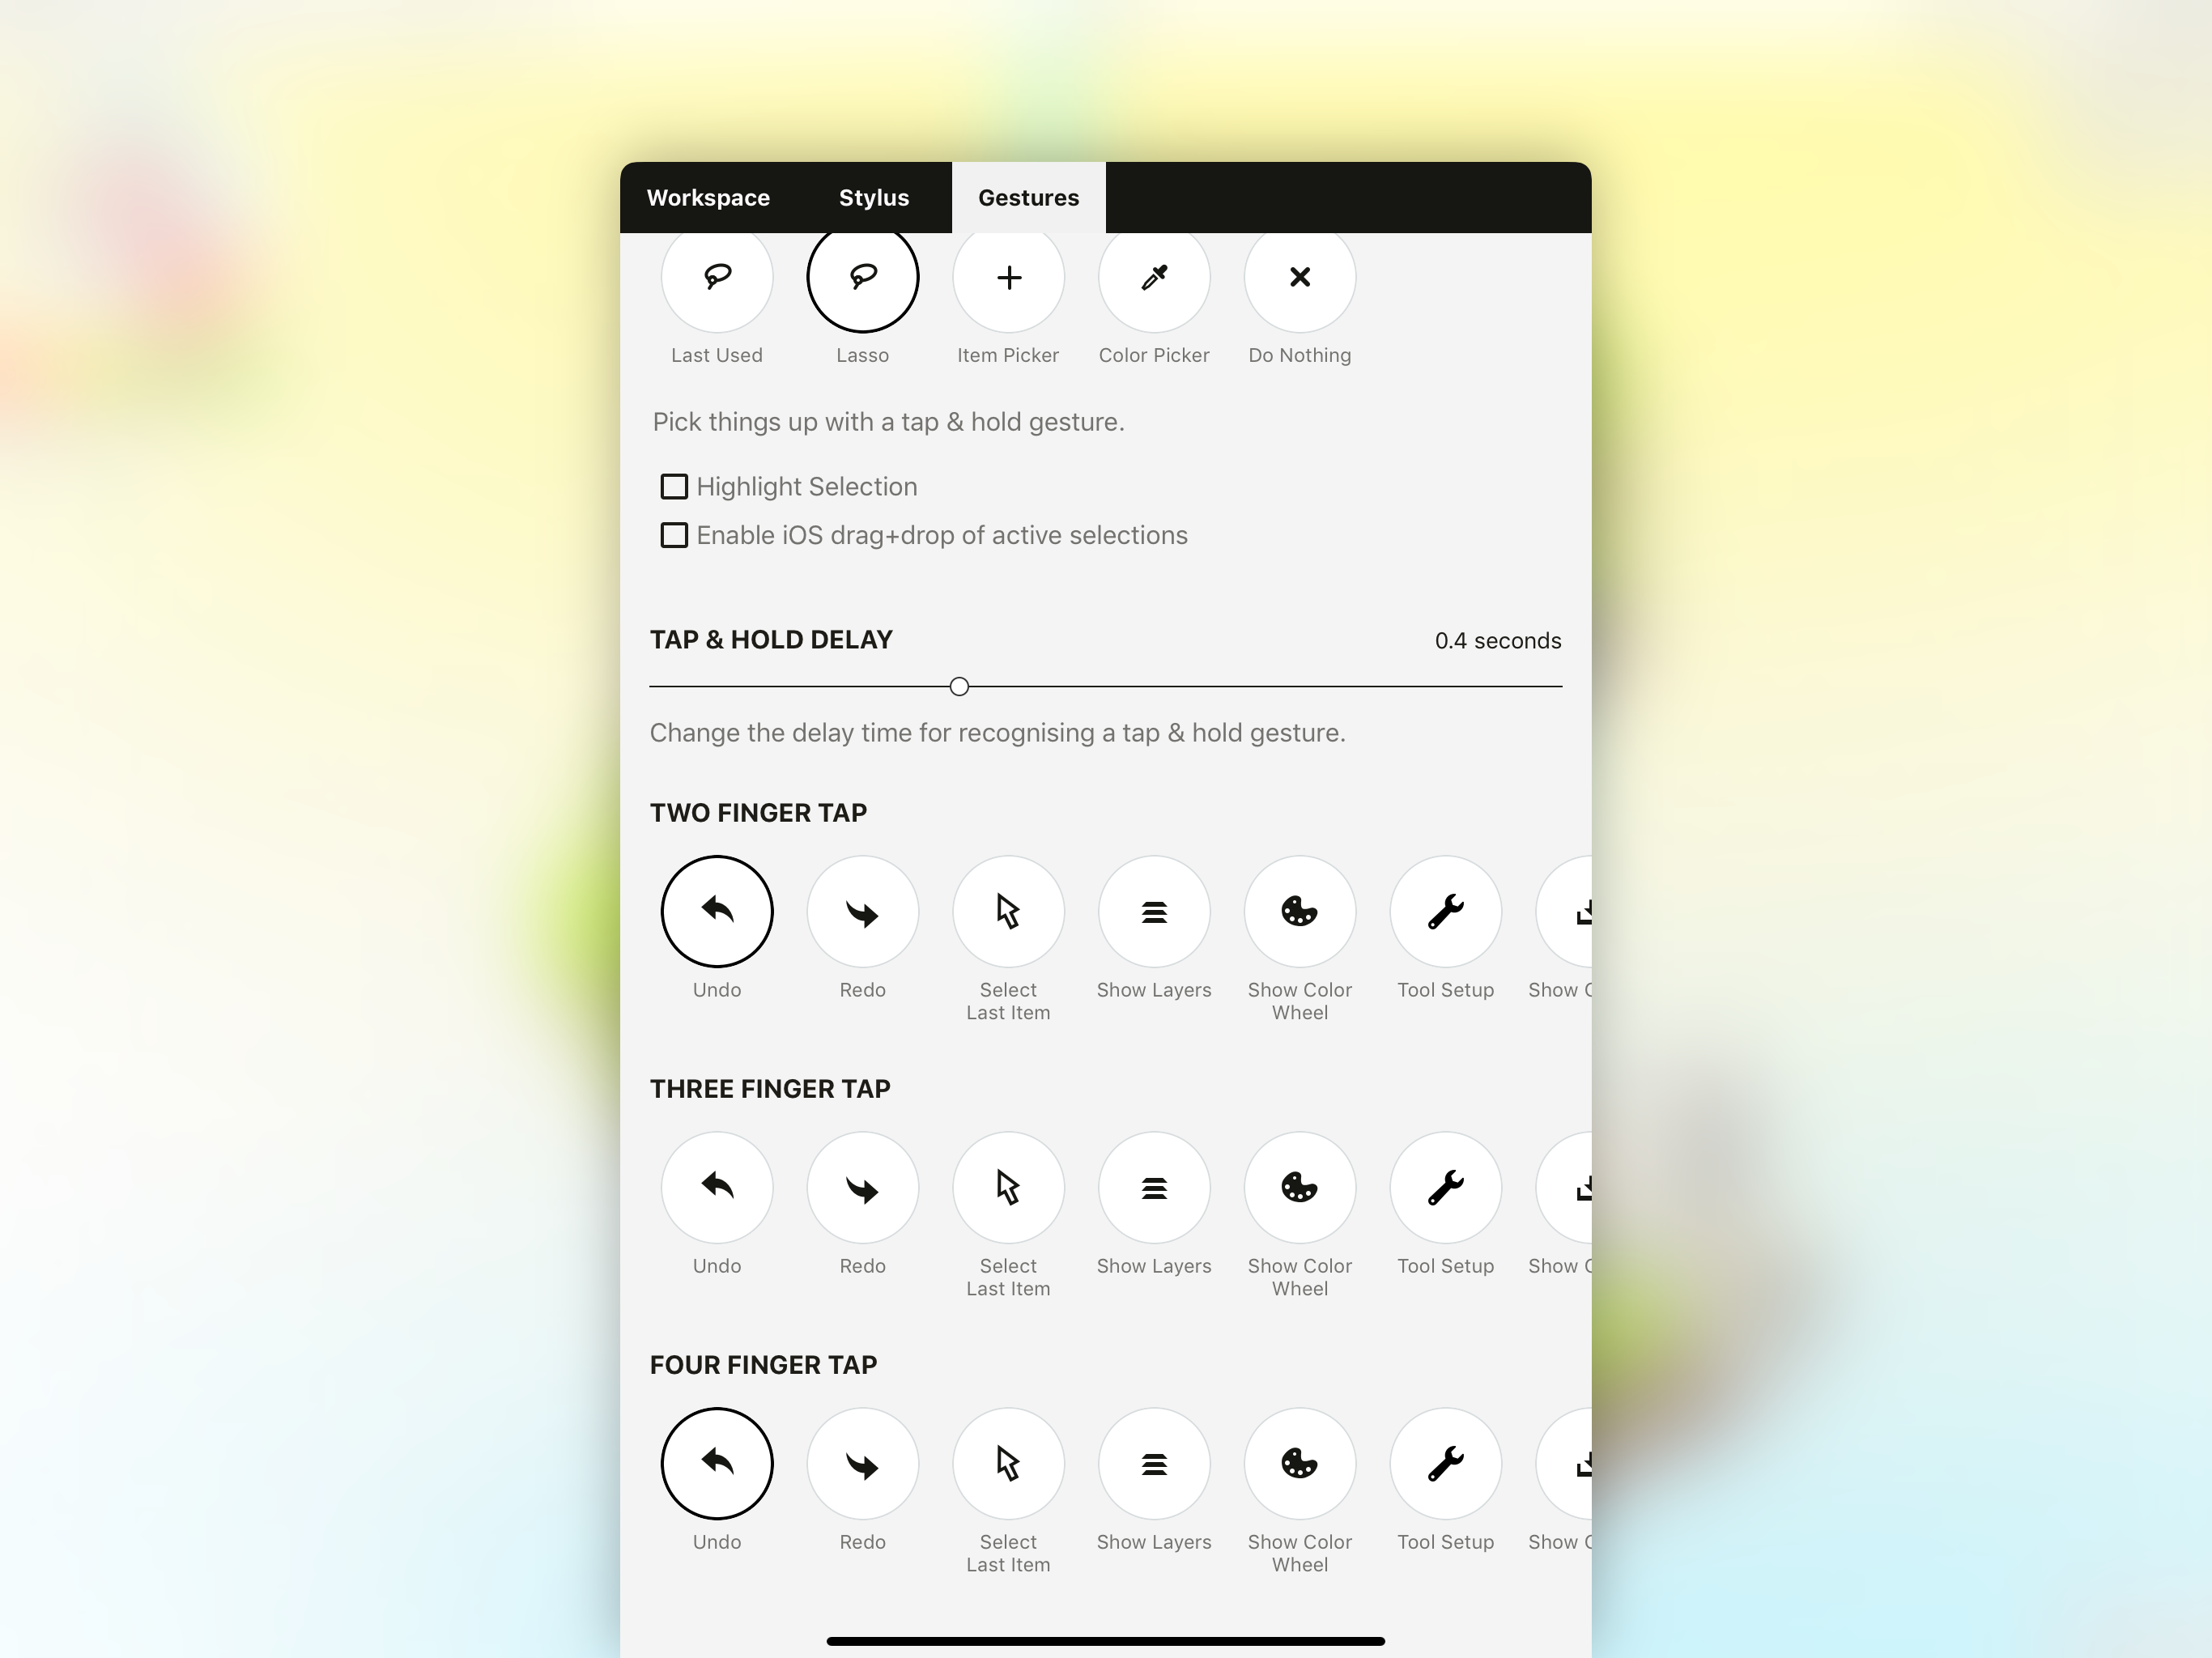
Under the Gestures tab, you can adjust your tap+hold timing to be quicker or slower. You can also set your tap+hold to be just the Lasso or just the Item Picker, depending on which mechanism you like best.
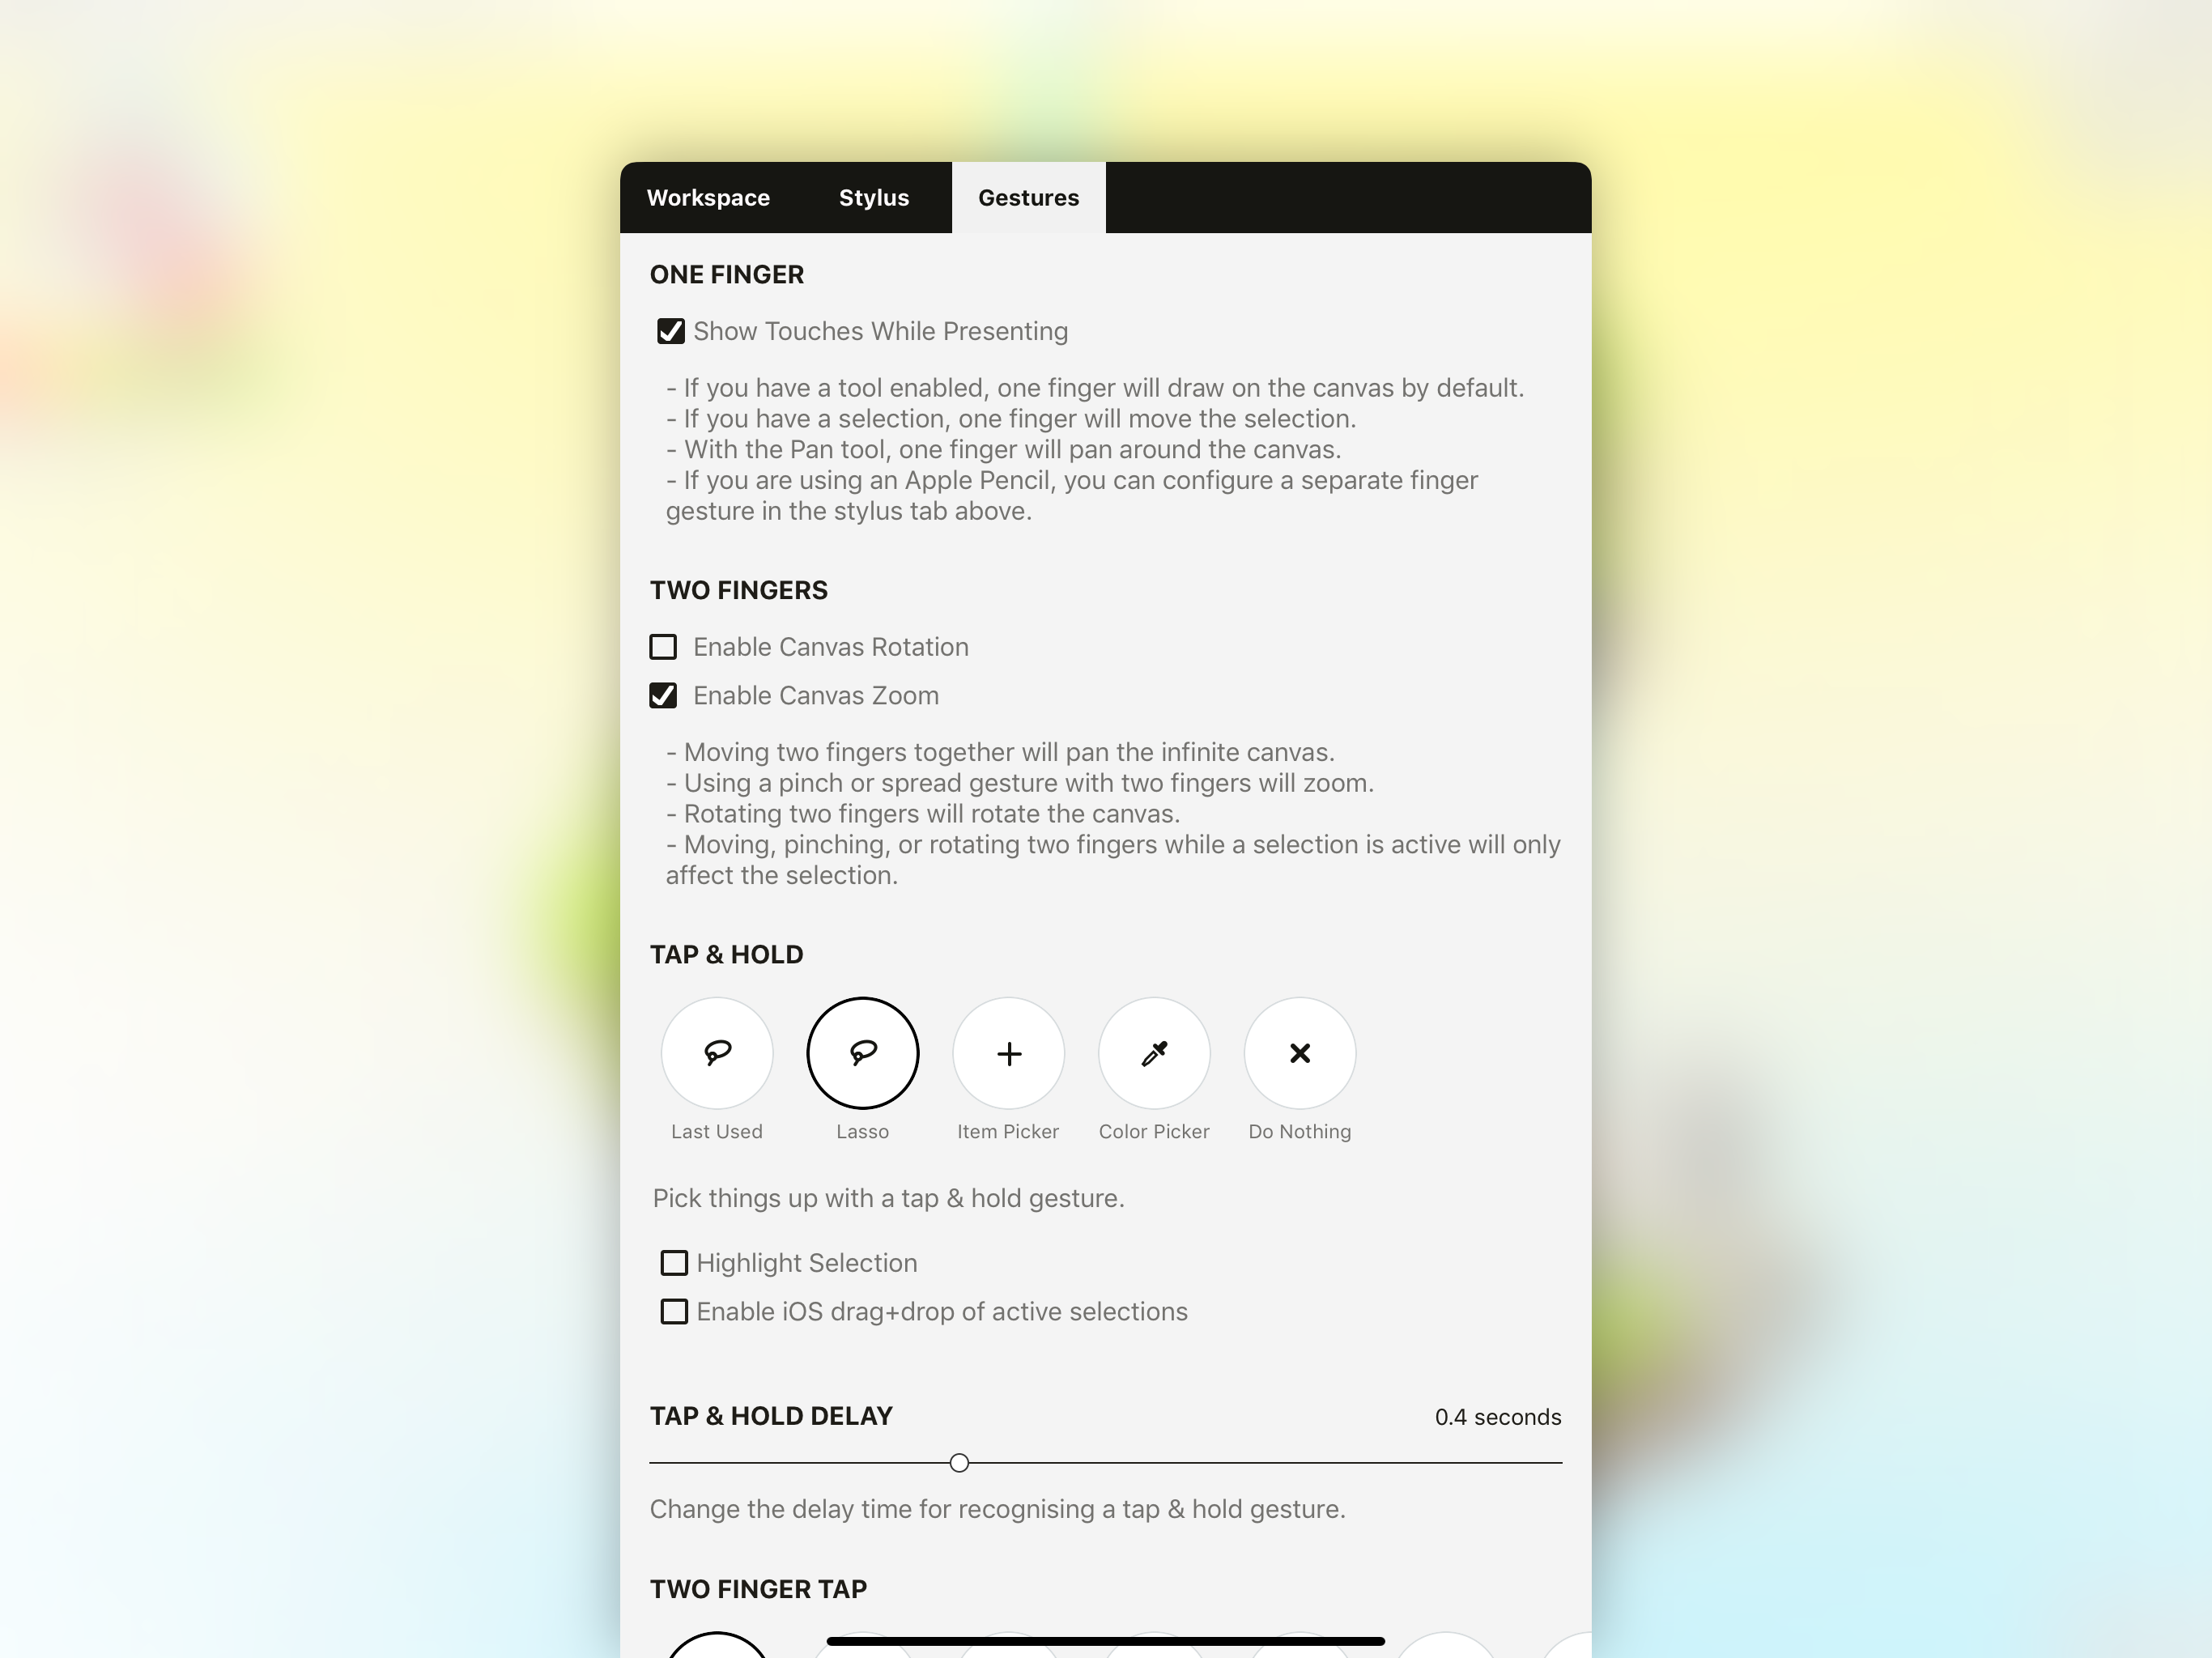
The iOS Settings > Gestures menu.
Further down in this menu, you can also set two, three and four finger tap gestures to different functions, including “Select Last Item”, which selects the last item you selected. Experiment with the settings and see what helps you most.
If you’re using an Apple Pencil as your stylus, you can set your finger action to Select, while your stylus remains a drawing tool. If you’re moving and adjusting your sketch a lot, this can be a great shortcut.
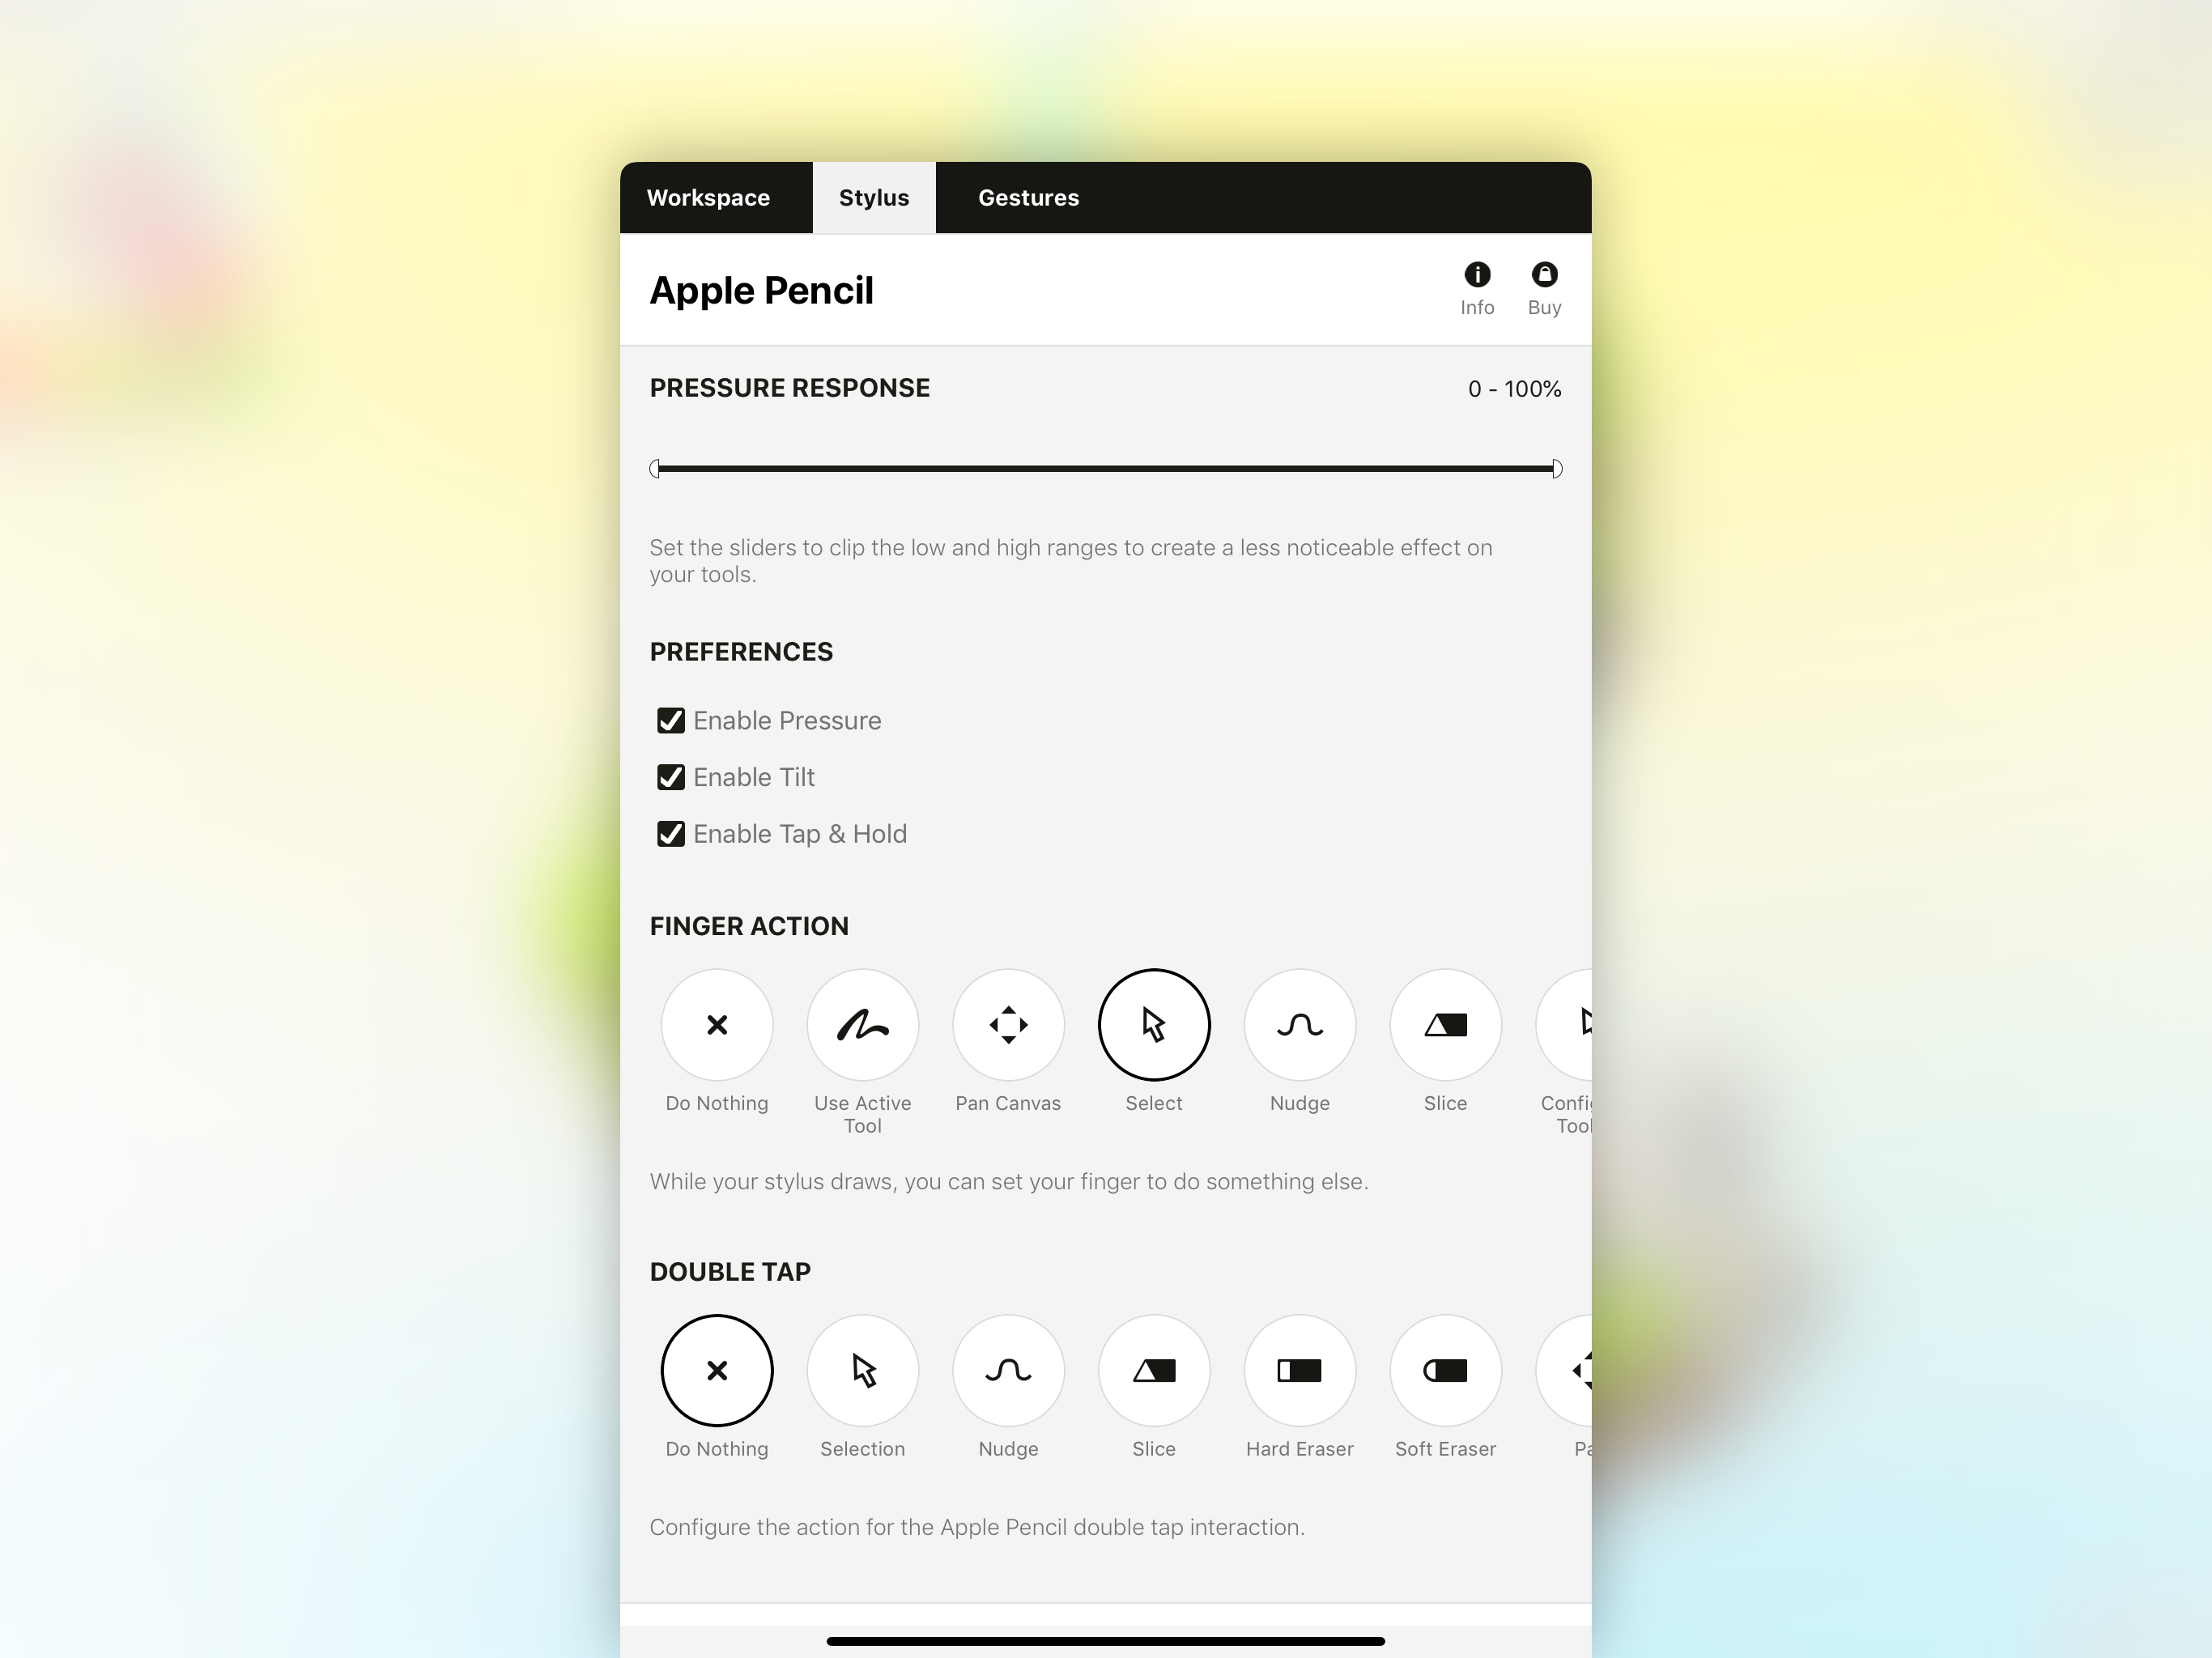
Settings > Stylus menu in iOS.
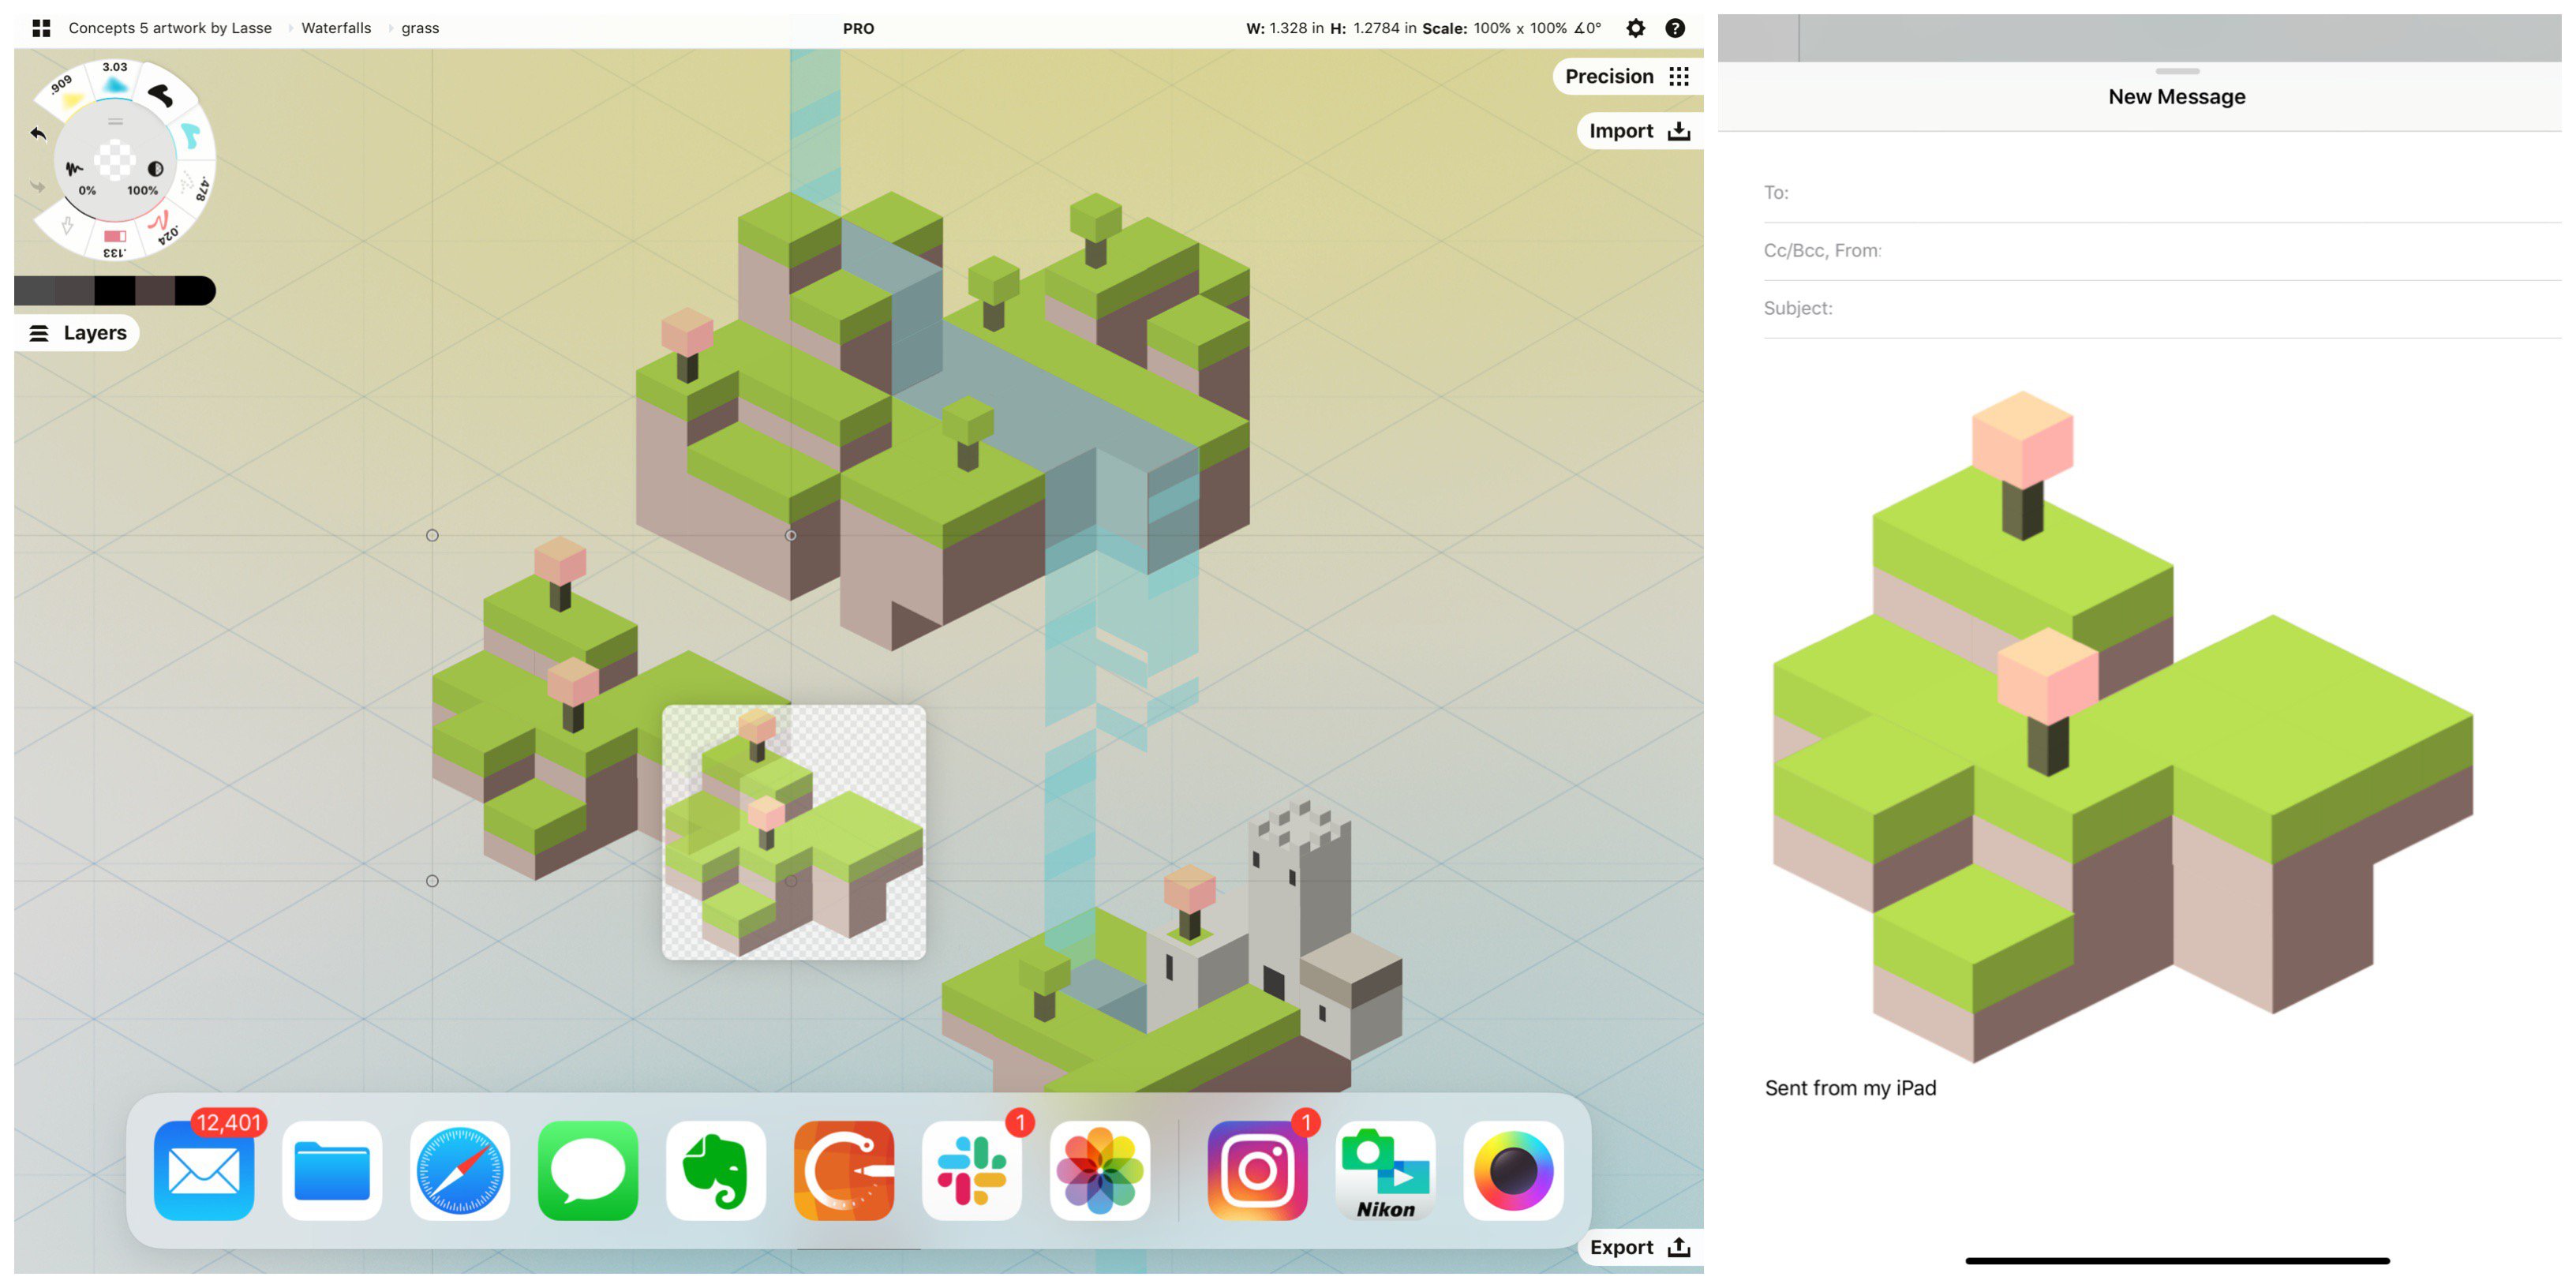
Drag+drop selections into email. Selection is also a nice shortcut for exporting parts of your sketches into emails, texts or other apps that support drag+drop. For example, if you’ve taken notes at a conference and want to pass a section along to a colleague, just select the relevant text, tap+hold the selection and begin dragging it across your canvas, then bring up your other app and drag+drop it in.
Once you try Selection, you’ll see how quickly you can create, organize and edit your work. You’ll find freedom in experimenting with ideas and find new ways to explore thoughts, design styles and artistic expression. The ability to edit your drawings is a powerful time saver and a game-changing friend.
Do you have questions about Selection? Tap Help > Ask Us Anything in app or email our team at support@concepts.app. We’ll be happy to help.
By Erica Christensen
Recommended
Setting Up Your Menus, Brushes and Presets - Learn how to customize your canvas layout, menus, tool wheel and brush presets in Concepts.
The Slice Tool: Divide and Conquer Your Ideas - Learn how to use Slice to edit, trim and erase your sketch.
Winning Concepts in Retail Design: An Interview with Charles Freestone - Retail designer Charles Freestone shares strategies for creating award-winning design bids.