Concepts is an infinite, flexible creative tool for all your good ideas. Available on iOS, Windows and Android.
How to Make a Transparent PNG Object
Transparent objects are instant creative assets in Concepts. Learn how to create one in five easy steps.
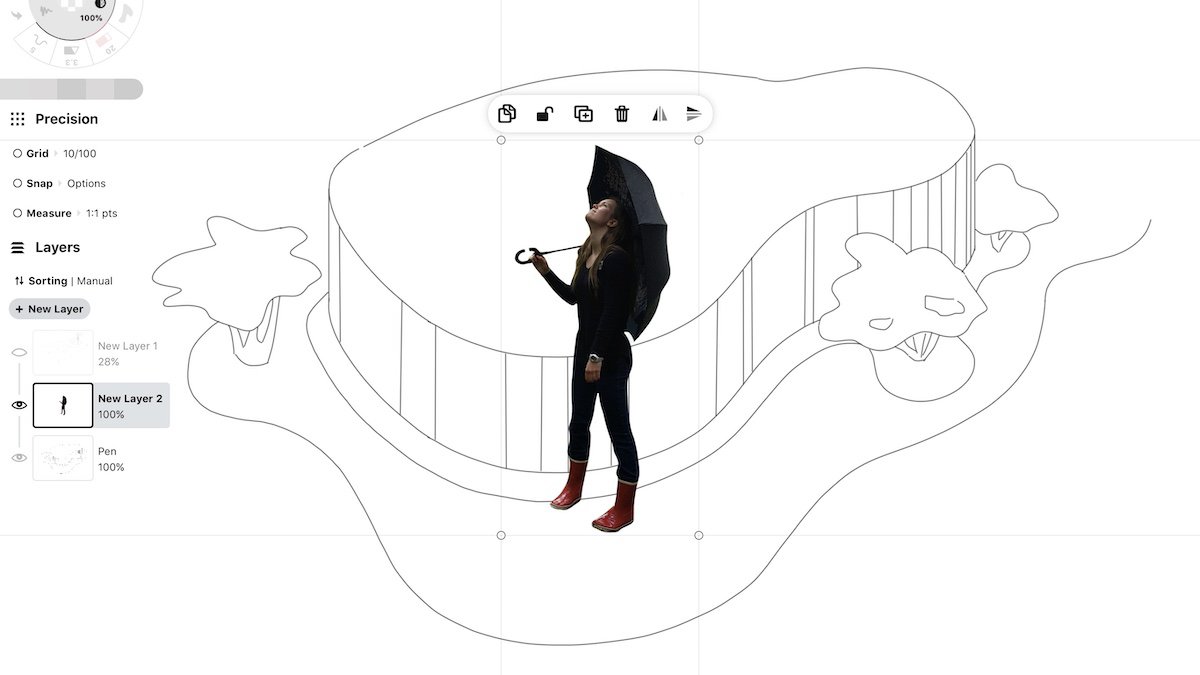
One way to create fast graphic layouts is to drag and drop pre-made transparent images or objects onto your canvas. These add quick polish to project plans, storyboards, presentations and client meetings, and can make design work and virtual whiteboarding a breeze.
In Concepts, these transparent objects are immediate creative assets. They act like stickers - scalable, editable, transformable (can be warped and skewed), and instant. You can create them from a photo, from a drawing you've made, or make them in Concepts and store them in your own Object Library (read how to make objects here).
The five steps:
1. Import an image with your object of choice.
2. Lower the opacity of your image.
3. Set a custom artboard.
4. Mask around your object.
5. Export your artboard with a transparent background.
1. Import a photo or image onto your canvas. You can drag+drop an image onto the canvas or double-tap the Imports menu and import a photo from your photo library or Cloud.
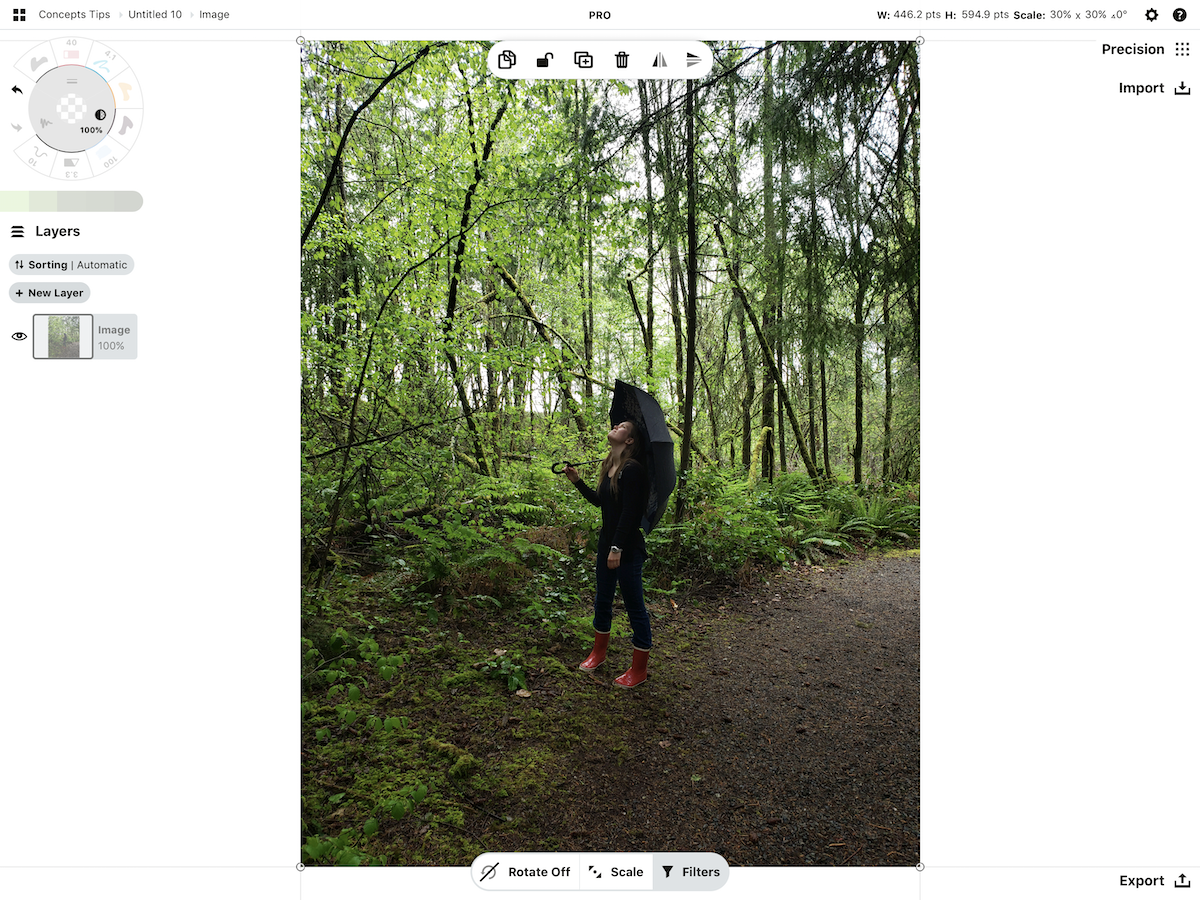
Double-tap the Import icon to avoid the objects library and go straight to the Imports tab.
2. Lower the opacity of your image to around 25%. Tap the active layer thumbnail to bring up the layer's menu, then use the slider to lower the opacity.
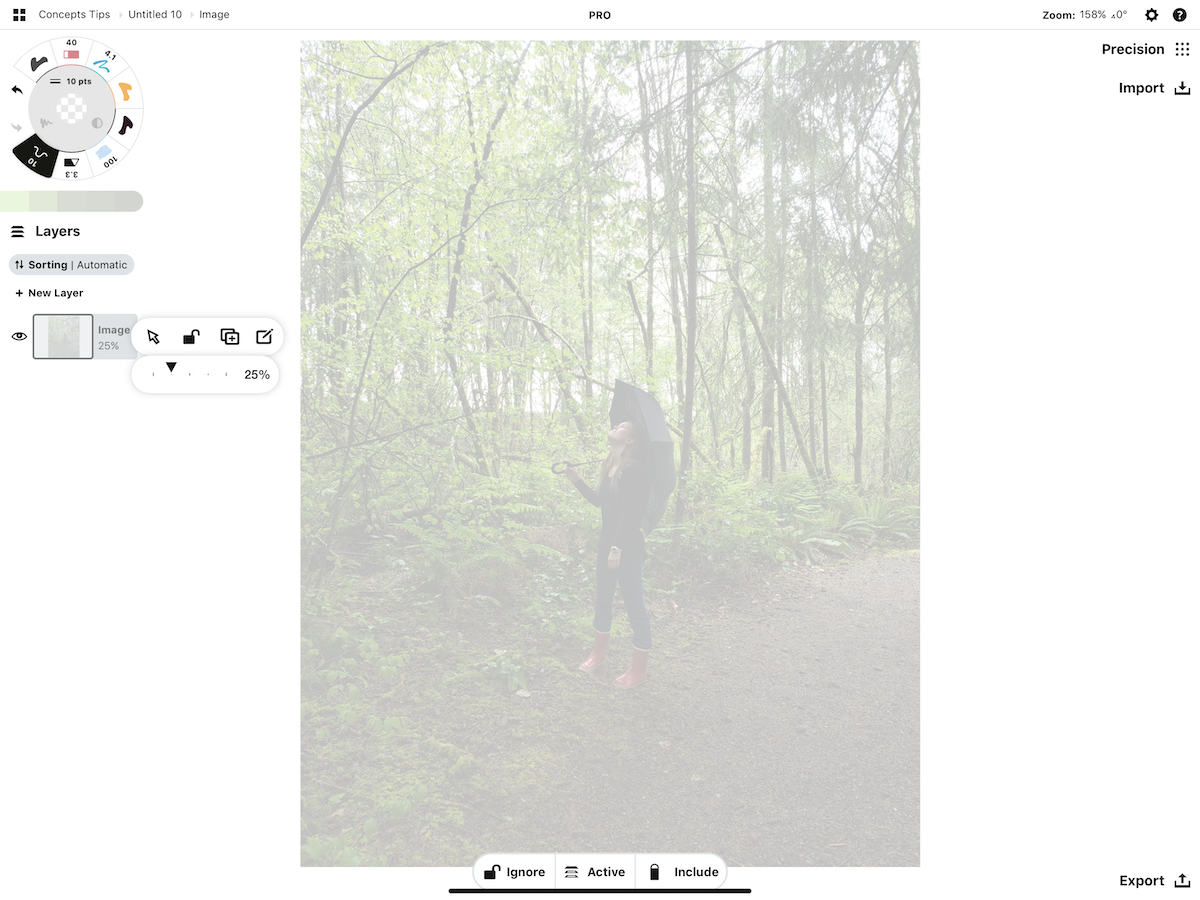
The image layer menu and opacity slider set to 25%.
3. Set an artboard boundary and frame it around the portion of the photo you wish to isolate. Tap Settings > Artboard and tap on a field to enter an approximate size (here is an illustrated tutorial). You can always change the size later in the same menu. Tap+hold the corner of the artboard to move it, or select and scale your image to the artboard.
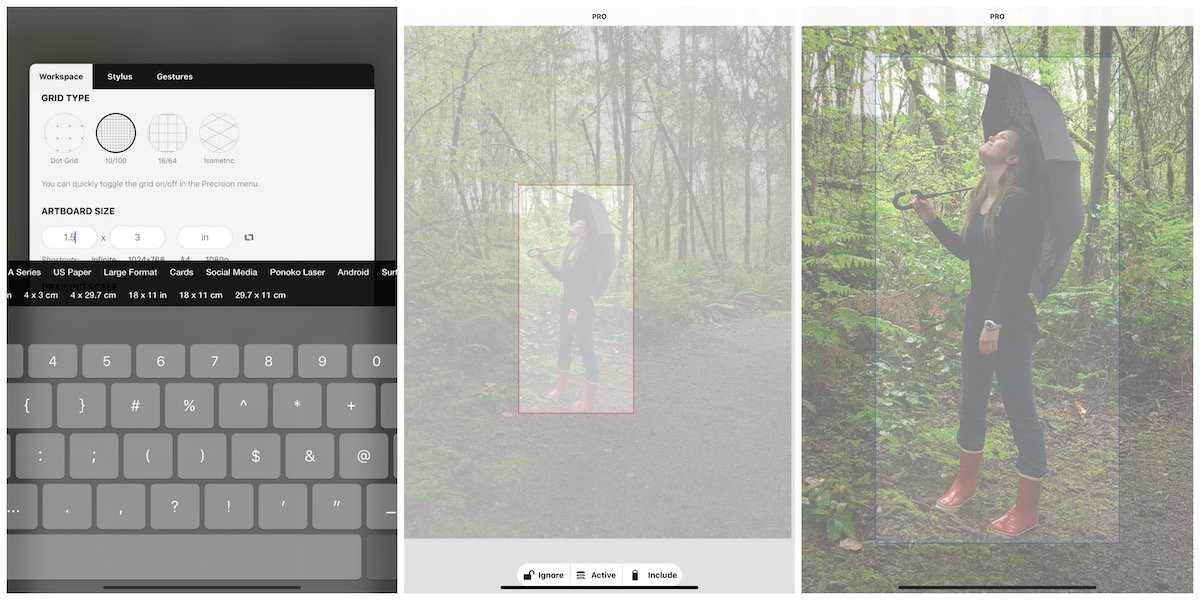
Try a few artboard sizes to see which fits your object best. Use as little surround as you can to keep the file size small and maximize your control of the object.
For smaller objects, remember that bigger images take more memory, and if you intend to include many in a drawing, they can slow down or even max out your project. It's better to keep them at a high resolution for scaling on the canvas (300+ dpi) but keep the overall object size low. For example, the final above object with a transparent background exported with a 450 x 900 px artboard at 300 dpi creates a file that is 296 KB (may differ among applications). If you're doing large-scale backgrounds you only intend to use one of in a drawing, go ahead and make it as large as you need.
4. Use the Hard Mask in the image layer to mask the surrounding edges of your object.The Hard Mask is a freehand masking tool. Make sure it is at 100% opacity for a clean mask. Apply ~20% smoothing to the tool to get a nice, even curve.
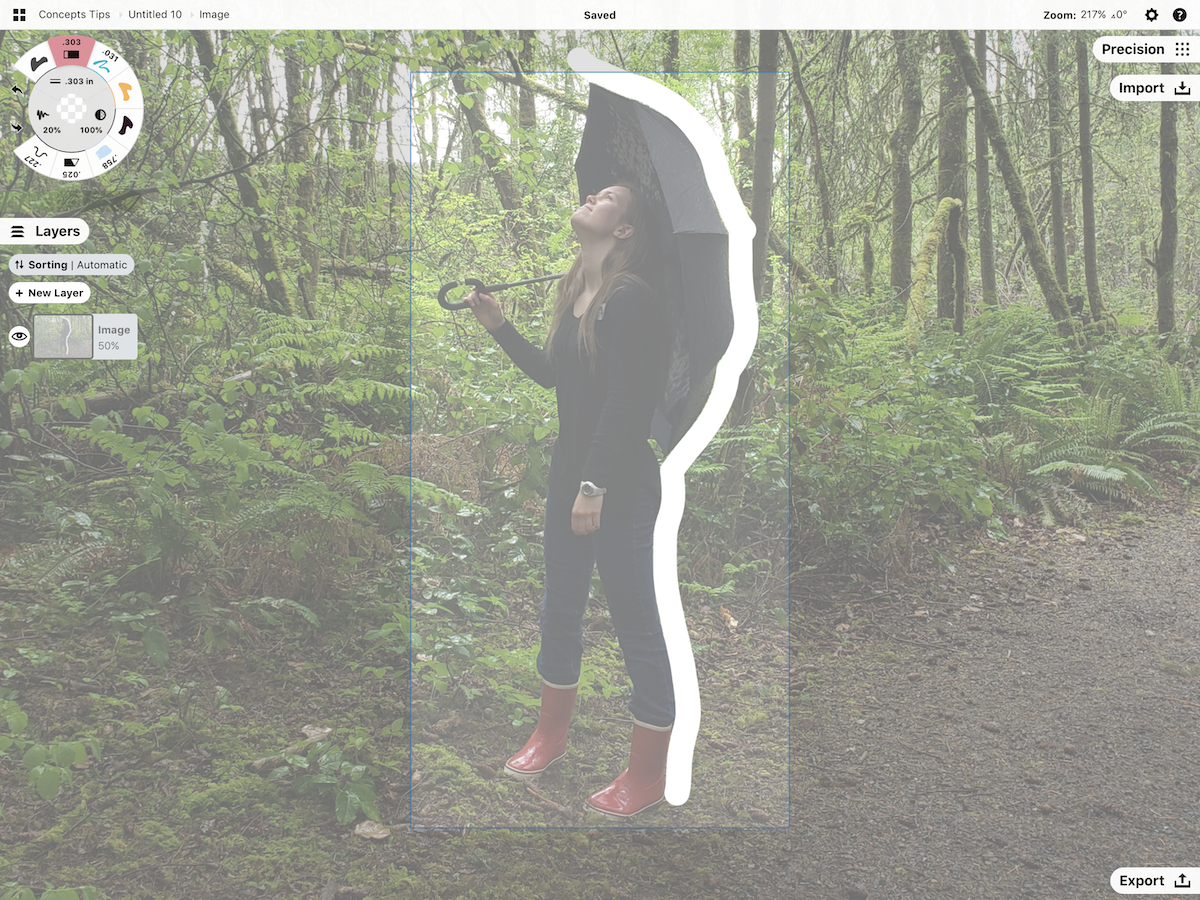
Start tracing around your image. Use smoothing to even out the edge.
You don't have to be exact, you can use the Nudge tool afterward to gently nudge the mask lines into place. Use a smaller tool radius to nudge smaller areas into place. Make sure the Mask tool is toggled in the Nudge settings at the bottom of the screen.
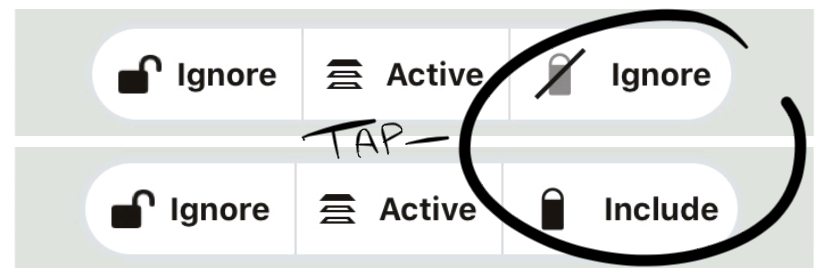
This is the Mask stroke toggle. Tap it to either include or ignore mask strokes as you Nudge.
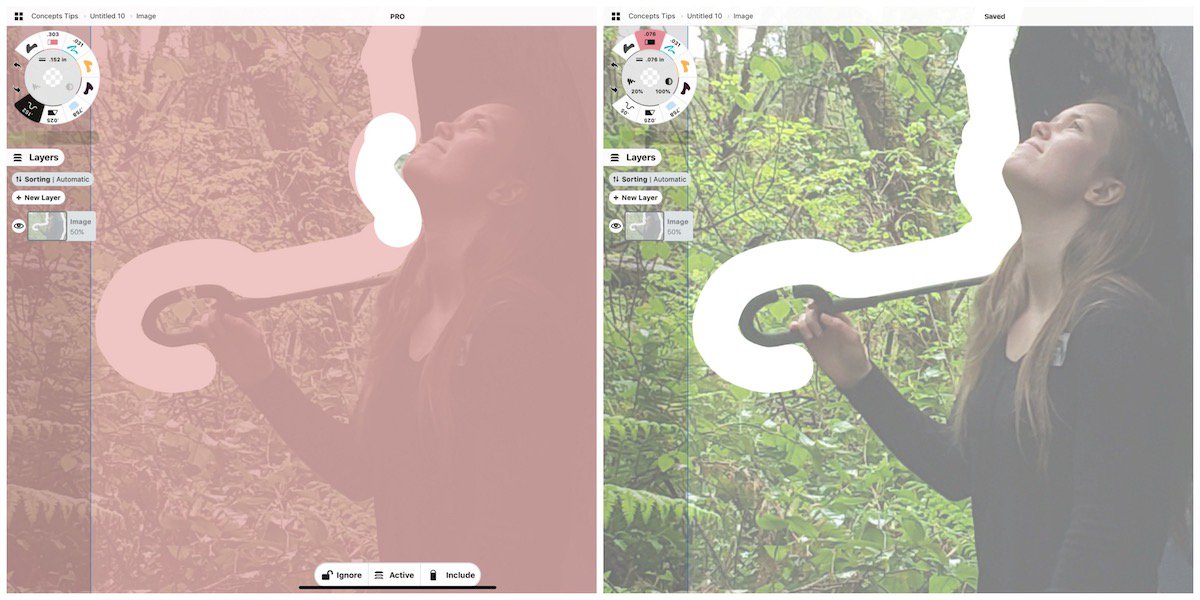
Nudge at work on the mask strokes.
Zoom in and out on the canvas to apply details. The mask tool remains the same size regardless of zoom levels, so zooming in on the image will allow you to work in smaller areas. A smaller mask size will also let you reach finer details.
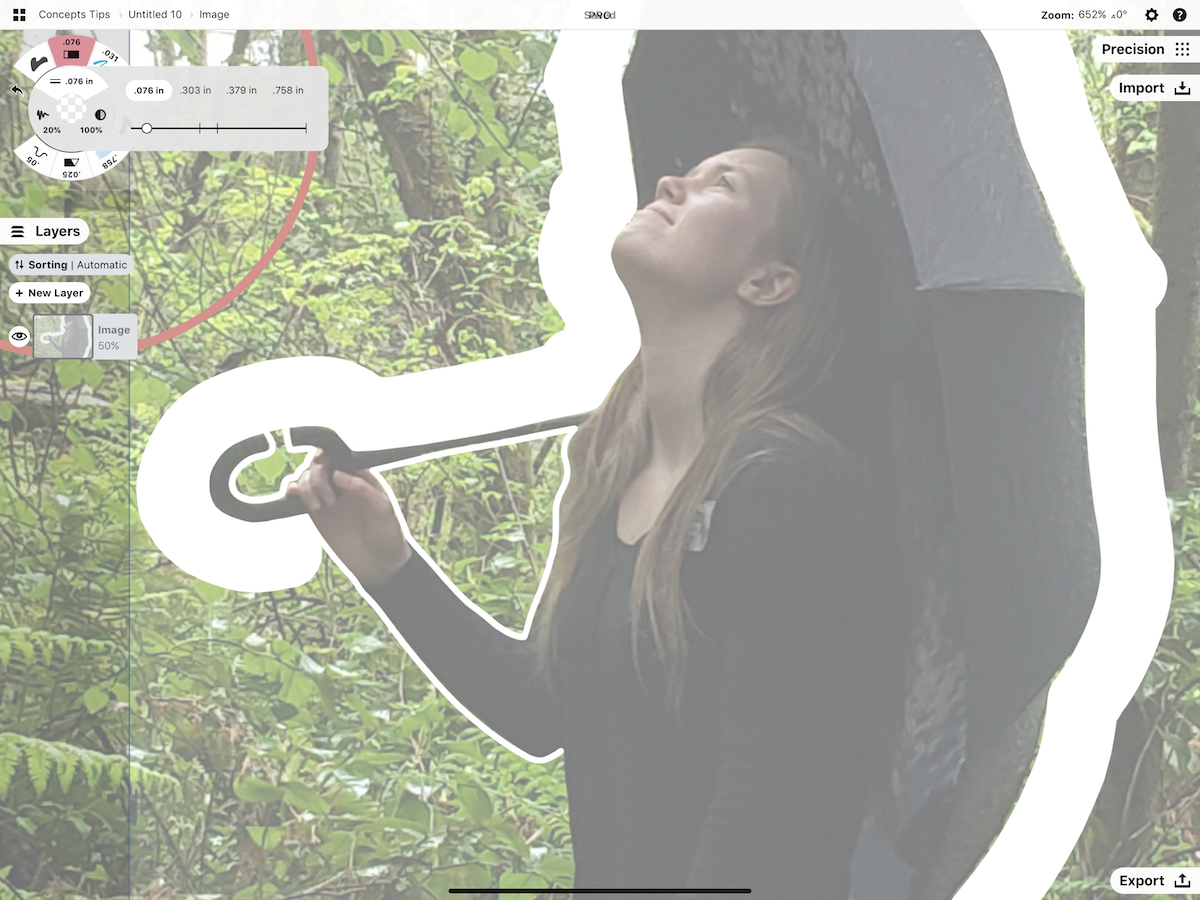
Use a smaller mask size and zoom in on the canvas to mask finer details.
If you're looking for a softer edge for your object, you can use the Soft Mask. This will blend edges for a diffused look. Use a larger size for greater diffusion. We recommend you mask with the Hard Mask first, then apply the Soft Mask.
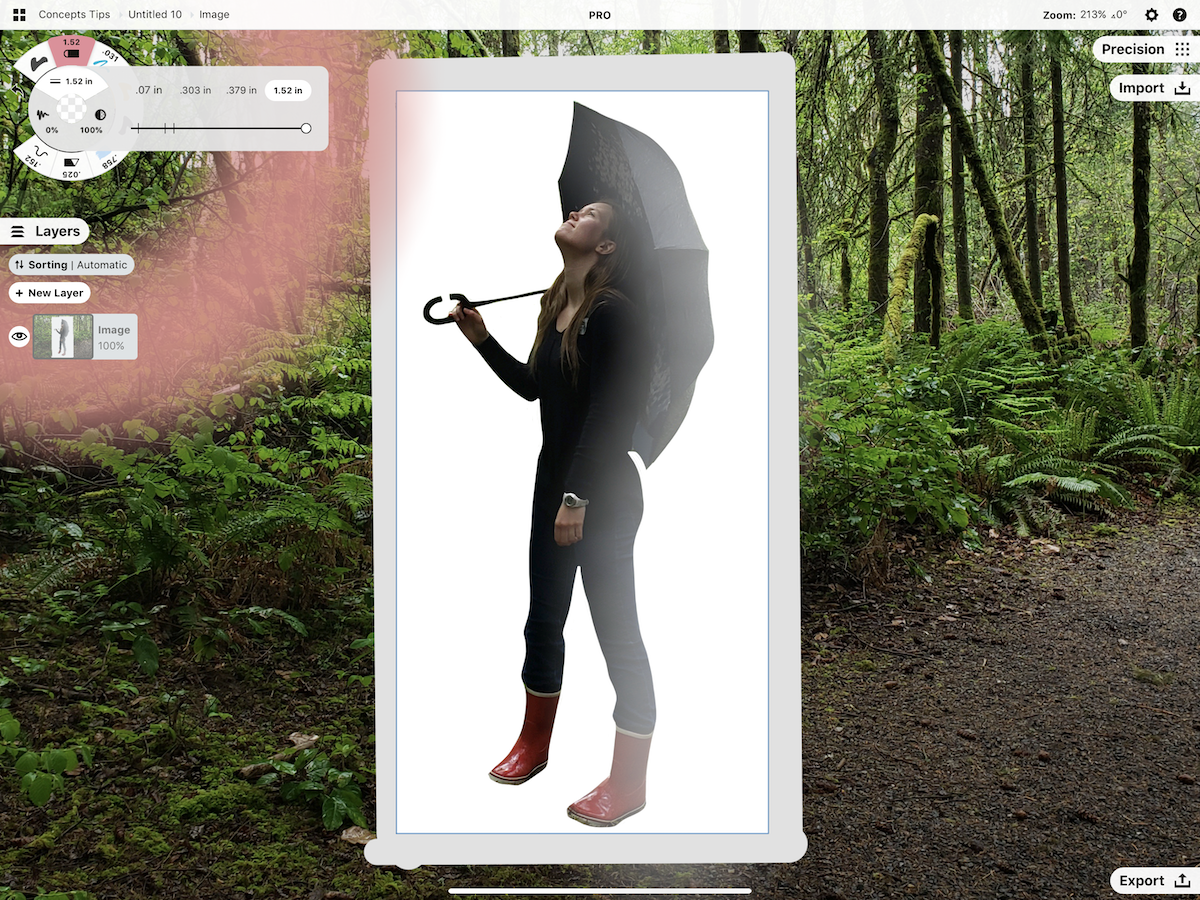
Use a larger size with the Soft Mask for greater edge diffusion.
5. Export your image. When your object is ready, tap Export, select PNG, and select the Custom Artboard size. Then tap Transparent as your background. Hit Export and save it to your Files or Photo library.
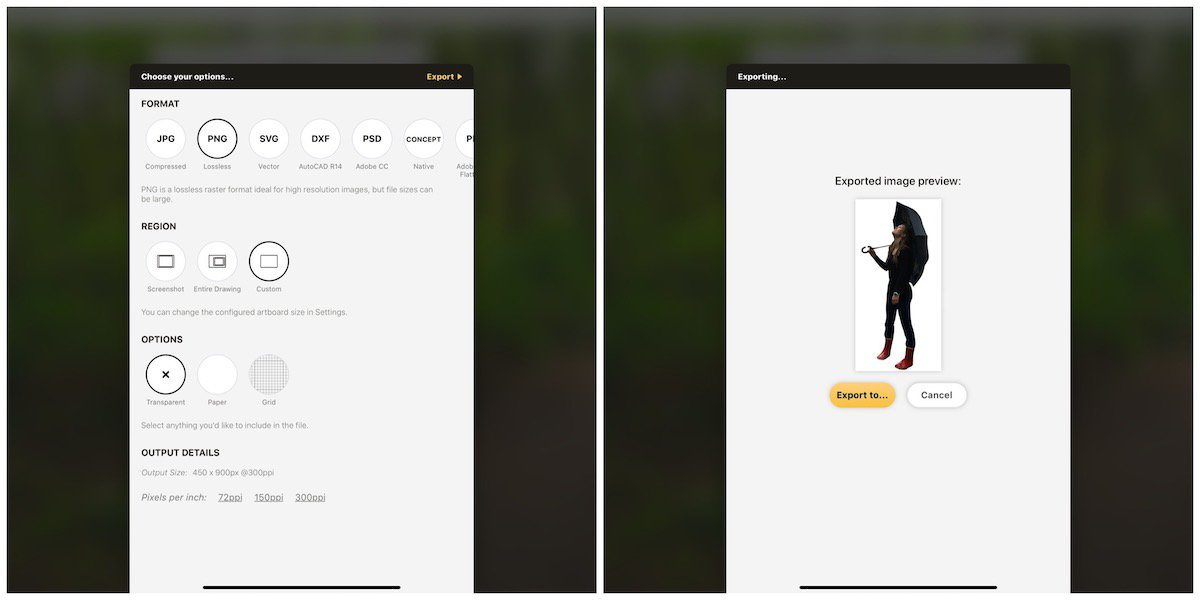
Select PNG > Custom > Transparent > 300+ dpi.
When you import the image back into Concepts, you will be able to treat it like an object with adjustable size and opacity, and transform it with the control points.
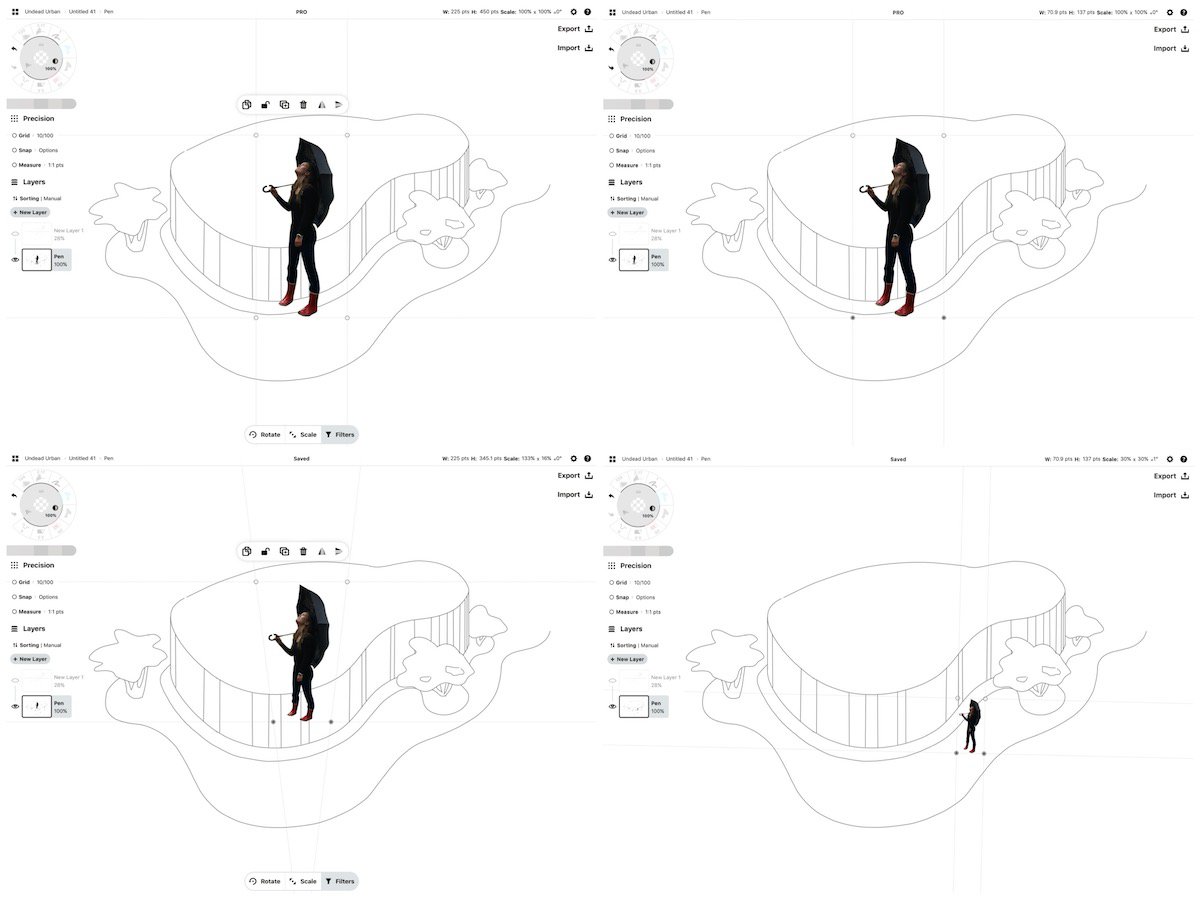
Import your new object, resize and transform it, and position it into your drawing.
If you have any questions about creating your transparent PNG file, send us an email to support@concepts.app or tap Help > Ask Us Anything in-app. We're happy to help.
By Erica Christensen
Photo credit: Debra Williams, Kira Christensen
Recommended
Working With Your Infinite Canvas - Learn how to create artboards and maximize your infinite canvas.
Select and Edit Your Notes, Drawings and Designs - Learn how to work with Selection and transforms.
How to Touch Up a Photo - Learn how to edit and touch up your photos.
Tips for Exporting Your Designs - Learn how to format your work for professional quality export.
The Nudge Tool - Learn how to use Nudge to poke, prod and edit your sketch.