Concepts is an infinite, flexible creative tool for all your good ideas. Available on iOS, Windows and Android.
The Transparency of a Glass Sphere
Learn how to use layers and the soft eraser to draw a glass sphere in this tutorial from artist Mick Fisher.

Mick Fisher - My name is Michael Fisher, but everybody knows me as Mick. I worked in construction for many years, sometimes drawing changes to help clients visualise what the end product could look like. Now I work with my wife caring for children, which is very rewarding. I love drawing, photography, people working together for the greater good, and my soulmate, my wonderful wife of 38 years.
There is so much beauty all around us. Whatever your beliefs are, you’ve got to admit there’s plenty to inspire us in the things we see everyday, from a glorious sunset to the early morning dew adorning a spider’s web, like jewels on a thread.
I like to emulate what I see. I’m not an artist or an illustrator, I just enjoy creating things that others will get pleasure from looking at. My creative process is haphazard, it consists of many iterations until I can be happy with what I’ve produced. I realise that my work isn’t perfect and although others may love it I can still see those little imperfections glaring at me.
My tools of choice were always pencils of various hardness and a nice smooth Bristol paper, but I have always been willing to try new things, so the transition to an iPad wasn’t a problem. 90% of my drawings are now done on the iPad. I started drawing on the iPad using Procreate, it just had a natural feel and it was a good introduction to digital art.
Concepts came onto my radar about three years ago, at the time I was still using the other app, and to be perfectly honest I initially found Concepts a bit fiddly. However, I kept returning to it, and the real game changer was the introduction of the soft pencil and soft eraser earlier this year. Since then I rarely use anything other than Concepts. For me it has everything I need. I realise that it was produced with designers in mind, but I love pushing the tools to see how far they will go. In short, it’s a brilliant app.
Gradients
Art is an illusion, it’s trying to convince the viewer to see a reality that isn’t there. Turning something that is two dimensional into what is perceived as three dimensional has always intrigued me. It’s all about light and dark. I’ve always loved the transitional effects that nature offers up, whether it’s the subtle change in the colour of a rose petal or a setting sun that illuminates the sky and gives it that gradual change from pink to blue. So how could I achieve that using Concepts?
I mentioned the soft eraser earlier on. That is my primary tool for achieving these transitions, along with the ability to reproduce layers (I learned this from Ewen Miller in a post). Let me demonstrate by showing you the process first.
I’ve chosen an oblong fill with pink as my choice of colour. I then simply duplicate the layer, so I have two layers both filled with pink. I’m going to change the top layer to blue by pressing on it, selecting it, and then changing the colour.
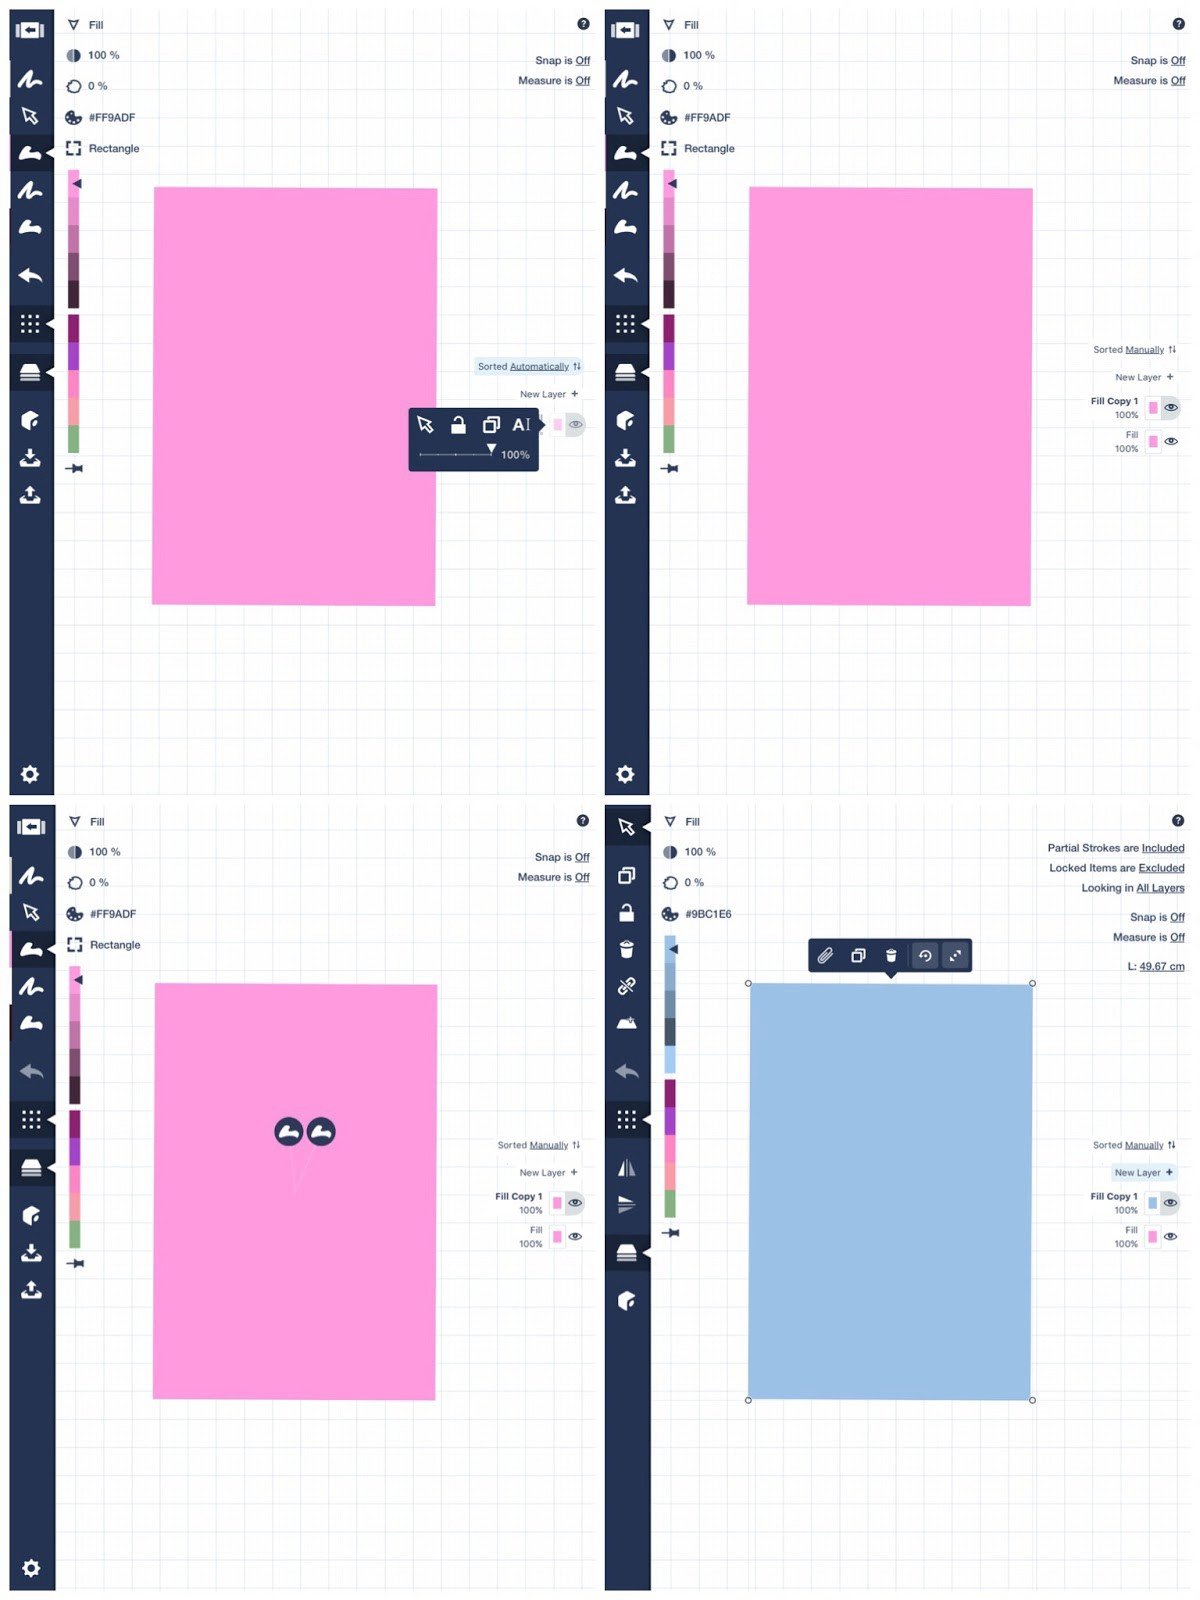
Now I take the soft eraser, lower the opacity to around 3%, and start erasing in broad strokes from the edge of the blue rectangle to around two thirds of it. I repeat the process, each time erasing more of the blue to expose the pink underneath.
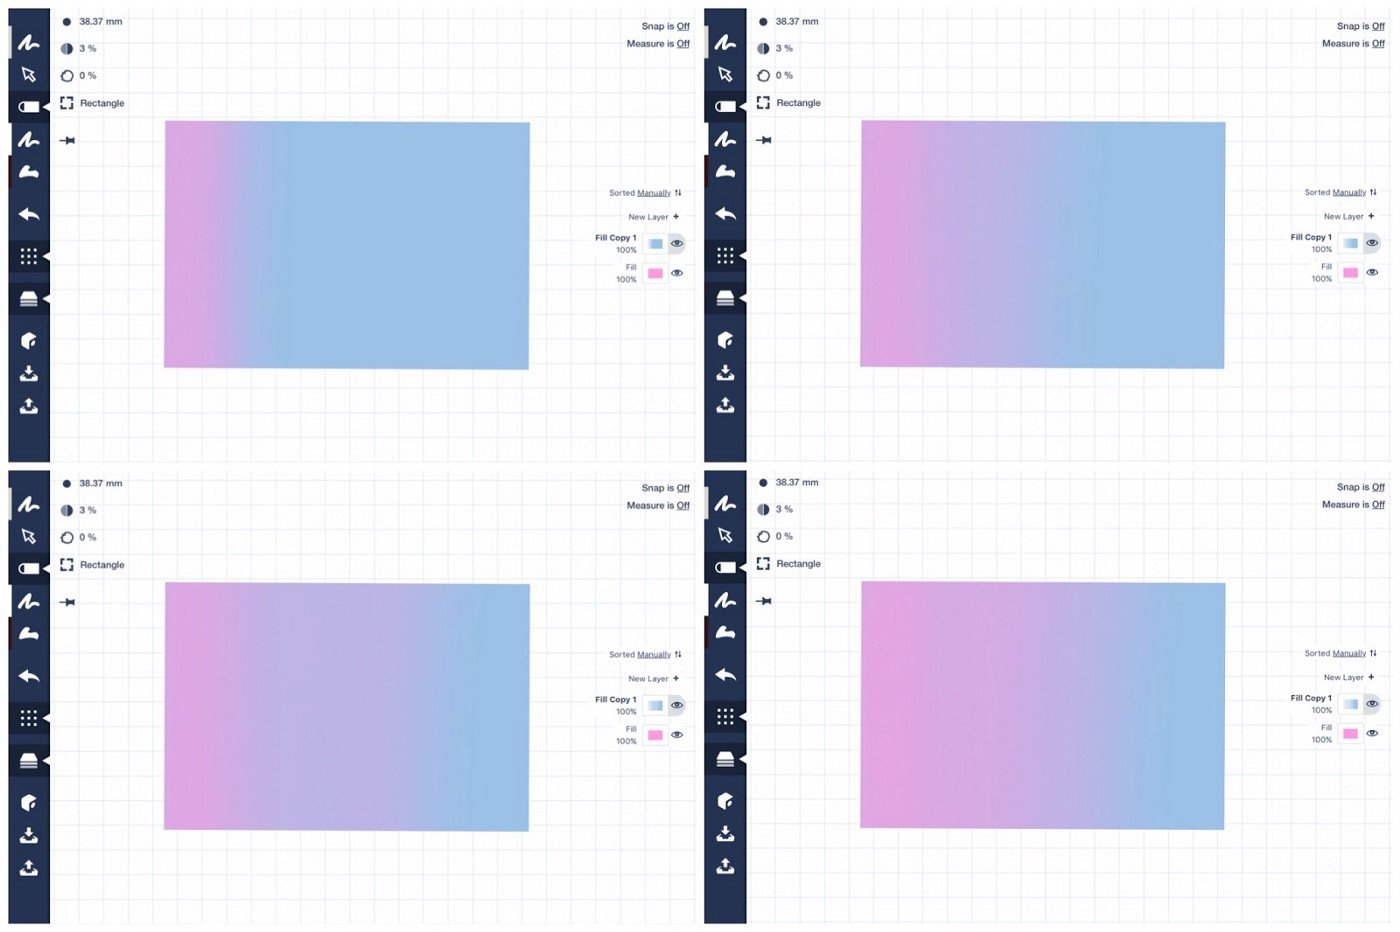
Once you’ve done the process you can bind the shapes and eraser, then change the colours and alter the shape using the transform handles. So it could be the side of a building, the bonnet (hood) of a car, whatever you choose.
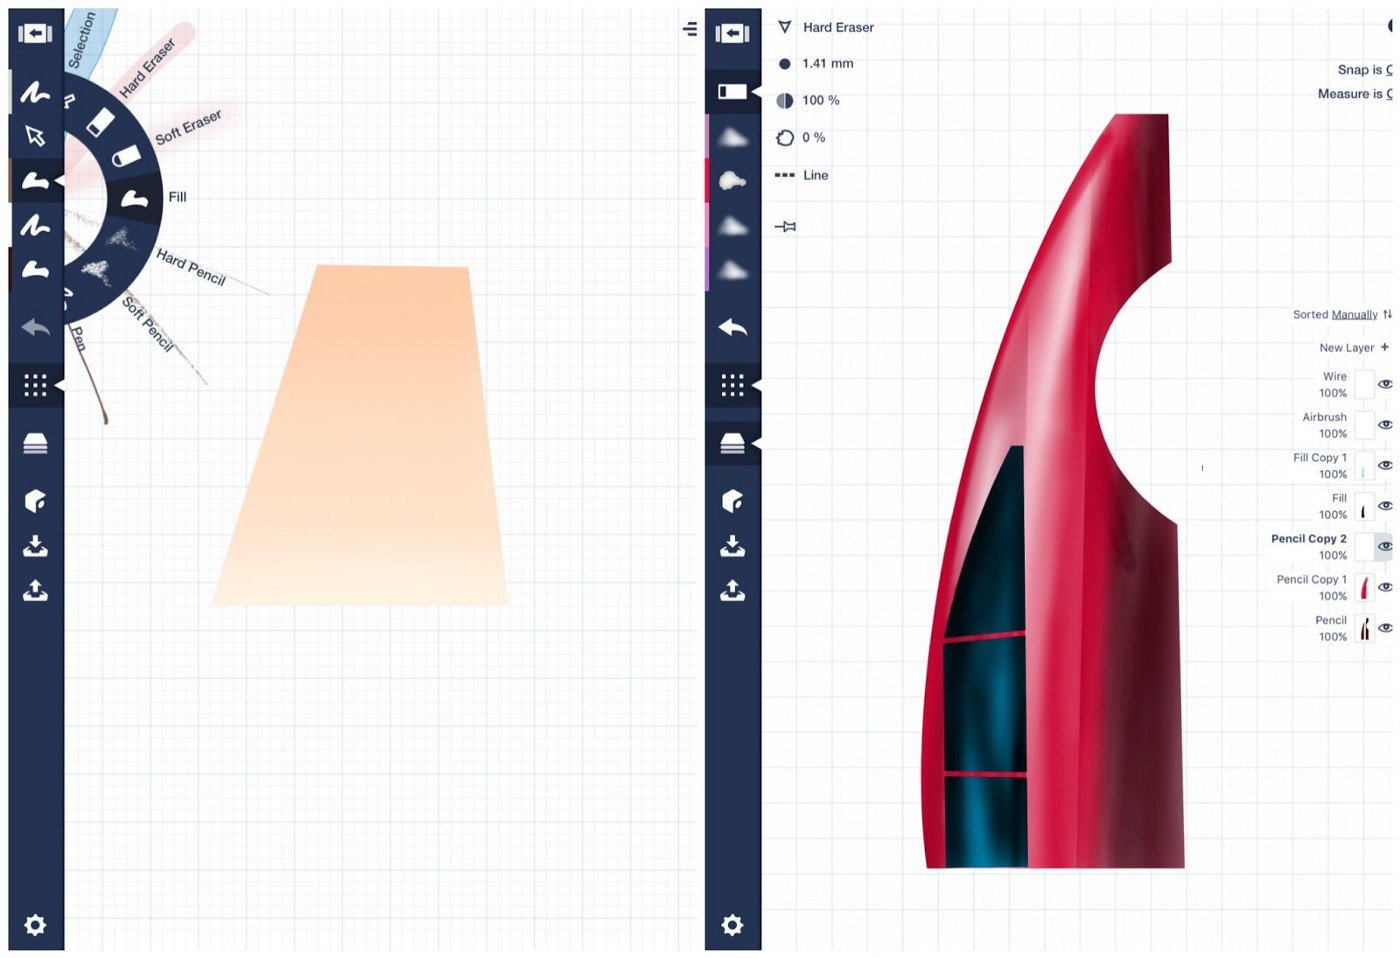
It doesn’t matter which tool you use, Fill or Airbrush or other, this layering technique with the soft eraser works with any of them.

It also doesn’t matter which shape you choose. This one I’ve given a metal sheen with the same technique.
Glass Sphere
I used this same process to draw a glass sphere. The only difference is that to create the illusion of glass, you have to erase both layers to let the underlying paper show through. It takes practice but it’s worth it in the end. I’ve shown as many steps as I can, but the key thing is to mess about with it and push the capabilities of Concepts.
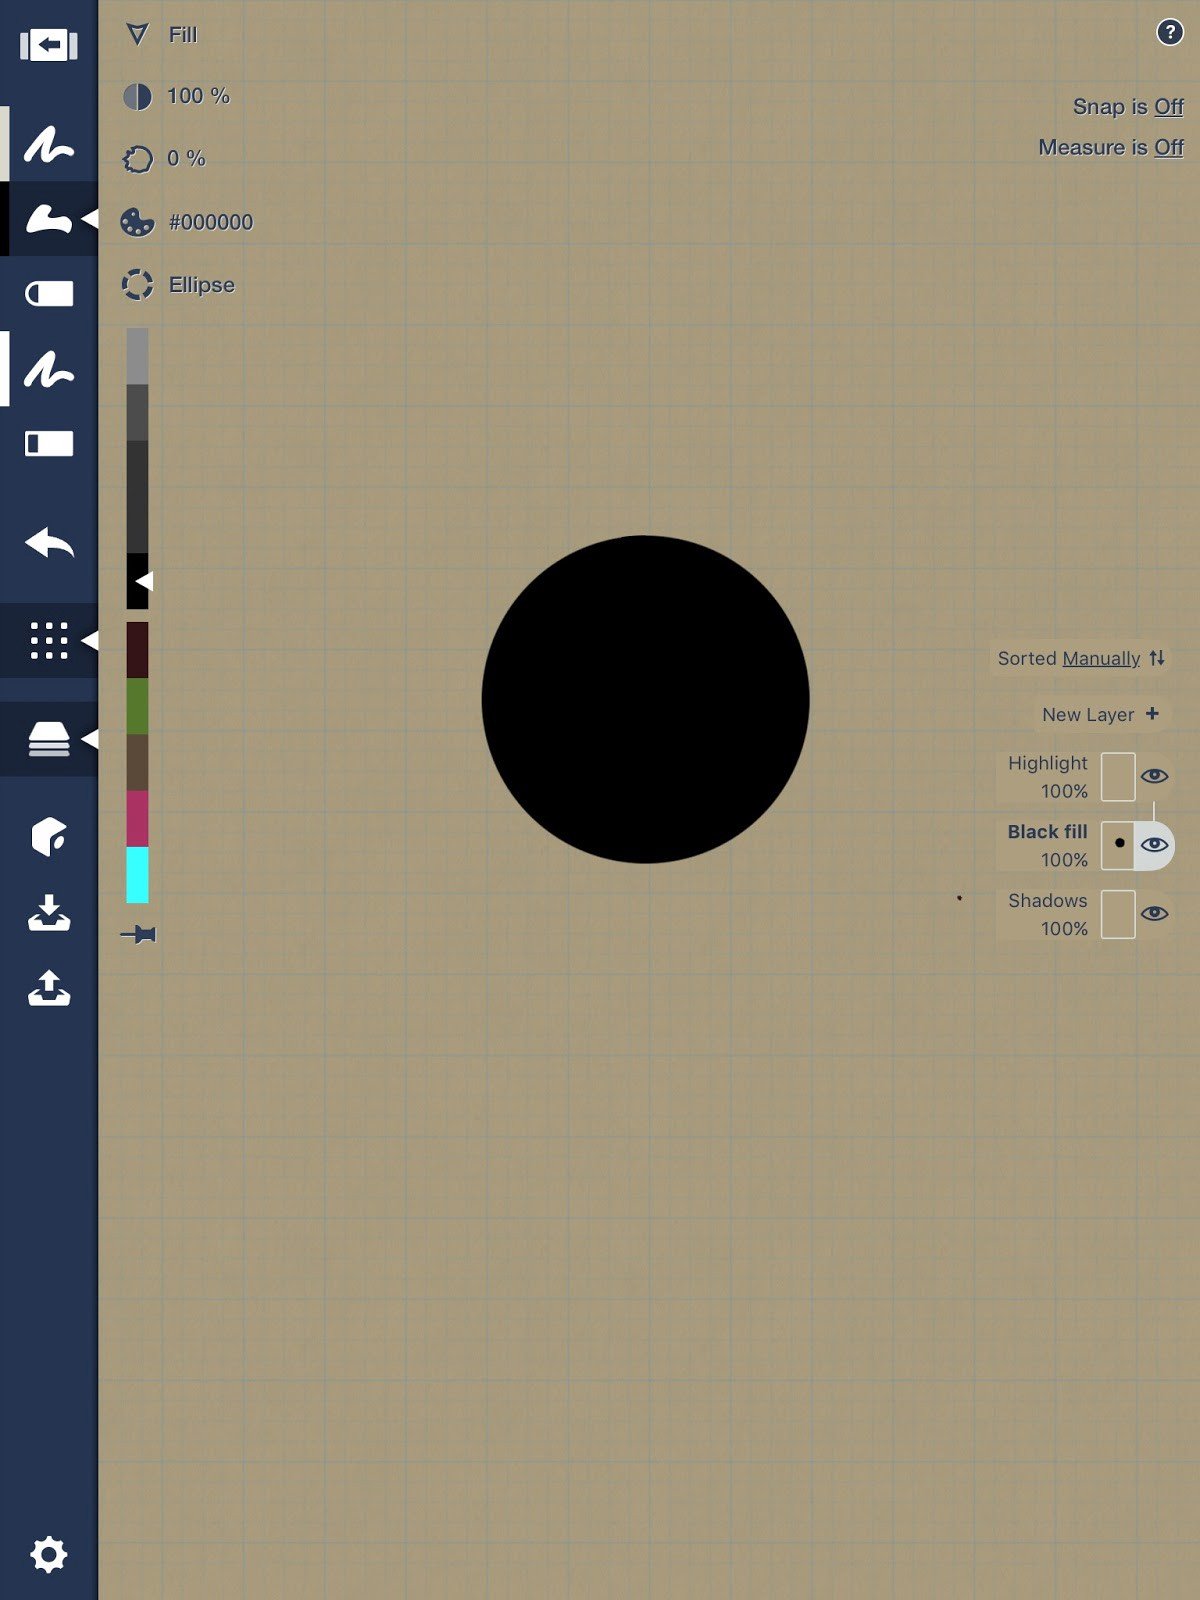
To make the drawing, I start by choosing a background colour in Settings. In my original drawing I used a neutral grey, but for this demo I’ve chosen a light brown. I bring up the Ellipse guide, double-tap the centre to create a perfect circle, then use the Fill tool to completely fill the circle in black.
Next, tapping on the Layer to bring up its menu, I choose the Duplicate icon and make another layer with the same circle in it. Pressing on one of the black circles to select it, I change its colour to white. To make this easier, it’s better to have the “Search Active Layer Only” option set to “On” in the Settings menu.
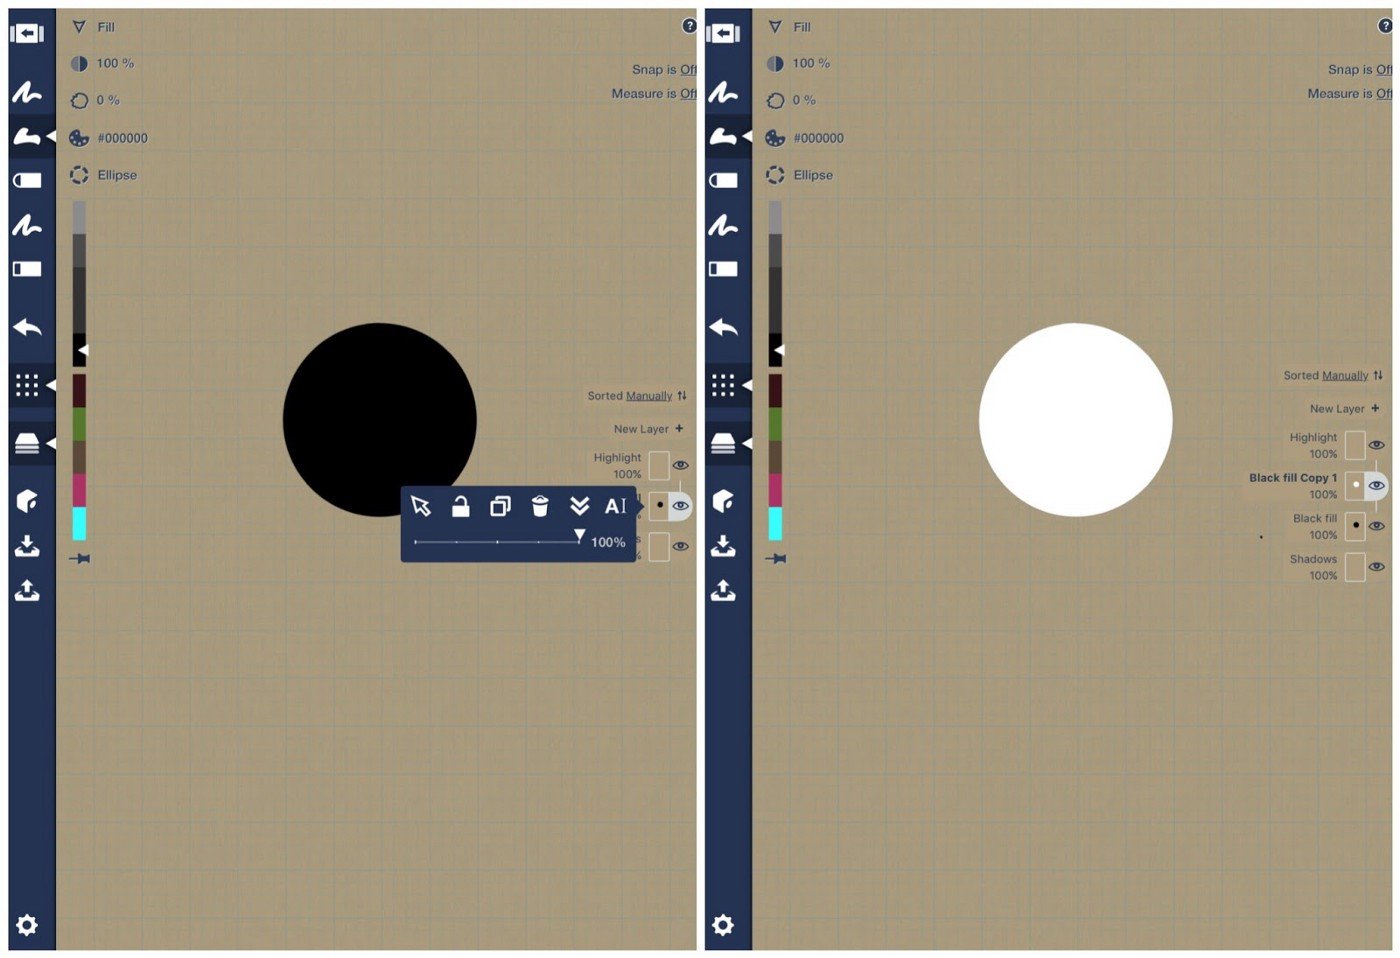
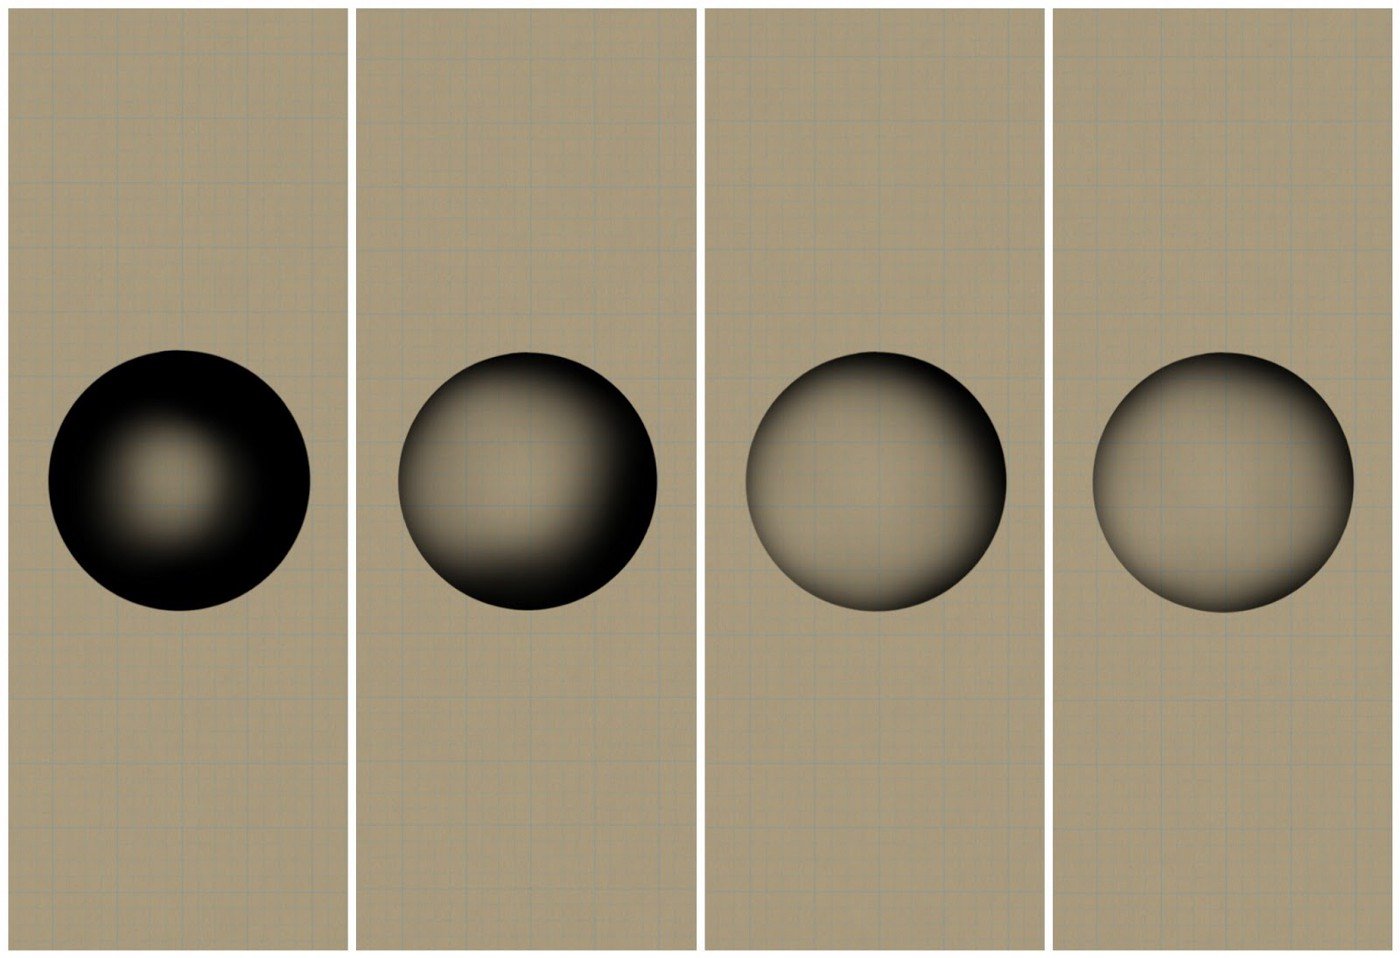
So far, we have two circles, each on a layer of its own. I hide the layer with the white circle on it by touching the eye and make the black circle layer active. This is where the beauty of creating the illusion of a 3D shape begins.
The next tool to choose is the soft eraser. I make sure the opacity of the eraser is 3% or lower, and the width of the eraser is around a quarter of the diameter of your circle. With gentle circular movements, I begin erasing the black circle from the centre outwards. You get a feel for how much or how little to erase. When I feel that the black that’s remaining represents the shadow of the circle, then it’s time to stop erasing.
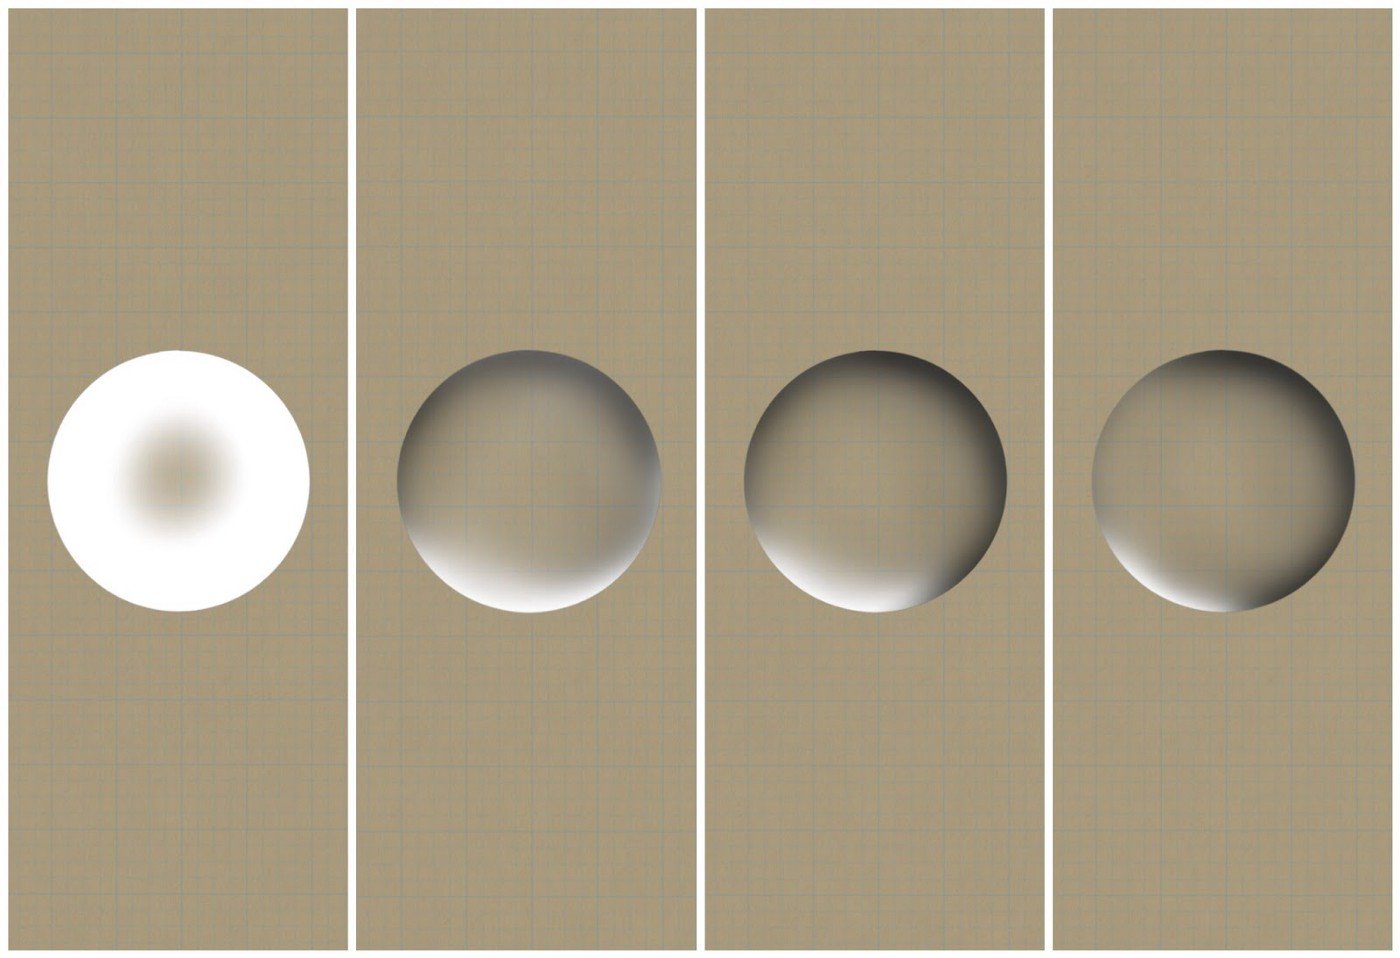
Next, I make the layer with the white circle active and carry out the same activity, gently erasing until I’ve exposed the darkest elements of the circle underneath, and left the highlight at the bottom of the circle. The remnants of the black and white converge, leaving a subtle gradation.
I then create another layer on the top of these two layers and create the highlight, erasing the edges with hard eraser set to 100%. After doing this, I set the width of the brush to a small size, lower the opacity to around 30%, and make a line through the highlight to complete the reflection.
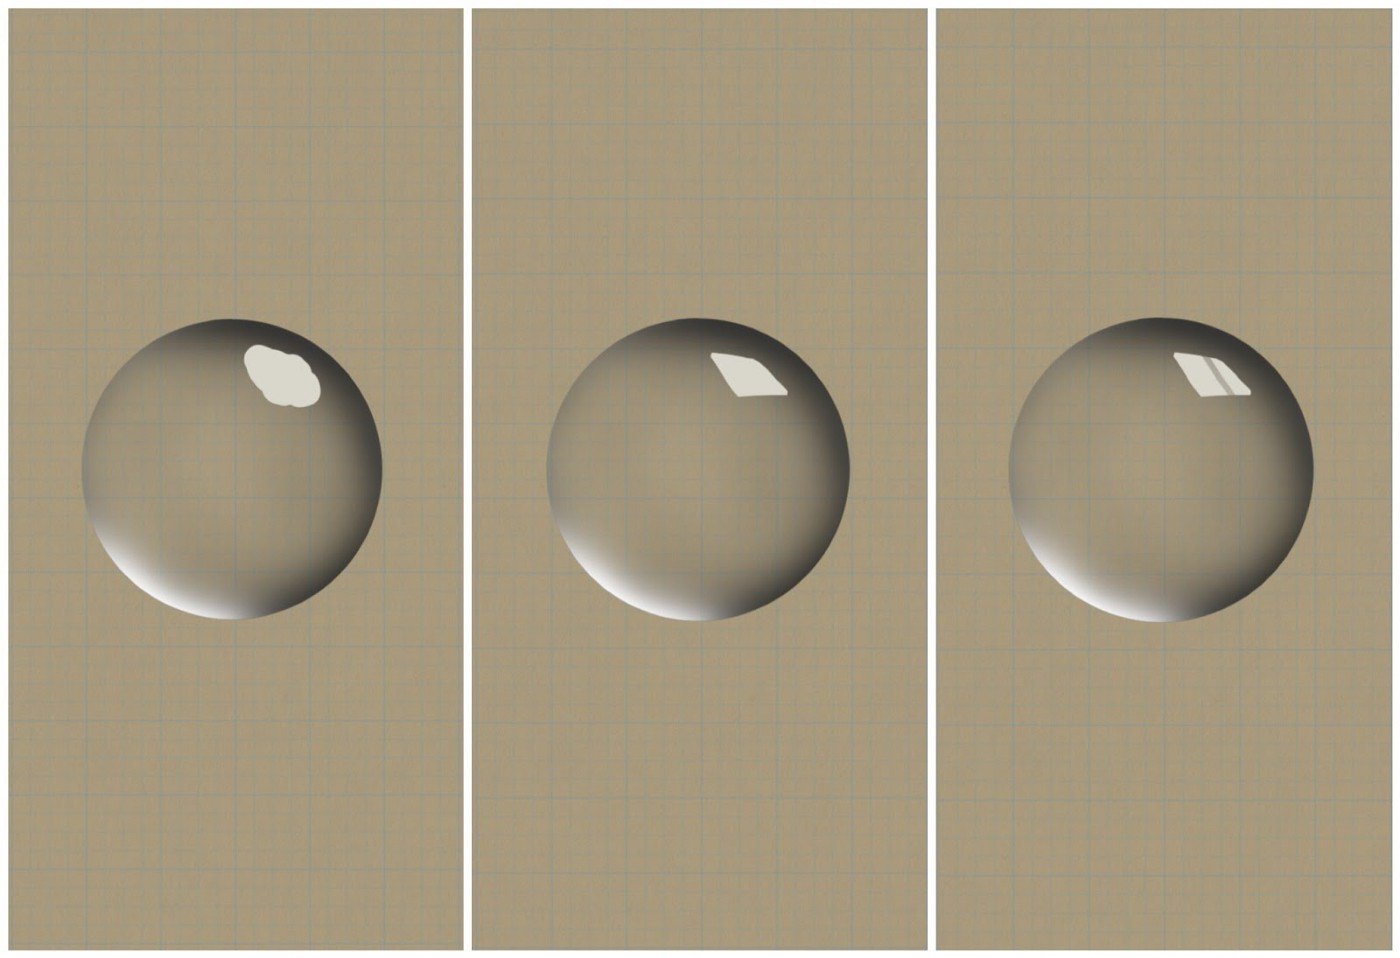
You now have your glass sphere.
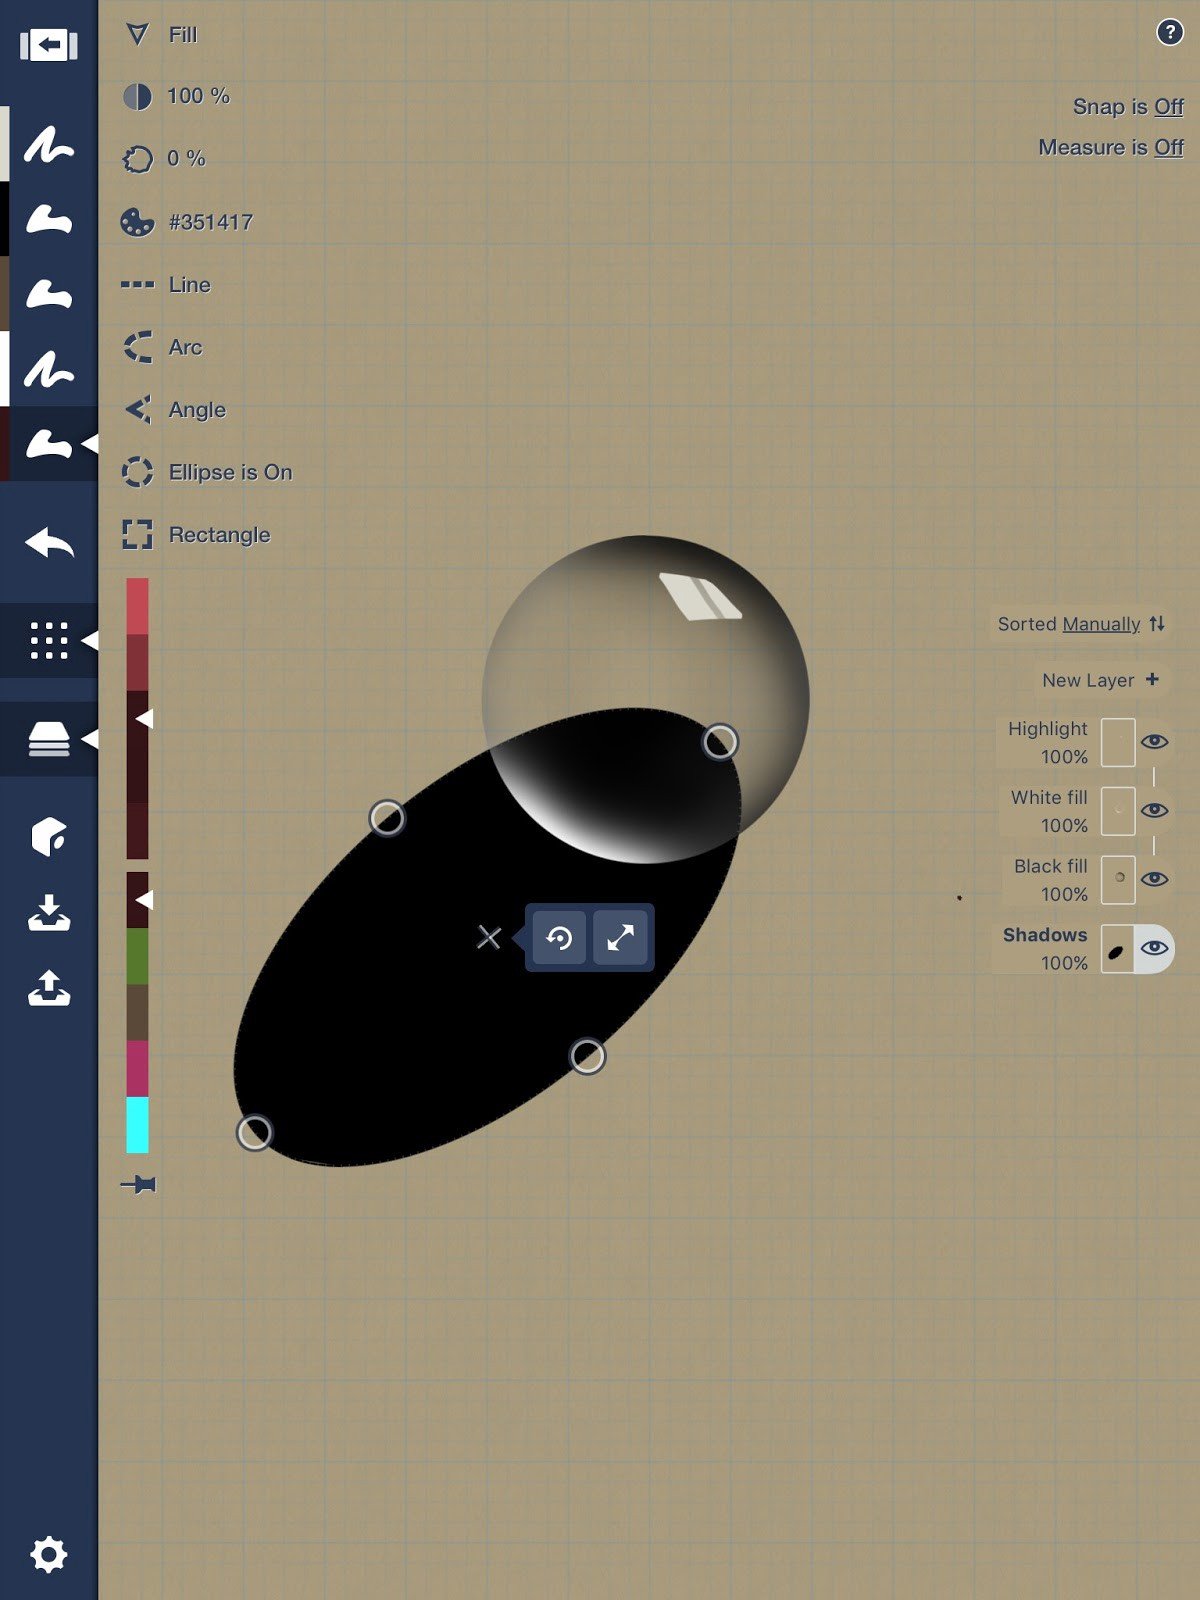
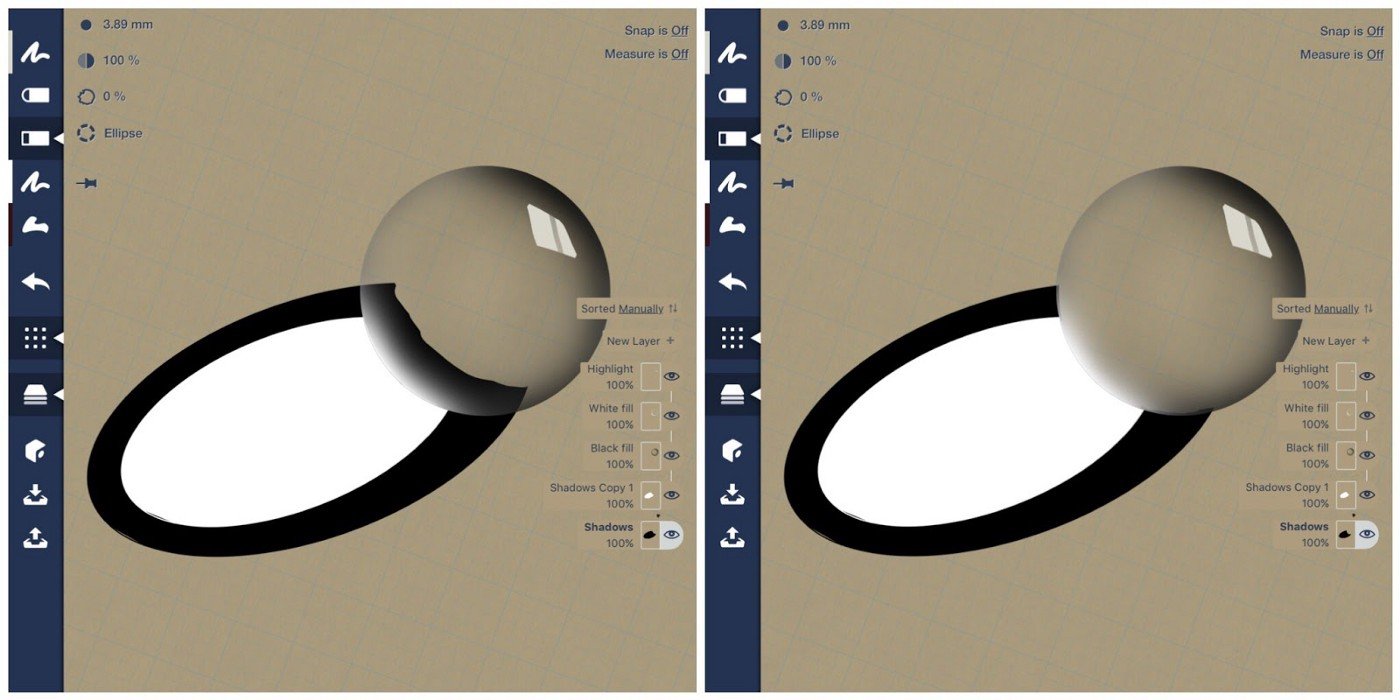
To make it pop off the page, the sphere needs shadows and highlights. I create another layer and move it to the bottom of the layer stack. Choosing the Ellipse guide and the black Fill tool, I position a black ellipse as an extending shadow in the place I think looks right.
Then I duplicate the layer and follow the same procedure as I did with the sphere.
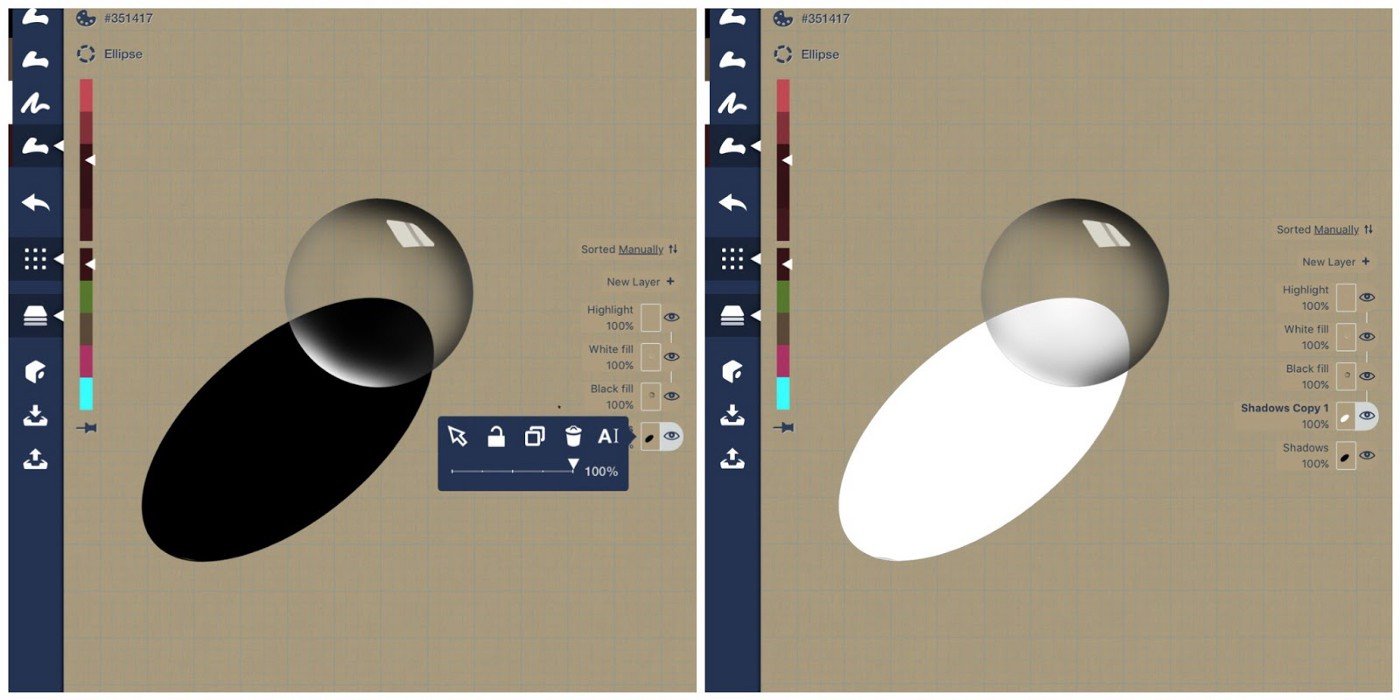
I copy the ellipse to a new layer and change the copy to white.
Then I position the white ellipse inside the dark one to represent the shadows around the edges, since the brilliant light is focused and projected through the inside of the sphere.
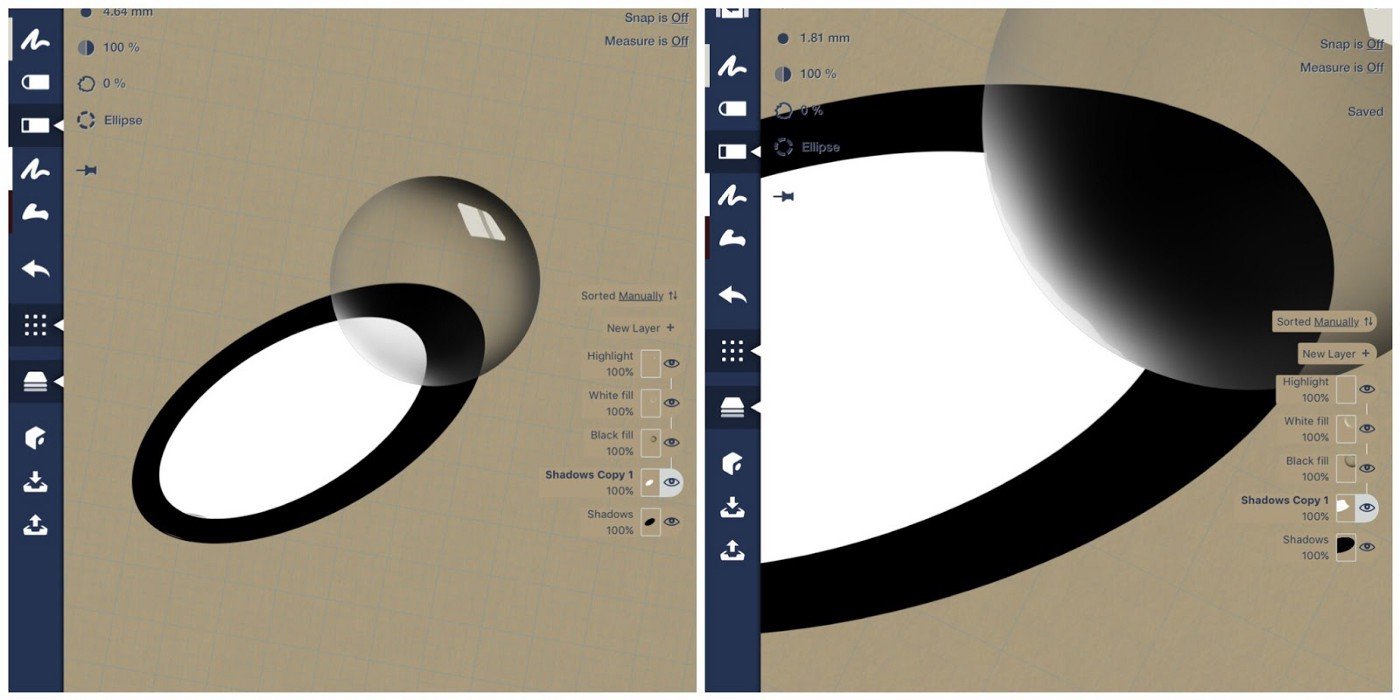
I use the hard eraser to mask the shadows and highlights within the sphere, and blend the edges into the sphere with the soft eraser.
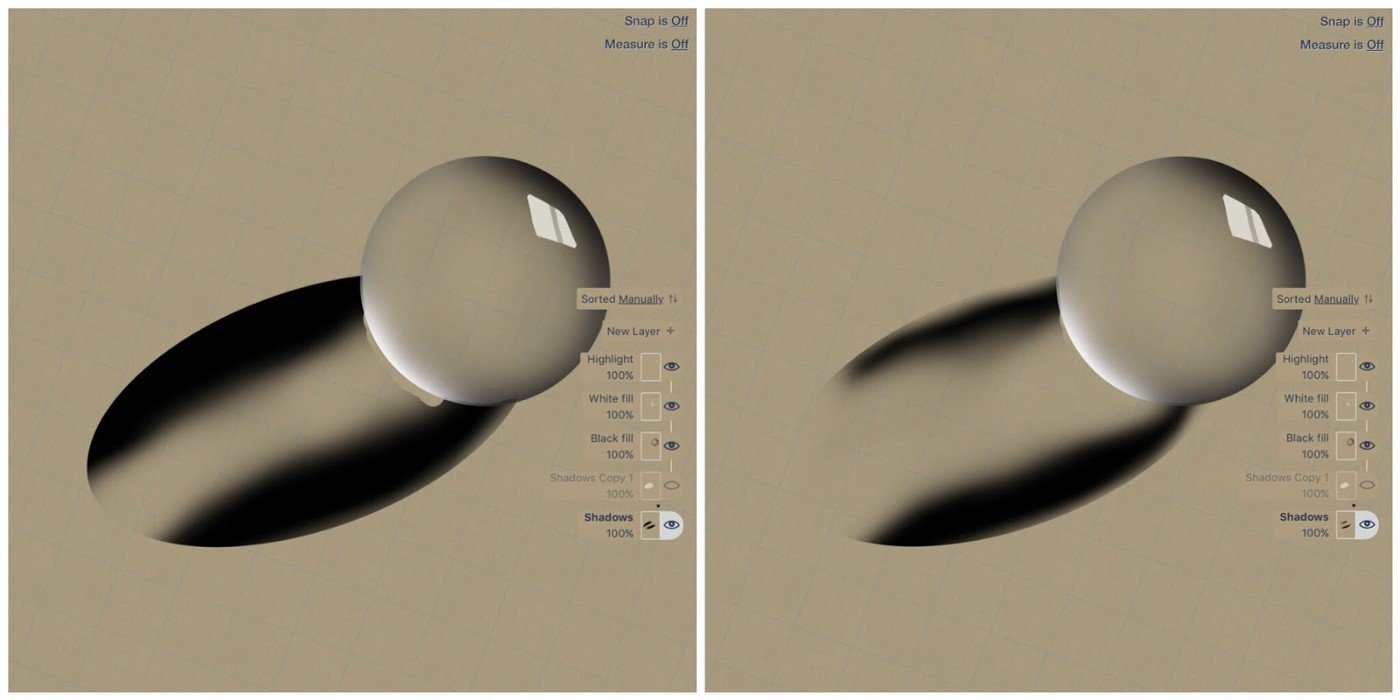
Then in an attempt to fool the viewer, the rest of the shadow and highlight are erased in the same way as the globe, softening the edges and letting them blend within the shadow.

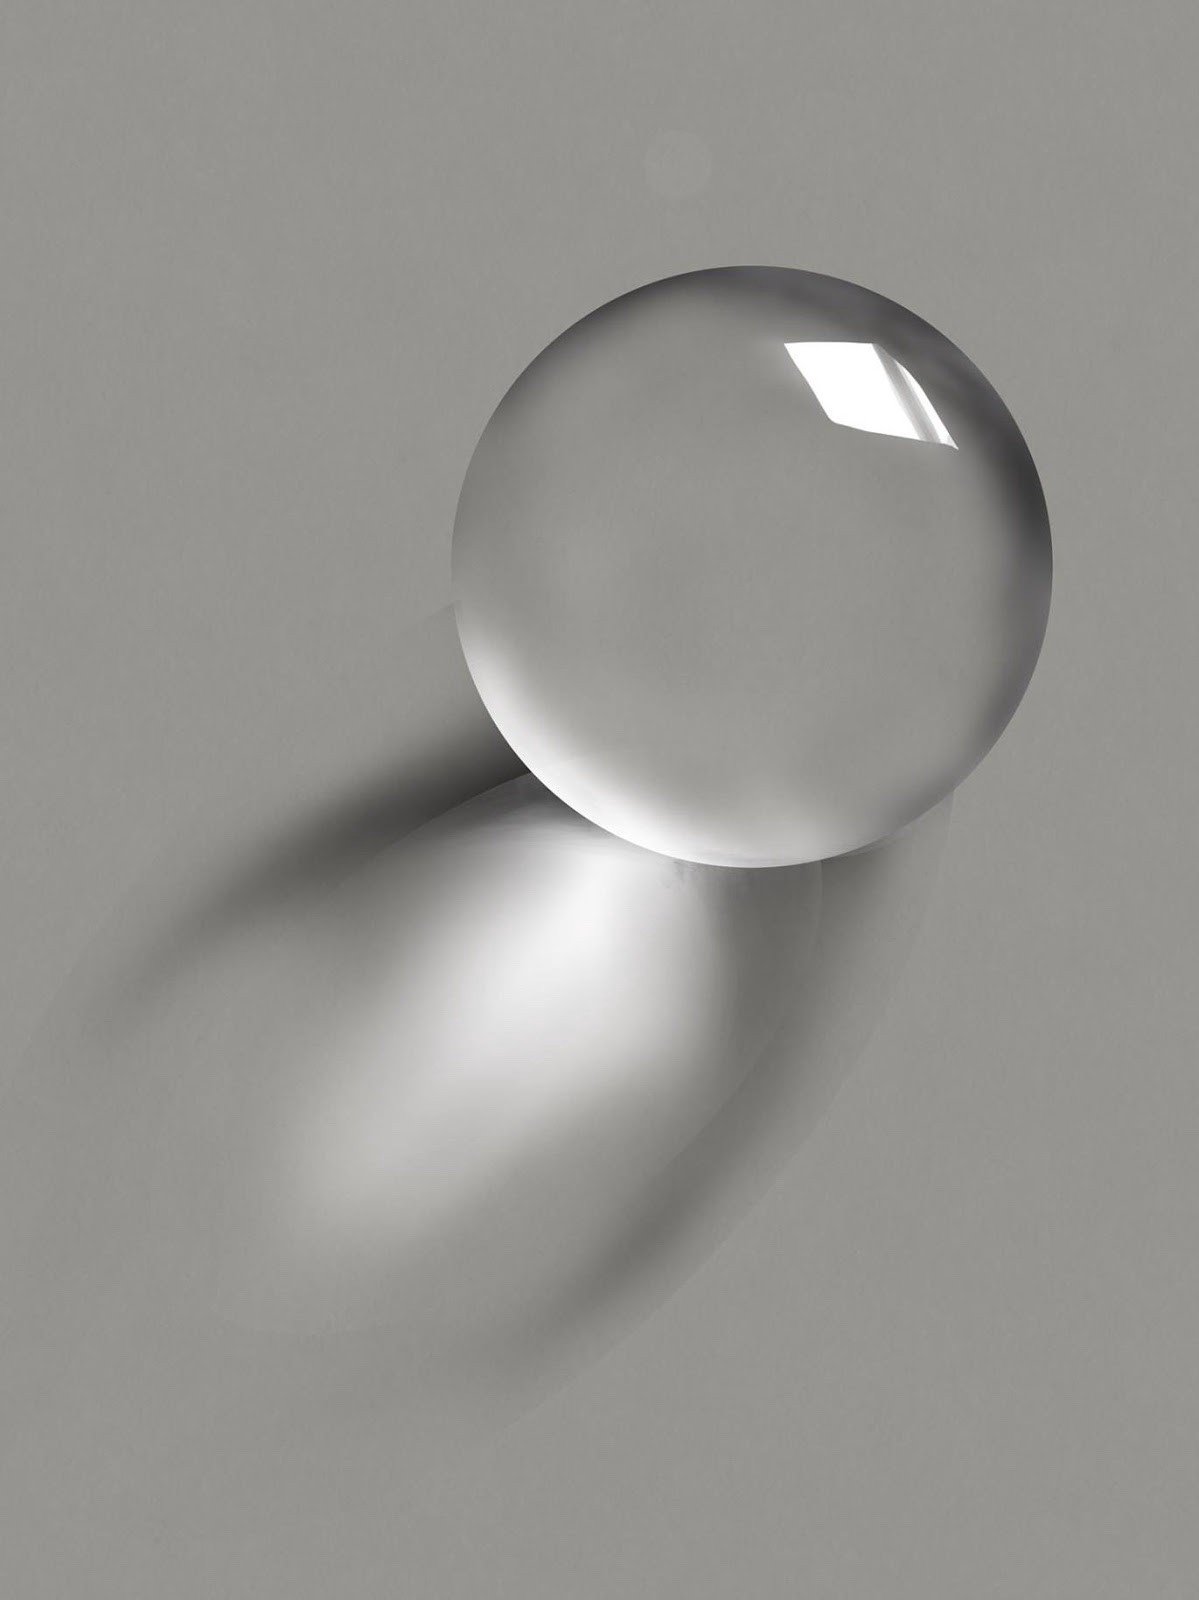
Here is the finished sphere and its reflection.
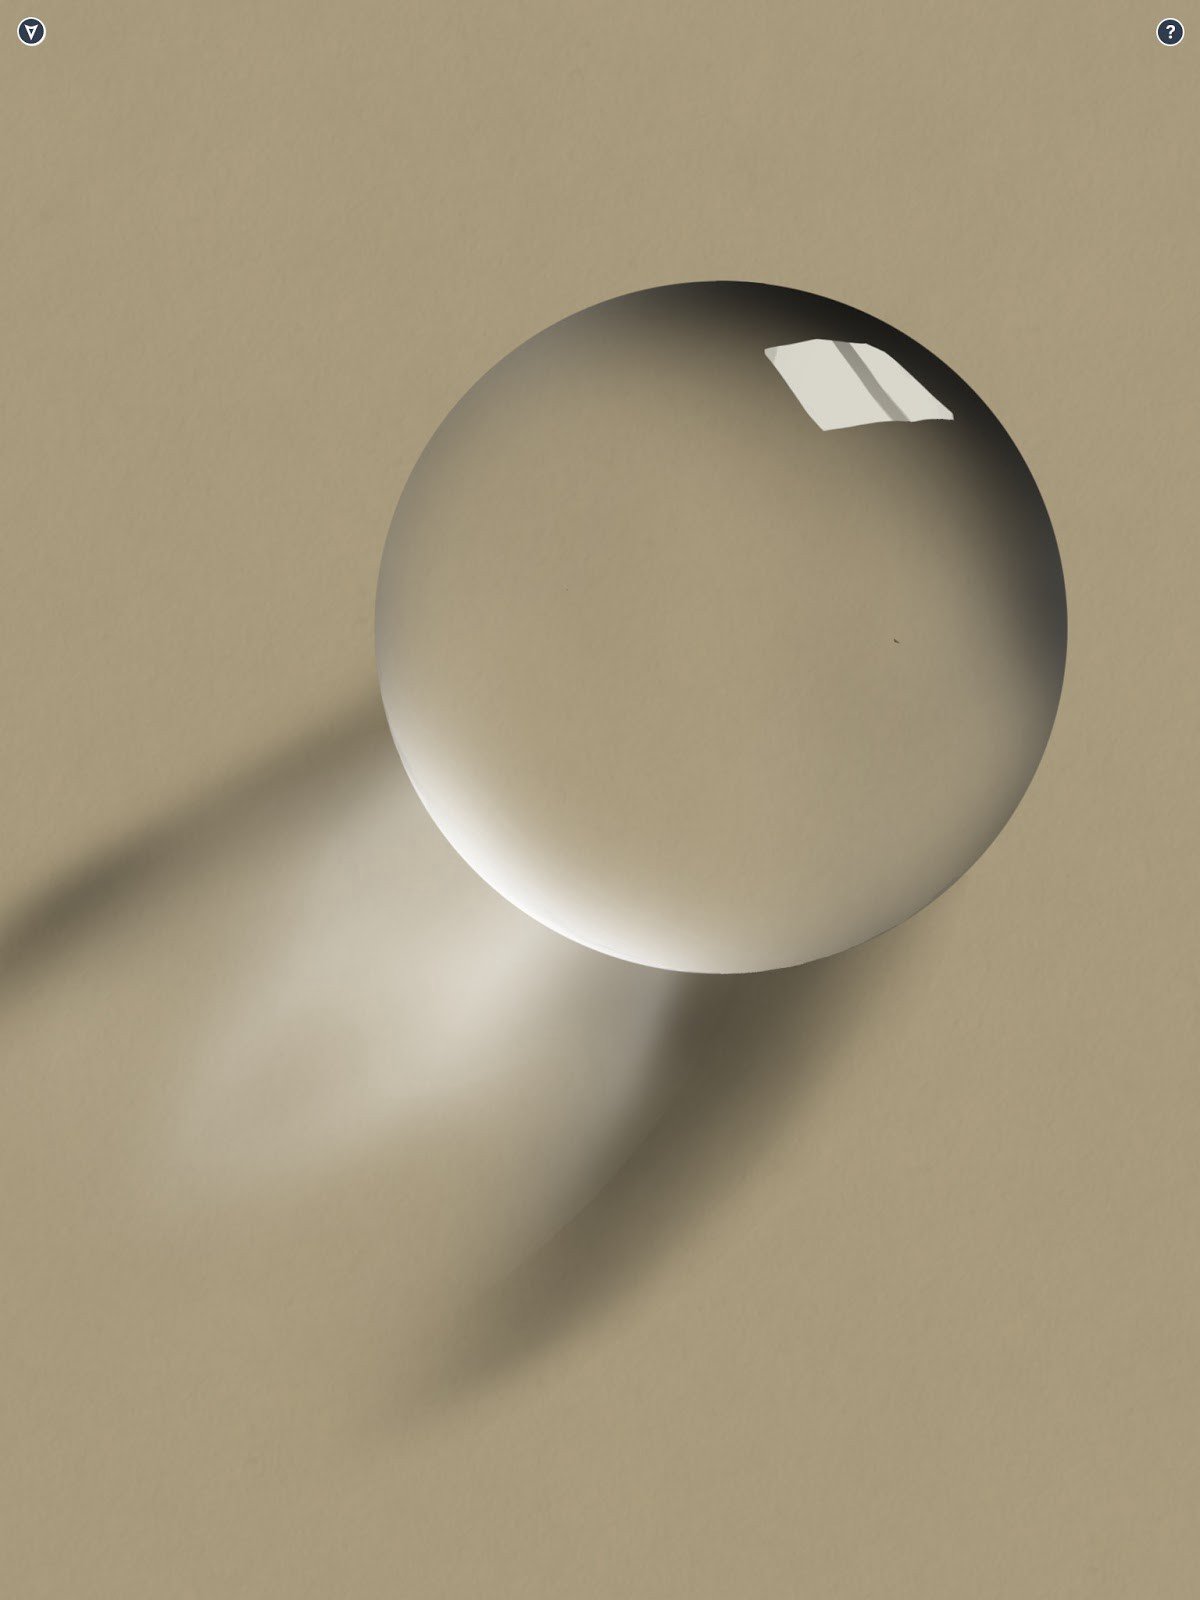
I created this video to help show the process in motion.

Concepts is a powerful app that is brilliant for design, but there are also many tools that allow you to expand your artistic horizons. I hope you keep exploring both the app and your own drawing skills, and find ways to capture the beauty of the world around you.
Michael Fisher. To have been a designer or artist would have been my dream vocation, but my father was far too practical for that to happen. I have a daughter who is taking art A level at school and I love her work. I guess I would say to others follow your dream. More of my work is on Instagram.
Interview by Erica Christensen
Recommended
5 Tips to Transcend the Eraser - Polish up your vector eraser skills and your drawings with these five handy tips.
Drawing from Inspiration - Iron Man - Freelance artist Cory Siewert shares how he draws Iron Man with digital Copic markers in Concepts.
How to Draw Metal Textures - Marcelo Cominguez shares his process and tips for creating photorealistic art.