Concepts is an infinite, flexible creative tool for all your good ideas. Available on iOS, Windows and Android.
3D Rendering a Mechanical Ibis
Learn how to turn 2D sketches into 3D art in this interview with graphic artist Mike McFadyean.

Michael Kevin McFadyean - I was born and raised in Southern Africa. I have never left African soil, although I am of British descent. I live in Durban, South Africa — a sub-tropical paradise city, the Miami of Africa — a veritable melting pot of British colonial, Indian and African influences reflected in its food, art, music, languages and people.
I am a self-taught designer and artist. Never did art at high school — I studied psychology at varsity, but always had a private passion for drawing, art and design. Way back before computer graphics, I got a job at an advertising agency on the strength of my airbrush art skills (using a traditional Badger airbrush, compressor, hammer board and frisket). I learned a lot about the industry through hands-on experience.
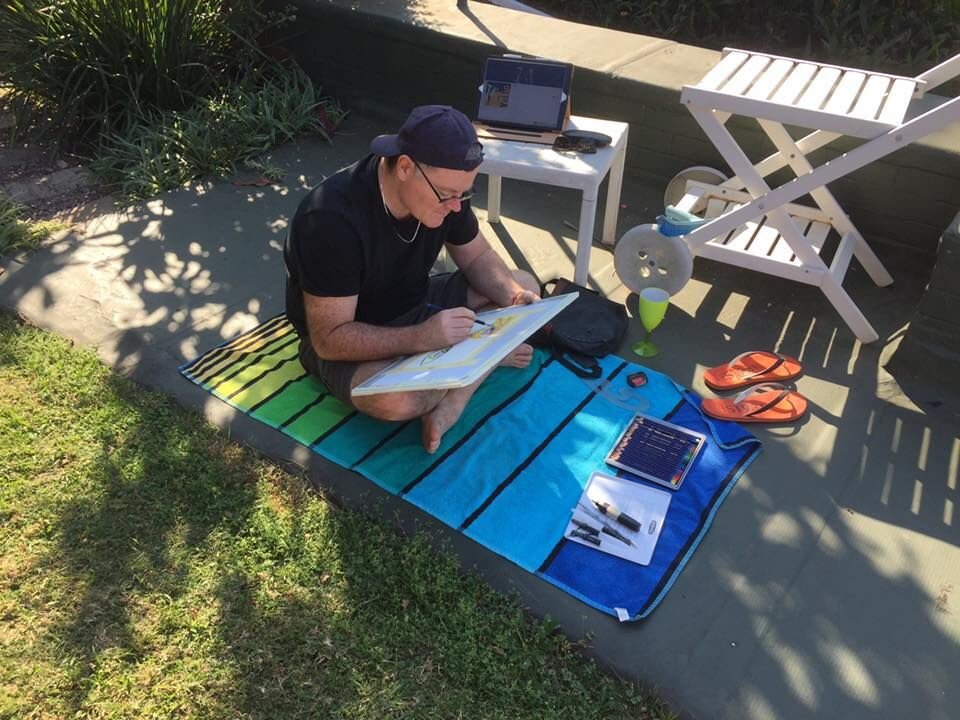
“Mike” aka Michael Kevin McFadyean aka MKM.
I hated computers at varsity, they terrified me — this was the early 80s with punch cards and terminals. My first foray into computer graphics was a little application called Harvard Graphics. I sat at someone’s old DOS computer one day and started playing around. I got instantly hooked on the potential for computers to become a new drawing, art and design tool.
Then I found a little app called DrawPerfect and tinkered with that. In a way, I was ahead of my time — I think I imagined the computer graphics apps of today before they happened. From that point on, I couldn’t get enough of any new application that gave me the opportunity to create digitally. Next CorelDraw, then Photoshop, then Lightwave 3D, 3ds Max, After Effects, etc… I spent countless hours teaching myself all this software and all the time looking at ways of integrating these skills with my traditional drawing and art.
Today, while I still keep drawing, painting, designing etc, I make my living out of graphics training. I fell into training completely by accident. I was asked, way back in the late 90s, to train a few people in the digital software I was using. In those days there was very little in the way of formal tuition on computer graphics software. It just grew from there. Now I make my living out of training as an independent certified instructor — basically freelance training wherever the work is. I train at colleges all over Durban and South Africa and even as far afield as Zimbabwe. I also go into companies and up-skill their design staff, as well as doing one-on-one training at my home studio.
“Honestly, if the iPad vanished tomorrow, I would miss it terribly — it fills that awkward gap between analogue and digital.”
Enter the iPad
I was a late switcher to Mac. Since Apple never had any footprint in apartheid South Africa, many of us had never heard of them until the mid-90s — I honestly thought Microsoft was our only choice. Then one day I saw an iMac. I decided, “this is the future of computing.” Although I still have an affection for Windows, many years later, I am firmly a Mac man. The only time I use Windows these days is for 3ds Max because unfortunately there is no Mac version.
When I got my first iPhone (3G), I obsessively collected any app that gave me some creative opportunity. But the small screen was always a limitation. I thought to myself, “Why doesn’t Apple bring out a big version of the iPhone for artists and designers?” From my lips to Steve Jobs’ ears! I was ecstatic when the iPad was released. I continued my journey of digital exploration using as many iPad creative apps as I could.
In my opinion, the iPad has now reached a level of maturity with the Pro series, and the apps have reached a level of sophistication to the point where it is not an exaggeration to say that an iPad Pro and Apple Pencil is an “essential designer’s tool set.” Honestly, if the iPad vanished tomorrow, I would miss it terribly — it fills that awkward gap between analogue and digital. Before the iPad, it felt like you were either a traditional artist or a digital artist, there was very little sense of a natural switching between the two. Now I feel completely comfortable skipping from analogue to digital and back again — it all feels right, and is only set to get more seamless in the future.
“What I love about Concepts is that it blurs the lines between raster and vector graphics.”
Why Concepts?
I have over 100 apps on my 12.9” iPad Pro, and I’m always curious to see what new updates bring. I have my favorites, Concepts being in the number one spot together with Procreate. What I love about Concepts is that it blurs the lines between raster and vector graphics. As someone who has done a lot of computer-based design, one of the first things you learn is when to use a raster graphics application like Photoshop and when to use a vector graphics application like Illustrator. There is a fairly clear distinction.
Concepts, for me, smudges that line quite a bit. At first it feels weird to be sketching as if in a raster-based app, and yet still have the ability to select strokes and transform them. It’s a unique perspective on computer graphics and allows for a greater level of creative freedom. I would even go so far as to say that Concepts may disrupt the industry and force graphics software companies like Adobe to rethink things, because it questions the entire basis of computer graphics, i.e. when is the right time to use a raster drawing app and when is the right time to use a vector drawing app. Others may disagree with me. Time will tell.
The Ibis
This bird can be found in most coastal parts of Africa. In South Africa we call it the “Hadida”, pronounced “haa-dee-daa”. I don’t know why. I draw much of my inspiration from my surroundings.

Photo credit: Sumeet Moghe — Own work, CC BY-SA 3.0, https://commons.wikimedia.org/w/index.php?curid=22577664.
I live a stone’s throw from Durban Botanical Gardens. A large population of indigenous ibis birds frequent this area. They often come to the gardens where I live and peck away for grubs and worms in the grass. They are very odd looking birds and make a most peculiar sound, like a cross between a baby’s cry and a goat bleating. They look quite jurassic, but also quite alien. I often sit in the garden and sketch them.
One day I thought, “Imagine if the ibis birds around here were actually alien drones spying on humans….” That silly idea started to take shape in my head and eventually evolved into the idea of a biomechanical ibis. I had also just finished watching the HBO series “Westworld” which nudged me in the direction of biomechanics.
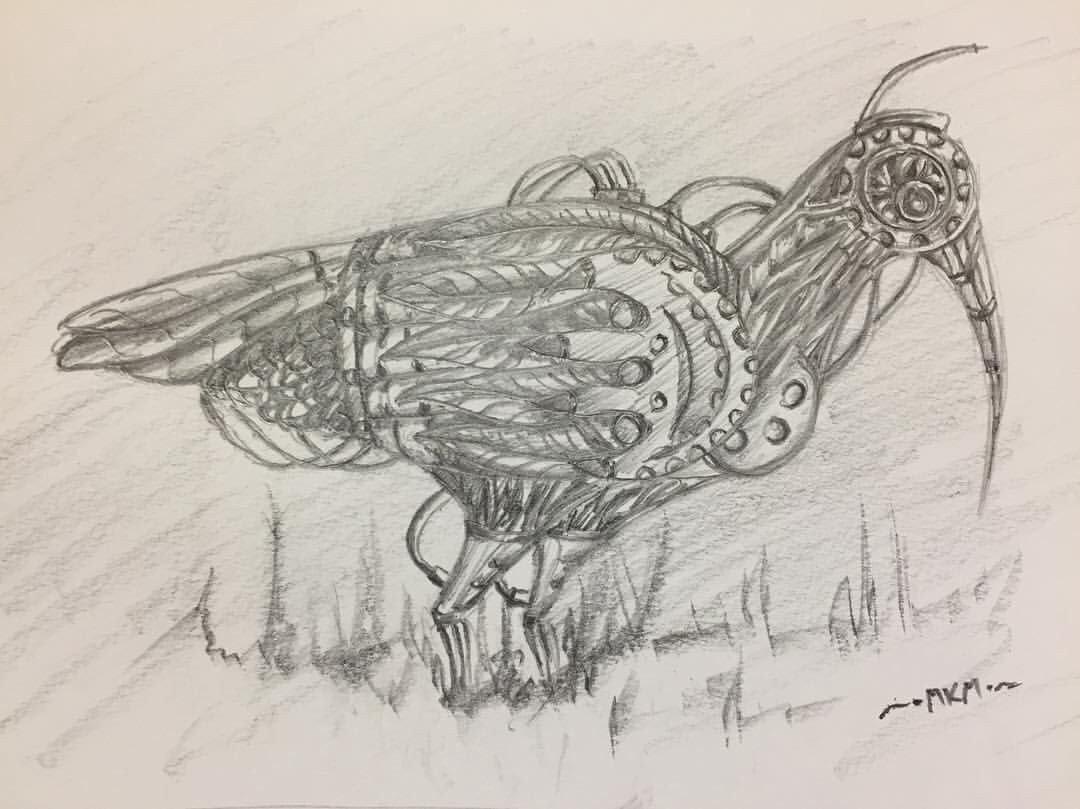
Stage 1. I started just sketching in pencil. Playing around very roughly.
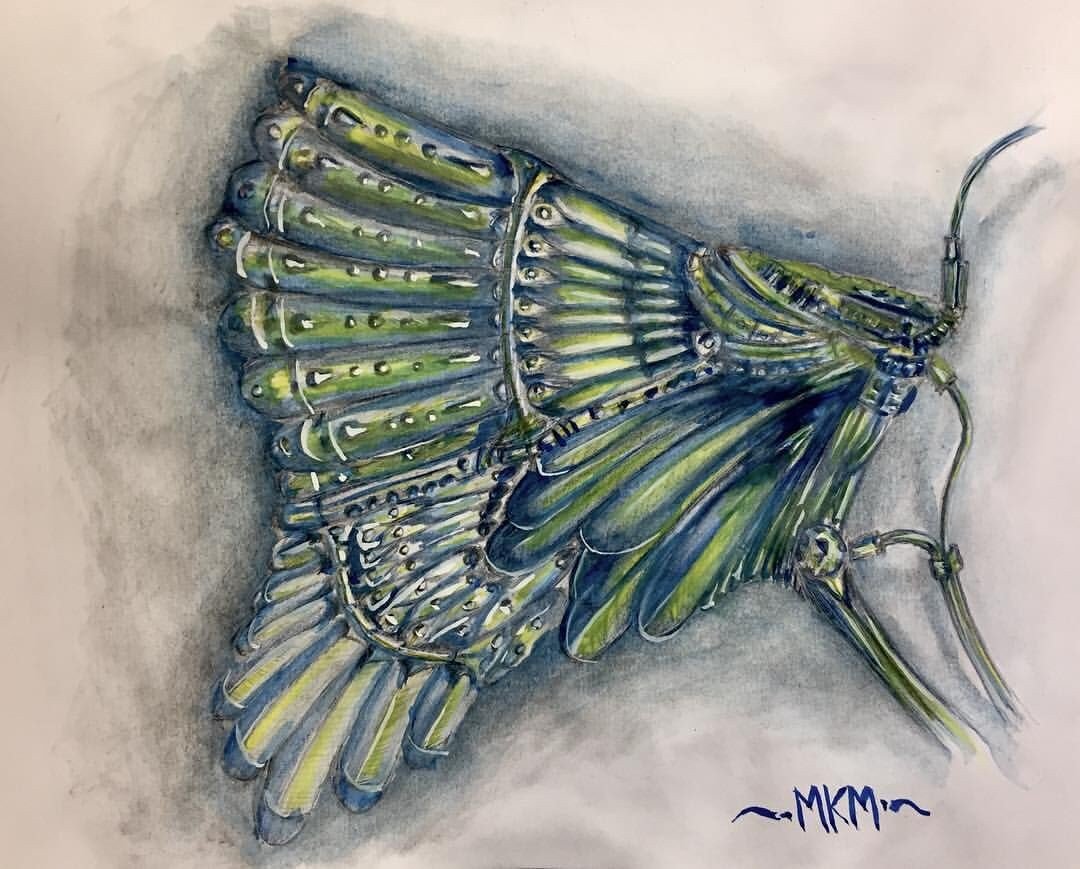
Stage 2. I played around in Procreate with a scanned version of one of my sketches.
Stage 3. More experimentation in Concepts.
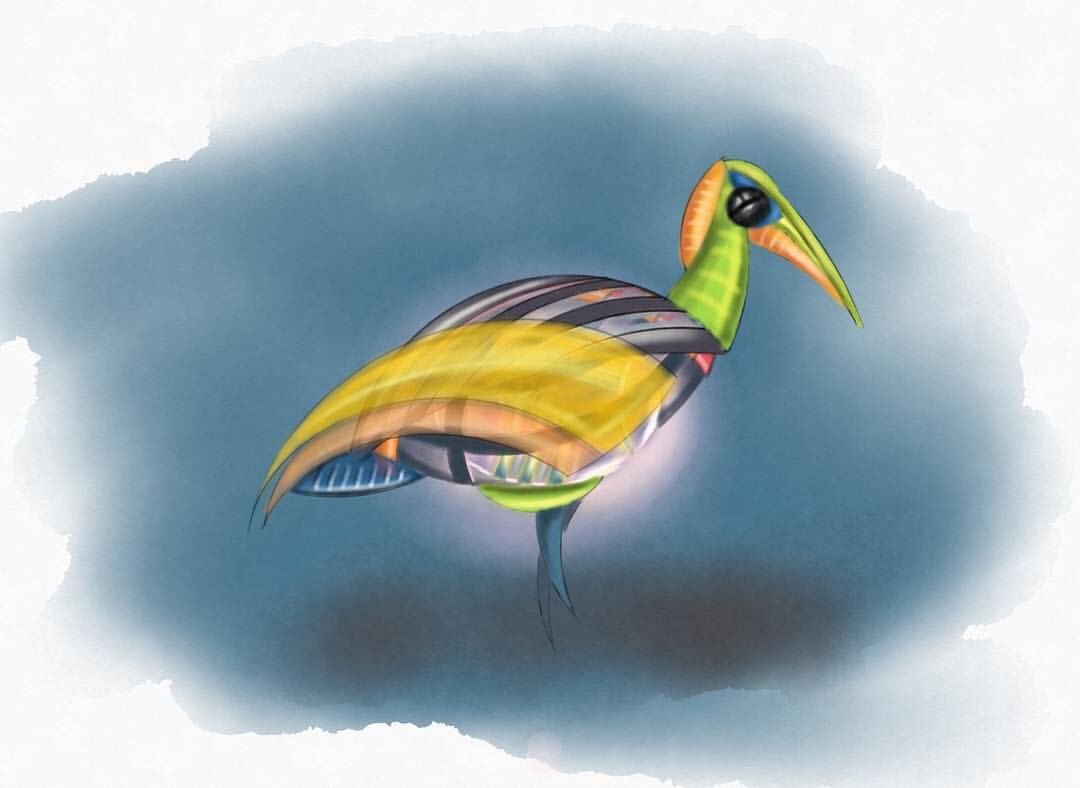
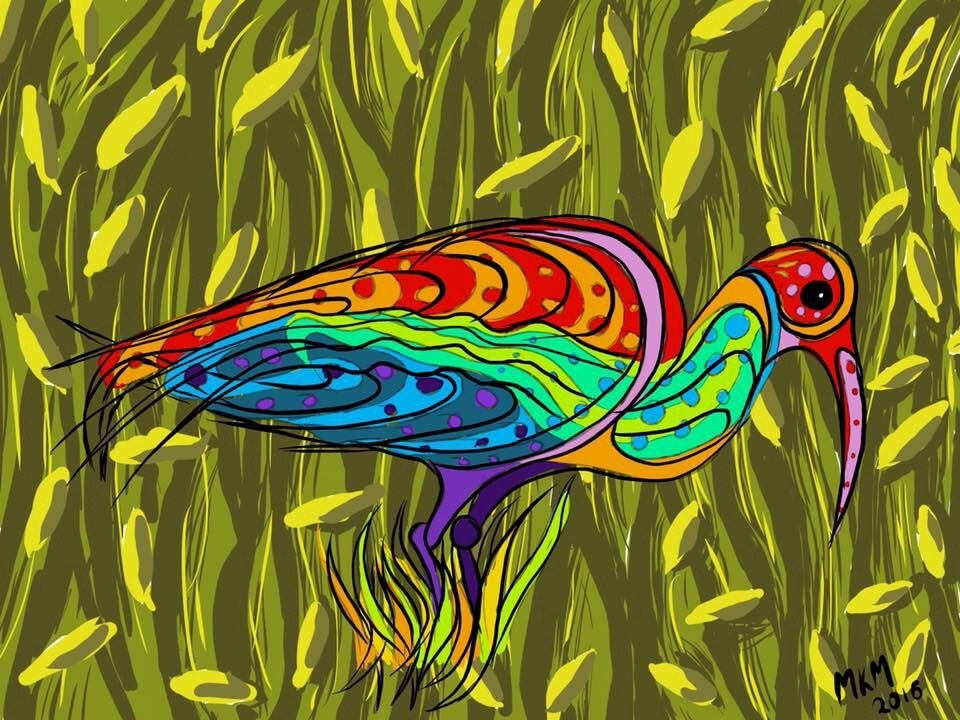
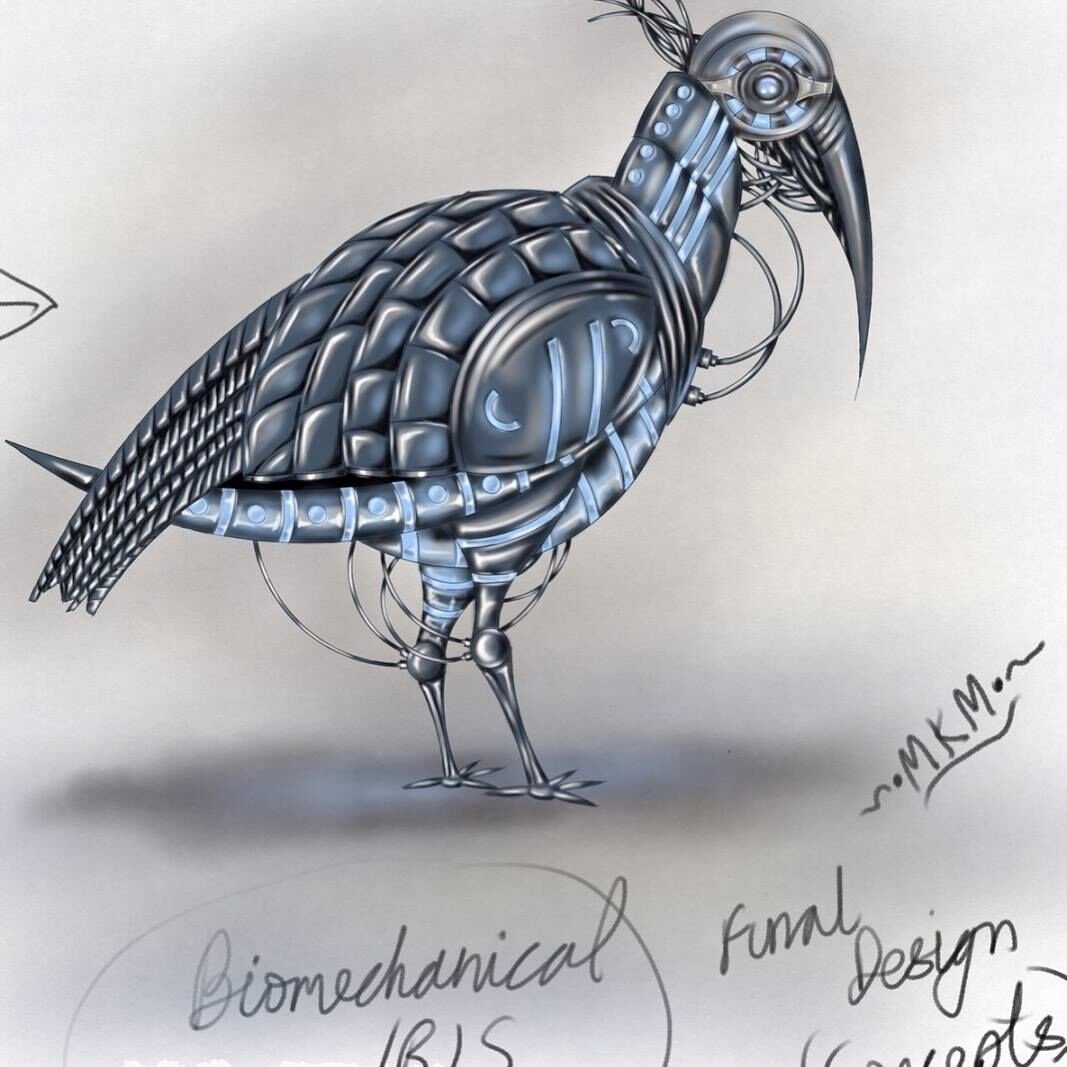
Stage 4. Final ideation completed in Concepts and exported as a JPG for further development.
Stage 5. In 3ds Max (running on Windows on my 5k iMac through Parallels), I created a reference plane and placed the JPG exported from Concepts. I used this as my reference to start modeling the ibis. This is a time consuming process. I mostly used editable polys.
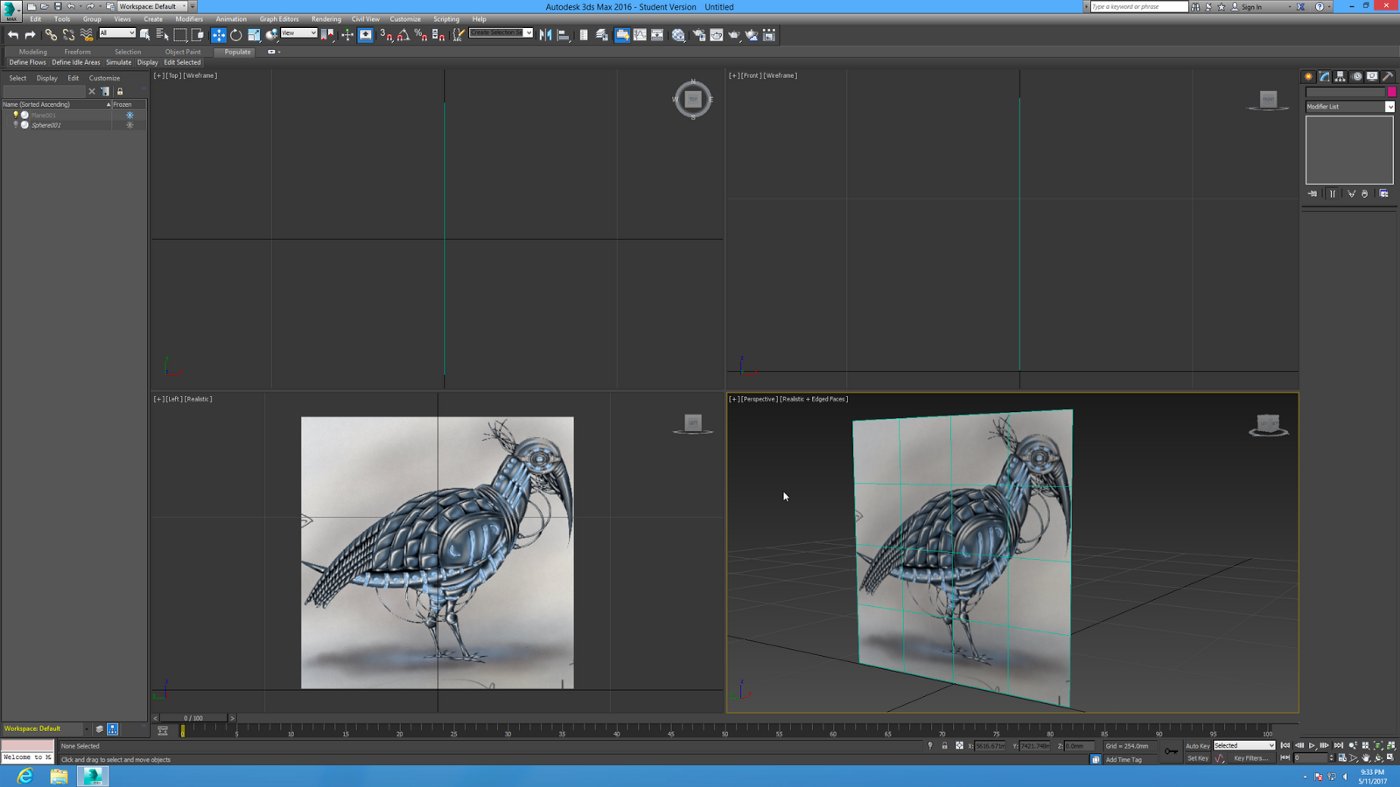
The Concepts image mapped to a plane as a reference for modeling.
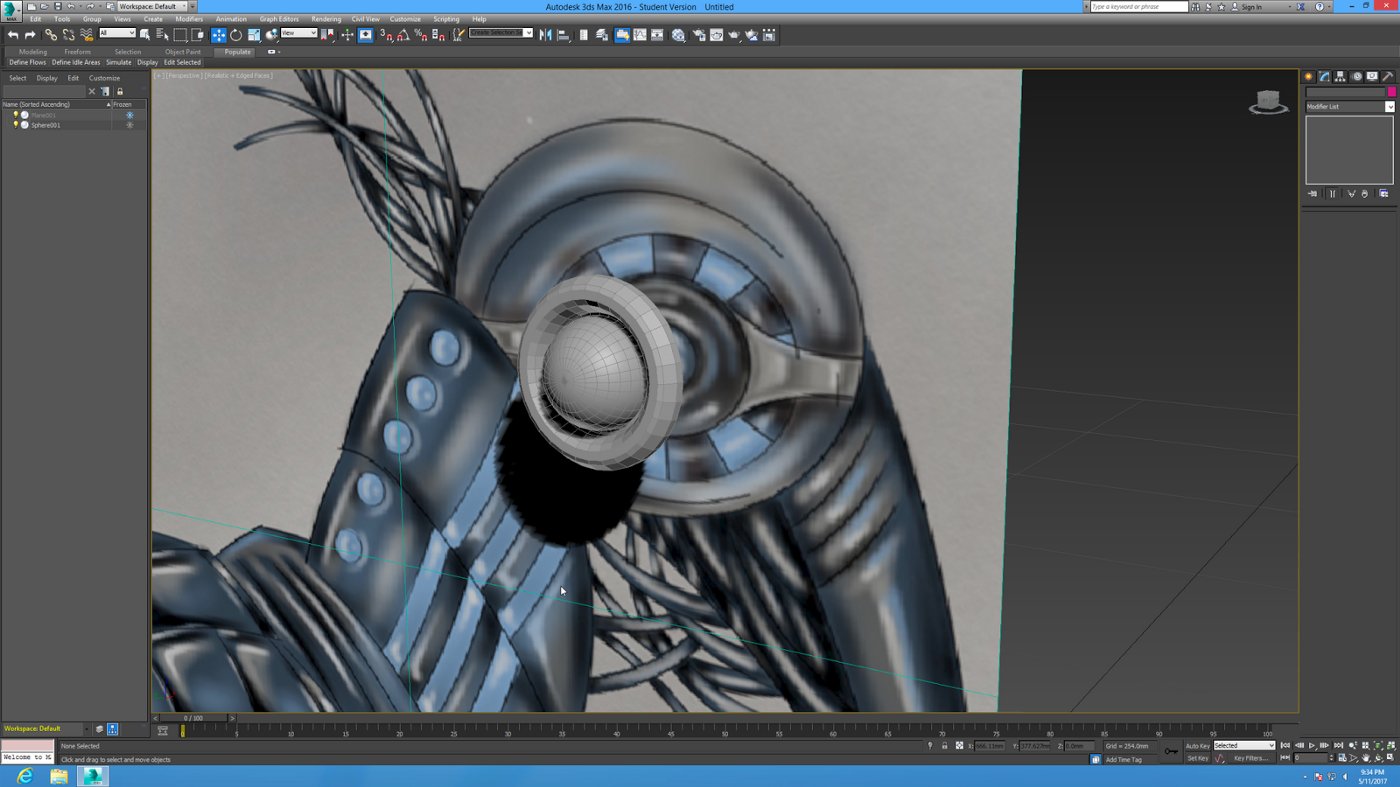
I began modeling the eye. Here I used a sphere, converted it to an editable poly and then extended and shaped.
As I continued to model the mesh, I named different surface elements and assigned basic materials to them.
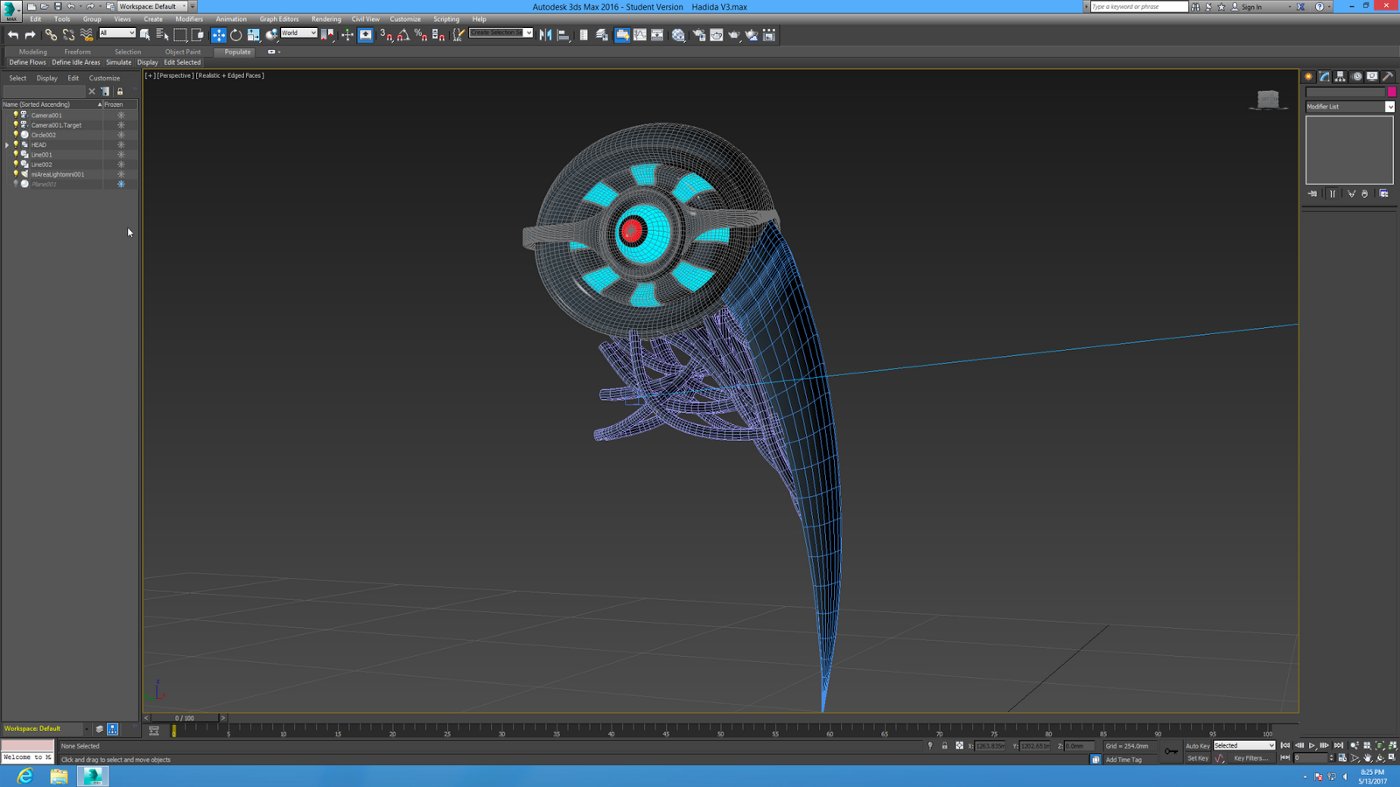
At this point, I could hide the reference image from view and see what the 3D mesh looked like.
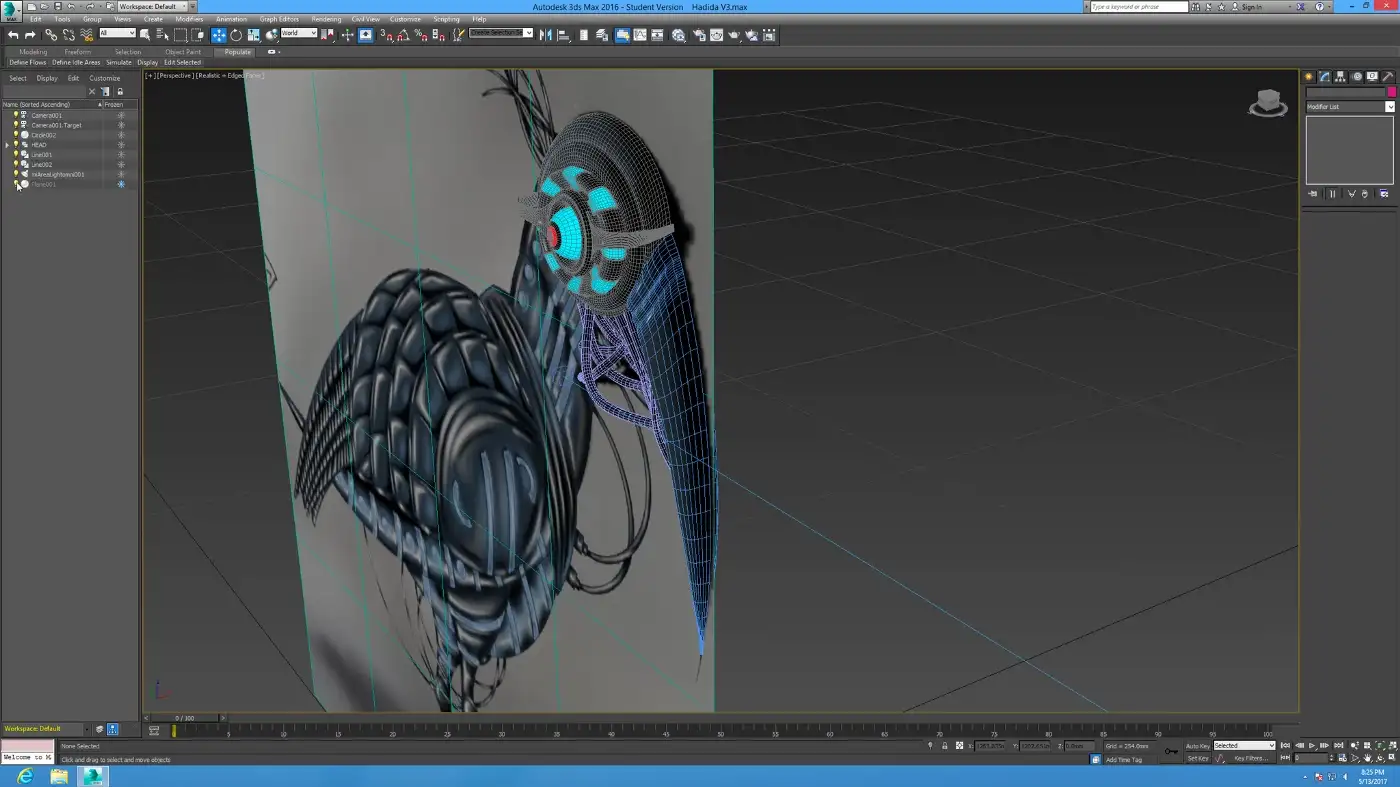
Here you can see that the 3D mesh sits on top of the reference image plane, mirrored on either side.
The basic modeling of the neck upwards is complete, now the elements making up the body are taking shape.
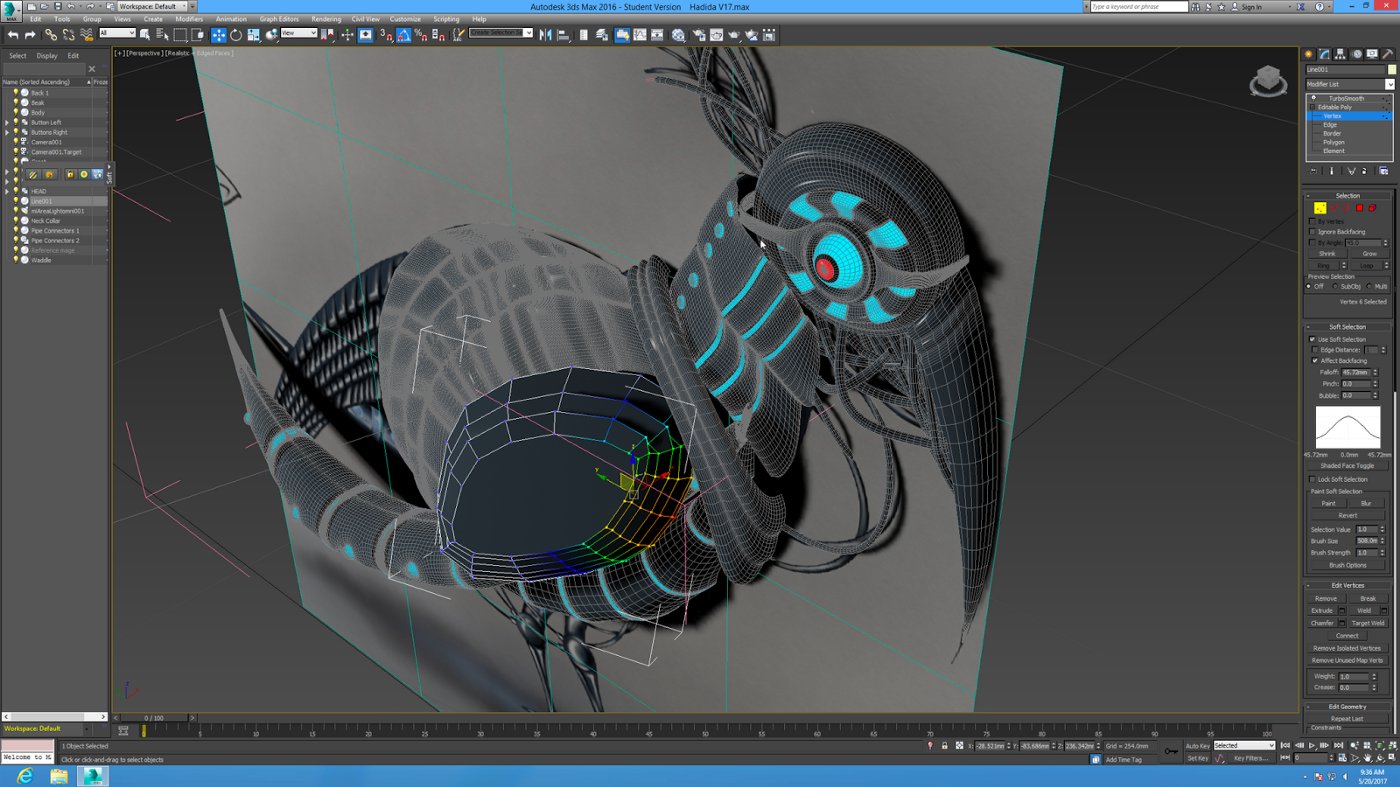
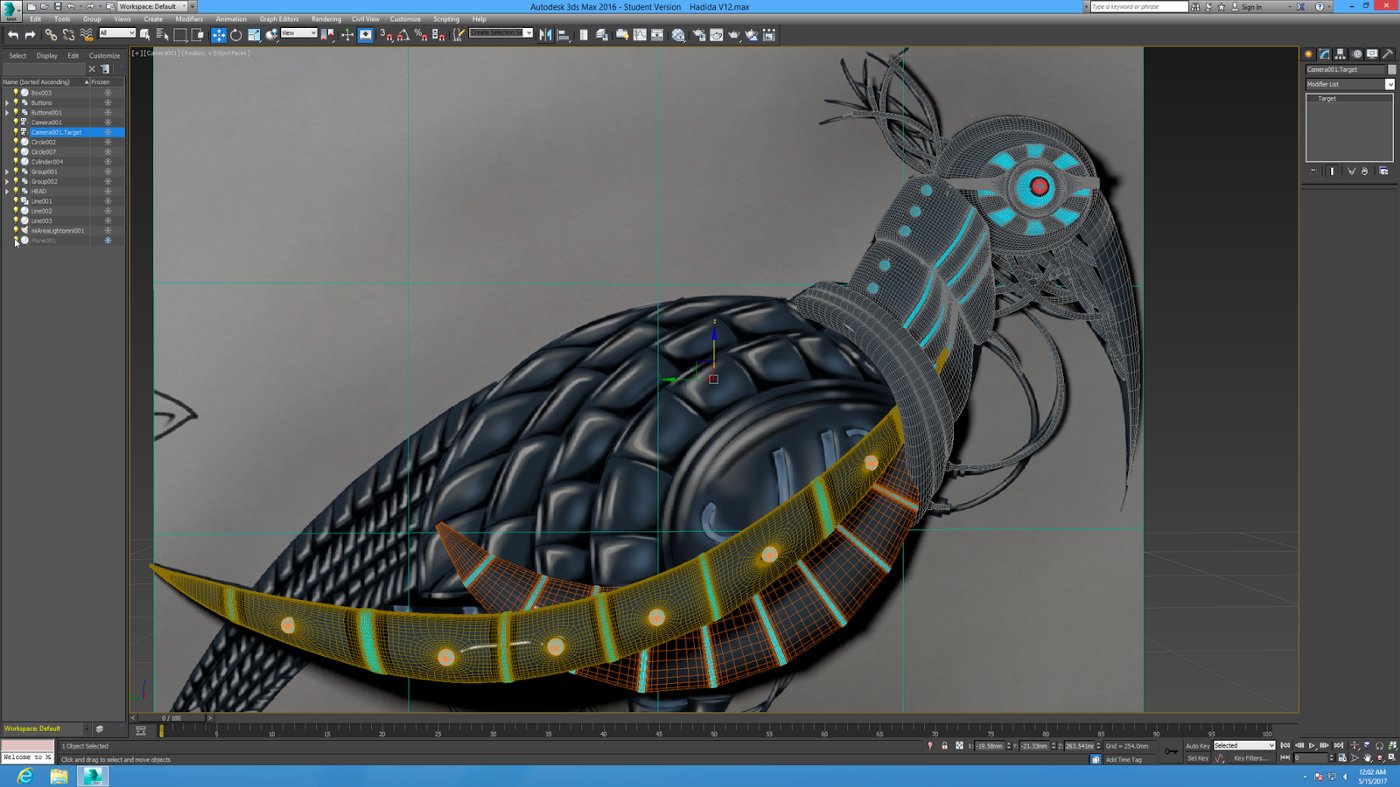
This one shows one of the 3D plates being modeled before the TurboSmooth modifier is applied to make it smooth and organic. The red, green and blue area is a Soft Selection of vertices while shaping.
Stage 6. Once each part of the ibis was modeled, I created a UV Map for it and output this as a high resolution JPG. Think of UV Mapping as creating a “pelt” for each 3D mesh — kind of unwrapping the skin and flattening it out to paint on.
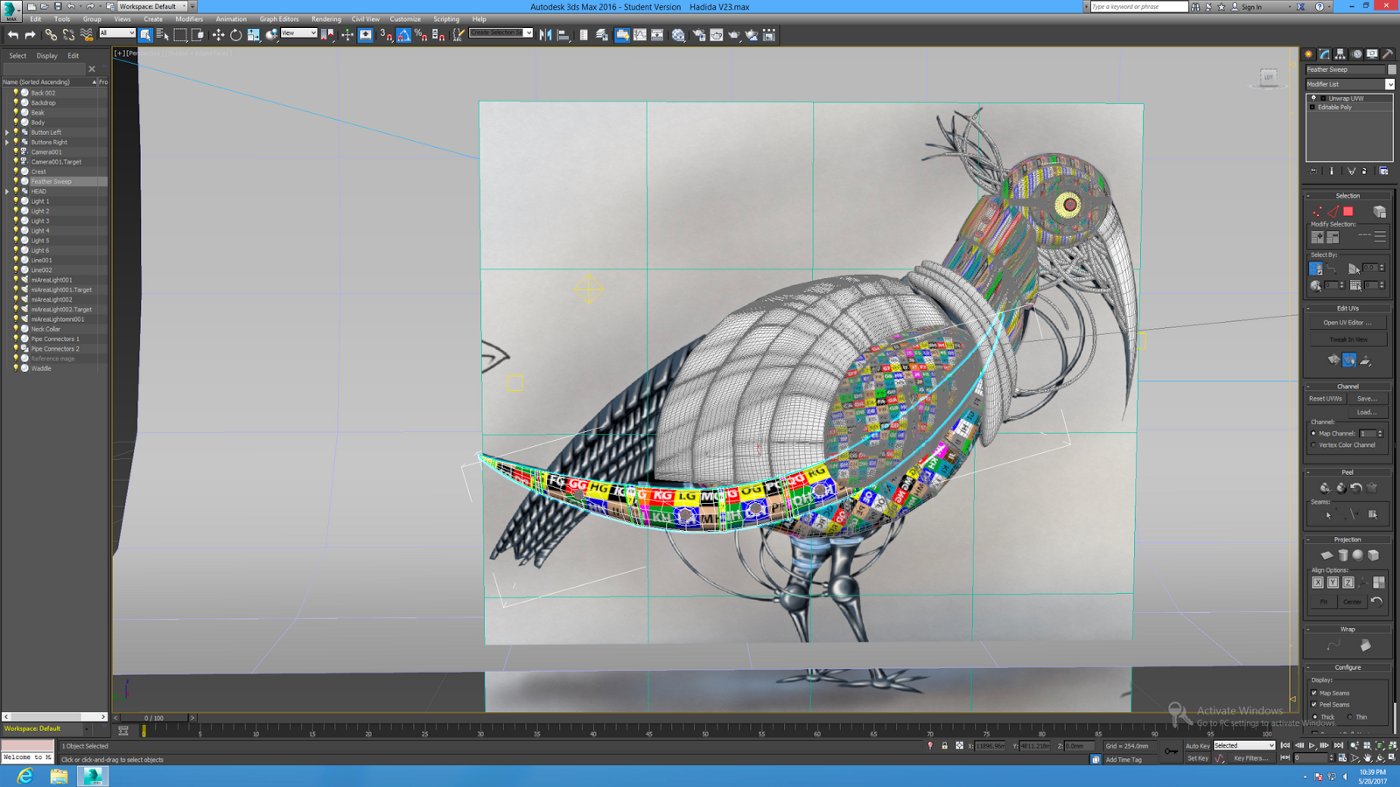
This is the beginning of the UV Mapping. Each separate 3D element is unwrapped along a seam and flattened out, then an image containing a checkered pattern of colours and numbers is applied. When this is viewed back on the 3D mesh, any numbers of parts of the checkered pattern that appear stretched or distorted will indicate a poor UV Map.
UV Mapping continues. This of this as printing your texture on a latex film and then stretching it over your 3D object as a skin. Any place you have to actually stretch the latex instead of just placing it will result in a distorted image. So you want your unwrapped UV Map mesh to be as accurate as possible. Imagine trying to gift wrap a bicycle. You would have to cut pieces of wrapping paper and arrange them over the different parts carefully, but also try and make sure that the pattern matched up to avoid seams — quite a difficult task.
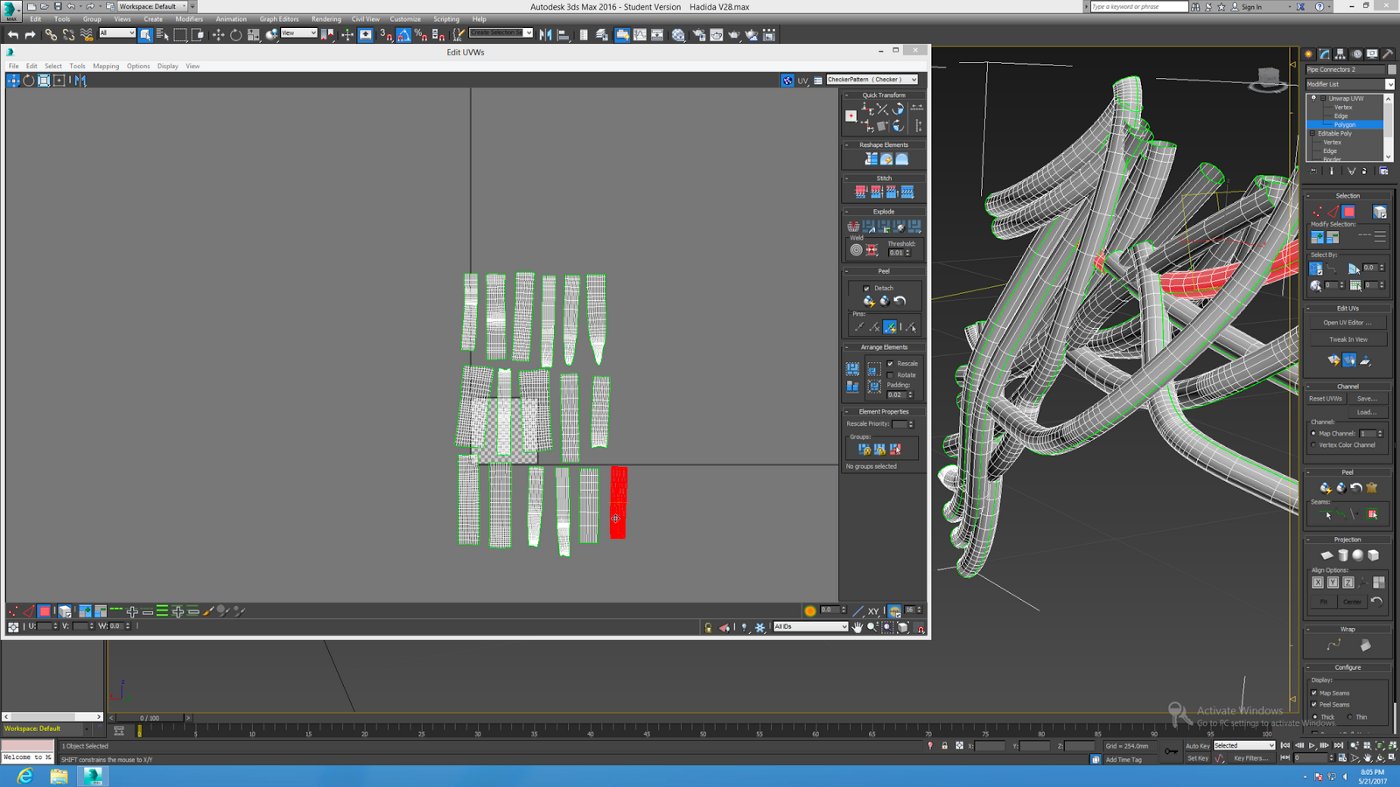
This is the actual UV Unwrap editor. Each one of those flat meshes represents one of the 3D tubes you see on the right, but unwrapped. You have to make sure the seam where the unwrapped map joins faces away from the camera.
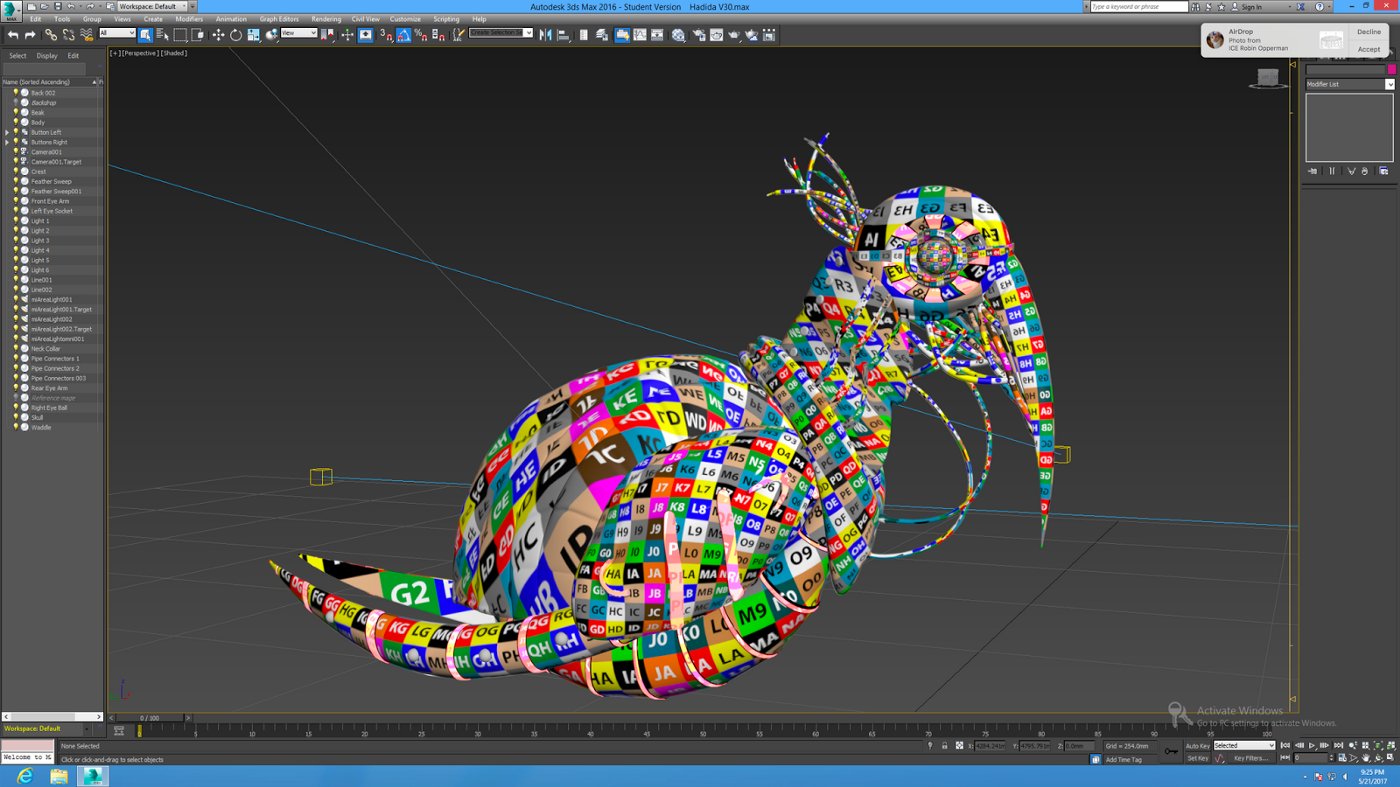
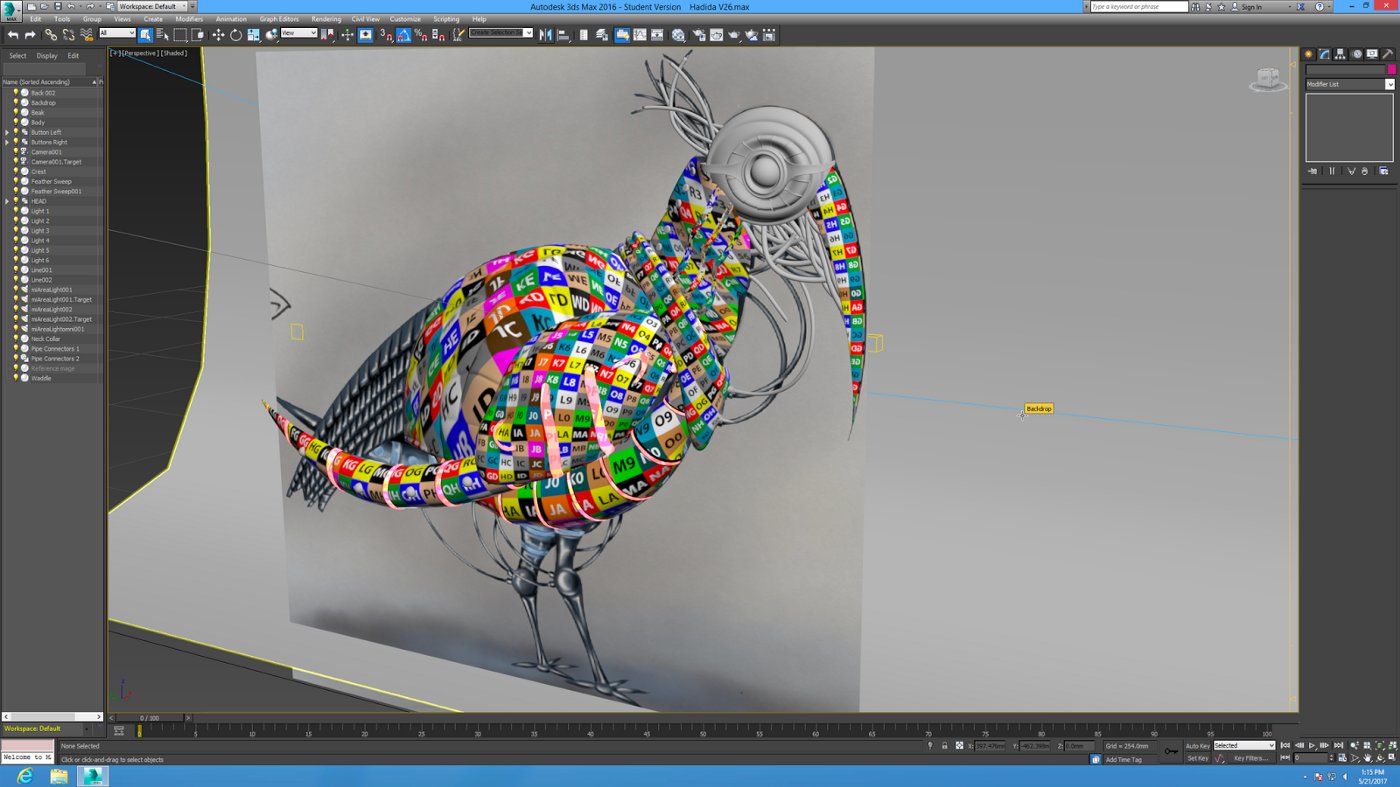
The entire bird is now UV Mapped and there does not appear to be any extreme distortion of the checkers / numbered image map. So I am now good to go with generating UV Map images to paint in. Each and every element will have its own JPG UV image that needs painting.
Stage 7. I then Airdropped these JPGs to my iPad and used Procreate to paint the textures. After experimenting with my original high-tech glossy biomechanical texture idea, I played around with the Procreate grunge brushes and rather liked them. So I did some research online into rusted metal, like on old motorcycles and cars, and decided that my ibis would be a badly corroded, ancient biomechanical drone.
Each piece had to have three texture images: a Color image for the Diffuse map, a Spec image for the Specularity map, and a Bump image for the bump map. Basically the Color image is mapped onto the mesh as its base color, then the Spec map determines what is shiny, and the Bump map determines what is rough or smooth.
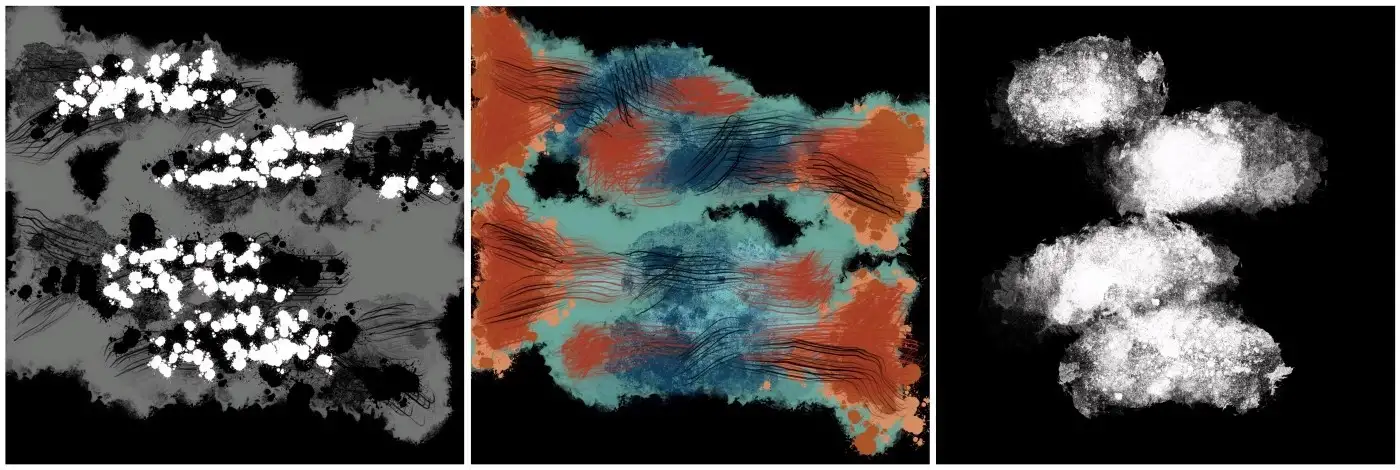
1. The bump map using Procreate’s grunge brushes. Back in Max, what is black will appear recessed and what is white will render bubbled out. So this basically creates the rough bubbled and flaked rust look. What’s grey will appear smooth. 2. Basic colour map. Lots of use of Procreate’s grunge brushes. 3. This is the spec map, so what is white here will be rendered shiny and glossy, and what is black will be dull and matte.
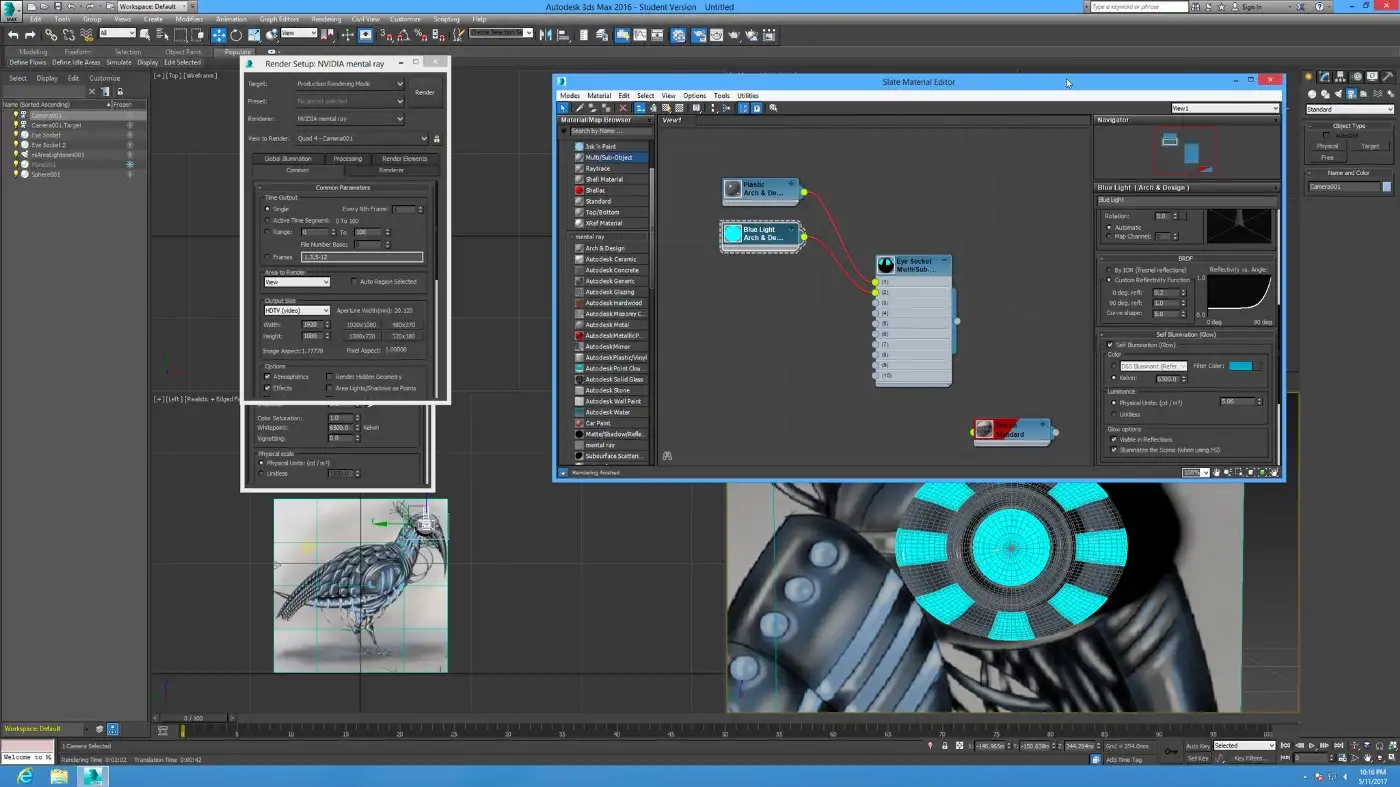
Stage 8: Once the textures were painted, Airdropped back to my iMac, and applied in 3ds Max, it was just a case of setting up suitable lighting and setting up a camera and doing some test renders.
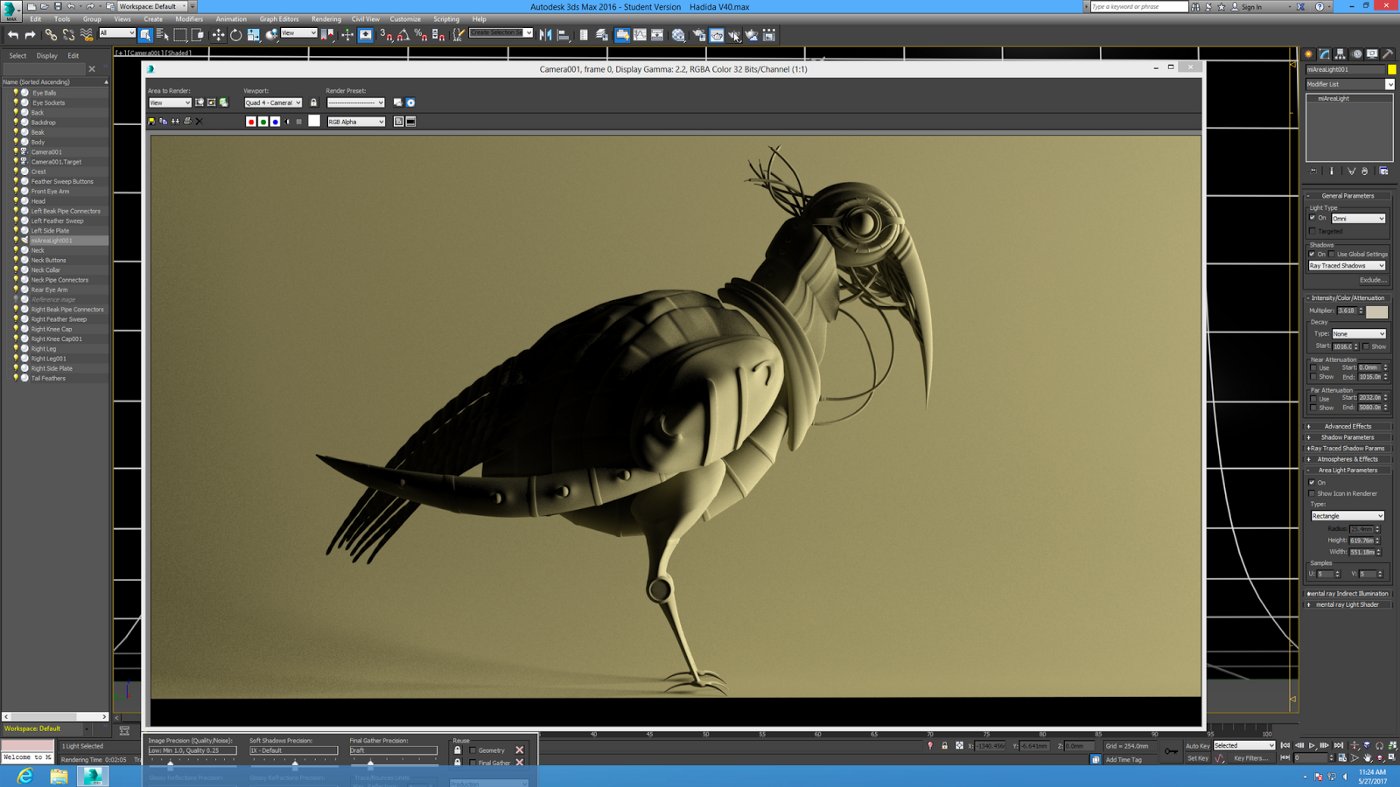
This is a test of lighting angle to try and establish shadows and highlights that best showcase the model. This is a single area light from the front with a yellow tint.
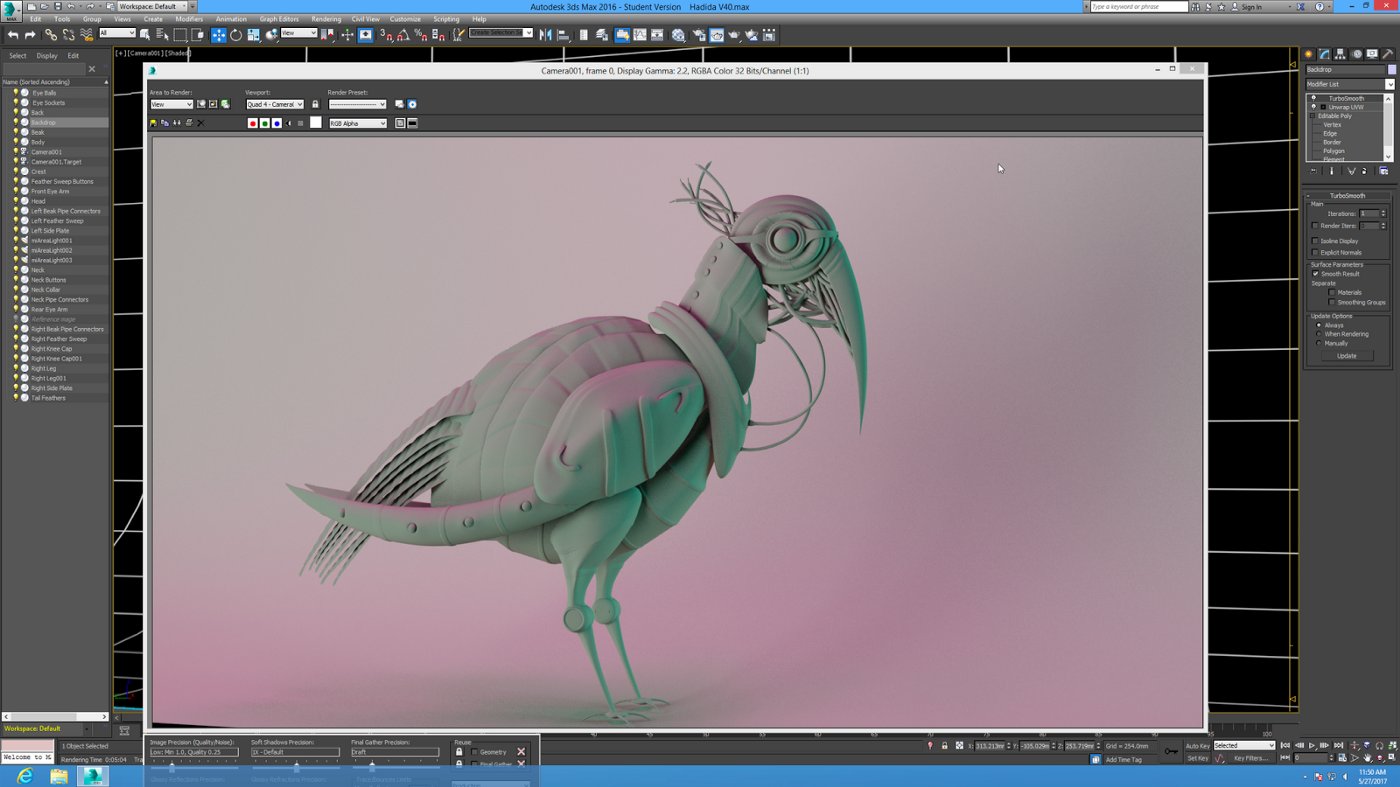
Here I am experimenting with two lights. One blue area light from the front right, and one pink area light from the from the front left. I am attempting to get good detail and shadow.
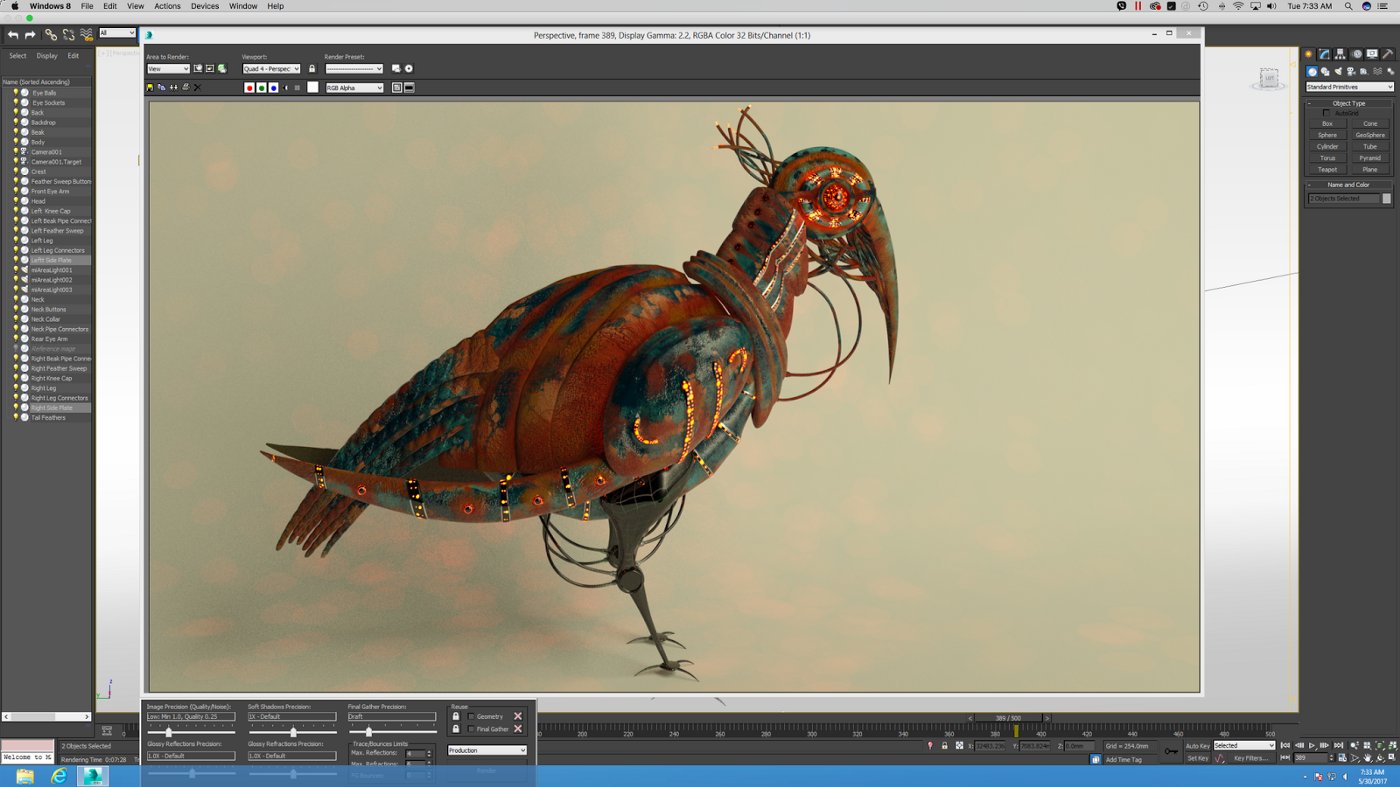
All the textures are now fully applied, the lighting is in place and the camera is set up. The only thing missing is the textures on the background set.
Stage 9. The final render was sent to Photoshop for some color correction.
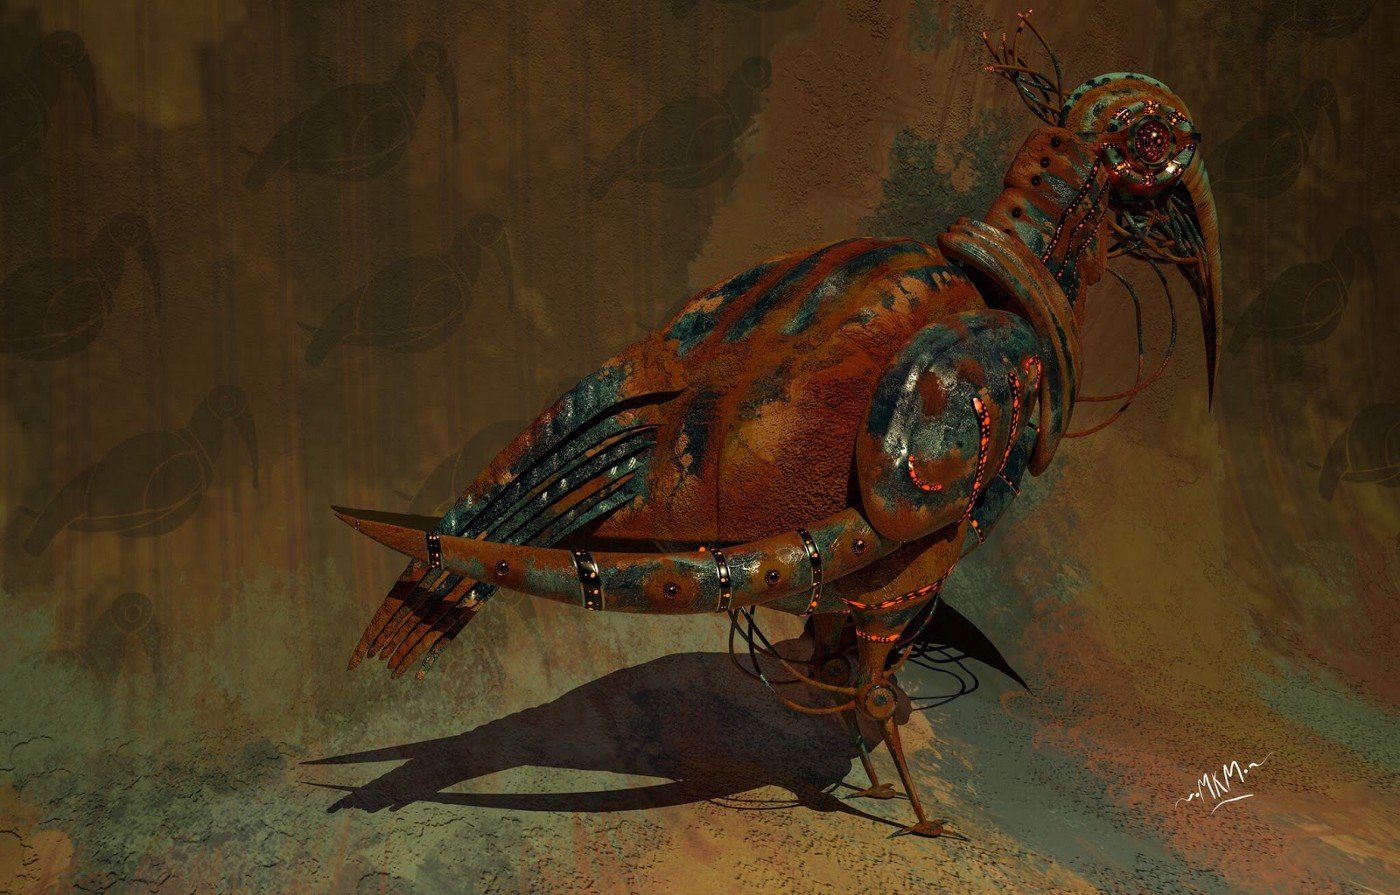
Homage to Hadidia by MKM.
To a seasoned professional, the above process may seem a little long-winded and tedious. But this job had no deadline, it was just me exploring new workflows — no client breathing down my neck. These days I try and do as much as possible on my iPad, just simply because it feels closer to sitting with a sketchpad than sitting at a computer or laptop does.
Kind regards,
Mike McFadyean
Check out my portfolio. I also have a YouTube channel where I try and put up regular training videos — Tips and Tricks by Michael McFadyean.
Interview by Erica Christensen
Recommended
Modeling Concept Designs on the iPad Pro in Shapr3D and Concepts (Part 1) - In Part 1 of our Shapr3D and Concepts Skillbuilder series, Chris Glenn shares how to build a 3D model in Shapr3D.
Tips for Exporting Your Designs - Flexibly format your drawings for export in Concepts.
Jewelry Design with the iPad Pro - Jeweler Kate Case shares how she transforms concept sketches on her iPad Pro into intricate silver masterpieces.