Concepts is an infinite, flexible creative tool for all your good ideas. Available on iOS, Windows and Android.
Modeling Concept Designs on the iPad Pro in Shapr3D and Concepts - Part 2
In Part 2 of our Shapr3D and Concepts skillbuilder series, Lasse Pekkala shares how to render a 3D model in Concepts.
Welcome to our skillbuilder series on 3D modeling and design rendering with Shapr3D and Concepts.
Shapr3D is a 3D modeling CAD app created just for the iPad and Apple Pencil. It pairs excellently with design apps like Concepts to create accurate models, design studies and illustrations for product designs, architectural concepts and imaginative concept art.
This is Part 2 of the skillbuilder. In Part 1, we invited Concept Designer Chris Glenn to demonstrate how he used Shapr3D to build a mini tank. Here in Part 2, we’ve handed Chris’ design to Industrial Designer Lasse Pekkala to create an artistic rendering based on the model in Concepts.
"In digital painting, knowing how to draw well is a good start. People say you should approach painting as sculpting with color values, and I think that’s good advice. In this project I had most of the work already done as I simply had to trace over Chris’ amazingly detailed 3D design."
Hi Lasse, thanks for sharing about design rendering in Concepts. Can you please tell us about yourself? What is your background and what do you do?
Lasse Pekkala - Growing up, I was always drawn to visual arts and crafting. Painting, sculpting, building stuff, you name it. But I never imagined there would be a way to pursue my passion for all of these things professionally until my early twenties. That’s when I decided to apply for Industrial Design studies at the Lahti Institute of Design. Best decision of my life. During my studies, I got to work with distinguished Finnish consumer goods companies such as Stala and Fiskars. I’ve been working for TopHatch as a designer since I graduated in 2016.
As a designer for TopHatch, you use Concepts all the time for your work. What do you like about the app for creating designs and renderings? Why and when might you choose to use Concepts over a more traditional painting app?
Having worked with 3D models and model building, I prefer vector programs over bitmap-based ones for their versatility. There are multiple benefits for drawing and rendering, as well — the adjustable nature of vector graphics really helps in plowing through ideas and iterations quickly.
There’s no such thing as “no turning back” when you draw with vectors. From the anxiety of setting an artboard to accidentally drawing on the wrong layer, vectors free you from worrying about mistakes because you can adjust them at any time. You can make decisions as you go and pick things apart. When you enter that flow state, you’re free to focus on the problems you’re solving.
For someone who is used to rendering with more conventional drawing apps, working in vectors might introduce some challenges, like not having clipping masks or blending modes. The Concepts team sees questions like these as a challenge to re-think how vector-based apps can work. We’re working hard to push the limits of what’s possible.
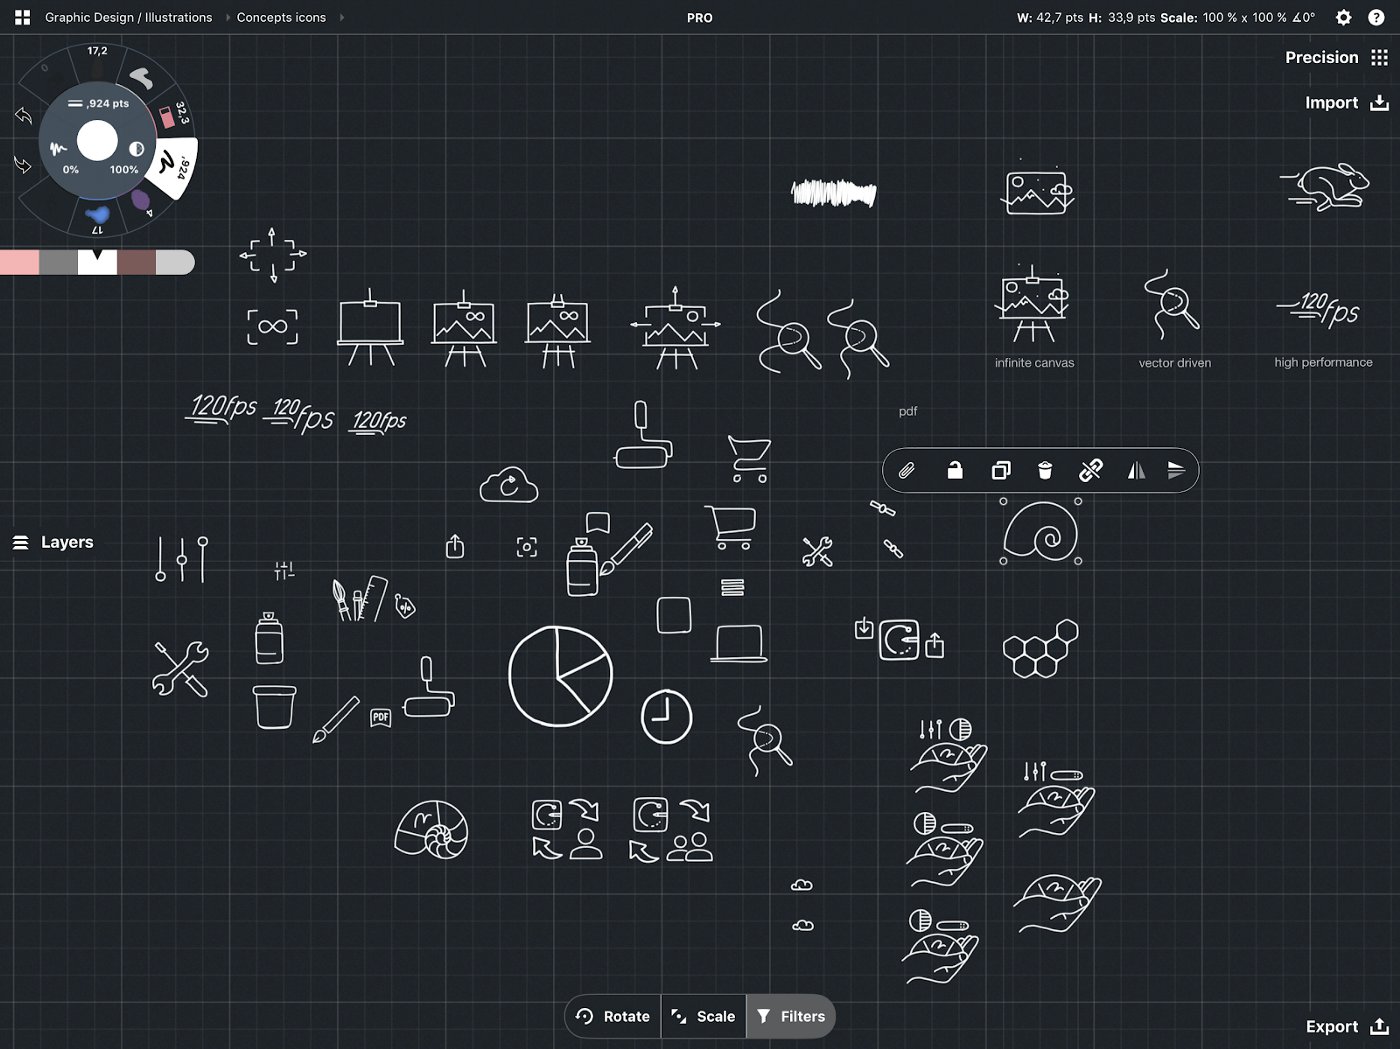
Just recently I was working on some hand-drawn icons and particularly enjoyed this iterative workflow. Having things like live smoothing, selection and nudge literally at your fingertips makes Concepts stand out as a creative tool.
In Part 1 of this series, Chris Glenn described how he built a mini-tank in Shapr3D. Can you share how to take a Shapr3D file like Chris’s and turn the model into a concept design with Concepts?

In digital painting, knowing how to draw well is a good start. People say you should approach painting as sculpting with color values, and I think that’s good advice. In this project I had most of the work already done as I simply had to trace over Chris’ amazingly detailed 3D design.
The first step was to figure out a pose for the model to work as a basis for the piece. I opened the file in Shapr3D and looked at it from different angles until I found something I liked, and took a screenshot of it.
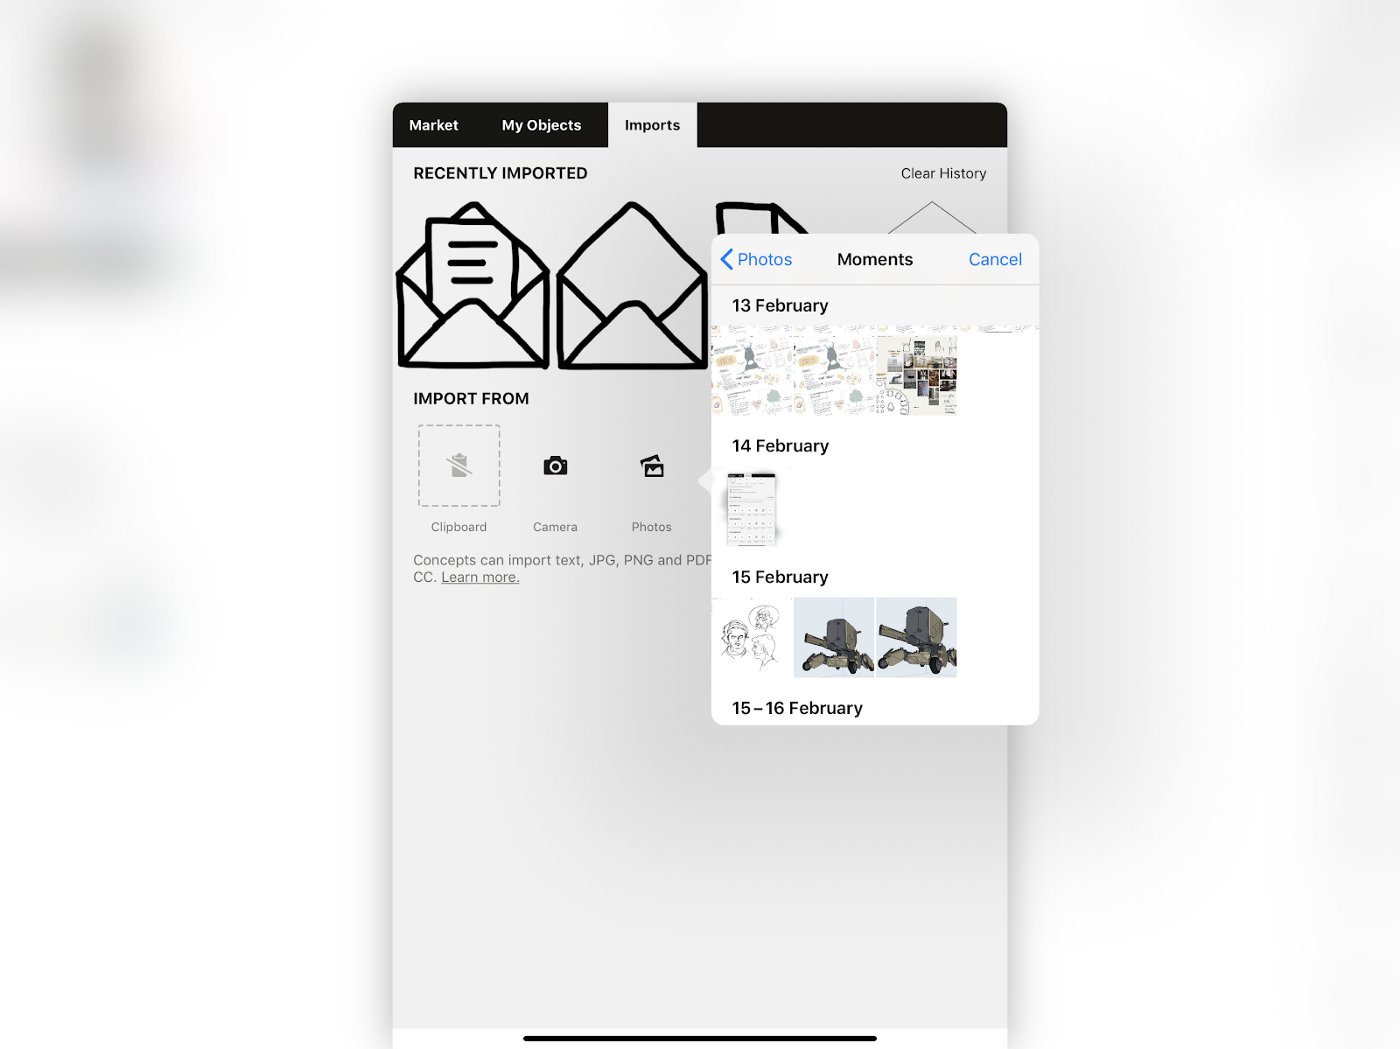
I usually end up taking more than one screenshot to choose from. It’s easier to decide which angle works best once you see them side by side in the photos app. In this case, I settled on two, and imported one into Concepts.
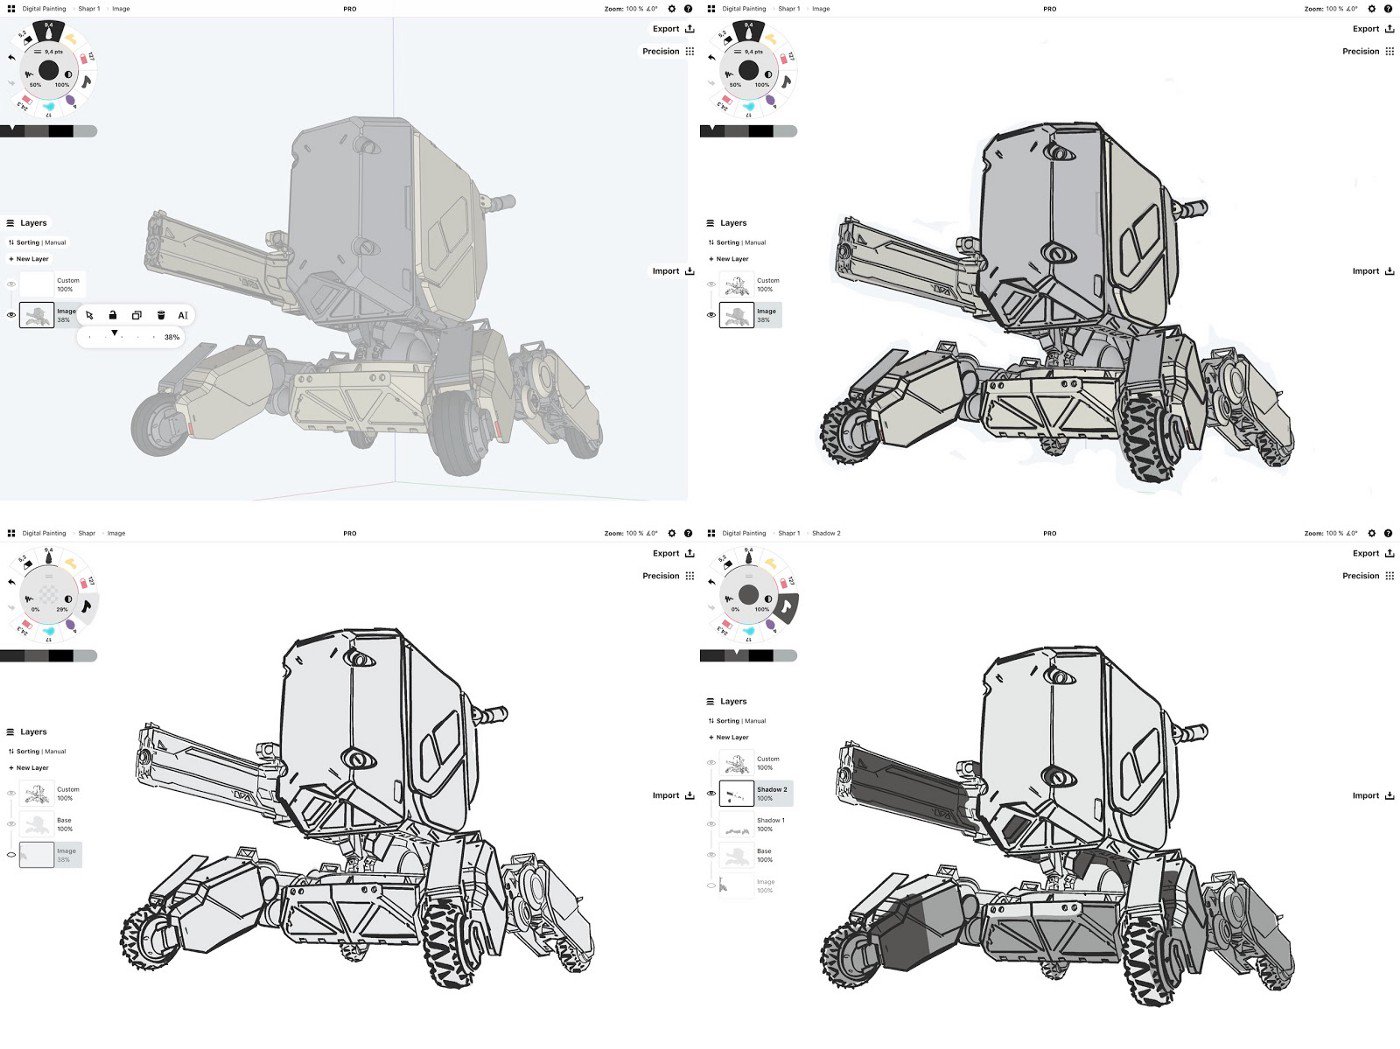
I lowered the opacity of the image layer and simply started tracing over it with the firm brush pen. At this point, I didn’t really have a plan on how I would approach the rendering part so I just went for it quick and dirty. A lot of my ideas come when I’m actually working and interacting with a piece. I also drew a base layer using the fill tool, and started figuring out the direction of lighting by adding some basic shadowing.
At this point, I looked up some mech paintings and sketches on Pinterest and imported a collection of references to the canvas.
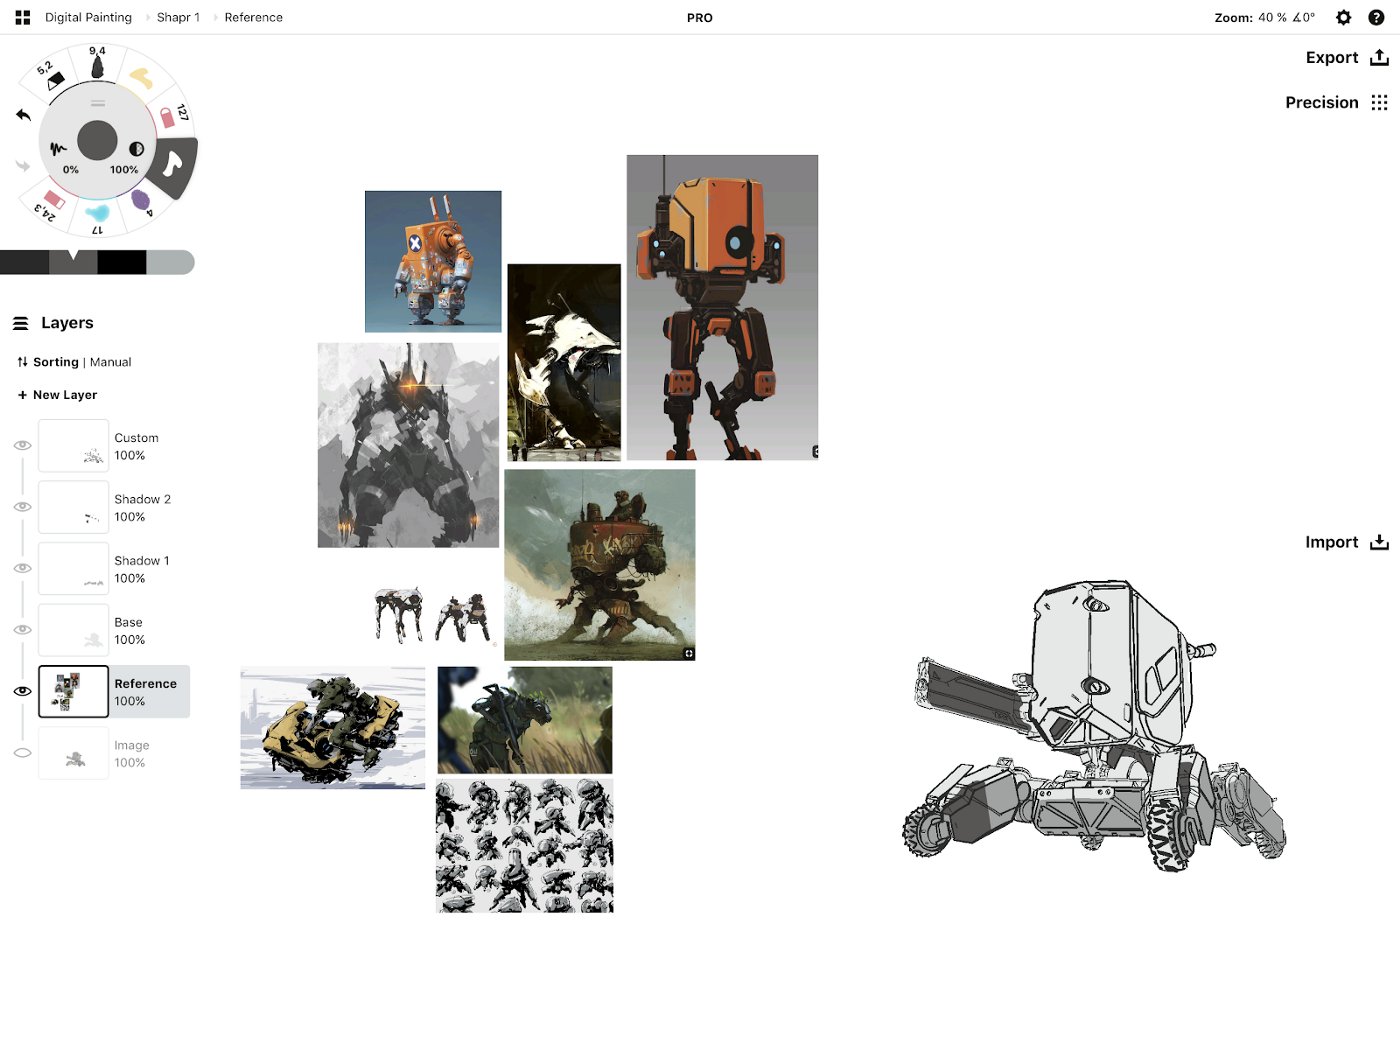
Some sweet mech art done by some talented artists. These images are copyright to their respective owners.
Next, I changed the background color in the workspace settings to something closer to the color scheme I’m imagining, so I could start blocking out different color areas.

I started adding some color to the background with the charcoal tool.
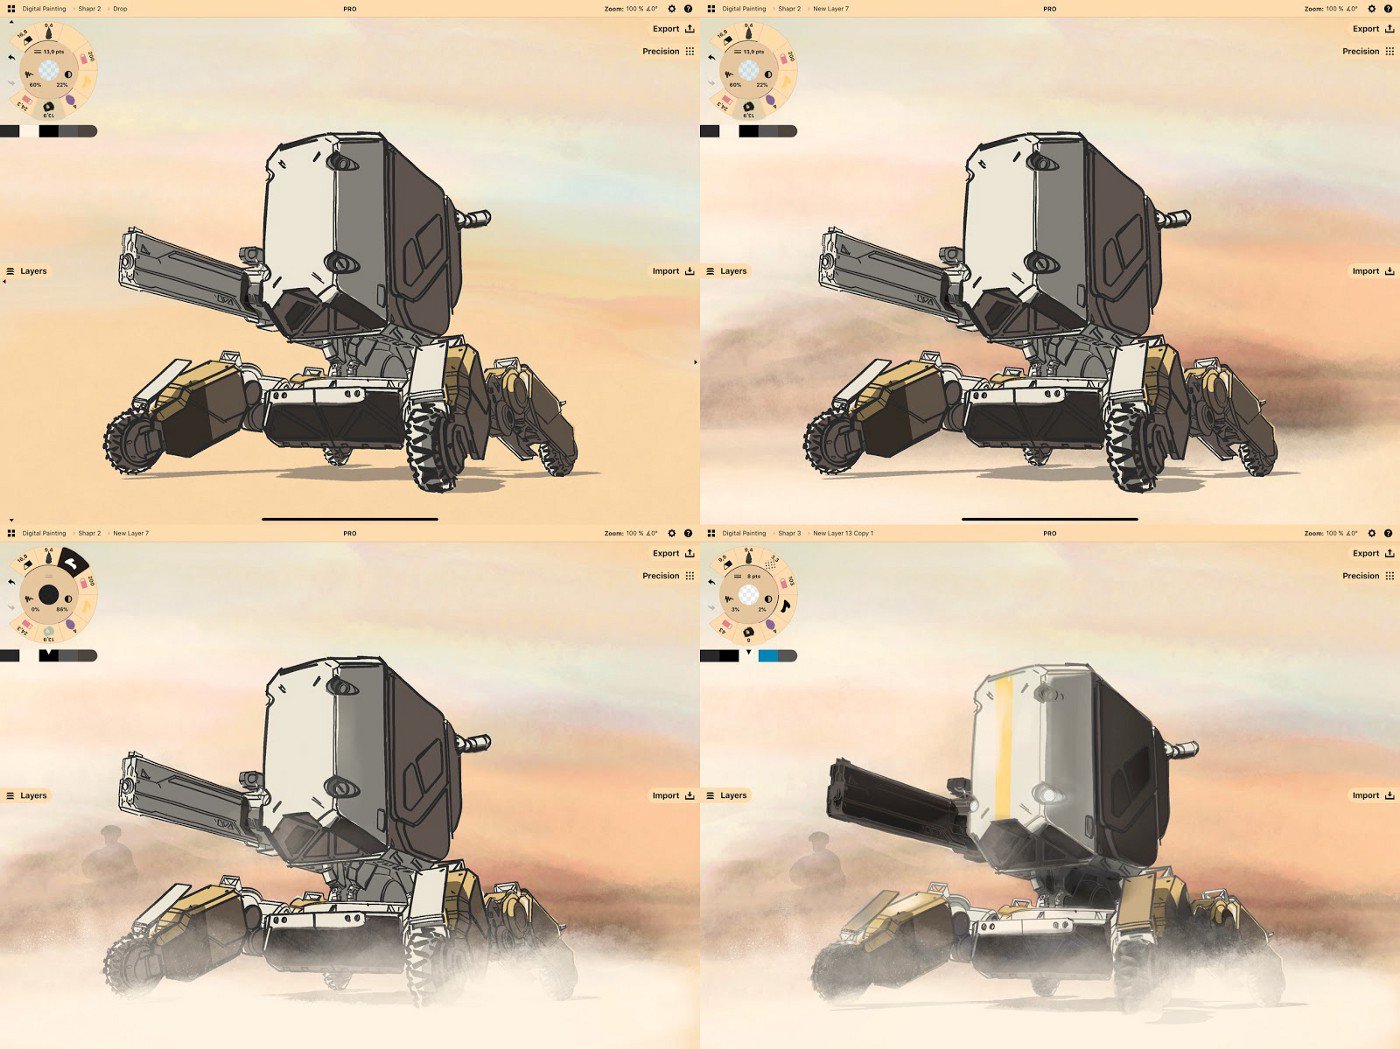
I added a drop shadow and kept working on the background a bit to add a sense of space. I decided to go for a windy desert type of environment, and to portray this, I used a low opacity charcoal and some spray paints to add dust and specks to the foreground. I also placed a human character in the background for scale. In the fourth frame, you can see how I’ve started moving away from the outlines and experimenting with details like the “eyes” of the mini tank and the paint job.
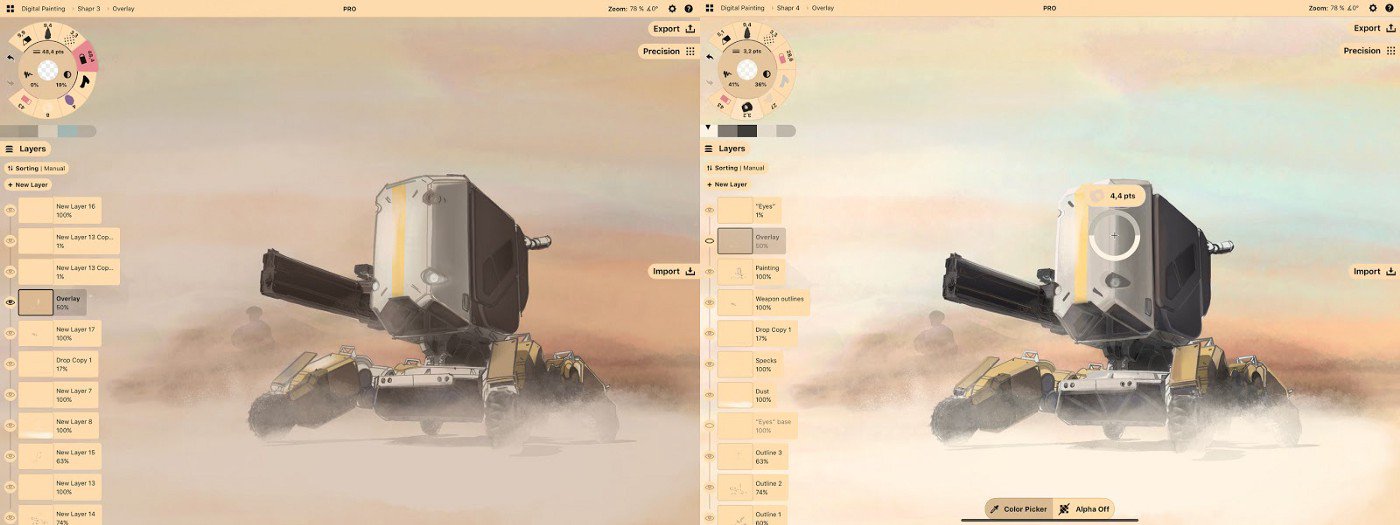
Next, I created a colored overlay which helps tie the mech together with the background. You can also erase some of it to bring light to certain areas. You can tell that my layering is all over the place at this point, something I fixed by the second image. I kept rendering the mech using the charcoal and the color picker.

One of the nice things about working in Concepts is that no matter how far you zoom, your content is always clear.
I added texture to some of the areas using the dry pastel. If you look closely, you can also see some tiny scratches added to the plate on the left.
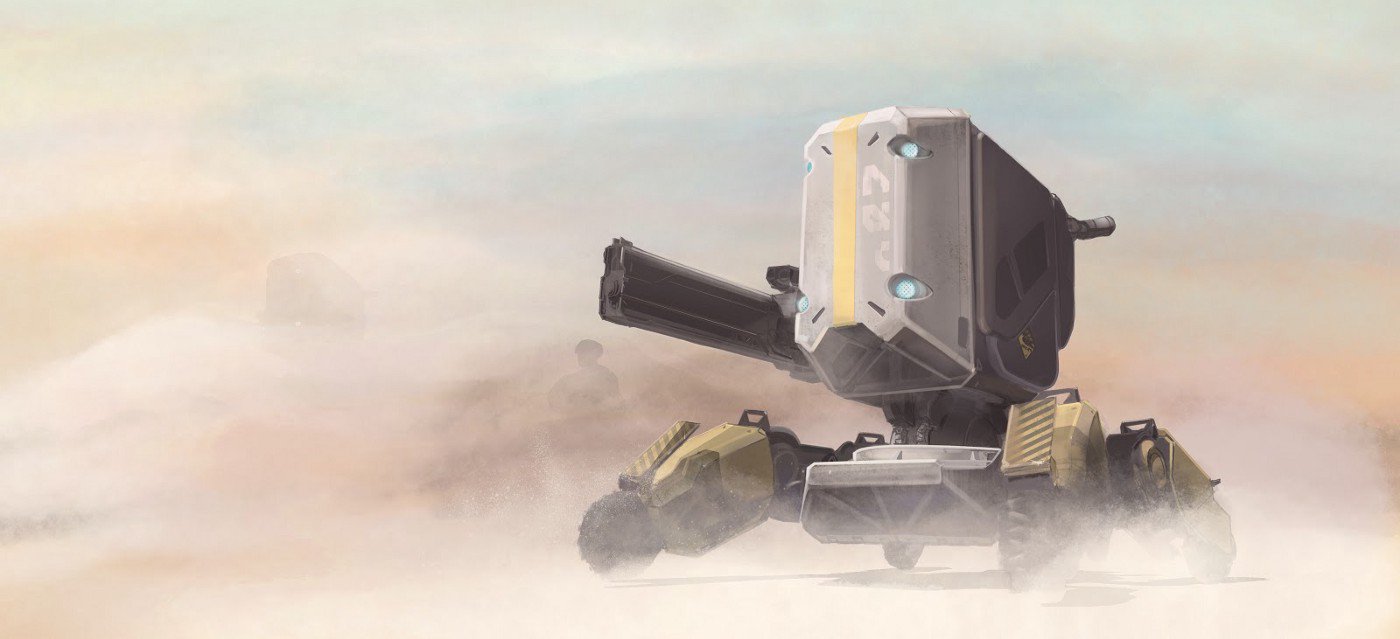
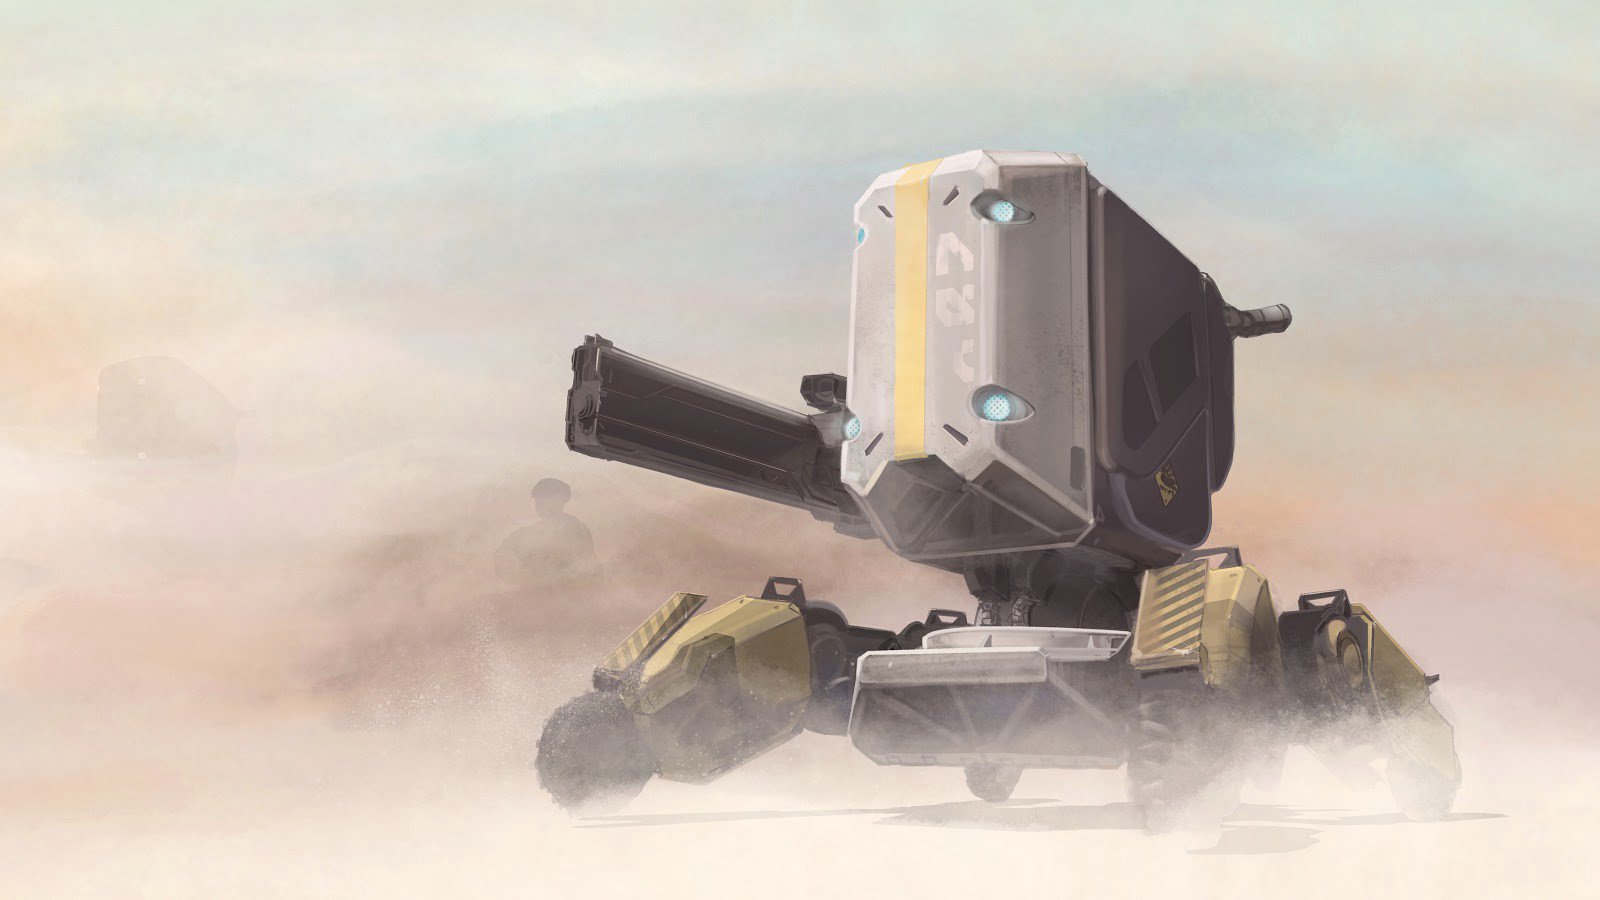
I added some final touches to make it a bit more believable, and finally exported the image.
Do you have any techniques or tips for working with Concepts that helped as you created the drawing?
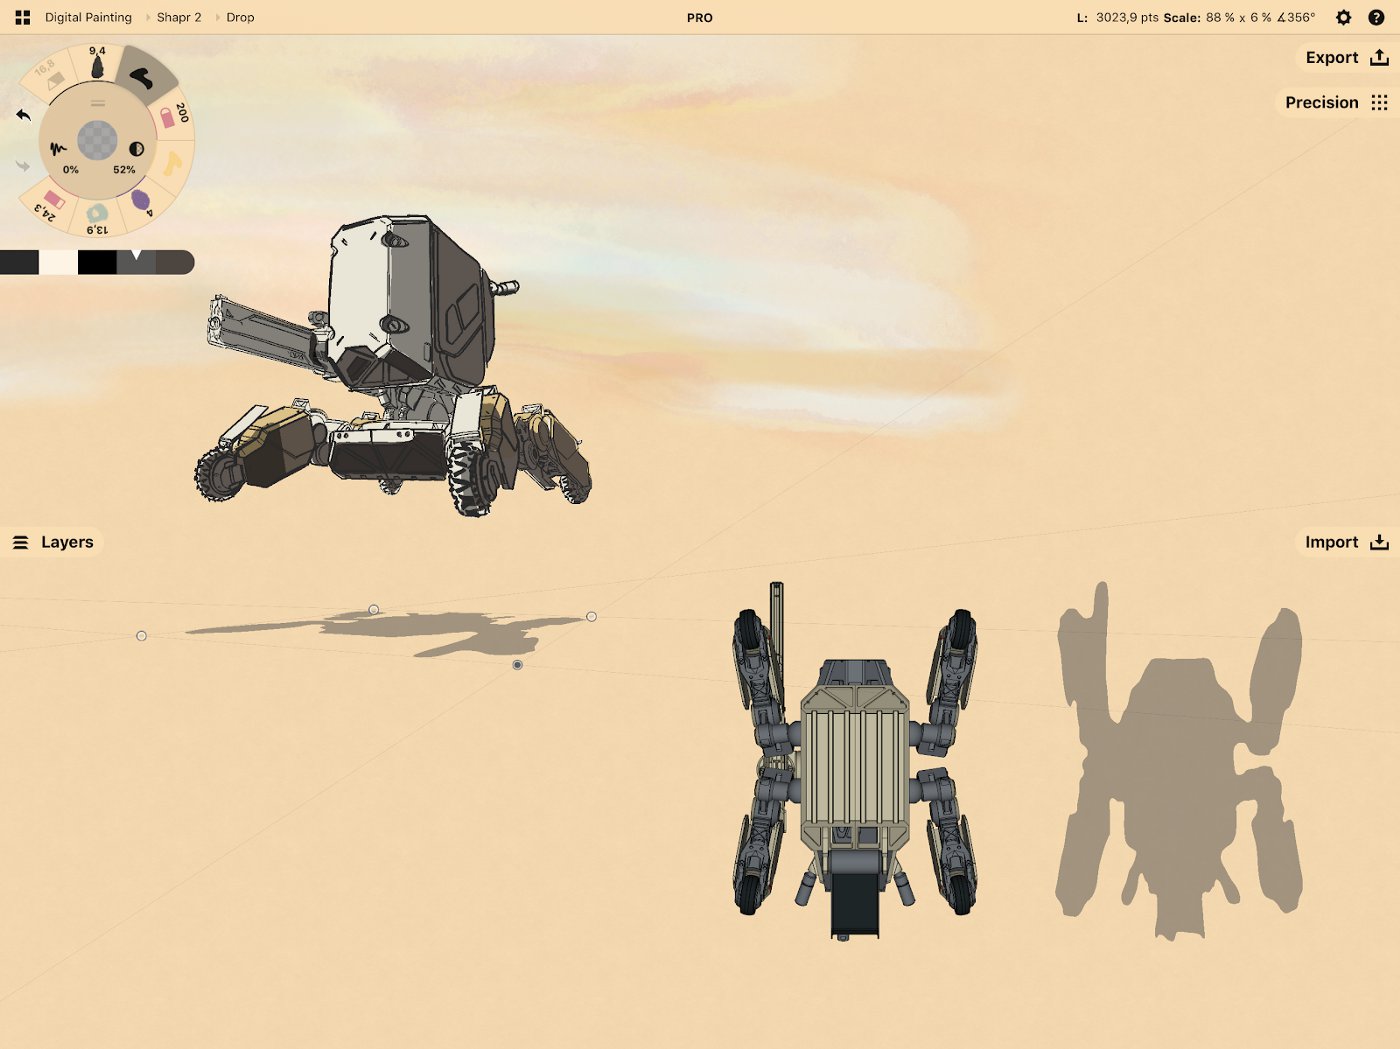
I created the drop shadow by taking another screenshot of the model from a bottom view. I traced it with the fill tool, selected it, and free transformed it to place. This is also when I realized that Shapr3D comes with a tool that allows you to export transparent PNGs as a screen capture, which is great.

Warning stripes are a common sight on big machinery. A big part of finalizing and detailing is trying to imagine a story or history for a practical device. I try to think about things like how it would be serviced and which parts would be worn. These warning stripes are meant for the mechanics not to step on.
I created a head-on transparent PNG of the stripes on a separate file, so it would be simpler to transform into perspective.
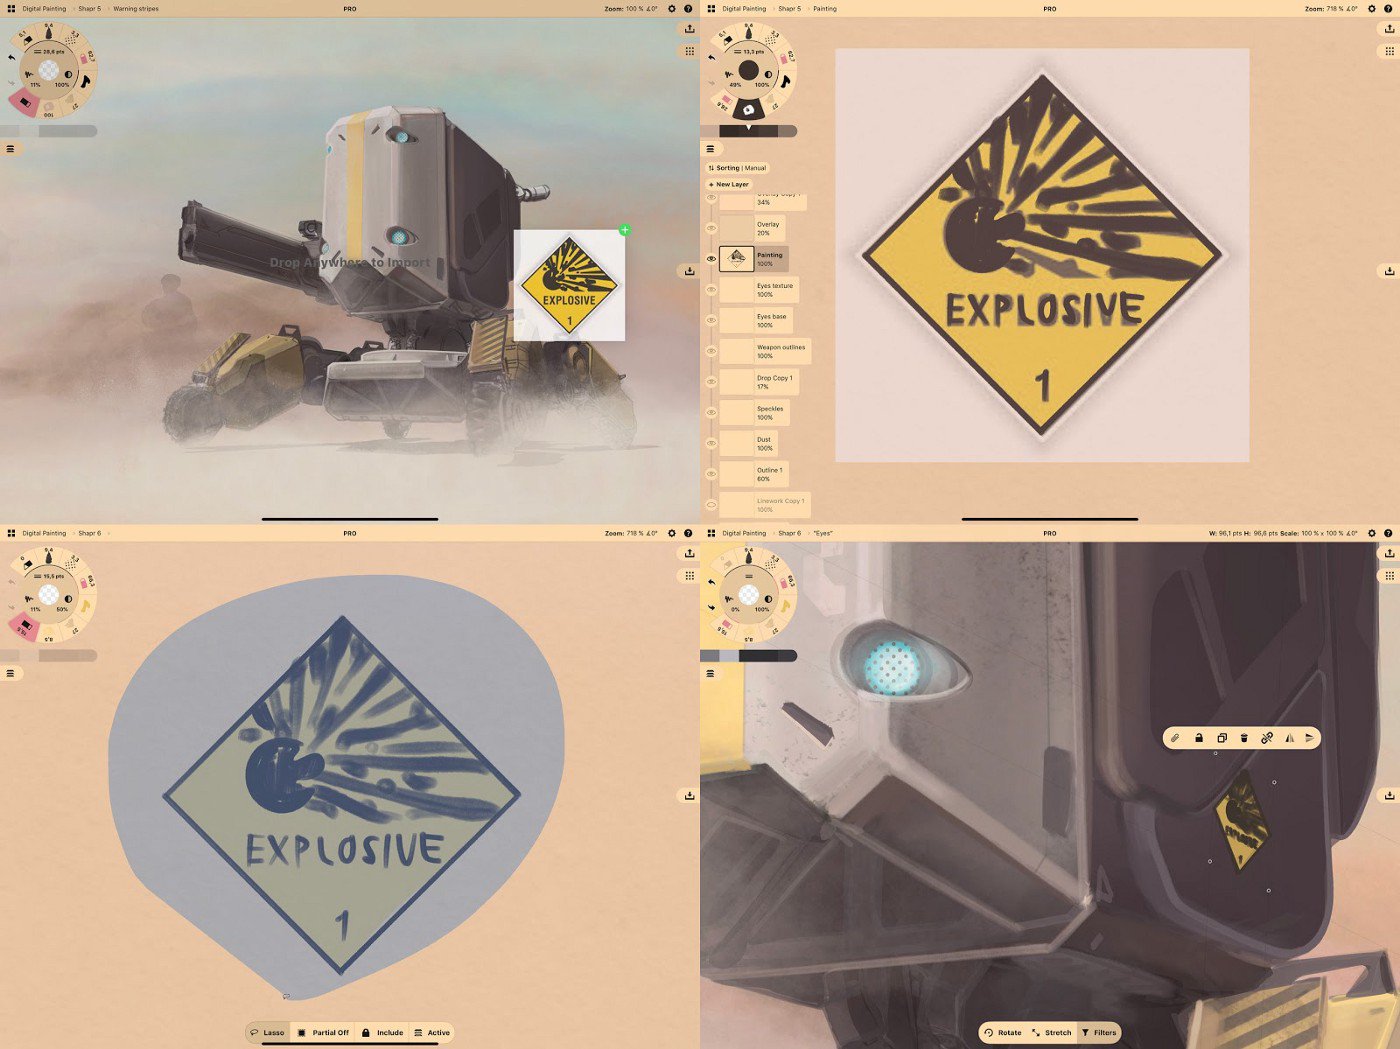
This tiny detail was roughly traced on an image. Instead of scaling it down, I ended up setting the size adjustment to Stretch because it would have stood out as too detailed otherwise.
You can see how Concepts offers you a lot of options for design rendering based on 3D models, and gives you flexibility for playing with ideas and adding details. Chris’ mini tank was an awesome model to work with, his concept really transports you to another world. Thanks for the great opportunity!

Lasse Pekkala has been working on Concepts at TopHatch since 2016, providing marketing material and visual content for companies such as Apple, Google and Microsoft. Industrial designer by education and product designer at heart, Lasse has cultivated his craft in the field of illustration, design and visual communication throughout his career.
3D modeling by Chris Glenn, with Shapr3D
Model rendering by Lasse Pekkala, with Concepts
Interview by Erica Christensen
Recommended
The Art of Storyboarding - Illustrator Mimi Chao shares how storyboarding helped launch her successful Kickstarter campaign.
Drawing from Inspiration - Iron Man - Freelance artist Cory Siewert shares how he draws Iron Man with digital Copic markers in Concepts.
Theatre Design Modeling on the iPad Pro - Peter McKintosh draws 160+ scenic and costume designs for the theatre production Funny Girl on the iPad Pro.