Concepts is an infinite, flexible creative tool for all your good ideas. Available on iOS, Windows and Android.
How to Draw Wood Textures
Learn how to add realistic wood texture to your art and designs.
Good design melds smart function with the natural beauty of its material. Like alchemy, the combination turns your final product into a work of art.
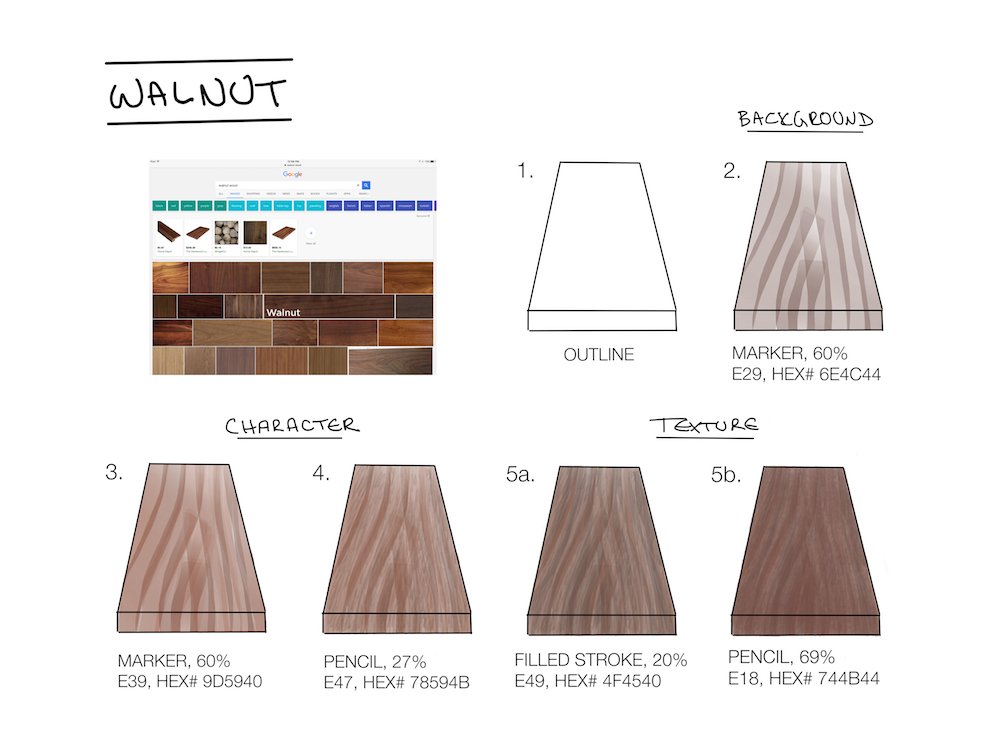
Wood is arguably the most beautiful natural material we have. It’s durable, flexible, renewable, and rich in texture and color. How do you take something so complex and reproduce it digitally? The secret is layers.
If you look closely at a piece of wood, you’ll find 1) lots of lines (the grain of the wood), and 2) lots of colors. Your digital wood should have these, too. Here’s how to use Concepts’ tools to layer on the lines and color.
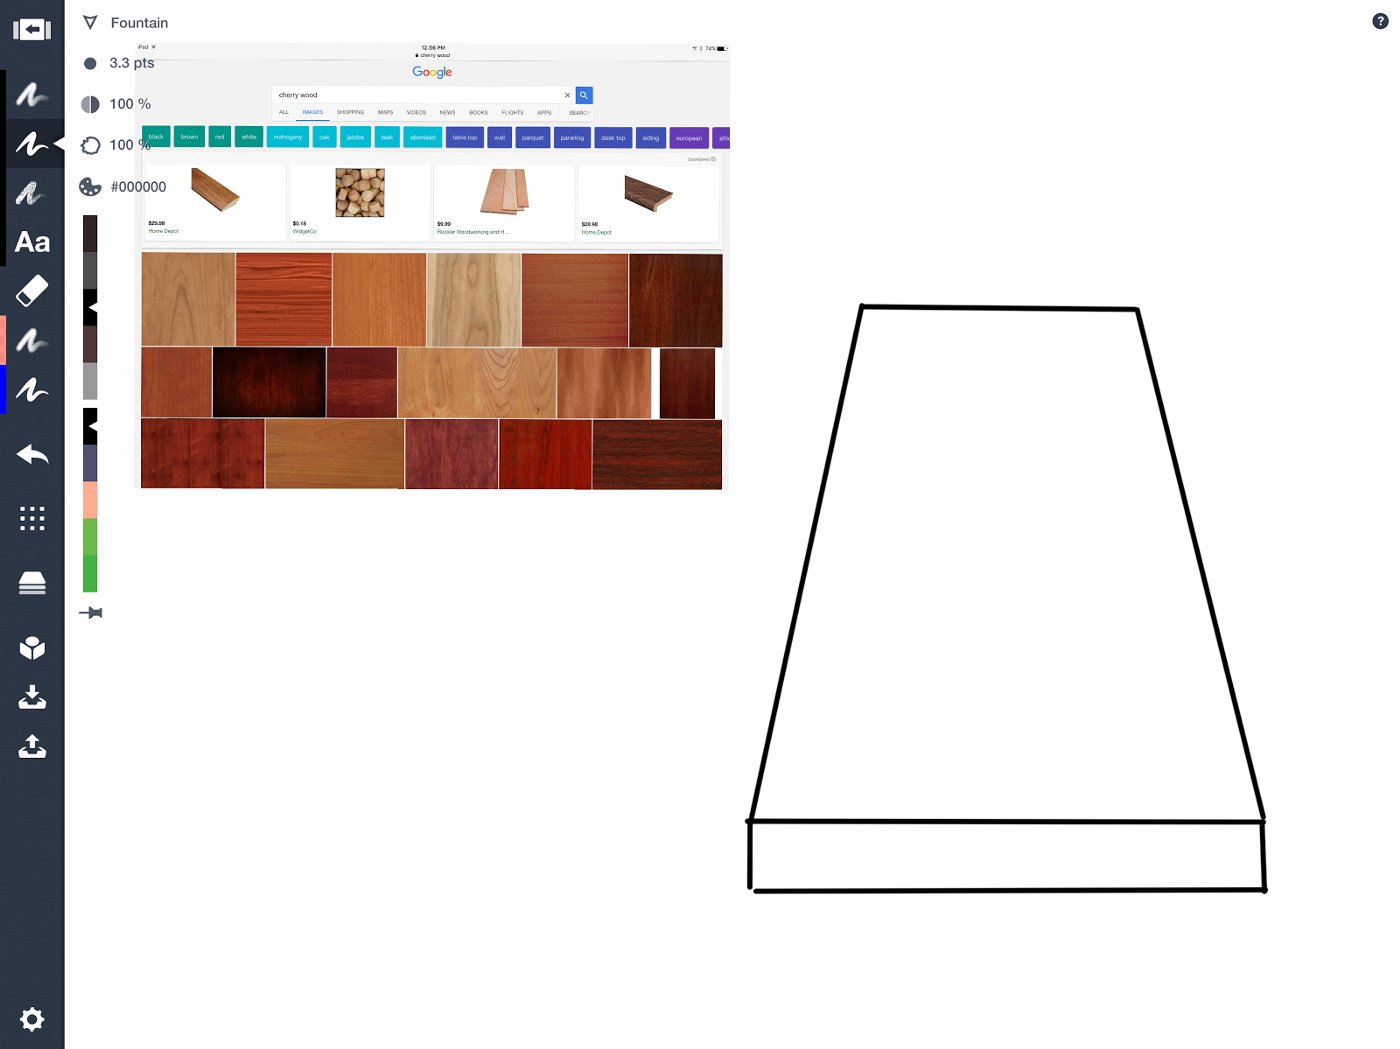
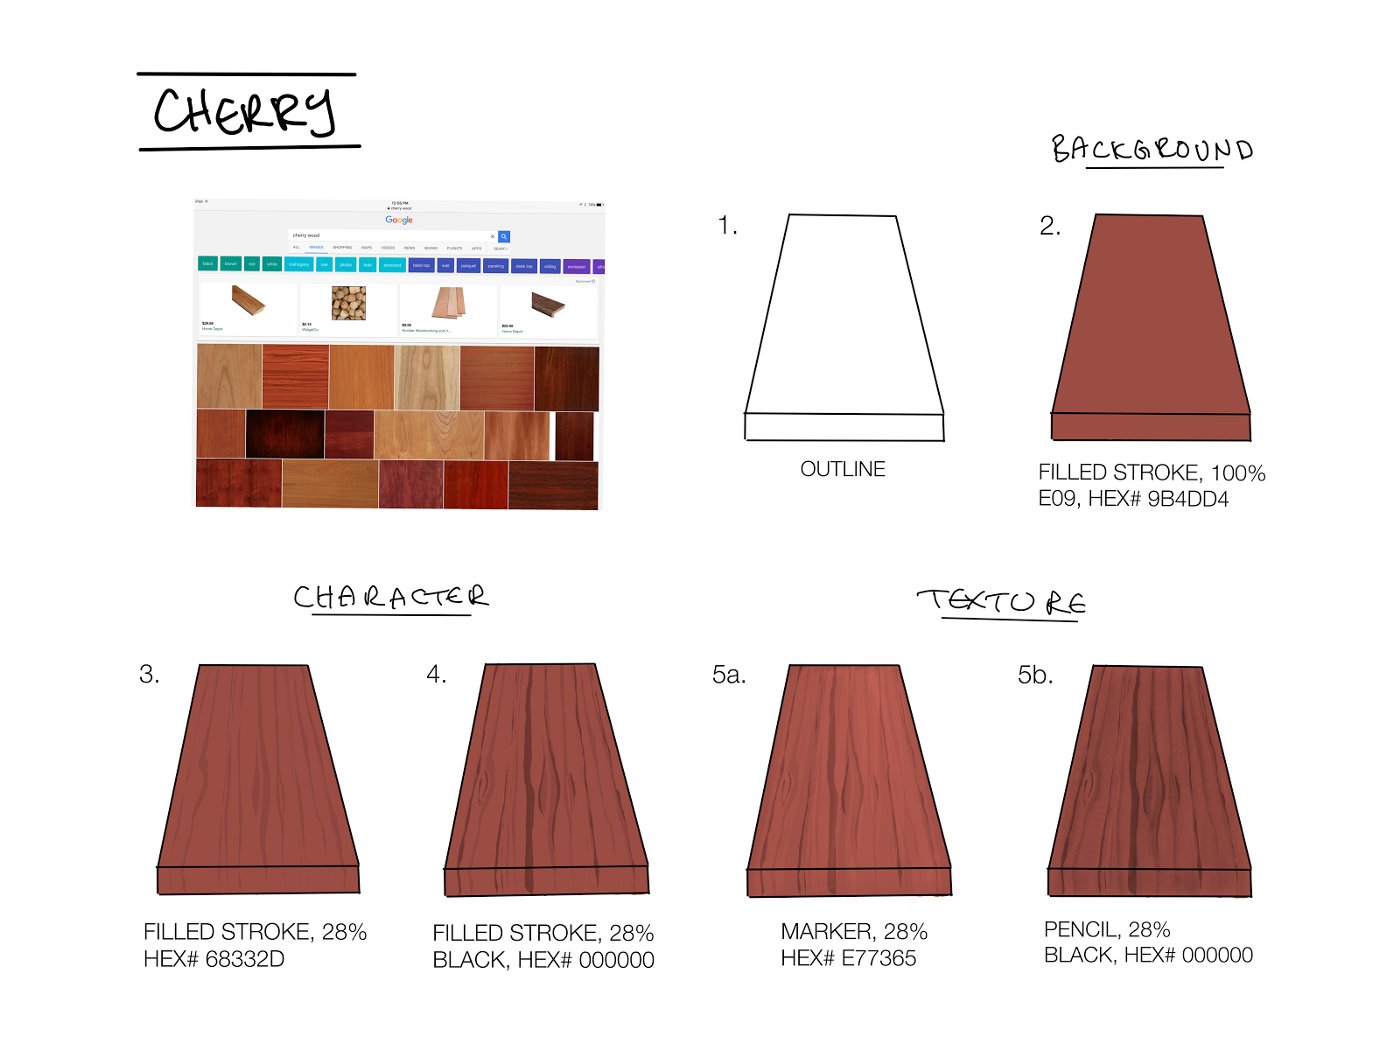
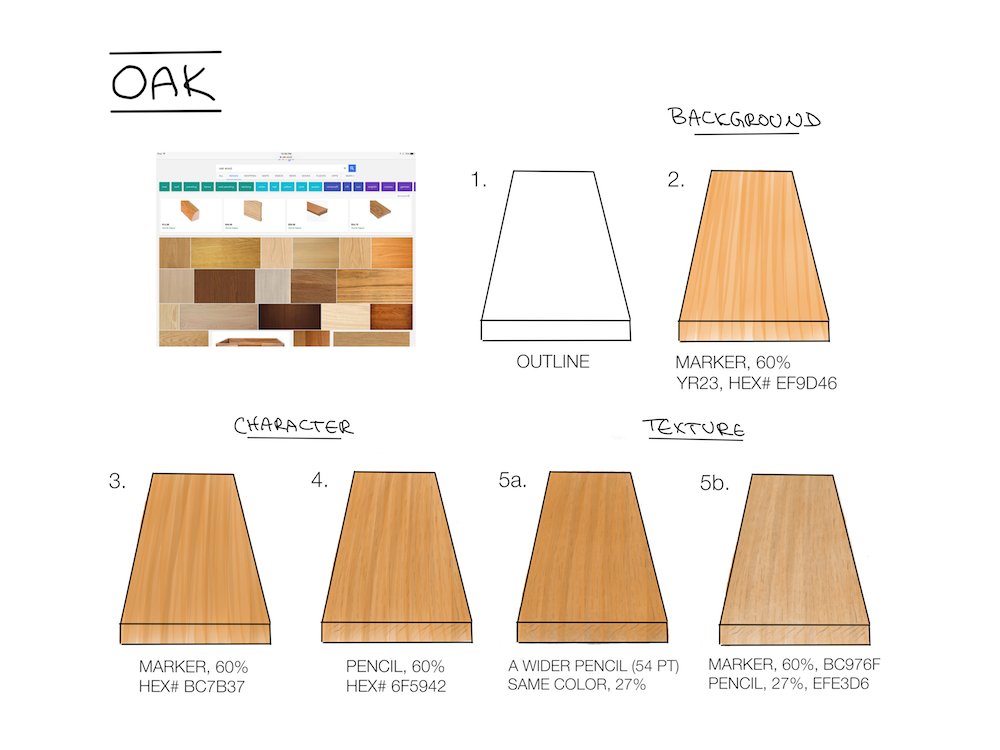
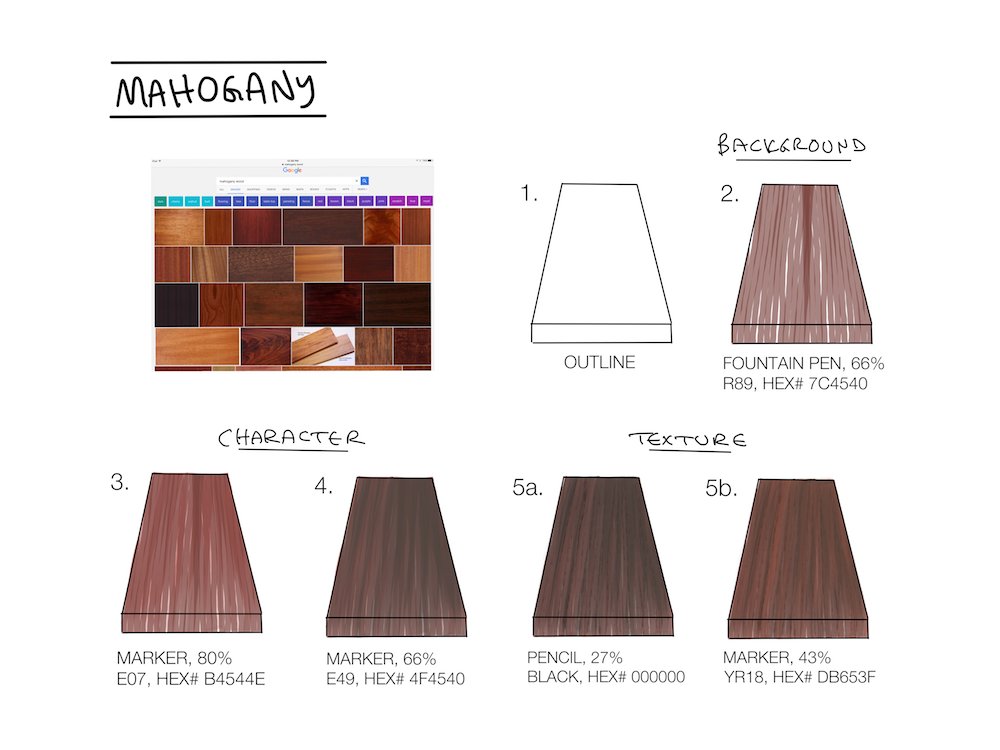
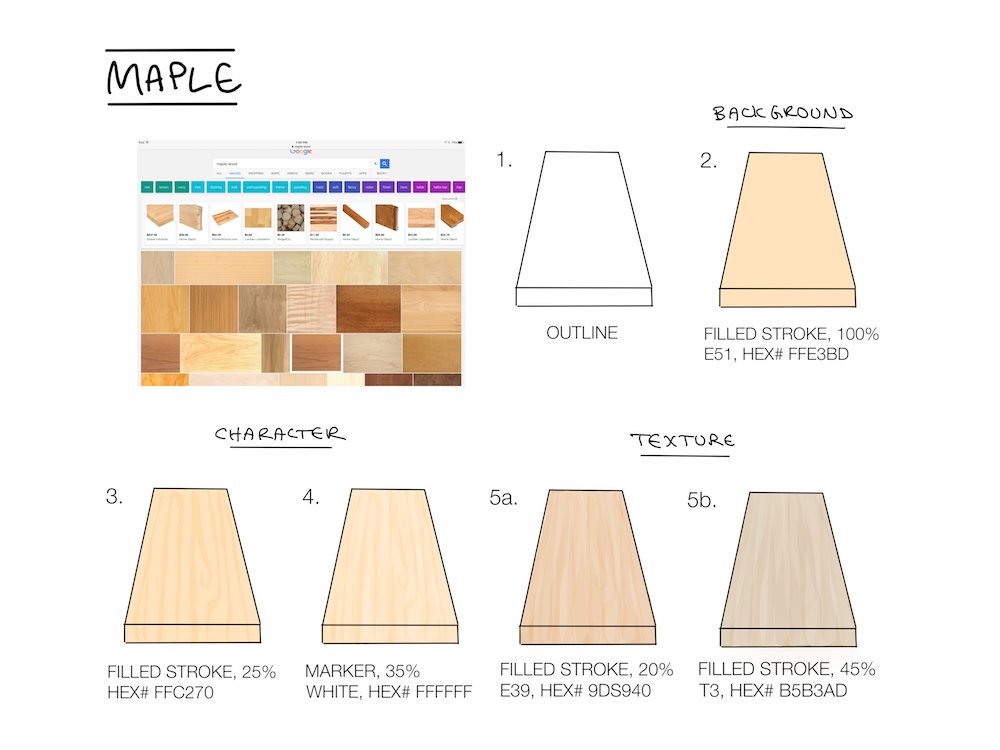
1. Do your research.
Go out and actually look at what you are trying to reproduce. See it from a distance to understand its form, and examine it up close to absorb its depths.
If you don’t have access to your chosen material, my favorite source is Google Images. Type in what you’re trying to draw and study what comes up — not to copy any one image, of course, but to get a feel for what the textures and flow of the material are like.
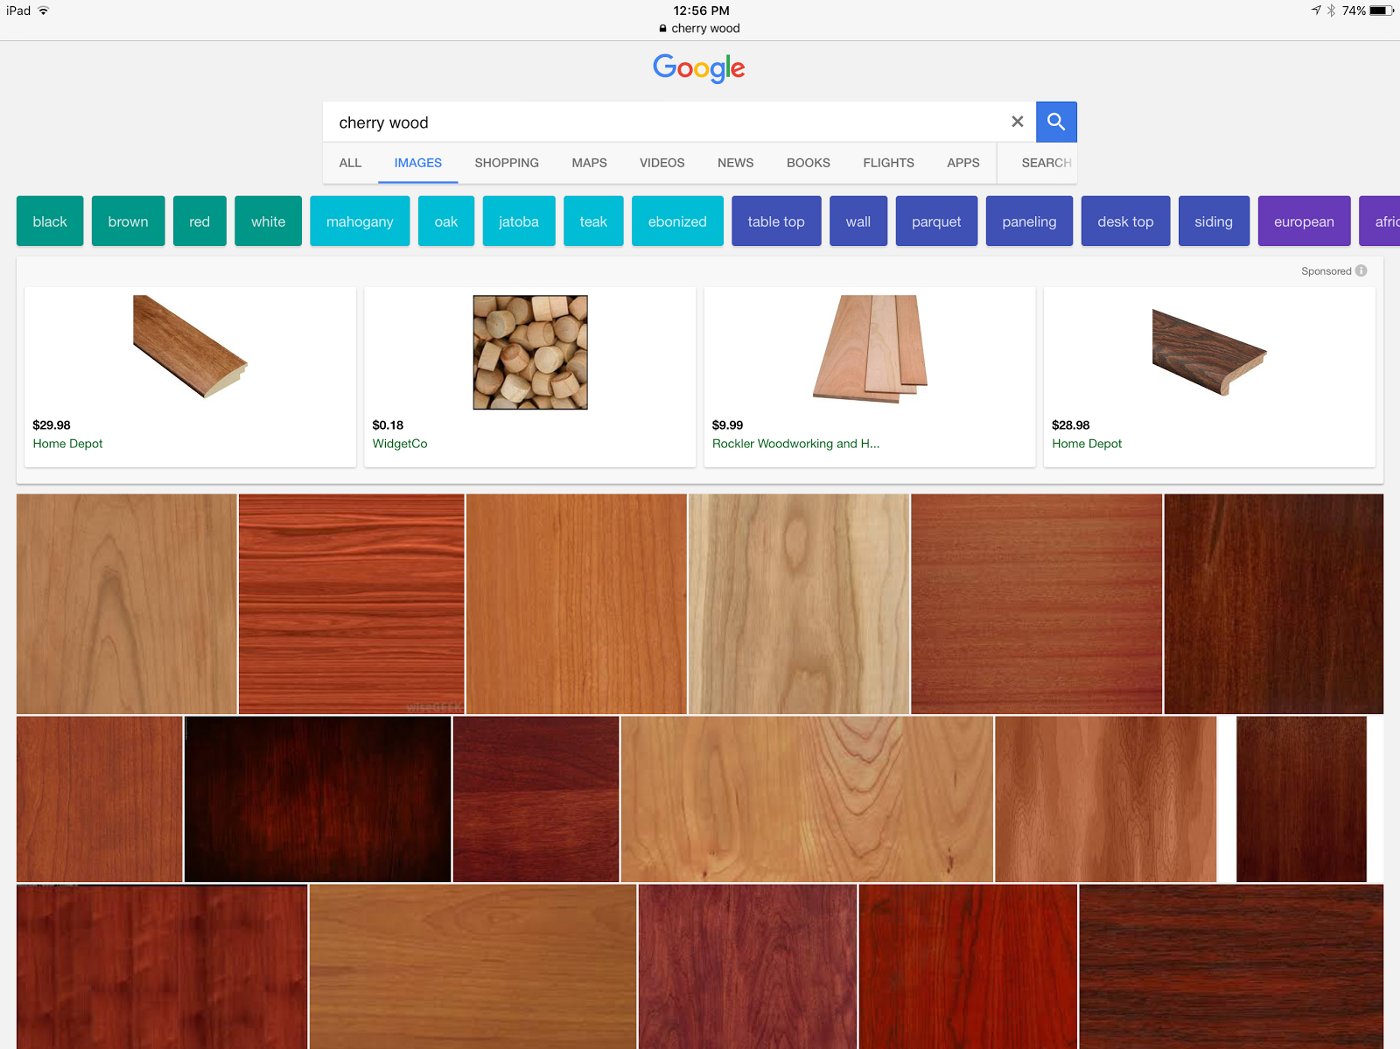
Then, take a pic of your subject or a screenshot of your image search, and import it into your drawing for further reference.
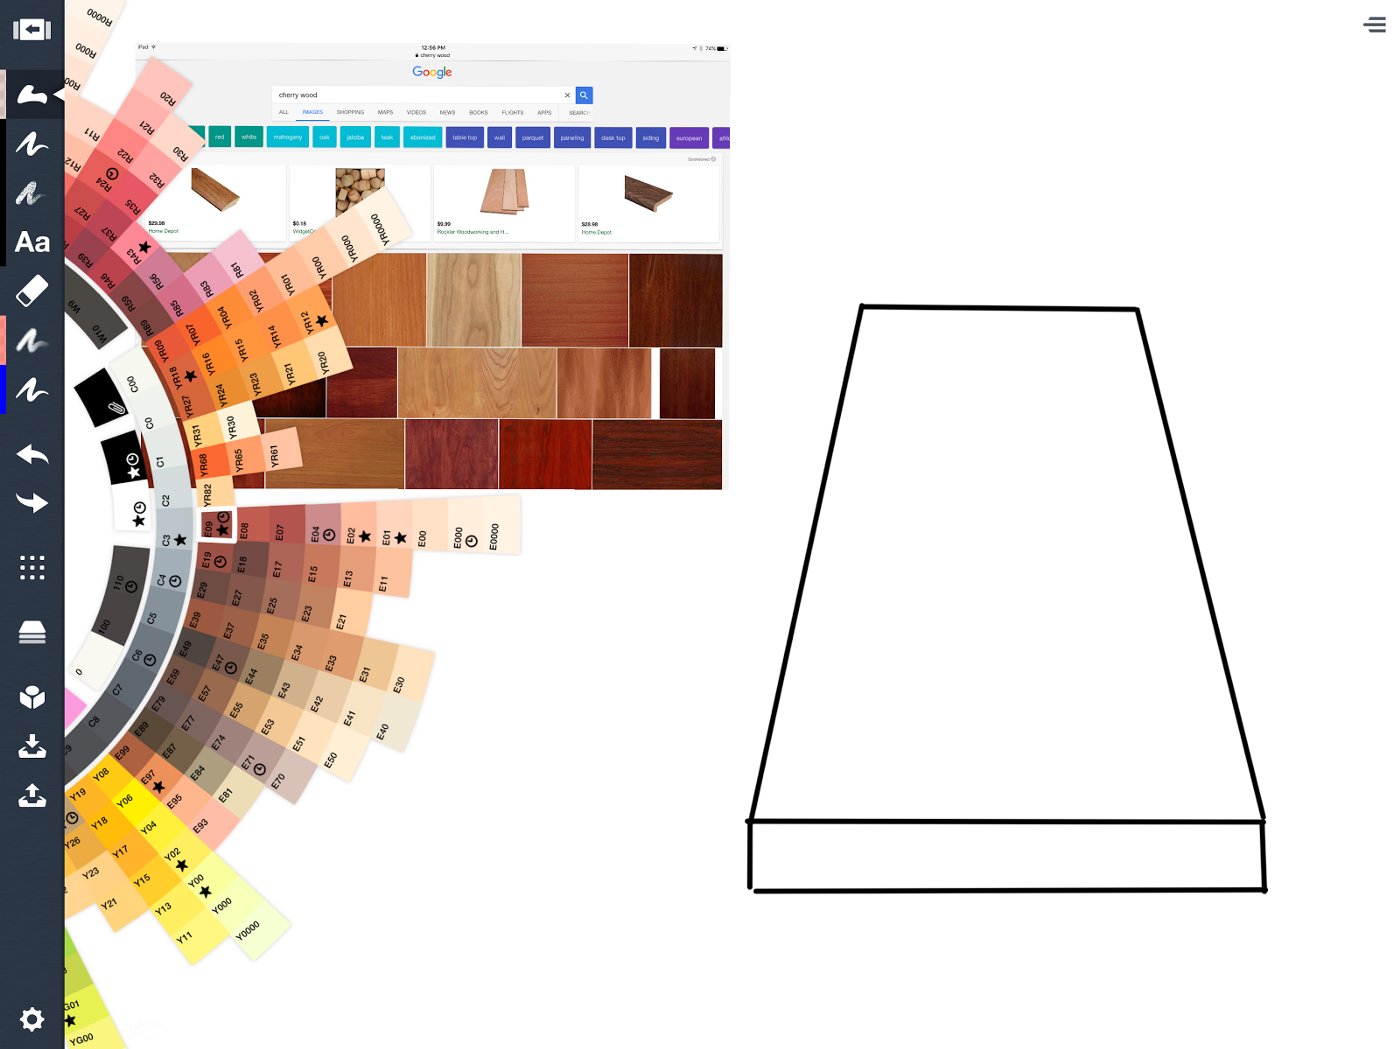
2. Study the tools.
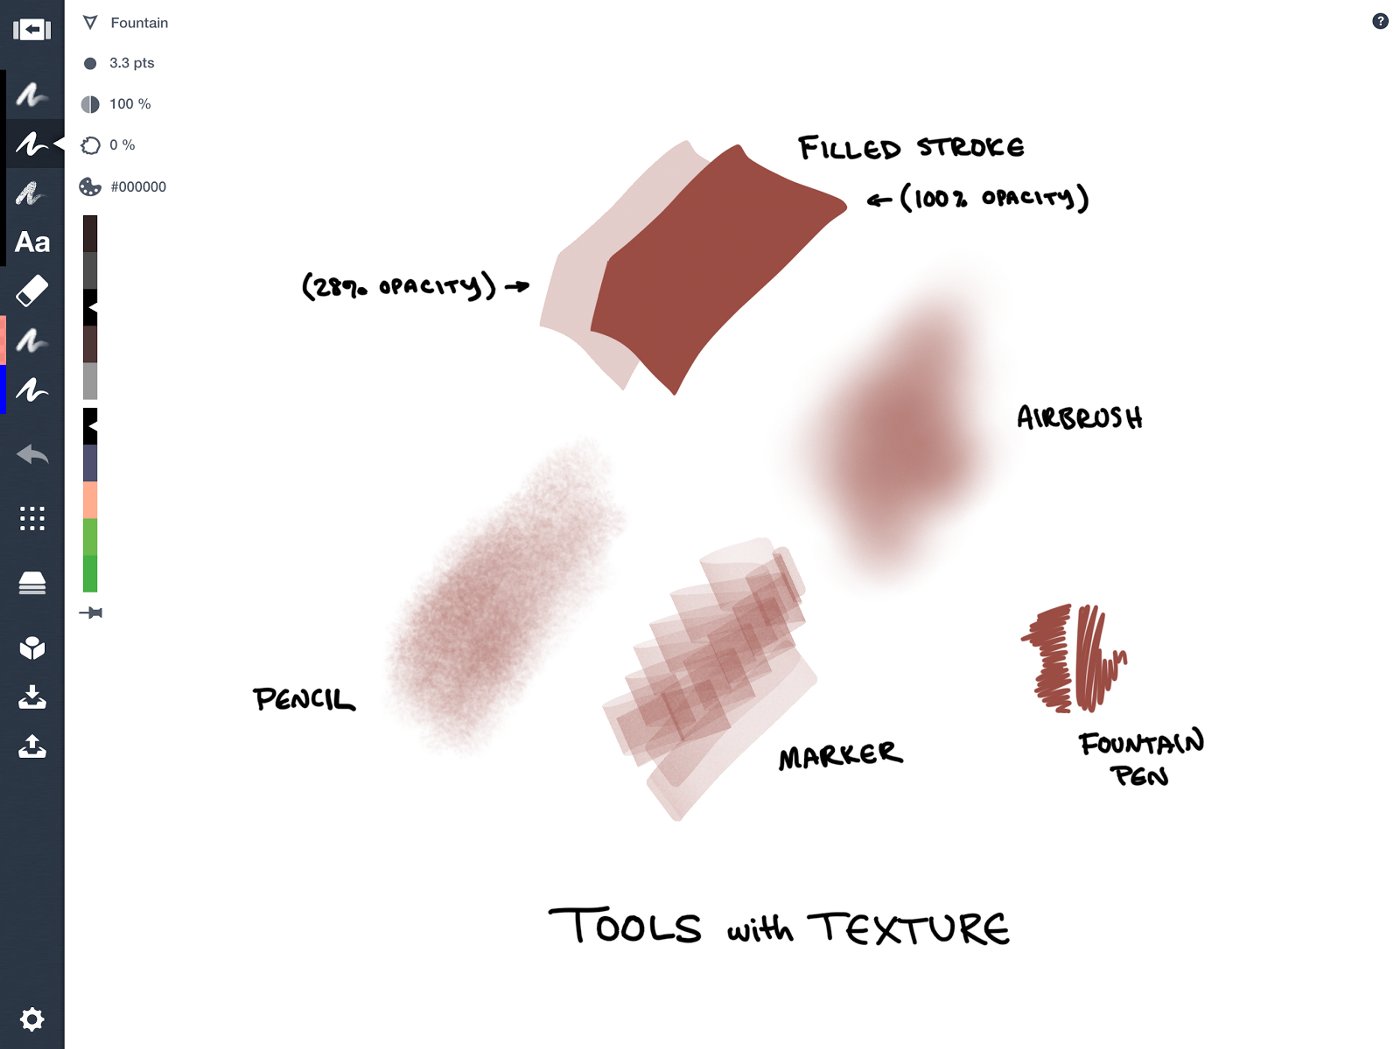
Concepts has some lovely texture to its design tools, plus the opacity bar on the secondary toolbar is magic for applying not only layers of color, but layers of lines. These overlapping, see-through lines will become the grain of your wood.
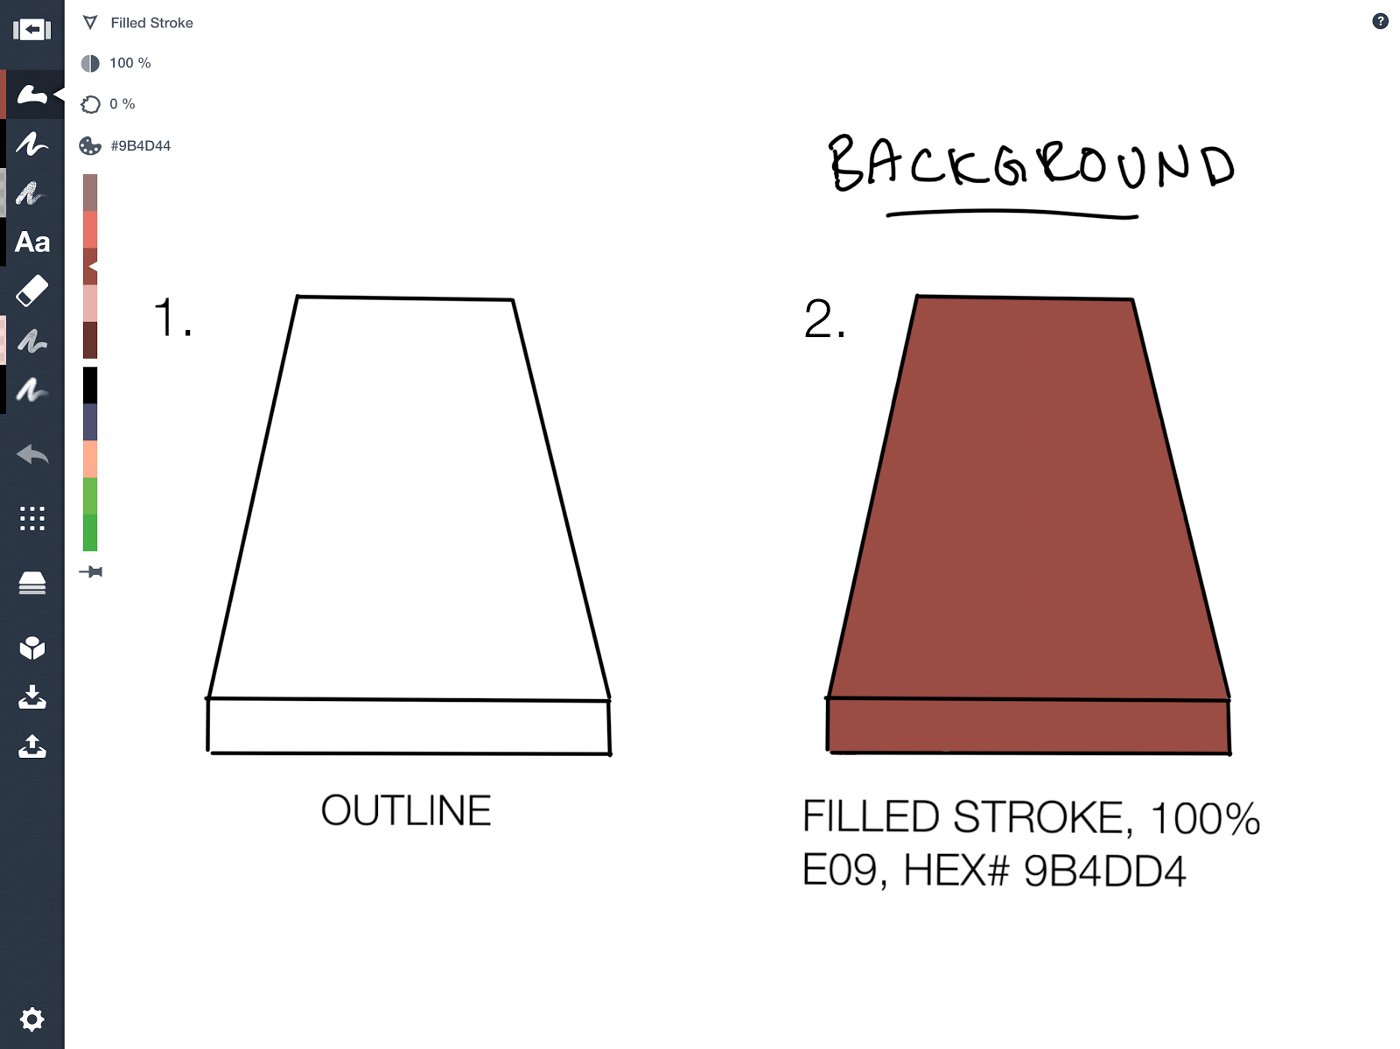
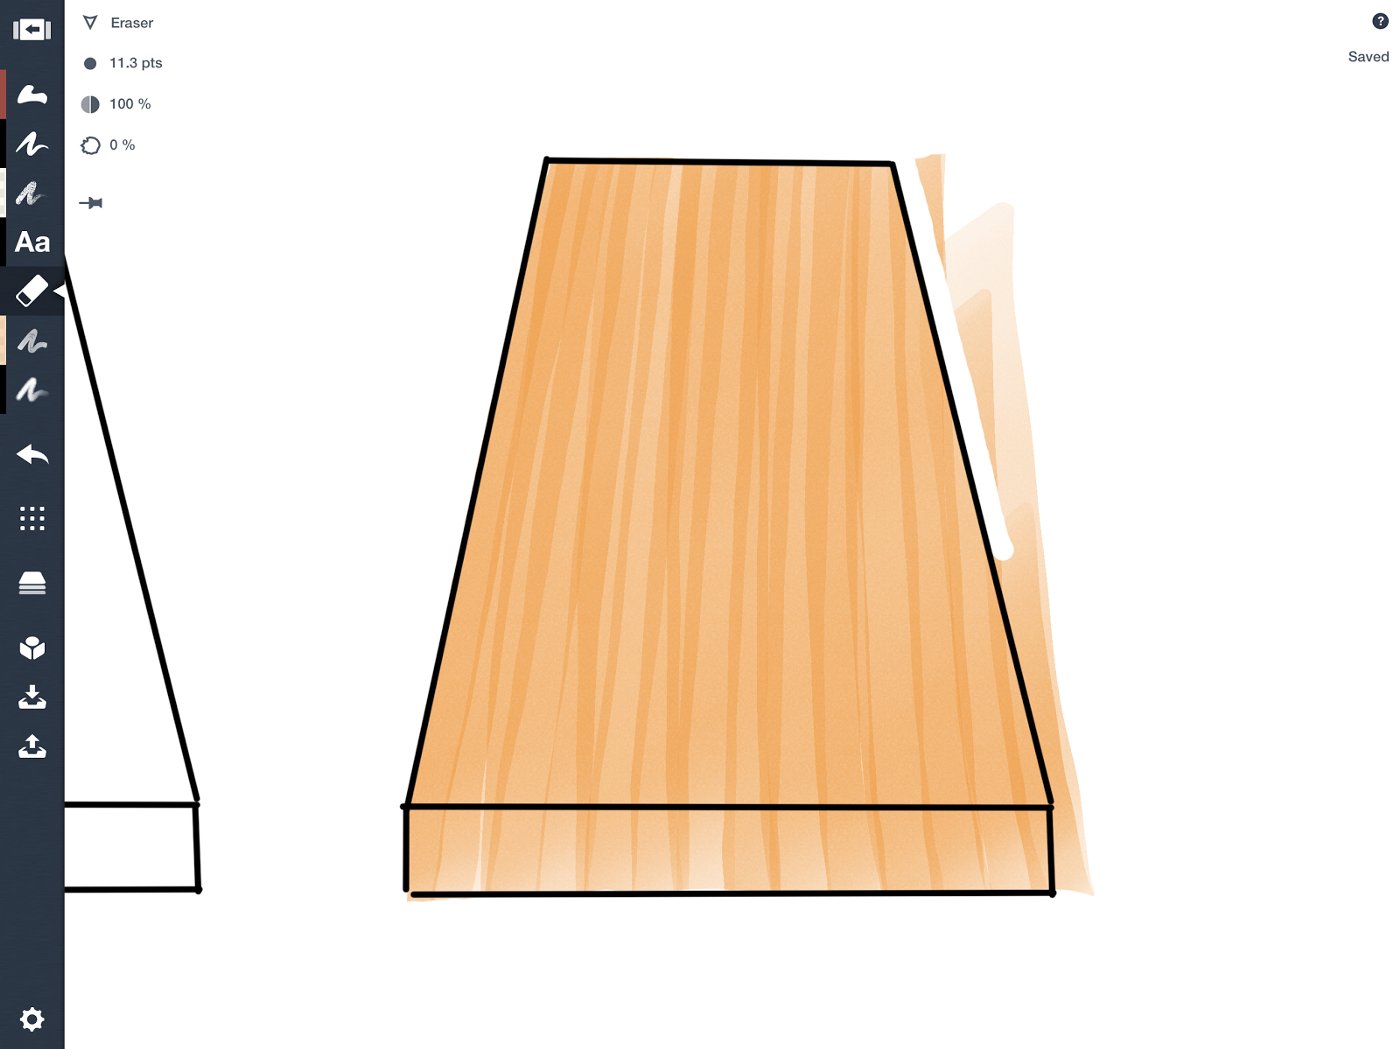
3. Draw your shape.
Your design sketch goes here. For me, it’s this beautiful piece of wood.
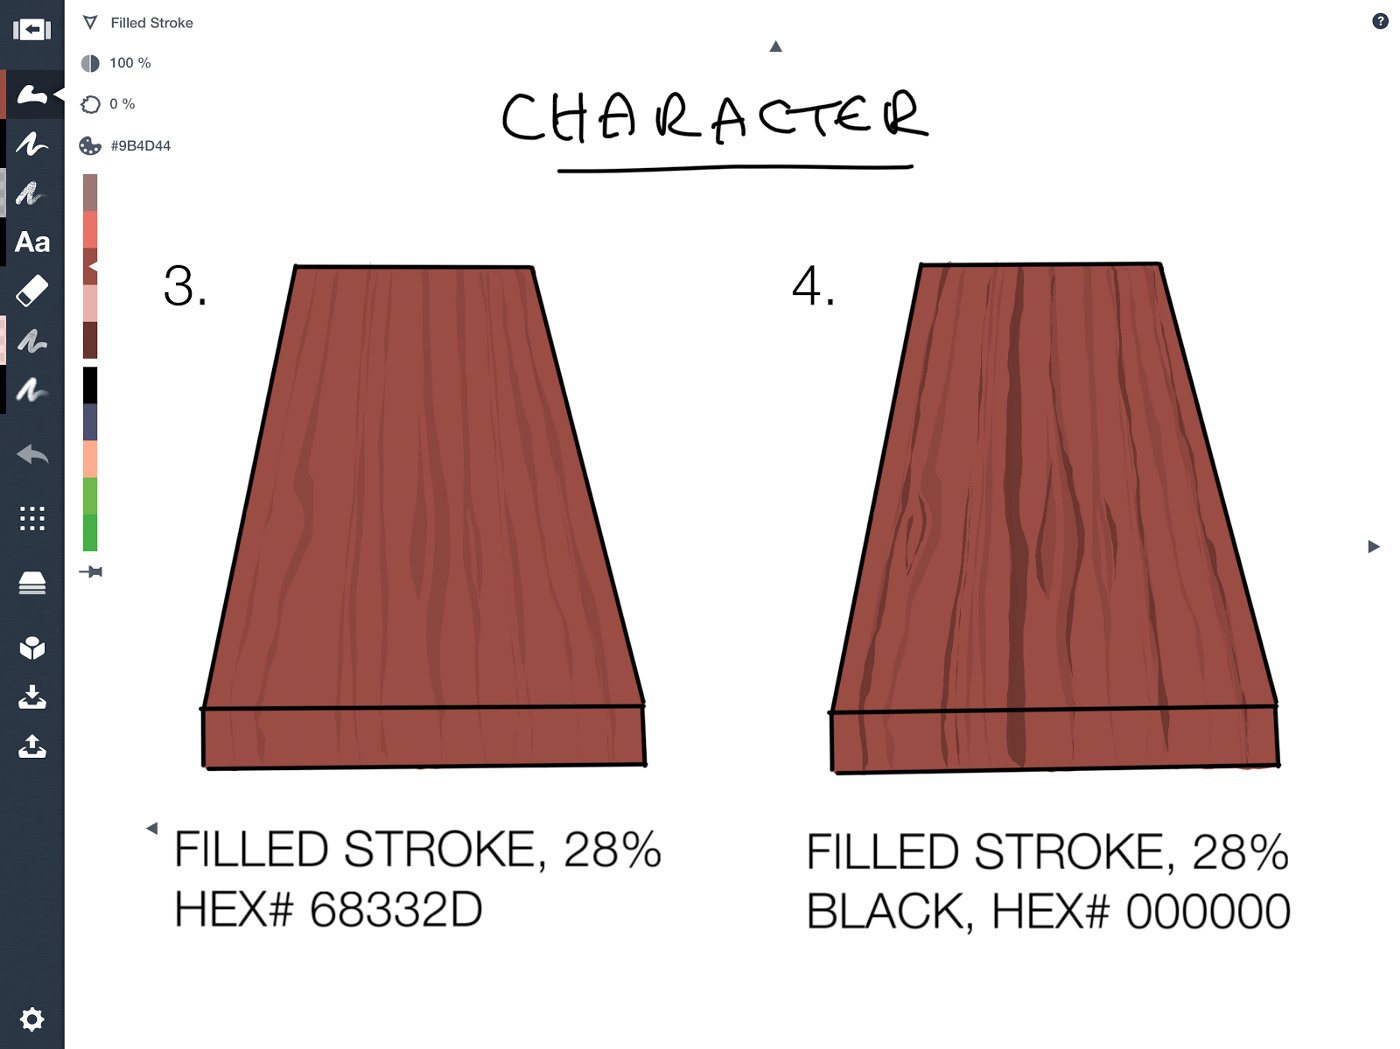
4. Apply a background.
Open the color wheel and compare it to your imported image. Which one fits your wood choice the best? Do you want it to have dark undertones or light ones? What do your images suggest, and what does your design want?
Open the Layers menu and create a new layer beneath your design sketch. Start coloring. With Filled Stroke, it’s easy enough to trace the edges and let the tool fill it in for you.
For the other tools, draw straight through the shape with the grain of the wood so you don’t get weird color bunches at the edge. Clean up afterward using the eraser.
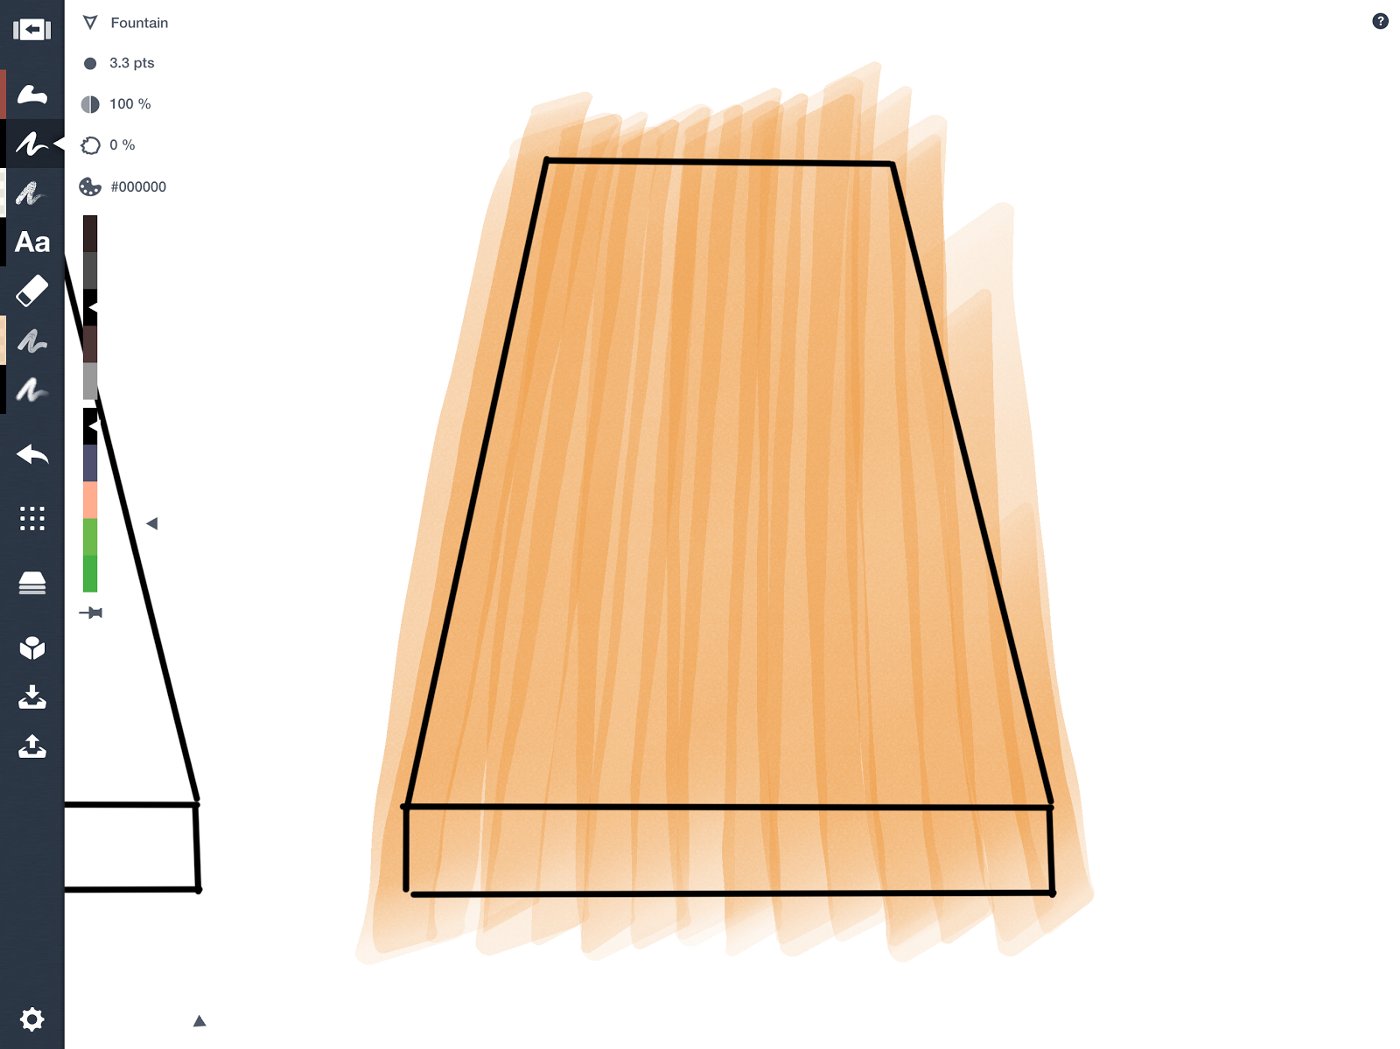
5. Start layering.
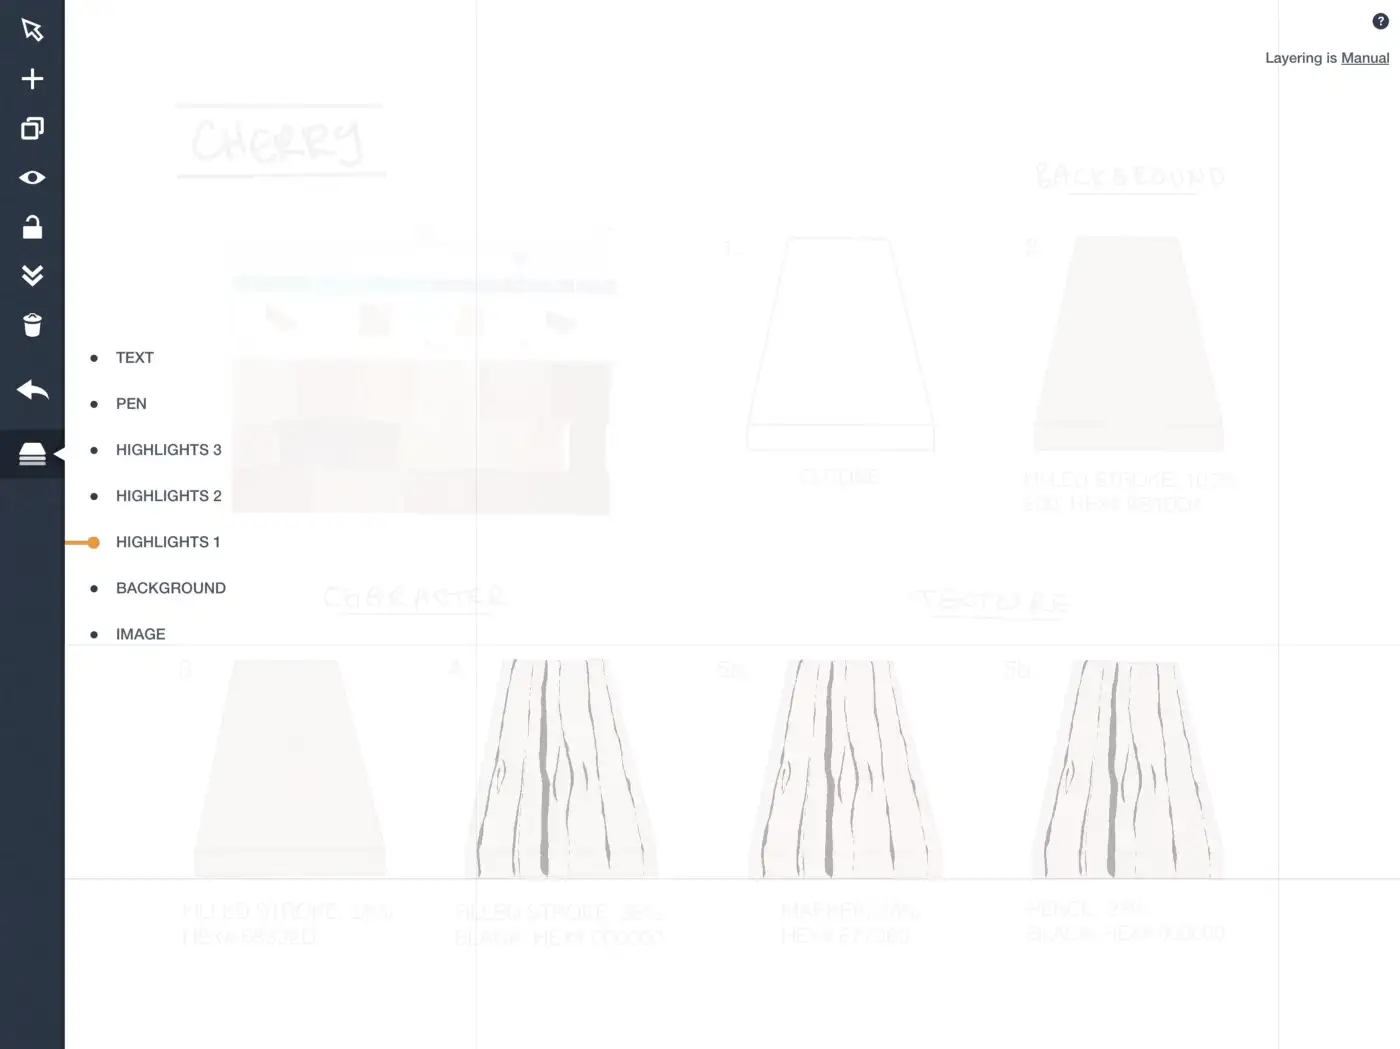
What does your wood look like? Choose the colors that seem organic to your wood in warm or cool tones and don’t be afraid to layer them. The more layers, the richer the product. Lower the opacity of your tool using the opacity slider so you can see through the strokes, and overlap the edges to make the grain lines. Use a separate Layer for each color or tool so you can easily change them after-the-fact if you want a different look.
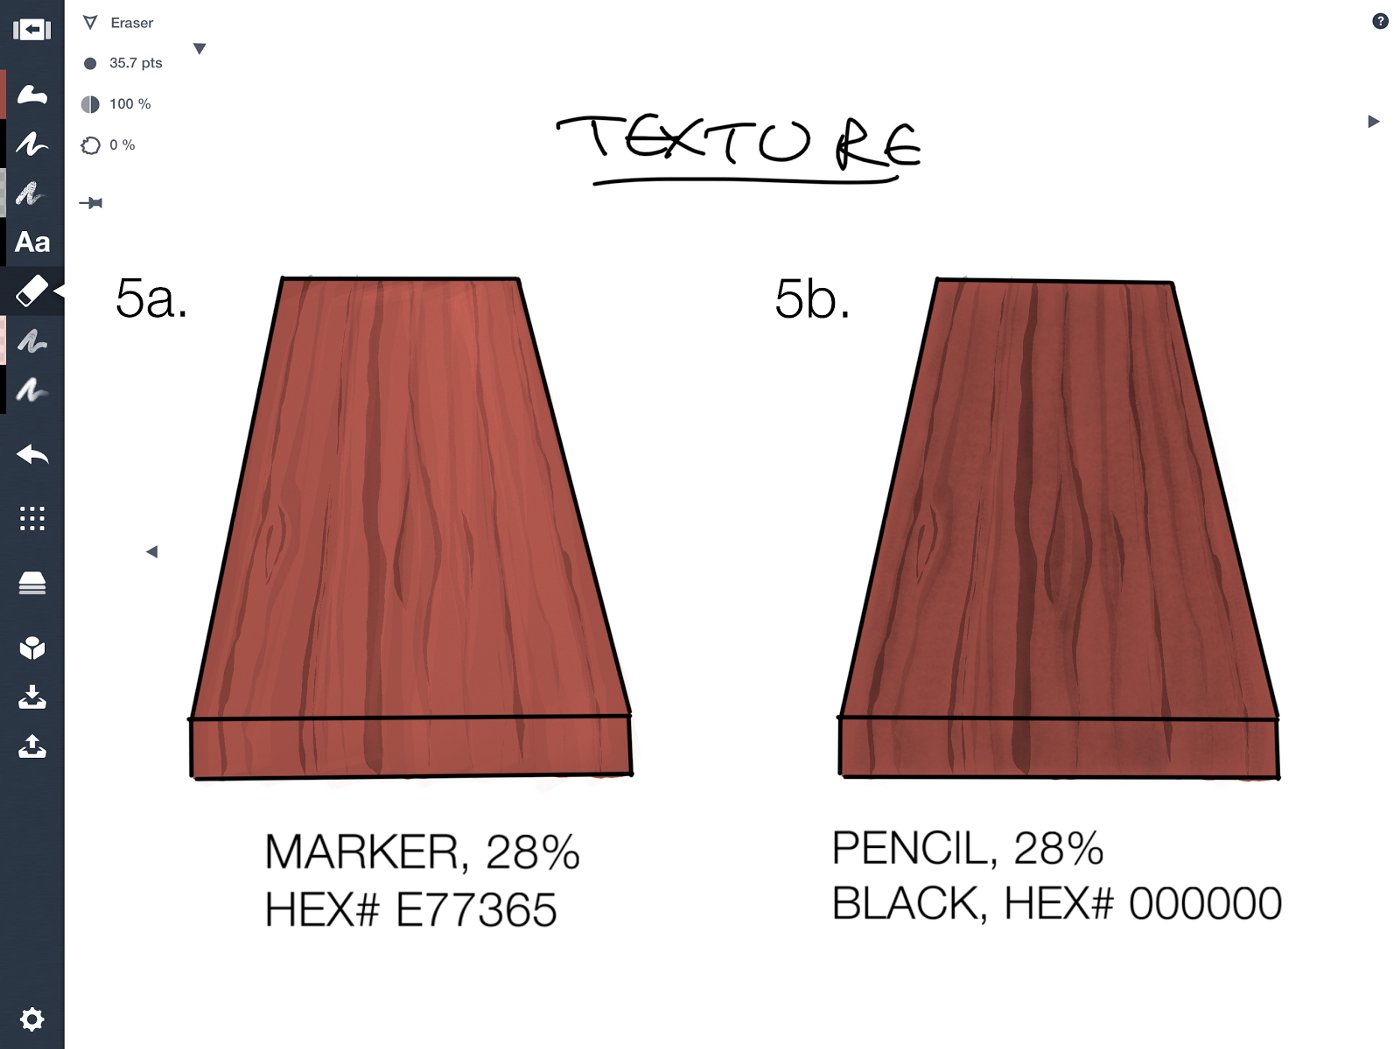
6. Add your finishes.
Just like you apply a stain or a wax to the surface of your wood, you can add a final sheen or texture to your drawing. In these alternatives, I used a light-colored marker to give a light shine, and a black pencil to darken it up, both at a low opacity.
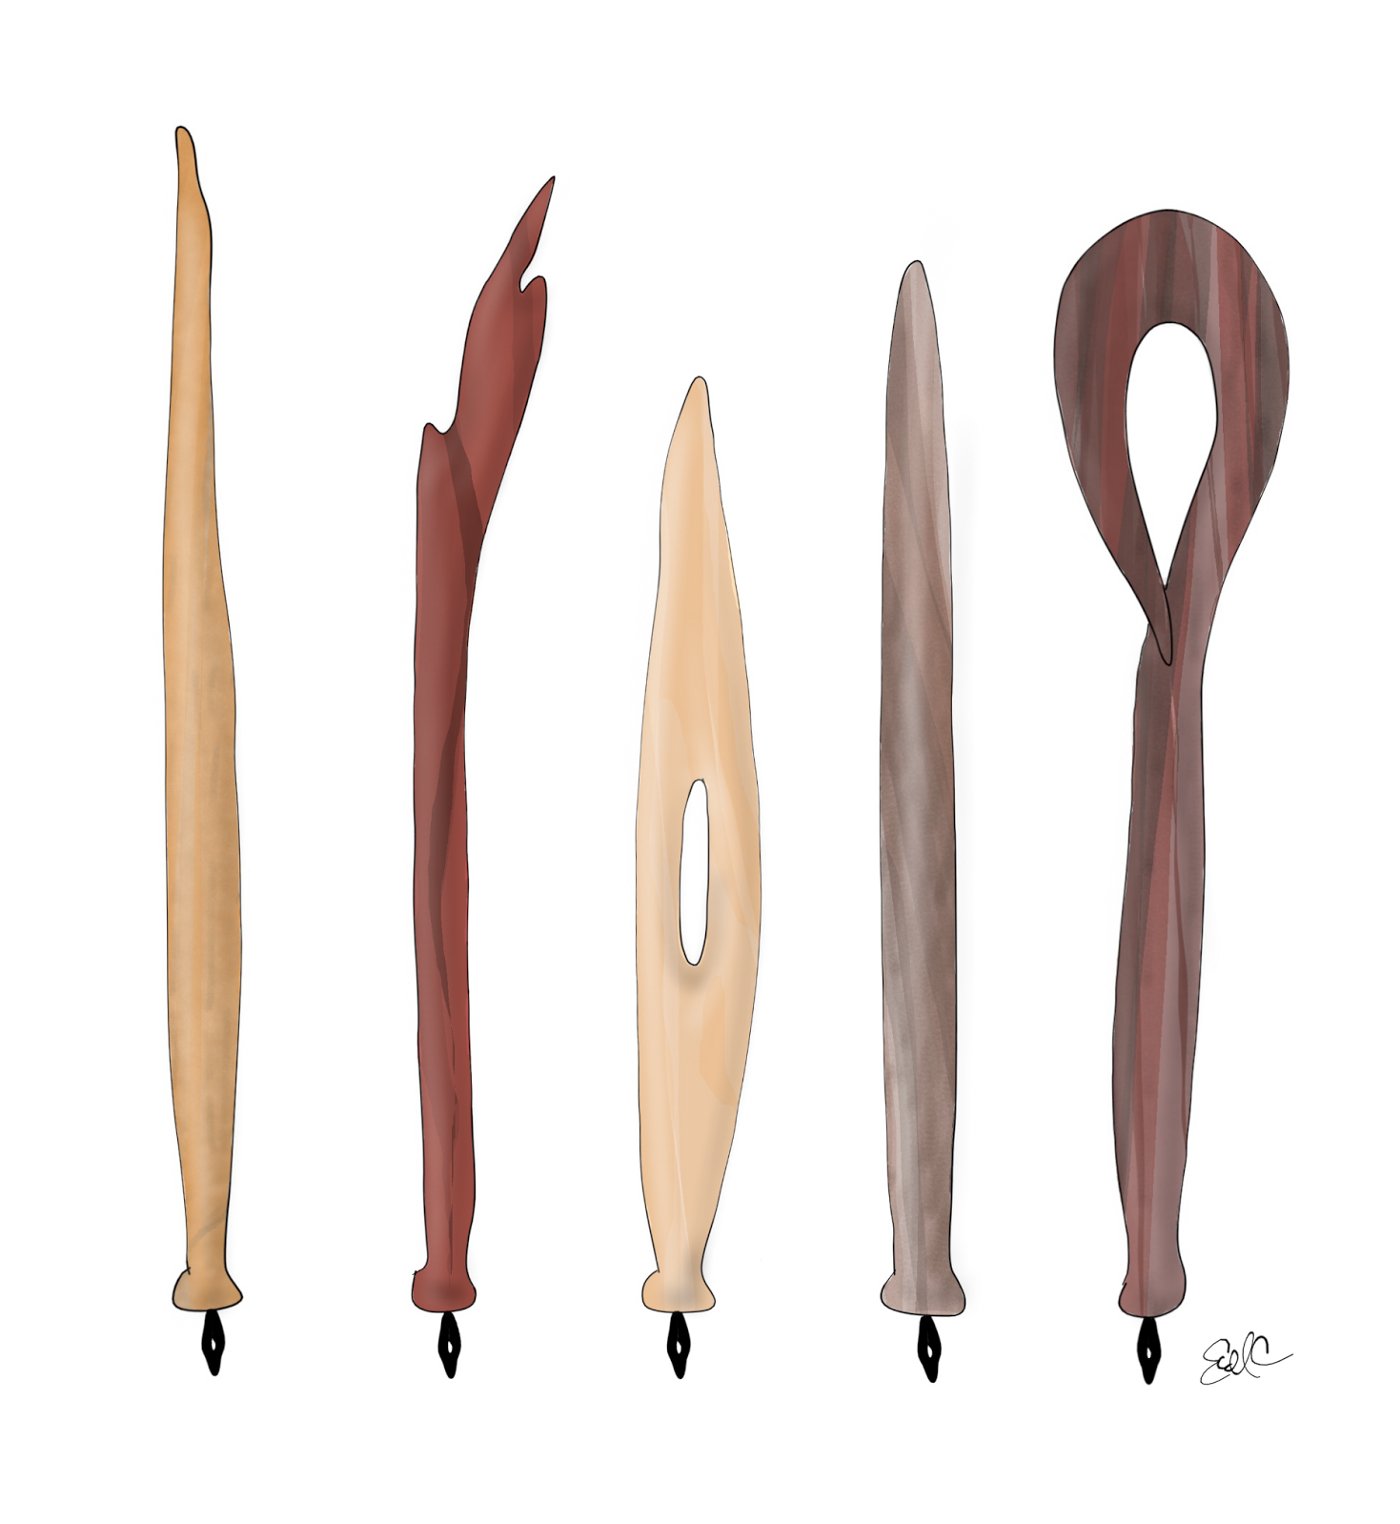
A complete look at the process:
Here are some finished wood types for you to try, or look at some wood and try your own. No combination is a fail. Find the one that turns your smart design into that natural, polished work of art.
Tip: Create a wood “texture” in a separate project or object library. (Yes, Make Your Own Objects is coming soon!) When you need a wood pattern for a design, copy it to the clipboard or drag it straight from the library as a layer beneath your sketch. Clean it up with your eraser and your design is ready to go!
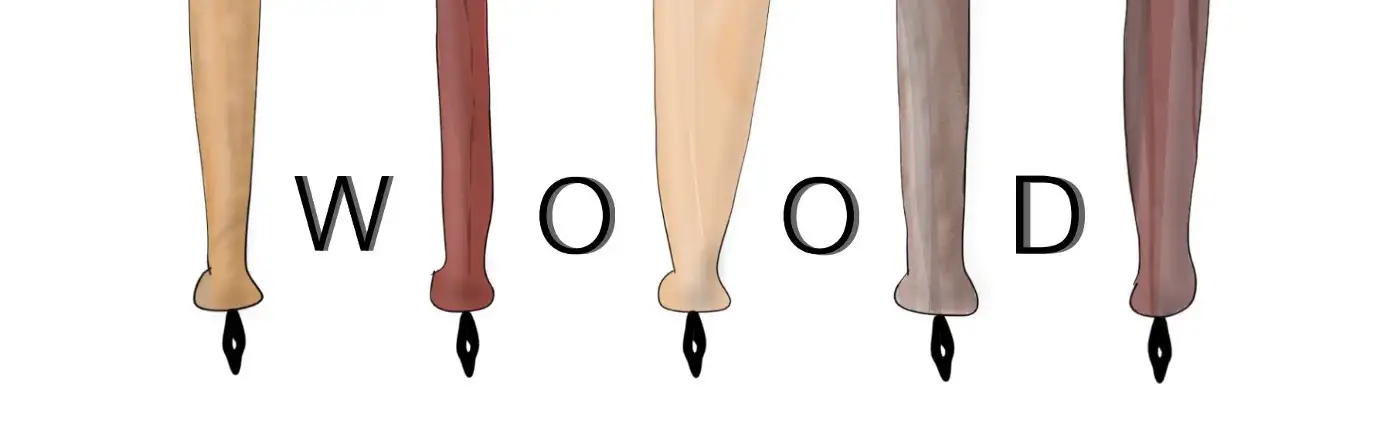
These turned pens were drawn using the above wood examples as the underlayer.
If you have any questions about this article or if you have something you'd like to share with us, let us know by tapping Help > Ask Us Anything in app, or email us at support@concepts.app and we'll be happy to help.
Happy sketching!
By Erica Christensen
Recommended
How to Make a Custom Brush Stamp and Grain - Learn how to make your own brush stamps and grains to create custom brushes in Concepts.
How to Create a Custom Brush - Learn how to make your own brush stamps and grains to create custom brushes in Concepts.
Sketching for Digital Product Design - Artist MiksKS shares their creative process behind designing for digital products and two new brush libraries for Concepts.